| If you have been locked out of your account you can request a password reset here. |
Difference between revisions of "Call of Duty 2"
| (121 intermediate revisions by 18 users not shown) | |||
| Line 1: | Line 1: | ||
{{Infobox Video Game|{{PAGENAME}} | {{Infobox Video Game|{{PAGENAME}} | ||
| − | |name=Call of Duty | + | |name=''Call of Duty 2'' |
|picture=Call_of_Duty_2.jpg | |picture=Call_of_Duty_2.jpg | ||
| − | |caption='' | + | |caption=''Official Boxart'' |
| − | |series=[[Call of Duty]] | + | |series=''[[Call of Duty]]'' |
|date= October 25, 2005 | |date= October 25, 2005 | ||
|developer=Infinity Ward | |developer=Infinity Ward | ||
| − | |platforms=PC<br>Xbox 360 | + | |platforms=PC<br>Xbox 360 <br> Mac OS X |
|publisher=Activision Blizzard | |publisher=Activision Blizzard | ||
|genre=[[First-Person Shooter]] | |genre=[[First-Person Shooter]] | ||
}} | }} | ||
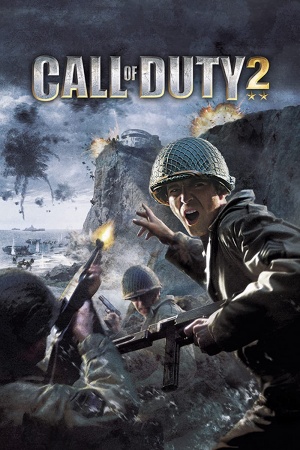
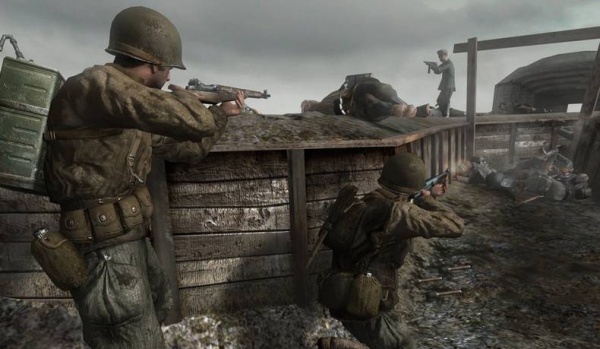
| − | ''' | + | '''''Call of Duty 2''''' is a 2005 first-person shooter developed by Infinity Ward and published by Activision, the second installment of the ''Call of Duty'' series. Like its predecessor, it is set during the Second World War and the single-player campaign follows three soldiers of the Soviet, American, and British armies throughout different theaters of war. |
| + | |||
| + | {{VG Title}} | ||
__TOC__<br clear="all> | __TOC__<br clear="all> | ||
| Line 17: | Line 19: | ||
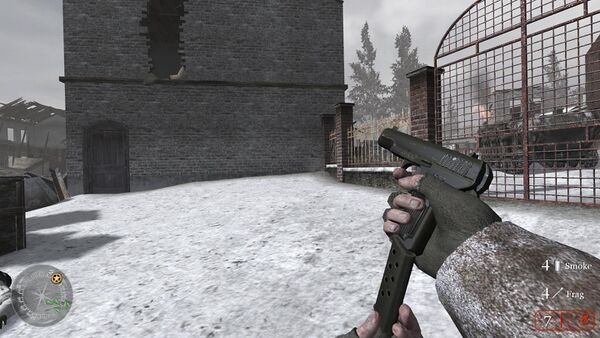
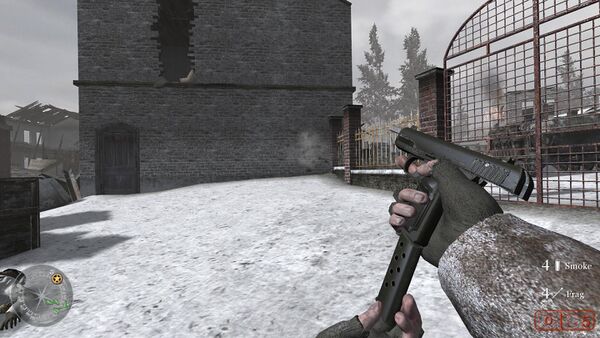
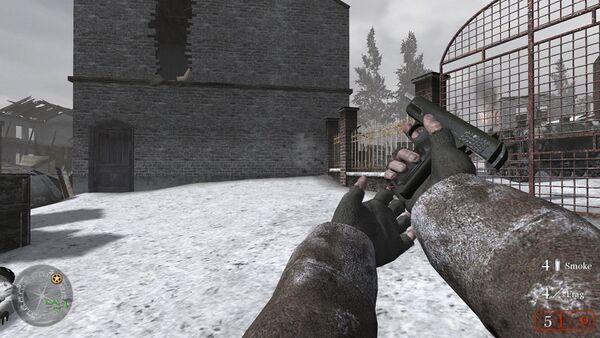
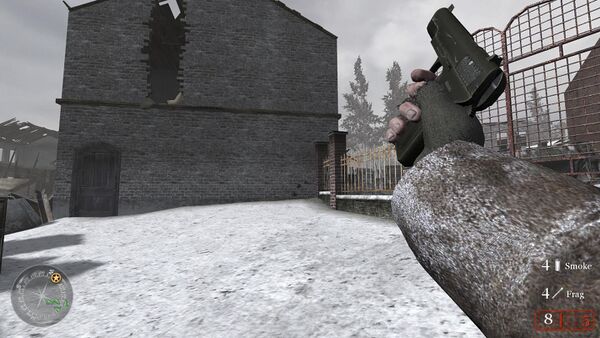
=Handguns= | =Handguns= | ||
==Colt M1911A1== | ==Colt M1911A1== | ||
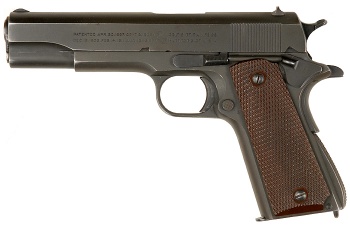
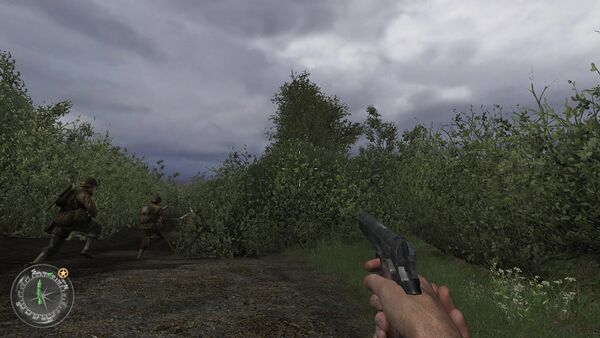
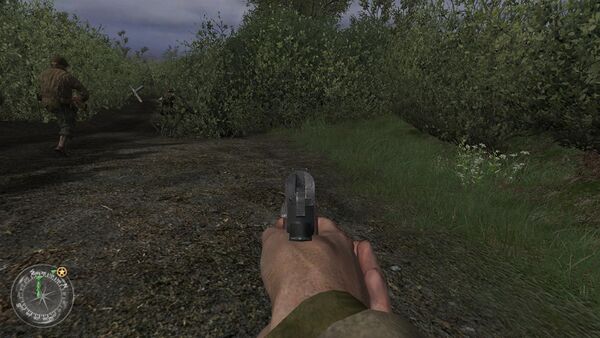
| − | The [[M1911A1]] appears in-game as the "Colt .45", and is the standard sidearm of the American | + | The [[M1911A1]] appears in-game as the "Colt .45", and is the standard sidearm of the American forces throughout the game. |
| − | + | [[File:M1911Colt.jpg|thumb|none|350px|Colt M1911A1 - .45 ACP]] | |
| − | [[ | + | [[File:CoD2SP Colt M1911A1 hold.jpg|thumb|none|600px|In France, US Army Ranger Corporal Bill Taylor holds an M1911A1. Note the "teacup" grip, shared by all handguns. While not a recommended practice in the modern day, this grip style was widely used during WWII and the years immediately after.]] |
| − | [[ | + | [[File:CoD2SP Colt M1911A1 aim.jpg|thumb|none|600px|Aiming down the teeny tiny GI M1911 sights- fancy things like raised night sights are still some years away.]] |
| − | [[ | + | [[File:CoD2SP Colt M1911A1 rel 1.jpg|thumb|none|600px|Slotting in a new magazine on a tactical reload. The witness holes in the magazine for viewing remaining cartridges are black voids instead.]] |
| − | [[ | + | [[File:CoD2SP Colt M1911A1 rel 2.jpg|thumb|none|600px|And doing the same on an empty reload, except...]] |
| + | [[File:CoD2SP Colt M1911A1 rel 3.jpg|thumb|none|600px|...you gotta release the slide, of course.]] | ||
| + | [[File:CoD2SP Colt M1911A1 mele.jpg|thumb|none|600px|Giving a good whack with the M1911A1.]] | ||
| + | [[File:CoD2SP Colt M1911A1 world.jpg|thumb|none|600px|The ''very'' deformed world model.]] | ||
==Luger P08== | ==Luger P08== | ||
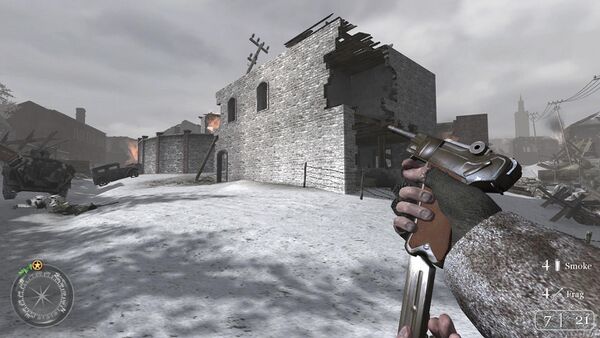
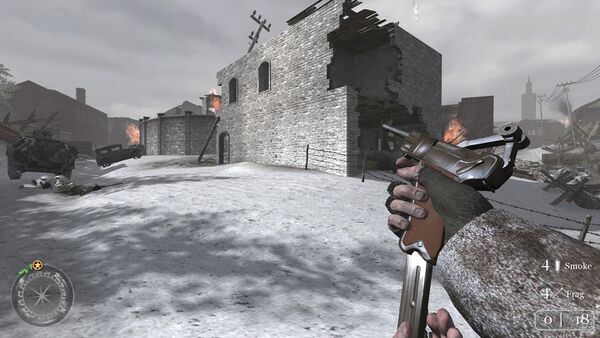
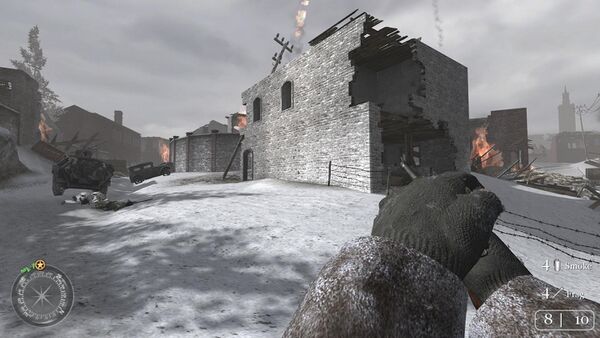
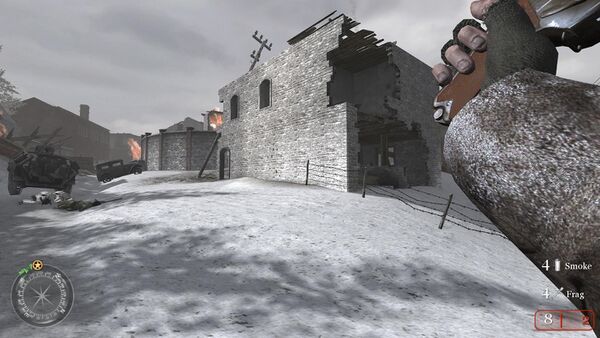
| − | The [[Luger P08]] appears in-game simply as the "Luger", and is the standard sidearm of the | + | The [[Luger P08]] appears in-game simply as the "Luger", and is the standard sidearm of the ''Wehrmacht''. It holds eight rounds, and is the default pistol of the Germans in multiplayer. It is also used by German troops if they are in "last stand", which eventually inspired the Last Stand and Second Chance perks in later ''Call of Duty'' games. |
| + | [[File:LugerP08Pistol.jpg|thumb|none|350px|Luger P08 - 9x19mm Parabellum]] | ||
| + | [[File:CoD2SP Luger P08 hold.jpg|thumb|none|600px|In the Moscow outskirts, Private Vasili Koslov holds a pilfered Luger.]] | ||
| + | [[File:CoD2SP Luger P08 aim.jpg|thumb|none|600px|Aiming at the snow, again with a teacup grip.]] | ||
| + | [[File:CoD2SP Luger P08 rel 1.jpg|thumb|none|600px|Loading up a fresh mag- the small slit on the side used to view cartridges on an actual Luger magazine are completely solid here.]] | ||
| + | [[File:CoD2SP Luger P08 rel 2.jpg|thumb|none|600px|Empty reload, this time the toggle lock is, well, locked back...]] | ||
| + | [[File:CoD2SP Luger P08 rel 3.jpg|thumb|none|600px|...and Vasili releases it with his off hand.]] | ||
| + | [[File:CoD2SP Luger P08 mele.jpg|thumb|none|600px|Melee attack.]] | ||
| + | [[File:CoD2SP Luger P08 world 1.jpg|thumb|none|600px|The world model is, thankfully, much less deformed]] | ||
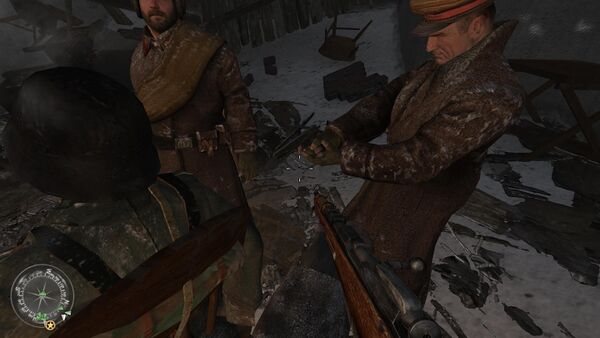
| + | [[File:CoD2SP Luger P08 world 2.jpg|thumb|none|600px|A German drawing a Luger P08 in "Red Army Training" and aiming it at his hand (a result of a glitch that causes NPCs to reuse animations for holding a rifle).]] | ||
| − | [[ | + | ==Tokarev TT-30== |
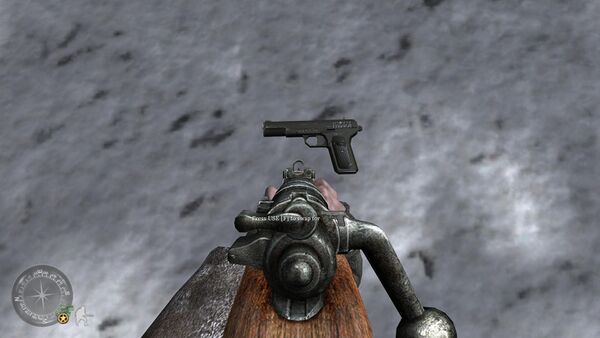
| − | + | The [[Tokarev TT-30]] appears in-game as the "TT30", and is the standard sidearm of the Soviet forces during the first few levels. It has a capacity of eight rounds and reuses the sounds and animations from the M1911A1. | |
| − | [[ | + | [[File:TT-30.jpg|thumb|none|350px|Tokarev TT-30 - 7.62x25mm Tokarev]] |
| − | [[ | + | [[File:CoD2SP TT30 hold.jpg|thumb|none|600px|Feeling patriotic, Vasili grabs a more homegrown sidearm option. Note the hammer clipping into his hand.]] |
| − | [[ | + | [[File:CoD2SP TT30 aim.jpg|thumb|none|600px|The sights, about as large as any other handgun of the era.]] |
| − | [[ | + | [[File:CoD2SP TT30 rel 1.jpg|thumb|none|600px|Reloading- the top of the magazine is completely solid, with the witness holes in a similar state to the ones on the M1911's magazines.]] |
| − | + | [[File:CoD2SP TT30 rel 2.jpg|thumb|none|600px|Now that we're all out, we have to follow the exact same process as on the M1911A1. New mag in...]] | |
| − | + | [[File:CoD2SP TT30 rel 3.jpg|thumb|none|600px|...and thumb the slide release]] | |
| − | + | [[File:CoD2SP TT30 mele.jpg|thumb|none|600px|Don't forget the celebratory pistol whip.]] | |
| − | + | [[File:CoD2SP TT30 world 1.jpg|thumb|none|600px|A dropped TT-30, a common sight as players are likely to replace this anemic sidearm with something more potent and with more easily sourced spare ammo.]] | |
| − | [[ | + | [[File:CoD2SP TT30 world 2.jpg|thumb|none|600px|Commissar Letlev executing a German prisoner with a Tokarev in "Red Army Training".]] |
| − | [[ | ||
| − | [[ | ||
| − | [[ | ||
| − | [[ | ||
==Webley Mk VI== | ==Webley Mk VI== | ||
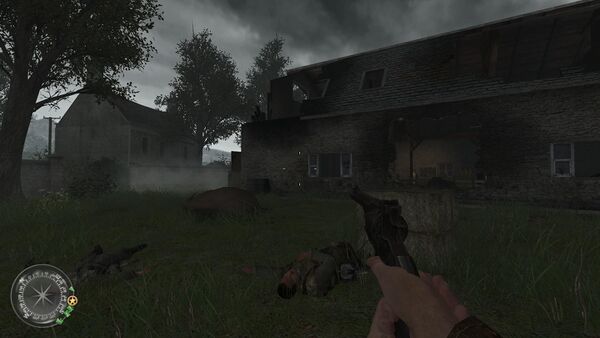
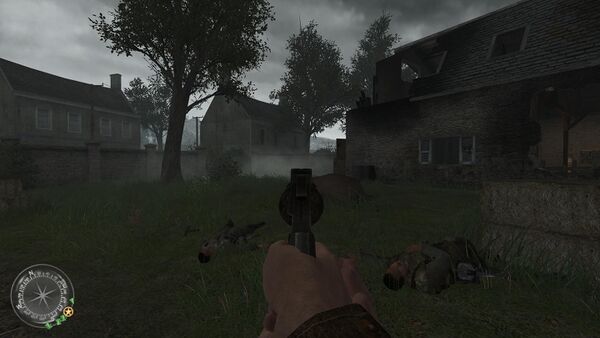
| − | The [[Webley Mk VI]] is the sidearm of the British forces. It is the most powerful sidearm in the game but holds only | + | The [[Webley Mk VI]] is the sole revolver in the game and is the sidearm of the British forces. It is the most powerful sidearm in the game but predictably holds only six bullets in the cylinder, and its reload is fairly slow. |
| − | + | [[File:Webley.JPG|thumb|none|350px|Webley Mk. VI - .455 Webley]] | |
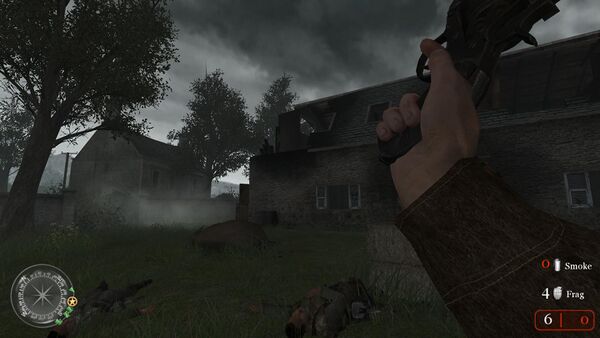
| − | [[ | + | [[File:CoD2SP Webley Mk VI hold.jpg|thumb|none|600px|After demonstrating the effectiveness of .455 to the local ''Wehrmacht'' garrison, Sergeant John Davis holds his big iron.]] |
| − | [[ | + | [[File:CoD2SP Webley Mk VI aim.jpg|thumb|none|600px|Aiming at the late afternoon fog.]] |
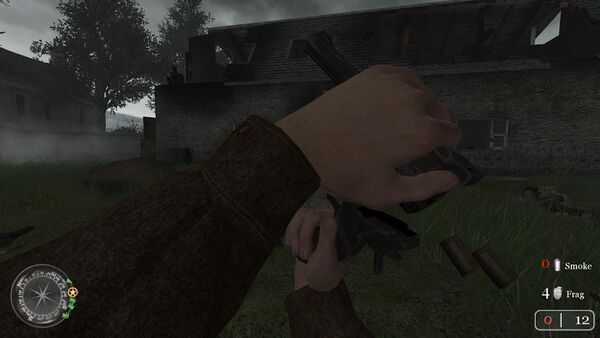
| − | [[ | + | [[File:CoD2SP Webley Mk VI rel 1.jpg|thumb|none|600px|Unfortunately, he seems to have been provided a defective revolver, as the automatic extractor doesn't seem to do anything and the player character instead turns over the revolver and dumps out spent rounds with a few shakes.]] |
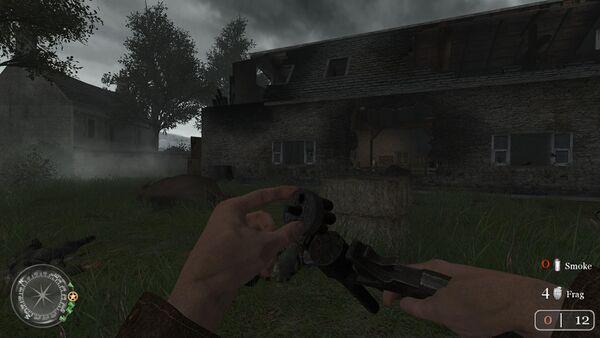
| − | [[ | + | [[File:CoD2SP Webley Mk VI rel 2.jpg|thumb|none|600px|Loading in new rounds via speedloader, before flicking the revolver shut.]] |
| + | [[File:CoD2SP Webley Mk VI mele.jpg|thumb|none|600px|Melee attack.]] | ||
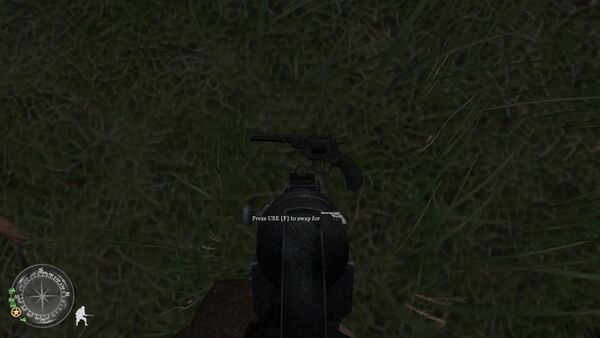
| + | [[File:CoD2SP Webley Mk VI world.jpg|thumb|none|600px|A dropped Webley lurks in the tall grass.]] | ||
=Submachine Guns= | =Submachine Guns= | ||
| − | |||
| − | |||
| − | |||
| − | |||
| − | |||
| − | |||
| − | |||
| − | |||
| − | |||
| − | |||
==M3 "Grease Gun"== | ==M3 "Grease Gun"== | ||
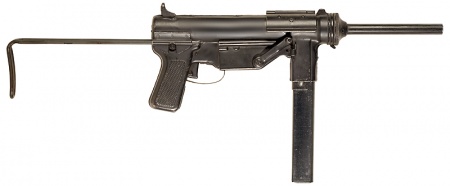
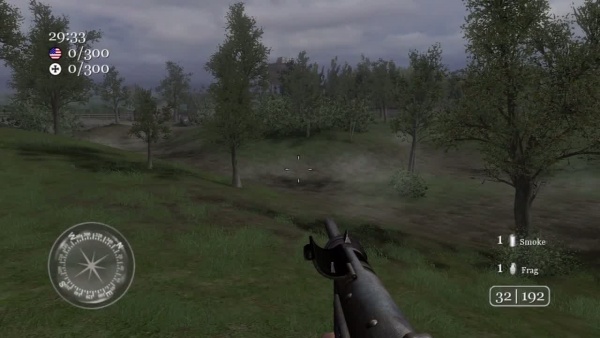
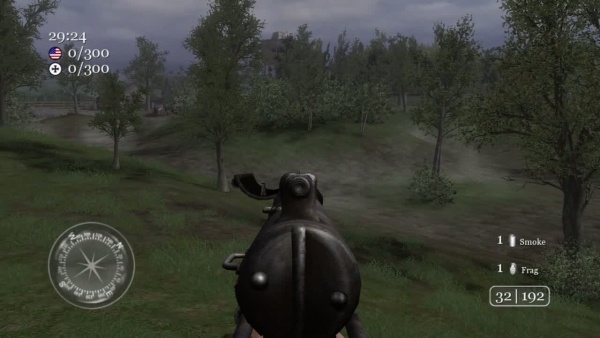
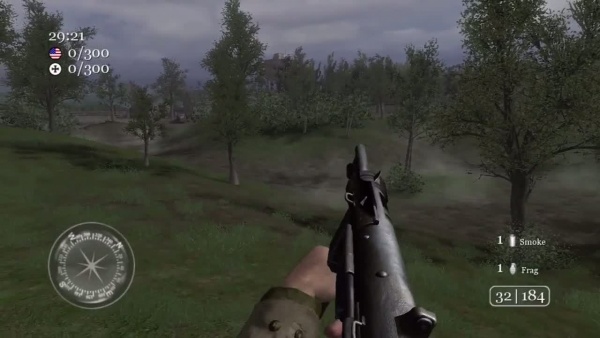
| + | The [[M3 "Grease Gun"]] is only available in the online multiplayer mode and incorrectly feeds a 32-round mag. | ||
| + | [[File:M3 Grease.jpg|thumb|none|450px|M3 "Grease Gun" - .45 ACP]] | ||
| + | [[File:COD2.greasegun.jpg |thumb|none|600px|First-person view of the weapon.]] | ||
| + | [[File:COD2.greasegun.scoped.jpg |thumb|none|600px|Taking aim. The sights are misaligned, with the aperture one should be aiming through in most situations going unused.]] | ||
| + | [[File:COD2.greasegun.reload.jpg |thumb|none|600px|Reloading.]] | ||
| − | The [[ | + | ==MP 40== |
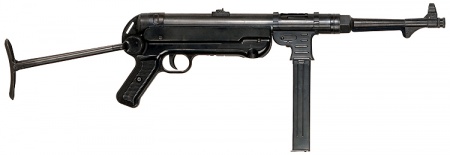
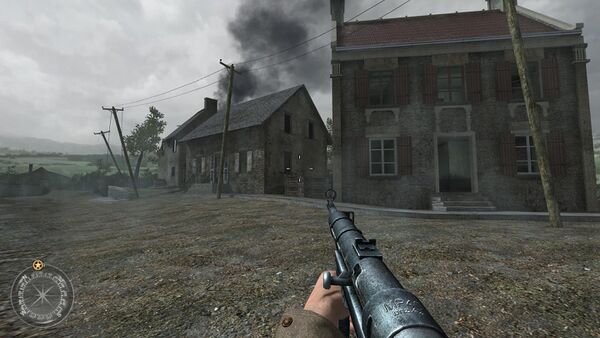
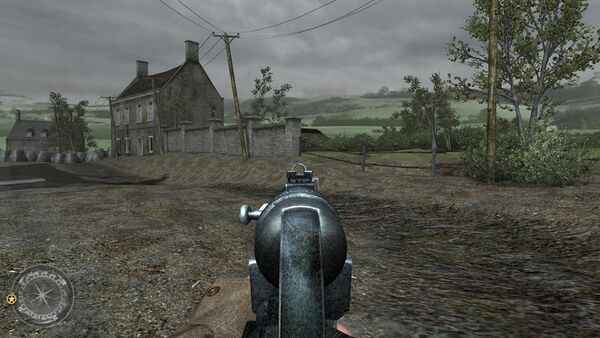
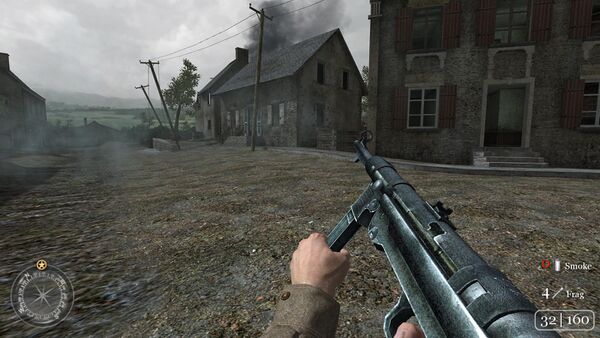
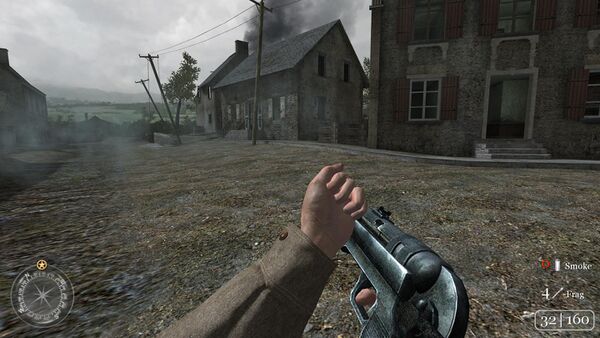
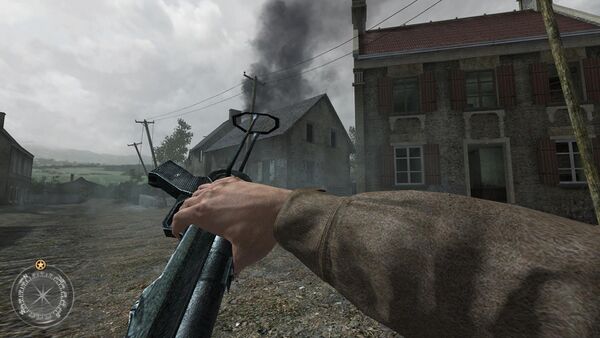
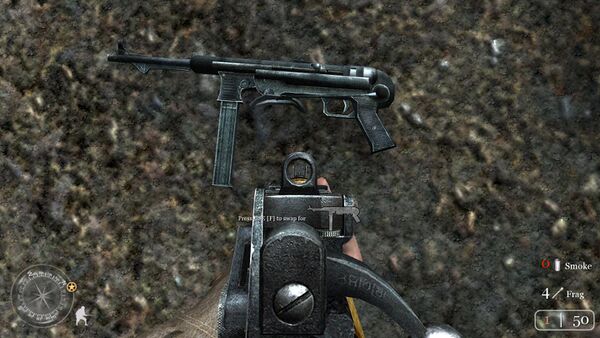
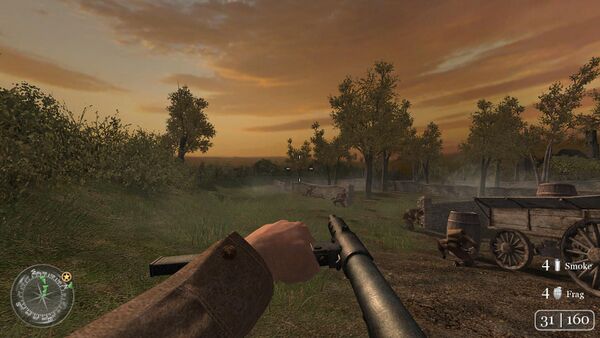
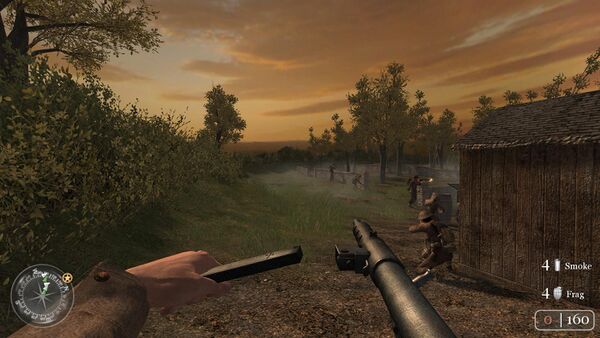
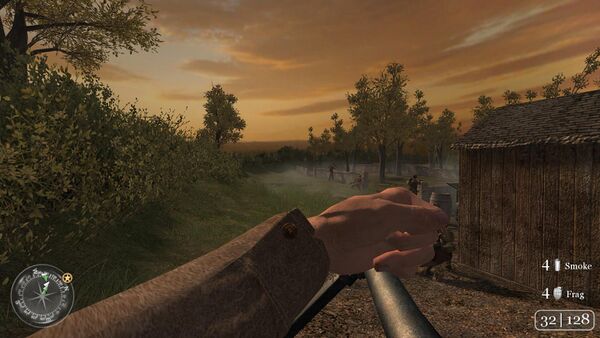
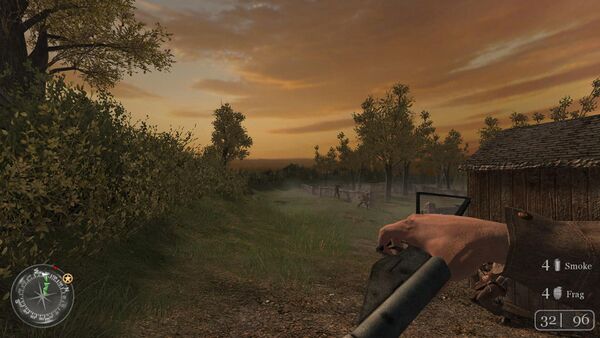
| − | + | The [[MP 40]] submachine gun appears with a 32-round magazine, high recoil, and poor range. It is relatively effective in CQC but hitting the target from a distance can be a problem. As in many games depicting the Second World War, it is an extremely common weapon amongst ''Wehrmacht'' infantry, much more commonly used than it was in most engagements. | |
| − | [[ | + | [[File:MP40.jpg|none|thumb|450px|MP 40 - 9x19mm Parabellum]] |
| − | [[ | + | [[File:CoD2SP MP 40 hold.jpg|thumb|none|600px|Sergeant Davis reaches for an MP 40, something ''Call of Duty 2'' players typically only do in singleplayer after running out of ammo for all their preferred weapons.]] |
| − | [[ | + | [[File:CoD2SP MP 40 aim.jpg|thumb|none|600px|Nevertheless, he takes aim down a muddy path.]] |
| − | [[ | + | [[File:CoD2SP MP 40 rel 1.jpg|thumb|none|600px|Loading in a mag...]] |
| − | + | [[File:CoD2SP MP 40 rel 2.jpg|thumb|none|600px|...and pulling back the charging handle.]] | |
| − | + | [[File:CoD2SP MP 40 mele.jpg|thumb|none|600px|Stock attack- note the unfolded stock here...]] | |
| − | + | [[File:CoD2SP MP 40 world.jpg|thumb|none|600px|...but the folded stock on both the world model and icon.]] | |
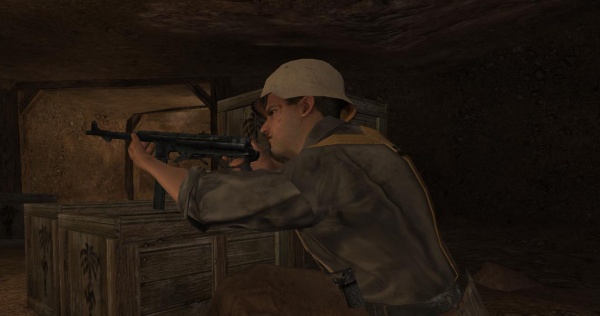
| − | + | [[File:MP40-COD2.jpg|thumb|none|600px|A German Afrika Korps soldier with an MP 40 in the tunnels of El Alamein. NPCs also use the MP 40 with the stock folded.]] | |
| − | |||
| − | |||
| − | [[ | ||
| − | [[ | ||
| − | [[ | ||
| − | [[ | ||
==PPSh-41== | ==PPSh-41== | ||
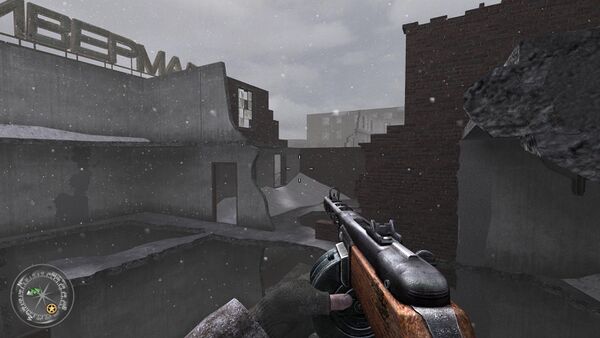
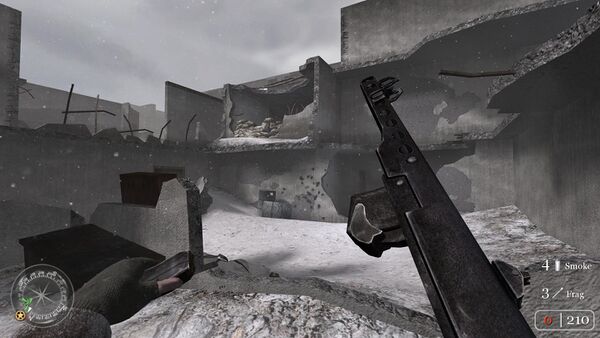
| − | + | The [[PPSh-41]] is the standard Soviet submachine gun, chambered in the 7.62x25mm Tokarev caliber. It is depicted with the 71-round drum magazine. The recoil of the gun is controllable coupled with a blistering rate-of-fire, but has low effective range. A very popular weapon on multiplayer servers due to its high ammo capacity and effectiveness in close quarters. | |
| − | The [[PPSh-41]] is the standard Soviet submachine gun. | + | Despite sharing the caliber with the PPS-42 submachine gun, the two guns don't share the same ammunition in-game, probably due to gameplay balancing reasons. |
| − | + | [[File:PPSH-01-SMG.jpg|450px|thumb|none|PPSh-41 - 7.62x25mm Tokarev]] | |
| − | [[ | + | [[File:CoD2SP PPSh-41 hold.jpg|thumb|none|600px|Vasili holds a PPSh-41 in a typical bombed-out Stalingrad apartment block.]] |
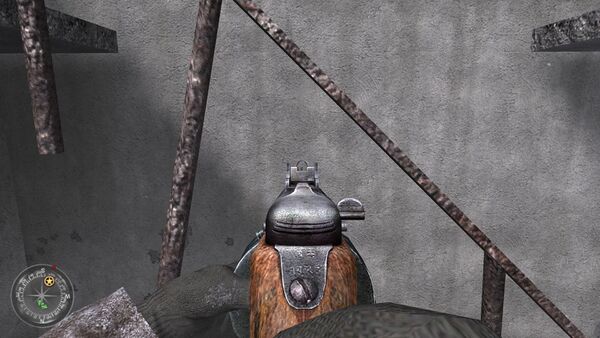
| − | [[ | + | [[File:CoD2SP PPSh-41 aim.jpg|thumb|none|600px|Taking aim at an also equally typical gray Soviet wall.]] |
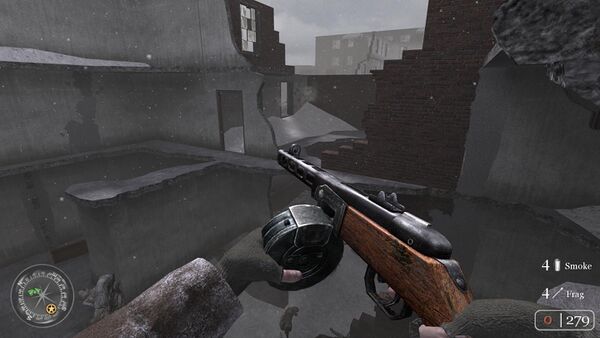
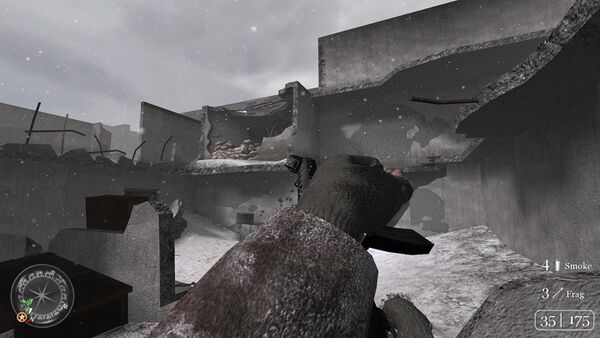
| − | [[ | + | [[File:CoD2SP PPSh-41 rel 1.jpg|thumb|none|600px|Loading reveals that the magazines completely lack feed lips... which would make the task of actually feeding ammunition into the gun quite hard.]] |
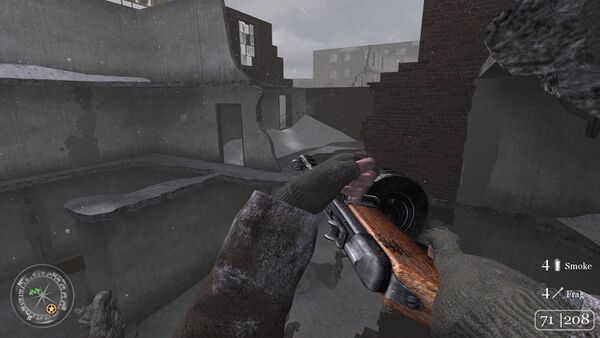
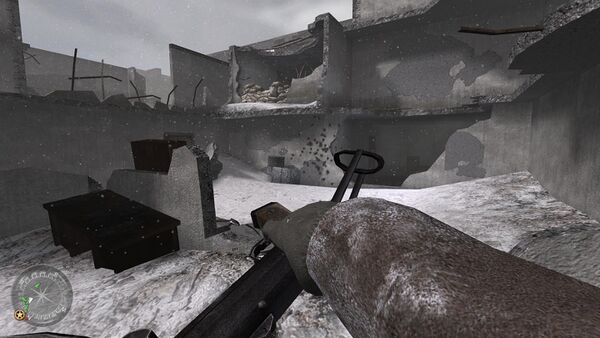
| − | [[ | + | [[File:CoD2SP PPSh-41 rel 2.jpg|thumb|none|600px|Undeterred, our hero charges his weapon and gets to work.]] |
| − | [[ | + | [[File:CoD2SP PPSh-41 mele.jpg|thumb|none|600px|But first, he needs to check the heft with a melee attack.]] |
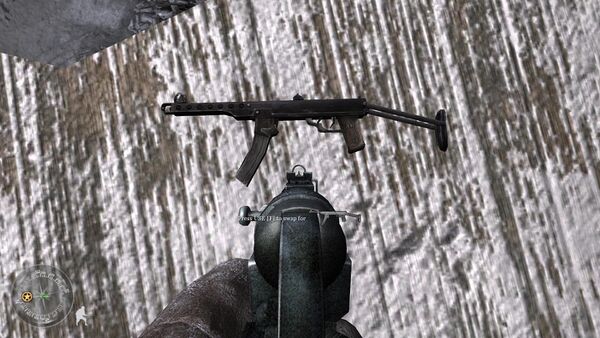
| + | [[File:CoD2SP PPSh-41 world 1.jpg|thumb|none|600px|A PPSh-41 dropped after swapping it for an MP 40- something no self-respecting ''CoD 2'' player would actually do.]] | ||
==PPS-42== | ==PPS-42== | ||
| + | The [[PPS-42]], an early model of the PPS-43, appears with a 35-round box magazine and is chambered in 7.62x25mm Tokarev. The low rate of fire makes it easier to control, but this could be a disadvantage at close range. | ||
| + | As mentioned above, the PPS-42 doesn't share the same ammunition with the PPSh-41 despite being chambered in the 7.62x25mm Tokarev caliber, probably due to gameplay balancing reasons. | ||
| + | [[File:PPS-42.jpg|450px|thumb|none|PPS-42 with stock extended - 7.62x25mm Tokarev]] | ||
| + | [[File:CoD2SP PPS-42 hold.jpg|thumb|none|600px|In another blown-to-bits apartment, Vasili holds another kind of Soviet bullethose.]] | ||
| + | [[File:CoD2SP PPS-42 aim.jpg|thumb|none|600px|Checking the sights against the still very gray walls.]] | ||
| + | [[File:CoD2SP PPS-42 rel 1.jpg|thumb|none|600px|Loading- the new magazine has a 2D texture of cartridges on the top, but its better than being either empty or completely solid instead.]] | ||
| + | [[File:CoD2SP PPS-42 rel 2.jpg|thumb|none|600px|Working the charging handle.]] | ||
| + | [[File:CoD2SP PPS-42 mele.jpg|thumb|none|600px|Melee attack. One might assume this would hurt less than being thwacked with the PPSh-41's solid wood stock.]] | ||
| + | [[File:CoD2SP PPS-42 world.jpg|thumb|none|600px|Unlike the MP 40, the PPS-42's stock remains loyally unfolded.]] | ||
| − | The [[ | + | ==Sten Mk II (Canadian)== |
| + | The [[Sten Mk II|Sten Mk II (Canadian)]] is a very accurate submachine gun (contrary to the real-life counterpart, which is fairly inaccurate, surely more so than the MP 40 or the Thompson) for the UK forces. It holds 32 rounds just like the MP 40, even though in reality soldiers would usually load the magazines of both weapons with 30 or 28 rounds to prevent spring failures. | ||
| + | [[File:Unitsten2.jpg|thumb|none|450px|Sten Mk II (Canadian) - 9x19mm Parabellum]] | ||
| + | [[File:CoD2SP Sten Mk II (Canadian) hold.jpg|thumb|none|600px|Sergeant Davis with a Sten- it's crude, but beats having no gun 100% of the time. Note the ill-advised technique of holding the Sten by the magazine. which was known to damage the magazine and cause misfeeds.]] | ||
| + | [[File:CoD2SP Sten Mk II (Canadian) aim.jpg|thumb|none|600px|Aiming with a slightly canted view. A similar ADS style would later be used for the [[Type 100]] in ''[[Call of Duty: World at War]]''.]] | ||
| + | [[File:CoD2SP Sten Mk II (Canadian) rel 1.jpg|thumb|none|600px|Pulling out a magazine (the top of which is solid).]] | ||
| + | [[File:CoD2SP Sten Mk II (Canadian) rel 2.jpg|thumb|none|600px|Pulling the charging handle at the end of an empty reload.]] | ||
| + | [[File:CoD2SP Sten Mk II (Canadian) mele.jpg|thumb|none|600px|Giving the most solid possible whack you can get out of the skeletal stock.]] | ||
| + | [[File:CoD2SP Sten Mk II (Canadian) world.jpg|thumb|none|600px|Examining a dropped Sten to confirm it is indeed a Canadian variant.]] | ||
| + | [[File:StenMkII-COD2.jpg|thumb|none|600px|A British soldier firing his Sten during the Battle for Caen. Note that he does not hold it by the magazine like the player character does and instead reuses the animation set for using a rifle, resulting in his hand hovering around the foreend, almost gripping it properly.]] | ||
| − | [[ | + | ==Thompson M1A1== |
| − | [[ | + | The [[Thompson M1A1]] is used by American soldiers such as Sergeant Randall. It is also used by the British in the North Africa campaign, likely standing it for the [[M1928A1 Thompson]] actually used by Commonwealth forces early in the war. It is more powerful than the MP 40 but holds only 20 rounds, even though it is modeled with a 30-round magazine. |
| − | [[ | + | [[File:M1sb.jpg|thumb|none|450px|Thompson M1A1 - .45 ACP]] |
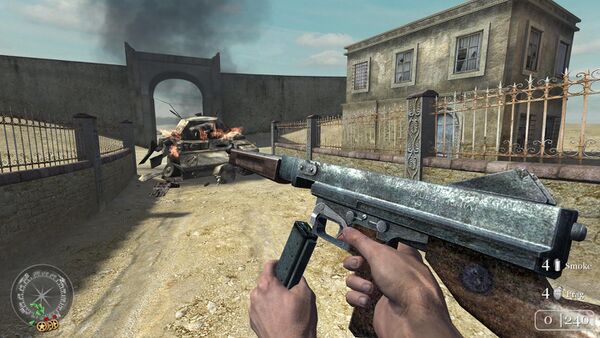
| − | [[ | + | [[File:CoD2SP M1A1 Thompson hold.jpg|thumb|none|600px|In North Africa, Sergeant Davis holds a Thompson and examines a wrecked Crusader tank.]] |
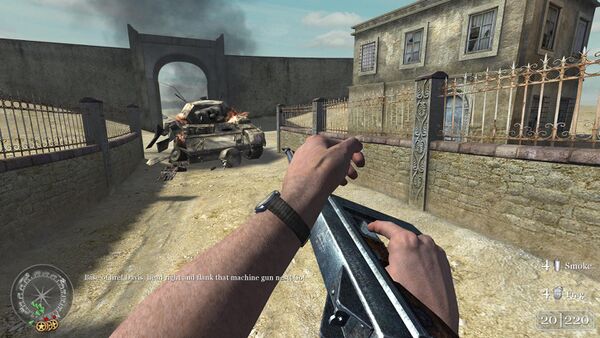
| − | [[ | + | [[File:CoD2SP M1A1 Thompson aim.jpg|thumb|none|600px|He turns around to examine some more intact offerings. The front sight is aligned through the higher notch on the rear sight, which is intended for longer-range engagements, rather than the aperture for close-range targets below.]] |
| + | [[File:CoD2SP M1A1 Thompson rel 1.jpg|thumb|none|600px|Inserting a fresh mag...]] | ||
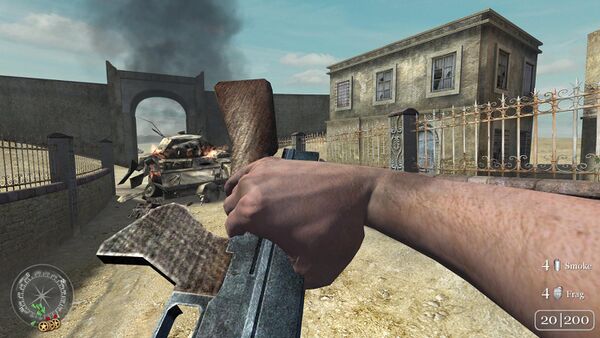
| + | [[File:CoD2SP M1A1 Thompson rel 2.jpg|thumb|none|600px|...and locking n' loading while the subtitles urge Davis onward.]] | ||
| + | [[File:CoD2SP M1A1 Thompson mele.jpg|thumb|none|600px|A solid stock provides a very satisfying thumping.]] | ||
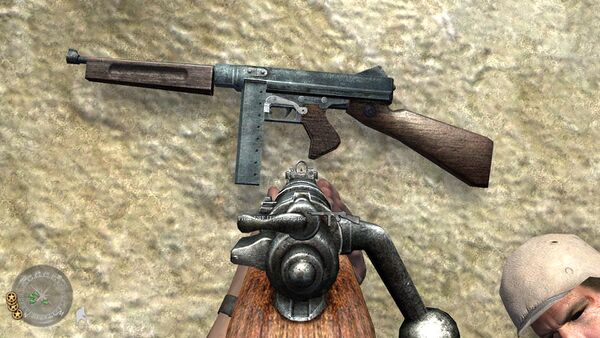
| + | [[File:CoD2SP M1A1 Thompson world.jpg|thumb|none|600px|The world model, featuring a cameo from a napping Afrika Corp soldier.]] | ||
| − | = | + | =Shotguns= |
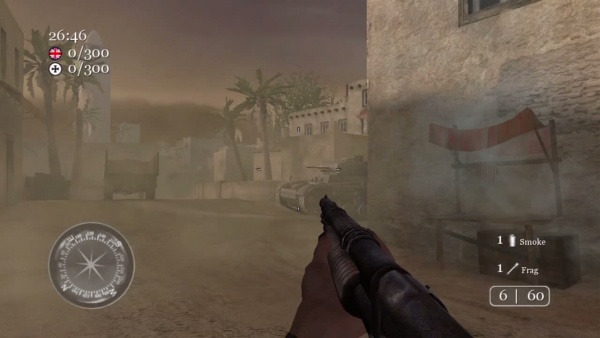
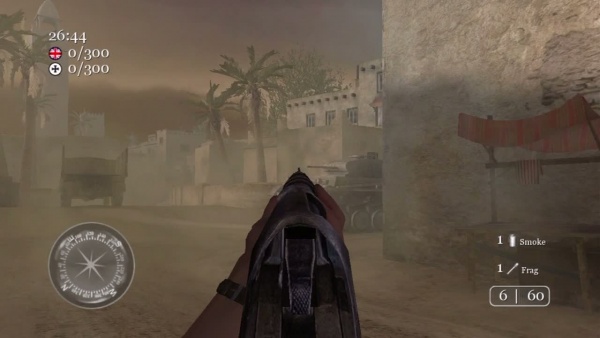
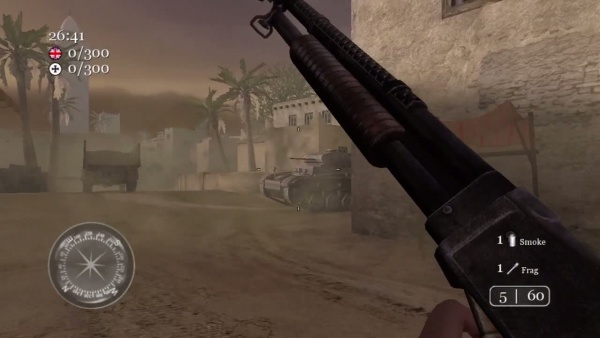
| − | The [[ | + | ==Winchester Model 1897 "Trench Gun"== |
| + | The [[Winchester Model 1897 "Trench Gun"]] is available only in multiplayer, usable by every faction. Erroneously holds six shells instead of the real weapons five-round capacity. | ||
| + | [[File:1897.jpg|thumb|none|400px|Winchester Model 1897 "Trench Gun" with Parkerized finish - 12 gauge]] | ||
| + | [[File:COD2.trenchgun.jpg |thumb|none|600px|A multiplayer tries to use their M1897 to clear up a dust storm.]] | ||
| + | [[File:COD2.trenchgun.scoped.jpg |thumb|none|600px|Aiming reveals no rear sight of any kind, with only the front bead being used.]] | ||
| + | [[File:COD2.trenchgun.reload.jpg |thumb|none|600px|Slotting in low-res shells, which is followed by a pump (even if the weapon was not yet empty).]] | ||
| − | + | =Rifles= | |
| − | |||
| − | |||
| − | |||
| − | |||
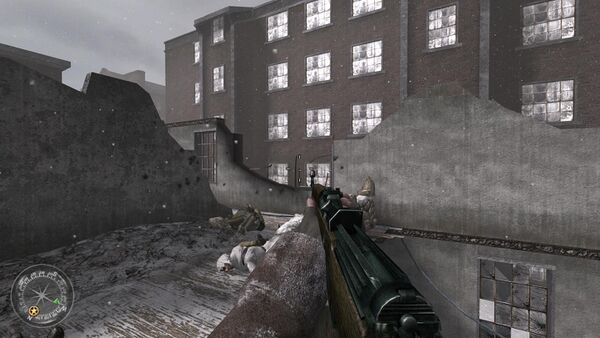
| − | = | + | ==Gewehr 43== |
| + | The [[Gewehr 43]] is uncommonly used by ''Wehrmacht'' infantry in all three campaigns. The scoped variant is only available in campaign, and, despite being the same rifle and thus having the same caliber, in-game it nonsensically doesn't share the same ammunition as the non-scoped variant; as is the case with most video games, this is likely due to gameplay balancing reasons, so the player may not take advantage of using it as a sniper rifle and collecting additional ammo from non-scoped variants. Both variants hold ten rounds and are reloaded via detachable magazines. | ||
| − | + | Its appearance in the Stalingrad missions (and potential use in multiplayer maps like Moscow, Railyard, Kalach, Harbor, and Leningrad) is anachronistic, as the rifle was produced from October 1943 onward (and the Battle of Stalingrad ended in February 1943). The period-appropriate semi-automatic German rifle for this battle should have been its predecessor, the [[Gewehr 41]], which was produced from 1940 until 1941 and was widely used in the Eastern Front. | |
| + | [[File:K43 nc.jpg|thumb|none|450px|Gewehr 43 - 7.92x57mm Mauser]] | ||
| + | [[File:CoD2SP Gewehr 43 hold.jpg|thumb|none|600px|In Stalingrad, Vasili strikes it lucky and acquires a rifle a bit too early for this party.]] | ||
| + | [[File:CoD2SP Gewehr 43 aim.jpg|thumb|none|600px|Iron sights, and another standard issue gray Soviet wall.]] | ||
| + | [[File:CoD2SP Gewehr 43 rel 1.jpg|thumb|none|600px|Stripper clips? Ha! That's so Gewehr 41. The old magazine is yanked out a new (still empty) one is replaced.]] | ||
| + | [[File:CoD2SP Gewehr 43 rel 2.jpg|thumb|none|600px|As demonstrated here.]] | ||
| + | [[File:CoD2SP Gewehr 43 mele.jpg|thumb|none|600px|Meleeing the air after a job well done.]] | ||
| + | [[File:CoD2SP Gewehr 43 world.jpg|thumb|none|600px|Unfortunately, the G43 also suffers from major world model disfigurement like the M1911A1- the magazine is skewed at a much more severe angle, isn't inserted all the way, and the entire trigger group is missing,]] | ||
| + | <br> | ||
| + | '''Gewehr 43 with ZF 4 scope''' | ||
| + | <br> | ||
| + | [[File:Gew_43.jpg|thumb|none|450px|Gewehr 43 with ZF 4 scope - 7.92x57mm Mauser]] | ||
| + | [[File:CoD2SP Gewehr 43 Sniper hold.jpg|thumb|none|600px|Not to be outdone, Vasili acquires a scoped G43]] | ||
| + | [[File:CoD2SP Gewehr 43 Sniper aim.jpg|thumb|none|600px|The German sniper rifles all share the same three-post reticle.]] | ||
| + | [[File:CoD2SP Gewehr 43 Sniper rel 1.jpg|thumb|none|600px|Reloading- we just explained how this works, so let's hope you were paying attention.]] | ||
| + | [[File:CoD2SP Gewehr 43 Sniper rel 2.jpg|thumb|none|600px|Blah, blah, magazine is inserted, blah, blah...]] | ||
| + | [[File:CoD2SP Gewehr 43 Sniper mele.jpg|thumb|none|600px|Whacking with this thing might not be good for your scope.]] | ||
| + | [[File:CoD2SP Gewehr 43 Sniper world.jpg|thumb|none|600px|The world model is not safe from its unscoped cousin's curse of ugliness.]] | ||
| − | The [[ | + | ==Karabiner 98k== |
| + | The bolt-action [[Karabiner 98k]] is the standard German service rifle, chambered in 7.92x57mm Mauser. It holds five rounds and is very accurate, even at long distances. German snipers use the scoped version, which, nonsensically and probably due to gameplay balancing reasons, does not share ammunition with the non-scoped Kar98k. | ||
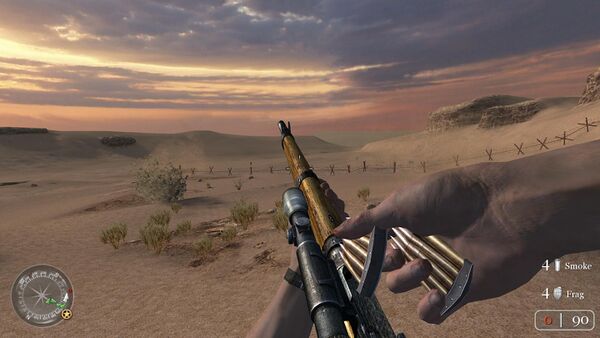
| + | The player character correctly reloads it by using its 5-round stripper clip, but erroneously does so by inserting all five bullets in the clip whether the weapon was completely emptied before reloading or if there are still rounds in the magazine, whereupon either some of the bullets would still be left on the clip or the player character would need to load rounds one at a time, as with the sniper variant. | ||
| + | [[File:Karabiner-98K.jpg|thumb|none|450px|Karabiner 98k - 7.92x57mm Mauser]] | ||
| + | [[File:CoD2SP Kar98K hold.jpg|thumb|none|600px|Sergeant Davis with a very common sight in this game- a pilfered Kar98k.]] | ||
| + | [[File:CoD2SP Kar98K aim.jpg|thumb|none|600px|Aiming. The hammer does not move when firing, although this sort of detail and ones like it are very commonly omitted in games of this time period.]] | ||
| + | [[File:CoD2SP Kar98K rel 1.jpg|thumb|none|600px|Opening up the bolt...]] | ||
| + | [[File:CoD2SP Kar98K rel 2.jpg|thumb|none|600px|...and shoving home a fresh clip of 8mm Mauser.]] | ||
| + | [[File:CoD2SP Kar98K mele.jpg|thumb|none|600px|A nice solid stock gives some nice solid thwacks.]] | ||
| + | [[File:CoD2SP Kar98K world.jpg|thumb|none|600px|A dropped Kar98k, a common sight when your character mows down dozens and dozens of enemies singlehandedly.]] | ||
| + | <br> | ||
| + | '''Karabiner 98k Sniper with Zeiss ZF42 scope''' | ||
| + | <br> | ||
| + | [[File:Mauser K98 Sniper.jpg|thumb|none|450px|Karabiner 98k Sniper with Zeiss ZF42 scope - 7.92x57mm Mauser]] | ||
| + | [[File:CoD2SP Kar98K Sniper hold.jpg|thumb|none|600px|Meanwhile, in Stalingrad, Vasili arms himself with a scoped Kar98k.]] | ||
| + | [[File:CoD2SP Kar98K Sniper aim.jpg|thumb|none|600px|There's our old friend the three-post reticle again.]] | ||
| + | [[File:CoD2SP Kar98K Sniper rel 1.jpg|thumb|none|600px|Now that the scope is blocking the breech, you need to open the bolt...]] | ||
| + | [[File:CoD2SP Kar98K Sniper rel 2.jpg|thumb|none|600px|...and feed it with loose rounds.]] | ||
| + | [[File:CoD2SP Kar98K Sniper mele.jpg|thumb|none|600px|A standard whack, nothing to see here.]] | ||
| + | [[File:CoD2SP Kar98K Sniper world.jpg|thumb|none|600px|Thankfully, this rifle is nicely modeled in the world.]] | ||
| − | + | ==Lee-Enfield No. 4 Mk. I== | |
| − | [[ | + | The British service rifle, chambered in the .303 British caliber. Called simply the "Lee-Enfield", the [[Lee-Enfield No.4 Mk.I]] is better than the Kar98k because it (correctly) holds 10 rounds rather than five. Like the real-life rifle, the player reloads by using two sets of 5-round stripper clips, making a mid-reload impossible if the number of rounds left in the magazine is higher than 5; if one round is left in the chamber and the player performs a mid-reload, for example, the total number of rounds in the magazine will be 6, without the ability to reload again until the number of rounds is 5 or fewer. A full 10-round reload when there are no rounds left is performed by having to reload manually an additional time in order to insert the remaining 5-round stripper clip, as the player inserts only one 5-round stripper clip automatically when out of ammunition. You can notice the second clip in the loader's hand waiting to be also inserted during a reloading animation. |
| − | + | [[File:LeeEnfield4Rifle.jpg|thumb|none|450px|Lee-Enfield No.4 Mark I - .303 British]] | |
| − | + | [[File:CoD2SP Lee-Enfield No. 4 hold.jpg|thumb|none|600px|In North Africa, Sergeant Davis holds his service rifle while Captain Price (voiced by [[Michael Gough]]) takes cover behind the air.]] | |
| − | + | [[File:CoD2SP Lee-Enfield No. 4 aim.jpg|thumb|none|600px|Sighing heavily at his superior's antics, Davis aims at the horizon.]] | |
| − | + | [[File:CoD2SP Lee-Enfield No. 4 rel 1.jpg|thumb|none|600px|Soon after, he opens the bolt...]] | |
| − | + | [[File:CoD2SP Lee-Enfield No. 4 rel 2.jpg|thumb|none|600px|...and inserts a clip into the void (note the second clip in his off hand).]] | |
| − | + | [[File:CoD2SP Lee-Enfield No. 4 mele.jpg|thumb|none|600px|After that, you know what time it is.]] | |
| − | + | [[File:CoD2SP Lee-Enfield No. 4 world 1.jpg|thumb|none|600px|A nicely modeled Lee-Enfield out in the world, although it does seem a tad bit too short.]] | |
| − | + | [[File:CoD2SP Lee-Enfield No. 4 world 2.jpg|thumb|none|600px|Captain Price with his signature Lee-Enfield.]] | |
| − | + | <br> | |
| − | [[ | + | '''Lee-Enfield No. 4 Mk I (T)''' |
| − | + | <br> | |
| − | [[ | + | A scoped version of the rifle, the [[Lee-Enfield No. 4 Mk I (T)]], can also be found and used as a sniper rifle in single-player and multiplayer modes. Just like many other scoped variants of rifles in the game, it does not share the same ammunition most likely due to gameplay balancing reasons, despite being the same rifle chambered in the same caliber. |
| − | [[ | + | [[File:Smle4mk1t.jpg|thumb|none|450px|Lee-Enfield No. 4 Mk I (T) - .303 British]] |
| − | + | [[File:CoD2SP Lee-Enfield No. 4 sniper hold.jpg|thumb|none|600px|Sergeant Davis holds a scoped No. 4 while checking out the beautiful skybox.]] | |
| − | [[ | + | [[File:CoD2SP Lee-Enfield No. 4 sniper aim.jpg|thumb|none|600px|The scoped Lee-Enfield uses a unique reticle.]] |
| − | + | [[File:CoD2SP Lee-Enfield No. 4 sniper rel 1.jpg|thumb|none|600px|Normally, the scoped bolt-action rifles need to be loaded round-by-round...]] | |
| − | + | [[File:CoD2SP Lee-Enfield No. 4 sniper rel 2.jpg|thumb|none|600px|...not the case here, as the offset scope allows clips to be used as normal.]] | |
| − | + | [[File:CoD2SP Lee-Enfield No. 4 sniper mele.jpg|thumb|none|600px|Giving the air a taste of English beechwood.]] | |
| − | + | [[File:CoD2SP Lee-Enfield No. 4 sniper world.jpg|thumb|none|600px|A dropped scoped Lee-Enfield, much the same as the common variant.]] | |
| − | |||
| − | |||
| − | |||
| − | [[ | ||
| − | |||
| − | [[ | ||
| − | [[ | ||
| − | [[ | ||
| − | |||
| − | |||
| − | |||
| − | |||
| − | |||
| − | [[ | ||
| − | [[ | ||
| − | [[ | ||
| − | [[ | ||
| − | [[ | ||
| − | |||
| − | |||
| − | |||
| − | |||
| − | |||
| − | |||
| − | [[ | ||
| − | [[ | ||
| − | |||
| − | |||
| + | ==M1 Carbine== | ||
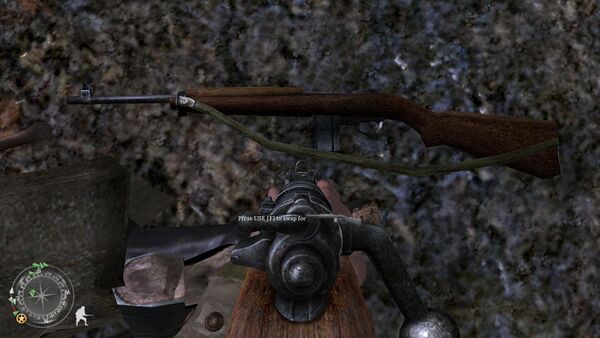
The [[M1 Carbine]] is used by American soldiers in the game. Holds 15 rounds in the magazine. | The [[M1 Carbine]] is used by American soldiers in the game. Holds 15 rounds in the magazine. | ||
| − | + | [[File:M1-Carbine.jpg|thumb|none|450px|M1 Carbine - .30 Carbine]] | |
| − | [[ | + | [[File:CoD2SP M1 Carbine hold.jpg|thumb|none|600px|Corporal Taylor guards his tractor with an M1 Carbine.]] |
| − | [[ | + | [[File:CoD2SP M1 Carbine aim.jpg|thumb|none|600px|Peering down the rear aperture sight, understandably enlarged for gameplay purposes.]] |
| − | [[ | + | [[File:CoD2SP M1 Carbine rel 1.jpg|thumb|none|600px|Reloading begins by pulling out the old mag with the offhand...]] |
| − | [[ | + | [[File:CoD2SP M1 Carbine rel 2.jpg|thumb|none|600px|...and working the charging handle after giving it a good thumping to make sure it's seated in place.]] |
| − | [[ | + | [[File:CoD2SP M1 Carbine mele.jpg|thumb|none|600px|Can't forgot a whack.]] |
| + | [[File:CoD2SP M1 Carbine world.jpg|thumb|none|600px|The dropped M1 Carbine, one of the few weapons to be modeled with a sling.]] | ||
| + | [[File:M1Carbine-COD2.jpg|thumb|none|600px|An American soldier nervously holding his M1 Carbine during the Battle of Pointe du Hoc.]] | ||
==M1 Garand== | ==M1 Garand== | ||
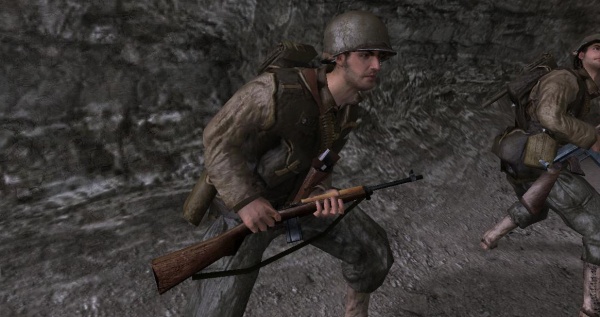
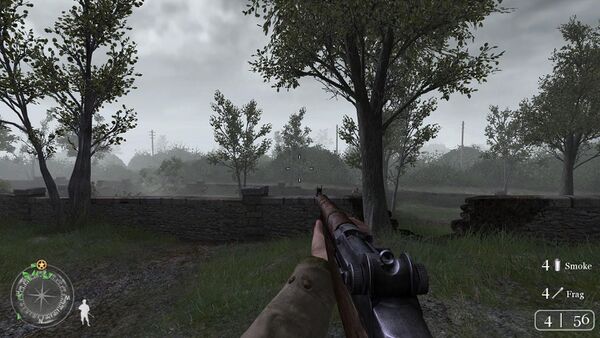
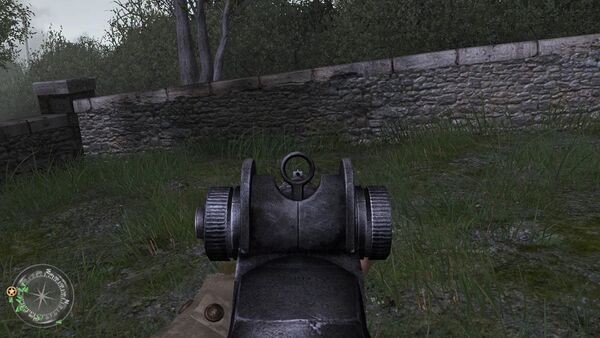
| + | The [[M1 Garand]] is the service rifle of the American forces. It holds eight bullets and cannot be reloaded if there are unfired rounds in it, in multiplayer it's used by both American and British forces. | ||
| + | [[File:M1 Garand.jpg|thumb|none|450px|M1 Garand - .30-06]] | ||
| + | [[File:CoD2SP M1 Garand hold.jpg|thumb|none|600px|Later, Taylor defends the nearby broken wall with "the greatest battle implement ever devised".]] | ||
| + | [[File:CoD2SP M1 Garand aim.jpg|thumb|none|600px|Sighting up a nearby patch of grass.]] | ||
| + | [[File:CoD2SP M1 Garand rel 1.jpg|thumb|none|600px|The Garand, mid-ping. Perspective conspires to make the nearby .30-06 casing appear to be about the size of the .50 BMG round. The casing model appears to have a slimmer and longer bottleneck than the actual cartridge.]] | ||
| + | [[File:CoD2SP M1 Garand rel 2.jpg|thumb|none|600px|Feeding the Garand a new clip. The bolt on the M1 Garand in this game goes into battery automatically upon being loaded with a fresh en bloc clip, unlike the "sticky" bolts seen in some other games.]] | ||
| + | [[File:CoD2SP M1 Garand mele.jpg|thumb|none|600px|Now, this is a rifle that's good for cracking heads.]] | ||
| + | [[File:CoD2SP M1 Garand world.jpg|thumb|none|600px|An M1 Garand indignantly dropped in the mud.]] | ||
| + | [[File:M1Garand-COD2.jpg|thumb|none|600px|Pvt. Braeburn firing his M1 Garand on the cliffs of Pointe du Hoc. The soldier to his right is armed with an M1A1 Thompson.]] | ||
| − | + | ==Mosin Nagant M38 Carbine== | |
| − | + | The [[Mosin Nagant M38 Carbine]] is one of the best weapons in the game. Deals extremely high damage but the slow (bolt-action) rate of fire and lack of ammo supply can be a problem. The scoped variant is used by the Soviet troops as a sniper rifle. Interestingly, the sniper version has a different reload animation: it must be reloaded one bullet at a time instead of the "normal" weapon's stripper clip, because the scope would interfere with the clip insertion. Just like the rest of the scoped rifle variants in-game, it nonsensically uses different ammunition from the non-scoped Mosin Nagant, probably due to gameplay balancing reasons. Also, although being chambered in the 7.62x54mmR caliber, the Mosin Nagant doesn't share ammunition with the SVT-40. The iron sights are misaligned when used, in real life the bullet would hit above the target. | |
| − | + | [[File:M38Carbine.jpg|thumb|none|450px|Mosin Nagant M38 Carbine - 7.62x54mmR]] | |
| − | + | [[File:CoD2SP Mosin Nagant Model 1938 Carbine hold.jpg|thumb|none|600px|Red Army hero Vasili arms himself with the only kind of rifle a self-respecting Red Army trooper should be using.]] | |
| − | + | [[File:CoD2SP Mosin Nagant Model 1938 Carbine aim.jpg|thumb|none|600px|Aiming- you don't need sight alignment, comrade, the wisdom of Marx and Lenin shall guide your aim!]] | |
| − | + | [[File:CoD2SP Mosin Nagant Model 1938 Carbine rel 1.jpg|thumb|none|600px|Preparing to open the bolt.]] | |
| − | + | [[File:CoD2SP Mosin Nagant Model 1938 Carbine rel 2.jpg|thumb|none|600px|As with most of the bolt-action rifles, a full clip is shoved in regardless of ammo remaining. However, one cannot even see the clip going in due to the field of view being too low to see it.]] | |
| − | + | [[File:CoD2SP Mosin Nagant Model 1938 Carbine mele.jpg|thumb|none|600px|As with any Mosin rifle, the M38 Carbine makes a highly effective club when you're low on ammo.]] | |
| − | ==Mosin Nagant== | + | [[File:CoD2SP Mosin Nagant Model 1938 Carbine world 1.jpg|thumb|none|600px|An M38 presumably dropped by a heroic defender of the Motherland.]] |
| − | + | [[File:CoD2SP Mosin Nagant Model 1938 Carbine world 2.jpg|thumb|none|600px|A Soviet soldier aiming a Mosin Nagant in "Red Army Training."]] | |
| − | The [[Mosin Nagant | + | <br> |
| − | + | '''Mosin Nagant M38 Carbine with PU scope''' | |
| − | [[ | + | <br> |
| − | [[ | + | The sniper version of the [[Mosin Nagant M38 Carbine]] is used during the Soviet campaign. It notably features cloth covers on both the scope and the handguard, in order to protect the rifle from snow and also act as a form of primitive camouflage to prevent giving away the sniper's position. This design choice is likely inspired by [[Enemy_at_the_Gates#Mosin_Nagant_M91.2F30_Sniper_Rifle|''Enemy at the Gates'']], which features a near-identical Mosin Nagant configuration. |
| − | [[ | + | [[File:Mosin-Nagant M38 Carbine Sniper.jpg|thumb|none|450px|Mosin Nagant M38 Carbine with PU scope - 7.62x54mmR]] |
| − | [[ | + | [[File:CoD2SP Mosin Nagant Model 1938 Carbine sniper hold.jpg|thumb|none|600px|Our Vasili tries to channel another kind of Vasily with a camo-wrapped M38 Carbine.]] |
| − | [[ | + | [[File:CoD2SP Mosin Nagant Model 1938 Carbine sniper aim.jpg|thumb|none|600px|Aiming reveals the unique Soviet reticle.]] |
| − | + | [[File:CoD2SP Mosin Nagant Model 1938 Carbine sniper rel 1.jpg|thumb|none|600px|Cycling the rifle sends a spent cartridge flying.]] | |
| − | + | [[File:CoD2SP Mosin Nagant Model 1938 Carbine sniper rel 2.jpg|thumb|none|600px|Loading in fresh rounds, also done off-screen like its unscoped brother.]] | |
| + | [[File:CoD2SP Mosin Nagant Model 1938 Carbine sniper mele.jpg|thumb|none|600px|Of course, this Soviet rifle is unafraid to get up close and personal either (and shows off the correct down-turned bolt handle of sniper variant Mosins, though it sticks out a bit further than the real deal).]] | ||
| + | [[File:CoD2SP Mosin Nagant Model 1938 Carbine sniper world.jpg|thumb|none|600px|A dropped M38 sniper kept warm by its cloth covering.]] | ||
| − | The sniper | + | ==M1903A4 Springfield== |
| + | The US Army sniper rifle is the [[M1903A4 Springfield]], appearing as just "Springfield". The non-scoped variant is not available. | ||
| + | [[File:M1903A4 M84 scope.jpg|thumb|none|450px|M1903A4 Springfield with M84 scope .30-06]] | ||
| + | [[File:CoD2SP Springfield M1903A4 hold.jpg|thumb|none|600px|At Pointe du Hoc, Corporal Taylor holds a scoped Springfield while a comrade urges him to kindly take a hike.]] | ||
| + | [[File:CoD2SP Springfield M1903A4 aim.jpg|thumb|none|600px|He checks out a fellow Ranger unloading into the air with a BAR.]] | ||
| + | [[File:CoD2SP Springfield M1903A4 rel 1.jpg|thumb|none|600px|Opening the bolt...]] | ||
| + | [[File:CoD2SP Springfield M1903A4 rel 2.jpg|thumb|none|600px|...and slotting in new rounds. Like the Mosin M38, this is done off-screen.]] | ||
| + | [[File:CoD2SP Springfield M1903A4 mele.jpg|thumb|none|600px|But a stock whacking is done on-screen.]] | ||
| + | [[File:CoD2SP Springfield M1903A4 world.jpg|thumb|none|600px|A dropped Springfield.]] | ||
| − | [[ | + | ==StG 44== |
| − | [[ | + | The [[StG 44]], called by the older "MP44" name, is a powerful German assault rifle. |
| − | [[ | + | [[File:Sturmgewehr 44.jpg|thumb|none|450px|StG 44 - 7.92x33mm Kurz]] |
| − | + | [[File:CoD2SP StG 44 hold.jpg|thumb|none|600px|Further afield, Sergeant Davis loots an StG 44 for himself. The rifle is held by the foreend- which was not recommended as it could heat it up greatly during sustained fire.]] | |
| − | + | [[File:CoD2SP StG 44 aim.jpg|thumb|none|600px|Testing the sights against a patch of unruly grass. Maybe some 7.92x33mm Kurz will trim it down?]] | |
| − | + | [[File:CoD2SP StG 44 rel 1.jpg|thumb|none|600px|Inserting a new magazine. Davis should hang on to a few of these, as even a single genuine StG 44 magazine can go for quite a pretty penny on the collector's market these days.]] | |
| − | + | [[File:CoD2SP StG 44 rel 2.jpg|thumb|none|600px|Charging the handle and getting back to the fun with his machine gun.]] | |
| − | + | [[File:CoD2SP StG 44 mele.jpg|thumb|none|600px|A stock attack, not a recommended practice with the StG as its stocks are somewhat fragile.]] | |
| − | [[ | + | [[File:CoD2SP StG 44 world.jpg|thumb|none|600px|A dropped assault rifle, ripe to add to the collection.]] |
| − | [[ | ||
| − | [[ | ||
| − | [[ | ||
==Tokarev SVT-40== | ==Tokarev SVT-40== | ||
| + | The [[SVT-40]] is the semi-automatic service rifle used by Soviet forces. It uses a 10-round box magazine and is reloaded via swapping detachable magazines, although in actuality, the SVT-40 was primarily reloaded using stripper clips. Although chambered in the 7.62x54mmR caliber just like the Mosin Nagant, the rifles don't share ammunition, again likely due to gameplay balancing reasons. | ||
| + | [[File:SVT-40.jpg|thumb|none|450px|Tokarev SVT-40 - 7.62x54mmR]] | ||
| + | [[File:CoD2SP SVT-40 hold.jpg|thumb|none|600px|The Mosin is well and good, but Vasili craves a little more rapid, higher capacity firepower.]] | ||
| + | [[File:CoD2SP SVT-40 aim.jpg|thumb|none|600px|The sights on this Soviet classic are aligned, at least.]] | ||
| + | [[File:CoD2SP SVT-40 rel 1.jpg|thumb|none|600px|Swapping an empty mag...]] | ||
| + | [[File:CoD2SP SVT-40 rel 2.jpg|thumb|none|600px|...for another mag that's also empty.]] | ||
| + | [[File:CoD2SP SVT-40 mele.jpg|thumb|none|600px|Armed with one of the few SVT-40s that can reliably use multiple spare magazines instead of just the one it came with, Vasili slaps the air in celebration.]] | ||
| + | [[File:CoD2SP SVT-40 world 1.jpg|thumb|none|600px|Like the M1 Carbine, the SVT also gets a sling.]] | ||
| − | + | =Machine Guns= | |
| − | [[ | + | ==Bren Mk2== |
| − | [[ | + | The main squad support weapon for the Commonwealth forces is the [[Bren Mk2]], appearing as the "Bren LMG". It is correctly depicted with a 30-round detachable box magazine. Its ammunition is very scarce and is not shared with the Lee-Enfields, despite being chambered for the same caliber. |
| − | [[ | + | [[File:Bren_mk2.jpg|thumb|none|450px|Bren Mk2 - .303 British]] |
| − | [[ | + | [[File:CoD2SP Bren Mk2 hold.jpg|thumb|none|600px|During a lull in the Battle for Caen, Sergeant Davis shows off his Bren Gun.]] |
| − | [[ | + | [[File:CoD2SP Bren Mk2 aim.jpg|thumb|none|600px|Hoisting up the LMG to his shoulder and taking aim at the local abandoned farmhouse.]] |
| + | [[File:CoD2SP Bren Mk2 rel 1.jpg|thumb|none|600px|Davis pulls back the charging handle...]] | ||
| + | [[File:CoD2SP Bren Mk2 rel 2.jpg|thumb|none|600px|...and pops out the magazine.]] | ||
| + | [[File:CoD2SP Bren Mk2 mele.jpg|thumb|none|600px|Getting smacked in the face with an almost 25 pound machine gun would certainly be bad for your health.]] | ||
| + | [[File:CoD2SP Bren Mk2 world.jpg|thumb|none|600px|Davis checks to make sure the world model didn't get hit with the ugly stick.]] | ||
| + | [[File:Bren-COD2.jpg|thumb|none|600px|Two British soldiers of the 7th Armoured firing their Bren machine guns, ignoring the carrying handle that would help them in this position.]] | ||
| − | = | + | ==Besa== |
| − | + | The [[Besa machine gun]] is mounted on British Crusader Tanks. | |
| − | = | + | [[File:BESA.jpg|thumb|none|450px|Besa Mark 2 - 7.92x57mm Mauser]] |
| − | + | [[File:CoD2SP Besa Machine Gun.jpg|thumb|none|600px|A Crusader tank with two mounted Besa machine guns.]] | |
| − | |||
| − | |||
| − | |||
| − | |||
| − | |||
| − | |||
| − | |||
| − | |||
| − | |||
| − | |||
| − | |||
| − | |||
| − | |||
| − | |||
| − | |||
| − | |||
| − | |||
| − | |||
| − | |||
| − | |||
| − | |||
| − | |||
| − | |||
| − | [[ | ||
| − | |||
| − | |||
| − | |||
| − | |||
| − | |||
| − | |||
| − | |||
| − | [[ | ||
| − | |||
| − | |||
| − | |||
| − | == | + | ==Browning Automatic Rifle M1918A2== |
| + | The [[Browning Automatic Rifle M1918A2]] is used by the American support gunners. Referred to as the "BAR." | ||
| + | [[File:BAR.jpg|thumb|none|450px|Browning Automatic Rifle M1918A2 - .30-06]] | ||
| + | [[File:CoD2SP Browning Automatic Rifle M1918A2 hold.jpg|thumb|none|600px|After ascending the cliffs of Pointe du Hoc, Corporal Taylor scouts the trenches for Germans with his BAR.]] | ||
| + | [[File:CoD2SP Browning Automatic Rifle M1918A2 aim.jpg|thumb|none|600px|''"So three Nazis walk into a BAR..."'']] | ||
| + | [[File:CoD2SP Browning Automatic Rifle M1918A2 rel 1.jpg|thumb|none|600px|Reloading- Taylor swaps grips and hefts up the BAR with his right hand and first pulls back the charging handle...]] | ||
| + | [[File:CoD2SP Browning Automatic Rifle M1918A2 rel 2.jpg|thumb|none|600px|...and seats a mag with an enthusiastic smack.]] | ||
| + | [[File:CoD2SP Browning Automatic Rifle M1918A2 mele.jpg|thumb|none|600px|The plastic stock definitely brings the weight down, let's hope it serves just as well at smacking as a wood stock.]] | ||
| + | [[File:CoD2SP Browning Automatic Rifle M1918A2 world.jpg|thumb|none|600px|Thoroughly examining a dropped BAR to make sure it is indeed the M1918A2 variant.]] | ||
| + | [[File:BAr-COd2.jpg|thumb|none|600px|A US soldier firing his BAR during the defense of Pointe du Hoc.]] | ||
| − | + | ==Browning M1919A4== | |
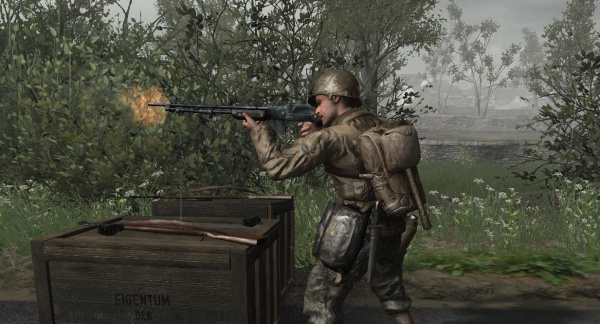
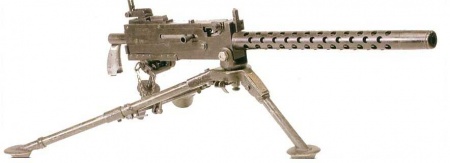
| + | Known as the ".30 cal", the [[Browning M1919A4]] is mounted in places that Americans have captured and need to hold. | ||
| + | [[File:M1919A4Browning.jpg|thumb|none|450px|Browning M1919A4 on M2 tripod - .30-06]] | ||
| + | [[File:CoD2SP Browning M1919A4 1.jpg|thumb|none|600px]] | ||
| + | [[File:CoD2SP Browning M1919A4 2.jpg|thumb|none|600px]] | ||
| + | [[File:CoD2SP Browning M1919A4 3.jpg|thumb|none|600px|Using the M1919A4 reveals the machine gun reticle that would be reused many times in future installments.]] | ||
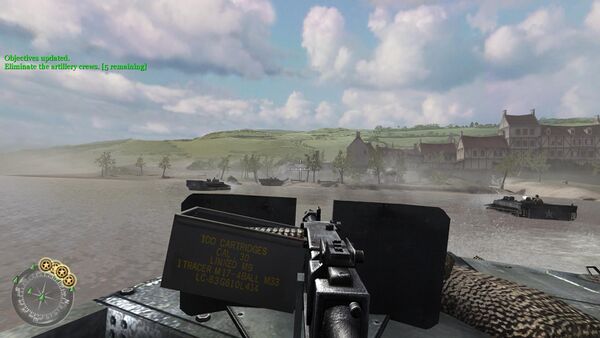
| + | [[File:CoD2SP Browning M1919A4 5.jpg|thumb|none|600px|An M1919A4 is briefly usable aboard an LVT-4.]] | ||
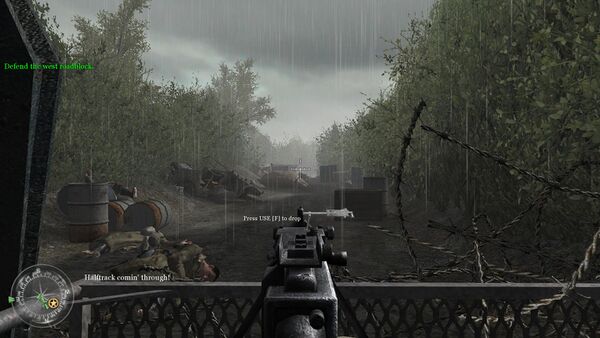
| + | [[File:CoD2SP Browning M1919A4 4.jpg|thumb|none|600px|Mounted on a Sherman tank.]] | ||
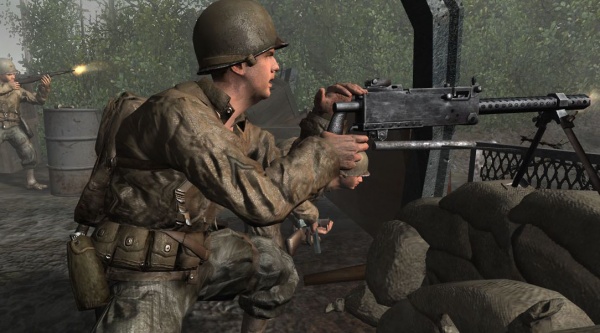
| + | [[File:M1919-COD2.jpg|thumb|none|600px|A US Army Ranger firing his .30 cal machine gun during the defense of Pointe du Hoc.]] | ||
| − | == | + | ==MG 34 Panzerlauf== |
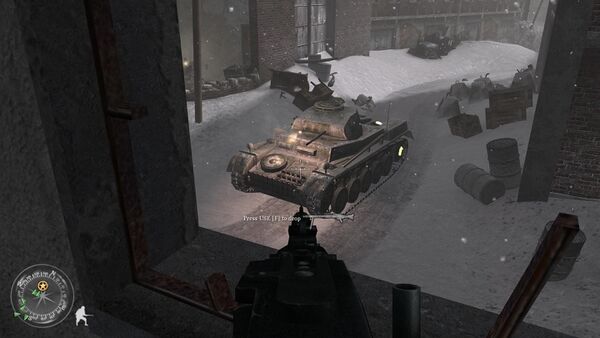
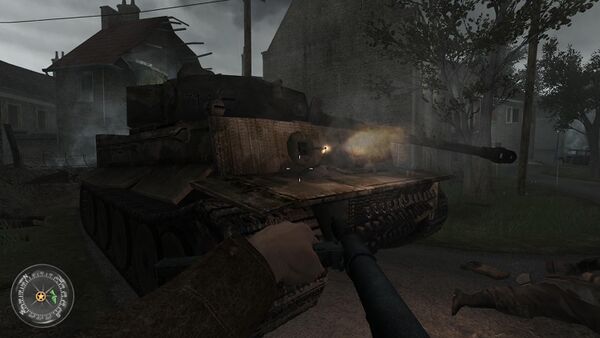
| + | The [[MG 34 Panzerlauf]] is mounted coaxially on German tanks seen throughout the campaign. | ||
| + | [[File:MG 34 Panzerlauf 2.jpg|thumb|none|450px|MG 34 Panzerlauf - 7.92x57mm Mauser]] | ||
| + | [[file:CoD2SP Panzer 2.jpg|thumb|none|600px|Mounted on Panzerkampfwagen II.]] | ||
| + | [[file:CoD2SP Tiger.jpg|thumb|none|600px|Mounted on Panzerkampfwagen VI Tiger.]] | ||
| − | + | ==MG 42== | |
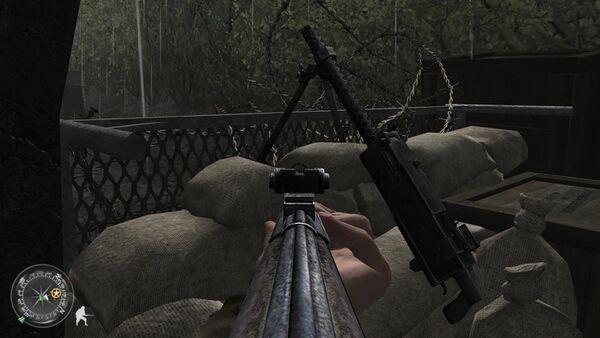
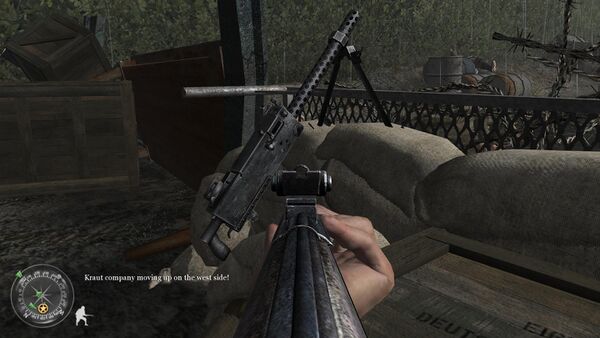
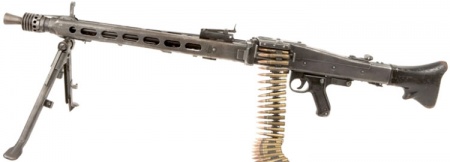
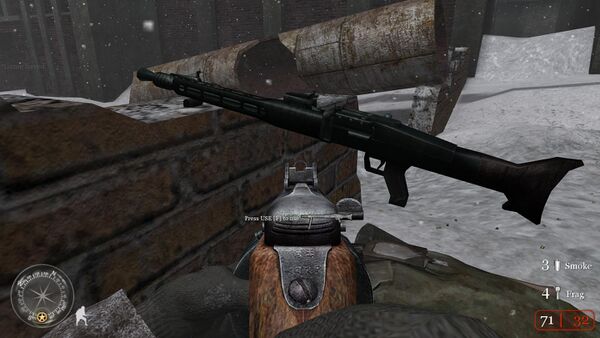
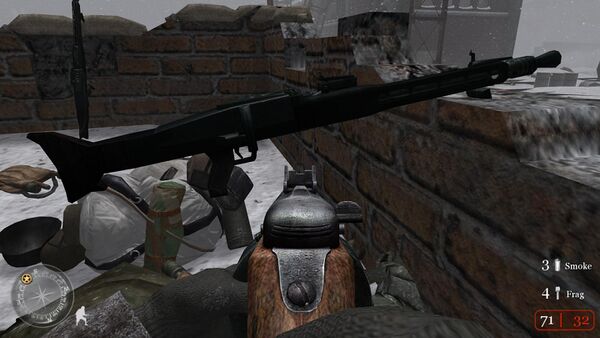
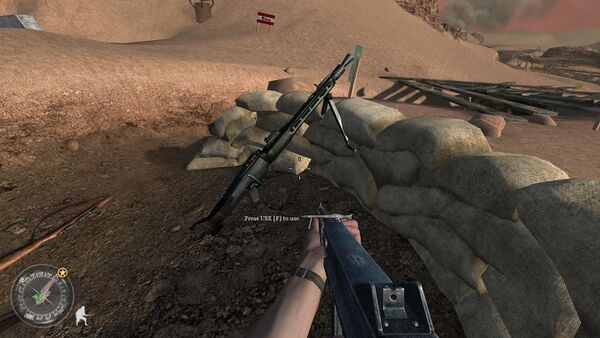
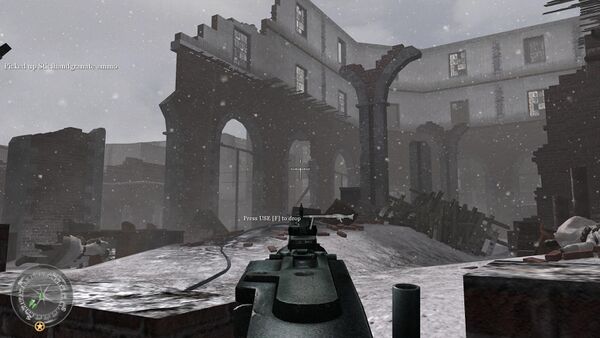
| + | Although not a weapon that can be carried around, the [[MG 42]] makes several appearances as the player progresses throughout the game including the missions set in the Battle of Stalingrad. While the MG 42 actually saw limited use at Stalingrad, the game's depiction commits the common error of showing the weapon with the post-1943 vertical charging handle instead of the period appropriate and rare slab-sided horizontal handle. | ||
| + | [[File:MG42.jpg|450px|thumb|none|MG 42 - 7.92x57mm Mauser]] | ||
| + | [[File:CoD2SP MG 42 1.jpg|thumb|none|600px]] | ||
| + | [[File:CoD2SP MG 42 2.jpg|thumb|none|600px]] | ||
| + | [[File:CoD2SP MG 42 4.jpg|thumb|none|600px]] | ||
| + | [[File:CoD2SP MG 42 3.jpg|thumb|none|600px|The player aiming a MG 42 in the Stalingrad missions. Note the vertical charging handle, a feature which was developed at some point in 1943 after the Battle of Stalingrad.]] | ||
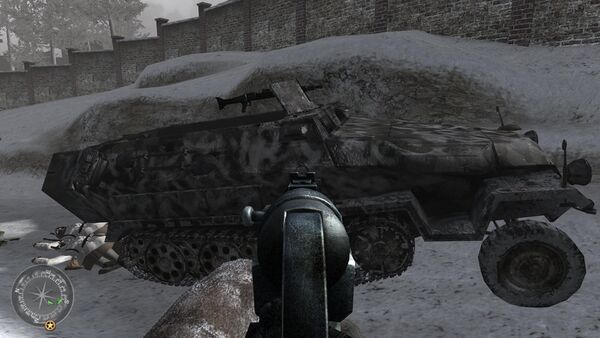
| + | [[File:CoD2SP MG 42 Sd.Kfz 251.jpg|thumb|none|600px|Mounted on Sd.Kfz 251.]] | ||
| − | + | =Grenades and Explosives= | |
| − | == | + | ==AN/M8 HC smoke grenade== |
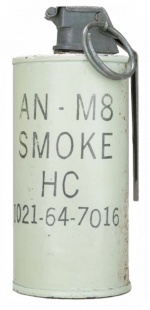
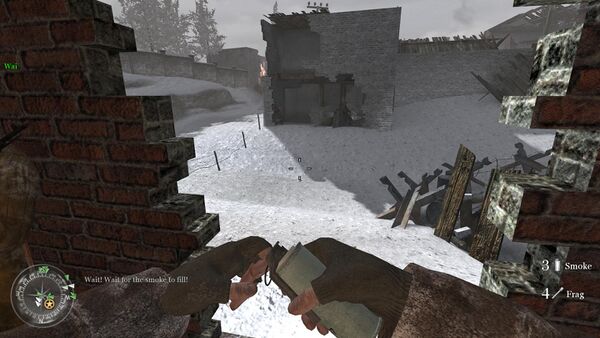
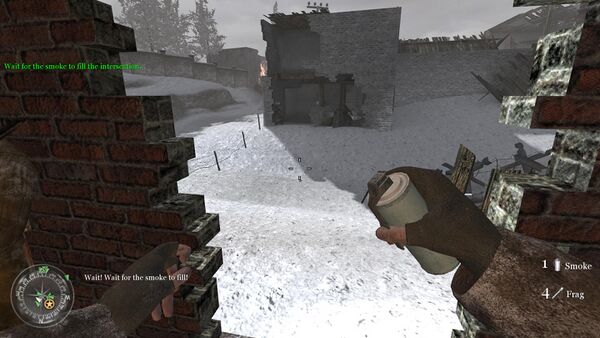
| + | The [[AN/M8 HC smoke grenade]] appears as the secondary grenade, used to screen the player character's position from enemy fire. At times they are essentially a "not get killed grenade" which must be used to get by otherwise impassible machine gun positions. | ||
| + | [[File:AN-M8HC.jpg|thumb|none|150px|Surplus AN/M8 HC smoke grenade]] | ||
| + | [[File:CoD2SP AN-M8 HC smoke grenade hold 1.jpg|thumb|none|600px|Shortly after training, Vasili encounters the designated smoke grenade tutorial, where he must throw an AN/M8 to block the line of sight of a German halftrack.]] | ||
| + | [[File:CoD2SP AN-M8 HC smoke grenade hold 2.jpg|thumb|none|600px|He seems to not have fully understood the pin-pulling part of training, however.]] | ||
| + | [[File:CoD2SP AN-M8 HC smoke grenade world 1.jpg|thumb|none|600px|A few smoke grenades, presumably a Lend-Lease gift from Uncle Sam.]] | ||
| + | ==Mk 2 hand grenade== | ||
The [[Mk 2 hand grenade]] is the standard hand grenade of the Americans in the game. | The [[Mk 2 hand grenade]] is the standard hand grenade of the Americans in the game. | ||
| + | [[File:MK2_grenade_DoD.jpg|thumb|none|150px|Mk 2 hand grenade]] | ||
| + | [[File:CoD2SP Mk 2 hand grenade 1.jpg|thumb|none|600px|Of course, everyone knows you start the grenade-throwing process by pulling the pin.]] | ||
| + | [[File:CoD2SP Mk 2 hand grenade 2.jpg|thumb|none|600px|Alas, Corporal Taylor seems to have fumbled this step.]] | ||
| + | [[File:CoD2SP Mk 2 hand grenade 3.jpg|thumb|none|600px|A rare sight, some spare Mk 2 grenades in a static spawn.]] | ||
| − | [[ | + | ==Model 24 Stielhandgranate== |
| − | + | The [[Model 24 Stielhandgranate]] is the standard hand grenade of the Axis forces. They are also the only hand grenades that regularly spawn during a mission, with refills being dropped by dead German soldiers. Once the player uses all four of the "faction" grenades they begin the level with, Model 24 Stielhandgranates will likely be the only grenade used for the remainder of the level. | |
| − | + | [[File:M24handgrenade.JPG|thumb|none|250px|Model 24 Stielhandgranate]] | |
| + | [[File:CoD2SP Model 24 Stielhandgranate hold 1.jpg|thumb|none|600px|Vasili prepares a potato masher.]] | ||
| + | [[File:CoD2SP Model 24 Stielhandgranate hold 2.jpg|thumb|none|600px|Just before it is tossed, we must make a note that the pull cord used to actually prime the grenade is completely missing.]] | ||
| + | [[File:CoD2SP Model 24 Stielhandgranate world.jpg|thumb|none|600px|A very common sight- a dropped bag of Model 24s, which refill the player character's grenade inventory.]] | ||
| − | The [[ | + | ==No. 36M Mk. I "Mills Bomb"== |
| − | + | The hand grenade used by British forces, the [[Mills Bomb|No. 36M Mk. I "Mills Bomb"]] performs just like every other grenade in the game. | |
| − | [[ | + | [[File:Mills Bomb SGM-1.jpg|thumb|none|150px|No. 36M Mk. I "Mills Bomb"]] |
| − | + | [[File:CoD2SP No. 36M Mk. I Mills Bomb 1.jpg|thumb|none|600px|While his comrades bravely advance, Sergeant Davis instead opts to mess around with a Mills Bomb.]] | |
| − | + | [[File:CoD2SP No. 36M Mk. I Mills Bomb 2.jpg|thumb|none|600px|Luckily, his superior British discipline means he actually pulls the pin of his grenade.]] | |
| + | [[File:CoD2SP No. 36M Mk. I Mills Bomb 3.jpg|thumb|none|600px|A moment later, he very ill-advisably examines a primed Mills Bomb.]] | ||
| + | ==RGD-33 stick grenade== | ||
The [[RGD-33 stick grenade]] is the standard grenade for the Soviet Union. Appears only a few times in the Russian levels. | The [[RGD-33 stick grenade]] is the standard grenade for the Soviet Union. Appears only a few times in the Russian levels. | ||
| + | Notably, ''CoD 2'' starts a common error with the RGD-33 that would be repeated in later games as it re-uses the Model 24 Stielhandgranate's arming animation with the player twisting a non-existent cap at the bottom of the grenade (despite the fact that ''[[Call of Duty: Finest Hour]]'' earlier actually had a correct arming animation of inserting a detonator into the top of the grenade). | ||
| + | [[File:Rgd-33russianfrag mp.jpg|thumb|none|250px|RGD-33 stick grenade]] | ||
| + | [[File:CoD2SP RGD-33 stick grenade 1.jpg|thumb|none|600px|For once, Vasili gets to play with an RGD-33 as opposed to a Stielhandgranate. He celebrates by gesturing around the base.]] | ||
| + | [[File:CoD2SP RGD-33 stick grenade 2.jpg|thumb|none|600px|He then bids farewell to his Soviet stick greande.]] | ||
| + | [[File:CoD2SP RGD-33 stick grenade 3.jpg|thumb|none|600px|But like Sergeant Davis, he can't help but get a close-up.]] | ||
| − | + | =="Sticky Bomb"== | |
| − | + | Explosive charges are used to destroy German Panzer II tanks during the Soviet campaign. In spite of what the game calls them, these are ''not'' No 74 ST Grenades; rather, they are improvised charges which serve a similar function. These appear to be based on similar improvised sticky explosive charges seen in ''[[Saving Private Ryan]]''. | |
| − | == "Sticky Bomb" == | + | [[File:CoD2SP Sticki bomb 3.jpg|thumb|none|600px|Vasili examines a rather explosive lump.]] |
| − | + | [[File:CoD2SP Sticki bomb 1.jpg|thumb|none|600px|During one rather infamous level, Vasili must run up and plant explosives on three German tanks. All of which conveniently ignores other AI soldiers and can track the player character through cover and inside buildings.]] | |
| − | Explosive charges are used to destroy German Panzer II tanks during the | + | [[File:CoD2SP Sticki bomb 2.jpg|thumb|none|600px|A golden outline, indicating explosives can be planted here.]] |
| − | |||
| − | |||
| + | ==TNT== | ||
Objectives requiring demolition generally require the use of an explosive charge. This is depicted as a bundle of four US-issue 1/2 pound TNT charges rigged with a timer. | Objectives requiring demolition generally require the use of an explosive charge. This is depicted as a bundle of four US-issue 1/2 pound TNT charges rigged with a timer. | ||
| + | [[File:TNTchargeUS.jpg|thumb|none|300px|US Army issue 1/2 pound TNT charge with 8" prima cord and M1 pull fuze igniter]] | ||
| + | [[File:CoD2SP s TNT 1.jpg|thumb|none|600px|During another explosive rendezvous, Vasili ignores the helpful message flashing across his vision and examines a TNT charge.]] | ||
| + | [[File:CoD2SP s TNT 2.jpg|thumb|none|600px|Sometime later, he examines another charge during a less urgent moment.]] | ||
| − | [[ | + | =Launchers= |
| − | [[ | + | ==RPzB 54 "Panzerschreck"== |
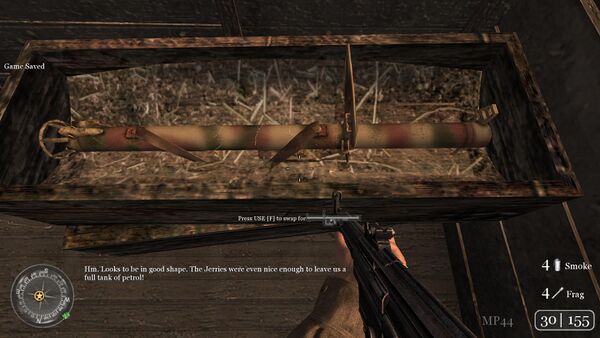
| − | + | The [[Panzerschreck|RPzB 54 "Panzerschreck"]] is the only mobile anti-tank weapon in the game. Can be used to take out Tiger tanks and other German vehicles. As is tradition for the series, it can only be fired while aiming. | |
| − | + | [[File:Tank_h5.jpg|thumb|none|450px|RPzB 54 "Panzerschreck" - 88mm]] | |
| − | + | [[File:CoD2SP RPzB 54 Panzerschreck hold.jpg|thumb|none|600px|Sergeant Davis hefts around a pilfered Panzerschreck, looking for something to explode.]] | |
| − | + | [[File:CoD2SP RPzB 54 Panzerschreck aim.jpg|thumb|none|600px|This devious French wall will do nicely.]] | |
| + | [[File:CoD2SP RPzB 54 Panzerschreck rel 1.jpg|thumb|none|600px|The wall, however, foolishly resists British colonization, so he begins to load a new rocket.]] | ||
| + | [[File:CoD2SP RPzB 54 Panzerschreck rel 2.jpg|thumb|none|600px|The depiction of the Panzerschreck in this game contains the very common error in video games of having the rocket simply being shoved into the launcher without connecting a wire to the nearby contact leads for electrical ignition of the rocket motor (this error is also common in video game depictions of the [[Bazooka]], the weapon the Panzerschreck is based on).]] | ||
| + | [[File:CoD2SP RPzB 54 Panzerschreck mele.jpg|thumb|none|600px|If push comes to shove, don't be afraid to use this giant metal tube as an improvised club.]] | ||
| + | [[File:CoD2SP RPzB 54 Panzerschreck world.jpg|thumb|none|600px|Davis strikes it lucky and finds a perfectly good Panzerschreck in a crate waiting for him.]] | ||
| + | [[File:Panzershrek-COD2.jpg|thumb|none|600px|Two German Afrika Korps soldiers taking down a Crusader tank with their Panzershreks, completely disregarding the layout of the weapon's grips.]] | ||
| − | + | =Emplaced Weapons= | |
| − | [[ | + | ==2 cm Flakvierling 38== |
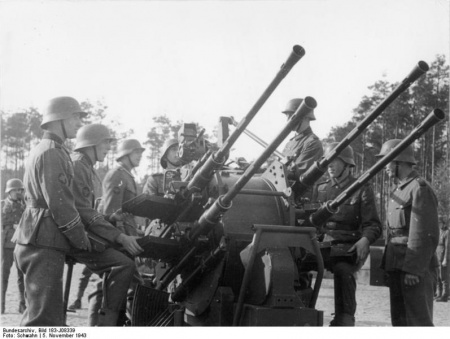
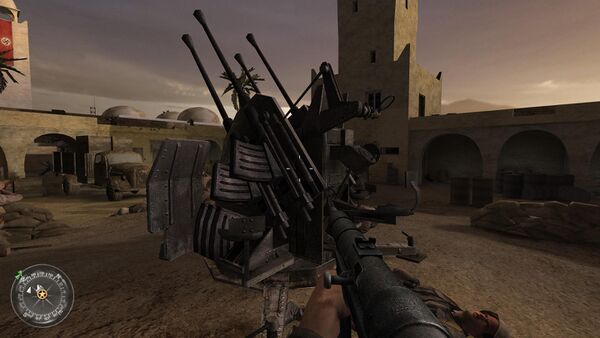
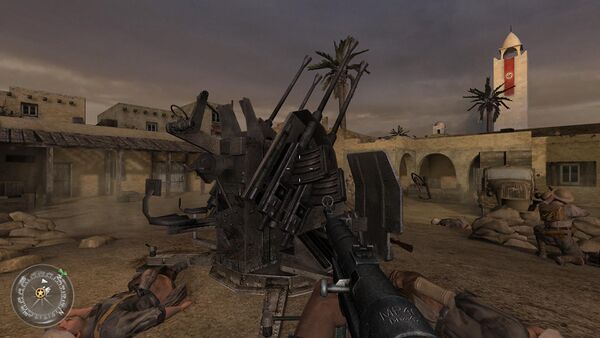
| − | [[ | + | In the level "Battle of Point du Hoc," a [[2 cm Flakvierling 38]] is seen firing onto advancing US Army Rangers before being destroyed itself sometime after Corporal. Taylor and Sergeant Randall destroys the coastal artillery guns. In the level "Assault on Matmata", Sergeant John Davis uses this gun to take down some Stukas. |
| + | [[File:Flak38.jpg|thumb|none|450px|Flakvierling 38 - 20x138mmB]] | ||
| + | [[File:CoD2SP 2 cm Flakvierling 38 1.jpg|thumb|none|600px|In North Africa, Sergeant Davis comes across an AA gun just begging for some action.]] | ||
| + | [[File:CoD2SP 2 cm Flakvierling 38 2.jpg|thumb|none|600px|The other side, featuring its unfortunate former crew.]] | ||
| + | [[File:CoD2SP 2 cm Flakvierling 38 3.jpg|thumb|none|600px|Of course, Sergeant Davis is perfectly capable of operating the gun by himself without needing the other six guys required to operate one of these effectively.]] | ||
| + | [[File:Flak38-COD2.jpg|thumb|none|600px|A Flakvierling 38 cannon pins down US Army Rangers climbing up the cliffs of Pointe du Hoc.]] | ||
| − | = | + | ==2 cm KwK 30== |
| + | The [[2 cm FlaK 30|2 cm KwK 30]] is mounted on various German vehicles. It is most notably used and controlled by the player during the mission "Outnumbered and Outgunned". | ||
| + | [[file:KwK30mountedon222.jpg|thumb|none|450px|2 cm KwK 30 (2 cm Kampfwagenkanone 30) - 20x138mm B]] | ||
| + | [[file:CoD2SP 2 cm KwK 30 1.jpg|thumb|none|600px|Captain Price, Sergeant Davis, and Private MacGregor commandeer a Sd.Kfz. 222 scout car with a mounted cannon.]] | ||
| + | [[file:CoD2SP 2 cm KwK 30 2.jpg|thumb|none|600px|In the gunner's seat, Davis gets the best view in the house.]] | ||
| + | [[file:CoD2SP Panzer 2.jpg|thumb|none|600px|A Panzer II with a 2 cm KwK 30 fires away.]] | ||
| − | == | + | ==8 cm Granatwerfer 42 Mortar== |
| + | The [[8 cm Granatwerfer 42 Mortar]] are used by German mortar teams during the campaign. As a trivia note, the [[Kurzer 8 cm Granatwerfer 42]] model would later reappear in the unused explosives range on the South side of the SAS base in the first level of ''[[Call of Duty 4: Modern Warfare]]'', ''[[Call of Duty: Modern Warfare 2]]'' and ''[[Call of Duty: Black Ops II]]'' "Pyrrhic Victory". In ''[[Call of Duty: WWII]]'' the ''GrW 42'' is finally remodeled. | ||
| + | [[File:GermanMortar.jpg|thumb|none|250px|8 cm Granatwerfer 42 Mortar - 81.4mm]] | ||
| + | [[File:CoD2SP 8 cm Granatwerfer 42 Mortar 1.jpg|thumb|none|600px]] | ||
| + | [[File:CoD2SP 8 cm Granatwerfer 42 Mortar 2.jpg|thumb|none|600px]] | ||
| − | + | ==8.8 cm Flak 36== | |
| + | The [[8.8 cm Flak 18/36/37/41|8.8 cm Flak 36]] guns seen in the game are now FlaK 36s, distinguished by the two-piece barrel as opposed to the one-piece barrel of the FlaK 18s in the previous game. As before, for gameplay purposes, a gun that requires a ten-man crew to function can be operated by a single man. | ||
| + | [[File:FlaK36.jpg|thumb|none|400px|8.8 cm Flak 36 - 88x571mmR]] | ||
| + | [[File:CoD2SP 8.8 cm Flak 36 1.jpg|thumb|none|600px|Non-usable FlaK 88s in the British campaign.]] | ||
| + | [[File:CoD2SP 8.8 cm Flak 36 2.jpg|thumb|none|600px]] | ||
| + | [[File:CoD2SP 8.8 cm Flak 36 3.jpg|thumb|none|600px|Corporal Taylor tries out a FlaK for himself.]] | ||
| − | + | ==28/32 cm Schweres Wurfgerät 40== | |
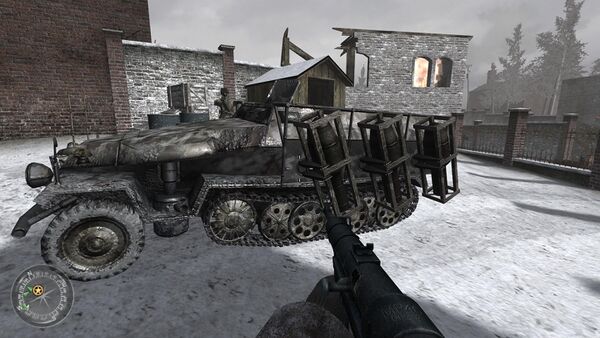
| − | + | During the "Red Army Training" mission, the player is tasked to destroy a German Sd.Kfz 251 half-track with mounted 28/32 cm Schweres Wurfgerät 40 / Wurfrahmen 40 rocket launchers. | |
| − | + | [[File:CoD2SP 28-32 cm Schweres Wurfgerät 40.jpg|thumb|none|600px|Vasili looks at the so called ''Panzerwerfer''.]] | |
| − | == | ||
| − | |||
| − | |||
| − | |||
| − | |||
| − | [[ | ||
| − | |||
| − | |||
| − | |||
| − | |||
| − | |||
| − | |||
| − | |||
| − | |||
| − | |||
| − | |||
==Canon de 155mm GPF== | ==Canon de 155mm GPF== | ||
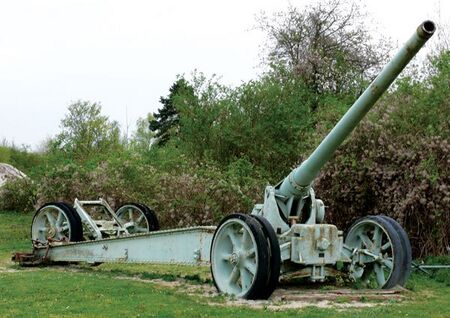
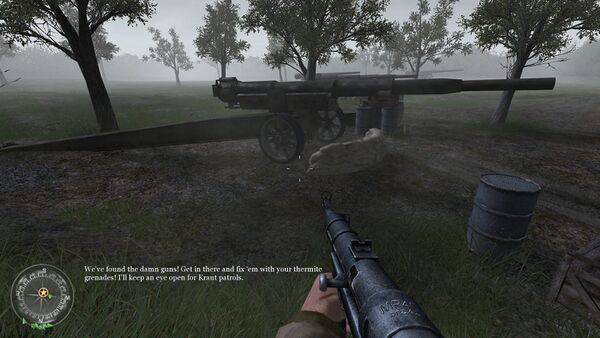
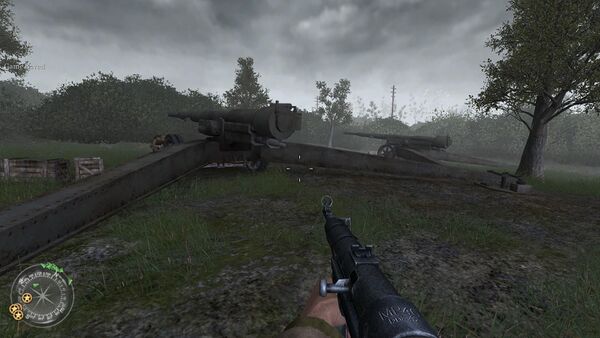
| − | Corporal Bill Taylor and | + | Corporal Bill Taylor and Sergeant Randall are tasked to destroy some French Canon de 155 Grande Puissance Filloux (GPF) during the "Battle of Pointe du Hoc". These guns are also seen in ''[[Call of Duty: WWII]]''. |
| − | [[ | + | [[File:French-Canon-de-155mm-GPF-1917.jpg|thumb|none|450px|Canon de 155 Grande Puissance Filloux (GPF) - 155mm]] |
| − | [[ | + | [[File:CoD2SP Canon de 155mm GPF 1.jpg|thumb|none|600px|Taylor and Randall come across their objective, some massive French guns. True to life, they are disabled through the use of thermite charges.]] |
| − | [[ | + | [[File:CoD2SP Canon de 155mm GPF 2.jpg|thumb|none|600px]] |
| − | == | + | ==Ordnance QF 2-pounder== |
| − | + | British Crusader Mk. II tanks have [[Ordnance QF 2-pounder]]s as their main armament. | |
| + | [[File:QF-2pdr-Gun.jpg|thumb|none|400px|Ordnance QF 2-pounder - 40x304mmR (1.57 in)]] | ||
| + | [[File:CoD2SP Besa Machine Gun.jpg|thumb|none|600px|]] | ||
| − | [[ | + | ==Ordnance QF 6-pounder== |
| + | An Ordnance QF 6-pounder anti-tank gun can be seen in the level "Hold the Line". | ||
| + | [[File:qf6at.jpg|thumb|none|400px|Ordnance QF 6-pounder]] | ||
| + | [[File:CoD2-antigun1.jpg|thumb|none|600px|The gun in-game]] | ||
| + | [[File:CoD2-antigun2.jpg|thumb|none|600px|Another view.]] | ||
| − | == | + | =Other= |
| − | + | ==Smith & Wesson M1917== | |
| − | [[ | + | Sergeant Randall and other US Army Rangers have low-detail [[Smith & Wesson M1917]] revolvers holstered. |
| − | [[ | + | [[File:S&W-Model-1917.jpg|thumb|none|350px|Smith & Wesson M1917 Revolver (Military issue with lanyard ring) - .45 ACP.]] |
| − | [[ | + | [[File:COD2-RandallRevolver.jpg|thumb|none|600px|Corporal Tayler looks at the grip.]] |
{{Call of Duty Series}} | {{Call of Duty Series}} | ||
Latest revision as of 00:11, 3 April 2024
|
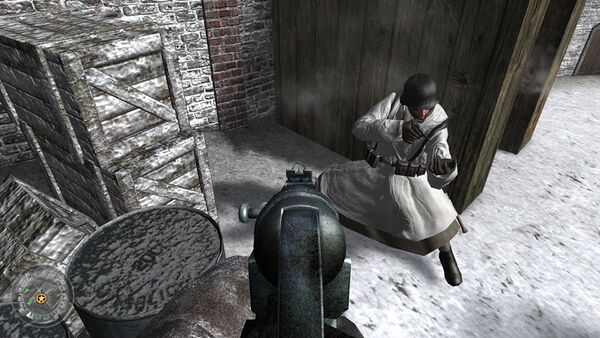
Call of Duty 2 is a 2005 first-person shooter developed by Infinity Ward and published by Activision, the second installment of the Call of Duty series. Like its predecessor, it is set during the Second World War and the single-player campaign follows three soldiers of the Soviet, American, and British armies throughout different theaters of war.
The following weapons appear in the video game Call of Duty 2:
Handguns
Colt M1911A1
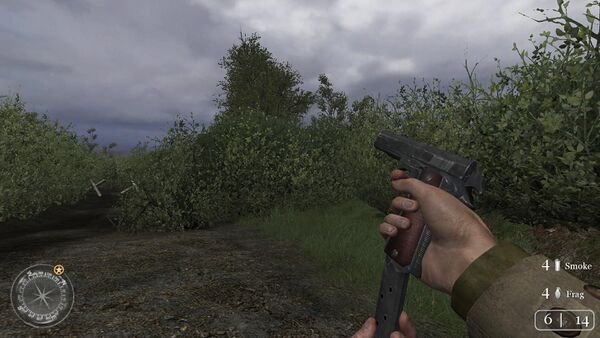
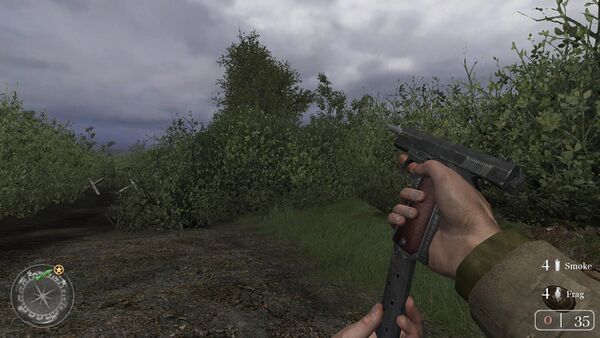
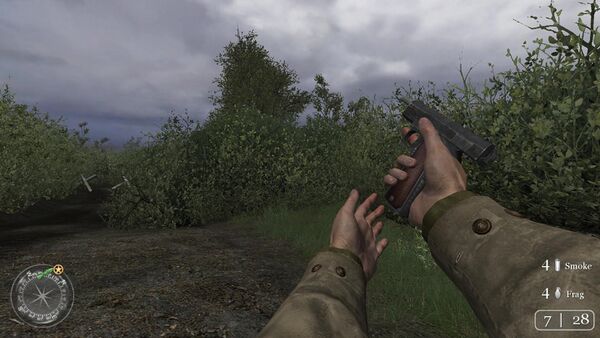
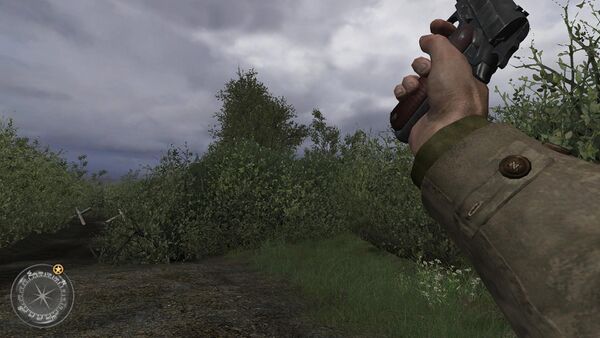
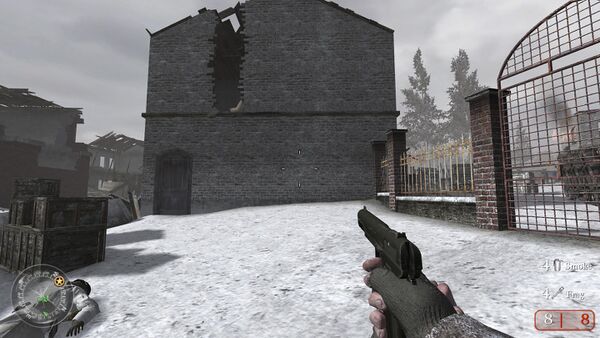
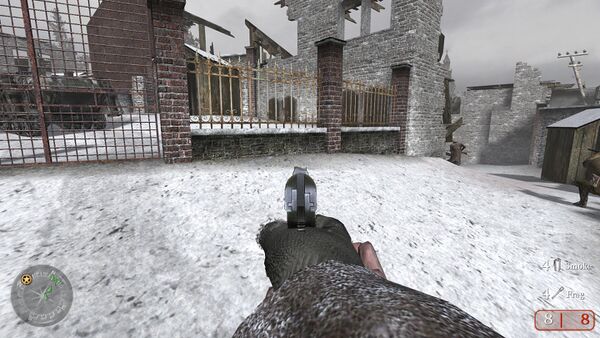
The M1911A1 appears in-game as the "Colt .45", and is the standard sidearm of the American forces throughout the game.
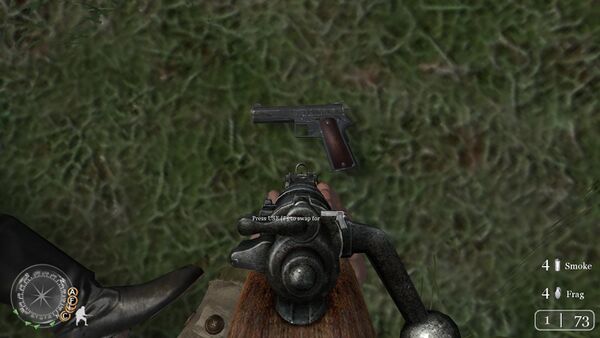
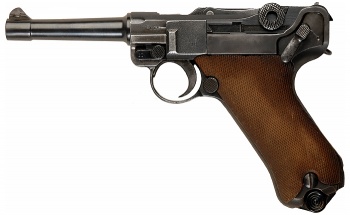
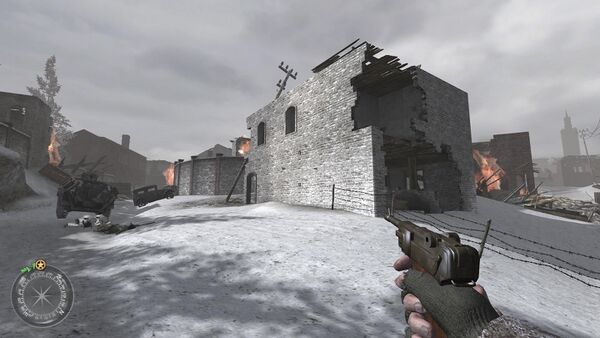
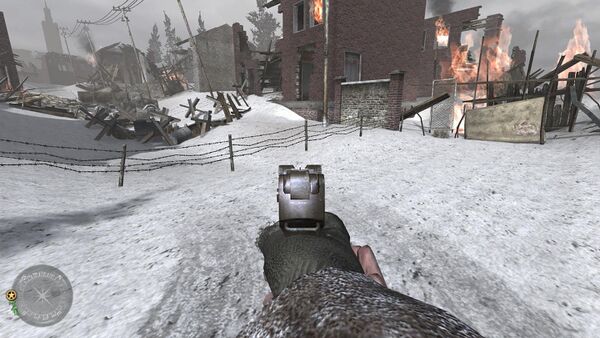
Luger P08
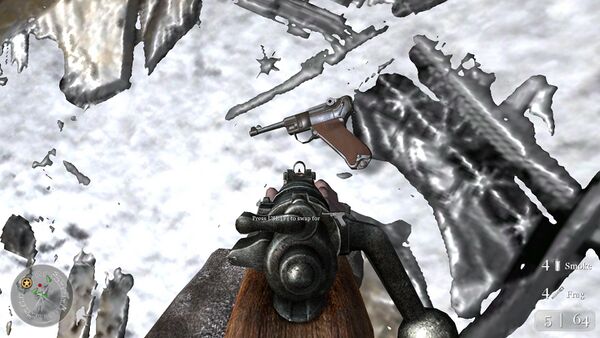
The Luger P08 appears in-game simply as the "Luger", and is the standard sidearm of the Wehrmacht. It holds eight rounds, and is the default pistol of the Germans in multiplayer. It is also used by German troops if they are in "last stand", which eventually inspired the Last Stand and Second Chance perks in later Call of Duty games.
Tokarev TT-30
The Tokarev TT-30 appears in-game as the "TT30", and is the standard sidearm of the Soviet forces during the first few levels. It has a capacity of eight rounds and reuses the sounds and animations from the M1911A1.
Webley Mk VI
The Webley Mk VI is the sole revolver in the game and is the sidearm of the British forces. It is the most powerful sidearm in the game but predictably holds only six bullets in the cylinder, and its reload is fairly slow.
Submachine Guns
M3 "Grease Gun"
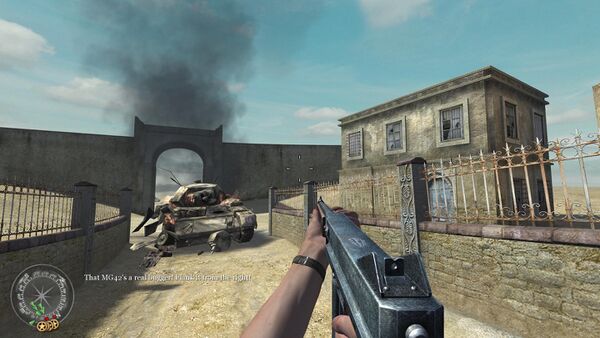
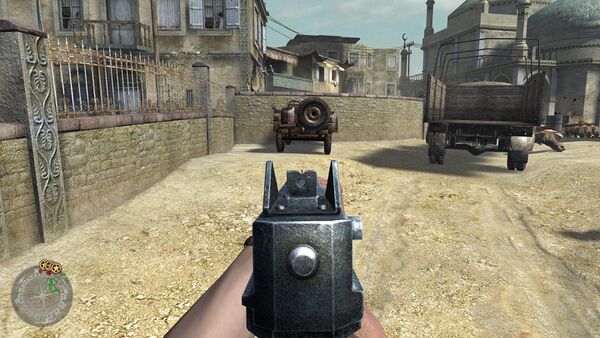
The M3 "Grease Gun" is only available in the online multiplayer mode and incorrectly feeds a 32-round mag.
MP 40
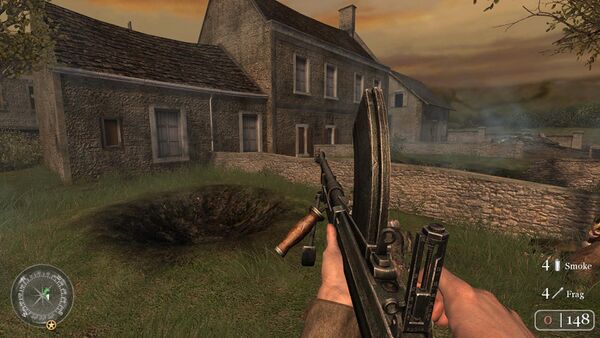
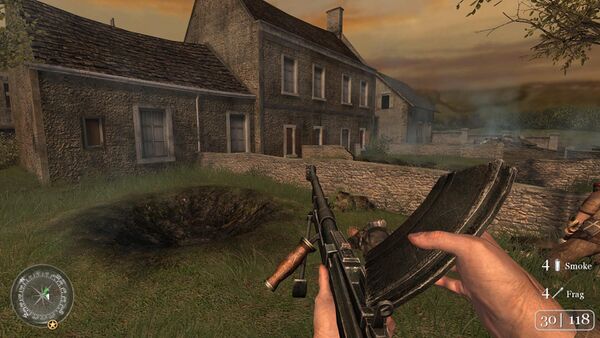
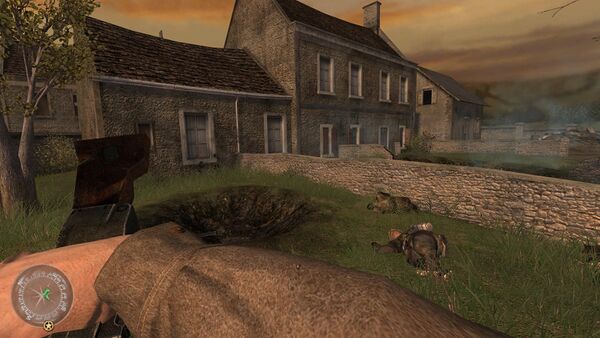
The MP 40 submachine gun appears with a 32-round magazine, high recoil, and poor range. It is relatively effective in CQC but hitting the target from a distance can be a problem. As in many games depicting the Second World War, it is an extremely common weapon amongst Wehrmacht infantry, much more commonly used than it was in most engagements.
PPSh-41
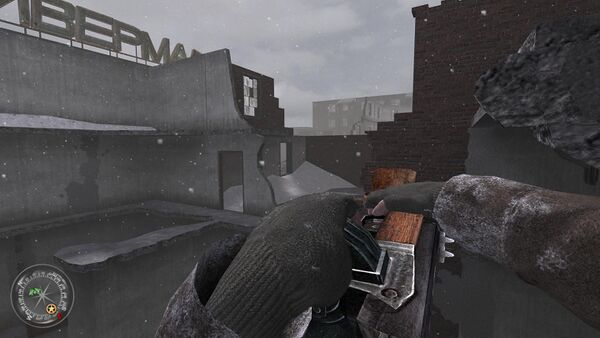
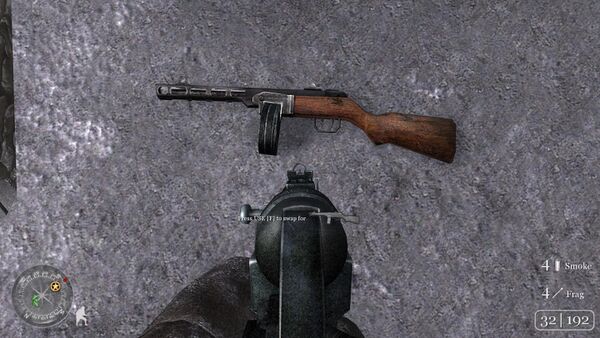
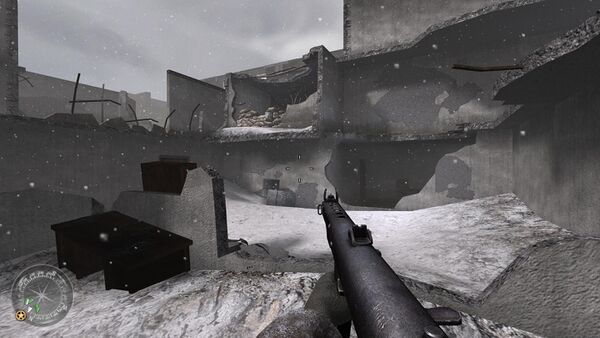
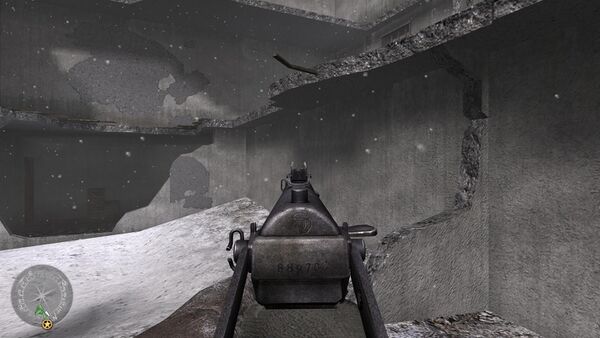
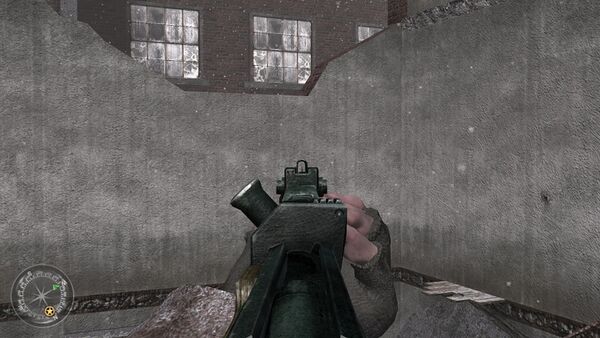
The PPSh-41 is the standard Soviet submachine gun, chambered in the 7.62x25mm Tokarev caliber. It is depicted with the 71-round drum magazine. The recoil of the gun is controllable coupled with a blistering rate-of-fire, but has low effective range. A very popular weapon on multiplayer servers due to its high ammo capacity and effectiveness in close quarters. Despite sharing the caliber with the PPS-42 submachine gun, the two guns don't share the same ammunition in-game, probably due to gameplay balancing reasons.
PPS-42
The PPS-42, an early model of the PPS-43, appears with a 35-round box magazine and is chambered in 7.62x25mm Tokarev. The low rate of fire makes it easier to control, but this could be a disadvantage at close range. As mentioned above, the PPS-42 doesn't share the same ammunition with the PPSh-41 despite being chambered in the 7.62x25mm Tokarev caliber, probably due to gameplay balancing reasons.
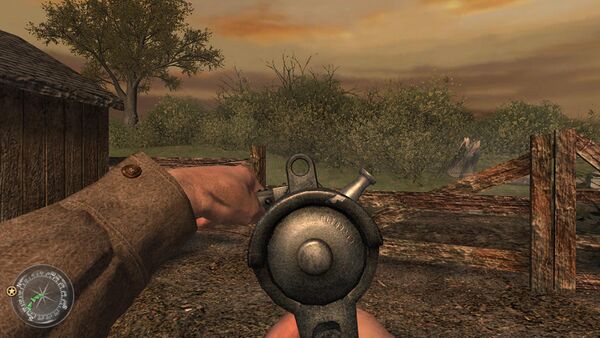
Sten Mk II (Canadian)
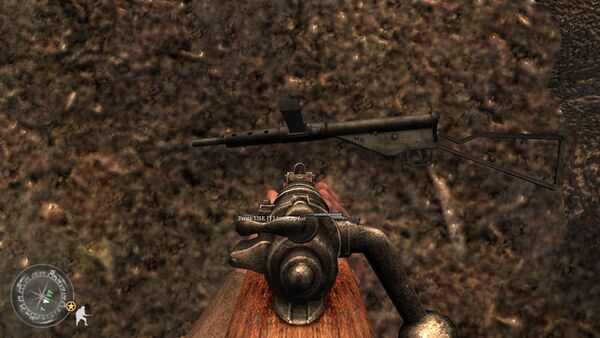
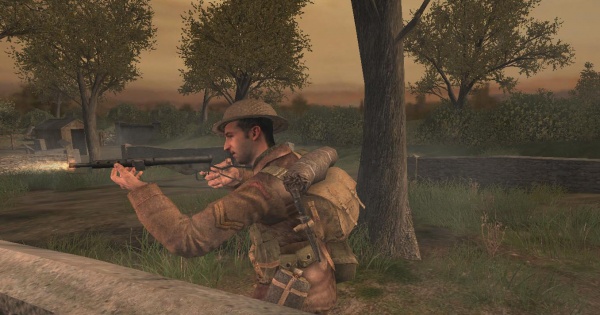
The Sten Mk II (Canadian) is a very accurate submachine gun (contrary to the real-life counterpart, which is fairly inaccurate, surely more so than the MP 40 or the Thompson) for the UK forces. It holds 32 rounds just like the MP 40, even though in reality soldiers would usually load the magazines of both weapons with 30 or 28 rounds to prevent spring failures.
Thompson M1A1
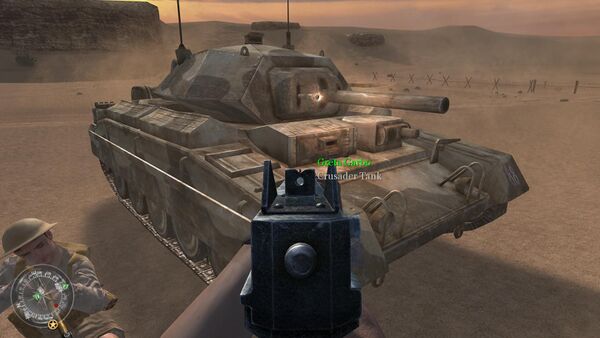
The Thompson M1A1 is used by American soldiers such as Sergeant Randall. It is also used by the British in the North Africa campaign, likely standing it for the M1928A1 Thompson actually used by Commonwealth forces early in the war. It is more powerful than the MP 40 but holds only 20 rounds, even though it is modeled with a 30-round magazine.
Shotguns
Winchester Model 1897 "Trench Gun"
The Winchester Model 1897 "Trench Gun" is available only in multiplayer, usable by every faction. Erroneously holds six shells instead of the real weapons five-round capacity.
Rifles
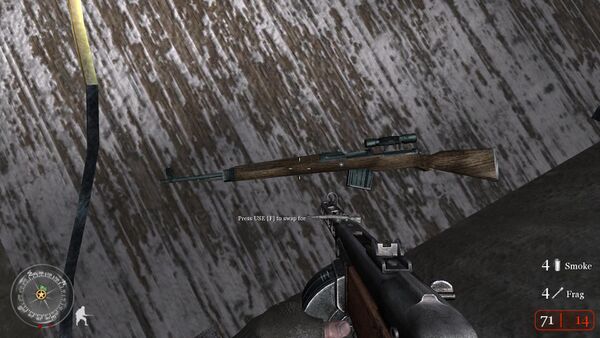
Gewehr 43
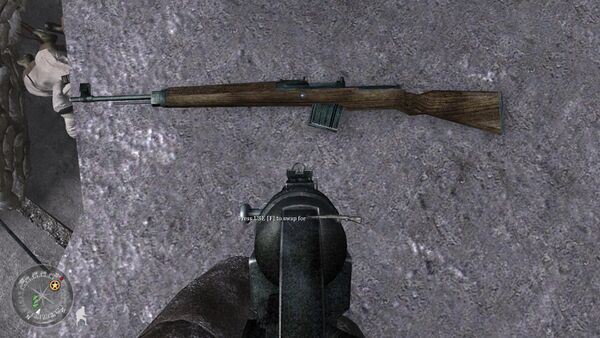
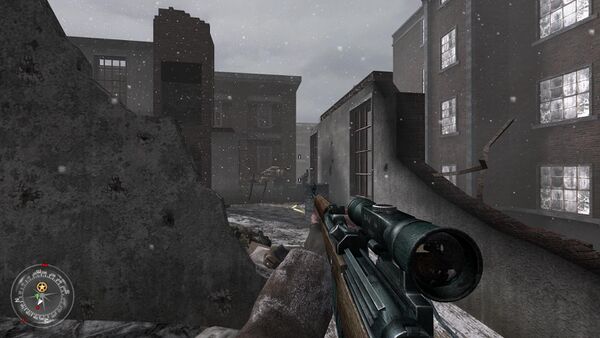
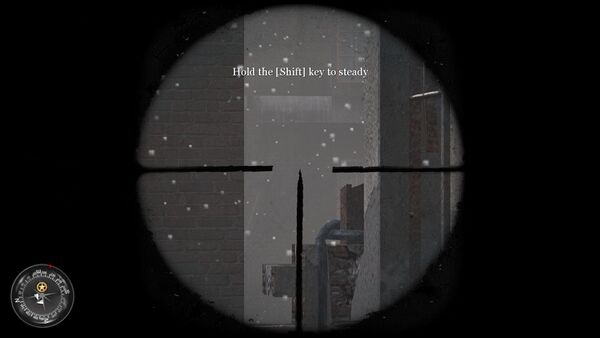
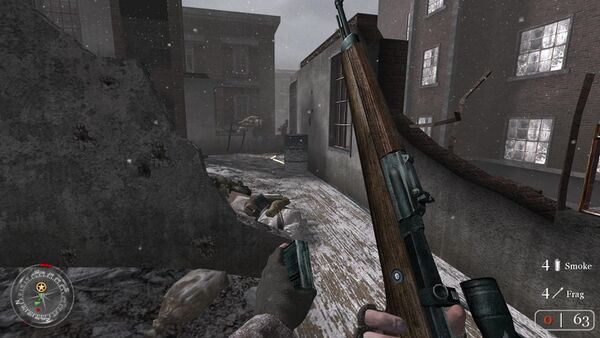
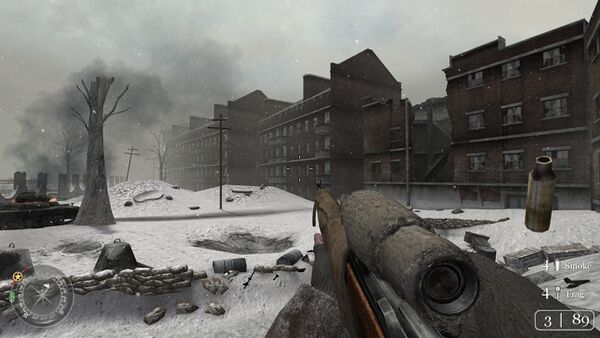
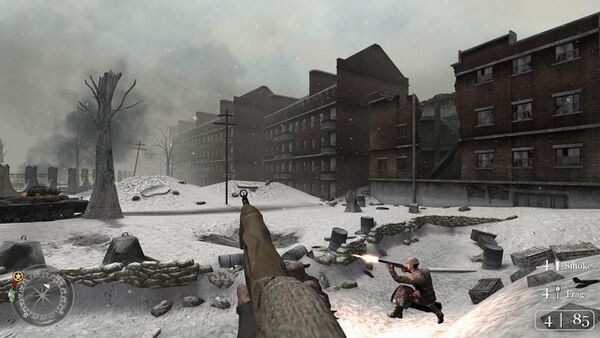
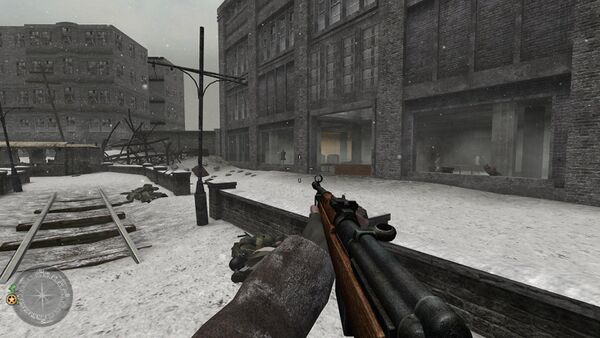
The Gewehr 43 is uncommonly used by Wehrmacht infantry in all three campaigns. The scoped variant is only available in campaign, and, despite being the same rifle and thus having the same caliber, in-game it nonsensically doesn't share the same ammunition as the non-scoped variant; as is the case with most video games, this is likely due to gameplay balancing reasons, so the player may not take advantage of using it as a sniper rifle and collecting additional ammo from non-scoped variants. Both variants hold ten rounds and are reloaded via detachable magazines.
Its appearance in the Stalingrad missions (and potential use in multiplayer maps like Moscow, Railyard, Kalach, Harbor, and Leningrad) is anachronistic, as the rifle was produced from October 1943 onward (and the Battle of Stalingrad ended in February 1943). The period-appropriate semi-automatic German rifle for this battle should have been its predecessor, the Gewehr 41, which was produced from 1940 until 1941 and was widely used in the Eastern Front.
Gewehr 43 with ZF 4 scope
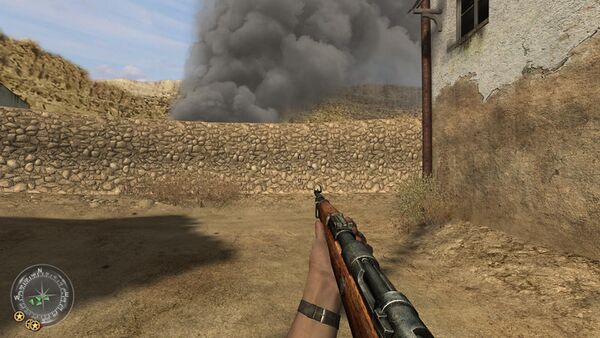
Karabiner 98k
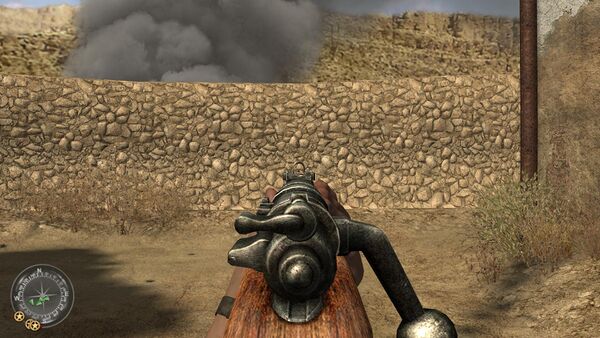
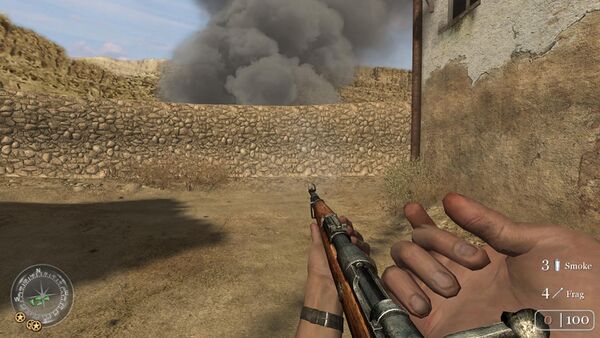
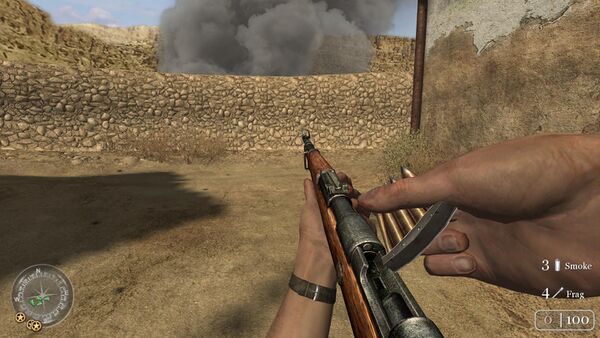
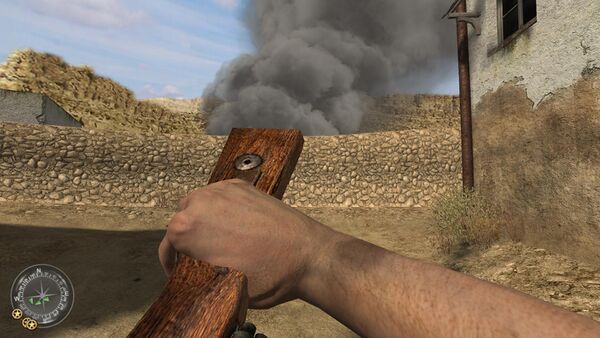
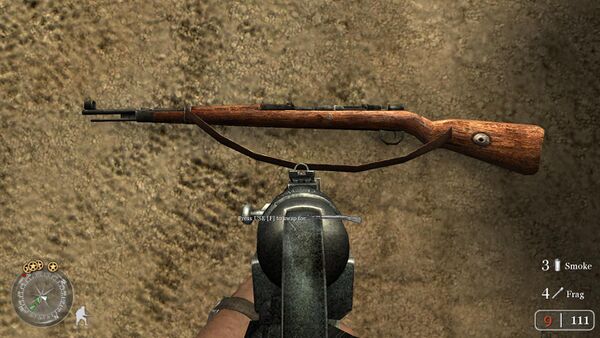
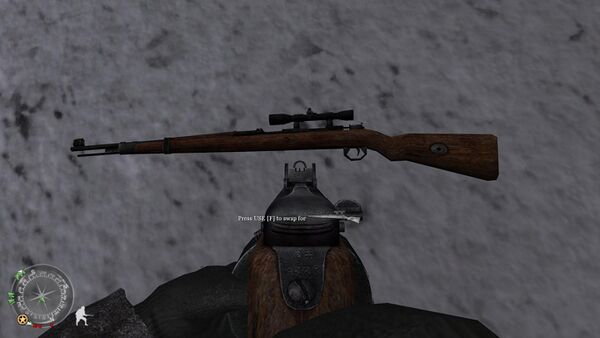
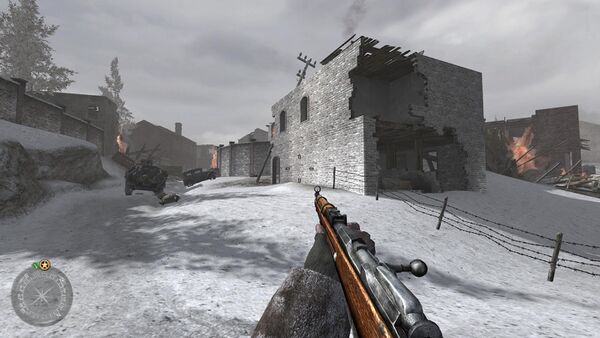
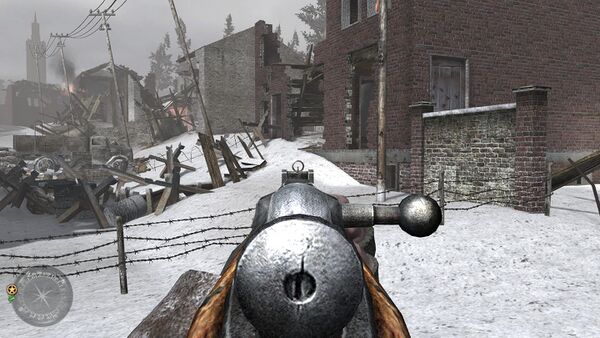
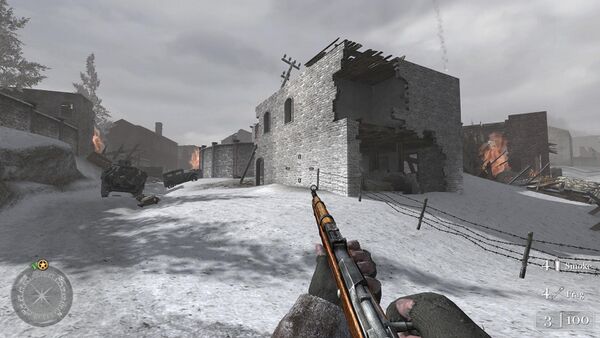
The bolt-action Karabiner 98k is the standard German service rifle, chambered in 7.92x57mm Mauser. It holds five rounds and is very accurate, even at long distances. German snipers use the scoped version, which, nonsensically and probably due to gameplay balancing reasons, does not share ammunition with the non-scoped Kar98k. The player character correctly reloads it by using its 5-round stripper clip, but erroneously does so by inserting all five bullets in the clip whether the weapon was completely emptied before reloading or if there are still rounds in the magazine, whereupon either some of the bullets would still be left on the clip or the player character would need to load rounds one at a time, as with the sniper variant.
Karabiner 98k Sniper with Zeiss ZF42 scope
Lee-Enfield No. 4 Mk. I
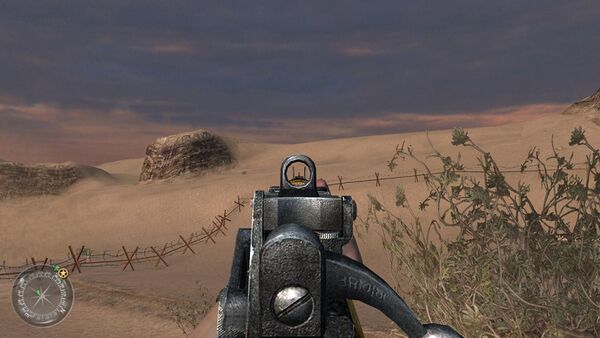
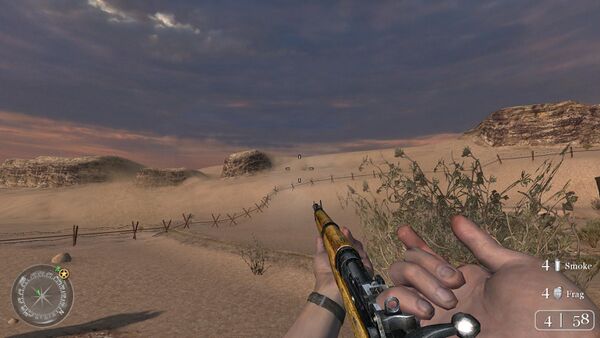
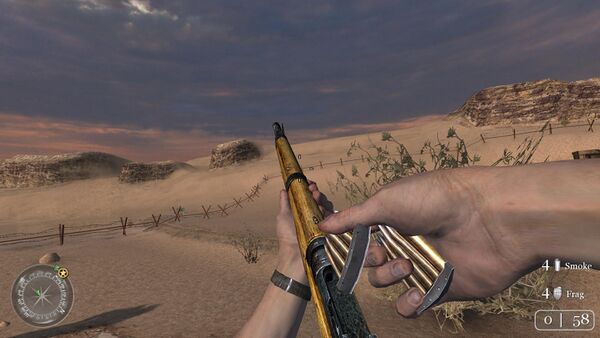
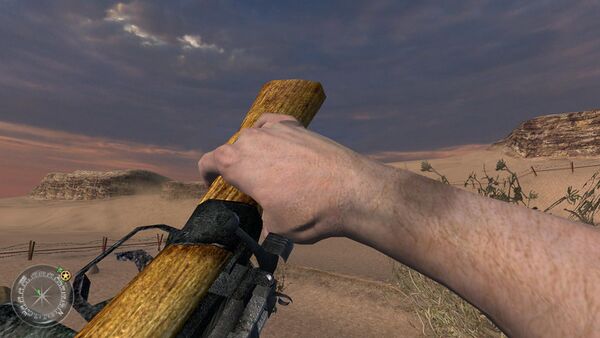
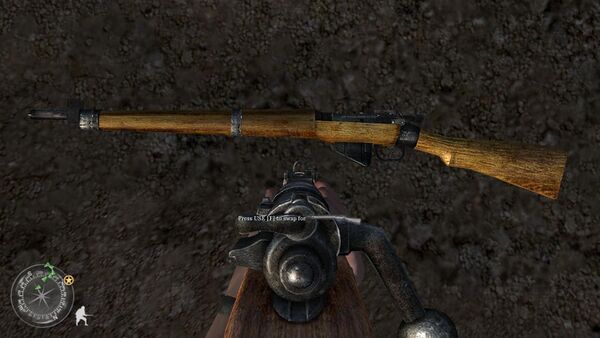
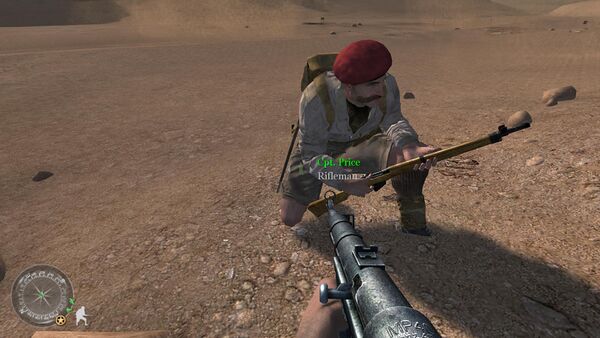
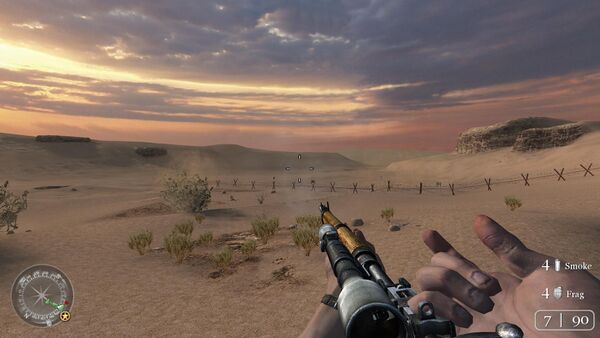
The British service rifle, chambered in the .303 British caliber. Called simply the "Lee-Enfield", the Lee-Enfield No.4 Mk.I is better than the Kar98k because it (correctly) holds 10 rounds rather than five. Like the real-life rifle, the player reloads by using two sets of 5-round stripper clips, making a mid-reload impossible if the number of rounds left in the magazine is higher than 5; if one round is left in the chamber and the player performs a mid-reload, for example, the total number of rounds in the magazine will be 6, without the ability to reload again until the number of rounds is 5 or fewer. A full 10-round reload when there are no rounds left is performed by having to reload manually an additional time in order to insert the remaining 5-round stripper clip, as the player inserts only one 5-round stripper clip automatically when out of ammunition. You can notice the second clip in the loader's hand waiting to be also inserted during a reloading animation.
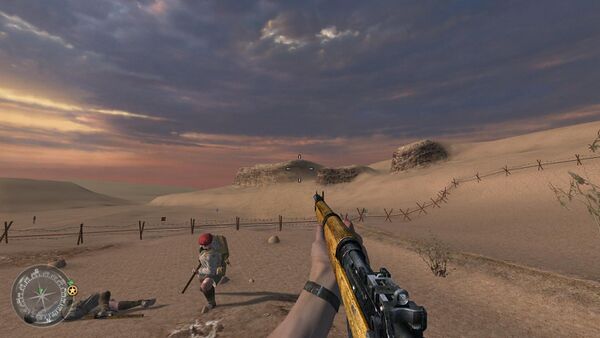
Lee-Enfield No. 4 Mk I (T)
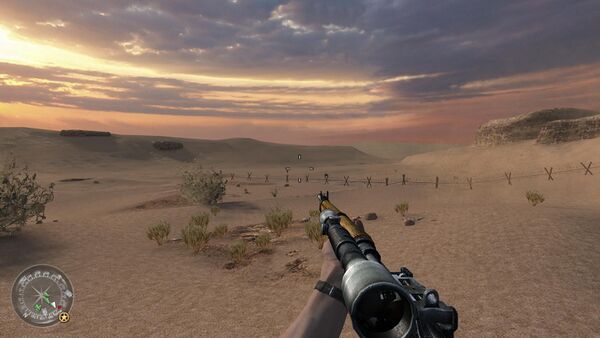
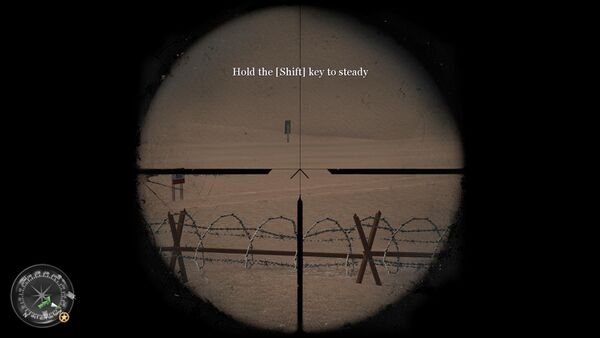
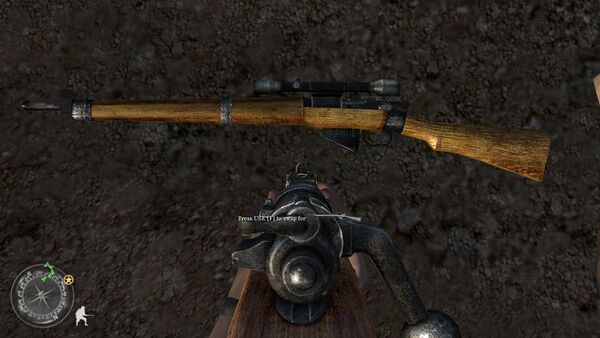
A scoped version of the rifle, the Lee-Enfield No. 4 Mk I (T), can also be found and used as a sniper rifle in single-player and multiplayer modes. Just like many other scoped variants of rifles in the game, it does not share the same ammunition most likely due to gameplay balancing reasons, despite being the same rifle chambered in the same caliber.
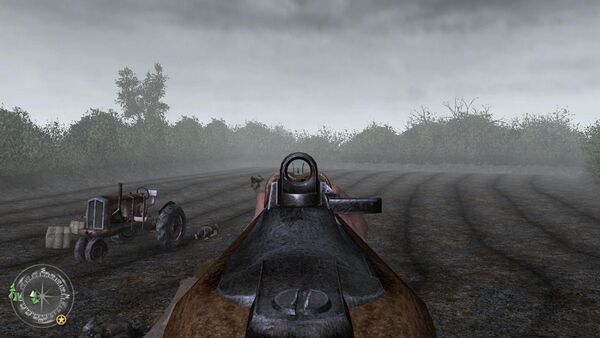
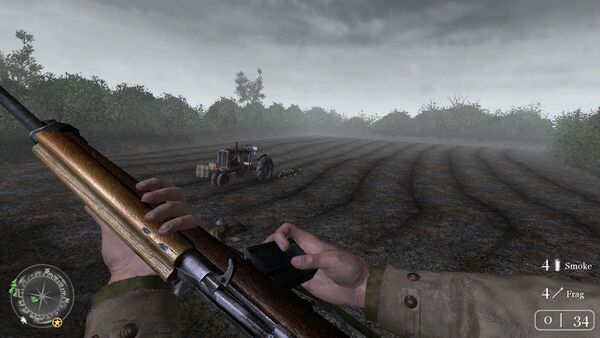
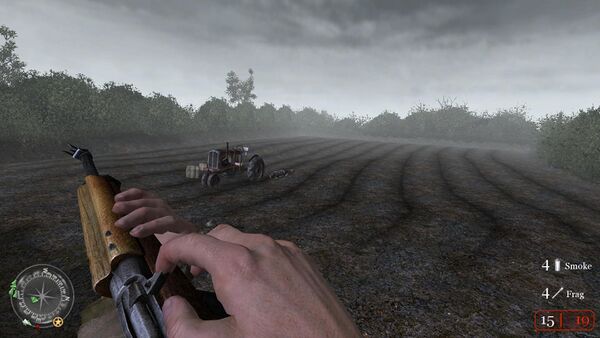
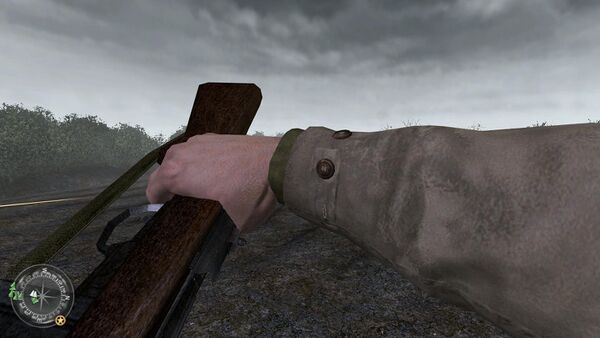
M1 Carbine
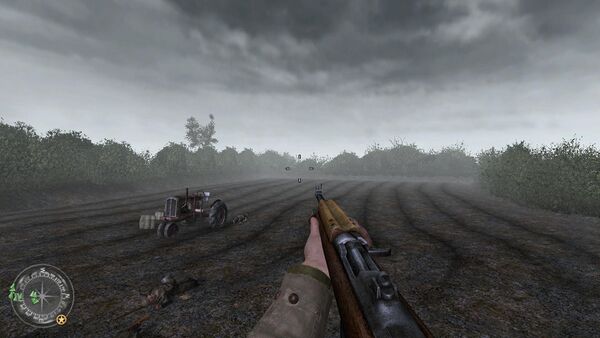
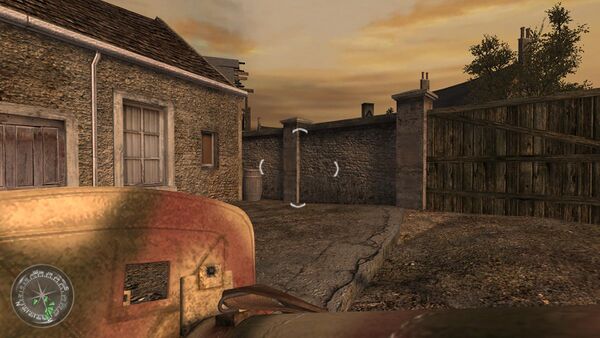
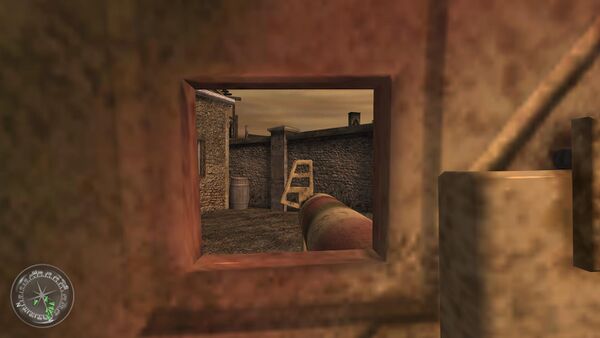
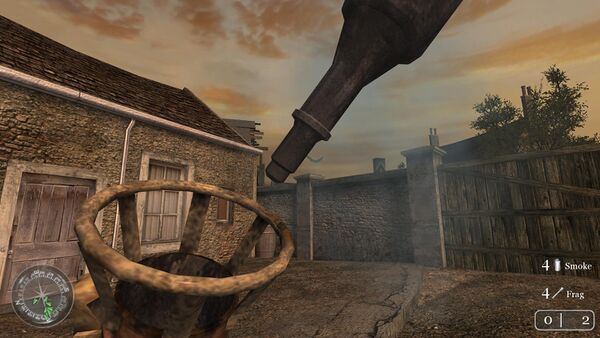
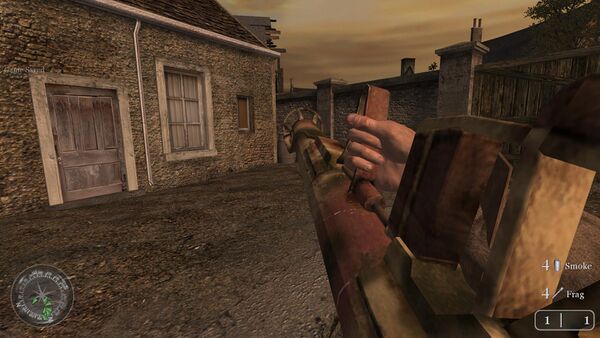
The M1 Carbine is used by American soldiers in the game. Holds 15 rounds in the magazine.
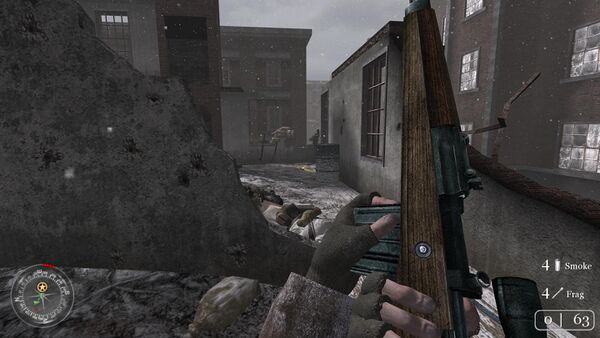
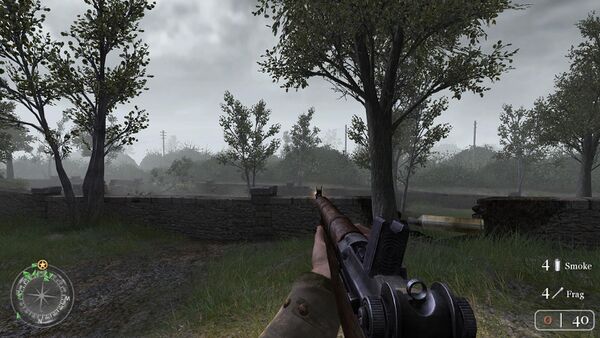
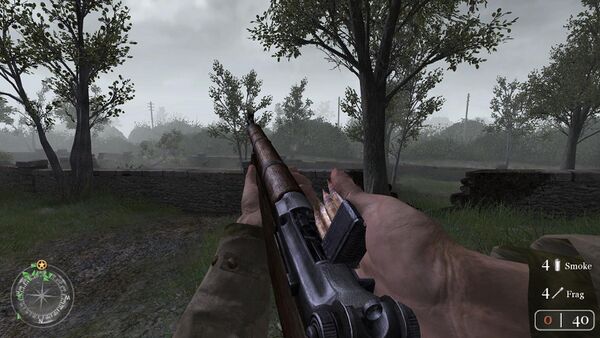
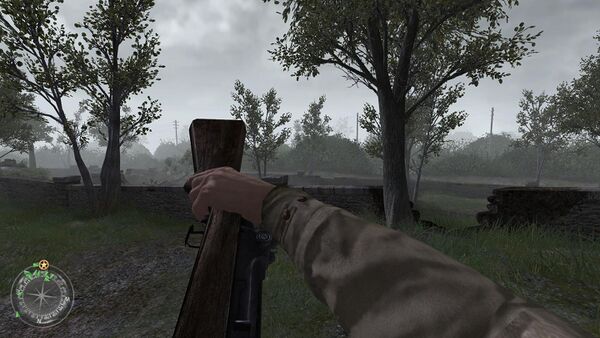
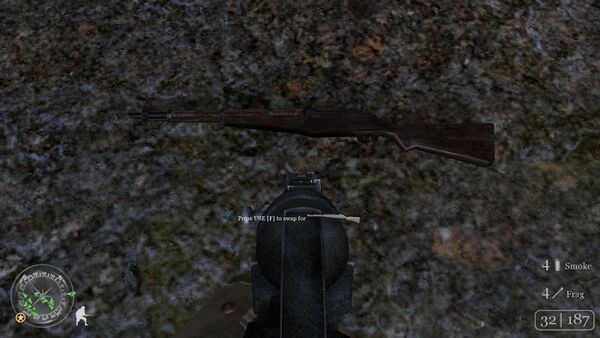
M1 Garand
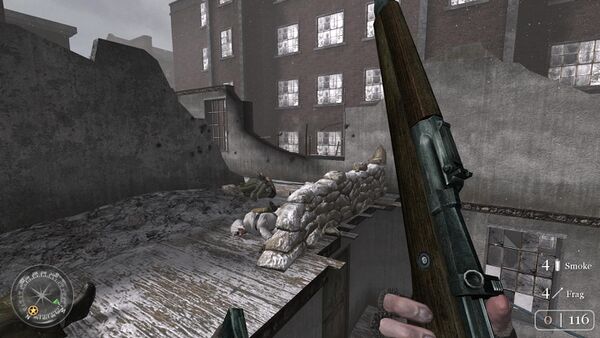
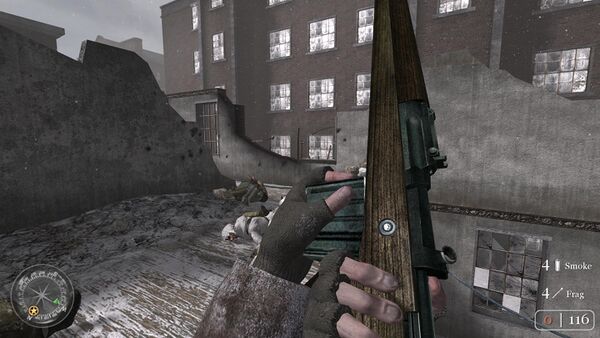
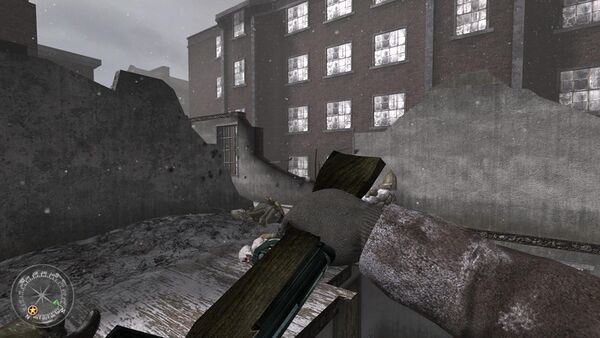
The M1 Garand is the service rifle of the American forces. It holds eight bullets and cannot be reloaded if there are unfired rounds in it, in multiplayer it's used by both American and British forces.
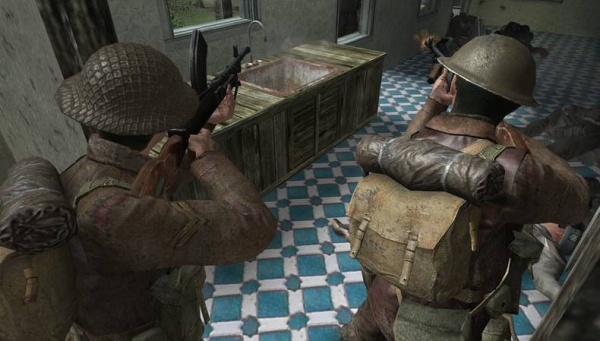
Mosin Nagant M38 Carbine
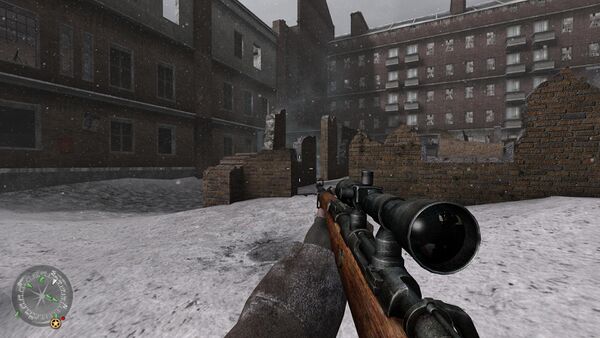
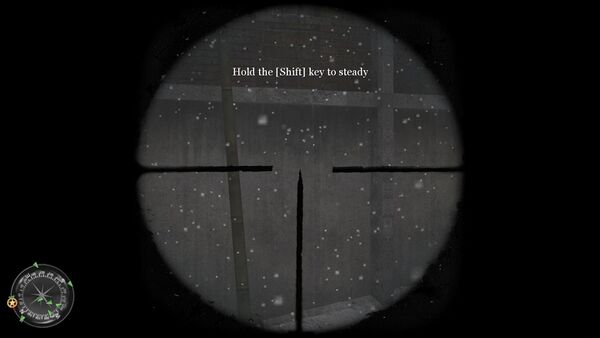
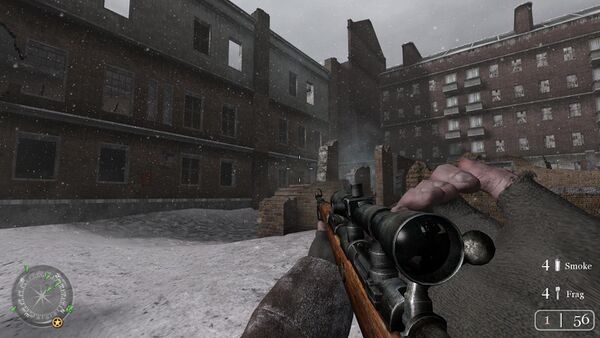
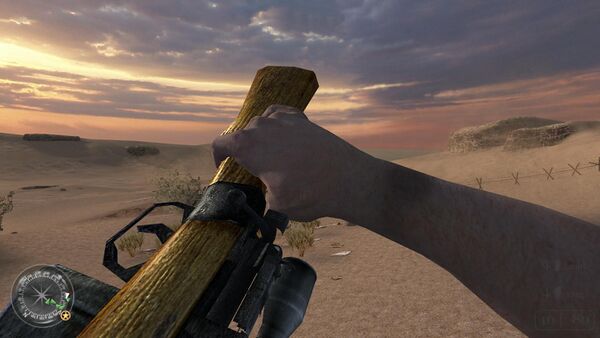
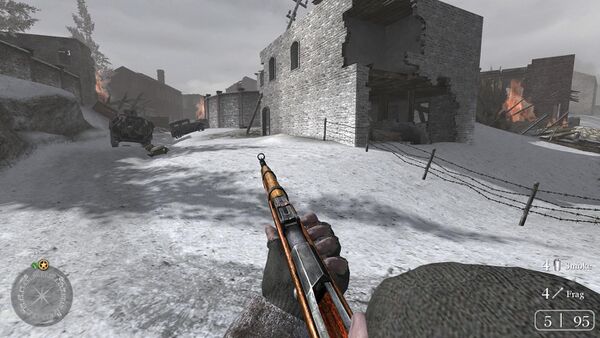
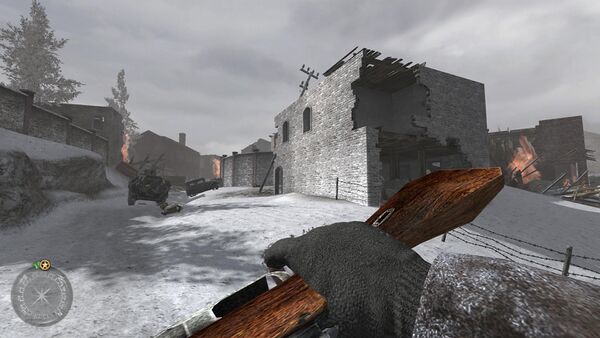
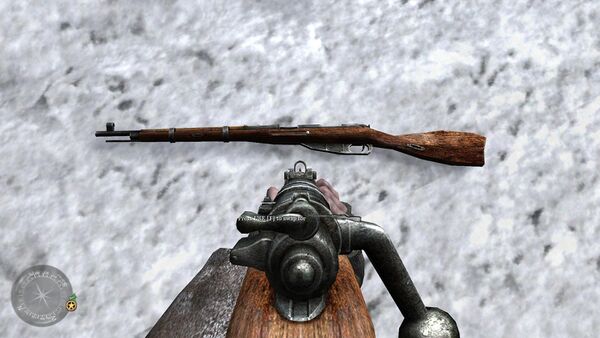
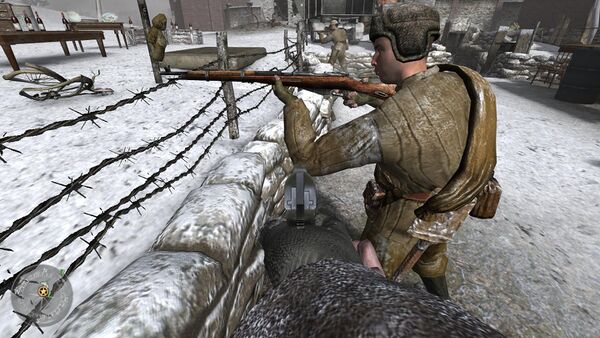
The Mosin Nagant M38 Carbine is one of the best weapons in the game. Deals extremely high damage but the slow (bolt-action) rate of fire and lack of ammo supply can be a problem. The scoped variant is used by the Soviet troops as a sniper rifle. Interestingly, the sniper version has a different reload animation: it must be reloaded one bullet at a time instead of the "normal" weapon's stripper clip, because the scope would interfere with the clip insertion. Just like the rest of the scoped rifle variants in-game, it nonsensically uses different ammunition from the non-scoped Mosin Nagant, probably due to gameplay balancing reasons. Also, although being chambered in the 7.62x54mmR caliber, the Mosin Nagant doesn't share ammunition with the SVT-40. The iron sights are misaligned when used, in real life the bullet would hit above the target.
Mosin Nagant M38 Carbine with PU scope
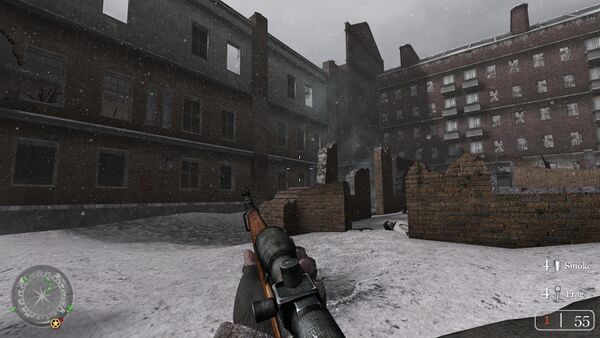
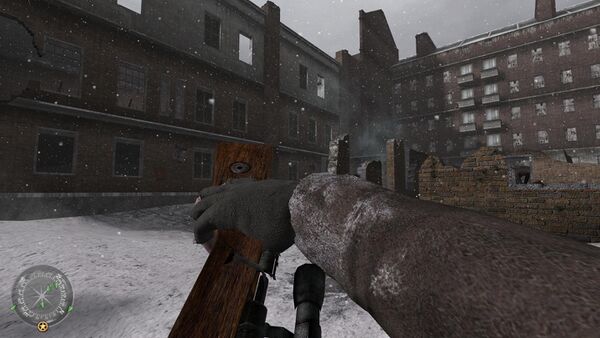
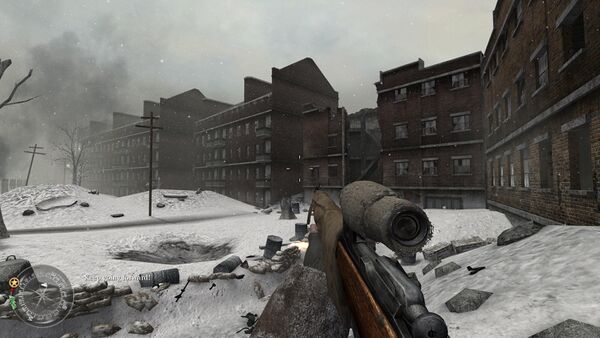
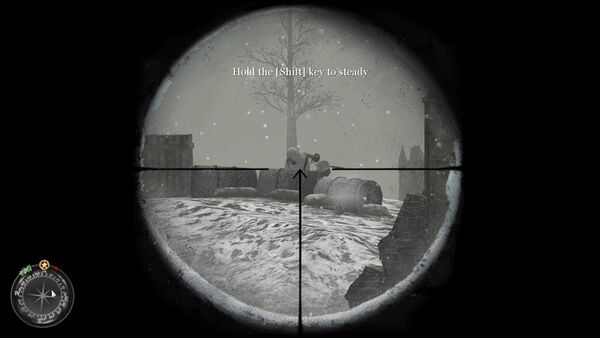
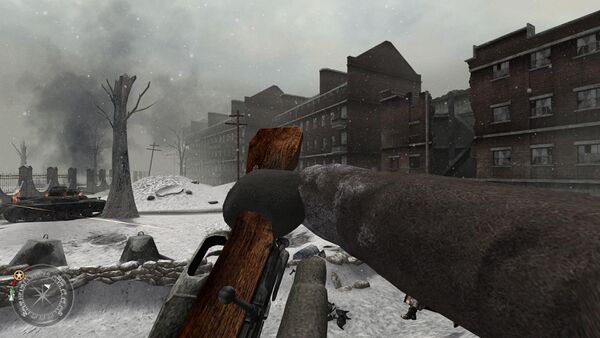
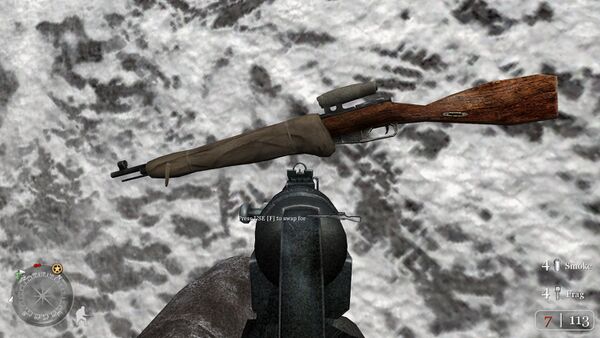
The sniper version of the Mosin Nagant M38 Carbine is used during the Soviet campaign. It notably features cloth covers on both the scope and the handguard, in order to protect the rifle from snow and also act as a form of primitive camouflage to prevent giving away the sniper's position. This design choice is likely inspired by Enemy at the Gates, which features a near-identical Mosin Nagant configuration.
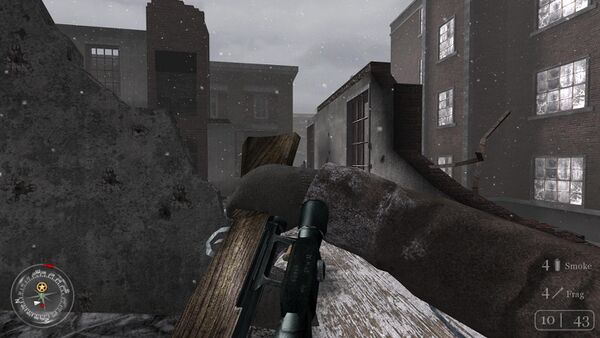
M1903A4 Springfield
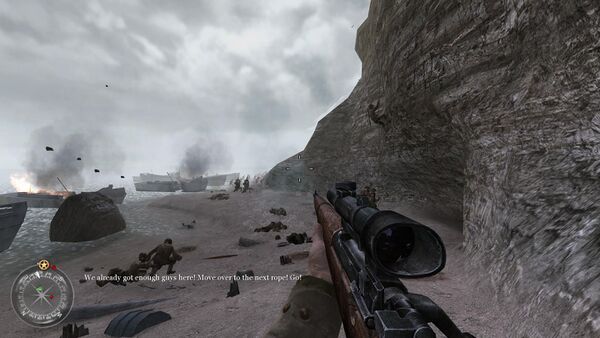
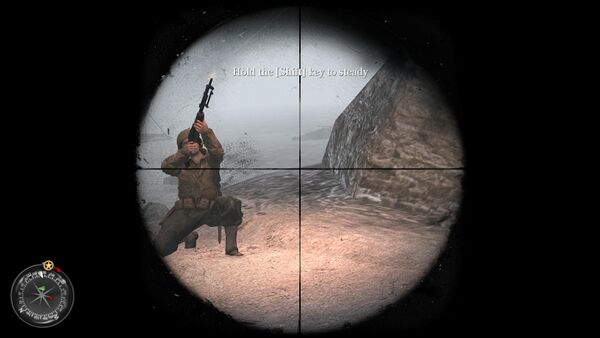
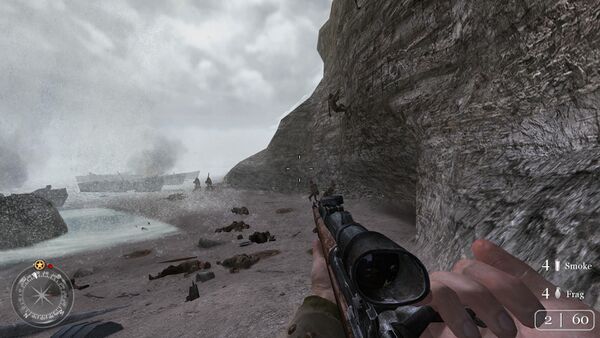
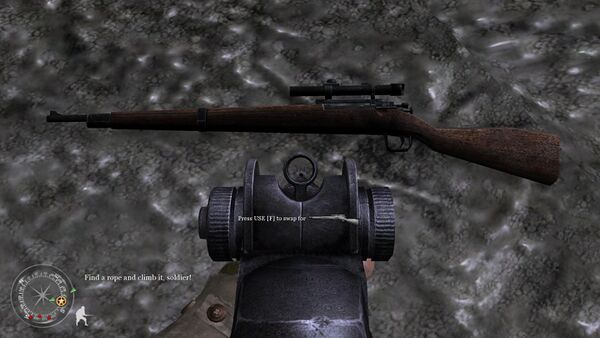
The US Army sniper rifle is the M1903A4 Springfield, appearing as just "Springfield". The non-scoped variant is not available.
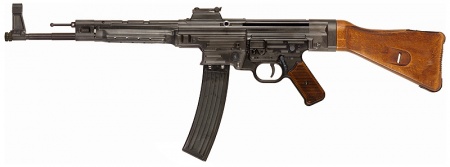
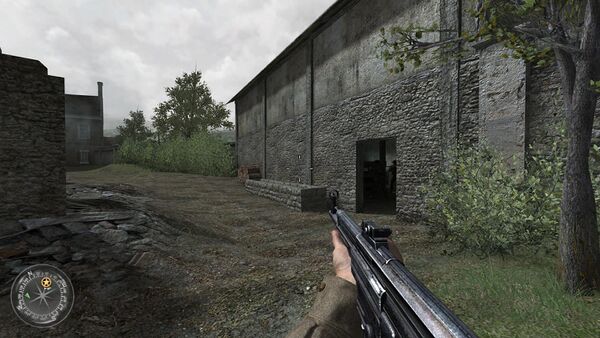
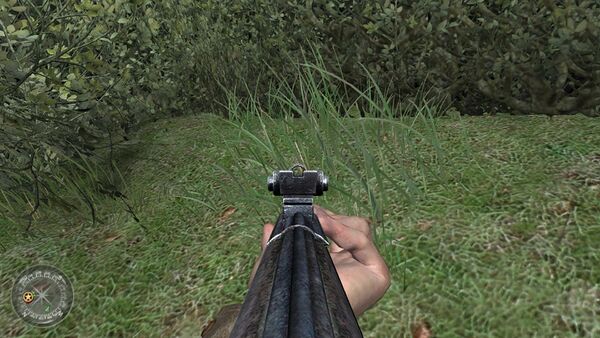
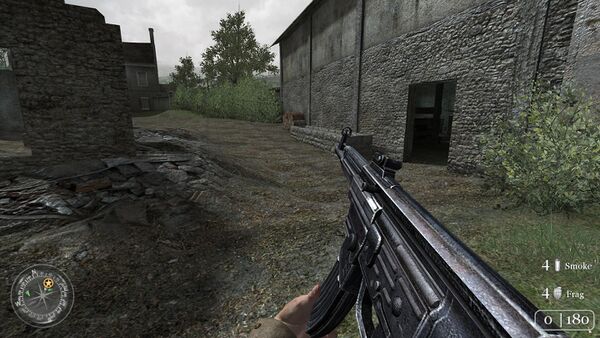
StG 44
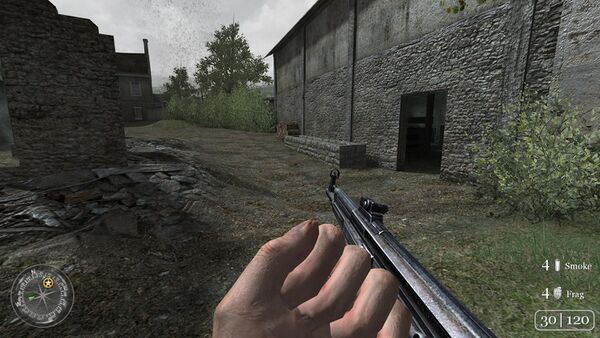
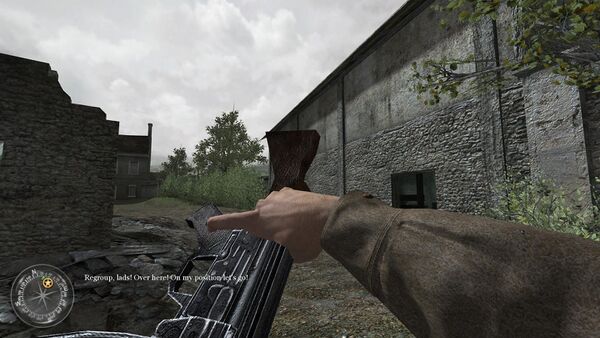
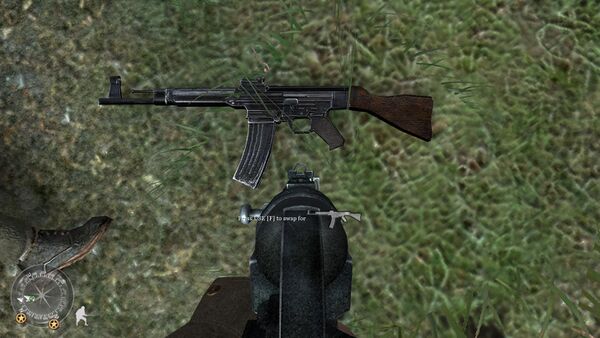
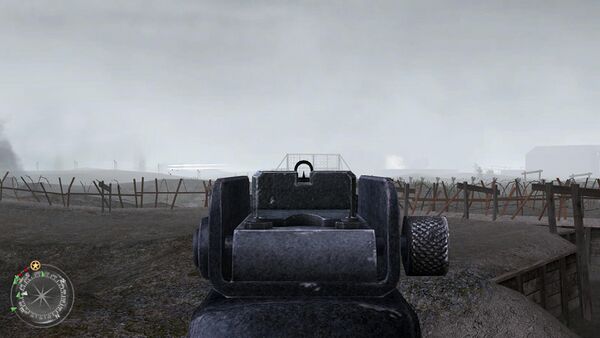
The StG 44, called by the older "MP44" name, is a powerful German assault rifle.
Tokarev SVT-40
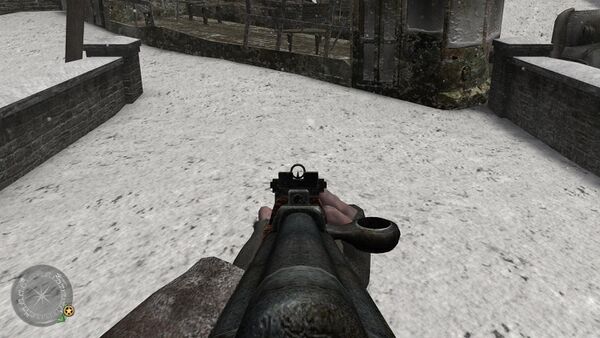
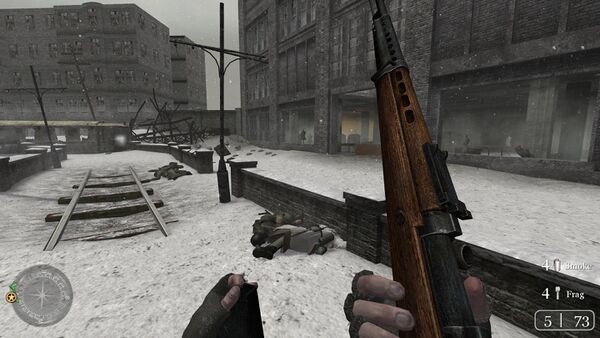
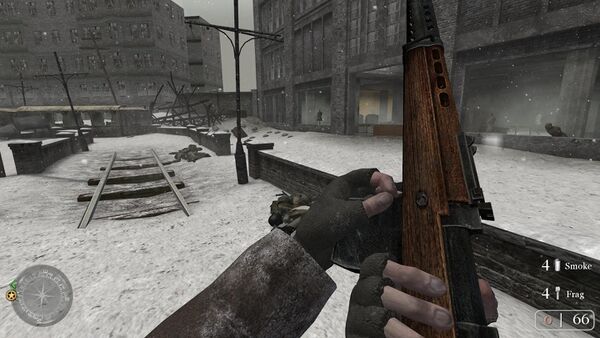
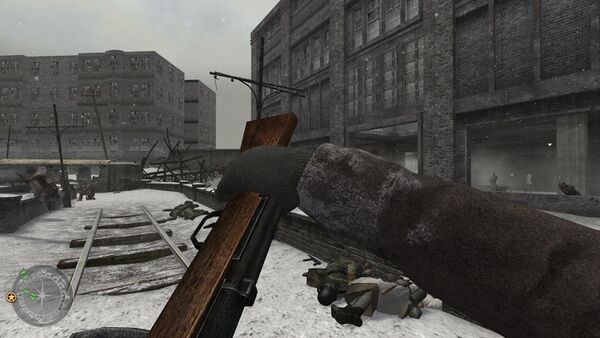
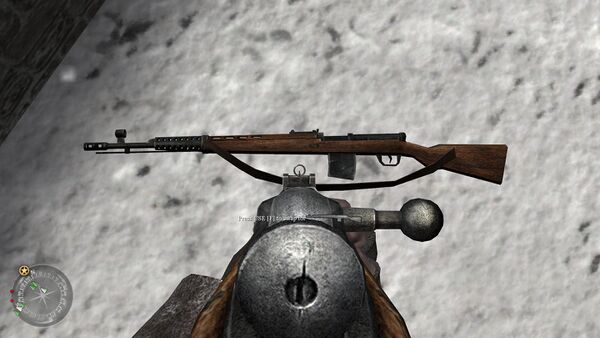
The SVT-40 is the semi-automatic service rifle used by Soviet forces. It uses a 10-round box magazine and is reloaded via swapping detachable magazines, although in actuality, the SVT-40 was primarily reloaded using stripper clips. Although chambered in the 7.62x54mmR caliber just like the Mosin Nagant, the rifles don't share ammunition, again likely due to gameplay balancing reasons.
Machine Guns
Bren Mk2
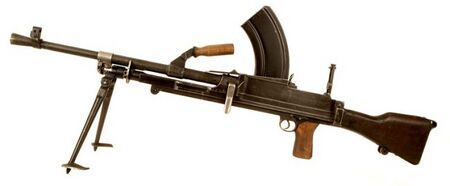
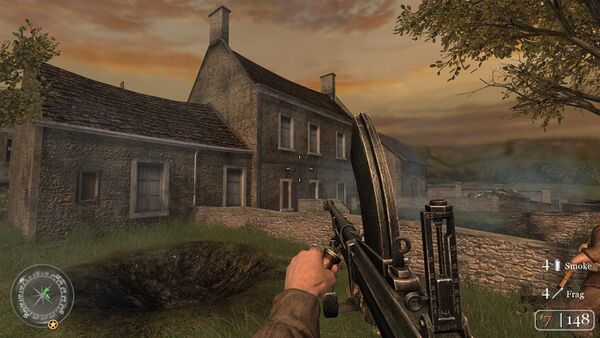
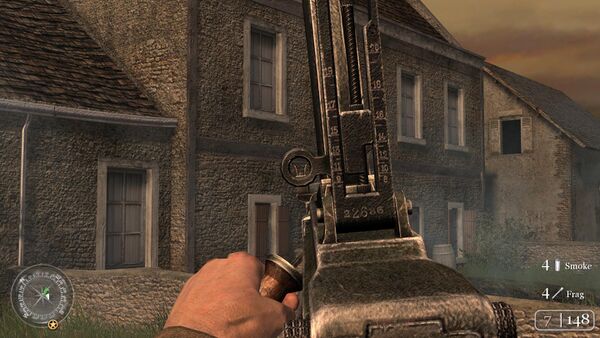
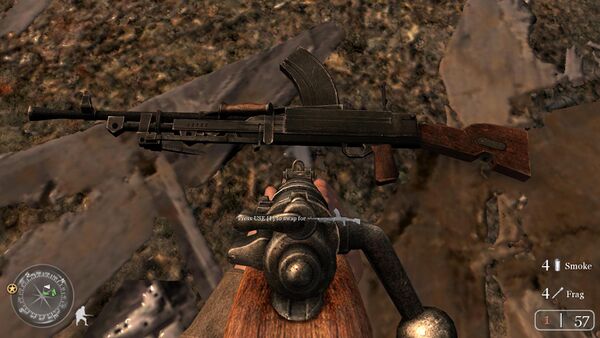
The main squad support weapon for the Commonwealth forces is the Bren Mk2, appearing as the "Bren LMG". It is correctly depicted with a 30-round detachable box magazine. Its ammunition is very scarce and is not shared with the Lee-Enfields, despite being chambered for the same caliber.
Besa
The Besa machine gun is mounted on British Crusader Tanks.
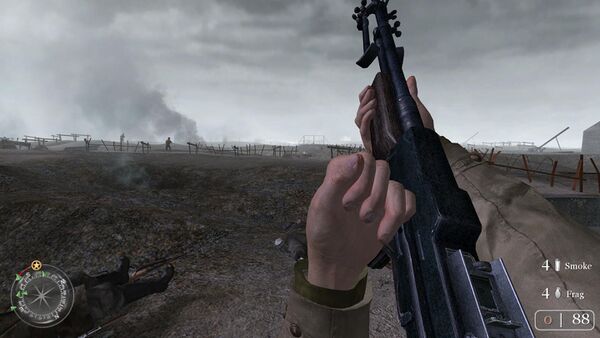
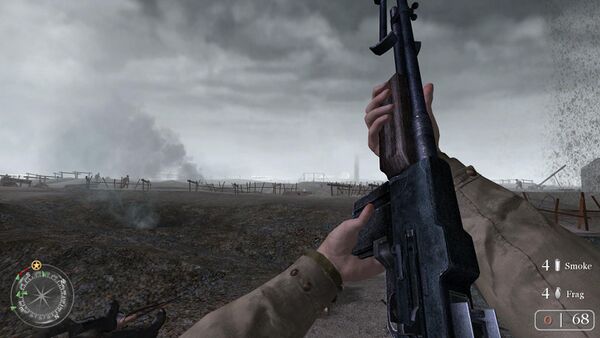
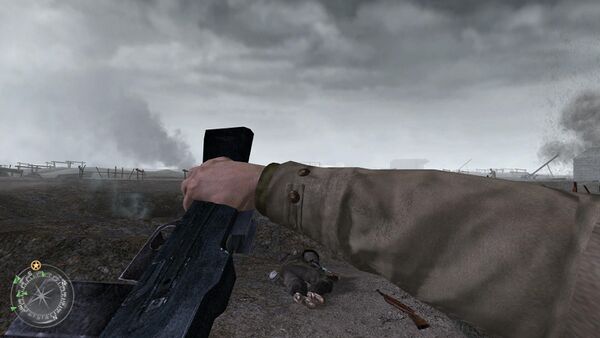
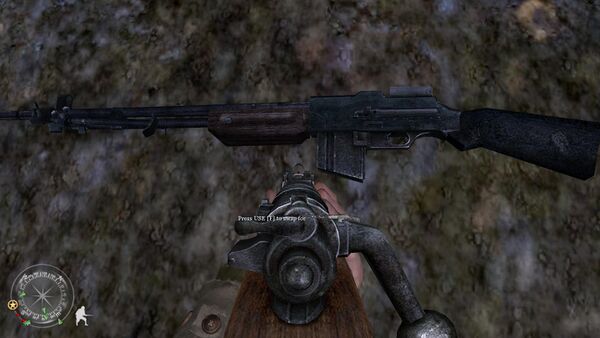
Browning Automatic Rifle M1918A2
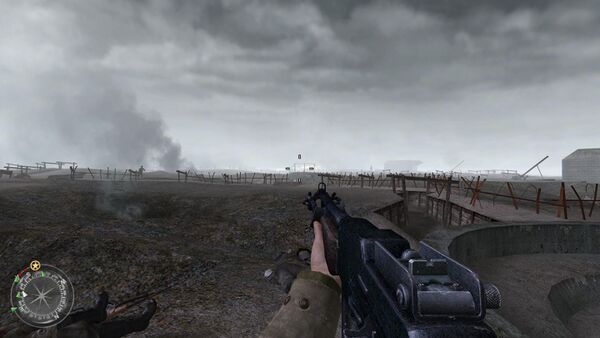
The Browning Automatic Rifle M1918A2 is used by the American support gunners. Referred to as the "BAR."
Browning M1919A4
Known as the ".30 cal", the Browning M1919A4 is mounted in places that Americans have captured and need to hold.
MG 34 Panzerlauf
The MG 34 Panzerlauf is mounted coaxially on German tanks seen throughout the campaign.
MG 42
Although not a weapon that can be carried around, the MG 42 makes several appearances as the player progresses throughout the game including the missions set in the Battle of Stalingrad. While the MG 42 actually saw limited use at Stalingrad, the game's depiction commits the common error of showing the weapon with the post-1943 vertical charging handle instead of the period appropriate and rare slab-sided horizontal handle.
Grenades and Explosives
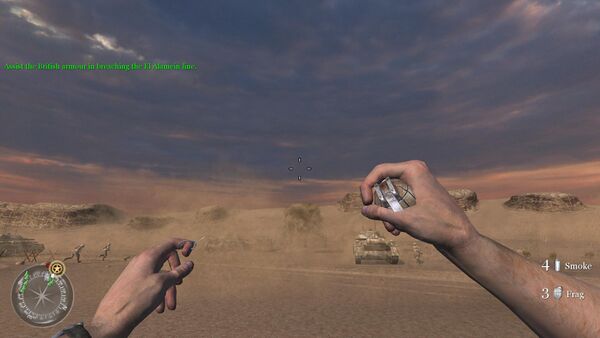
AN/M8 HC smoke grenade
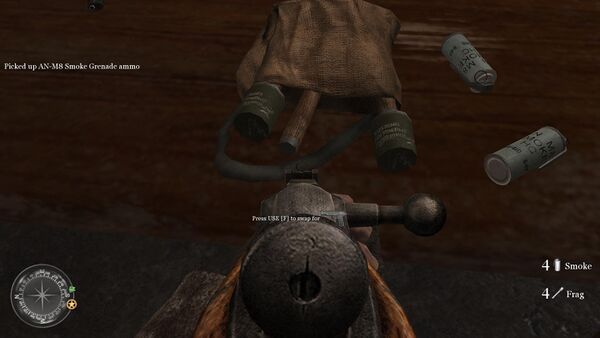
The AN/M8 HC smoke grenade appears as the secondary grenade, used to screen the player character's position from enemy fire. At times they are essentially a "not get killed grenade" which must be used to get by otherwise impassible machine gun positions.
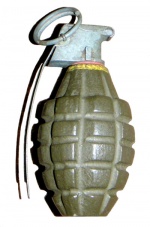
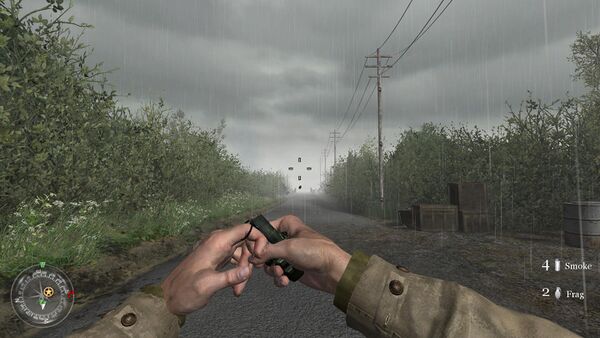
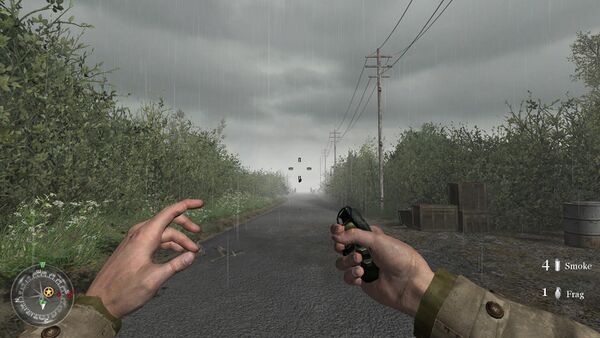
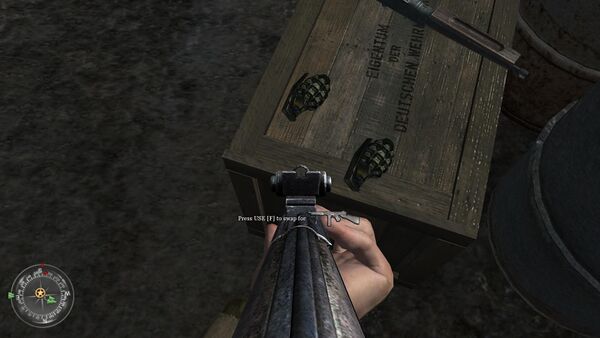
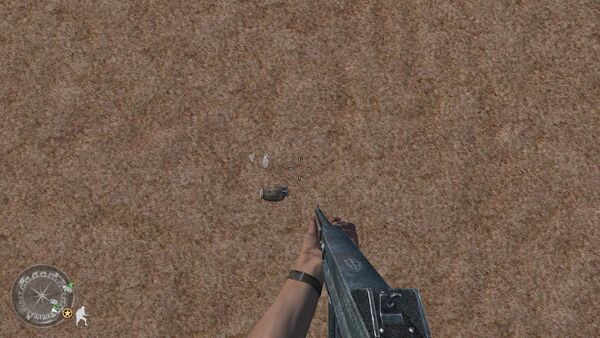
Mk 2 hand grenade
The Mk 2 hand grenade is the standard hand grenade of the Americans in the game.
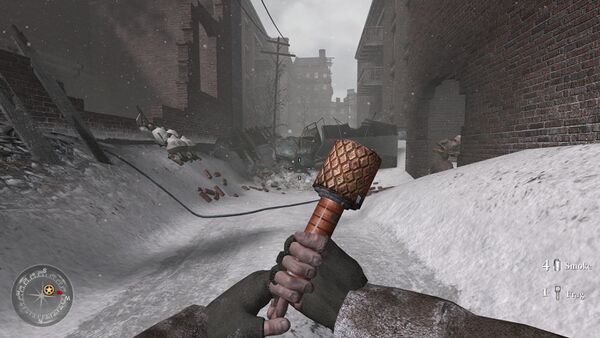
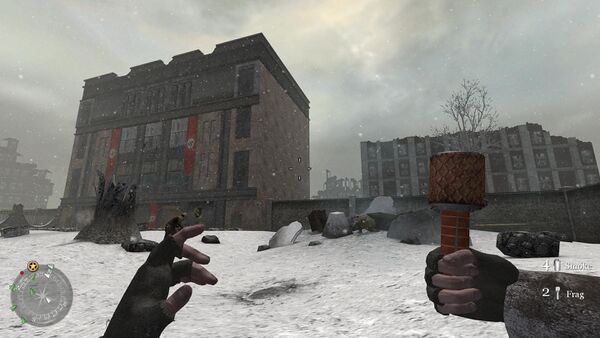
Model 24 Stielhandgranate
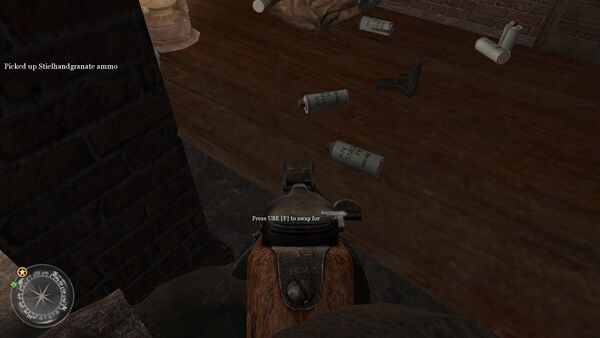
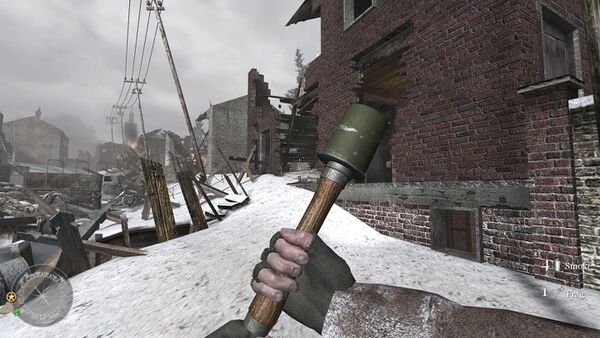
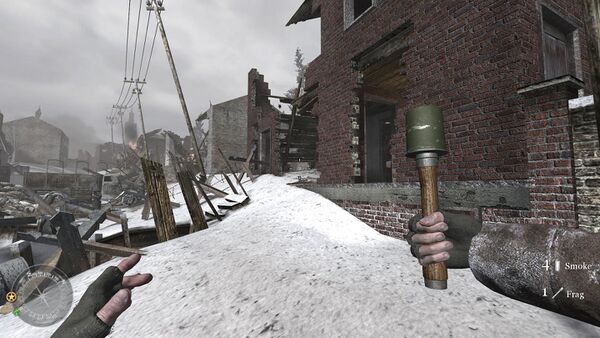
The Model 24 Stielhandgranate is the standard hand grenade of the Axis forces. They are also the only hand grenades that regularly spawn during a mission, with refills being dropped by dead German soldiers. Once the player uses all four of the "faction" grenades they begin the level with, Model 24 Stielhandgranates will likely be the only grenade used for the remainder of the level.
No. 36M Mk. I "Mills Bomb"
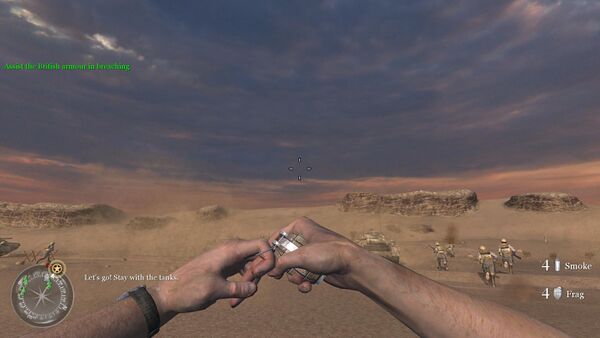
The hand grenade used by British forces, the No. 36M Mk. I "Mills Bomb" performs just like every other grenade in the game.
RGD-33 stick grenade
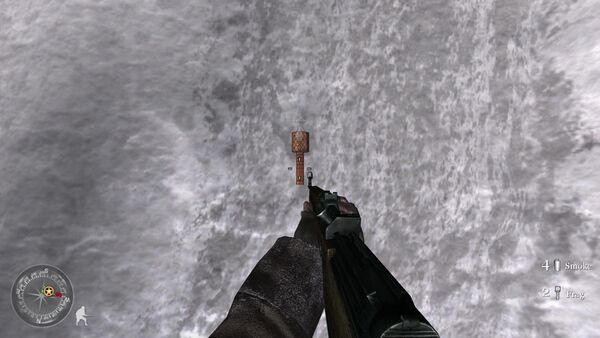
The RGD-33 stick grenade is the standard grenade for the Soviet Union. Appears only a few times in the Russian levels. Notably, CoD 2 starts a common error with the RGD-33 that would be repeated in later games as it re-uses the Model 24 Stielhandgranate's arming animation with the player twisting a non-existent cap at the bottom of the grenade (despite the fact that Call of Duty: Finest Hour earlier actually had a correct arming animation of inserting a detonator into the top of the grenade).
"Sticky Bomb"
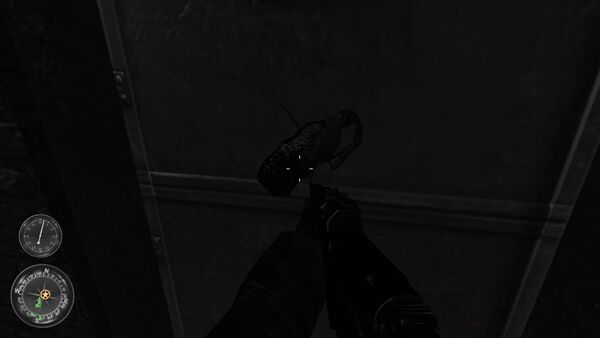
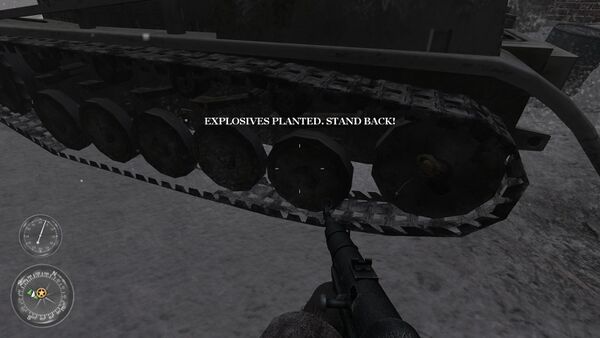
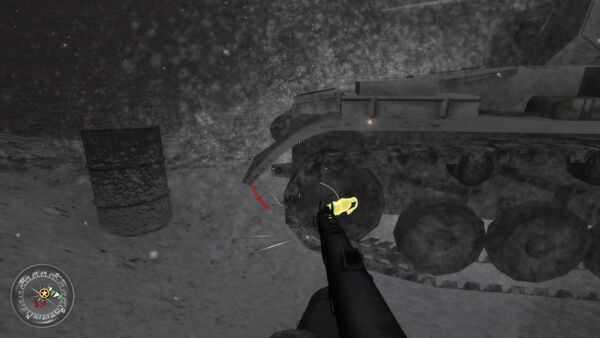
Explosive charges are used to destroy German Panzer II tanks during the Soviet campaign. In spite of what the game calls them, these are not No 74 ST Grenades; rather, they are improvised charges which serve a similar function. These appear to be based on similar improvised sticky explosive charges seen in Saving Private Ryan.
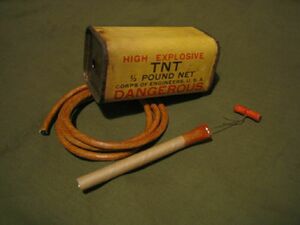
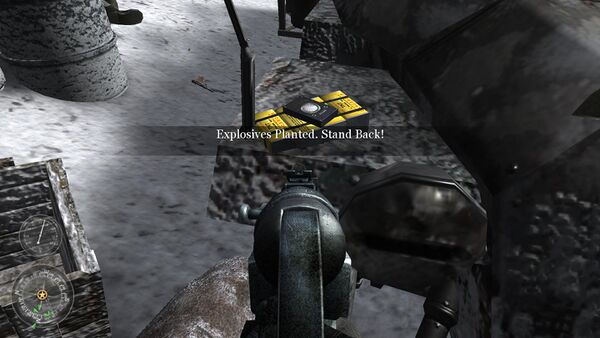
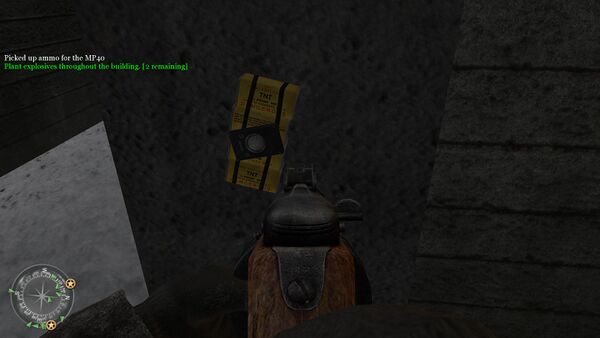
TNT
Objectives requiring demolition generally require the use of an explosive charge. This is depicted as a bundle of four US-issue 1/2 pound TNT charges rigged with a timer.
Launchers
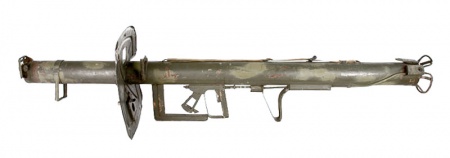
RPzB 54 "Panzerschreck"
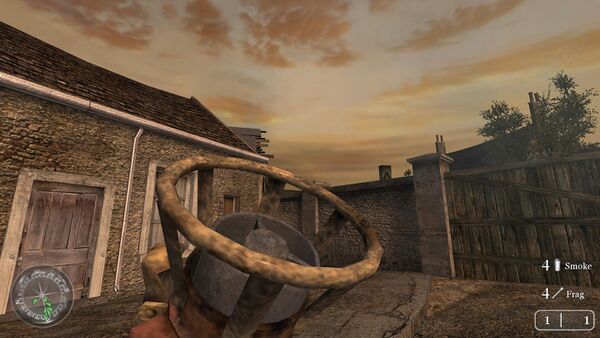
The RPzB 54 "Panzerschreck" is the only mobile anti-tank weapon in the game. Can be used to take out Tiger tanks and other German vehicles. As is tradition for the series, it can only be fired while aiming.
Emplaced Weapons
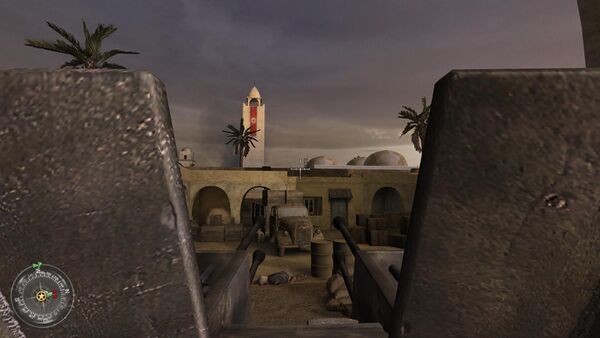
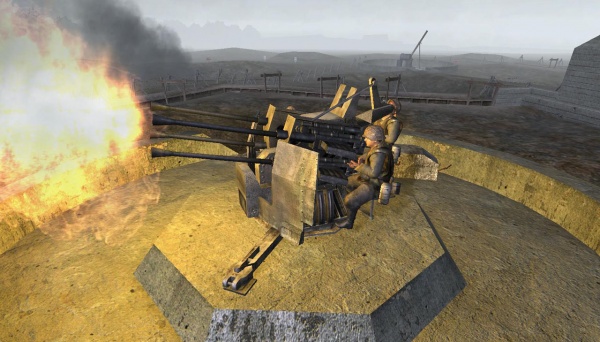
2 cm Flakvierling 38
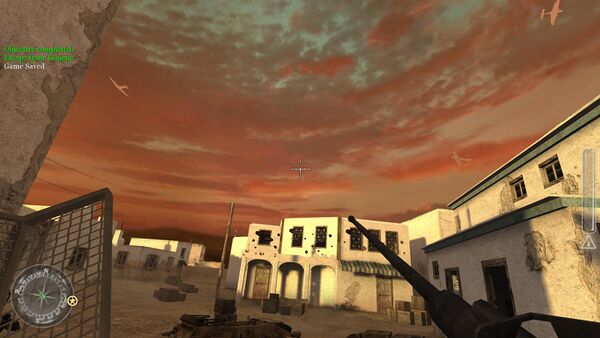
In the level "Battle of Point du Hoc," a 2 cm Flakvierling 38 is seen firing onto advancing US Army Rangers before being destroyed itself sometime after Corporal. Taylor and Sergeant Randall destroys the coastal artillery guns. In the level "Assault on Matmata", Sergeant John Davis uses this gun to take down some Stukas.
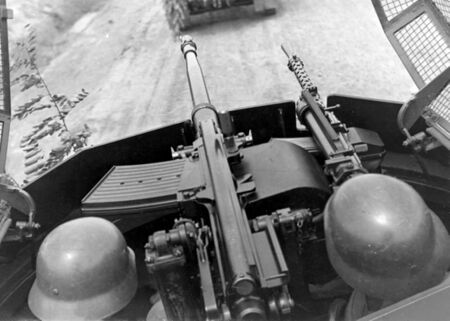
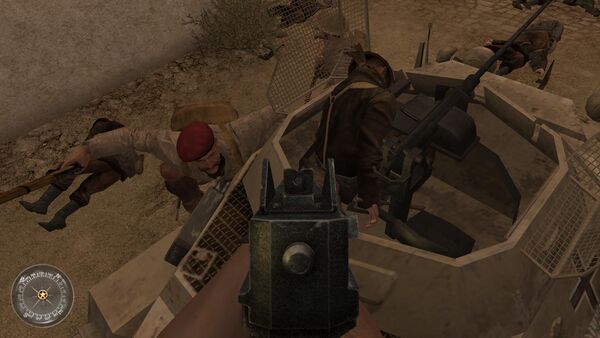
2 cm KwK 30
The 2 cm KwK 30 is mounted on various German vehicles. It is most notably used and controlled by the player during the mission "Outnumbered and Outgunned".
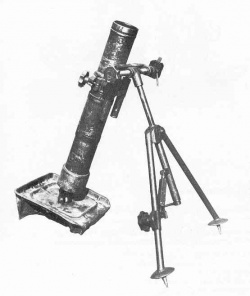
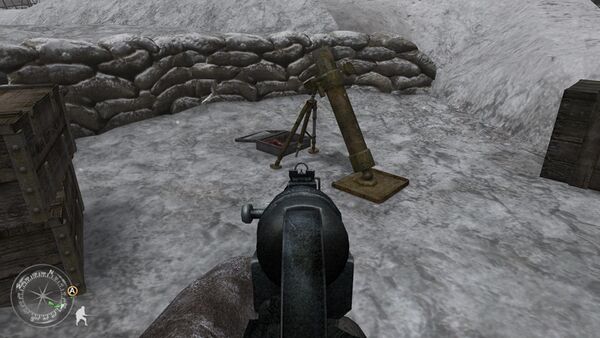
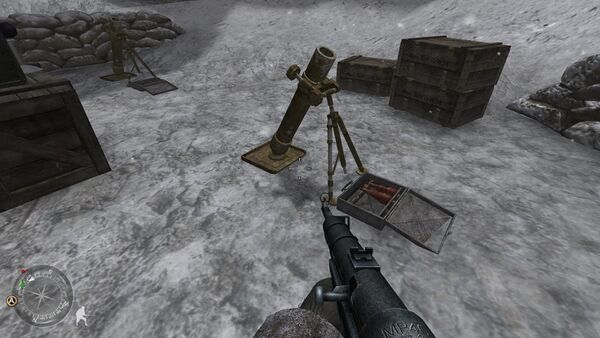
8 cm Granatwerfer 42 Mortar
The 8 cm Granatwerfer 42 Mortar are used by German mortar teams during the campaign. As a trivia note, the Kurzer 8 cm Granatwerfer 42 model would later reappear in the unused explosives range on the South side of the SAS base in the first level of Call of Duty 4: Modern Warfare, Call of Duty: Modern Warfare 2 and Call of Duty: Black Ops II "Pyrrhic Victory". In Call of Duty: WWII the GrW 42 is finally remodeled.
8.8 cm Flak 36
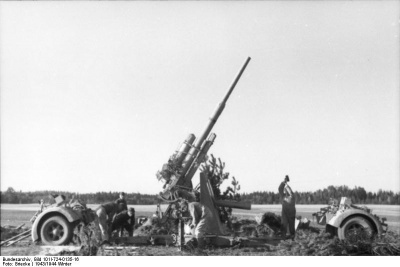
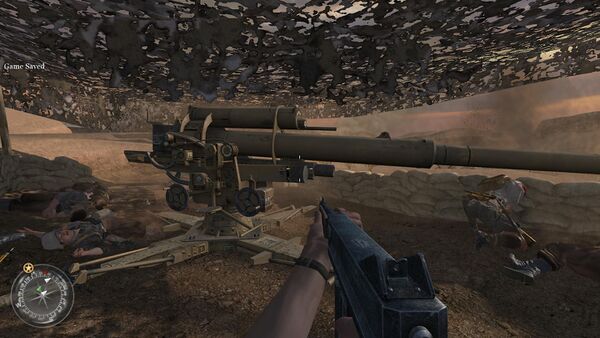
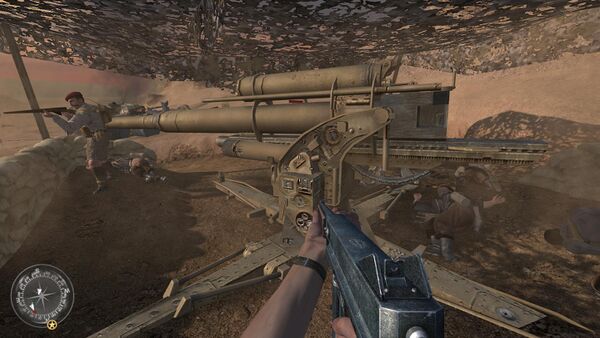
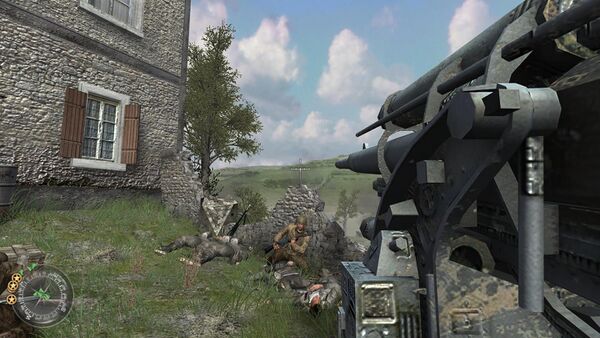
The 8.8 cm Flak 36 guns seen in the game are now FlaK 36s, distinguished by the two-piece barrel as opposed to the one-piece barrel of the FlaK 18s in the previous game. As before, for gameplay purposes, a gun that requires a ten-man crew to function can be operated by a single man.
28/32 cm Schweres Wurfgerät 40
During the "Red Army Training" mission, the player is tasked to destroy a German Sd.Kfz 251 half-track with mounted 28/32 cm Schweres Wurfgerät 40 / Wurfrahmen 40 rocket launchers.
Canon de 155mm GPF
Corporal Bill Taylor and Sergeant Randall are tasked to destroy some French Canon de 155 Grande Puissance Filloux (GPF) during the "Battle of Pointe du Hoc". These guns are also seen in Call of Duty: WWII.
Ordnance QF 2-pounder
British Crusader Mk. II tanks have Ordnance QF 2-pounders as their main armament.
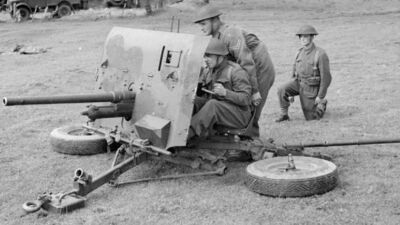
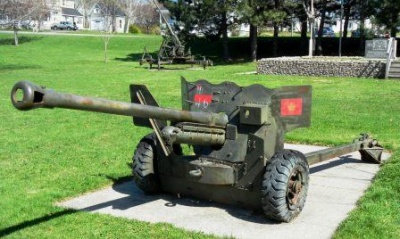
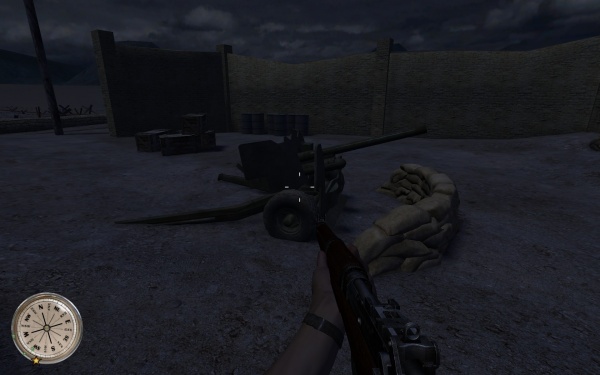
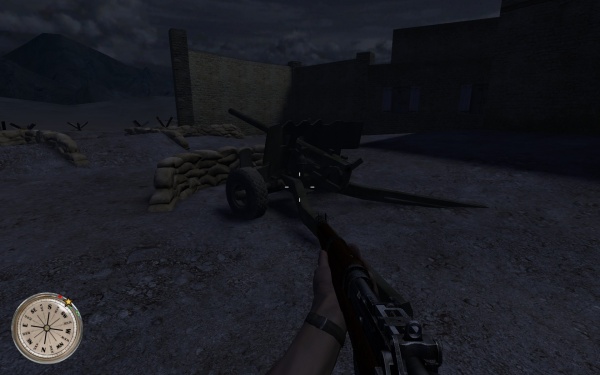
Ordnance QF 6-pounder
An Ordnance QF 6-pounder anti-tank gun can be seen in the level "Hold the Line".
Other
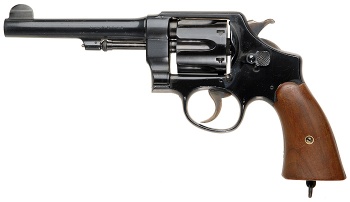
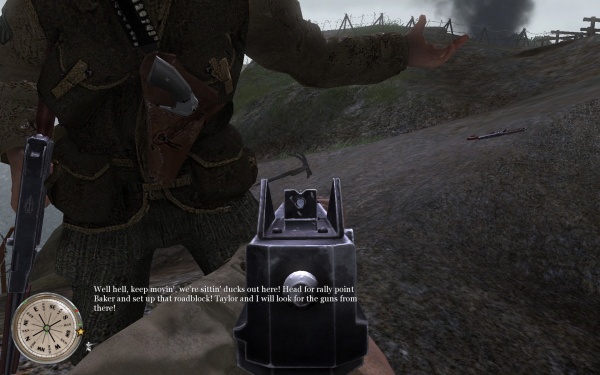
Smith & Wesson M1917
Sergeant Randall and other US Army Rangers have low-detail Smith & Wesson M1917 revolvers holstered.
