| If you have been locked out of your account you can request a password reset here. |
Difference between revisions of "Battlefield: 1918"
m |
m |
||
| Line 10: | Line 10: | ||
[[Image:Mauser g98.jpg|thumb|none|450px|Mauser Gewehr 1898 - 7.92x57 mm]] | [[Image:Mauser g98.jpg|thumb|none|450px|Mauser Gewehr 1898 - 7.92x57 mm]] | ||
[[Image:Gewehr98scope.jpg|thumb|none|450px|Scoped Mauser Gewehr 1898 - 7.92x57 mm]] | [[Image:Gewehr98scope.jpg|thumb|none|450px|Scoped Mauser Gewehr 1898 - 7.92x57 mm]] | ||
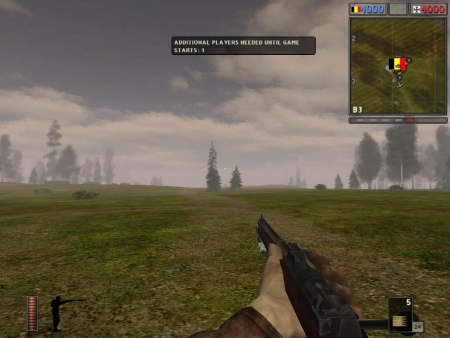
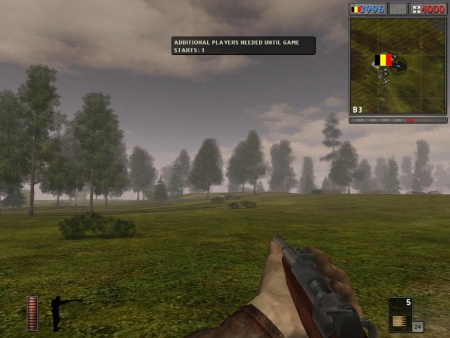
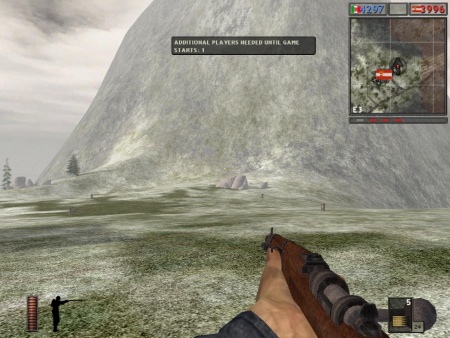
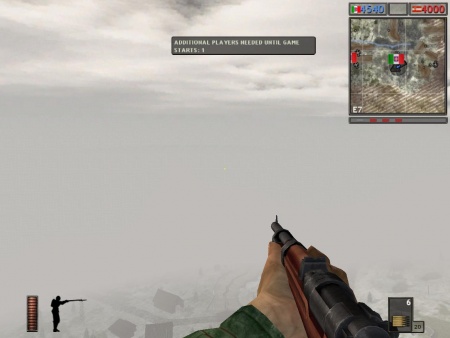
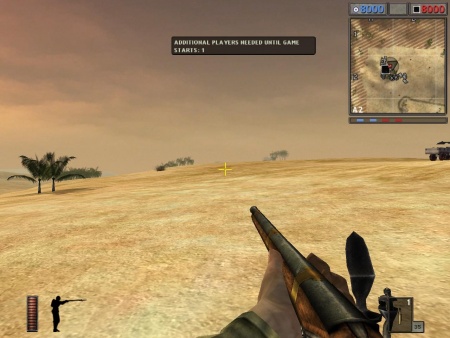
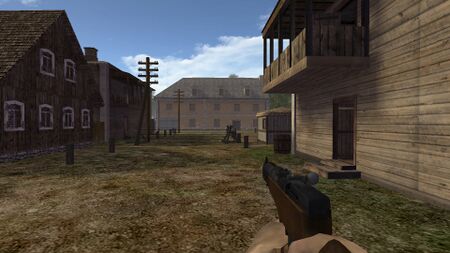
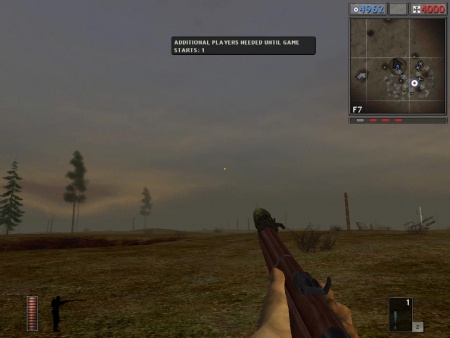
| − | [[Image:Bf1918g981.JPG|thumb|none|450px|The Gewehr 98 in Battlefield 1918.]] | + | [[Image:Bf1918g981.JPG|thumb|none|450px|The Gewehr 98 in Battlefield: 1918.]] |
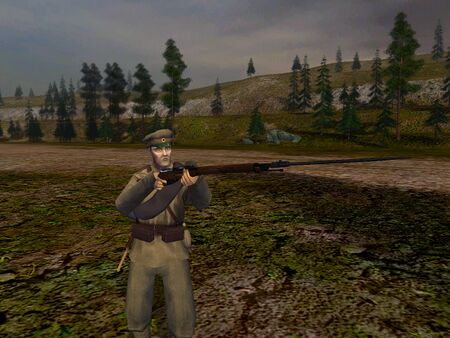
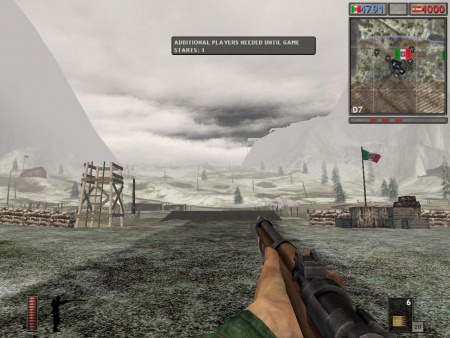
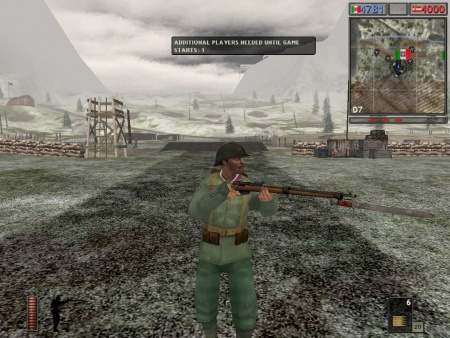
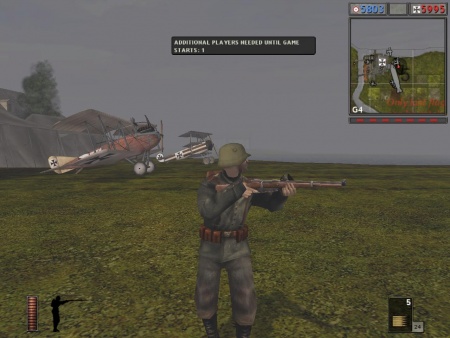
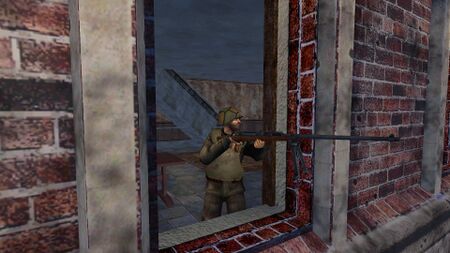
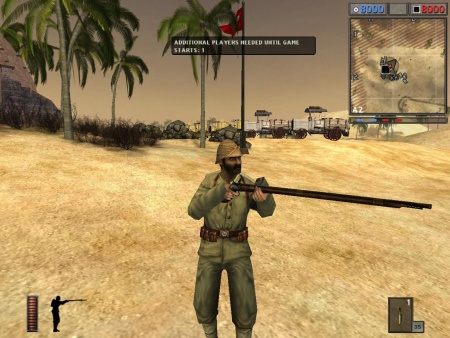
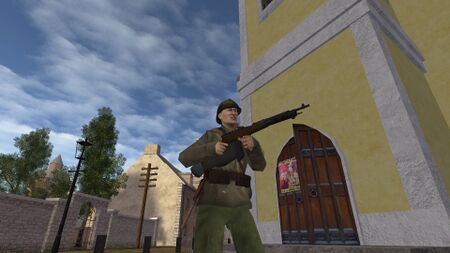
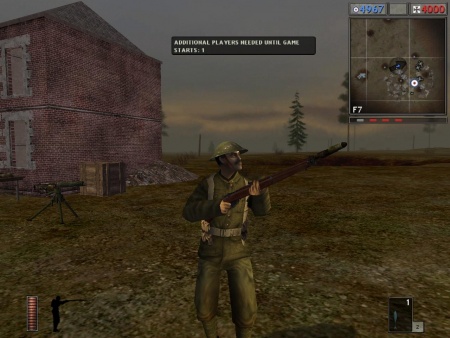
[[Image:Bf1918g983.JPG|thumb|none|450px|Third Person view of the Gewehr 98.]] | [[Image:Bf1918g983.JPG|thumb|none|450px|Third Person view of the Gewehr 98.]] | ||
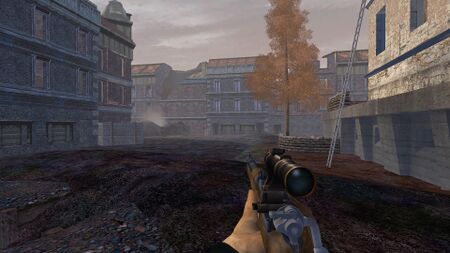
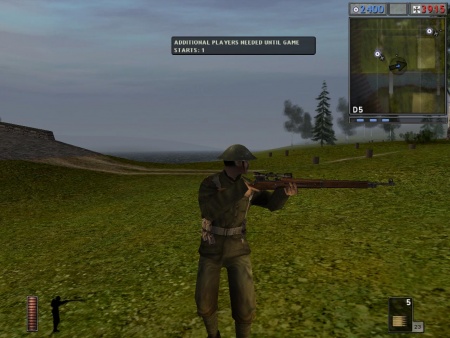
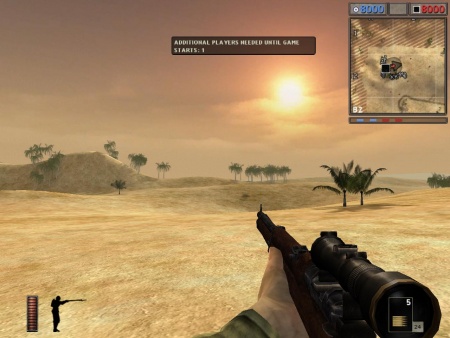
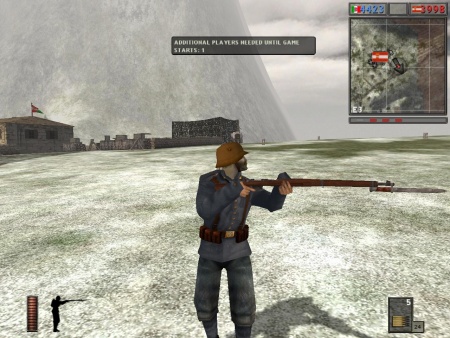
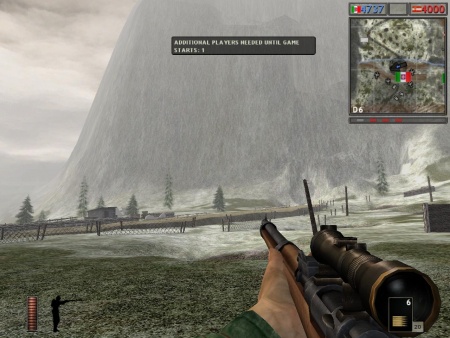
| − | [[Image:Bf1918g98scope1.JPG|thumb|none|450px|The scoped Gewehr 98 in Battlefield 1918.]] | + | [[Image:Bf1918g98scope1.JPG|thumb|none|450px|The scoped Gewehr 98 in Battlefield: 1918.]] |
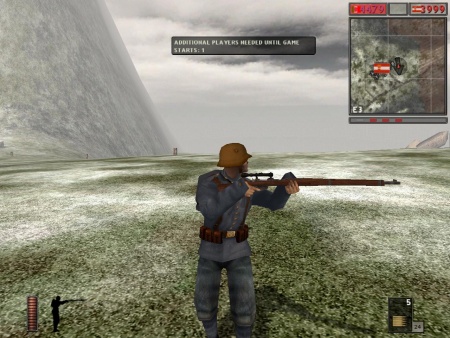
[[Image:Bf1918g98scope3.JPG|thumb|none|450px|Third Person view of the scoped Gewehr 98.]] | [[Image:Bf1918g98scope3.JPG|thumb|none|450px|Third Person view of the scoped Gewehr 98.]] | ||
| Line 19: | Line 19: | ||
[[Image:Modele1886Lebel.jpg|thumb|none|450px|Lebel Model 1886 Rifle - 8x50Rmm]] | [[Image:Modele1886Lebel.jpg|thumb|none|450px|Lebel Model 1886 Rifle - 8x50Rmm]] | ||
[[Image:Apx1917 1.jpg|thumb|none|350px|Lebel Model 1886 Rifle fitted with APX Mle 1917 sniper scope.]] | [[Image:Apx1917 1.jpg|thumb|none|350px|Lebel Model 1886 Rifle fitted with APX Mle 1917 sniper scope.]] | ||
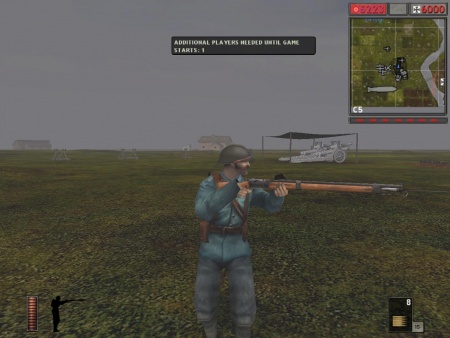
| − | [[Image:Bf1918lebel1.JPG|thumb|none|450px|The Lebel M1886 in Battlefield 1918.]] | + | [[Image:Bf1918lebel1.JPG|thumb|none|450px|The Lebel M1886 in Battlefield: 1918.]] |
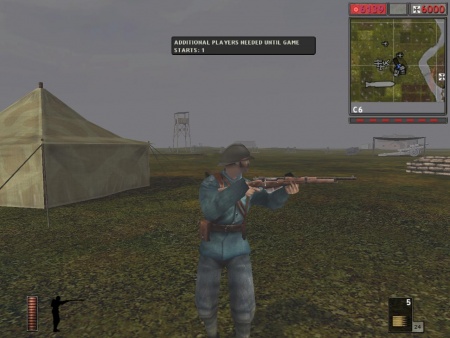
[[Image:Bf1918lebel3.JPG|thumb|none|450px|Third Person view of the Lebel M1886.]] | [[Image:Bf1918lebel3.JPG|thumb|none|450px|Third Person view of the Lebel M1886.]] | ||
| − | [[Image:Bf1918lebelscope1.JPG|thumb|none|450px|The scoped Lebel M1886 in Battlefield 1918.]] | + | [[Image:Bf1918lebelscope1.JPG|thumb|none|450px|The scoped Lebel M1886 in Battlefield: 1918.]] |
[[Image:Bf1918lebelscope3.JPG|thumb|none|450px|Third person view of the scoped Lebel M1886.]] | [[Image:Bf1918lebelscope3.JPG|thumb|none|450px|Third person view of the scoped Lebel M1886.]] | ||
| Line 27: | Line 27: | ||
The [[Short_Magazine_Lee-Enfield_(SMLE)|Lee Enfield No.1 Mk.III]] appears as the standard issue rifle for British Commonwealth forces. | The [[Short_Magazine_Lee-Enfield_(SMLE)|Lee Enfield No.1 Mk.III]] appears as the standard issue rifle for British Commonwealth forces. | ||
[[Image:SMLE.jpg|thumb|none|450px|Lee-Enfield No.1 Mk.III* - .303 British]] | [[Image:SMLE.jpg|thumb|none|450px|Lee-Enfield No.1 Mk.III* - .303 British]] | ||
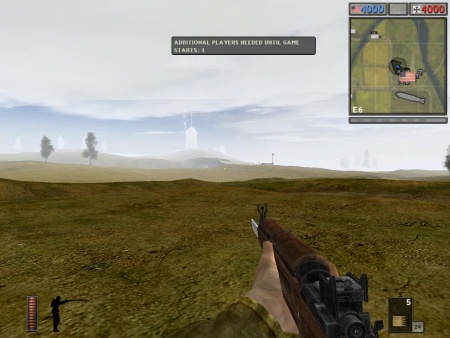
| − | [[Image:Bf1918smle1.JPG|thumb|none|450px|The Lee Enfield No1. Mk.III in Battlefield 1918.]] | + | [[Image:Bf1918smle1.JPG|thumb|none|450px|The Lee Enfield No1. Mk.III in Battlefield: 1918.]] |
[[Image:Bf1918smle3.JPG|thumb|none|450px|Third Person view of the Lee-Enfield No.1 Mk.III.]] | [[Image:Bf1918smle3.JPG|thumb|none|450px|Third Person view of the Lee-Enfield No.1 Mk.III.]] | ||
| Line 34: | Line 34: | ||
[[File:Pattern1914.jpg|thumb|none|450px|Pattern M1914 (P14) Enfield - .303 British]] | [[File:Pattern1914.jpg|thumb|none|450px|Pattern M1914 (P14) Enfield - .303 British]] | ||
[[File:Pattern1914scoped.jpg|thumb|none|450px|Pattern M1914 (P14) Enfield sniper variant fitted with telescopic sight - .303 British]] | [[File:Pattern1914scoped.jpg|thumb|none|450px|Pattern M1914 (P14) Enfield sniper variant fitted with telescopic sight - .303 British]] | ||
| − | [[Image:Bf1918p141.JPG|thumb|none|450px|The Pattern 1914 Enfield in Battlefield 1918.]] | + | [[Image:Bf1918p141.JPG|thumb|none|450px|The Pattern 1914 Enfield in Battlefield: 1918.]] |
[[Image:Bf1918p143.JPG|thumb|none|450px|Third Person view of the Pattern 1914 Enfield.]] | [[Image:Bf1918p143.JPG|thumb|none|450px|Third Person view of the Pattern 1914 Enfield.]] | ||
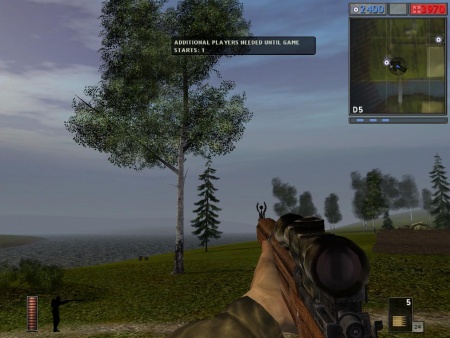
| − | [[Image:Bf1918p14scope1.JPG|thumb|none|450px|The scoped Pattern 1914 Enfield in Battlefield 1918.]] | + | [[Image:Bf1918p14scope1.JPG|thumb|none|450px|The scoped Pattern 1914 Enfield in Battlefield: 1918.]] |
[[Image:Bf1918p14scope3.JPG|thumb|none|450px|Third Person view of the scoped Pattern 1914 Enfield.]] | [[Image:Bf1918p14scope3.JPG|thumb|none|450px|Third Person view of the scoped Pattern 1914 Enfield.]] | ||
| Line 42: | Line 42: | ||
The [[Mauser_Rifle_Series#1893_Spanish_Mauser|Turkish Mauser M1893]] appears as the standard issue rifle for the Ottoman forces. It is modeled in the game after the original M1893 rifles converted to 7.92x57mm in the 1930's. | The [[Mauser_Rifle_Series#1893_Spanish_Mauser|Turkish Mauser M1893]] appears as the standard issue rifle for the Ottoman forces. It is modeled in the game after the original M1893 rifles converted to 7.92x57mm in the 1930's. | ||
[[Image:Turk_Mauser_M1893.jpg|thumb|none|450px|Turkish Mauser M1893/33 - 7.65x53mm Mauser]] | [[Image:Turk_Mauser_M1893.jpg|thumb|none|450px|Turkish Mauser M1893/33 - 7.65x53mm Mauser]] | ||
| − | [[Image:Bf1918m931.JPG|thumb|none|450px|The Turkish Mauser M1893 in Battlefield 1918.]] | + | [[Image:Bf1918m931.JPG|thumb|none|450px|The Turkish Mauser M1893 in Battlefield: 1918.]] |
[[Image:Bf1918m933.JPG|thumb|none|450px|Third Person view of the Turkish Mauser M1893.]] | [[Image:Bf1918m933.JPG|thumb|none|450px|Third Person view of the Turkish Mauser M1893.]] | ||
| − | [[Image:Bf1918m93scope1.JPG|thumb|none|450px|The scoped Turkish Mauser M1893 in Battlefield 1918.]] | + | [[Image:Bf1918m93scope1.JPG|thumb|none|450px|The scoped Turkish Mauser M1893 in Battlefield: 1918.]] |
[[Image:Bf1918m93scope3.JPG|thumb|none|450px|Third Person view of the scoped Turkish Mauser M1893.]] | [[Image:Bf1918m93scope3.JPG|thumb|none|450px|Third Person view of the scoped Turkish Mauser M1893.]] | ||
| Line 51: | Line 51: | ||
[[Image:Belgian_1889_Mauser.jpg|thumb|none|450px|Belgian Mauser M1889 - 7.65x53mm Mauser]] | [[Image:Belgian_1889_Mauser.jpg|thumb|none|450px|Belgian Mauser M1889 - 7.65x53mm Mauser]] | ||
[[Image:Belgian_1889_carbine.jpg|thumb|none|450px|Belgian Mauser M1889 Carbine - 7.65x53mm Mauser]] | [[Image:Belgian_1889_carbine.jpg|thumb|none|450px|Belgian Mauser M1889 Carbine - 7.65x53mm Mauser]] | ||
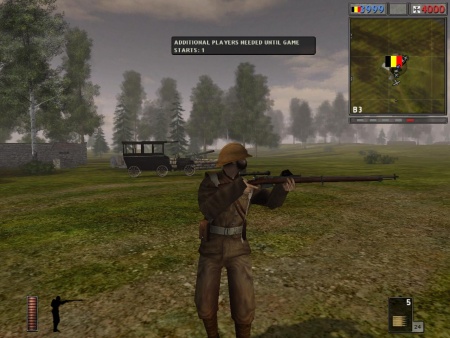
| − | [[Image:Bf1918m891.JPG|thumb|none|450px|The Belgian Mauser M1889 in Battlefield 1918.]] | + | [[Image:Bf1918m891.JPG|thumb|none|450px|The Belgian Mauser M1889 in Battlefield: 1918.]] |
[[Image:Bf1918m893.JPG|thumb|none|450px|Third Person view of the Belgian Mauser M1889.]] | [[Image:Bf1918m893.JPG|thumb|none|450px|Third Person view of the Belgian Mauser M1889.]] | ||
| − | [[Image:Bf1918m89scope1.JPG|thumb|none|450px|The scoped Belgian Mauser M1889 in Battlefield 1918.]] | + | [[Image:Bf1918m89scope1.JPG|thumb|none|450px|The scoped Belgian Mauser M1889 in Battlefield: 1918.]] |
[[Image:Bf1918m89scope3.JPG|thumb|none|450px|Third Person view of the scoped Belgian Mauser M1889.]] | [[Image:Bf1918m89scope3.JPG|thumb|none|450px|Third Person view of the scoped Belgian Mauser M1889.]] | ||
| − | [[Image:Bf1918m89car1.JPG|thumb|none|450px|The Belgian Mauser M1889 carbine in Battlefield 1918.]] | + | [[Image:Bf1918m89car1.JPG|thumb|none|450px|The Belgian Mauser M1889 carbine in Battlefield: 1918.]] |
[[Image:Bf1918m89car3.JPG|thumb|none|450px|Third Person view of the Belgian Mauser M1889 carbine.]] | [[Image:Bf1918m89car3.JPG|thumb|none|450px|Third Person view of the Belgian Mauser M1889 carbine.]] | ||
| Line 61: | Line 61: | ||
The [[Mosin_Nagant_Rifle|Mosin-Nagant M1891]] appears as the standard issue rifle for the Imperial Russian forces. The in-game model appears to be a mixture of the M1891 infantry rifle and the dragoon rifle. | The [[Mosin_Nagant_Rifle|Mosin-Nagant M1891]] appears as the standard issue rifle for the Imperial Russian forces. The in-game model appears to be a mixture of the M1891 infantry rifle and the dragoon rifle. | ||
[[Image:1891-Mosin-Nagant.jpg|thumb|none|450px|Full-length, Imperial Russian Mosin Nagant M1891 - 7.62x54mmR ]] | [[Image:1891-Mosin-Nagant.jpg|thumb|none|450px|Full-length, Imperial Russian Mosin Nagant M1891 - 7.62x54mmR ]] | ||
| − | [[Image:Bf1918mosin1.JPG|thumb|none|450px|The Mosin-Nagant M1891 in Battlefield 1918.]] | + | [[Image:Bf1918mosin1.JPG|thumb|none|450px|The Mosin-Nagant M1891 in Battlefield: 1918.]] |
[[Image:Bf1918mosin3.JPG|thumb|none|450px|Third Person view of the Mosin-Nagant M1891.]] | [[Image:Bf1918mosin3.JPG|thumb|none|450px|Third Person view of the Mosin-Nagant M1891.]] | ||
| − | [[Image:Bf1918mosinscope1.JPG|thumb|none|450px|The scoped Mosin-Nagant M1891 in Battlefield 1918. Note the globe front sight and PU scope which was not introduced until years after the war.]] | + | [[Image:Bf1918mosinscope1.JPG|thumb|none|450px|The scoped Mosin-Nagant M1891 in Battlefield: 1918. Note the globe front sight and PU scope which was not introduced until years after the war.]] |
[[Image:Bf1918mosinscope3.JPG|thumb|none|450px|Third Person view of the scoped Mosin-Nagant M1891.]] | [[Image:Bf1918mosinscope3.JPG|thumb|none|450px|Third Person view of the scoped Mosin-Nagant M1891.]] | ||
| Line 71: | Line 71: | ||
[[Image:SteyrM95Short.jpg|thumb|none|450px|Steyr M1895 Short Rifle - 8x50mmR Mannlicher]] | [[Image:SteyrM95Short.jpg|thumb|none|450px|Steyr M1895 Short Rifle - 8x50mmR Mannlicher]] | ||
[[Image:Mannlicher1895sniper.JPG|thumb|none|450px|Scoped Steyr M1895 Rifle - 8x50mmR Mannlicher]] | [[Image:Mannlicher1895sniper.JPG|thumb|none|450px|Scoped Steyr M1895 Rifle - 8x50mmR Mannlicher]] | ||
| − | [[Image:Bf1918m951.JPG|thumb|none|450px|The Steyr-Mannlicher M1895 in Battlefield 1918.]] | + | [[Image:Bf1918m951.JPG|thumb|none|450px|The Steyr-Mannlicher M1895 in Battlefield: 1918.]] |
[[Image:Bf1918m953.JPG|thumb|none|450px|Third Person view of the Steyr-Mannlicher M1895.]] | [[Image:Bf1918m953.JPG|thumb|none|450px|Third Person view of the Steyr-Mannlicher M1895.]] | ||
| − | [[Image:Bf1918m95scope1.JPG|thumb|none|450px|The scoped Steyr-Mannlicher M1895 in Battlefield 1918.]] | + | [[Image:Bf1918m95scope1.JPG|thumb|none|450px|The scoped Steyr-Mannlicher M1895 in Battlefield: 1918.]] |
[[Image:Bf1918m95scope3.JPG|thumb|none|450px|Third Person view of the scoped Steyr-Mannlicher M1895.]] | [[Image:Bf1918m95scope3.JPG|thumb|none|450px|Third Person view of the scoped Steyr-Mannlicher M1895.]] | ||
| − | [[Image:Bf1918m95car1.JPG|thumb|none|450px|The Steyr-Mannlicher M1895 carbine in Battlefield 1918.]] | + | [[Image:Bf1918m95car1.JPG|thumb|none|450px|The Steyr-Mannlicher M1895 carbine in Battlefield: 1918.]] |
[[Image:Bf1918m95car3.JPG|thumb|none|450px|Third Person view of the Steyr-Mannlicher M1895 carbine.]] | [[Image:Bf1918m95car3.JPG|thumb|none|450px|Third Person view of the Steyr-Mannlicher M1895 carbine.]] | ||
| Line 83: | Line 83: | ||
[[File:CarcanoM91-38ShortRifle.jpg|thumb|none|450px|Carcano M1891/38 Short Rifle - 6.5x52mm]] | [[File:CarcanoM91-38ShortRifle.jpg|thumb|none|450px|Carcano M1891/38 Short Rifle - 6.5x52mm]] | ||
[[File:Carcanosniper.jpg |thumb|none|450px|Scoped Carcano M1891 Rifle - 6.5x52mm]] | [[File:Carcanosniper.jpg |thumb|none|450px|Scoped Carcano M1891 Rifle - 6.5x52mm]] | ||
| − | [[Image:Bf1918carcano1.JPG|thumb|none|450px|The Carcano M1891 in Battlefield 1918.]] | + | [[Image:Bf1918carcano1.JPG|thumb|none|450px|The Carcano M1891 in Battlefield: 1918.]] |
[[Image:Bf1918carcano3.JPG|thumb|none|450px|Third Person view of the Carcano M1891. Note the bent bolt handle]] | [[Image:Bf1918carcano3.JPG|thumb|none|450px|Third Person view of the Carcano M1891. Note the bent bolt handle]] | ||
| − | [[Image:Bf1918carcanoscope1.JPG|thumb|none|450px|The scoped Carcano M1891 in Battlefield 1918.]] | + | [[Image:Bf1918carcanoscope1.JPG|thumb|none|450px|The scoped Carcano M1891 in Battlefield: 1918.]] |
[[Image:Bf1918carcanoscope3.JPG|thumb|none|450px|Third Person view of the scoped Carcano M1891.]] | [[Image:Bf1918carcanoscope3.JPG|thumb|none|450px|Third Person view of the scoped Carcano M1891.]] | ||
| − | [[Image:Bf1918carcanocar1.JPG|thumb|none|450px|The Carcano M1891 carbine in Battlefield 1918.]] | + | [[Image:Bf1918carcanocar1.JPG|thumb|none|450px|The Carcano M1891 carbine in Battlefield: 1918.]] |
[[Image:Bf1918carcanocar3.JPG|thumb|none|450px|Third Person view of the Carcano M1891 carbine. Note how it appears to be the 1891/38 variant which would make it anachronistic for World War I.]] | [[Image:Bf1918carcanocar3.JPG|thumb|none|450px|Third Person view of the Carcano M1891 carbine. Note how it appears to be the 1891/38 variant which would make it anachronistic for World War I.]] | ||
| Line 93: | Line 93: | ||
The [[Mauser_Rifle_Series#Gewehr_1888|Karabiner 88]] appears in the engineer class of the Imperial German and Ottoman forces and acts as a secondary rifle for the respective armies. | The [[Mauser_Rifle_Series#Gewehr_1888|Karabiner 88]] appears in the engineer class of the Imperial German and Ottoman forces and acts as a secondary rifle for the respective armies. | ||
[[Image:Karabiner88.jpg|thumb|none|450px|Karabiner 1888 - 7.92x57 mm]] | [[Image:Karabiner88.jpg|thumb|none|450px|Karabiner 1888 - 7.92x57 mm]] | ||
| − | [[Image:Bf1918k881.JPG|thumb|none|450px|The Karabiner 88 in Battlefield 1918.]] | + | [[Image:Bf1918k881.JPG|thumb|none|450px|The Karabiner 88 in Battlefield: 1918.]] |
[[Image:Bf1918k883.JPG|thumb|none|450px|Third Person view of the Karabiner 88.]] | [[Image:Bf1918k883.JPG|thumb|none|450px|Third Person view of the Karabiner 88.]] | ||
| Line 99: | Line 99: | ||
The [[Berthier_Mle_1916#Fusil_Mod.C3.A8le_1916_Carabine|Berthier M1916 Carbine]] appears in the engineer class of the French forces and acts as a secondary rifle for the French. | The [[Berthier_Mle_1916#Fusil_Mod.C3.A8le_1916_Carabine|Berthier M1916 Carbine]] appears in the engineer class of the French forces and acts as a secondary rifle for the French. | ||
[[Image:Bert-c92_70.jpg|thumb|none|450px|Berthier Model 1916 carbine - 8x50Rmm]] | [[Image:Bert-c92_70.jpg|thumb|none|450px|Berthier Model 1916 carbine - 8x50Rmm]] | ||
| − | [[Image:Bf1918berthier1.JPG|thumb|none|450px|The Berthier carbine in Battlefield 1918.]] | + | [[Image:Bf1918berthier1.JPG|thumb|none|450px|The Berthier carbine in Battlefield: 1918.]] |
[[Image:Bf1918berthier3.JPG|thumb|none|450px|Third Person view of the Berthier M1916 carbine.]] | [[Image:Bf1918berthier3.JPG|thumb|none|450px|Third Person view of the Berthier M1916 carbine.]] | ||
| Line 105: | Line 105: | ||
The [[Lebel_1886#R.S.C._Model_1917|RSC M1917]] semi-automatic rifle appears in several maps featuring France set late in the war. It is powerful and accurate but limited to a 5 round magazine. | The [[Lebel_1886#R.S.C._Model_1917|RSC M1917]] semi-automatic rifle appears in several maps featuring France set late in the war. It is powerful and accurate but limited to a 5 round magazine. | ||
[[Image:R.S.C. Model 1917.jpg|thumb|450px|none|R.S.C. Model 1917 - 8x50Rmm]] | [[Image:R.S.C. Model 1917.jpg|thumb|450px|none|R.S.C. Model 1917 - 8x50Rmm]] | ||
| − | [[Image:Bf1918rsc1.JPG|thumb|none|450px|The RSC M1917 in Battlefield 1918.]] | + | [[Image:Bf1918rsc1.JPG|thumb|none|450px|The RSC M1917 in Battlefield: 1918.]] |
[[Image:Bf1918rsc3.JPG|thumb|none|450px|Third Person view of the RSC M1917.]] | [[Image:Bf1918rsc3.JPG|thumb|none|450px|Third Person view of the RSC M1917.]] | ||
| Line 111: | Line 111: | ||
The [[Browning Auto-5]] is the shotgun given to British Commonwealth and American forces where it is available for pickup in certain maps. | The [[Browning Auto-5]] is the shotgun given to British Commonwealth and American forces where it is available for pickup in certain maps. | ||
[[Image:RemingtonRiot11.jpg|thumb|450px|none|Browning Auto-5 - 12 Gauge]] | [[Image:RemingtonRiot11.jpg|thumb|450px|none|Browning Auto-5 - 12 Gauge]] | ||
| − | [[Image:Bf1918auto51.JPG|thumb|none|450px|The Browning Auto-5 in Battlefield 1918.]] | + | [[Image:Bf1918auto51.JPG|thumb|none|450px|The Browning Auto-5 in Battlefield: 1918.]] |
[[Image:Bf1918auto52.JPG|thumb|none|450px|Third Person view of the Browning Auto-5.]] | [[Image:Bf1918auto52.JPG|thumb|none|450px|Third Person view of the Browning Auto-5.]] | ||
| Line 117: | Line 117: | ||
The [[Mauser 1918 T-Gewehr|Mauser M1918 T-Gewehr]] appears in later maps of the European theatre where it is available for pickup where it is highly effective against tanks and armored vehicles. | The [[Mauser 1918 T-Gewehr|Mauser M1918 T-Gewehr]] appears in later maps of the European theatre where it is available for pickup where it is highly effective against tanks and armored vehicles. | ||
[[Image:Tankgewehr1918.jpg|thumb|none|450px|Mauser M1918 Tank Gewehr - 13.2mm TuF]] | [[Image:Tankgewehr1918.jpg|thumb|none|450px|Mauser M1918 Tank Gewehr - 13.2mm TuF]] | ||
| − | [[Image:Bf1918tankgewehr1.JPG|thumb|none|450px|The Mauser M1918 Tank Gewehr in Battlefield 1918.]] | + | [[Image:Bf1918tankgewehr1.JPG|thumb|none|450px|The Mauser M1918 Tank Gewehr in Battlefield: 1918.]] |
[[Image:Bf1918tankgewehr3.JPG|thumb|none|450px|Third Person view of the Mauser M1918 Tank Gewehr.]] | [[Image:Bf1918tankgewehr3.JPG|thumb|none|450px|Third Person view of the Mauser M1918 Tank Gewehr.]] | ||
| Line 123: | Line 123: | ||
The [[Jezail musket]] is available for pickup in several maps featuring the Ottoman empire and is very accurate and powerful with a cost of long reload time and single shot capacity. | The [[Jezail musket]] is available for pickup in several maps featuring the Ottoman empire and is very accurate and powerful with a cost of long reload time and single shot capacity. | ||
[[Image:Jezail1.jpg|thumb|none|450px|Jezail Musket]] | [[Image:Jezail1.jpg|thumb|none|450px|Jezail Musket]] | ||
| − | [[Image:Bf1918musket1.JPG|thumb|none|450px|The Jezail musket in Battlefield 1918.]] | + | [[Image:Bf1918musket1.JPG|thumb|none|450px|The Jezail musket in Battlefield: 1918.]] |
[[Image:Bf1918musket2.JPG|thumb|none|450px|Third Person view of the Jezail.]] | [[Image:Bf1918musket2.JPG|thumb|none|450px|Third Person view of the Jezail.]] | ||
| Line 131: | Line 131: | ||
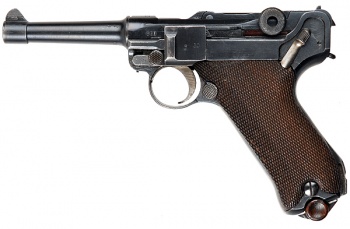
The [[Luger|Luger P08]] is the sidearm of the Imperial German forces and issued mainly to the officer class. | The [[Luger|Luger P08]] is the sidearm of the Imperial German forces and issued mainly to the officer class. | ||
[[Image:P08Luger1917.jpg|thumb|none|350px|Luger P08 - 9x19mm]] | [[Image:P08Luger1917.jpg|thumb|none|350px|Luger P08 - 9x19mm]] | ||
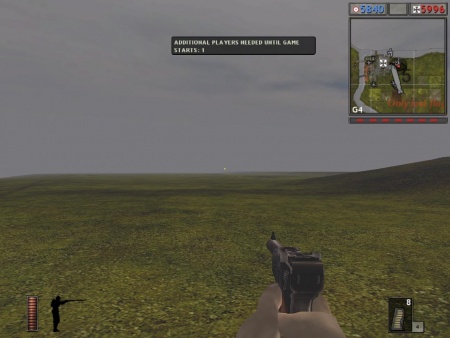
| − | [[Image:Bf1918luger1.JPG|thumb|none|450px|The Luger P08 in Battlefield 1918.]] | + | [[Image:Bf1918luger1.JPG|thumb|none|450px|The Luger P08 in Battlefield: 1918.]] |
[[Image:Bf1918luger3.JPG|thumb|none|450px|Third Person view of the Luger P08.]] | [[Image:Bf1918luger3.JPG|thumb|none|450px|Third Person view of the Luger P08.]] | ||
| Line 137: | Line 137: | ||
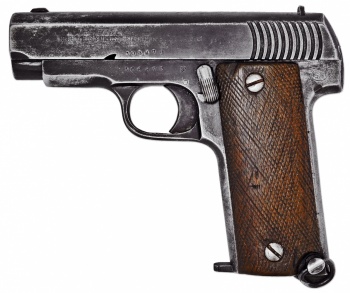
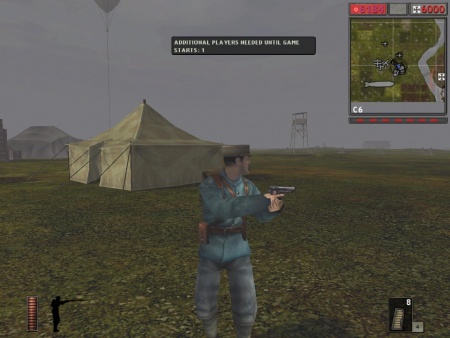
The [[Star_Ruby_Pistol|Star Ruby M1915]] is the sidearm of the French forces and issued mainly to the officer class. | The [[Star_Ruby_Pistol|Star Ruby M1915]] is the sidearm of the French forces and issued mainly to the officer class. | ||
[[Image:French-Pistol-Ruby-M1915-left.jpg|thumb|none|350px|Star Ruby Model 1915 - .32 ACP]] | [[Image:French-Pistol-Ruby-M1915-left.jpg|thumb|none|350px|Star Ruby Model 1915 - .32 ACP]] | ||
| − | [[Image:Bf1918ruby1.JPG|thumb|none|450px|The Star Ruby in Battlefield 1918.]] | + | [[Image:Bf1918ruby1.JPG|thumb|none|450px|The Star Ruby in Battlefield: 1918.]] |
[[Image:Bf1918ruby3.JPG|thumb|none|450px|Third Person view of the Star Ruby.]] | [[Image:Bf1918ruby3.JPG|thumb|none|450px|Third Person view of the Star Ruby.]] | ||
| Line 143: | Line 143: | ||
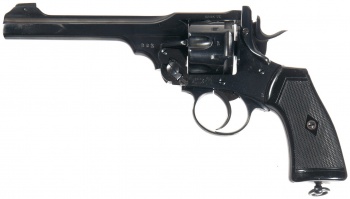
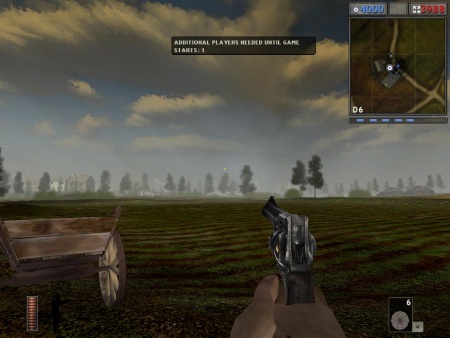
The [[Webley_Revolvers#Webley_.455_Mk_VI|Webley Mk. VI]] is the sidearm of the British commonwealth forces and issued mainly to the officer class. | The [[Webley_Revolvers#Webley_.455_Mk_VI|Webley Mk. VI]] is the sidearm of the British commonwealth forces and issued mainly to the officer class. | ||
[[File:Webley Mk VI.jpg|thumb|none|350px|Webley Mk. VI - .455 Webley]] | [[File:Webley Mk VI.jpg|thumb|none|350px|Webley Mk. VI - .455 Webley]] | ||
| − | [[Image:Bf1918webley1.JPG|thumb|none|450px|The Webley Mk. VI in Battlefield 1918.]] | + | [[Image:Bf1918webley1.JPG|thumb|none|450px|The Webley Mk. VI in Battlefield: 1918.]] |
[[Image:Bf1918webley3.JPG|thumb|none|450px|Third Person view of the Webley Mk. VI.]] | [[Image:Bf1918webley3.JPG|thumb|none|450px|Third Person view of the Webley Mk. VI.]] | ||
| Line 149: | Line 149: | ||
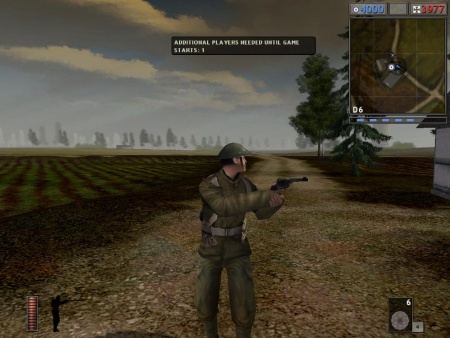
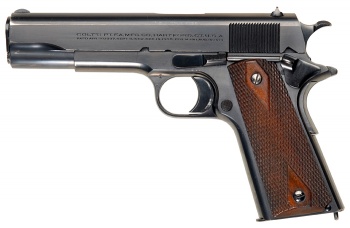
The [[Colt M1911]] is the sidearms of the American forces and issued mainly to the officer class. | The [[Colt M1911]] is the sidearms of the American forces and issued mainly to the officer class. | ||
[[Image:COLTM1911 1913.jpg|thumb|350px|none|Colt M1911 - .45 ACP]] | [[Image:COLTM1911 1913.jpg|thumb|350px|none|Colt M1911 - .45 ACP]] | ||
| − | [[Image:Bf191819111.JPG|thumb|none|450px|The Colt M1911 in Battlefield 1918.]] | + | [[Image:Bf191819111.JPG|thumb|none|450px|The Colt M1911 in Battlefield: 1918.]] |
[[Image:Bf191819113.JPG|thumb|none|450px|Third Person view of the Colt M1911.]] | [[Image:Bf191819113.JPG|thumb|none|450px|Third Person view of the Colt M1911.]] | ||
| Line 155: | Line 155: | ||
The [[Mauser C96]] is the sidearm of the Ottoman forces issued to the officer class and appears in several special classes of the Imperial German forces. | The [[Mauser C96]] is the sidearm of the Ottoman forces issued to the officer class and appears in several special classes of the Imperial German forces. | ||
[[Image:C96Pistol.jpg|thumb|none|350px|Mauser C96 - 7.63x25mm Mauser]] | [[Image:C96Pistol.jpg|thumb|none|350px|Mauser C96 - 7.63x25mm Mauser]] | ||
| − | [[Image:Bf1918c961.JPG|thumb|none|450px|The Mauser C96 in Battlefield 1918.]] | + | [[Image:Bf1918c961.JPG|thumb|none|450px|The Mauser C96 in Battlefield: 1918.]] |
[[Image:Bf1918c963.JPG|thumb|none|450px|Third Person view of the Mauser C96.]] | [[Image:Bf1918c963.JPG|thumb|none|450px|Third Person view of the Mauser C96.]] | ||
| Line 161: | Line 161: | ||
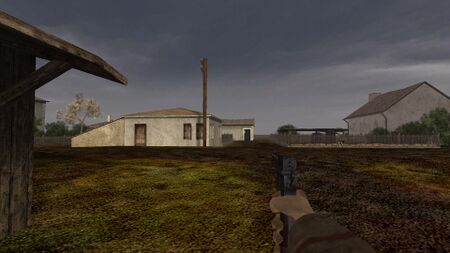
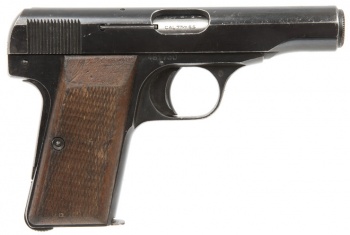
The [[FN_Model_1910/1922|FN M1910]] is the sidearm of the Belgian forces and issued to the officer class. | The [[FN_Model_1910/1922|FN M1910]] is the sidearm of the Belgian forces and issued to the officer class. | ||
[[Image:Browning 1910.jpg|thumb|none|350px|FN Model 1910 with wood grips - .380 ACP]] | [[Image:Browning 1910.jpg|thumb|none|350px|FN Model 1910 with wood grips - .380 ACP]] | ||
| − | [[Image:Bf1918fn19101.JPG|thumb|none|450px|The FN M1910 in Battlefield 1918.]] | + | [[Image:Bf1918fn19101.JPG|thumb|none|450px|The FN M1910 in Battlefield: 1918.]] |
[[Image:Bf1918fn19103.JPG|thumb|none|450px|Third Person view of the FN M1910.]] | [[Image:Bf1918fn19103.JPG|thumb|none|450px|Third Person view of the FN M1910.]] | ||
| Line 167: | Line 167: | ||
The [[Nagant_Revolver|Nagant M1895 revolver]] is the sidearm of the Imperial Russian forces and issued to the officer class. | The [[Nagant_Revolver|Nagant M1895 revolver]] is the sidearm of the Imperial Russian forces and issued to the officer class. | ||
[[Image:Nagant-1895.jpg|thumb|none|350px|Nagant M1895 Revolver - 7.62x38mm]] | [[Image:Nagant-1895.jpg|thumb|none|350px|Nagant M1895 Revolver - 7.62x38mm]] | ||
| − | [[Image:Bf1918nagant1.JPG|thumb|none|450px|The Nagant M1895 in Battlefield 1918.]] | + | [[Image:Bf1918nagant1.JPG|thumb|none|450px|The Nagant M1895 in Battlefield: 1918.]] |
[[Image:Bf1918nagant3.JPG|thumb|none|450px|Third Person view of the Nagant M1895.]] | [[Image:Bf1918nagant3.JPG|thumb|none|450px|Third Person view of the Nagant M1895.]] | ||
| Line 173: | Line 173: | ||
The [[Steyr 1912]] is the sidearm of the Austro-Hungarian forces and issued to the officer class. | The [[Steyr 1912]] is the sidearm of the Austro-Hungarian forces and issued to the officer class. | ||
[[Image:SteyerHahn1913Pistol.jpg|thumb|none|350px|Steyr Model 1912 - 9x23mm Steyr]] | [[Image:SteyerHahn1913Pistol.jpg|thumb|none|350px|Steyr Model 1912 - 9x23mm Steyr]] | ||
| − | [[Image:Bf1918steyr1.JPG|thumb|none|450px|The Steyr M1912 in Battlefield 1918.]] | + | [[Image:Bf1918steyr1.JPG|thumb|none|450px|The Steyr M1912 in Battlefield: 1918.]] |
[[Image:Bf1918steyr3.JPG|thumb|none|450px|Third Person view of the Steyr M1912.]] | [[Image:Bf1918steyr3.JPG|thumb|none|450px|Third Person view of the Steyr M1912.]] | ||
| Line 179: | Line 179: | ||
The [[Glisenti_Model_1910|Glisenti M1910]] is the sidearm of the Italian forces and issued to the officer class. | The [[Glisenti_Model_1910|Glisenti M1910]] is the sidearm of the Italian forces and issued to the officer class. | ||
[[Image:GlisentiM1910.jpg|thumb|none|350px|Glisenti Model 1910 - 9mm Glisenti]] | [[Image:GlisentiM1910.jpg|thumb|none|350px|Glisenti Model 1910 - 9mm Glisenti]] | ||
| − | [[Image:Bf1918gilsenti1.JPG|thumb|none|450px|The Glisenti M1910 in Battlefield 1918.]] | + | [[Image:Bf1918gilsenti1.JPG|thumb|none|450px|The Glisenti M1910 in Battlefield: 1918.]] |
[[Image:Bf1918gilsenti3.JPG|thumb|none|450px|Third Person view of the Glisenti M1910.]] | [[Image:Bf1918gilsenti3.JPG|thumb|none|450px|Third Person view of the Glisenti M1910.]] | ||
| Line 187: | Line 187: | ||
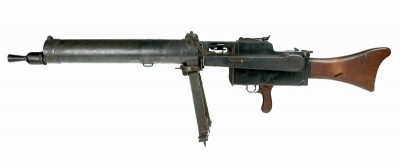
The [[MG08#Maxim_MG08.2F15|MG08/15]] acts as the standard light machine gun for the Imperial German, Austro-Hungarian, and Ottoman forces. | The [[MG08#Maxim_MG08.2F15|MG08/15]] acts as the standard light machine gun for the Imperial German, Austro-Hungarian, and Ottoman forces. | ||
[[Image:Maxim MG08-15.jpg|thumb|none|400px|Maxim MG08/15 - 7.92x57mm Mauser]] | [[Image:Maxim MG08-15.jpg|thumb|none|400px|Maxim MG08/15 - 7.92x57mm Mauser]] | ||
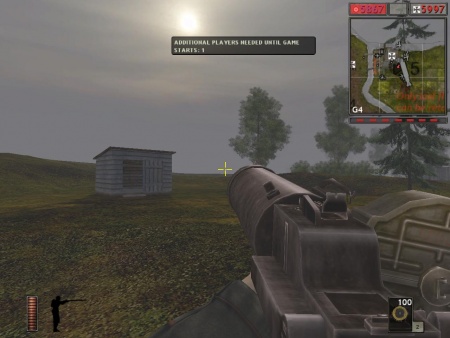
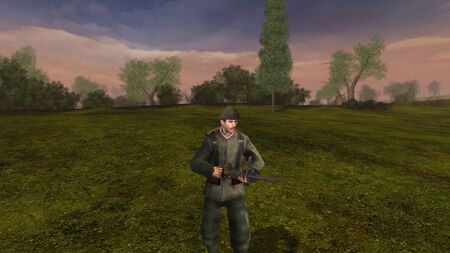
| − | [[Image:Bf1918mg08151.JPG|thumb|none|450px|The MG08/15 in Battlefield 1918.]] | + | [[Image:Bf1918mg08151.JPG|thumb|none|450px|The MG08/15 in Battlefield: 1918.]] |
[[Image:Bf1918mg08153.JPG|thumb|none|450px|Third Person view of the MG08/15.]] | [[Image:Bf1918mg08153.JPG|thumb|none|450px|Third Person view of the MG08/15.]] | ||
| Line 193: | Line 193: | ||
The [[Parabellum MG14]] is primarily seen mounted on German aircraft but can also be seen independently on a couple European maps. | The [[Parabellum MG14]] is primarily seen mounted on German aircraft but can also be seen independently on a couple European maps. | ||
[[Image:Parabellum-mg14.jpg|thumb|none|400px|Parabellum MG14 - 7.92x57mm Mauser]] | [[Image:Parabellum-mg14.jpg|thumb|none|400px|Parabellum MG14 - 7.92x57mm Mauser]] | ||
| − | [[Image:Bf1918mg15.JPG |thumb|none|450px|The Parabellum MG14 in Battlefield 1918.]] | + | [[Image:Bf1918mg15.JPG |thumb|none|450px|The Parabellum MG14 in Battlefield: 1918.]] |
[[Image:Bf1918mg152.JPG |thumb|none|450px|Manning the Parabellum MG14.]] | [[Image:Bf1918mg152.JPG |thumb|none|450px|Manning the Parabellum MG14.]] | ||
| Line 199: | Line 199: | ||
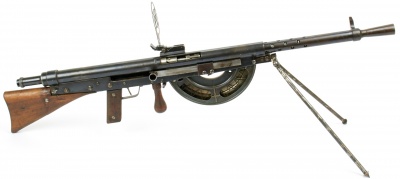
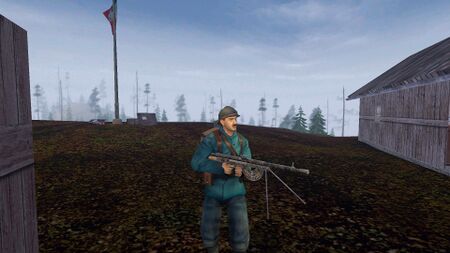
The [[Chauchat|Chauchat M1915]] is the standard light machine gun for the French forces. | The [[Chauchat|Chauchat M1915]] is the standard light machine gun for the French forces. | ||
[[Image:Chauchat.jpg|thumb|none|400px|Chauchat M1915 Light Machine Gun - 8x50mmR]] | [[Image:Chauchat.jpg|thumb|none|400px|Chauchat M1915 Light Machine Gun - 8x50mmR]] | ||
| − | [[Image:Bf1918chauchat1.JPG|thumb|none|450px|The Chauchat M1915 in Battlefield 1918.]] | + | [[Image:Bf1918chauchat1.JPG|thumb|none|450px|The Chauchat M1915 in Battlefield: 1918.]] |
[[Image:Bf1918chauchat3.JPG|thumb|none|450px|Third Person view of the Chauchat M1915.]] | [[Image:Bf1918chauchat3.JPG|thumb|none|450px|Third Person view of the Chauchat M1915.]] | ||
| Line 205: | Line 205: | ||
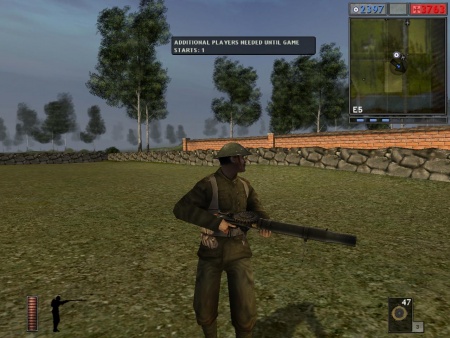
The [[Lewis Gun]] is the standard light machine gun for the British commonwealth forces. | The [[Lewis Gun]] is the standard light machine gun for the British commonwealth forces. | ||
[[Image:Lewis gun.JPG|thumb|none|400px|Lewis Gun Mk. I - .303 British]] | [[Image:Lewis gun.JPG|thumb|none|400px|Lewis Gun Mk. I - .303 British]] | ||
| − | [[Image:Bf1918lewis1.JPG|thumb|none|450px|The Lewis gun Mk. I in Battlefield 1918.]] | + | [[Image:Bf1918lewis1.JPG|thumb|none|450px|The Lewis gun Mk. I in Battlefield: 1918.]] |
[[Image:Bf1918lewis3.JPG|thumb|none|450px|Third Person view of the Lewis gun Mk. I.]] | [[Image:Bf1918lewis3.JPG|thumb|none|450px|Third Person view of the Lewis gun Mk. I.]] | ||
| Line 211: | Line 211: | ||
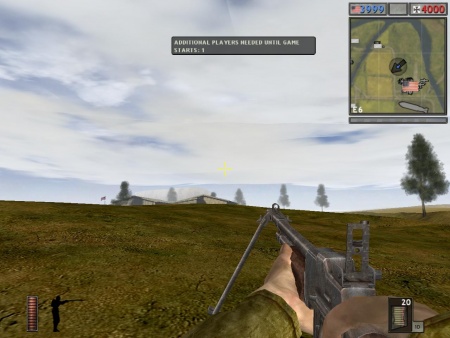
The [[BAR|BAR M1918]] is the standard light machine gun for the American forces. | The [[BAR|BAR M1918]] is the standard light machine gun for the American forces. | ||
[[Image:BARearlymodel.jpg|thumb|400px|none|M1918 Browning Automatic Rifle - .30-06]] | [[Image:BARearlymodel.jpg|thumb|400px|none|M1918 Browning Automatic Rifle - .30-06]] | ||
| − | [[Image:Bf1918bar1.JPG|thumb|none|450px|The BAR M1918 in Battlefield 1918.]] | + | [[Image:Bf1918bar1.JPG|thumb|none|450px|The BAR M1918 in Battlefield: 1918.]] |
[[Image:Bf1918bar3.JPG|thumb|none|450px|Third Person view of the BAR M1918.]] | [[Image:Bf1918bar3.JPG|thumb|none|450px|Third Person view of the BAR M1918.]] | ||
| Line 217: | Line 217: | ||
The [[Madsen_machine_gun|Madsen M1902]] is the standard light machine gun for the Belgian and Imperial Russian forces. | The [[Madsen_machine_gun|Madsen M1902]] is the standard light machine gun for the Belgian and Imperial Russian forces. | ||
[[Image:MadsenM1902.jpg|thumb|none|400px|Danish Madsen Model 1902]] | [[Image:MadsenM1902.jpg|thumb|none|400px|Danish Madsen Model 1902]] | ||
| − | [[Image:Bf1918madsen1.JPG|thumb|none|450px|The Madsen M1902 in Battlefield 1918.]] | + | [[Image:Bf1918madsen1.JPG|thumb|none|450px|The Madsen M1902 in Battlefield: 1918.]] |
[[Image:Bf1918madsen3.JPG|thumb|none|450px|Third Person view of the Madsen M1902.]] | [[Image:Bf1918madsen3.JPG|thumb|none|450px|Third Person view of the Madsen M1902.]] | ||
| Line 223: | Line 223: | ||
The [[Fedorov Avtomat|Fedorov Avtomat M1916]] appears in several maps taking place on the Eastern Front and is highly advantageous over the standard bolt-action rifles. | The [[Fedorov Avtomat|Fedorov Avtomat M1916]] appears in several maps taking place on the Eastern Front and is highly advantageous over the standard bolt-action rifles. | ||
[[Image:Fedorovavtomat.jpg|thumb|none|400px|Fedorov Avtomat M1916 - 6.5x50mmSR]] | [[Image:Fedorovavtomat.jpg|thumb|none|400px|Fedorov Avtomat M1916 - 6.5x50mmSR]] | ||
| − | [[Image:Bf1918federov1.JPG|thumb|none|450px|The Fedorov Avtomat M1916 in Battlefield 1918.]] | + | [[Image:Bf1918federov1.JPG|thumb|none|450px|The Fedorov Avtomat M1916 in Battlefield: 1918.]] |
[[Image:Bf1918federov3.JPG|thumb|none|450px|Third Person view of the Fedorov Avtomat M1916.]] | [[Image:Bf1918federov3.JPG|thumb|none|450px|Third Person view of the Fedorov Avtomat M1916.]] | ||
| Line 231: | Line 231: | ||
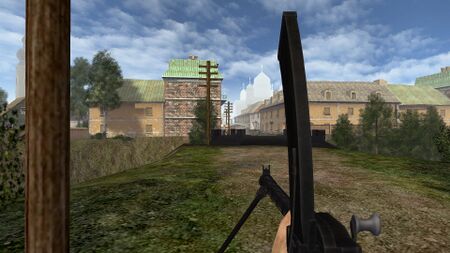
The [[Bergmann_MP18|MP18]] appears in several maps and is very effective clearing out trenches and large numbers of enemy troops. | The [[Bergmann_MP18|MP18]] appears in several maps and is very effective clearing out trenches and large numbers of enemy troops. | ||
[[Image:MP18.JPG|thumb|none|400px|Bergmann MP18 Sub Machine Gun with Drum - 9x19mm]] | [[Image:MP18.JPG|thumb|none|400px|Bergmann MP18 Sub Machine Gun with Drum - 9x19mm]] | ||
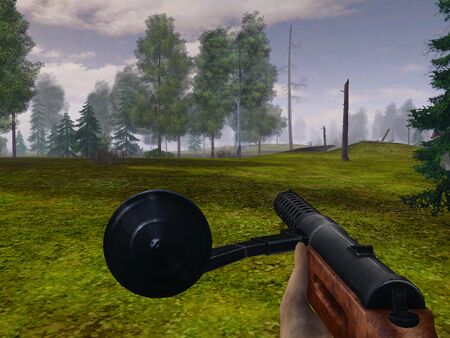
| − | [[Image:Bf1918mp181.JPG|thumb|none|450px|The MP18 in Battlefield 1918.]] | + | [[Image:Bf1918mp181.JPG|thumb|none|450px|The MP18 in Battlefield: 1918.]] |
[[Image:Bf1918mp182.JPG|thumb|none|450px|Third Person view of the MP18.]] | [[Image:Bf1918mp182.JPG|thumb|none|450px|Third Person view of the MP18.]] | ||
| Line 238: | Line 238: | ||
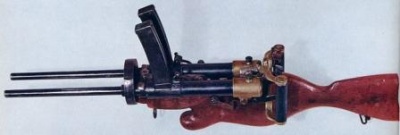
[[Image:VP15a.jpg|thumb|none|400px|Villar-Perosa - 9mm Glisenti]] | [[Image:VP15a.jpg|thumb|none|400px|Villar-Perosa - 9mm Glisenti]] | ||
[[Image:Villar-perosa 1915 4.jpg|thumb|none|400px|Villar-Perosa M1915, fitted with wooden stock for off-hand use - 9 mm Glisenti]] | [[Image:Villar-perosa 1915 4.jpg|thumb|none|400px|Villar-Perosa M1915, fitted with wooden stock for off-hand use - 9 mm Glisenti]] | ||
| − | [[Image:Bf1918villarperosa1.JPG|thumb|none|450px|The Villar-Perosa M1915 in Battlefield 1918.]] | + | [[Image:Bf1918villarperosa1.JPG|thumb|none|450px|The Villar-Perosa M1915 in Battlefield: 1918.]] |
[[Image:Bf1918villarperosa3.JPG|thumb|none|450px|Third Person view of the Villar-Perosa M1915.]] | [[Image:Bf1918villarperosa3.JPG|thumb|none|450px|Third Person view of the Villar-Perosa M1915.]] | ||
| Line 246: | Line 246: | ||
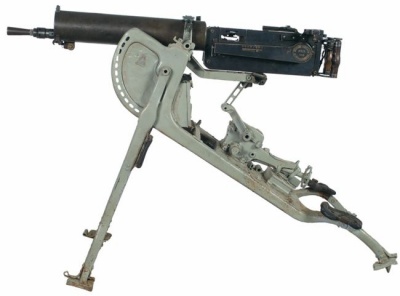
The [[MG08#Maxim_MG08|MG08]] appears as the standard heavy machine gun for the Imperial German forces and also used in some maps by the Austro-Hungarian and Ottoman forces. | The [[MG08#Maxim_MG08|MG08]] appears as the standard heavy machine gun for the Imperial German forces and also used in some maps by the Austro-Hungarian and Ottoman forces. | ||
[[Image:MaximMG08.jpg|thumb|none|400px|MG08 - 7.92x57mm]] | [[Image:MaximMG08.jpg|thumb|none|400px|MG08 - 7.92x57mm]] | ||
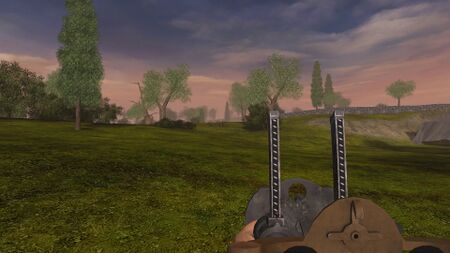
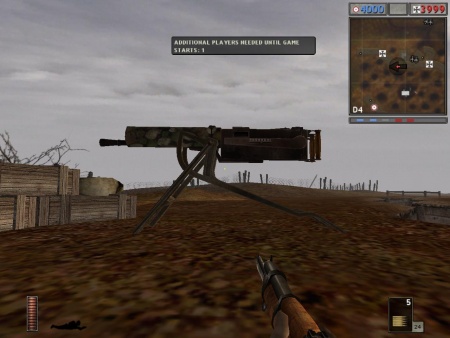
| − | [[Image:Bf1918mg08.JPG|thumb|none|450px|The MG08 in Battlefield 1918.]] | + | [[Image:Bf1918mg08.JPG|thumb|none|450px|The MG08 in Battlefield: 1918.]] |
[[Image:Bf1918mg082.JPG|thumb|none|450px|Manning the MG08.]] | [[Image:Bf1918mg082.JPG|thumb|none|450px|Manning the MG08.]] | ||
| Line 252: | Line 252: | ||
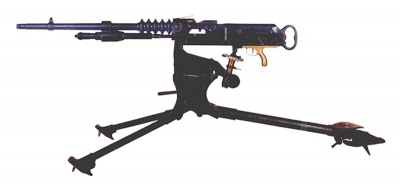
The [[M1914_Hotchkiss_Machine_Gun|Hothkiss M1914]] is the standard heavy machine gun for the French, Belgian, Italian, and American forces. It also appears mounted on several vehicles. | The [[M1914_Hotchkiss_Machine_Gun|Hothkiss M1914]] is the standard heavy machine gun for the French, Belgian, Italian, and American forces. It also appears mounted on several vehicles. | ||
[[Image:M1914Hotchkiss.jpg|thumb|none|400px|Hotchkiss M1914 - 8x50Rmm]] | [[Image:M1914Hotchkiss.jpg|thumb|none|400px|Hotchkiss M1914 - 8x50Rmm]] | ||
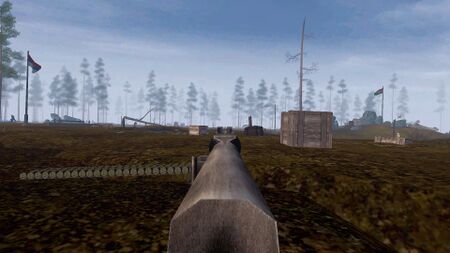
| − | [[Image:Bf1918hotchkiss1.JPG|thumb|none|450px|The Hotchkiss M1914 in Battlefield 1918.]] | + | [[Image:Bf1918hotchkiss1.JPG|thumb|none|450px|The Hotchkiss M1914 in Battlefield: 1918.]] |
[[Image:Bf1918hotchkiss2.JPG|thumb|none|450px|Manning the Hotchkiss M1914.]] | [[Image:Bf1918hotchkiss2.JPG|thumb|none|450px|Manning the Hotchkiss M1914.]] | ||
| Line 258: | Line 258: | ||
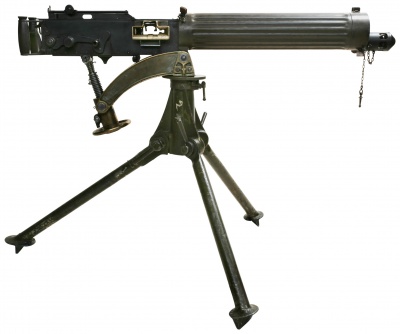
The [[Vickers|Vickers Mk. I]] is the standard heavy machine gun for the British Commonwealth forces. | The [[Vickers|Vickers Mk. I]] is the standard heavy machine gun for the British Commonwealth forces. | ||
[[Image:Vickers_gun.JPG|thumb|none|400px|Vickers Mk. I - .303 British]] | [[Image:Vickers_gun.JPG|thumb|none|400px|Vickers Mk. I - .303 British]] | ||
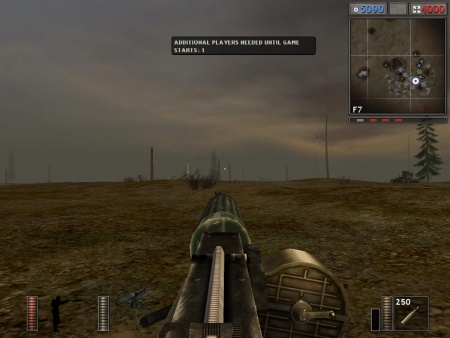
| − | [[Image:Bf1918vickers1.JPG|thumb|none|450px|The Vickers Mk. I in Battlefield 1918.]] | + | [[Image:Bf1918vickers1.JPG|thumb|none|450px|The Vickers Mk. I in Battlefield: 1918.]] |
[[Image:Bf1918vickers2.JPG|thumb|none|450px|Manning the Vickers Mk. I.]] | [[Image:Bf1918vickers2.JPG|thumb|none|450px|Manning the Vickers Mk. I.]] | ||
| Line 264: | Line 264: | ||
The Bergmann MG02 appears as the standard heavy machine gun for the Ottoman forces and seen on several European maps used by the Imperial German forces. | The Bergmann MG02 appears as the standard heavy machine gun for the Ottoman forces and seen on several European maps used by the Imperial German forces. | ||
[[Image:BergmannMG02.jpg|thumb|none|400px|MG02 - 7.92x57mm]] | [[Image:BergmannMG02.jpg|thumb|none|400px|MG02 - 7.92x57mm]] | ||
| − | [[Image:Bf1918bergmg02.JPG|thumb|none|450px|The MG02 in Battlefield 1918.]] | + | [[Image:Bf1918bergmg02.JPG|thumb|none|450px|The MG02 in Battlefield: 1918.]] |
[[Image:Bf1918bergmg022.JPG|thumb|none|450px|Manning the MG02.]] | [[Image:Bf1918bergmg022.JPG|thumb|none|450px|Manning the MG02.]] | ||
| Line 270: | Line 270: | ||
The [[Maxim_M1910/30#Maxim_M1910.2F30|Maxim 1910]] is the standard heavy machine gun for the Imperial Russian forces. The weapon can be seen in both with and without the wheel mount and shield. | The [[Maxim_M1910/30#Maxim_M1910.2F30|Maxim 1910]] is the standard heavy machine gun for the Imperial Russian forces. The weapon can be seen in both with and without the wheel mount and shield. | ||
[[Image:Maxim_M1910_30.jpg|thumb|none|400px|Maxim M1910 - 7.62x54Rmm]] | [[Image:Maxim_M1910_30.jpg|thumb|none|400px|Maxim M1910 - 7.62x54Rmm]] | ||
| − | [[Image:Bf1918maxim19101.JPG|thumb|none|450px|The Maxim M1910 in Battlefield 1918.]] | + | [[Image:Bf1918maxim19101.JPG|thumb|none|450px|The Maxim M1910 in Battlefield: 1918.]] |
[[Image:Bf1918maxim19102.JPG|thumb|none|450px|Manning the Maxim M1910. Note the hatch on top of the cooling jacket which indicates post 1941 manufacture making it anachronistic for World War I]] | [[Image:Bf1918maxim19102.JPG|thumb|none|450px|Manning the Maxim M1910. Note the hatch on top of the cooling jacket which indicates post 1941 manufacture making it anachronistic for World War I]] | ||
| Line 276: | Line 276: | ||
The [[Schwarzlose_M1907/24#Specifications|Schwarzlose M1907/12]] is the standard heavy machine gun for the Austro-Hungarian forces. It can be seen both with and without the tripod. | The [[Schwarzlose_M1907/24#Specifications|Schwarzlose M1907/12]] is the standard heavy machine gun for the Austro-Hungarian forces. It can be seen both with and without the tripod. | ||
[[Image:Schwarz_07-12.jpeg|thumb|none|400px|Schwarzlose M1907/12 - 8x50mmR Mannlicher]] | [[Image:Schwarz_07-12.jpeg|thumb|none|400px|Schwarzlose M1907/12 - 8x50mmR Mannlicher]] | ||
| − | [[Image:Bf1918kukmg1.JPG|thumb|none|450px|The Schwarzlose M1907/12 in Battlefield 1918.]] | + | [[Image:Bf1918kukmg1.JPG|thumb|none|450px|The Schwarzlose M1907/12 in Battlefield: 1918.]] |
[[Image:Bf1918kukmg2.JPG|thumb|none|450px|Manning the Schwarzlose M1907/12.]] | [[Image:Bf1918kukmg2.JPG|thumb|none|450px|Manning the Schwarzlose M1907/12.]] | ||
| Line 284: | Line 284: | ||
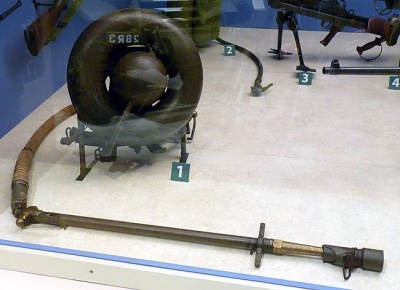
The Flammenwerfer M.16 appears in the service of Imperial German and Austro-Hungarian forces in several maps. | The Flammenwerfer M.16 appears in the service of Imperial German and Austro-Hungarian forces in several maps. | ||
[[Image:01WWIGermanFlameThrower1918.jpg|thumb|none|400px|World War 1 era German flamethrower.]] | [[Image:01WWIGermanFlameThrower1918.jpg|thumb|none|400px|World War 1 era German flamethrower.]] | ||
| − | [[Image:Bf1918flame1.JPG|thumb|none|450px|The Flammenwerfer M.16 in Battlefield 1918.]] | + | [[Image:Bf1918flame1.JPG|thumb|none|450px|The Flammenwerfer M.16 in Battlefield: 1918.]] |
[[Image:Bf1918flame2.JPG|thumb|none|450px|Third Person view of the Flammenwerfer M.16.]] | [[Image:Bf1918flame2.JPG|thumb|none|450px|Third Person view of the Flammenwerfer M.16.]] | ||
| Line 293: | Line 293: | ||
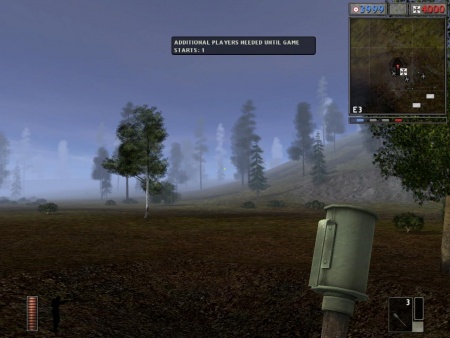
The [[Model 16 Stielhandgranate]] appears as the standard hand grenade for the Imperial German forces. | The [[Model 16 Stielhandgranate]] appears as the standard hand grenade for the Imperial German forces. | ||
[[Image:M16stick.jpg|thumb|none|200px|Model 16 Stielhandgranate "Potato Masher" High-Explosive Fragmentation hand grenade.]] | [[Image:M16stick.jpg|thumb|none|200px|Model 16 Stielhandgranate "Potato Masher" High-Explosive Fragmentation hand grenade.]] | ||
| − | [[Image:Bf1918gergranate1.JPG|thumb|none|450px|The Model 16 Stielhandgranate in Battlefield 1918.]] | + | [[Image:Bf1918gergranate1.JPG|thumb|none|450px|The Model 16 Stielhandgranate in Battlefield: 1918.]] |
[[Image:Bf1918gergranate2.JPG|thumb|none|450px|The Model 16 Stielhandgranate about to be thrown.]] | [[Image:Bf1918gergranate2.JPG|thumb|none|450px|The Model 16 Stielhandgranate about to be thrown.]] | ||
| Line 300: | Line 300: | ||
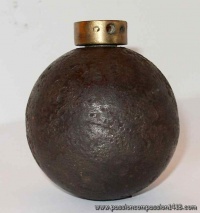
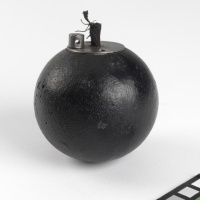
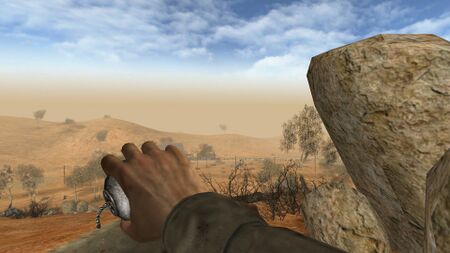
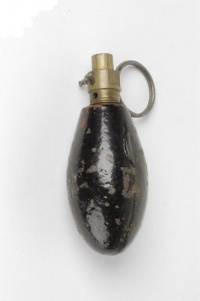
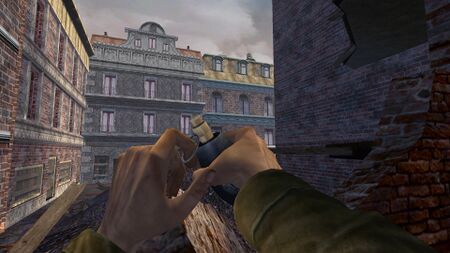
The M1914 ball grenade appears as the standard grenade for the French forces. | The M1914 ball grenade appears as the standard grenade for the French forces. | ||
[[Image:Mod1914a.jpg|thumb|none|200px|Model 1914 ball grenade without fuse.]] | [[Image:Mod1914a.jpg|thumb|none|200px|Model 1914 ball grenade without fuse.]] | ||
| − | [[Image:Bf1918gren19141.JPG |thumb|none|450px|The M1914 ball grenade in Battlefield 1918.]] | + | [[Image:Bf1918gren19141.JPG |thumb|none|450px|The M1914 ball grenade in Battlefield: 1918.]] |
[[Image:Bf1918gren19142.JPG |thumb|none|450px|The M1914 ball grenade about to be thrown.]] | [[Image:Bf1918gren19142.JPG |thumb|none|450px|The M1914 ball grenade about to be thrown.]] | ||
| Line 307: | Line 307: | ||
The [[Mills Bomb|Mills No.5 Mk.I]] appear as the standard grenade for the British Commonwealth and American forces. | The [[Mills Bomb|Mills No.5 Mk.I]] appear as the standard grenade for the British Commonwealth and American forces. | ||
[[Image:MillsNo5MkI.jpg|thumb|none|200px|Mills No.5 Mk.I hand grenade.]] | [[Image:MillsNo5MkI.jpg|thumb|none|200px|Mills No.5 Mk.I hand grenade.]] | ||
| − | [[Image:Bf1918mills1.JPG |thumb|none|450px|The Mills No.5 Mk.I in Battlefield 1918.]] | + | [[Image:Bf1918mills1.JPG |thumb|none|450px|The Mills No.5 Mk.I in Battlefield: 1918.]] |
[[Image:Bf1918mills2.JPG |thumb|none|450px|The Mills No.5 Mk.I about to be thrown.]] | [[Image:Bf1918mills2.JPG |thumb|none|450px|The Mills No.5 Mk.I about to be thrown.]] | ||
| Line 313: | Line 313: | ||
The No. 15 "Cricket" ball grenade appears as the standard grenade for the Ottoman forces. | The No. 15 "Cricket" ball grenade appears as the standard grenade for the Ottoman forces. | ||
[[Image:Crickeball_grenade.jpg|thumb|none|200px|No. 15 "Cricket" ball grenade.]] | [[Image:Crickeball_grenade.jpg|thumb|none|200px|No. 15 "Cricket" ball grenade.]] | ||
| − | [[Image:Bf1918cricket1.JPG |thumb|none|450px|The No. 15 "Cricket" grenade in Battlefield 1918.]] | + | [[Image:Bf1918cricket1.JPG |thumb|none|450px|The No. 15 "Cricket" grenade in Battlefield: 1918.]] |
[[Image:Bf1918cricket2.JPG |thumb|none|450px|The No. 15 "Cricket" grenade about to be thrown.]] | [[Image:Bf1918cricket2.JPG |thumb|none|450px|The No. 15 "Cricket" grenade about to be thrown.]] | ||
| Line 319: | Line 319: | ||
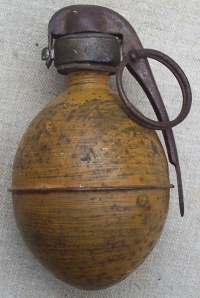
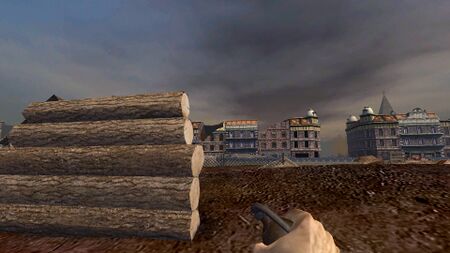
The OF-15 is the standard hand grenade for the Belgian forces. | The OF-15 is the standard hand grenade for the Belgian forces. | ||
[[Image:OF-15 fuze Billiant.JPG|thumb|none|200px|OF-15 hand grenade.]] | [[Image:OF-15 fuze Billiant.JPG|thumb|none|200px|OF-15 hand grenade.]] | ||
| − | [[Image:Bf1918belgren1.JPG |thumb|none|450px|The OF-15 hand grenade in Battlefield 1918.]] | + | [[Image:Bf1918belgren1.JPG |thumb|none|450px|The OF-15 hand grenade in Battlefield: 1918.]] |
[[Image:Bf1918belgren2.JPG |thumb|none|450px|The OF-15 hand grenade about to be thrown.]] | [[Image:Bf1918belgren2.JPG |thumb|none|450px|The OF-15 hand grenade about to be thrown.]] | ||
| Line 325: | Line 325: | ||
The Russian M1912 "Lantern" grenade appears as the standard grenade for the Imperial Russian forces. | The Russian M1912 "Lantern" grenade appears as the standard grenade for the Imperial Russian forces. | ||
[[Image:M1912_618.jpg|thumb|none|200px|Russian M1912 hand grenade.]] | [[Image:M1912_618.jpg|thumb|none|200px|Russian M1912 hand grenade.]] | ||
| − | [[Image:Bf19181912gren1.JPG|thumb|none|450px|The Russian M1912 "Lantern" grenade in Battlefield 1918.]] | + | [[Image:Bf19181912gren1.JPG|thumb|none|450px|The Russian M1912 "Lantern" grenade in Battlefield: 1918.]] |
[[Image:Bf19181912gren.JPG |thumb|none|450px|The Russian M1912 "Lantern" grenade about to be thrown.]] | [[Image:Bf19181912gren.JPG |thumb|none|450px|The Russian M1912 "Lantern" grenade about to be thrown.]] | ||
| Line 331: | Line 331: | ||
The Rohr Handgranate is the standard hand grenade for the Austro-Hungarian forces. | The Rohr Handgranate is the standard hand grenade for the Austro-Hungarian forces. | ||
[[Image:Kugal Rohr handgranate 1.jpg|thumb|none|200px|Rohr Handgranate.]] | [[Image:Kugal Rohr handgranate 1.jpg|thumb|none|200px|Rohr Handgranate.]] | ||
| − | [[Image:Bf1918kukgren1.JPG |thumb|none|450px|The Rohr handgranate in Battlefield 1918.]] | + | [[Image:Bf1918kukgren1.JPG |thumb|none|450px|The Rohr handgranate in Battlefield: 1918.]] |
[[Image:Bf1918kukgren2.JPG |thumb|none|450px|The Rohr handgranate about to be thrown.]] | [[Image:Bf1918kukgren2.JPG |thumb|none|450px|The Rohr handgranate about to be thrown.]] | ||
| Line 337: | Line 337: | ||
The Lenticolare M1914 is the standard hand grenade for the Italian forces. | The Lenticolare M1914 is the standard hand grenade for the Italian forces. | ||
[[Image:Lenticolare.jpg|thumb|none|200px|Lenticolare M1914 hand grenade.]] | [[Image:Lenticolare.jpg|thumb|none|200px|Lenticolare M1914 hand grenade.]] | ||
| − | [[Image:Bf1918itagren1.JPG |thumb|none|450px|The Lenticolare M1914 in Battlefield 1918.]] | + | [[Image:Bf1918itagren1.JPG |thumb|none|450px|The Lenticolare M1914 in Battlefield: 1918.]] |
[[Image:Bf1918itagren2.JPG |thumb|none|450px|The Lenticolare M1914 about to be thrown.]] | [[Image:Bf1918itagren2.JPG |thumb|none|450px|The Lenticolare M1914 about to be thrown.]] | ||
| Line 343: | Line 343: | ||
The [[Model_24_Stielhandgranate|Geballte Ladung]] (made with Model 16 Stielhandgranate heads) appears in the engineer class of the Imperial German, Austro-Hungarian, and Ottoman forces and is primarily used to take out tanks and armored vehicles. | The [[Model_24_Stielhandgranate|Geballte Ladung]] (made with Model 16 Stielhandgranate heads) appears in the engineer class of the Imperial German, Austro-Hungarian, and Ottoman forces and is primarily used to take out tanks and armored vehicles. | ||
[[Image:M24_geballte_ladung.jpg|thumb|none|201px|The Geballte Ladung (World War II example).]] | [[Image:M24_geballte_ladung.jpg|thumb|none|201px|The Geballte Ladung (World War II example).]] | ||
| − | [[Image:Bf1918gebalte1.JPG |thumb|none|450px|The Geballte Ladung in Battlefield 1918.]] | + | [[Image:Bf1918gebalte1.JPG |thumb|none|450px|The Geballte Ladung in Battlefield: 1918.]] |
[[Image:Bf1918gebalte2.JPG |thumb|none|450px|The Geballte Ladung about to be thrown.]] | [[Image:Bf1918gebalte2.JPG |thumb|none|450px|The Geballte Ladung about to be thrown.]] | ||
| Line 349: | Line 349: | ||
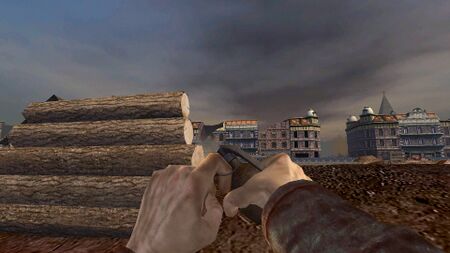
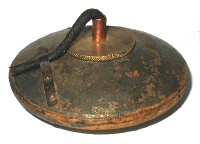
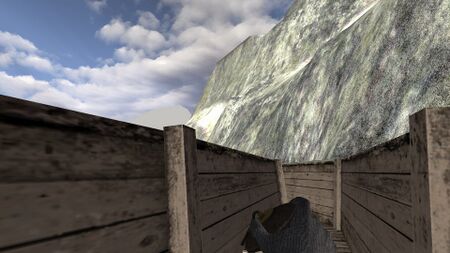
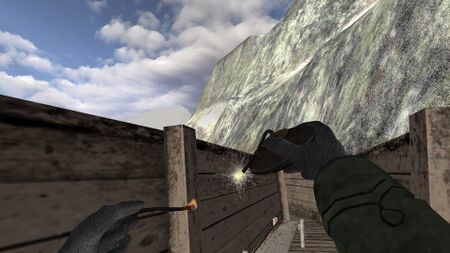
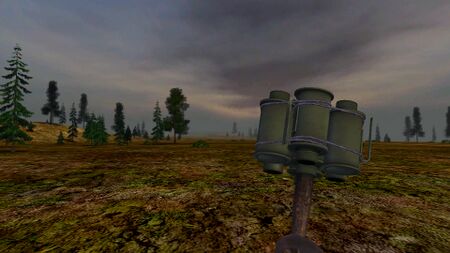
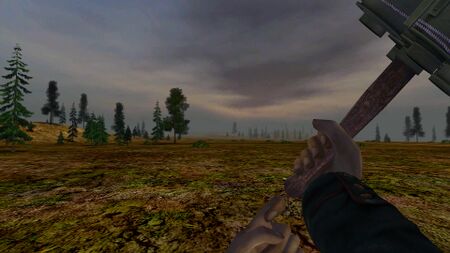
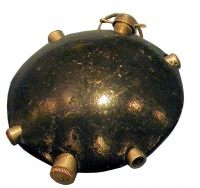
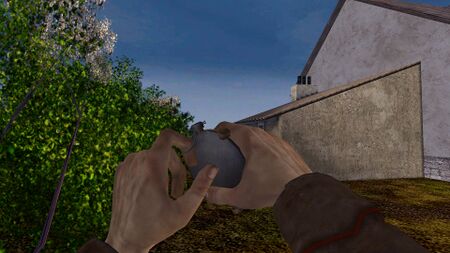
The M1915 "Turtle" disk grenade appears in the engineer class of the Imperial German forces in maps set late in the war and takes the place of the Geballte Ladung. | The M1915 "Turtle" disk grenade appears in the engineer class of the Imperial German forces in maps set late in the war and takes the place of the Geballte Ladung. | ||
[[Image:Disc_grenade_1914_called_%27Turtle%27_grenade.jpg|thumb|none|200px|M1915 "Turtle" disk grenade.]] | [[Image:Disc_grenade_1914_called_%27Turtle%27_grenade.jpg|thumb|none|200px|M1915 "Turtle" disk grenade.]] | ||
| − | [[Image:Bf1918diskgren2.JPG |thumb|none|450px|The M1915 "Turtle" disk grenade in Battlefield 1918.]] | + | [[Image:Bf1918diskgren2.JPG |thumb|none|450px|The M1915 "Turtle" disk grenade in Battlefield: 1918.]] |
[[Image:Bf1918diskgren.JPG |thumb|none|450px|The M1915 "Turtle" disk grenade about to be thrown.]] | [[Image:Bf1918diskgren.JPG |thumb|none|450px|The M1915 "Turtle" disk grenade about to be thrown.]] | ||
| Line 355: | Line 355: | ||
The No.34 Mk.III percussion grenade appears in the engineer class of French and Belgian forces and is primarily used to take out tanks and armored vehicles. | The No.34 Mk.III percussion grenade appears in the engineer class of French and Belgian forces and is primarily used to take out tanks and armored vehicles. | ||
[[Image:No34mk3.JPG |thumb|none|200px|The No.34 MK.III grenade.]] | [[Image:No34mk3.JPG |thumb|none|200px|The No.34 MK.III grenade.]] | ||
| − | [[Image:Bf1918no34gren1.JPG |thumb|none|450px|The No.34 Mk.III grenade in Battlefield 1918.]] | + | [[Image:Bf1918no34gren1.JPG |thumb|none|450px|The No.34 Mk.III grenade in Battlefield: 1918.]] |
[[Image:Bf1918no34gren2.JPG |thumb|none|450px|The No.34 Mk.III grenade about to be thrown.]] | [[Image:Bf1918no34gren2.JPG |thumb|none|450px|The No.34 Mk.III grenade about to be thrown.]] | ||
| Line 361: | Line 361: | ||
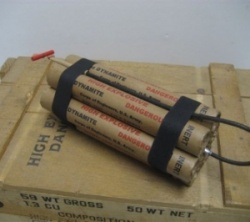
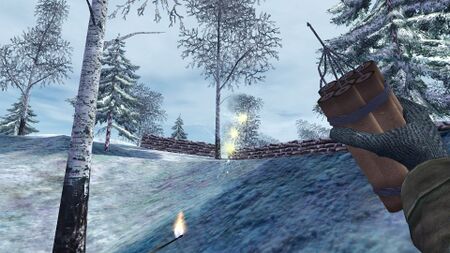
Italian and Russian engineers are given bundles of dynamite and is primarily used to take out tanks and armored vehicles. | Italian and Russian engineers are given bundles of dynamite and is primarily used to take out tanks and armored vehicles. | ||
[[Image:Dynamitebundle.JPG |thumb|none|250px|A bundle of dynamite.]] | [[Image:Dynamitebundle.JPG |thumb|none|250px|A bundle of dynamite.]] | ||
| − | [[Image:Dynamitebundle1.JPG |thumb|none|450px|A bundle of dynamite in Battlefield 1918.]] | + | [[Image:Dynamitebundle1.JPG |thumb|none|450px|A bundle of dynamite in Battlefield: 1918.]] |
[[Image:Bf1918dynamite.JPG |thumb|none|450px|A bundle of dynamite about to be thrown.]] | [[Image:Bf1918dynamite.JPG |thumb|none|450px|A bundle of dynamite about to be thrown.]] | ||
| Line 367: | Line 367: | ||
The No.2 percussion grenade appears in the engineer class of the British commonwealth and American forces and is primarily used to take out tanks and armored vehicles. | The No.2 percussion grenade appears in the engineer class of the British commonwealth and American forces and is primarily used to take out tanks and armored vehicles. | ||
[[Image:Page1No2Mk2.jpg|thumb|none|200px|The No.2 grenade.]] | [[Image:Page1No2Mk2.jpg|thumb|none|200px|The No.2 grenade.]] | ||
| − | [[Image:Bf1918no2p1.JPG |thumb|none|450px|The No.2 grenade in Battlefield 1918.]] | + | [[Image:Bf1918no2p1.JPG |thumb|none|450px|The No.2 grenade in Battlefield: 1918.]] |
[[Image:Bf1918no2p2.JPG |thumb|none|450px|The No.2 grenade about to be thrown.]] | [[Image:Bf1918no2p2.JPG |thumb|none|450px|The No.2 grenade about to be thrown.]] | ||
| Line 373: | Line 373: | ||
The M1915 "Jam Tin" grenade appears in the grenadier kit for British Commonwealth forces and is available for pickup in several maps. | The M1915 "Jam Tin" grenade appears in the grenadier kit for British Commonwealth forces and is available for pickup in several maps. | ||
[[Image:Page1JamTinBomb.jpg|thumb|none|200px|The M1915 "Jam Tin" grenade.]] | [[Image:Page1JamTinBomb.jpg|thumb|none|200px|The M1915 "Jam Tin" grenade.]] | ||
| − | [[Image:Bf1918tingren1.JPG |thumb|none|450px|The M1915 "Jam Tin" grenade in Battlefield 1918.]] | + | [[Image:Bf1918tingren1.JPG |thumb|none|450px|The M1915 "Jam Tin" grenade in Battlefield: 1918.]] |
[[Image:Bf1918tingren2.JPG |thumb|none|450px|The M1915 "Jam Tin" grenade about to be thrown.]] | [[Image:Bf1918tingren2.JPG |thumb|none|450px|The M1915 "Jam Tin" grenade about to be thrown.]] | ||
| Line 379: | Line 379: | ||
The grenadier kit for the British Commonwealth forces also receives the No.1 Mk.I rifle grenade for the Lee-Enfield No.1 Mk. III. | The grenadier kit for the British Commonwealth forces also receives the No.1 Mk.I rifle grenade for the Lee-Enfield No.1 Mk. III. | ||
[[Image:GrenadeCup001.jpg|thumb|none|250px|The No.1 Mk.I Cup Discharger on the muzzle of a Lee-Enfield No.1 Mk. III]] | [[Image:GrenadeCup001.jpg|thumb|none|250px|The No.1 Mk.I Cup Discharger on the muzzle of a Lee-Enfield No.1 Mk. III]] | ||
| − | [[Image:Bf1918riflegren1.JPG |thumb|none|450px|The No.1 Mk.I rifle grenade in Battlefield 1918.]] | + | [[Image:Bf1918riflegren1.JPG |thumb|none|450px|The No.1 Mk.I rifle grenade in Battlefield: 1918.]] |
[[Image:Bf1918riflegren2.JPG |thumb|none|450px|Third person view of the No.1 Mk.I rifle grenade.]] | [[Image:Bf1918riflegren2.JPG |thumb|none|450px|Third person view of the No.1 Mk.I rifle grenade.]] | ||
| Line 387: | Line 387: | ||
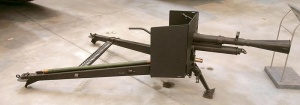
The Granatenwerfer 16 appears as the standard mortar for the Imperial German and Ottoman forces. | The Granatenwerfer 16 appears as the standard mortar for the Imperial German and Ottoman forces. | ||
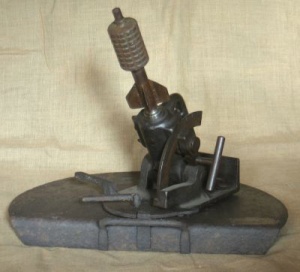
[[Image:Granatenwerfer_16.jpg|thumb|none|300px|The Granatenwerfer 16]] | [[Image:Granatenwerfer_16.jpg|thumb|none|300px|The Granatenwerfer 16]] | ||
| − | [[Image:Bf1918gwerfer1.JPG |thumb|none|450px|The Granatenwerfer 16 in Battlefield 1918.]] | + | [[Image:Bf1918gwerfer1.JPG |thumb|none|450px|The Granatenwerfer 16 in Battlefield: 1918.]] |
==Stokes Mortar== | ==Stokes Mortar== | ||
The [[Stokes_Trench_Mortar|Stokes Mortar]] is the standard mortar for the British Commonwealth, French, Belgian, Italian, and American forces. | The [[Stokes_Trench_Mortar|Stokes Mortar]] is the standard mortar for the British Commonwealth, French, Belgian, Italian, and American forces. | ||
[[Image:3inch_Stokes_Mortar.jpg|thumb|none|300px|Stokes Trench Mortar - 3 inch]] | [[Image:3inch_Stokes_Mortar.jpg|thumb|none|300px|Stokes Trench Mortar - 3 inch]] | ||
| − | [[Image:Bf1918stokes1.JPG |thumb|none|450px|The Stokes Mortar in Battlefield 1918.]] | + | [[Image:Bf1918stokes1.JPG |thumb|none|450px|The Stokes Mortar in Battlefield: 1918.]] |
==9.15 cm Minenwerfer== | ==9.15 cm Minenwerfer== | ||
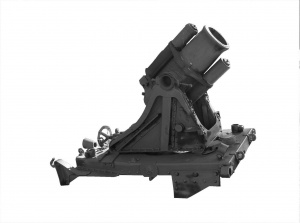
The 9.15cm Minenwerfer appears as the standard mortar for the Austro-Hungarian forces. | The 9.15cm Minenwerfer appears as the standard mortar for the Austro-Hungarian forces. | ||
[[Image:200px-Lanz_91_mm_Memorial_de_Verdun.jpg|thumb|none|300px|9.15cm Minenwerfer]] | [[Image:200px-Lanz_91_mm_Memorial_de_Verdun.jpg|thumb|none|300px|9.15cm Minenwerfer]] | ||
| − | [[Image:Bf1918kukmortar.JPG |thumb|none|450px|The 9.15cm Minenwerfer in Battlefield 1918.]] | + | [[Image:Bf1918kukmortar.JPG |thumb|none|450px|The 9.15cm Minenwerfer in Battlefield: 1918.]] |
==91mm Minethrower== | ==91mm Minethrower== | ||
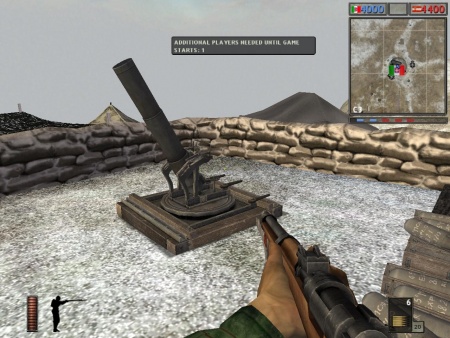
The 91mm Minethrower appears as the standard mortar for the Imperial Russian forces. | The 91mm Minethrower appears as the standard mortar for the Imperial Russian forces. | ||
[[Image:91MT_2.jpg|thumb|none|300px|91mm Minethrower]] | [[Image:91MT_2.jpg|thumb|none|300px|91mm Minethrower]] | ||
| − | [[Image:Bf1918rusmortar.JPG |thumb|none|450px|The 91mm Minethrower in Battlefield 1918.]] | + | [[Image:Bf1918rusmortar.JPG |thumb|none|450px|The 91mm Minethrower in Battlefield: 1918.]] |
==9.45 inch "Flying Pig"== | ==9.45 inch "Flying Pig"== | ||
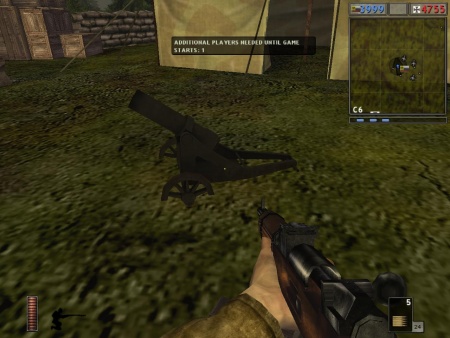
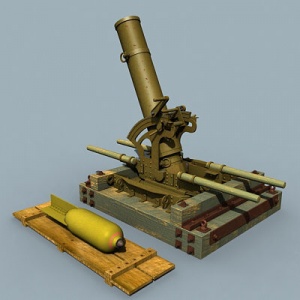
The 9.45 inch "Flying Pig" appears as a heavy mortar used by all sides of the game. | The 9.45 inch "Flying Pig" appears as a heavy mortar used by all sides of the game. | ||
[[Image:Flyingpigmortar.jpg|thumb|none|300px|9.45 inch "Flying Pig"]] | [[Image:Flyingpigmortar.jpg|thumb|none|300px|9.45 inch "Flying Pig"]] | ||
| − | [[Image:Bf1918flyingpig.JPG |thumb|none|450px|The 9.45 inch "Flying Pig" in Battlefield 1918.]] | + | [[Image:Bf1918flyingpig.JPG |thumb|none|450px|The 9.45 inch "Flying Pig" in Battlefield: 1918.]] |
==17cm Minenwerfer== | ==17cm Minenwerfer== | ||
The 17cm Minenwerfer appears as a heavy mortar used by the Imperial German forces appearing in maps set late in the war. | The 17cm Minenwerfer appears as a heavy mortar used by the Imperial German forces appearing in maps set late in the war. | ||
[[Image:17cmminen.jpg|thumb|none|300px|17cm Minenwerfer]] | [[Image:17cmminen.jpg|thumb|none|300px|17cm Minenwerfer]] | ||
| − | [[Image:Bf191817cmminenwerfer.JPG |thumb|none|450px|The 17cm Minenwerfer in Battlefield 1918.]] | + | [[Image:Bf191817cmminenwerfer.JPG |thumb|none|450px|The 17cm Minenwerfer in Battlefield: 1918.]] |
=Field Guns & Howitzers= | =Field Guns & Howitzers= | ||
| Line 419: | Line 419: | ||
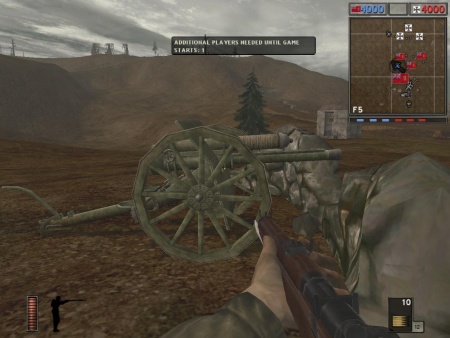
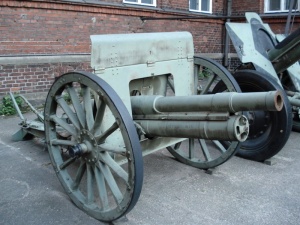
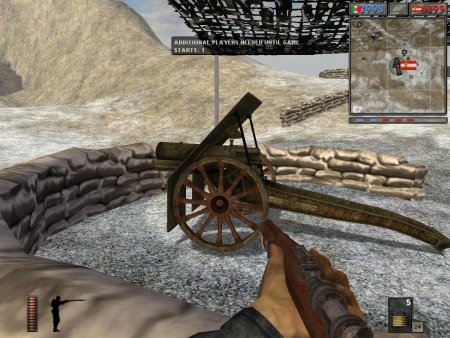
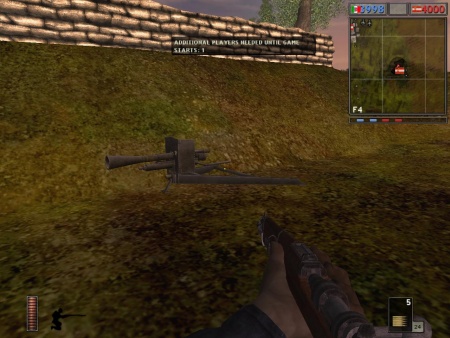
The Feldkanone 77mm 96 n.A. appears as the standard field gun for the Imperial German and Ottoman forces. | The Feldkanone 77mm 96 n.A. appears as the standard field gun for the Imperial German and Ottoman forces. | ||
[[Image:800px-7.7_cm_Feldkanone_16_IMG_6414b.jpg|thumb|none|300px|77mm Feldkanone 96]] | [[Image:800px-7.7_cm_Feldkanone_16_IMG_6414b.jpg|thumb|none|300px|77mm Feldkanone 96]] | ||
| − | [[Image:Bf1918ger77.JPG |thumb|none|450px|The 77mm Feldkanaone 96 in Battlefield 1918.]] | + | [[Image:Bf1918ger77.JPG |thumb|none|450px|The 77mm Feldkanaone 96 in Battlefield: 1918.]] |
| − | [[Image:Bf1918otto77.JPG |thumb|none|450px|The 77mm Feldkanaone 96 in Ottoman service in Battlefield 1918.]] | + | [[Image:Bf1918otto77.JPG |thumb|none|450px|The 77mm Feldkanaone 96 in Ottoman service in Battlefield: 1918.]] |
==Canon 75mm Mle. 1897== | ==Canon 75mm Mle. 1897== | ||
The Canon 75mm Mle. 1897 appears as the standard field gun for the French, Belgian, and American forces. | The Canon 75mm Mle. 1897 appears as the standard field gun for the French, Belgian, and American forces. | ||
[[Image:Canon-75-mm-MLE-1897-No-15932.jpg|thumb|none|300px|Canon 75mm Mle. 1897]] | [[Image:Canon-75-mm-MLE-1897-No-15932.jpg|thumb|none|300px|Canon 75mm Mle. 1897]] | ||
| − | [[Image:Bf1918fr75.JPG |thumb|none|450px|The Canon 75mm Mle. 1897 in Battlefield 1918.]] | + | [[Image:Bf1918fr75.JPG |thumb|none|450px|The Canon 75mm Mle. 1897 in Battlefield: 1918.]] |
| − | [[Image:Bf1918us75.JPG |thumb|none|450px|The Canon 75mm Mle. 1897 in American service in Battlefield 1918.]] | + | [[Image:Bf1918us75.JPG |thumb|none|450px|The Canon 75mm Mle. 1897 in American service in Battlefield: 1918.]] |
==Ordnance QF 18 Pounder== | ==Ordnance QF 18 Pounder== | ||
The Ordance QF Pounder appears as the standard field gun for the British Commonwealth forces. | The Ordance QF Pounder appears as the standard field gun for the British Commonwealth forces. | ||
[[Image:9-18_Pounder_QF_Gun.jpg|thumb|none|300px|Ordnance QF 18 Pounder]] | [[Image:9-18_Pounder_QF_Gun.jpg|thumb|none|300px|Ordnance QF 18 Pounder]] | ||
| − | [[Image:Bf1918qf181.JPG |thumb|none|450px|The Ordnance QF 18 Pounder in Battlefield 1918.]] | + | [[Image:Bf1918qf181.JPG |thumb|none|450px|The Ordnance QF 18 Pounder in Battlefield: 1918.]] |
==Putilov 76mm== | ==Putilov 76mm== | ||
The Putilov 76mm is the standard field gun for the Imperial Russian forces. | The Putilov 76mm is the standard field gun for the Imperial Russian forces. | ||
[[Image:Putilov76mm.jpg|thumb|none|300px|Putilov 76mm Field Gun]] | [[Image:Putilov76mm.jpg|thumb|none|300px|Putilov 76mm Field Gun]] | ||
| − | [[Image:Bf1918putilov76.JPG |thumb|none|450px|The Putilov 76mm Field Gun in Battlefield 1918.]] | + | [[Image:Bf1918putilov76.JPG |thumb|none|450px|The Putilov 76mm Field Gun in Battlefield: 1918.]] |
==Skoda 75mm M15== | ==Skoda 75mm M15== | ||
The Skoda 75mm M15 appears the standard field gun for the Austro-Hungarian forces. | The Skoda 75mm M15 appears the standard field gun for the Austro-Hungarian forces. | ||
[[Image:Skoda gebk m15 1.jpg |thumb|none|300px|Skoda 75mm M15]] | [[Image:Skoda gebk m15 1.jpg |thumb|none|300px|Skoda 75mm M15]] | ||
| − | [[Image:Bf1918kuk75.JPG |thumb|none|450px|The Skoda 75mm M15 in Battlefield 1918.]] | + | [[Image:Bf1918kuk75.JPG |thumb|none|450px|The Skoda 75mm M15 in Battlefield: 1918.]] |
==Cannone 75/27 Modello 06== | ==Cannone 75/27 Modello 06== | ||
The Cannone 75/27 Modello 06 is the standard field gun used by the Italian forces. | The Cannone 75/27 Modello 06 is the standard field gun used by the Italian forces. | ||
[[Image:Canone7527.jpg |thumb|none|300px|Cannone 75/27 Modello 06]] | [[Image:Canone7527.jpg |thumb|none|300px|Cannone 75/27 Modello 06]] | ||
| − | [[Image:Bf1918ita75.JPG |thumb|none|450px|The Cannone 75/27 Modello 06 in Battlefield 1918.]] | + | [[Image:Bf1918ita75.JPG |thumb|none|450px|The Cannone 75/27 Modello 06 in Battlefield: 1918.]] |
==Canon d'Infanterie 37mm Mle. 1916== | ==Canon d'Infanterie 37mm Mle. 1916== | ||
The Canon d'Infanterie 37mm Mle. 1916 appears as a support weapon in several maps set in Europe. | The Canon d'Infanterie 37mm Mle. 1916 appears as a support weapon in several maps set in Europe. | ||
[[Image:800px-French_M1916_37mm_infantry_gun.jpg |thumb|none|300px|Canon d'Infanterie 37mm Mle. 1916]] | [[Image:800px-French_M1916_37mm_infantry_gun.jpg |thumb|none|300px|Canon d'Infanterie 37mm Mle. 1916]] | ||
| − | [[Image:Bf191837mm.JPG |thumb|none|450px|The Canon d'Infanterie 37mm Mle. 1916 in Battlefield 1918.]] | + | [[Image:Bf191837mm.JPG |thumb|none|450px|The Canon d'Infanterie 37mm Mle. 1916 in Battlefield: 1918.]] |
==150mm sFH 13== | ==150mm sFH 13== | ||
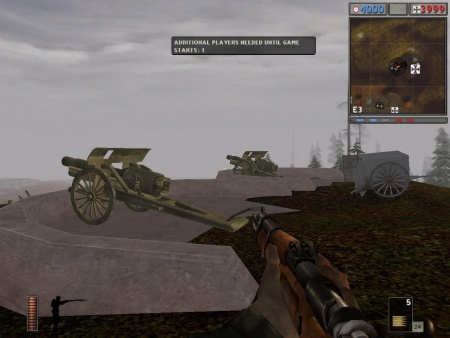
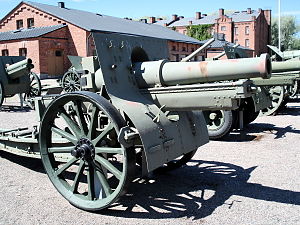
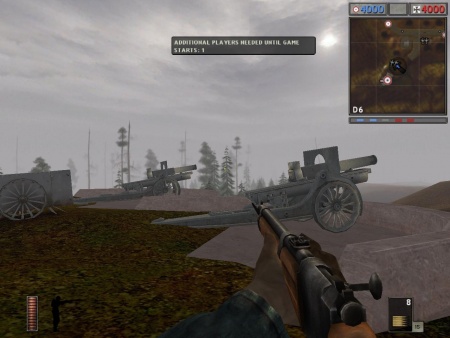
The 150mm sFH 13 appears as the standard field howitzer for the Imperial German and Ottoman forces. | The 150mm sFH 13 appears as the standard field howitzer for the Imperial German and Ottoman forces. | ||
[[Image:Ger155mmfh13.jpg |thumb|none|300px|150mm sFH 13]] | [[Image:Ger155mmfh13.jpg |thumb|none|300px|150mm sFH 13]] | ||
| − | [[Image:Bf1918ger150.JPG |thumb|none|450px|The 150mm sFH 13 in Battlefield 1918.]] | + | [[Image:Bf1918ger150.JPG |thumb|none|450px|The 150mm sFH 13 in Battlefield: 1918.]] |
| − | [[Image:Bf1918otto150.JPG |thumb|none|450px|The 150mm sFH 13 in Ottoman service in Battlefield 1918.]] | + | [[Image:Bf1918otto150.JPG |thumb|none|450px|The 150mm sFH 13 in Ottoman service in Battlefield: 1918.]] |
==Canon 155mm Mle. 1917== | ==Canon 155mm Mle. 1917== | ||
The Canon 155mm Mle. 1917 appears as the standard field howitzer for the French and American forces. | The Canon 155mm Mle. 1917 appears as the standard field howitzer for the French and American forces. | ||
[[Image:155mm m1917 Schneider Hameenlinna 1.jpg |thumb|none|300px|Canon 155mm Mle. 1917]] | [[Image:155mm m1917 Schneider Hameenlinna 1.jpg |thumb|none|300px|Canon 155mm Mle. 1917]] | ||
| − | [[Image:Bf1918fr155.JPG |thumb|none|450px|The Canon 155mm Mle. 1917 in Battlefield 1918.]] | + | [[Image:Bf1918fr155.JPG |thumb|none|450px|The Canon 155mm Mle. 1917 in Battlefield: 1918.]] |
| − | [[Image:Bf1918us155.JPG |thumb|none|450px|The Canon 155mm Mle. 1917 in American service in Battlefield 1918.]] | + | [[Image:Bf1918us155.JPG |thumb|none|450px|The Canon 155mm Mle. 1917 in American service in Battlefield: 1918.]] |
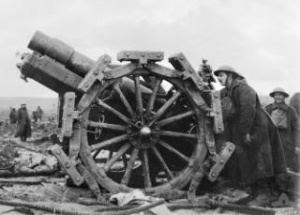
==BL 6 inch 26cwt Howitzer== | ==BL 6 inch 26cwt Howitzer== | ||
The BL 6 inch 26cwt Howitzer appears as the standard field howitzer for the British Commonwealth forces. | The BL 6 inch 26cwt Howitzer appears as the standard field howitzer for the British Commonwealth forces. | ||
[[Image:26cwthowitzer.JPG |thumb|none|300px|BL 6 inch 26cwt Howitzer]] | [[Image:26cwthowitzer.JPG |thumb|none|300px|BL 6 inch 26cwt Howitzer]] | ||
| − | [[Image:Bf1918brit26in.JPG |thumb|none|450px|The BL 6 inch 26cwt in Battlefield 1918.]] | + | [[Image:Bf1918brit26in.JPG |thumb|none|450px|The BL 6 inch 26cwt in Battlefield: 1918.]] |
==Canon 120mm Mle. 1878== | ==Canon 120mm Mle. 1878== | ||
The Canon 120mm Mle. 1878 appears as the standard field howitzer for the Belgian forces. | The Canon 120mm Mle. 1878 appears as the standard field howitzer for the Belgian forces. | ||
[[Image:Canon_120_M1878_6.jpg |thumb|none|300px|Canon 120mm Mle. 1878]] | [[Image:Canon_120_M1878_6.jpg |thumb|none|300px|Canon 120mm Mle. 1878]] | ||
| − | [[Image:Bf1918bel1201.JPG |thumb|none|450px|The Canon 120mm Mle. 1878 in Battlefield 1918.]] | + | [[Image:Bf1918bel1201.JPG |thumb|none|450px|The Canon 120mm Mle. 1878 in Battlefield: 1918.]] |
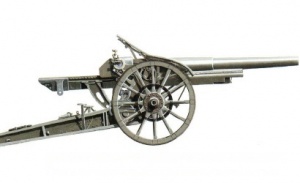
==152mm M1904 Siege Gun== | ==152mm M1904 Siege Gun== | ||
The 152mm M1904 siege gun appears as the standard field howitzer for the Imperial Russian forces. | The 152mm M1904 siege gun appears as the standard field howitzer for the Imperial Russian forces. | ||
[[Image:152mm_m1877_190_pood_gun_2.jpg |thumb|none|300px|152mm M1904 siege gun]] | [[Image:152mm_m1877_190_pood_gun_2.jpg |thumb|none|300px|152mm M1904 siege gun]] | ||
| − | [[Image:Bf1918rus150.JPG |thumb|none|450px|The 152mm M1904 siege gun in Battlefield 1918.]] | + | [[Image:Bf1918rus150.JPG |thumb|none|450px|The 152mm M1904 siege gun in Battlefield: 1918.]] |
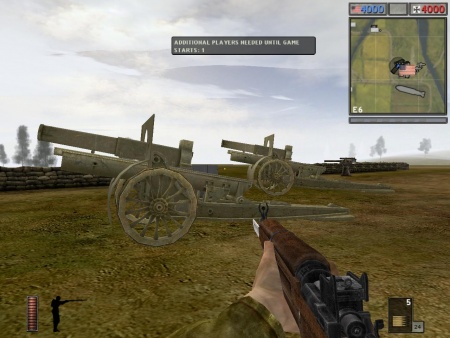
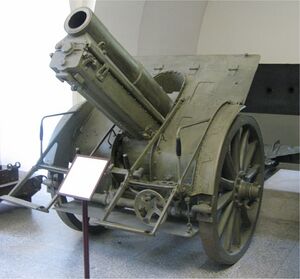
==Skoda 15cm M14== | ==Skoda 15cm M14== | ||
The Skoda 15cm M14 appears as the standard field howitzer for the Austro-Hungarian forces. | The Skoda 15cm M14 appears as the standard field howitzer for the Austro-Hungarian forces. | ||
[[Image:Skoda 15 cm field howitzer M1914.jpg |thumb|none|300px|Skoda 15cm M14]] | [[Image:Skoda 15 cm field howitzer M1914.jpg |thumb|none|300px|Skoda 15cm M14]] | ||
| − | [[Image:Bf1918kuk150.JPG |thumb|none|450px|The Skoda 15cm M14 in Battlefield 1918.]] | + | [[Image:Bf1918kuk150.JPG |thumb|none|450px|The Skoda 15cm M14 in Battlefield: 1918.]] |
==Canon 105mm Mle. 1913 Schneider== | ==Canon 105mm Mle. 1913 Schneider== | ||
The Canon 105mm Mle. 1913 Schneider appears as the standard field howitzer for the Italian forces. | The Canon 105mm Mle. 1913 Schneider appears as the standard field howitzer for the Italian forces. | ||
[[Image:French 105mm mle-1913 Schneider.jpg |thumb|none|300px|Canon 105mm Mle. 1913 Schneider]] | [[Image:French 105mm mle-1913 Schneider.jpg |thumb|none|300px|Canon 105mm Mle. 1913 Schneider]] | ||
| − | [[Image:Bf1918ita1501.JPG |thumb|none|450px|The Canon 105mm Mle. 1913 Schneider in Battlefield 1918.]] | + | [[Image:Bf1918ita1501.JPG |thumb|none|450px|The Canon 105mm Mle. 1913 Schneider in Battlefield: 1918.]] |
==L/12 M14 "Big Bertha"== | ==L/12 M14 "Big Bertha"== | ||
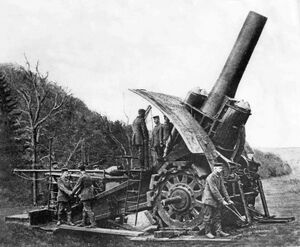
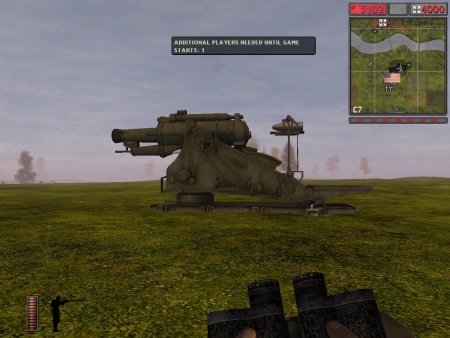
The L/12 M14 "Big Bertha" siege howitzer appears in several maps on the European theatre. | The L/12 M14 "Big Bertha" siege howitzer appears in several maps on the European theatre. | ||
[[Image:300px-Dicke Bertha.Big Bertha.jpg |thumb|none|300px|L/12 M14 "Big Bertha" - 16.5 inch]] | [[Image:300px-Dicke Bertha.Big Bertha.jpg |thumb|none|300px|L/12 M14 "Big Bertha" - 16.5 inch]] | ||
| − | [[Image:Bf1918bigbertha.JPG |thumb|none|450px|The L/12 M14 "Big Bertha" in Battlefield 1918.]] | + | [[Image:Bf1918bigbertha.JPG |thumb|none|450px|The L/12 M14 "Big Bertha" in Battlefield: 1918.]] |
==9.2 inch Mark I Siege Howitzer== | ==9.2 inch Mark I Siege Howitzer== | ||
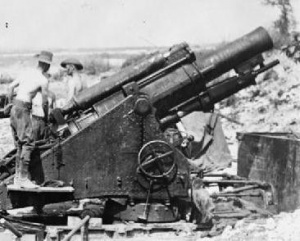
The 9.2 inch Mark I siege howitzer appears in several European theatre maps taking place late in the war. | The 9.2 inch Mark I siege howitzer appears in several European theatre maps taking place late in the war. | ||
[[Image:9.2inch Mark 1 Howitzer.JPG |thumb|none|300px|9.2 inch Mark I]] | [[Image:9.2inch Mark 1 Howitzer.JPG |thumb|none|300px|9.2 inch Mark I]] | ||
| − | [[Image:Bf1918m1siege.JPG |thumb|none|450px|The 9.2inch Mark I in Battlefield 1918.]] | + | [[Image:Bf1918m1siege.JPG |thumb|none|450px|The 9.2inch Mark I in Battlefield: 1918.]] |
=Anti-Aircraft= | =Anti-Aircraft= | ||
| Line 505: | Line 505: | ||
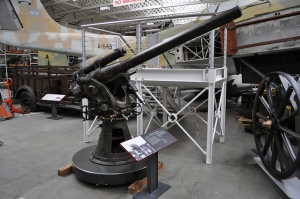
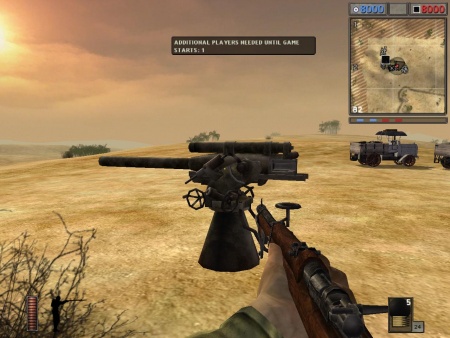
The L/35 M1916 7.7cm anti-aircraft is used on all sides of the conflict and is highly effective in taking down aircraft and ground vehicles alike. | The L/35 M1916 7.7cm anti-aircraft is used on all sides of the conflict and is highly effective in taking down aircraft and ground vehicles alike. | ||
[[Image:L35_Model_1916.jpg|thumb|none|300px|L35 Model 1916 7.7cm]] | [[Image:L35_Model_1916.jpg|thumb|none|300px|L35 Model 1916 7.7cm]] | ||
| − | [[Image:Bf1918bak77.JPG|thumb|none|450px|The L35 Model 1916 7.7cm in Battlefield 1918.]] | + | [[Image:Bf1918bak77.JPG|thumb|none|450px|The L35 Model 1916 7.7cm in Battlefield: 1918.]] |
==Maxim QF 1 Pounder "Pom-Pom"== | ==Maxim QF 1 Pounder "Pom-Pom"== | ||
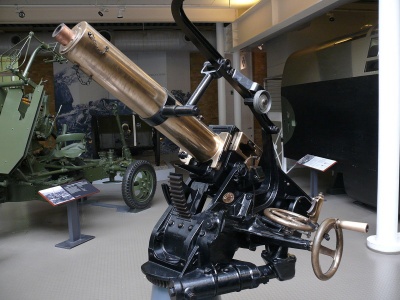
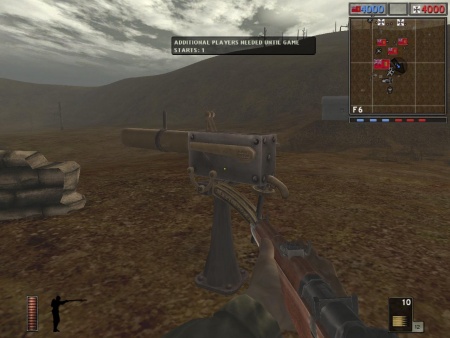
The Maxim QF 1 Pounder "Pom-Pom" appears as the light anti-aircraft gun used on all sides of the conflict. | The Maxim QF 1 Pounder "Pom-Pom" appears as the light anti-aircraft gun used on all sides of the conflict. | ||
[[Image:QF 1 Pounder.jpg|thumb|none|400px|Maxim-Nordenfelt QF Mk II 1-pounder Pom-Pom gun at the Imperial War Museum, London - 37x94mm R]] | [[Image:QF 1 Pounder.jpg|thumb|none|400px|Maxim-Nordenfelt QF Mk II 1-pounder Pom-Pom gun at the Imperial War Museum, London - 37x94mm R]] | ||
| − | [[Image:Bf1918pompom1.JPG|thumb|none|450px|The Maxim "Pom-Pom" in Battlefield 1918.]] | + | [[Image:Bf1918pompom1.JPG|thumb|none|450px|The Maxim "Pom-Pom" in Battlefield: 1918.]] |
[[Image:Bf1918pompom2.JPG|thumb|none|450px|Manning the Maxim "Pom-Pom".]] | [[Image:Bf1918pompom2.JPG|thumb|none|450px|Manning the Maxim "Pom-Pom".]] | ||
Revision as of 07:00, 30 September 2018
Battlefield: 1918 is a 2004 modification for the game Battlefield: 1942. Battlefield: 1918 is set during the First World War on multiple theatres and continents. Game maps or battles are often based on actual conflicts fought on and around Western Europe, Eastern Europe, Southern Europe, the Middle East, North Africa, Equatorial Africa, and Asia. The mod has over 90 maps and 15 playable armies. The mod also has a wide array of weapons, ground vehicles, aircraft, and ships to create and authentic representation of the First World War.
NOTE: For the original game, see Battlefield: 1942.
The following weapons appear in the video game Battlefield: 1918:
Long Guns
Gewehr 98
The Gewehr 98 appears as the standard issue rifle for the Imperial German forces.
Lebel M1886
The Lebel M1886 appears as the standard issue rifle for the French forces in.
Lee-Enfield No.1 Mk.III
The Lee Enfield No.1 Mk.III appears as the standard issue rifle for British Commonwealth forces.
Pattern 1914 Enfield
The Pattern 1914 Enfield appears in the arsenal of the British commonwealth and the American forces where it substitutes for the M1917 Enfield. The scoped variant is the standard sniper rifle for British Commonwealth and American forces. The non-scoped variant acts as the standard issue rifle for the American forces and a secondary rifle for the Commonwealth forces.
Turkish Mauser M1893
The Turkish Mauser M1893 appears as the standard issue rifle for the Ottoman forces. It is modeled in the game after the original M1893 rifles converted to 7.92x57mm in the 1930's.
Belgian Mauser M1889
The Belgian Mauser M1889 appears as the standard issue rifle for the Belgian forces.
Mosin-Nagant M1891
The Mosin-Nagant M1891 appears as the standard issue rifle for the Imperial Russian forces. The in-game model appears to be a mixture of the M1891 infantry rifle and the dragoon rifle.
Steyr-Mannlicher M1895
The Steyr-Mannlicher 1895 appears as the standard issue rifle for the Austro-Hungarian forces.
Carcano M1891
The Carcano M1891 appears as the standard issue rifle for the Italian forces.
Karabiner 88
The Karabiner 88 appears in the engineer class of the Imperial German and Ottoman forces and acts as a secondary rifle for the respective armies.
Berthier M1916 Carbine
The Berthier M1916 Carbine appears in the engineer class of the French forces and acts as a secondary rifle for the French.
RSC M1917
The RSC M1917 semi-automatic rifle appears in several maps featuring France set late in the war. It is powerful and accurate but limited to a 5 round magazine.
Browning Auto-5
The Browning Auto-5 is the shotgun given to British Commonwealth and American forces where it is available for pickup in certain maps.
Mauser M1918 Tank Gewehr
The Mauser M1918 T-Gewehr appears in later maps of the European theatre where it is available for pickup where it is highly effective against tanks and armored vehicles.
Jezail Musket
The Jezail musket is available for pickup in several maps featuring the Ottoman empire and is very accurate and powerful with a cost of long reload time and single shot capacity.
Handguns
Luger P08
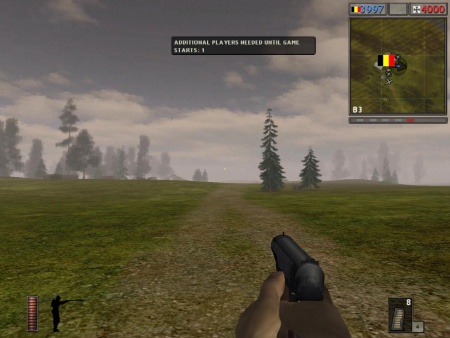
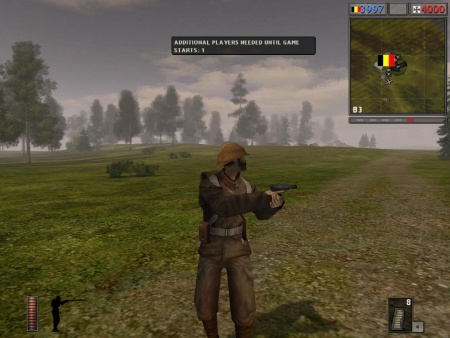
The Luger P08 is the sidearm of the Imperial German forces and issued mainly to the officer class.
Star Ruby M1915
The Star Ruby M1915 is the sidearm of the French forces and issued mainly to the officer class.
Webley Mk. VI
The Webley Mk. VI is the sidearm of the British commonwealth forces and issued mainly to the officer class.
Colt M1911
The Colt M1911 is the sidearms of the American forces and issued mainly to the officer class.
Mauser C96
The Mauser C96 is the sidearm of the Ottoman forces issued to the officer class and appears in several special classes of the Imperial German forces.
FN M1910
The FN M1910 is the sidearm of the Belgian forces and issued to the officer class.
Nagant M1895
The Nagant M1895 revolver is the sidearm of the Imperial Russian forces and issued to the officer class.
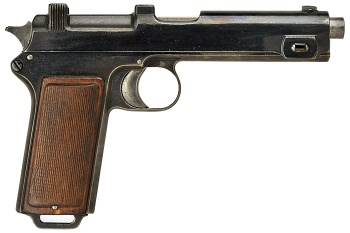
Steyr M1912
The Steyr 1912 is the sidearm of the Austro-Hungarian forces and issued to the officer class.
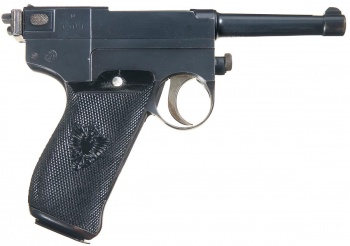
Glisenti M1910
The Glisenti M1910 is the sidearm of the Italian forces and issued to the officer class.
Light Machine Guns
MG08/15
The MG08/15 acts as the standard light machine gun for the Imperial German, Austro-Hungarian, and Ottoman forces.
Parabellum MG14
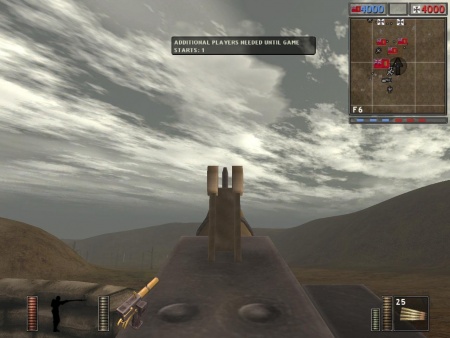
The Parabellum MG14 is primarily seen mounted on German aircraft but can also be seen independently on a couple European maps.
Chauchat M1915
The Chauchat M1915 is the standard light machine gun for the French forces.
Lewis Gun Mk. I
The Lewis Gun is the standard light machine gun for the British commonwealth forces.
BAR M1918
The BAR M1918 is the standard light machine gun for the American forces.
Madsen M1902
The Madsen M1902 is the standard light machine gun for the Belgian and Imperial Russian forces.
Fedorov Avtomat M1916
The Fedorov Avtomat M1916 appears in several maps taking place on the Eastern Front and is highly advantageous over the standard bolt-action rifles.
Submachine Guns
MP18
The MP18 appears in several maps and is very effective clearing out trenches and large numbers of enemy troops.
Villar-Perosa M1915
The Villar-Perosa M1915 appears as the standard machine gun for the Italian forces and is capable of being fired from the hip despite it being designed to be mounted on aircraft.
Heavy Machine Guns
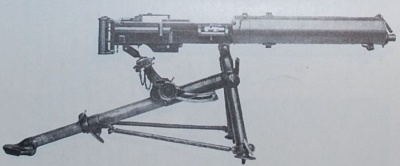
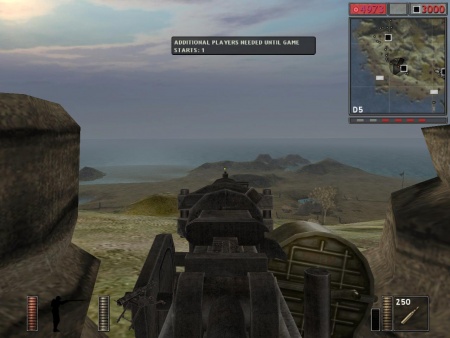
MG08
The MG08 appears as the standard heavy machine gun for the Imperial German forces and also used in some maps by the Austro-Hungarian and Ottoman forces.
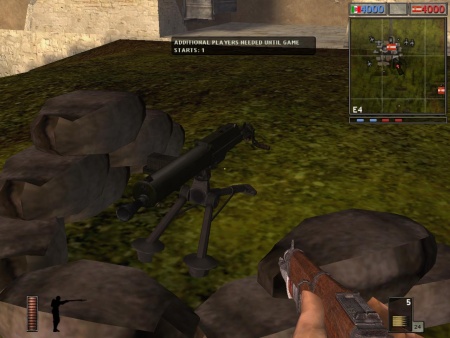
Hotchkiss M1914
The Hothkiss M1914 is the standard heavy machine gun for the French, Belgian, Italian, and American forces. It also appears mounted on several vehicles.
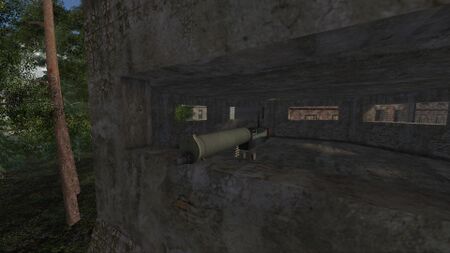
Vickers Mk. I
The Vickers Mk. I is the standard heavy machine gun for the British Commonwealth forces.
Bergmann MG02
The Bergmann MG02 appears as the standard heavy machine gun for the Ottoman forces and seen on several European maps used by the Imperial German forces.
Maxim M1910
The Maxim 1910 is the standard heavy machine gun for the Imperial Russian forces. The weapon can be seen in both with and without the wheel mount and shield.
Schwarzlose M1907/12
The Schwarzlose M1907/12 is the standard heavy machine gun for the Austro-Hungarian forces. It can be seen both with and without the tripod.
Flamethrower
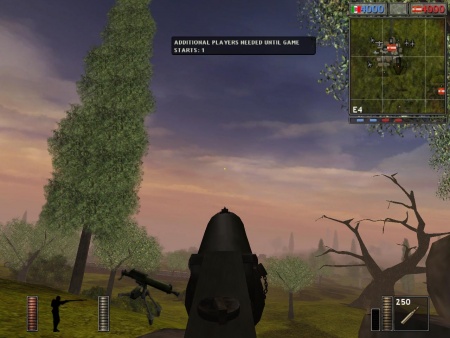
Flammenwerfer M.16
The Flammenwerfer M.16 appears in the service of Imperial German and Austro-Hungarian forces in several maps.
Explosives
Model 16 Stielhandgranate
The Model 16 Stielhandgranate appears as the standard hand grenade for the Imperial German forces.
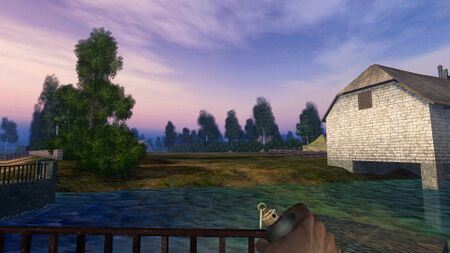
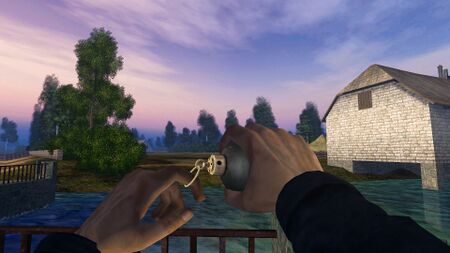
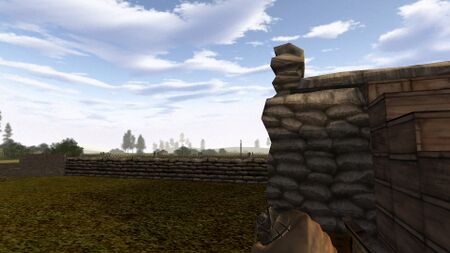
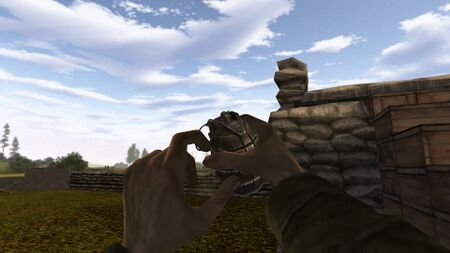
M1914 Ball Grenade
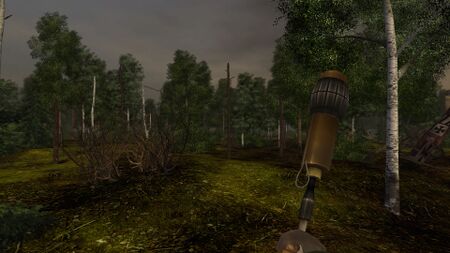
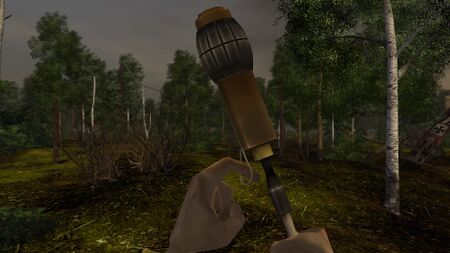
The M1914 ball grenade appears as the standard grenade for the French forces.
Mills No.5 Mk. I Hand Grenade
The Mills No.5 Mk.I appear as the standard grenade for the British Commonwealth and American forces.
No. 15 "Cricket" Ball Grenade
The No. 15 "Cricket" ball grenade appears as the standard grenade for the Ottoman forces.
OF-15 Hand Grenade
The OF-15 is the standard hand grenade for the Belgian forces.
M1912 "Lantern" Grenade
The Russian M1912 "Lantern" grenade appears as the standard grenade for the Imperial Russian forces.
Rohr Handgranate
The Rohr Handgranate is the standard hand grenade for the Austro-Hungarian forces.
Lenticolare M1914
The Lenticolare M1914 is the standard hand grenade for the Italian forces.
Geballte Ladung
The Geballte Ladung (made with Model 16 Stielhandgranate heads) appears in the engineer class of the Imperial German, Austro-Hungarian, and Ottoman forces and is primarily used to take out tanks and armored vehicles.
M1915 "Turtle" Disk Grenade
The M1915 "Turtle" disk grenade appears in the engineer class of the Imperial German forces in maps set late in the war and takes the place of the Geballte Ladung.
No.34 Mk.III Percussion Grenade
The No.34 Mk.III percussion grenade appears in the engineer class of French and Belgian forces and is primarily used to take out tanks and armored vehicles.
Dynamite
Italian and Russian engineers are given bundles of dynamite and is primarily used to take out tanks and armored vehicles.
No.2 Percussion Grenade
The No.2 percussion grenade appears in the engineer class of the British commonwealth and American forces and is primarily used to take out tanks and armored vehicles.
M1915 "Jam Tin" Grenade
The M1915 "Jam Tin" grenade appears in the grenadier kit for British Commonwealth forces and is available for pickup in several maps.
No.1 Mk.I Rifle Grenade
The grenadier kit for the British Commonwealth forces also receives the No.1 Mk.I rifle grenade for the Lee-Enfield No.1 Mk. III.
Mortars
Granatenwerfer 16
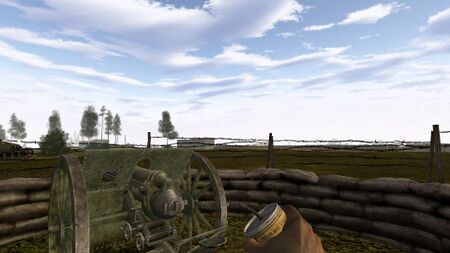
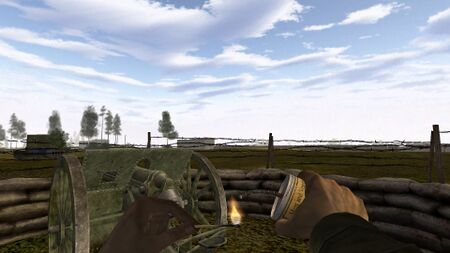
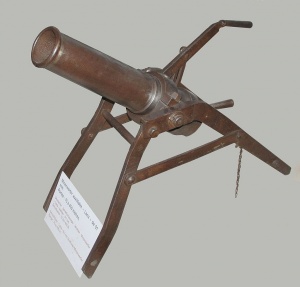
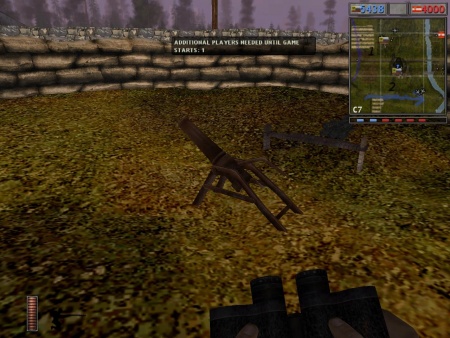
The Granatenwerfer 16 appears as the standard mortar for the Imperial German and Ottoman forces.
Stokes Mortar
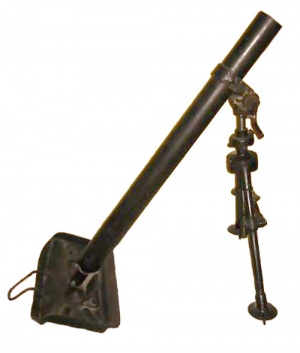
The Stokes Mortar is the standard mortar for the British Commonwealth, French, Belgian, Italian, and American forces.
9.15 cm Minenwerfer
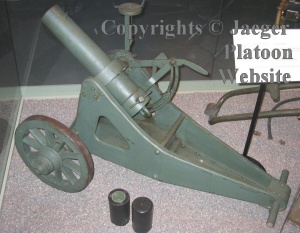
The 9.15cm Minenwerfer appears as the standard mortar for the Austro-Hungarian forces.
91mm Minethrower
The 91mm Minethrower appears as the standard mortar for the Imperial Russian forces.
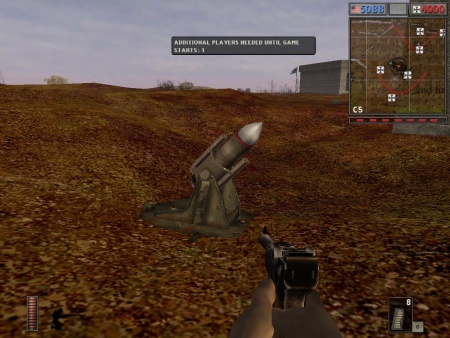
9.45 inch "Flying Pig"
The 9.45 inch "Flying Pig" appears as a heavy mortar used by all sides of the game.
17cm Minenwerfer
The 17cm Minenwerfer appears as a heavy mortar used by the Imperial German forces appearing in maps set late in the war.
Field Guns & Howitzers
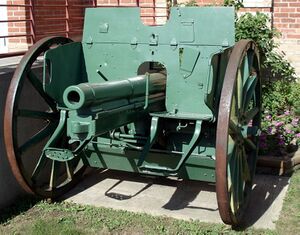
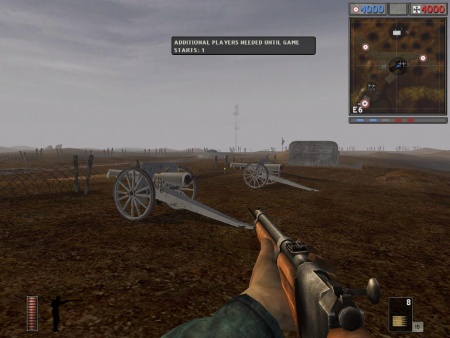
Feldkanone 77mm 96 n.A.
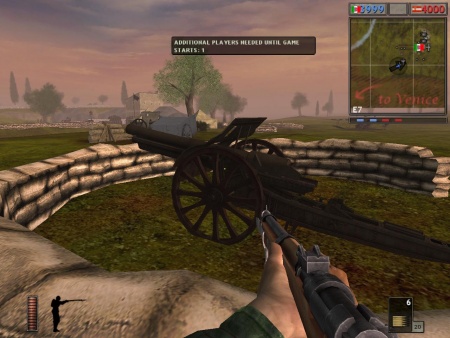
The Feldkanone 77mm 96 n.A. appears as the standard field gun for the Imperial German and Ottoman forces.
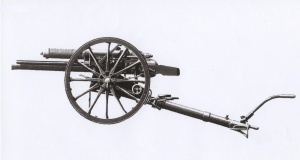
Canon 75mm Mle. 1897
The Canon 75mm Mle. 1897 appears as the standard field gun for the French, Belgian, and American forces.
Ordnance QF 18 Pounder
The Ordance QF Pounder appears as the standard field gun for the British Commonwealth forces.
Putilov 76mm
The Putilov 76mm is the standard field gun for the Imperial Russian forces.
Skoda 75mm M15
The Skoda 75mm M15 appears the standard field gun for the Austro-Hungarian forces.
Cannone 75/27 Modello 06
The Cannone 75/27 Modello 06 is the standard field gun used by the Italian forces.
Canon d'Infanterie 37mm Mle. 1916
The Canon d'Infanterie 37mm Mle. 1916 appears as a support weapon in several maps set in Europe.
150mm sFH 13
The 150mm sFH 13 appears as the standard field howitzer for the Imperial German and Ottoman forces.
Canon 155mm Mle. 1917
The Canon 155mm Mle. 1917 appears as the standard field howitzer for the French and American forces.
BL 6 inch 26cwt Howitzer
The BL 6 inch 26cwt Howitzer appears as the standard field howitzer for the British Commonwealth forces.
Canon 120mm Mle. 1878
The Canon 120mm Mle. 1878 appears as the standard field howitzer for the Belgian forces.
152mm M1904 Siege Gun
The 152mm M1904 siege gun appears as the standard field howitzer for the Imperial Russian forces.
Skoda 15cm M14
The Skoda 15cm M14 appears as the standard field howitzer for the Austro-Hungarian forces.
Canon 105mm Mle. 1913 Schneider
The Canon 105mm Mle. 1913 Schneider appears as the standard field howitzer for the Italian forces.
L/12 M14 "Big Bertha"
The L/12 M14 "Big Bertha" siege howitzer appears in several maps on the European theatre.
9.2 inch Mark I Siege Howitzer
The 9.2 inch Mark I siege howitzer appears in several European theatre maps taking place late in the war.
Anti-Aircraft
L/35 M1916
The L/35 M1916 7.7cm anti-aircraft is used on all sides of the conflict and is highly effective in taking down aircraft and ground vehicles alike.
Maxim QF 1 Pounder "Pom-Pom"
The Maxim QF 1 Pounder "Pom-Pom" appears as the light anti-aircraft gun used on all sides of the conflict.


