| If you have been locked out of your account you can request a password reset here. |
Difference between revisions of "Medal of Honor: Rising Sun"
| Line 1: | Line 1: | ||
| − | + | {{Infobox Video Game|{{PAGENAME}} | |
| + | |name=Medal of Honor: Rising Sun | ||
| + | |picture=MOHRSbox.jpg | ||
| + | |caption=''Cover Artwork'' | ||
| + | |date=November 11, 2003 | ||
| + | |developer=EA Los Angeles | ||
| + | |publisher=EA Games | ||
| + | |series=[[Medal of Honor]] | ||
| + | |platforms=GameCube<br />PlayStation 2<br />Xbox | ||
| + | |genre=[[First-Person Shooter]] | ||
| + | }} | ||
| − | '''''Medal of Honor: Rising Sun''''' is the fifth installment in the [[Medal of Honor]] series, released by Electronic Arts in November 2003. It is the first Medal of Honor game to take place in the Pacific Theater; and follows US Marine Joe Griffin through the Attack on Pearl Harbor, Guadalcanal, Singapore, Burma, and Thailand. Unlike previous MOH installments, ''Rising Sun'' is fairly short featuring only 9 levels. A sequel was planned for Joe Griffin's brother Donnie but was quickly canceled due to ''Rising Sun's'' negative reception. | + | '''''Medal of Honor: Rising Sun''''' is the fifth installment in the ''[[Medal of Honor]]'' series, released by Electronic Arts in November 2003. It is the first Medal of Honor game to take place in the Pacific Theater; and follows US Marine Joe Griffin through the Attack on Pearl Harbor, Guadalcanal, Singapore, Burma, and Thailand. Unlike previous MOH installments, ''Rising Sun'' is fairly short featuring only 9 levels. A sequel was planned for Joe Griffin's brother Donnie but was quickly canceled due to ''Rising Sun's'' negative reception. |
| − | ''' | + | '''Note:''' An emulator was used to capture very high-resolution screenshots of this game for clarity. This upscaling required the disabling of some post-processing effects due to resulting graphical glitches. All screenshots have been checked against original PS2 footage to ensure that any glitches noted on this page are also present in the PS2 version. |
| − | |||
| + | {{VG Title}} | ||
| − | = | + | __TOC__<br clear="all"> |
| − | == | + | =Handguns= |
| − | |||
| − | |||
| − | |||
| − | |||
| − | == | + | ==Colt M1911== |
| − | + | The early [[M1911]] is the main sidearm for the first few missions. | |
| − | [[ | + | [[File:COLTM1911 1913.jpg|thumb|none|300px|Original Colt M1911 (dated 1913) - .45 ACP]] |
| − | [[ | + | [[Image:MoHRS-Colt1.jpg|thumb|none|600px|Holding the "M1911" in-game.]] |
| − | + | [[Image:MoHRS-Colt2.jpg|thumb|none|600px|The aiming animation is just a zoomed screen; the iron sights are never used by any wielded gun.]] | |
| − | + | [[Image:MoHRS-Colt3.jpg|thumb|none|600px|Dropping out the magazine by pressing the mag release. Every weapon has only one reload animation; no matter if it still contains some bullets or is shot empty.]] | |
| − | + | [[Image:MoHRS-Colt4.jpg|thumb|none|600px|Putting in a new one.]] | |
| − | [[ | + | [[Image:MoHRS-Colt5.jpg|thumb|none|600px|Unswitching the slide stop.]] |
| + | [[Image:MoHRS-Colt6.jpg|thumb|none|600px|Melee animation.]] | ||
==Nambu Type 14== | ==Nambu Type 14== | ||
| − | + | From the third campaign mission "Fall of the Philippines" onwards, Japanese officers can be seen using [[Nambu Type 14]] pistols which are unusable for the player. German officers in Singapore are also armed with Nambu pistols instead of their own sidearms. | |
[[File: NambuType14Pistol.jpg|300px|thumb|none|Late Nambu Type 14 - 8x22mm Nambu]] | [[File: NambuType14Pistol.jpg|300px|thumb|none|Late Nambu Type 14 - 8x22mm Nambu]] | ||
| + | [[Image:MoHRS-Nambu1.jpg|thumb|none|600px|]] | ||
| + | [[Image:MoHRS-Nambu2.jpg|thumb|none|600px|]] | ||
| − | = | + | ==Webley .38 Mk. IV== |
| + | The second sidearm used by Japanese officers is the British [[Webley .38 Mk IV]] revolver. The reason for this revolver appearing in-game is unclear; either they are captured weapons or a stand-in for the [[Type 26 Revolver]]. Like the Nambu Type 14, they are not playable. | ||
| + | [[File:Weble .38 Mk IV.jpg|300px|thumb|none|Webley Markk IV - .38 S&W]] | ||
| + | [[Image:MoHRS-Webley1.jpg|thumb|none|600px|A dropped Webley revolver next to a ''Kenpeitai'' military police officer.]] | ||
| − | == | + | ==Welrod Mk. II== |
| − | The [[ | + | A suppressed [[Welrod Pistol]] is used in the mission "Singapore Sling". The pistol in-game is incorrectly shown as a single-shot weapon instead of a magazine fed pistol. |
| + | [[Image:HPIM0965.jpg|thumb|none|300px|Welrod Mark II - .32 ACP]] | ||
| + | [[Image:MoHRS-Welrod1.jpg|thumb|none|600px|Holding the "Welrod" in the streets of Singapore at night.]] | ||
| + | [[Image:MoHRS-Welrod2.jpg|thumb|none|600px|Cycling the action.]] | ||
| + | [[Image:MoHRS-Welrod3.jpg|thumb|none|600px|]] | ||
| + | [[Image:MoHRS-Welrod4.jpg|thumb|none|600px|Opening up the chamber.]] | ||
| + | [[Image:MoHRS-Welrod5.jpg|thumb|none|600px|Placing in a .32 ACP round.]] | ||
| + | [[Image:MoHRS-Welrod6.jpg|thumb|none|600px|Closing the chamber.]] | ||
| − | + | =Submachine Guns= | |
| − | |||
| − | |||
| − | [[Image: | + | ==M1928A1 Thompson== |
| + | The [[M1928A1 Thompson]] appears simply as the "Thompson" and hold only 20-rounds in its 30-rounds stick magazine. | ||
| + | [[File:M1928A1 Thompson.jpg|thumb|none|400px|M1928A1 Thompson with 30-round magazine - .45 ACP]] | ||
| + | [[Image:MoHRS-Thompson1.jpg|thumb|none|600px|Holding the "Thompson" in-game.]] | ||
| + | [[Image:MoHRS-Thompson2.jpg|thumb|none|600px|Firing the gun shows the moving charging handle.]] | ||
| + | [[Image:MoHRS-Thompson3.jpg|thumb|none|600px|Grabbing the used magazine.]] | ||
| + | [[Image:MoHRS-Thompson4.jpg|thumb|none|600px|Getting a new one in position. The charging handle is never touched during the reload.]] | ||
| − | ==Sten | + | ==Sten Mk. IIS== |
| − | The suppressed [[Sten Mk IIS]] is used by the player for a few missions and is used by Major Bromley. | + | The suppressed [[Sten Mk IIS]] is used by the player for a few missions and is used by Major Phillip Bromley. Like the Thompson, the magazine only contains 20-rounds, despite having a 32-round detachable box magazine. |
| − | [[File:Sten | + | [[File:StenMKIISilenced.jpg|thumb|none|400px|Sten Mark IIS (Canadian) - 9x19mm]] |
| − | [[ | + | [[Image:MoHRS-Sten1.jpg|thumb|none|600px|Holding the "Sten Mk II" in-game.]] |
| + | [[Image:MoHRS-Sten2.jpg|thumb|none|600px|Starting the reload.]] | ||
| + | [[Image:MoHRS-Sten3.jpg|thumb|none|600px|]] | ||
| + | [[Image:MoHRS-Sten4.jpg|thumb|none|600px|Inserting a new magazine.]] | ||
| + | [[Image:MoHRS-Sten5.jpg|thumb|none|600px|Pulling back the charging handle. The Sten is one of two weapons in-game which the charging handle is touched during the reload.]] | ||
| + | [[Image:MoHRS-Sten6.jpg|thumb|none|600px|Major Bromley interrupting a Japanese-German meeting dual wields two Sten Guns in "Singapore Sling".]] | ||
==Type 100== | ==Type 100== | ||
Though it was originally planned to be a useable weapon in the game, the [[Type 100 submachine gun]] is only seen in the first cutscene of the final mission. When PFC Tanaka gets off the plane, the Japanese sailor on the left is holding a Type 100 while talking to the other sailor on the right who has a Type 99 LMG. | Though it was originally planned to be a useable weapon in the game, the [[Type 100 submachine gun]] is only seen in the first cutscene of the final mission. When PFC Tanaka gets off the plane, the Japanese sailor on the left is holding a Type 100 while talking to the other sailor on the right who has a Type 99 LMG. | ||
| − | [[File: | + | [[File:Type100 1944.jpg|400px|thumb|none|Type 100 (1944-1945 model) with magazine removed - 8x22mm Nambu]] |
| + | [[Image:MoHRS-TypeSMG1.jpg|thumb|none|600px|]] | ||
| + | [[Image:MoHRS-TypeSMG2.jpg|thumb|none|600px|]] | ||
| − | = | + | =Shotguns= |
| − | == | + | ==Winchester Model 1912== |
| − | + | The [[Winchester Model 1912]] shotgun is Gunny's weapon of choice and eventually used by the player in further missions. | |
| − | [[ | + | [[File:WinchesterM12Trench.jpg|thumb|none|450px|Winchester Model 1912 "Trench Gun" with heat shield and bayonet lug - 12 gauge]] |
| − | [[Image: | + | [[Image:MoHRS-Shotgun1.jpg|thumb|none|600px|Holding the "shotgun" while enjoying the view of ""[[The Bridge on the River Kwai]]''.]] |
| − | [[ | + | [[Image:MoHRS-Shotgun2.jpg|thumb|none|600px|Pumping the shotgun; an ejecting shell is seen flying out.]] |
| + | [[Image:MoHRS-Shotgun3.jpg|thumb|none|600px|The reaload is done off-screen with most likely a speedloader.]] | ||
| + | [[Image:MoHRS-Shotgun4.jpg|thumb|none|600px|Finishing the reload by chambering the shotgun.]] | ||
| − | |||
| − | |||
| − | |||
| − | == | + | =Rifles= |
| − | |||
| − | |||
| − | |||
| − | == | + | ==Arisaka Type 38== |
| − | + | Japanese soldiers at all levels often carry [[Arisaka Type 38]] with Type 30 bayonets attached, which they can use to perform a banzai attack. The soldiers are also able fire two or three shots rapidly in semi-action despite being a bolt-action rifle. After these soldiers are killed, they disappear with their Arisaka rifles; so the player can not pick them up. However, sometimes the ammo of the Arisaka is usable for the [[M1 Garand]] an [[M1903 Springfield]] rifles. | |
| − | [[ | + | [[Image:Arisakat38.jpg|thumb|450px|none|Arisaka Type 38 - 6.5x50mmSR]] |
| − | [[ | + | [[Image:MoHRS-Arisaka1.jpg|thumb|none|600px|]] |
| + | [[Image:Type 38 rifle and Type 30 bayonet.jpg|thumb|450px|none|Arisaka Type 38 rifle with Type 30 bayonet - 6.5x50mmSR Arisaka]] | ||
| + | [[Image:MoHRS-Arisaka2.jpg|thumb|none|600px|]] | ||
| − | == | + | ==Lee-Enfield No. 4 Mk. I== |
| − | + | The [[Lee-Enfield No. 4 Mk I]] is seen in the hands of Chindit fighters, some Guadalcanal natives and (real-life veteran) Martin Clemens. Not usable by the player. | |
| − | [[ | + | [[File:LeeEnfield4Rifle.jpg|450px|thumb|none|Lee-Enfield No. 4 Mark I - .303 British]] |
| − | [[ | + | [[Image:MoHRS-LeeEnfield1.jpg|thumb|none|600px|]] |
| + | [[Image:MoHRS-LeeEnfield2.jpg|thumb|none|600px|]] | ||
| − | = | + | ==M1 Garand== |
| + | The [[M1 Garand]] is used by the player in a few of the missions and by US Marines in the 3rd mission. It is shown as the main rifle of the Marines, even though in the real battle of the Philippines, they mainly used the [[M1903 Springfield]] as their standard weapon. | ||
| + | [[File:M1 Garand.jpg|thumb|none|450px|M1 Garand - .30-06]] | ||
| + | [[Image:MoHRS-Garand1.jpg|thumb|none|600px|Holding an "M1 Garand".]] | ||
| + | [[Image:MoHRS-Garand2.jpg|thumb|none|600px|The aiming animation gives a closer view of the front sight.]] | ||
| + | [[Image:MoHRS-Garand3.jpg|thumb|none|600px|The beginning of the reload offers a nice view of the empty chamber. The reload can only be performed when the gun is empty.]] | ||
| + | [[Image:MoHRS-Garand4.jpg|thumb|none|600px|Bringing in the en-bloc clip.]] | ||
| + | [[Image:MoHRS-Garand5.jpg|thumb|none|600px|About to insert the clip into the chamber.]] | ||
| + | [[Image:MoHRS-Garand6.jpg|thumb|none|600px|The bolt closes by itself.]] | ||
| + | [[Image:MoHRS-Garand7.jpg|thumb|none|600px|A Garand on the ground.]] | ||
| − | == | + | ==Springfield M1903/A5== |
| − | The [[Winchester | + | The [[M1903 Springfield]] equipped with a Winchester A5 telescopic sight appears as the only sniper rifle in-game. |
| − | [[ | + | [[Image:Springfield1903.jpg|thumb|none|450px|Springfield M1903 Transitional (pre-WW2) issue - .30-06 Springfield]] |
| − | [[ | + | [[File:Scopedm1917enfield.jpg|thumb|none|450px|M1917 Enfield with Winchester A5 Scope - .30-06 Springfield; for comparison]] |
| + | [[Image:MoHRS-Springfield1.jpg|thumb|none|600px|Holding the "Springfield '03" in-game.]] | ||
| + | [[Image:MoHRS-Springfield2.jpg|thumb|none|600px|Lookinh through the Winchester scope.]] | ||
| + | [[Image:MoHRS-Springfield3.jpg|thumb|none|600px|Cycling the bolt-handle.]] | ||
| + | [[Image:MoHRS-Springfield4.jpg|thumb|none|600px|Reloading the rifle.]] | ||
| + | [[Image:MoHRS-Springfield5.jpg|thumb|none|600px|The melee animation reveals the buttstock.]] | ||
| + | [[Image:MoHRS-Springfield6.jpg|thumb|none|600px|An unscoped Springfield rifle at the beginning of the mission "Midnight Raid on Guadalcanal".]] | ||
=Machine Guns= | =Machine Guns= | ||
| − | ==Browning | + | ==M1918 Browning Automatic Rifle== |
| − | + | After reaching the deck of the USS ''California'', Joseph Griffin receives an [[M1918 Browning Automatic Rifle]] from Jack "Gunny" Lauton to defend the ship from air attack. | |
| − | [[ | + | [[File:BAR.jpg|thumb|none|400px|M1918A2 Browning Automatic Rifle without carry handle - .30-06]] |
| − | [[ | + | [[Image:MoHRS-BAR1.jpg|thumb|none|600px|Joseph Griffin wittnesses the Japanese attack with his BAR in hands.]] |
| + | [[Image:MoHRS-BAR2.jpg|thumb|none|600px|Reloading.]] | ||
| + | [[Image:MoHRS-BAR3.jpg|thumb|none|600px|The BAR is the second weapon in-game on which the charging handle is used.]] | ||
| + | [[Image:MoHRS-BAR4.jpg|thumb|none|600px|A Marine holding a BAR.]] | ||
| − | ==Type 11 | + | ==Type 11== |
| − | + | The [[Type 11 light machine gun]] is seen many times being used by Japanese soldiers, and can be used in several missions by the player. | |
[[Image:Type11.jpg|thumb|none|400px|Type 11 Light Machine Gun - 6.5x50mm Arisaka.]] | [[Image:Type11.jpg|thumb|none|400px|Type 11 Light Machine Gun - 6.5x50mm Arisaka.]] | ||
| + | [[Image:MoHRS-Type111.jpg|thumb|none|600px|The "T-11" wielded in multiplayer mode.]] | ||
| + | [[Image:MoHRS-Type112.jpg|thumb|none|600px|The stripper clips in the "magazine" are actually moving after 5-rounds are fired.]] | ||
| + | [[Image:MoHRS-Type113.jpg|thumb|none|600px|Reloading off-screen.]] | ||
| − | ==Type 99 | + | ==Type 99== |
| − | + | During the final mission, the [[Type 99 Light Machine Gun]] is first seen in the opening cutscene and then used by Japanese sailors. | |
| − | [[file:Type99LMG.jpg| | + | [[file:Type99LMG.jpg|400px|thumb|none|Type 99 light machine gun - 7.7x58mm Arisaka]] |
| − | [[ | + | [[Image:MoHRS-Type991.jpg|thumb|none|600px|Holding the "T-99" in-game.]] |
| + | [[Image:MoHRS-Type992.jpg|thumb|none|600px|Removing the used magazine off-screen.]] | ||
| + | [[Image:MoHRS-Type993.jpg|thumb|none|600px|The same is done with the new magazine.]] | ||
| + | [[Image:MoHRS-Type994.jpg|thumb|none|600px|A Type 99 LMG on the ground.]] | ||
| − | = | + | =Launchers= |
| − | |||
| − | |||
| − | |||
| − | |||
==M9A1 Bazooka== | ==M9A1 Bazooka== | ||
| − | + | An [[M91A1 Bazooka]] is used in the seventh mission "In Search of Yamashita's Gold". | |
[[File:M9A1 Bazooka.jpg|thumb|none|400px|M9A1 "Bazooka" - 2.36 inch]] | [[File:M9A1 Bazooka.jpg|thumb|none|400px|M9A1 "Bazooka" - 2.36 inch]] | ||
| + | [[Image:MoHRS-Bazooka1.jpg|thumb|none|600px|Equipping the "M9A1 Bazooka", first the character unfolds the 2.36 sight.]] | ||
| + | [[Image:MoHRS-Bazooka2.jpg|thumb|none|600px|Holding the launcher.]] | ||
| + | [[Image:MoHRS-Bazooka3.jpg|thumb|none|600px|Looking through the sight.]] | ||
| + | [[Image:MoHRS-Bazooka4.jpg|thumb|none|600px|Inserting a new round off-screen.]] | ||
| + | |||
| + | =Grenade & Explosives= | ||
| + | |||
| + | ==Lunge Mine== | ||
| + | The "Pole Miners" during the Philippines invasion are armed with Lunge Mines. Historically, this is quite inaccurate as the Japanese would not have been using such suicidal tactics early in the war in 1941, when they were on a seemingly unstoppable offensive in the Pacific and South East Asia. It was much later in the war (1944-1945) when they began to desperately turn to suicide tactics like the Lunge Mine, the Kamikaze raids and the human-mine. | ||
| + | [[Image:Lunge Mine.jpg|thumb|300px|none|Render of a Lunge Mine used by the Imperial Japanese Army participating in Self-Sacrifice]] | ||
| + | [[Image:MoHRS-LungeMine1.jpg|thumb|none|600px|Twp Japanese soldiers running with their Lunge mines towards the M3 Stuart.]] | ||
| + | |||
| + | ==Mk. 2 Hand Grenade== | ||
| + | One [[Mk 2 hand grenade]] is seen hanging from Major Bromley's uniform. | ||
| + | [[File:MK2 grenade DoD.jpg|thumb|none|175px|Mk 2 high-explosive fragmentation hand grenade]] | ||
| + | [[Image:MoHRS-Mk2Grenade1.jpg|thumb|none|600px|]] | ||
==Type 97 Frag Grenade== | ==Type 97 Frag Grenade== | ||
| − | + | The Japanese [[Type 97 hand grenade]] is the only playable grenade in the game. | |
| − | [[File:Japanese-type97-grenade.jpg| | + | [[File:Japanese-type97-grenade.jpg|150px|thumb|none|Type 97 hand grenade without pin]] |
| + | [[Image:MoHRS-TypeGrenade1.jpg|thumb|none|600px|]] | ||
| + | |||
| + | =Mounted Weapons= | ||
| − | == | + | ==14-inch/50-caliber gun== |
| − | + | The main armament of the USS ''California'' are 4 × triple 14 in (356 mm) guns. | |
| + | [[Image:MoHRS-CaliforniaGun1.jpg|thumb|none|600px|]] | ||
| + | |||
| + | ==Browning M2 Aircraft== | ||
| + | The PT-20-class motor torpedo boat in the second mission "Pearl Harbor" has a turret with dual mounted [[Browning M2 Aircraft]] machine guns. | ||
| + | [[Image:M2aircraft.jpg|thumb|none|450px|Browning M2 Aircraft, Fixed - .50 BMG]] | ||
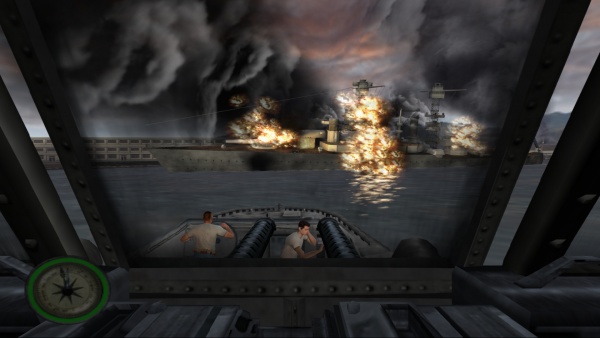
| + | [[Image:MoHRS-BrowningBoat1.jpg|thumb|none|600px|]] | ||
| + | |||
| + | ==Browning M2 Water Cooled== | ||
| + | The player is tasked to man a [[Browning M2 Water Cooled|water-cooled version]] of the [[Browning M2HB]] to shot down various Japanese planes and incoming torpedoes aboard the USS ''California'' at Pearl Harbor. | ||
| + | [[Image:M2watercooled.jpg|thumb|none|450px|Browning M2 Water Cooled - .50 BMG]] | ||
| + | [[Image:MoHRS-BrowningWater1.jpg|thumb|none|600px|]] | ||
| + | [[Image:MoHRS-BrowningWater2.jpg|thumb|none|600px|]] | ||
| + | [[Image:MoHRS-BrowningWater3.jpg|thumb|none|600px|]] | ||
| + | |||
| + | ==Browning M1919A4== | ||
| + | A [[Browning M1919A4]] is seen mounted in the Light Tank, M3. | ||
| + | [[Image:M1919A4.jpg|thumb|none|450px|Browning M1919A4 - .30-06 Springfield]] | ||
| + | [[Image:MoHRS-BrowningTank1.jpg|thumb|none|600px|]] | ||
| + | |||
| + | ==Type 11 light machine gun== | ||
| + | The [[Type 11 light machine gun]] appears also as a mounted weapon. | ||
| + | [[Image:Type 11 LMG bipod and sling.jpg|thumb|none|450px|Type 11 Light Machine Gun with bipod/sling - 6.5x50mm Arisaka]] | ||
| + | [[Image:MoHRS-Type11M1.jpg|thumb|none|600px|Unlike to the portable variant, the mounted one's magazine does not contain ammo.]] | ||
| + | [[Image:MoHRS-Type11M2.jpg|thumb|none|600px|]] | ||
| + | [[Image:MoHRS-Type11M3.jpg|thumb|none|600px|]] | ||
| + | |||
| + | ==Type 96 15 cm Howitzer== | ||
| + | Various Type 96 15 cm howitzers can be seen in the singleplayer campaign and multiplayer maps. | ||
| + | [[Image:Type96howitzer.jpg|thumb|none|450px|Type 96 15 cm Howitzer]] | ||
| + | [[Image:MoHRS-TypeHowitzer1.jpg|thumb|none|600px|]] | ||
| + | [[Image:MoHRS-TypeHowitzer2.jpg|thumb|none|600px|]] | ||
| − | [[Image: | + | ==Type 92 light machine gun== |
| + | A [[Type 92 light machine gun|Type 92]] machine gun is mounted on elephant (!) back in Burma, and at the end of the level "Supercarrier Sabotage", when mounted on a Japanese Aichi D3A "Val" Type 99 Carrier Bomber. | ||
| + | [[Image:Type 92 IJN.JPG|thumb|none|400px|Type 92 light machine gun - 7.7×58mm Arisaka]] | ||
| + | [[Image:MoHRS-Type921.jpg|thumb|none|600px|]] | ||
| + | [[Image:MoHRS-Type922.jpg|thumb|none|600px|The elephant mounted Type 92.]] | ||
| + | [[Image:MoHRS-Type923.jpg|thumb|none|600px|The Aichi D3A's rear-mounted Type 92-]] | ||
| + | [[Image:MoHRS-Type924.jpg|thumb|none|600px|Manning the Type 92.]] | ||
| − | [[Image: | + | ==Type 92 battalion gun== |
| + | During the mission "Pistol Pete Showdown", Sgt. Griffin encounters a usable Type 92 battalion gun. | ||
| + | [[Image:MoHRS-TypeGun1.jpg|thumb|none|600px|]] | ||
| + | [[Image:MoHRS-TypeGun2.jpg|thumb|none|600px|]] | ||
| + | [[Image:MoHRS-TypeGun3.jpg|thumb|none|600px|]] | ||
| − | + | ==Type 96 25 mm AT/AA Gun== | |
| + | Several [[Type 96 25 mm AT/AA Gun]] can be seen throughout the single-player champaign. | ||
| + | [[Image:Type96AAGun.jpg|thumb|none|450px|Type 96 AT/AA Gun on triple mount - 25x163mm]] | ||
| + | [[Image:MoHRS-TypeAA1.jpg|thumb|none|600px|]] | ||
| + | [[Image:MoHRS-TypeAA2.jpg|thumb|none|600px|]] | ||
| + | [[Image:MoHRS-TypeAA3.jpg|thumb|none|600px|]] | ||
| + | [[Image:MoHRS-TypeAA4.jpg|thumb|none|600px|Two Type 96 25 mm AT/AA Guns mounted on the supercarrier.]] | ||
| − | = | + | ==Type 97 light machine gun== |
| + | The Type 95 Ha-Gō light tank has two mounted [[Type 97 light machine gun]]s. | ||
| + | [[Image:Type 97 tank machine gun.jpg|thumb|none|450px|Type 97 light machine gun in tank configuration - 7.7x58mm Arisaka]] | ||
| + | [[Image:MoHRS-TypeTank1.jpg|thumb|none|600px|A disabled Type 95 Ha-Gō light tank.]] | ||
==Type 99 Cannon== | ==Type 99 Cannon== | ||
| − | + | Japanese A6M "Zeroe" fighters have poorly modelled [[Type 99 cannon]]s in their wings. The nose-mounted [[Type 97 Aircraft machine gun]]s are not visible. | |
| − | [[Image:Type 99- | + | [[Image:Type 99 cannon display.jpg|thumb|none|450px|Type 99 Mark 2 cannon - 20x72mm RB]] |
| − | [[ | + | [[Image:MoHRS-TypeCannon1.jpg|thumb|none|600px|]] |
| + | |||
| + | ==Type 99 81 mm mortar== | ||
| + | What appears to be Type 99 Mortars are sometimes used by Japanese soldiers. They can only be seen from a distance; after reaching the mortar's position it is no more there. | ||
| + | [[Image:Type99mortar.jpg|thumb|none|300px|Type 99 Mortar - 81 mm (3.19 in)]] | ||
| + | [[Image:MoHRS-TypeMortar1.jpg|thumb|none|600px|]] | ||
{{Medal of Honor Series}} | {{Medal of Honor Series}} | ||
Revision as of 08:46, 17 July 2022
|
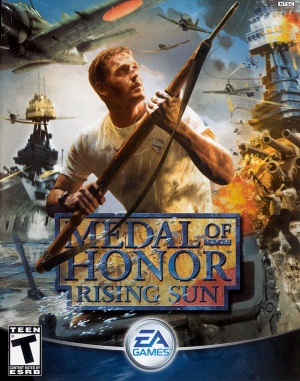
Medal of Honor: Rising Sun is the fifth installment in the Medal of Honor series, released by Electronic Arts in November 2003. It is the first Medal of Honor game to take place in the Pacific Theater; and follows US Marine Joe Griffin through the Attack on Pearl Harbor, Guadalcanal, Singapore, Burma, and Thailand. Unlike previous MOH installments, Rising Sun is fairly short featuring only 9 levels. A sequel was planned for Joe Griffin's brother Donnie but was quickly canceled due to Rising Sun's negative reception.
Note: An emulator was used to capture very high-resolution screenshots of this game for clarity. This upscaling required the disabling of some post-processing effects due to resulting graphical glitches. All screenshots have been checked against original PS2 footage to ensure that any glitches noted on this page are also present in the PS2 version.
The following weapons appear in the video game Medal of Honor: Rising Sun:
Handguns
Colt M1911
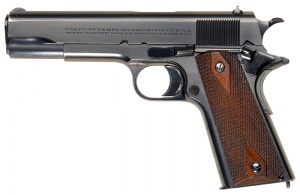
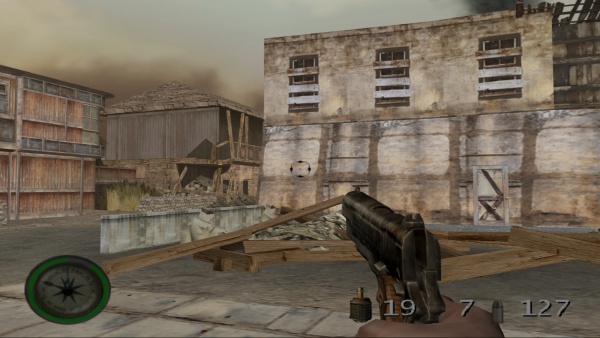
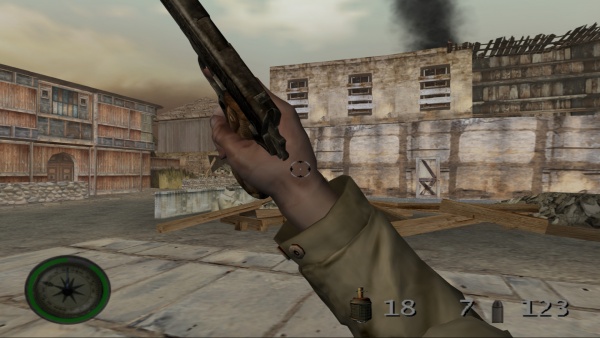
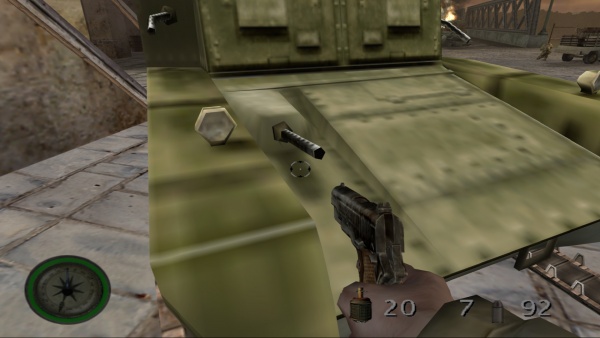
The early M1911 is the main sidearm for the first few missions.
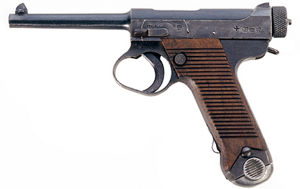
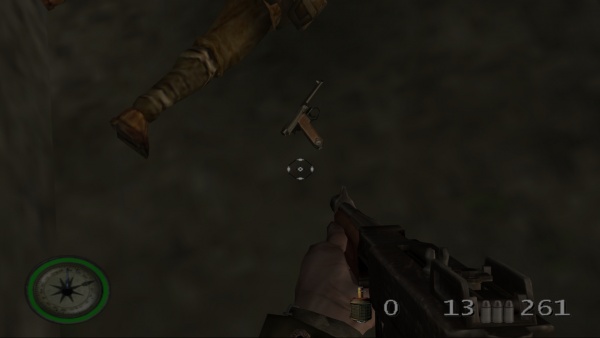
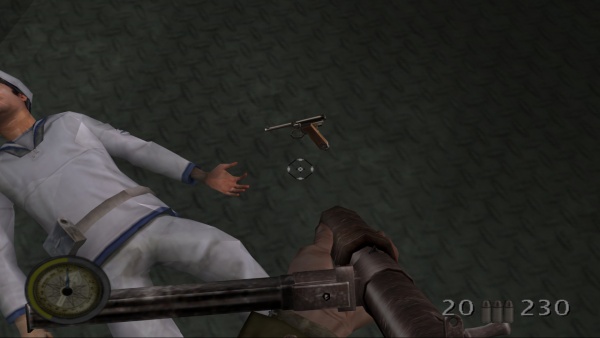
Nambu Type 14
From the third campaign mission "Fall of the Philippines" onwards, Japanese officers can be seen using Nambu Type 14 pistols which are unusable for the player. German officers in Singapore are also armed with Nambu pistols instead of their own sidearms.
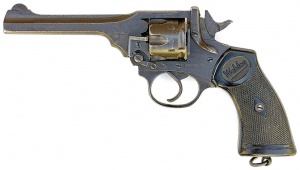
Webley .38 Mk. IV
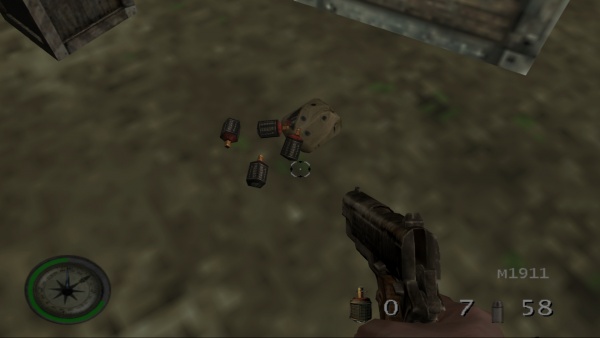
The second sidearm used by Japanese officers is the British Webley .38 Mk IV revolver. The reason for this revolver appearing in-game is unclear; either they are captured weapons or a stand-in for the Type 26 Revolver. Like the Nambu Type 14, they are not playable.
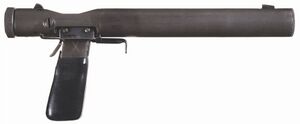
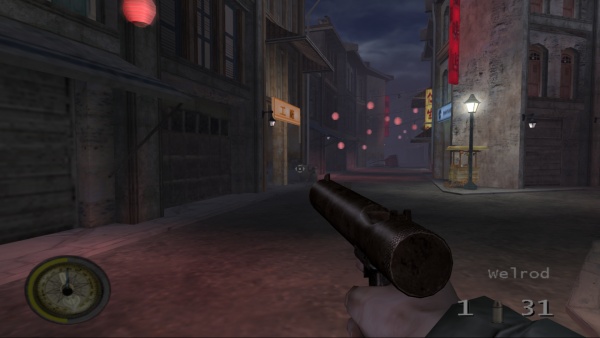
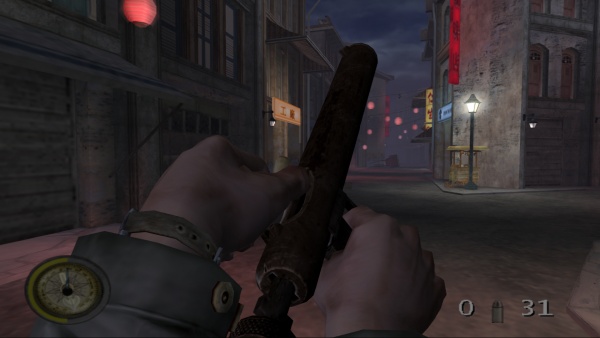
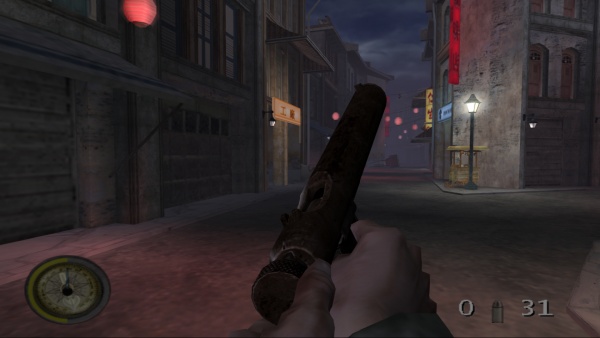
Welrod Mk. II
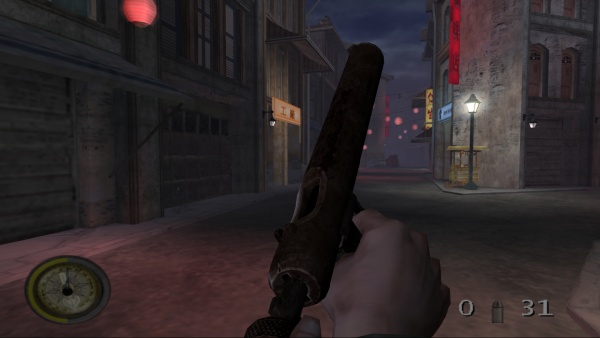
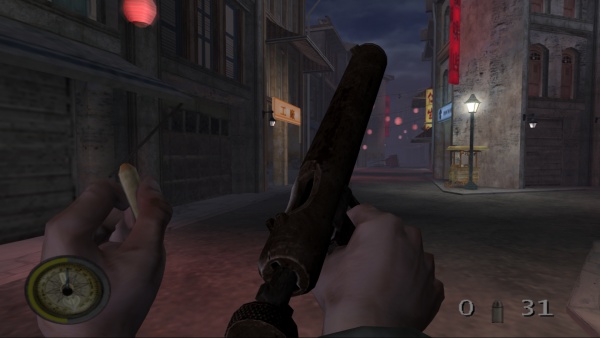
A suppressed Welrod Pistol is used in the mission "Singapore Sling". The pistol in-game is incorrectly shown as a single-shot weapon instead of a magazine fed pistol.
Submachine Guns
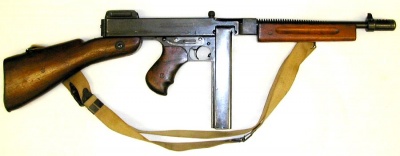
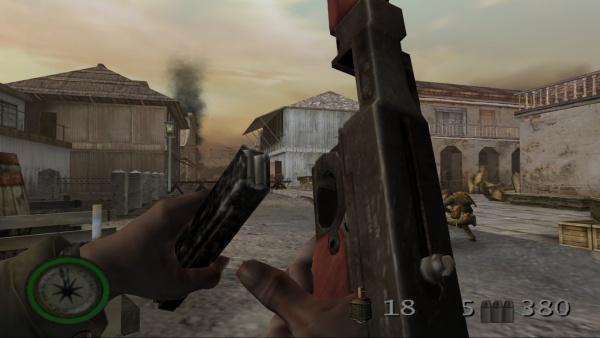
M1928A1 Thompson
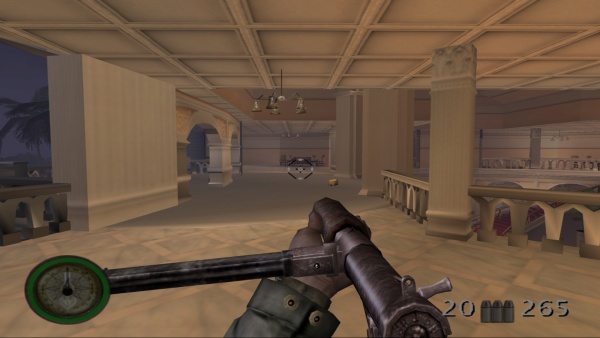
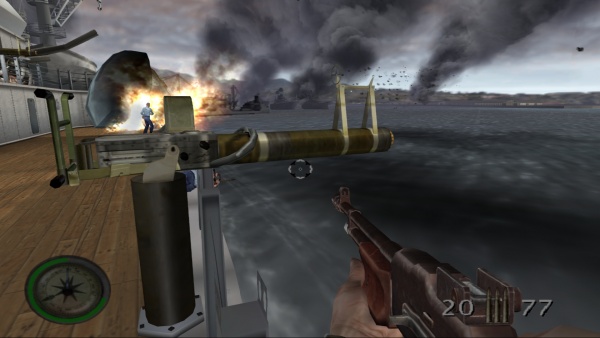
The M1928A1 Thompson appears simply as the "Thompson" and hold only 20-rounds in its 30-rounds stick magazine.
Sten Mk. IIS
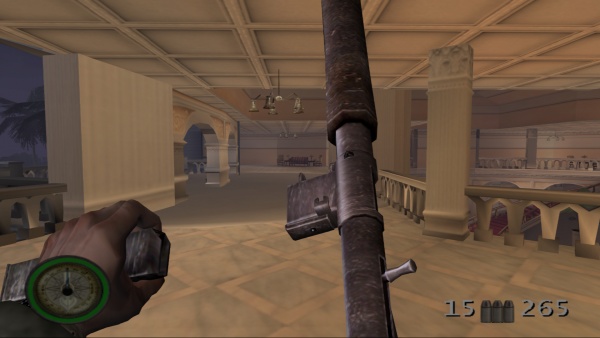
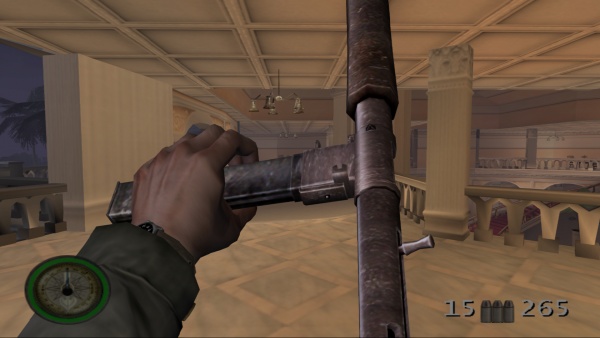
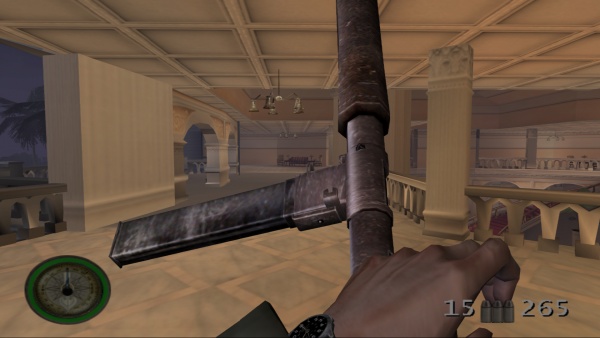
The suppressed Sten Mk IIS is used by the player for a few missions and is used by Major Phillip Bromley. Like the Thompson, the magazine only contains 20-rounds, despite having a 32-round detachable box magazine.
Type 100
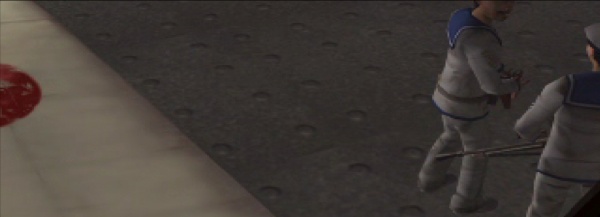
Though it was originally planned to be a useable weapon in the game, the Type 100 submachine gun is only seen in the first cutscene of the final mission. When PFC Tanaka gets off the plane, the Japanese sailor on the left is holding a Type 100 while talking to the other sailor on the right who has a Type 99 LMG.
Shotguns
Winchester Model 1912
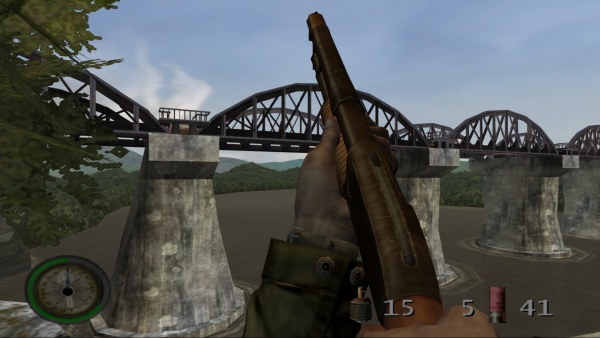
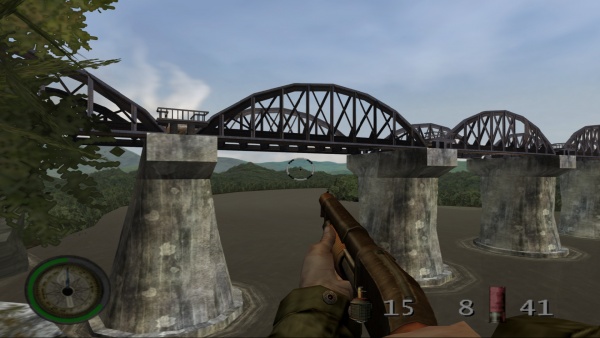
The Winchester Model 1912 shotgun is Gunny's weapon of choice and eventually used by the player in further missions.
Rifles
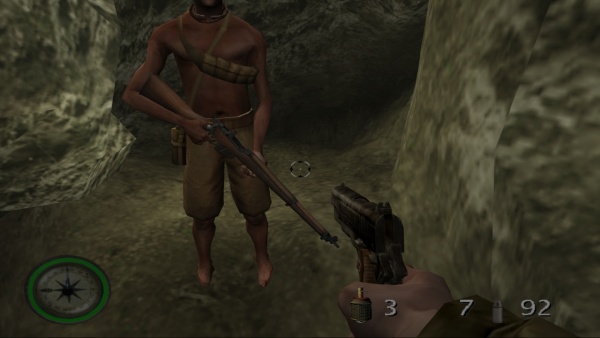
Arisaka Type 38
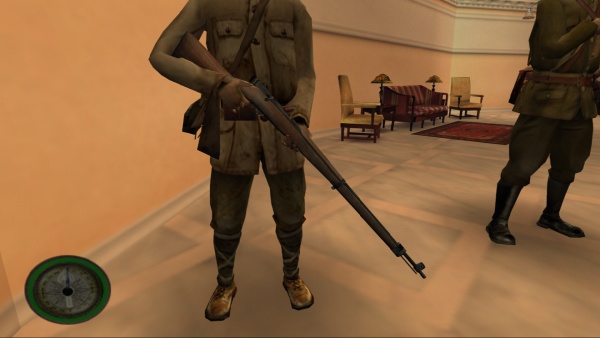
Japanese soldiers at all levels often carry Arisaka Type 38 with Type 30 bayonets attached, which they can use to perform a banzai attack. The soldiers are also able fire two or three shots rapidly in semi-action despite being a bolt-action rifle. After these soldiers are killed, they disappear with their Arisaka rifles; so the player can not pick them up. However, sometimes the ammo of the Arisaka is usable for the M1 Garand an M1903 Springfield rifles.
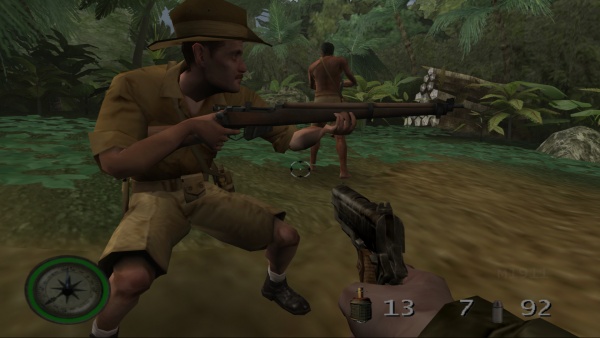
Lee-Enfield No. 4 Mk. I
The Lee-Enfield No. 4 Mk I is seen in the hands of Chindit fighters, some Guadalcanal natives and (real-life veteran) Martin Clemens. Not usable by the player.
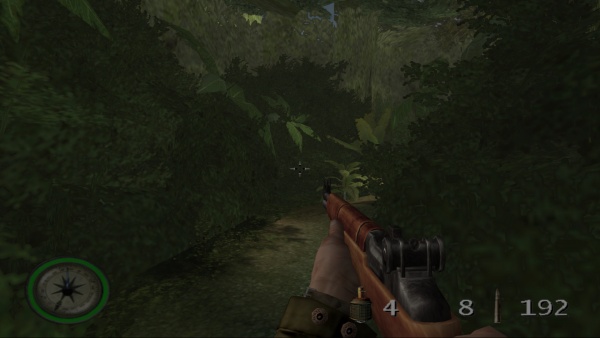
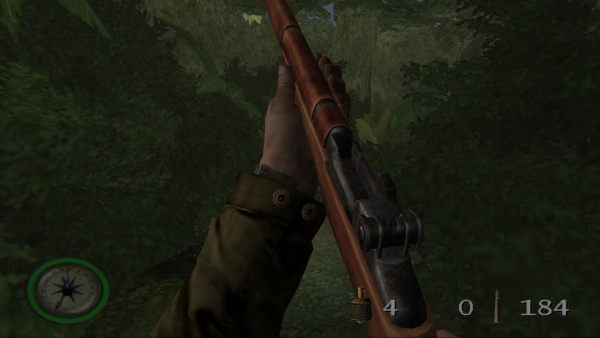
M1 Garand
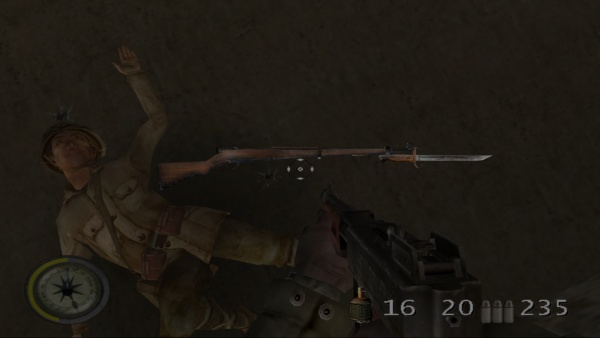
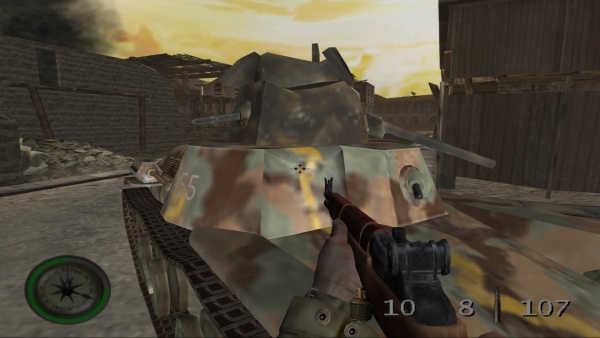
The M1 Garand is used by the player in a few of the missions and by US Marines in the 3rd mission. It is shown as the main rifle of the Marines, even though in the real battle of the Philippines, they mainly used the M1903 Springfield as their standard weapon.
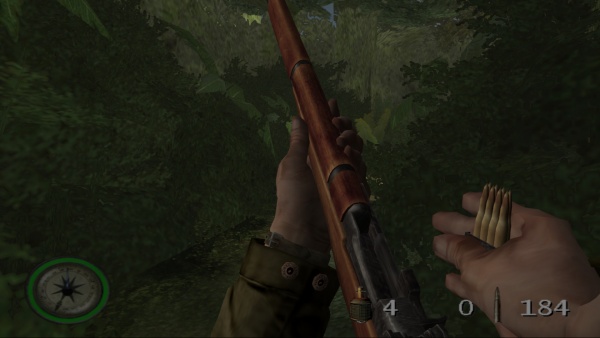
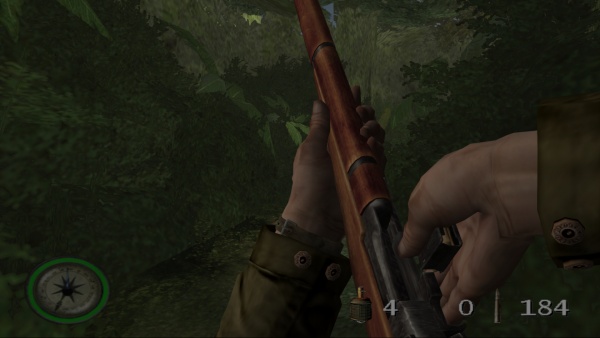
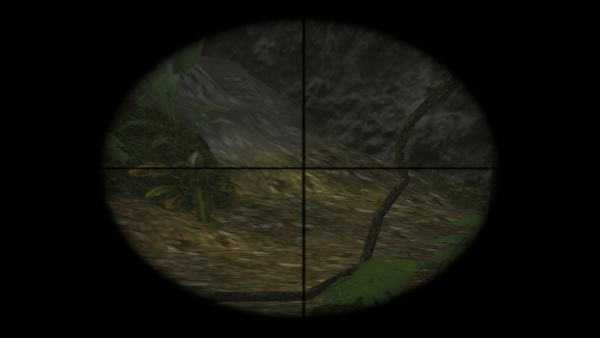
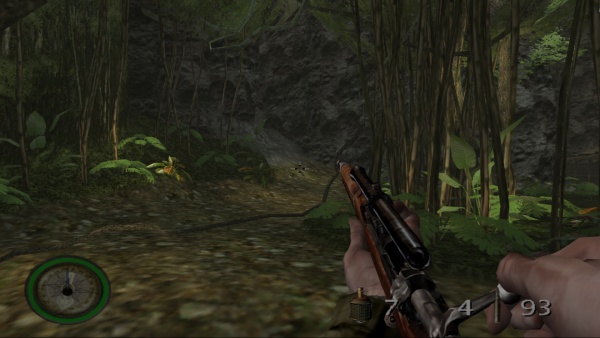
Springfield M1903/A5
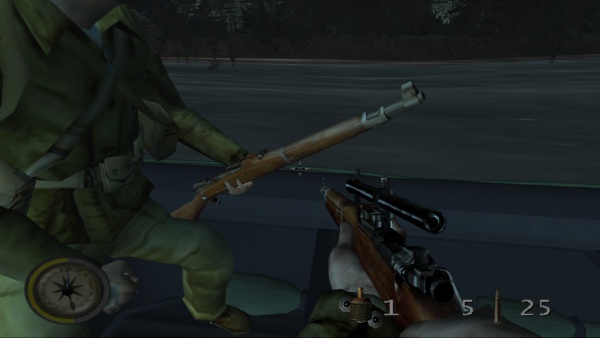
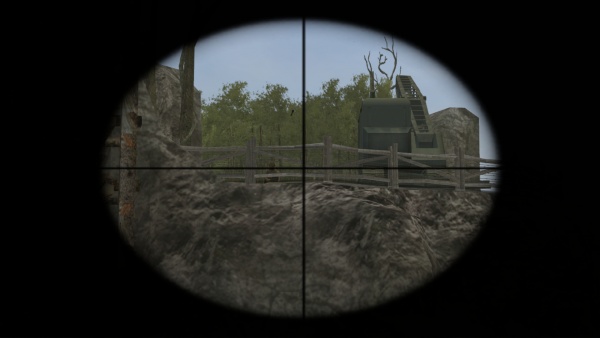
The M1903 Springfield equipped with a Winchester A5 telescopic sight appears as the only sniper rifle in-game.
Machine Guns
M1918 Browning Automatic Rifle
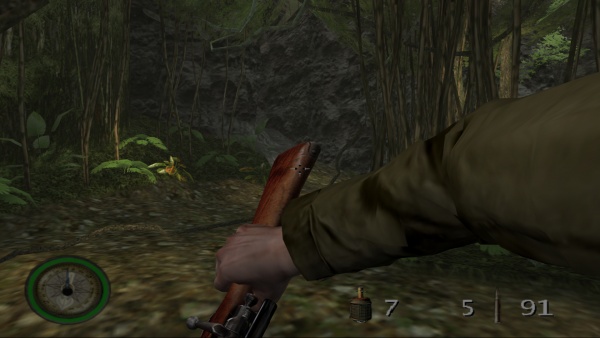
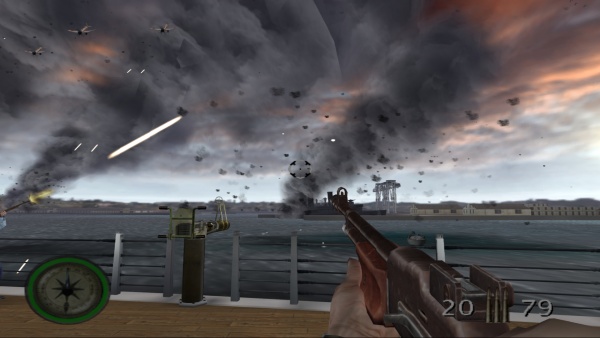
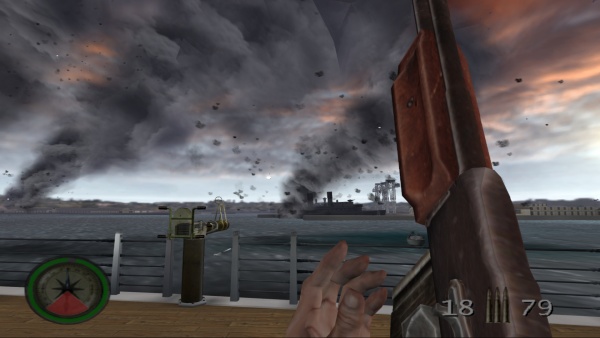
After reaching the deck of the USS California, Joseph Griffin receives an M1918 Browning Automatic Rifle from Jack "Gunny" Lauton to defend the ship from air attack.
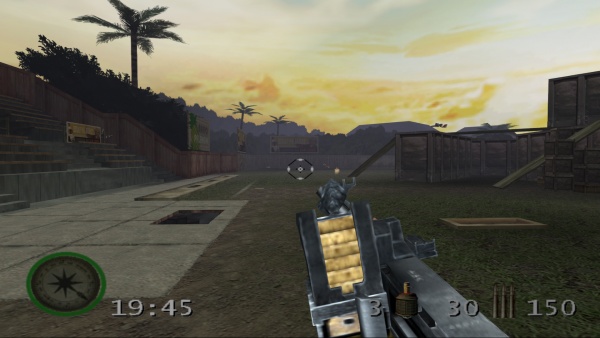
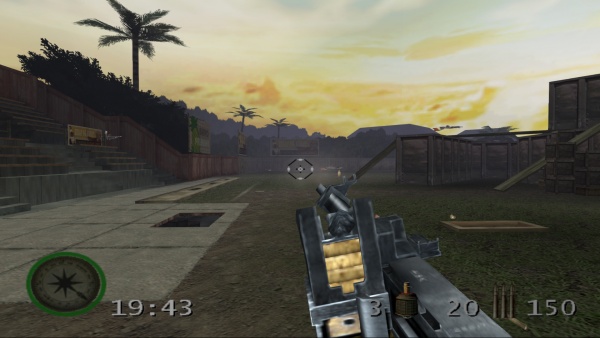
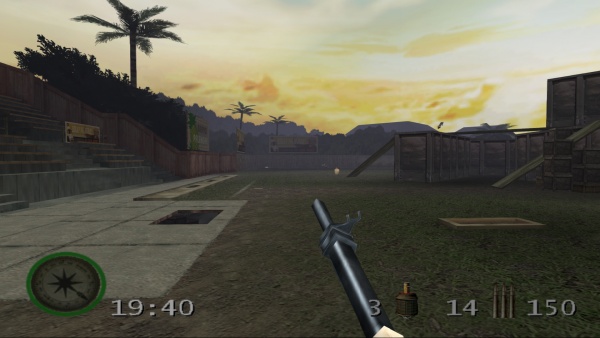
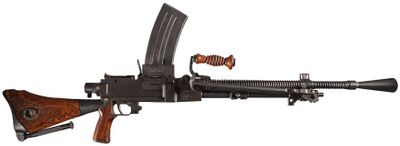
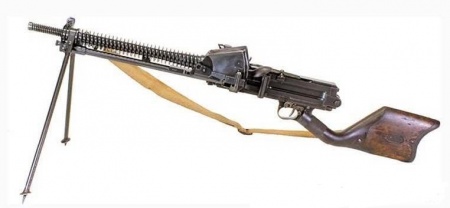
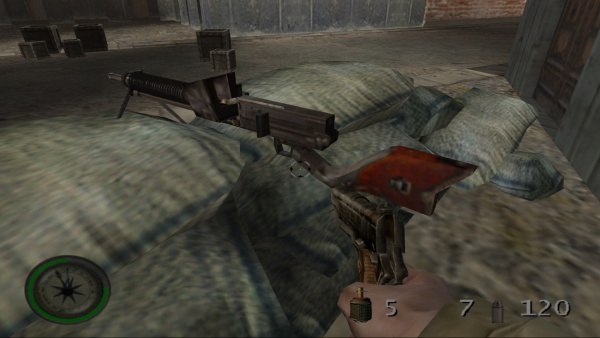
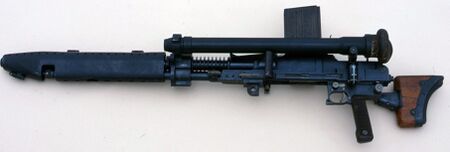
Type 11
The Type 11 light machine gun is seen many times being used by Japanese soldiers, and can be used in several missions by the player.
Type 99
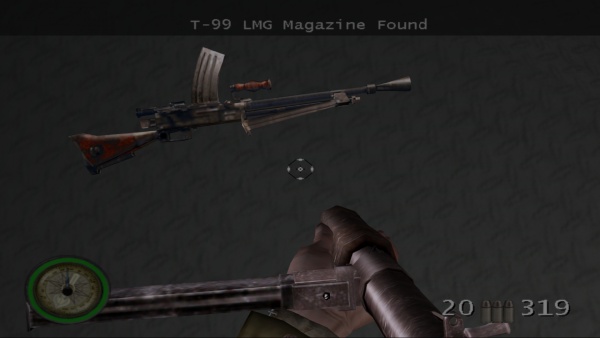
During the final mission, the Type 99 Light Machine Gun is first seen in the opening cutscene and then used by Japanese sailors.
Launchers
M9A1 Bazooka
An M91A1 Bazooka is used in the seventh mission "In Search of Yamashita's Gold".
Grenade & Explosives
Lunge Mine
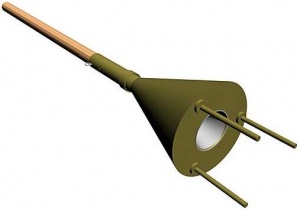
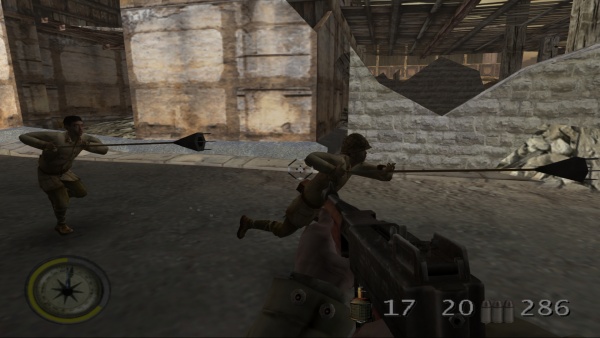
The "Pole Miners" during the Philippines invasion are armed with Lunge Mines. Historically, this is quite inaccurate as the Japanese would not have been using such suicidal tactics early in the war in 1941, when they were on a seemingly unstoppable offensive in the Pacific and South East Asia. It was much later in the war (1944-1945) when they began to desperately turn to suicide tactics like the Lunge Mine, the Kamikaze raids and the human-mine.
Mk. 2 Hand Grenade
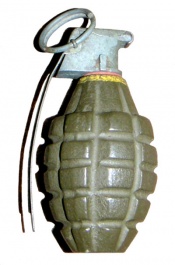
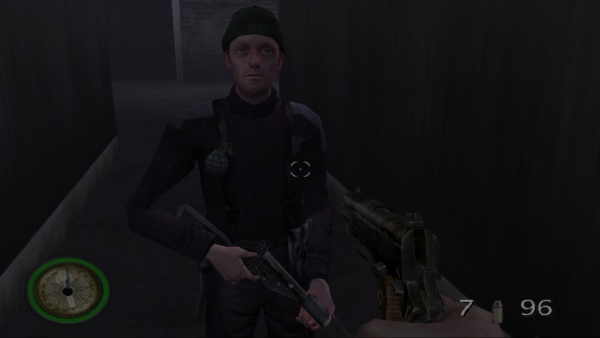
One Mk 2 hand grenade is seen hanging from Major Bromley's uniform.
Type 97 Frag Grenade
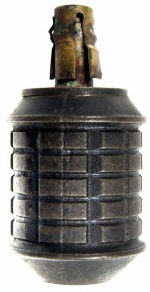
The Japanese Type 97 hand grenade is the only playable grenade in the game.
Mounted Weapons
14-inch/50-caliber gun
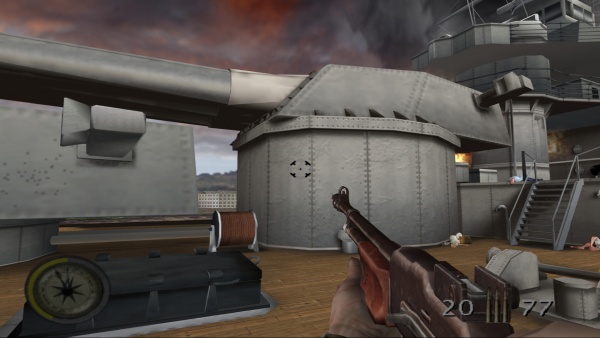
The main armament of the USS California are 4 × triple 14 in (356 mm) guns.
Browning M2 Aircraft
The PT-20-class motor torpedo boat in the second mission "Pearl Harbor" has a turret with dual mounted Browning M2 Aircraft machine guns.
Browning M2 Water Cooled
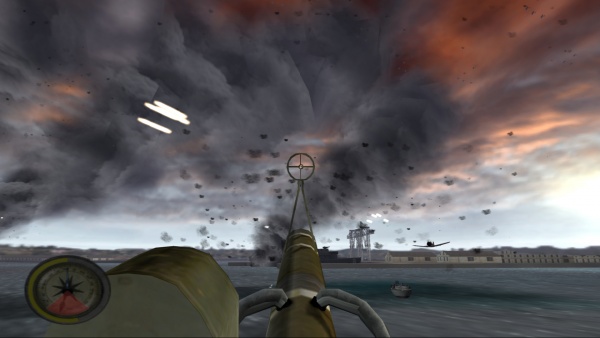
The player is tasked to man a water-cooled version of the Browning M2HB to shot down various Japanese planes and incoming torpedoes aboard the USS California at Pearl Harbor.
Browning M1919A4
A Browning M1919A4 is seen mounted in the Light Tank, M3.
Type 11 light machine gun
The Type 11 light machine gun appears also as a mounted weapon.
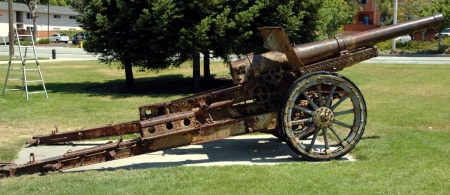
Type 96 15 cm Howitzer
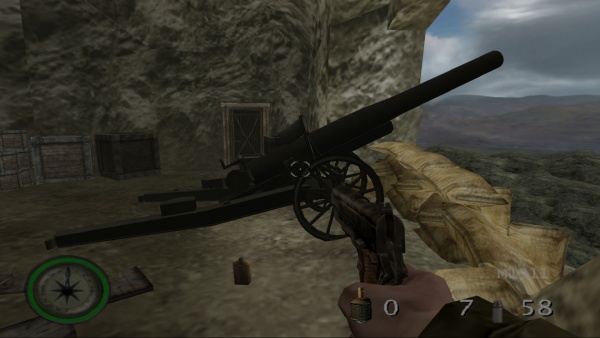
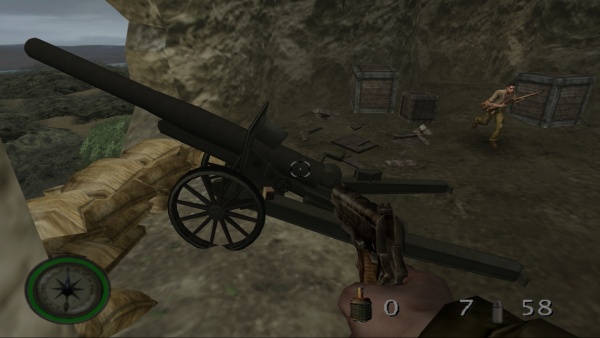
Various Type 96 15 cm howitzers can be seen in the singleplayer campaign and multiplayer maps.
Type 92 light machine gun
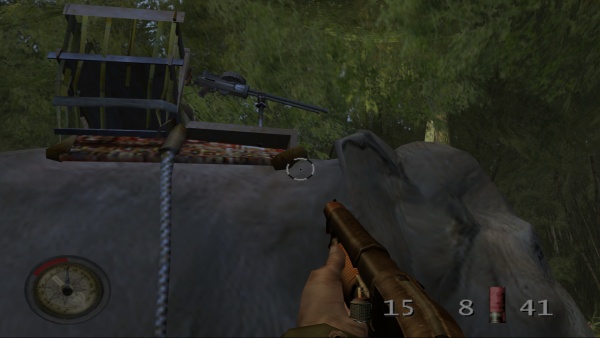
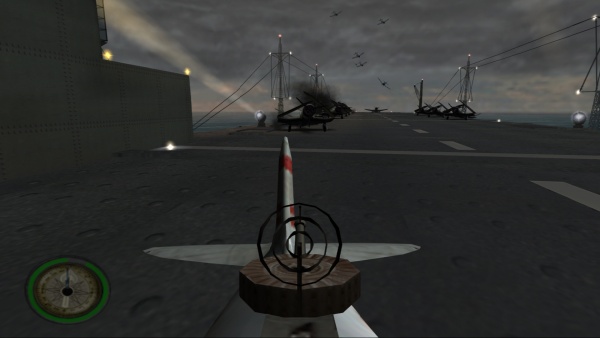
A Type 92 machine gun is mounted on elephant (!) back in Burma, and at the end of the level "Supercarrier Sabotage", when mounted on a Japanese Aichi D3A "Val" Type 99 Carrier Bomber.
Type 92 battalion gun
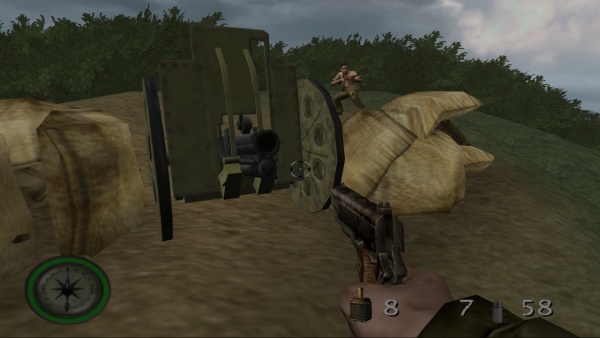
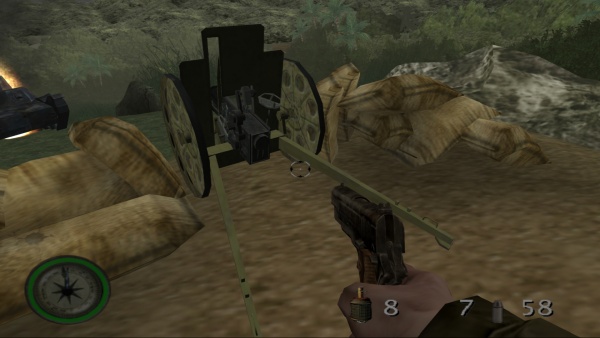
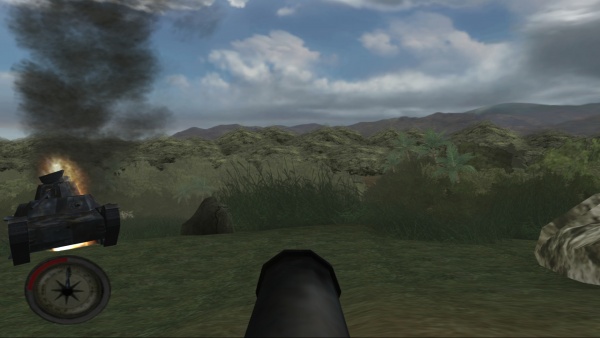
During the mission "Pistol Pete Showdown", Sgt. Griffin encounters a usable Type 92 battalion gun.
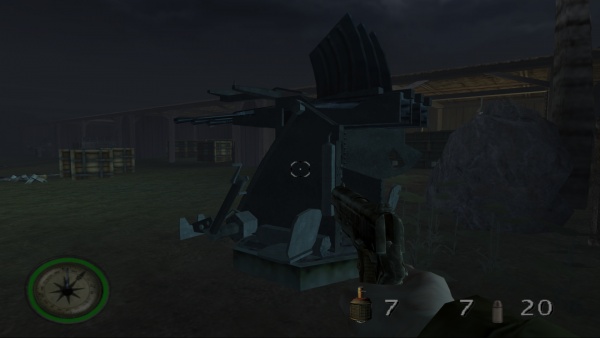
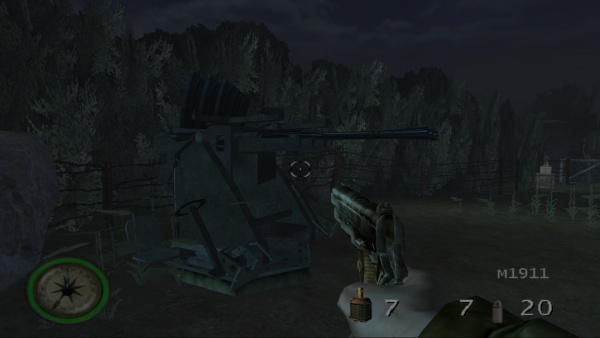
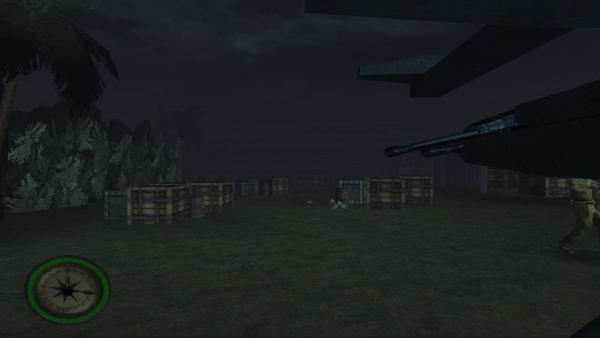
Type 96 25 mm AT/AA Gun
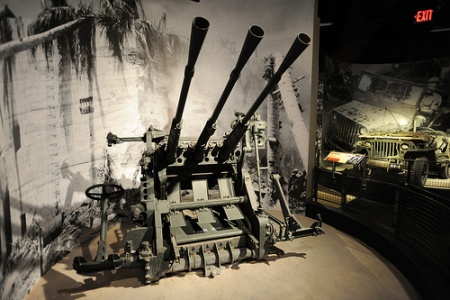
Several Type 96 25 mm AT/AA Gun can be seen throughout the single-player champaign.
Type 97 light machine gun
The Type 95 Ha-Gō light tank has two mounted Type 97 light machine guns.
Type 99 Cannon
Japanese A6M "Zeroe" fighters have poorly modelled Type 99 cannons in their wings. The nose-mounted Type 97 Aircraft machine guns are not visible.
Type 99 81 mm mortar
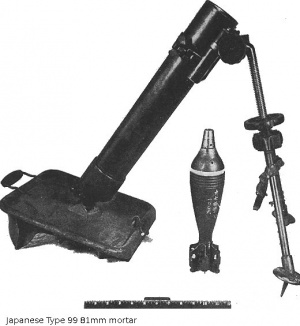
What appears to be Type 99 Mortars are sometimes used by Japanese soldiers. They can only be seen from a distance; after reaching the mortar's position it is no more there.
