| If you have been locked out of your account you can request a password reset here. |
Difference between revisions of "The Kill Point"
Orca1 9904 (talk | contribs) m (→Walther PPK) |
|||
| Line 9: | Line 9: | ||
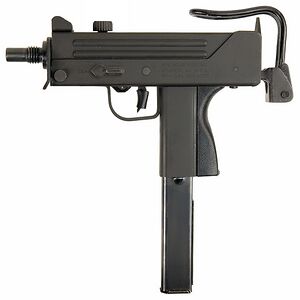
[[Image:Mac m11 9k.jpg|thumb|none|300px|Ingram MAC-11 .380 ACP]] | [[Image:Mac m11 9k.jpg|thumb|none|300px|Ingram MAC-11 .380 ACP]] | ||
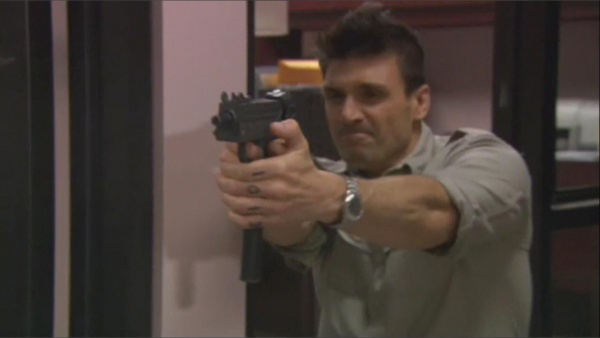
| − | [[Image:KP-MAC11-1.jpg||thumb|none| | + | [[Image:KP-MAC11-1.jpg||thumb|none|600px|Albert "Mr. Pig" Roman loads up his MAC-11 in the robbers' Suburban as they drive to the bank]] |
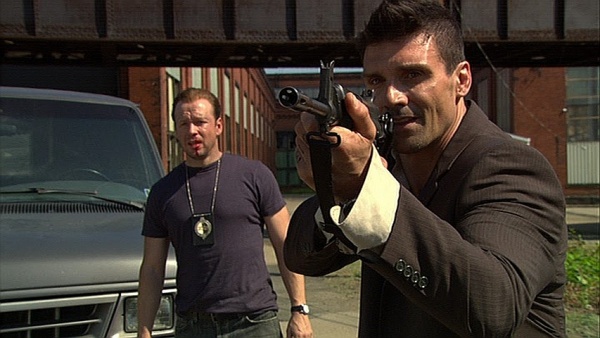
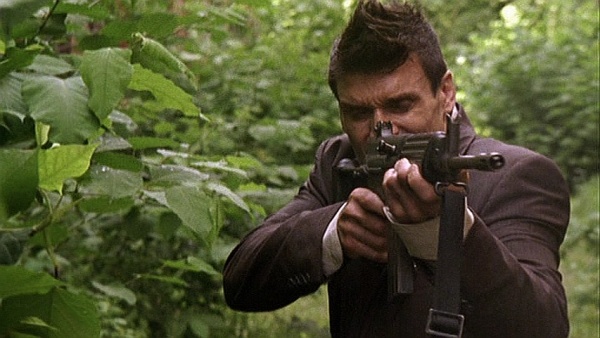
| − | [[Image:KP-MAC11-2.jpg|thumb|none| | + | [[Image:KP-MAC11-2.jpg|thumb|none|600px|Albert "Mr. Pig" Roman firing his MAC-11 at police outside the bank]] |
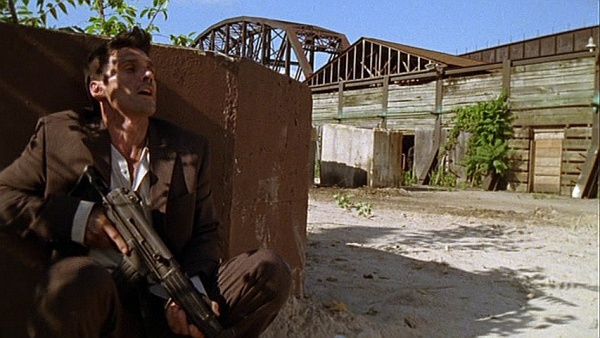
| − | [[Image:KP-MAC11-4.jpg|thumb|none| | + | [[Image:KP-MAC11-4.jpg|thumb|none|600px|Albert "Mr. Pig" Roman firing his MAC-11 when SWAT tries to storm the bank]] |
| − | [[Image:KP-MAC11-3.jpg|thumb|none| | + | [[Image:KP-MAC11-3.jpg|thumb|none|600px|Ashley Beck eyes Albert "Mr. Pig" Roman MAC-11 as it sits on a table unguarded]] |
| − | [[Image:KPMAC11 1.JPG|thumb|none| | + | [[Image:KPMAC11 1.JPG|thumb|none|600px|Ashley Beck holds Albert "Mr. Pig" Roman at gunpoint with his own MAC-11 during an attempt to overpower the robbers]] |
== Heckler & Koch SP89 == | == Heckler & Koch SP89 == | ||
| Line 20: | Line 20: | ||
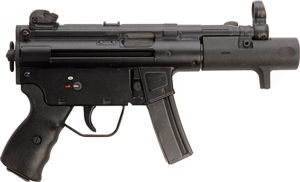
[[Image:H&KSP89.jpg|thumb|none|300px|Heckler & Koch SP89 9x19mm with 15-round magazine]] | [[Image:H&KSP89.jpg|thumb|none|300px|Heckler & Koch SP89 9x19mm with 15-round magazine]] | ||
| − | [[Image:KP-SP89-1.jpg|thumb|none| | + | [[Image:KP-SP89-1.jpg|thumb|none|600px|Jake "Mr. Wolf" Mendez cocks his Heckler & Koch SP89 in the robbers' Suburban as they drive to the bank]] |
| − | [[Image:KP-SP89-3.jpg|thumb|none| | + | [[Image:KP-SP89-3.jpg|thumb|none|600px|Jake "Mr. Wolf" Mendez holding his Heckler & Koch SP89 in the bank]] |
| − | [[Image:KP-SP89-4.jpg|thumb|none| | + | [[Image:KP-SP89-4.jpg|thumb|none|600px|Jake "Mr. Wolf" Mendez with his SP89]] |
| − | [[Image:KP-SP89-2.jpg|thumb|none| | + | [[Image:KP-SP89-2.jpg|thumb|none|600px|Jake "Mr. Wolf" Mendez takes the safety off on his SP89 when he thinks he may have to kill a hostage]] |
| − | [[Image:KPSP89 1.JPG|thumb|none| | + | [[Image:KPSP89 1.JPG|thumb|none|600px|Rocko with "Mr. Wolf's" Heckler & Koch SP89 while disguised as "Mr. Wolf" seconds before being shot in the ear by the hitman]] |
| − | [[Image:KPSP89Fake.JPG|thumb|none| | + | [[Image:KPSP89Fake.JPG|thumb|none|600px|Jake "Mr. Wolf" Mendez fires on FBI Agent Carrie Southwell with his Heckler & Koch SP89. The SP89 in this photo is obviously fake; it's a flashbulb-firing "Non Gun" used because at the distance of the shot, blanks would be harmful to the actor]] |
== Smith & Wesson Model 10 HB == | == Smith & Wesson Model 10 HB == | ||
| Line 32: | Line 32: | ||
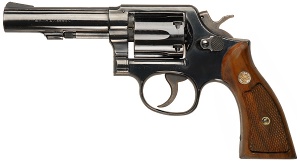
[[Image:S&WModel10HB.jpg|thumb|none|300px|Smith & Wesson Model 10 HB .38 Special]] | [[Image:S&WModel10HB.jpg|thumb|none|300px|Smith & Wesson Model 10 HB .38 Special]] | ||
| − | [[Image:KPS&WMod10.JPG|thumb|none| | + | [[Image:KPS&WMod10.JPG|thumb|none|600px|"Mr. Pig" brandishing Henry's Smith & Wesson Model 10 HB]] |
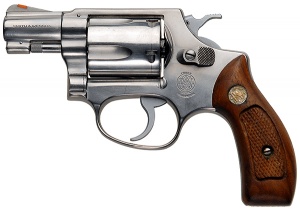
== Smith & Wesson Model 36 == | == Smith & Wesson Model 36 == | ||
| Line 39: | Line 39: | ||
[[Image:StainlessS&WModel36.jpg|thumb|none|300px|Smith & Wesson Model 36 .38 Special with stainless steel finish]] | [[Image:StainlessS&WModel36.jpg|thumb|none|300px|Smith & Wesson Model 36 .38 Special with stainless steel finish]] | ||
| − | [[Image:KPS&WM36 2.JPG|thumb|none| | + | [[Image:KPS&WM36 2.JPG|thumb|none|600px|Captain Horst Cali with his Smith & Wesson Model 36 drawn as he persues Jake "Mr. Wolf" Mendez]] |
| − | [[Image:KPS&WM36.JPG|thumb|none| | + | [[Image:KPS&WM36.JPG|thumb|none|600px|Capt. Cali with his Smith & Wesson Model 36 holstered while talking with Teddy Sabian ([[Peter Appel]])]] |
== AR-15 A2 HBAR == | == AR-15 A2 HBAR == | ||
| Line 47: | Line 47: | ||
[[Image:ColtGovtModHBAR.jpg|thumb|350px|none|Colt AR-15 A2 HBAR 5.56x45mm]] | [[Image:ColtGovtModHBAR.jpg|thumb|350px|none|Colt AR-15 A2 HBAR 5.56x45mm]] | ||
| − | [[Image:KPM16A2 1.JPG|thumb|none| | + | [[Image:KPM16A2 1.JPG|thumb|none|600px|A Pittsburg P.D. officer fires an AR-15 A2 HBAR during the first shootout]] |
| − | [[Image:KPM16A2 2.JPG|thumb|none| | + | [[Image:KPM16A2 2.JPG|thumb|none|600px|An armored van driver fires an AR-15 A2 during the first shootout]] |
| − | [[Image:KPM16A2 3.JPG|thumb|none| | + | [[Image:KPM16A2 3.JPG|thumb|none|600px|One of Deke's men brandishes an AR-15 A2]] |
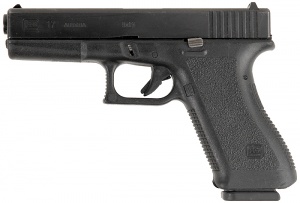
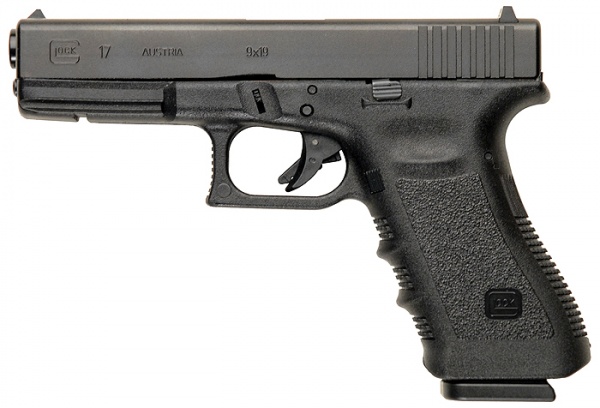
== Glock 17 == | == Glock 17 == | ||
| Line 56: | Line 56: | ||
[[Image:Glock17EarlyModel.jpg|thumb|none|300px|Glock 17 9x19mm 2nd-Gen]] | [[Image:Glock17EarlyModel.jpg|thumb|none|300px|Glock 17 9x19mm 2nd-Gen]] | ||
| − | [[Image:KP-Glock-1.jpg|thumb|none| | + | [[Image:KP-Glock-1.jpg|thumb|none|600px|FBI Agent Carrie Southwell fires her Glock 17 during the first shootout]] |
| − | [[Image:KP-Glock-3.jpg|thumb|none| | + | [[Image:KP-Glock-3.jpg|thumb|none|600px|Hawk draws his Glock 17 on Leon ([[Nick Koesters]])]] |
| − | [[Image:KP-Glock-5.jpg|thumb|none| | + | [[Image:KP-Glock-5.jpg|thumb|none|600px|SWAT commander Lt. Connie Reubens ([[Michael Hyatt]]) with her Glock 17 at the ready]] |
| − | [[Image:KillPointGlock1.JPG|thumb|none| | + | [[Image:KillPointGlock1.JPG|thumb|none|600px|FBI Agent Carrie Southwell raises her Glock 17 moments before being fatally wounded by Jake "Mr. Wolf" Mendez]] |
| − | [[Image:Glock173rdGen.jpg|thumb|none| | + | [[Image:Glock173rdGen.jpg|thumb|none|600px|Glock 17 9x19mm 3rd-Gen]] |
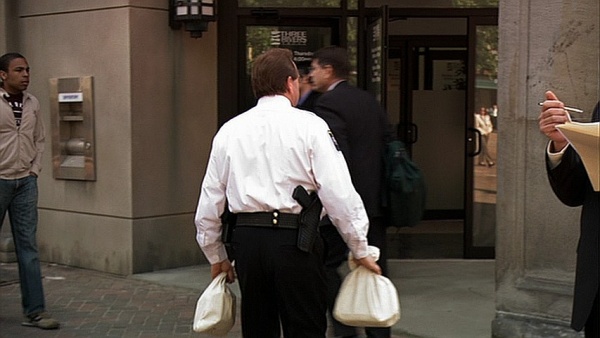
| − | [[Image:KPGlock 1.JPG|thumb|none| | + | [[Image:KPGlock 1.JPG|thumb|none|600px|An armored van driver with a holstered Glock 17]] |
| − | [[Image:KPGlock 2.JPG|thumb|none| | + | [[Image:KPGlock 2.JPG|thumb|none|600px|A Pittsburg P.D. officer fires his Glock 17 during the first shootout]] |
| − | [[Image:KP-Glock-2.jpg|thumb|none| | + | [[Image:KP-Glock-2.jpg|thumb|none|600px|A SWAT officer with a Glock 17]] |
== Micro Uzi == | == Micro Uzi == | ||
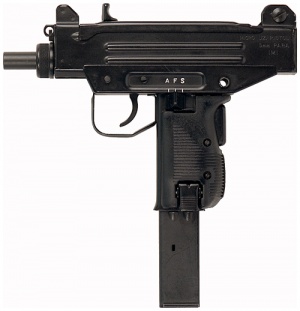
| Line 70: | Line 70: | ||
[[Image:MicroUziPistol02.jpg|thumb|none|300px|Micro Uzi 9x19mm]] | [[Image:MicroUziPistol02.jpg|thumb|none|300px|Micro Uzi 9x19mm]] | ||
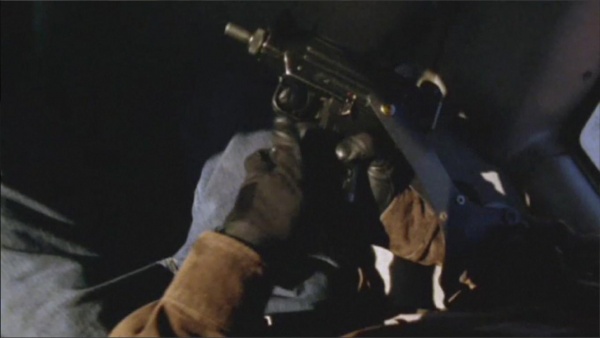
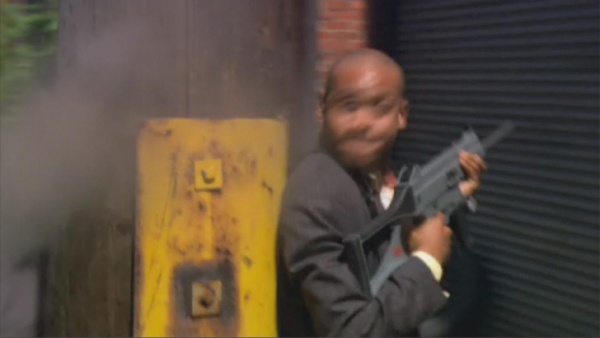
| − | [[Image:KP-MUzi-1.jpg|thumb|none| | + | [[Image:KP-MUzi-1.jpg|thumb|none|600px|Marshall "Mr. Cat" O'Brien, Jr. loads up his Micro-Uzi before the robbery.]] |
| − | [[Image:KP-MUzi-2.jpg|thumb|none| | + | [[Image:KP-MUzi-2.jpg|thumb|none|600px|Marshall "Mr. Cat" O'Brien, Jr. with his Micro Uzi in the bank during the robbery.]] |
| − | [[Image:KPMicroUzi 2.JPG|thumb|none| | + | [[Image:KPMicroUzi 2.JPG|thumb|none|600px|Marshall "Mr. Cat" O'Brien, Jr. being held at gunpoint with his own Micro-Uzi as some of the hostages make a bid to overpower the robbers]] |
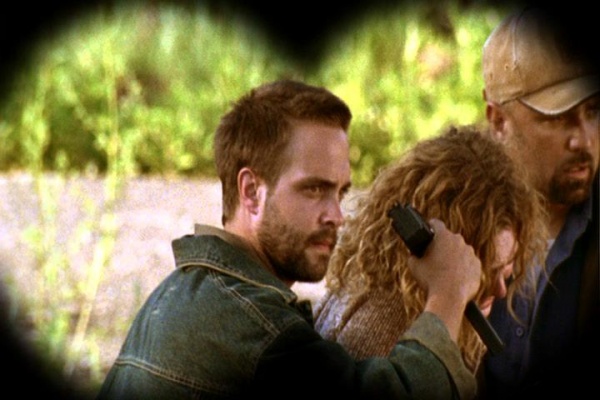
| − | [[Image:KPMicroUzi 3.JPG|thumb|none| | + | [[Image:KPMicroUzi 3.JPG|thumb|none|600px|One of Deke Quinlan's men holding Lucy Cali at gunpoint with a Micro Uzi, seen through a SWAT sniper's binoculars]] |
== Remington 870 == | == Remington 870 == | ||
| Line 80: | Line 80: | ||
[[Image:Remington870PoliceStd.jpg|thumb|none|350px|Remington 870 12 guage]] | [[Image:Remington870PoliceStd.jpg|thumb|none|350px|Remington 870 12 guage]] | ||
| − | [[Image:KP870 1.JPG|thumb|none| | + | [[Image:KP870 1.JPG|thumb|none|600px|A Pittsburg Police officer with a Remington 870 during the first shootout]] |
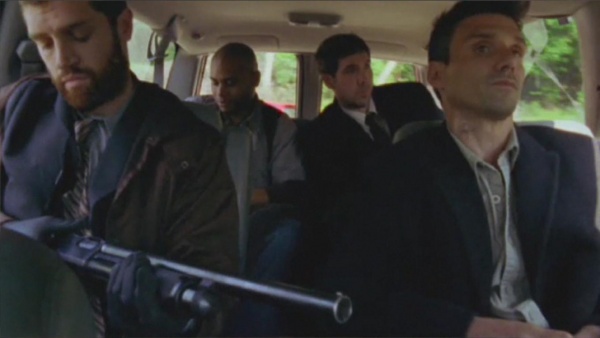
| − | [[Image:KP870 2.JPG|thumb|none| | + | [[Image:KP870 2.JPG|thumb|none|600px|An armored van driver aims a Remington 870 during the first shootout]] |
| − | [[Image:KP-870-1.jpg|thumb|none| | + | [[Image:KP-870-1.jpg|thumb|none|600px|Henry "Mr. Rabbit" Roman loads his Remington 870 in the robbers' vehicle]] |
| − | [[Image:KP870Rabbit 1.JPG|thumb|none| | + | [[Image:KP870Rabbit 1.JPG|thumb|none|600px|"Mr. Rabbit" lays his Remington 870 on a table while gathering up money in the bank vault]] |
| − | [[Image:KillPoint870Rabbit.JPG|thumb|none| | + | [[Image:KillPoint870Rabbit.JPG|thumb|none|600px|Henry "Mr. Rabbit" Roman guards a group of hostages while holding his Remington 870]] |
| − | [[Image:KP-870-5.jpg|thumb|none| | + | [[Image:KP-870-5.jpg|thumb|none|600px|Henry "Mr. Rabbit" Roman reloading his Remington 870]] |
| − | [[Image:KP870Rabbit 2.JPG|thumb|none| | + | [[Image:KP870Rabbit 2.JPG|thumb|none|600px|"Mr. Rabbit" lies dead with his Remington 870 after a fatal brawl with "Mr. Wolf"]] |
== M4A1 Carbine == | == M4A1 Carbine == | ||
| Line 93: | Line 93: | ||
[[Image:ColtM4 FirstVersion.jpg|thumb|none|350px|M4A1 5.56x45mm]] | [[Image:ColtM4 FirstVersion.jpg|thumb|none|350px|M4A1 5.56x45mm]] | ||
| − | [[Image:KillPointM4A1.JPG|thumb|none| | + | [[Image:KillPointM4A1.JPG|thumb|none|600px|A Pittsburg Police SWAT officer with his M4A1 at the ready]] |
| − | [[Image:KP-M4-1.jpg|thumb|none| | + | [[Image:KP-M4-1.jpg|thumb|none|600px|Pittsburg Police SWAT officers load up their M4A1s]] |
| − | [[Image:KPM4 2.JPG|thumb|none| | + | [[Image:KPM4 2.JPG|thumb|none|600px|A Pittsburg Police SWAT officer (right) readying his M4A1, fitted with a Surefire M500AB weaponlight]] |
| − | [[Image:KP-M4-2.jpg|thumb|none| | + | [[Image:KP-M4-2.jpg|thumb|none|600px|Pittsburg Police SWAT officers load up their M4A1s]] |
| − | [[Image:KP-M4-5.jpg|thumb|none| | + | [[Image:KP-M4-5.jpg|thumb|none|600px|A Pittsburg SWAT officer prepares to enter the bank with his M4A1]] |
== Colt AR-15 Sporter-1 Carbine == | == Colt AR-15 Sporter-1 Carbine == | ||
| Line 104: | Line 104: | ||
[[Image:ColtM654.jpg|thumb|350px|none|Colt Model 654 Carbine 5.56x45mm]] | [[Image:ColtM654.jpg|thumb|350px|none|Colt Model 654 Carbine 5.56x45mm]] | ||
| − | [[Image:KPCAR15 1.JPG|thumb|none| | + | [[Image:KPCAR15 1.JPG|thumb|none|600px|A Pittsburg Police SWAT officer aims his Colt AR-15 Sporter-1 carbine fitted with a Surefire M500AB weaponlight, which has transformed from the M4A1 he had moments ago (note the receiver)]] |
| − | [[Image:KP-M4-7.jpg|thumb|none| | + | [[Image:KP-M4-7.jpg|thumb|none|600px|Hawk with his "M4", which has mysteriously become an AR-15 carbine. Note the receiver design.]] |
| − | [[Image:KP-M4-6.jpg|thumb|none| | + | [[Image:KP-M4-6.jpg|thumb|none|600px|A first-person view down the barrel of Hawk's AR-15 carbine.]] |
== Blaser 93 Sniper Rifle == | == Blaser 93 Sniper Rifle == | ||
| Line 113: | Line 113: | ||
[[Image:BlaserR93WithHarrisBipod.jpg|thumb|none|350px|Blaser 93 sniper rifle 7.62x51mm NATO with HArris bipod]] | [[Image:BlaserR93WithHarrisBipod.jpg|thumb|none|350px|Blaser 93 sniper rifle 7.62x51mm NATO with HArris bipod]] | ||
| − | [[Image:KP-R93-1.jpg|thumb|none| | + | [[Image:KP-R93-1.jpg|thumb|none|600px|Quincy looking through the scope of his Blaser 93 sniper rifle]] |
| − | [[Image:KP-R93-2.jpg|thumb|none| | + | [[Image:KP-R93-2.jpg|thumb|none|600px|Quincy chatting with his spotter while holding his Blaser 93 sniper rifle]] |
| − | [[Image:KP-R93-3.jpg|thumb|none| | + | [[Image:KP-R93-3.jpg|thumb|none|600px|Quincy watching the siege while holding his Blaser 93 sniper rifle]] |
| − | [[Image:KP-R93-4.jpg|thumb|none| | + | [[Image:KP-R93-4.jpg|thumb|none|600px|Quincy aims his Blaser 93 sniper rifle during the final shootout]] |
== Remington 700PSS Sniper Rifle == | == Remington 700PSS Sniper Rifle == | ||
| Line 123: | Line 123: | ||
[[Image:RemingtonPSS700.jpg|thumb|none|350px|Remington Model 700PSS sniper rifle .300 Win Mag with Harris bipod]] | [[Image:RemingtonPSS700.jpg|thumb|none|350px|Remington Model 700PSS sniper rifle .300 Win Mag with Harris bipod]] | ||
| − | [[Image:KPRem700 1.JPG|thumb|none| | + | [[Image:KPRem700 1.JPG|thumb|none|600px|A Pittsburg P.D. SWAT sniper with a Remington 700PSS sniper rifle]] |
== M84 Stun Grenade == | == M84 Stun Grenade == | ||
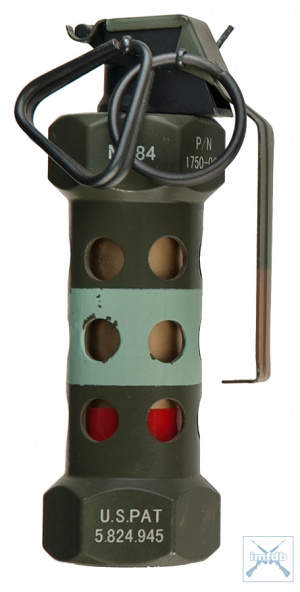
| Line 130: | Line 130: | ||
[[Image:M84stun.jpg|thumb|none|M84 stun grenade]] | [[Image:M84stun.jpg|thumb|none|M84 stun grenade]] | ||
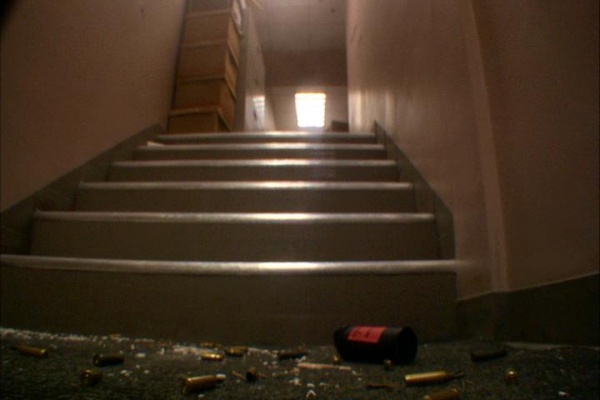
| − | [[Image:KPM84Stun 1.JPG|thumb|none| | + | [[Image:KPM84Stun 1.JPG|thumb|none|600px|An M84 stun grenade seconds before detonating in the bank]] |
== Ruger All-Weather Mark II Model 77 Rifle == | == Ruger All-Weather Mark II Model 77 Rifle == | ||
| Line 136: | Line 136: | ||
In one episode, a hitman hired by Alan Beck ([[Tobin Bell]]) can be seen assembling a suppressed Ruger All-Weather Mark II Model 77 sniper rifle that he had been carrying in a suitcase. He fires it on one of the robbers who turns out to be Rocko disguised as "Mr. Wolf", hitting him in the ear before other members of Platoon 10-13 operating outside the bank can kill the sniper. | In one episode, a hitman hired by Alan Beck ([[Tobin Bell]]) can be seen assembling a suppressed Ruger All-Weather Mark II Model 77 sniper rifle that he had been carrying in a suitcase. He fires it on one of the robbers who turns out to be Rocko disguised as "Mr. Wolf", hitting him in the ear before other members of Platoon 10-13 operating outside the bank can kill the sniper. | ||
| − | [[Image:KPSniper 1.JPG|thumb|none| | + | [[Image:KPSniper 1.JPG|thumb|none|600px|The sniper loads his rifle]] |
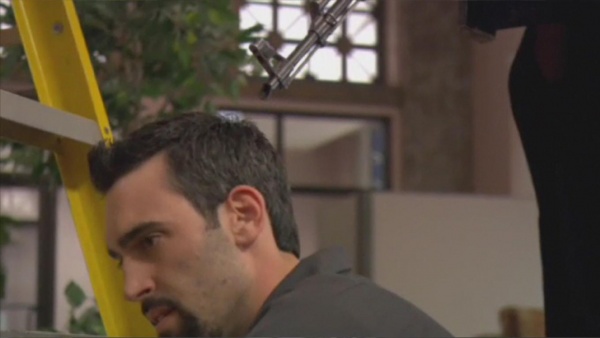
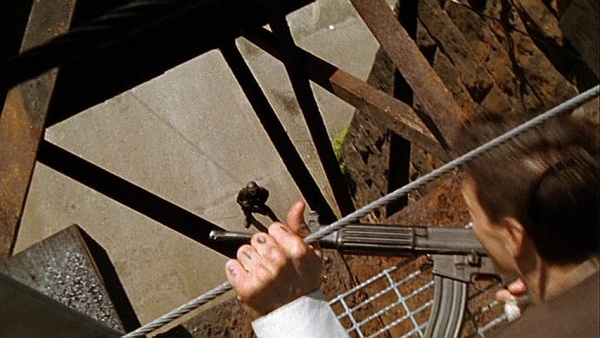
| − | [[Image:KP-rifle-2.jpg|thumb|none| | + | [[Image:KP-rifle-2.jpg|thumb|none|600px|The sniper prepares to shoot Rocko, disguised as "Mr. Wolf"]] |
== Norinco Type 56-1 == | == Norinco Type 56-1 == | ||
| Line 144: | Line 144: | ||
[[Image:Type56S.jpg|thumb|350px|none|Norinco Type 56-1 7.62x39mm]] | [[Image:Type56S.jpg|thumb|350px|none|Norinco Type 56-1 7.62x39mm]] | ||
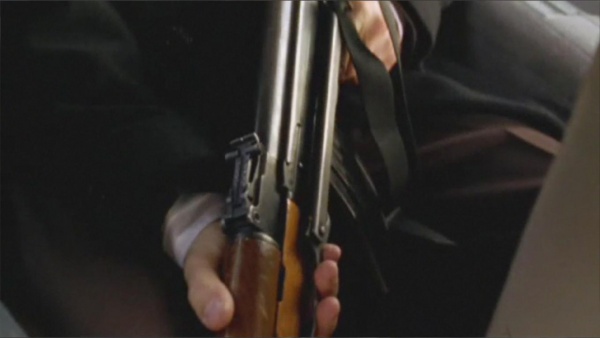
| − | [[Image:KP-Type56-1.jpg|thumb|none| | + | [[Image:KP-Type56-1.jpg|thumb|none|600px|Mr. Mouse with his Norinco Type 56-1 in the robbers' vehicle]] |
| − | [[Image:KP-Type56-2.jpg|thumb|none| | + | [[Image:KP-Type56-2.jpg|thumb|none|600px|Mr. Mouse holds his Norinco Type 56-1 on Rocko during the robbery. Note the front sight, which is clearly the full-circle type unique to Norinco AKs]] |
| − | [[Image:KP-Type56-4.jpg|thumb|none| | + | [[Image:KP-Type56-4.jpg|thumb|none|600px|Mr. Wolf hands Mr. Mouse back his his Type 56-1 after the accident where he shoots the girl]] |
| − | [[Image:KPAKS 3.JPG|thumb|none| | + | [[Image:KPAKS 3.JPG|thumb|none|600px|One of Deke Quinlan's men with a Norinco Type 56-1 during the final shootout]] |
== AKS-47 == | == AKS-47 == | ||
| Line 154: | Line 154: | ||
[[Image:Aks47e.jpg|thumb|none|350px|AKS-47 7.62x39mm]] | [[Image:Aks47e.jpg|thumb|none|350px|AKS-47 7.62x39mm]] | ||
| − | [[Image:KPAKS 1.JPG|thumb|none| | + | [[Image:KPAKS 1.JPG|thumb|none|600px|Rocko with an AKS-47, having taken it from "Mr. Mouse" during a bid by the hostages to overpower their captors]] |
| − | [[Image:KPAKS 2.JPG|thumb|none| | + | [[Image:KPAKS 2.JPG|thumb|none|600px|"Mr. Pig" with the AKS-47]] |
== Walther PPK == | == Walther PPK == | ||
| Line 162: | Line 162: | ||
[[Image:PPK_stainless.jpg|thumb|300px|none|Walther PPK .380 ACP with stainless steel finish]] | [[Image:PPK_stainless.jpg|thumb|300px|none|Walther PPK .380 ACP with stainless steel finish]] | ||
| − | [[Image:KPPPK 1.JPG|thumb|none| | + | [[Image:KPPPK 1.JPG|thumb|none|600px|Leroy Barnes hides his Walther PPK in a potted plant when the robbery becomes a hostage situation]] |
| − | [[Image:KPPPK 2.JPG|thumb|none| | + | [[Image:KPPPK 2.JPG|thumb|none|600px|Leroy Barnes pulls his Walther PPK on Mr. Rabbit during the attempt to overpower the robbers]] |
== Kimel AP-9 == | == Kimel AP-9 == | ||
| Line 170: | Line 170: | ||
[[Image:AP9-Pistol.jpg|thumb|300px|none|AA Arms/Kimel Industries AP-9 Pistol 9x19mm]] | [[Image:AP9-Pistol.jpg|thumb|300px|none|AA Arms/Kimel Industries AP-9 Pistol 9x19mm]] | ||
| − | [[Image:KP-AP9-1.jpg|thumb|none| | + | [[Image:KP-AP9-1.jpg|thumb|none|600px|Deke Quinlan firing his Kimel AP-9 during the first shootout.]] |
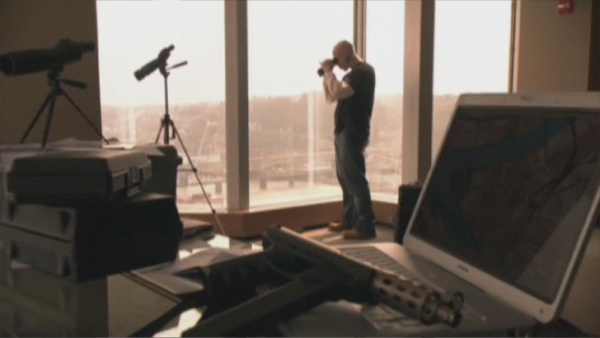
| − | [[Image:KP-AP9-3.jpg|thumb|none| | + | [[Image:KP-AP9-3.jpg|thumb|none|600px|Deke's AP-9 sitting on top of his laptop computer while he and the other 10-13 members are trying to figure out how to get Mr. Wolf and his crew out of the bank]] |
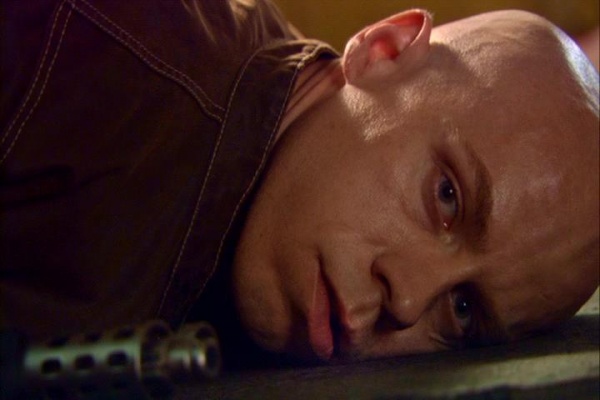
| − | [[Image:KPAP9.JPG|thumb|none| | + | [[Image:KPAP9.JPG|thumb|none|600px|Deke Quinlan lies dead with his Kimel AP-9 at his side]] |
== Desert Eagle == | == Desert Eagle == | ||
| Line 179: | Line 179: | ||
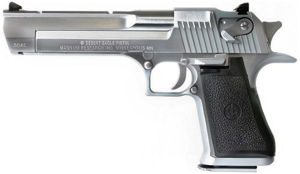
[[Image:DesertEagle50AE.jpg|thumb|300px|none|Desert Eagle .50 AE with stainless steel finish]] | [[Image:DesertEagle50AE.jpg|thumb|300px|none|Desert Eagle .50 AE with stainless steel finish]] | ||
| − | [[Image:KPDE 1.JPG|thumb|none| | + | [[Image:KPDE 1.JPG|thumb|none|600px|Leon with his Desert Eagle]] |
| − | [[Image:KPDE 2.JPG|thumb|none| | + | [[Image:KPDE 2.JPG|thumb|none|600px|Leon's Desert Eagle sitting on the table as Deke and his accomplices plan to liberate Mendez and the other robbers]] |
== Steyr AUG == | == Steyr AUG == | ||
| Line 187: | Line 187: | ||
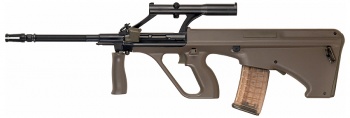
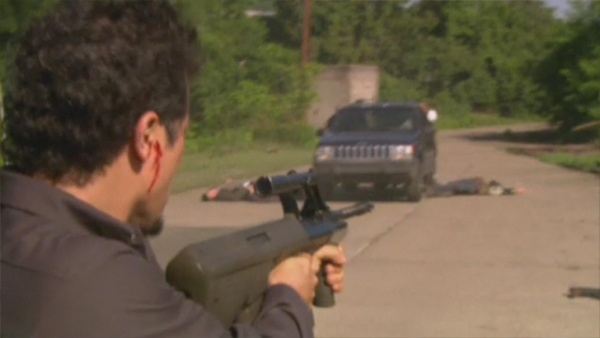
[[Image:Steyr-AUG.jpg|thumb|none|350px|Steyr AUG 5.56x45mm]] | [[Image:Steyr-AUG.jpg|thumb|none|350px|Steyr AUG 5.56x45mm]] | ||
| − | [[Image:KP-AUG-1.jpg|thumb|none| | + | [[Image:KP-AUG-1.jpg|thumb|none|600px|Wolf aims his AUG at Deke during the stand-off]] |
| − | [[Image:KP-AUG-2.jpg|thumb|none| | + | [[Image:KP-AUG-2.jpg|thumb|none|600px|Wolf fires his AUG at the SWAT officers]] |
== Beretta 92FS == | == Beretta 92FS == | ||
| Line 195: | Line 195: | ||
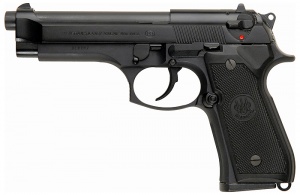
[[Image:BerettaM92FS.jpg|thumb|300px|none|Beretta 92FS 9x19mm]] | [[Image:BerettaM92FS.jpg|thumb|300px|none|Beretta 92FS 9x19mm]] | ||
| − | [[Image:KP-92F-1.jpg|thumb|none| | + | [[Image:KP-92F-1.jpg|thumb|none|600px|A close-up of the Beretta 92FS in Cali's hand]] |
| − | [[Image:KP-92F-2.jpg|thumb|none| | + | [[Image:KP-92F-2.jpg|thumb|none|600px|Cali about to shoot Wolf with the Beretta]] |
== Heckler & Koch USC == | == Heckler & Koch USC == | ||
| Line 203: | Line 203: | ||
[[Image:H&K-USC Rifle.jpg |thumb|none|350px|Heckler & Koch USC .45 ACP]] | [[Image:H&K-USC Rifle.jpg |thumb|none|350px|Heckler & Koch USC .45 ACP]] | ||
| − | [[Image:KP-USC-1.jpg|thumb|none| | + | [[Image:KP-USC-1.jpg|thumb|none|600px|Cat backing up Wolf, with his H&K USC slung across his chest.]] |
| − | [[Image:KP-USC-2.jpg|thumb|none| | + | [[Image:KP-USC-2.jpg|thumb|none|600px|Cat ducks SWAT gunfire with his USC.]] |
| − | [[Image:KP-USC-3.jpg|thumb|none| | + | [[Image:KP-USC-3.jpg|thumb|none|600px|Cat firing the USC.]] |
== Daewoo K1A == | == Daewoo K1A == | ||
| Line 212: | Line 212: | ||
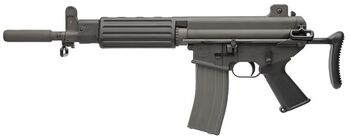
[[Image:Carbine Daewoo K1.jpg|thumb|350px|none|Daewoo K1A carbine .223 Remington]] | [[Image:Carbine Daewoo K1.jpg|thumb|350px|none|Daewoo K1A carbine .223 Remington]] | ||
| − | [[Image:KP-K1-1.jpg|thumb|none| | + | [[Image:KP-K1-1.jpg|thumb|none|600px|]] |
| − | [[Image:KP-K1-2.jpg|thumb|none| | + | [[Image:KP-K1-2.jpg|thumb|none|600px|]] |
| − | [[Image:KP-K1-3.jpg|thumb|none| | + | [[Image:KP-K1-3.jpg|thumb|none|600px|]] |
| − | [[Image:KP-K1-4.jpg|thumb|none| | + | [[Image:KP-K1-4.jpg|thumb|none|600px|]] |
| Line 223: | Line 223: | ||
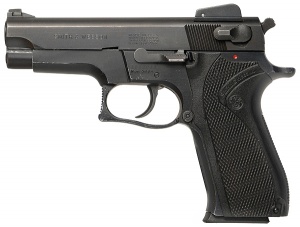
[[Image:S&W-5904-Early-RIGHT.jpg|thumb|none|300px|Smith & Wesson 5904 9x19mm]] | [[Image:S&W-5904-Early-RIGHT.jpg|thumb|none|300px|Smith & Wesson 5904 9x19mm]] | ||
| − | [[image:KP5904.JPG|thumb|none| | + | [[image:KP5904.JPG|thumb|none|600px|A Pittsburg Police officer with a Smith & Wesson 5904 at the ready]] |
== Jericho 941 == | == Jericho 941 == | ||
| Line 230: | Line 230: | ||
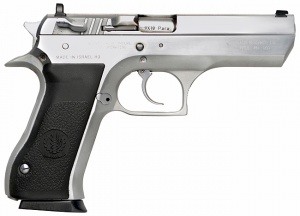
[[Image:JerichoStainless.jpg|thumb|none|300px|Jericho 941 "Baby Eagle" 9x19mm with stainless steel finish]] | [[Image:JerichoStainless.jpg|thumb|none|300px|Jericho 941 "Baby Eagle" 9x19mm with stainless steel finish]] | ||
| − | [[Image:KP-Jericho-1.jpg|thumb|none| | + | [[Image:KP-Jericho-1.jpg|thumb|none|600px|Wolf points the Jericho 941 at his own head.]] |
== Smith & Wesson Model 5906 == | == Smith & Wesson Model 5906 == | ||
| Line 237: | Line 237: | ||
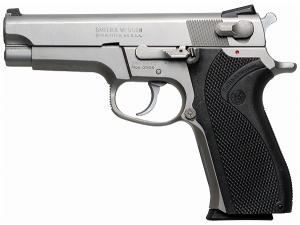
[[Image:S&W5906LateModel.jpg|thumb|none|300px|Smith & Wesson Model 5906 9x19mm]] | [[Image:S&W5906LateModel.jpg|thumb|none|300px|Smith & Wesson Model 5906 9x19mm]] | ||
| − | [[Image:KP-4506-1.jpg|thumb|none| | + | [[Image:KP-4506-1.jpg|thumb|none|600px|Mr. Cat with his Smith & Wesson 5906]] |
| − | [[Image:KP-4506-3.jpg|thumb|none| | + | [[Image:KP-4506-3.jpg|thumb|none|600px|A close-up of the 5906 in Mr. Cat's hands]] |
== Benelli M3 Super 90== | == Benelli M3 Super 90== | ||
| Line 245: | Line 245: | ||
[[Image:Benelli_m3-1-.jpg|thumb|none|350px|Benelli M3 Super 90 12 gauge with pistol grip stock combination]] | [[Image:Benelli_m3-1-.jpg|thumb|none|350px|Benelli M3 Super 90 12 gauge with pistol grip stock combination]] | ||
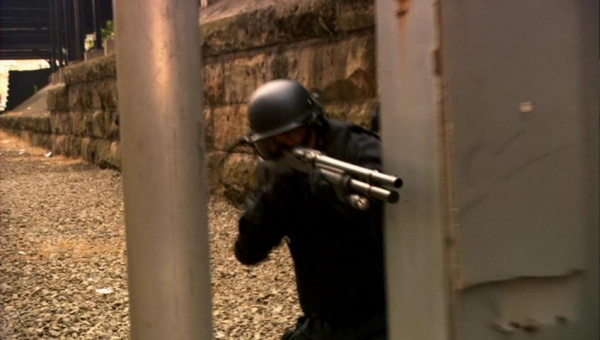
| − | [[Image:KPBene.jpg|thumb|none| | + | [[Image:KPBene.jpg|thumb|none|600px|A Pittsburg Police SWAT officer aims his Benelli M3 Super 90]] |
== Ruger KP94 == | == Ruger KP94 == | ||
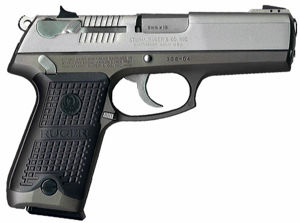
| Line 252: | Line 252: | ||
[[Image:RugerP94.jpg|thumb|none|300px|Ruger KP94DC 9x19mm with stainless steel finish]] | [[Image:RugerP94.jpg|thumb|none|300px|Ruger KP94DC 9x19mm with stainless steel finish]] | ||
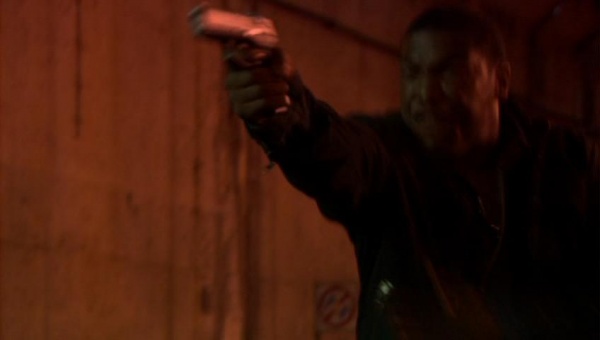
| − | [[Image:KPRuger.jpg|thumb|none| | + | [[Image:KPRuger.jpg|thumb|none|600px|Derzius draws his Ruger KP94]] |
== Wilkinson Arms Linda Pistol == | == Wilkinson Arms Linda Pistol == | ||
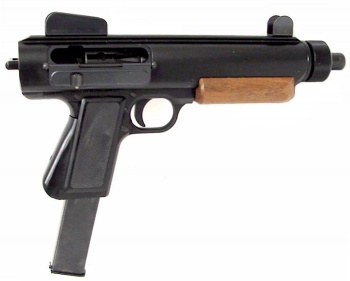
| Line 259: | Line 259: | ||
[[Image:Linda Pistol.jpg|thumb|none|350px|Linda Pistol 9x19mm]] | [[Image:Linda Pistol.jpg|thumb|none|350px|Linda Pistol 9x19mm]] | ||
| − | [[Image:KPSMG.jpg|thumb|none| | + | [[Image:KPSMG.jpg|thumb|none|600px|Big Stan engages SWAT with his Linda pistol]] |
| − | [[Image:KPSMG 1.JPG|thumb|none| | + | [[Image:KPSMG 1.JPG|thumb|none|600px|Another shot of Big Stan with his Linda pistol]] |
| − | [[Image:KPSMG 2.JPG|thumb|none| | + | [[Image:KPSMG 2.JPG|thumb|none|600px|Big Stan dies with his Linda pistol in-hand]] |
[[Category:Television]] | [[Category:Television]] | ||
[[Category:Crime]] | [[Category:Crime]] | ||
Revision as of 08:40, 12 August 2009
The following weapons are used in the television series The Kill Point:
Ingram MAC-11
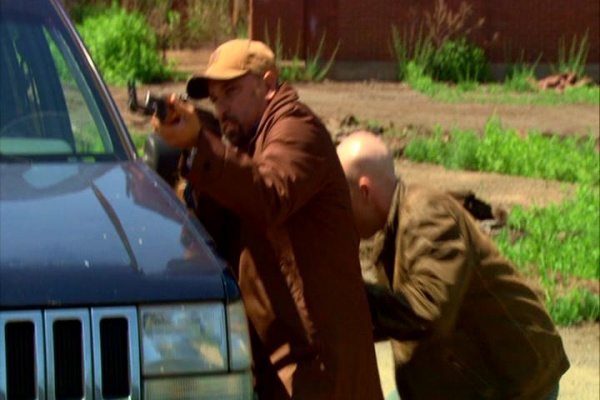
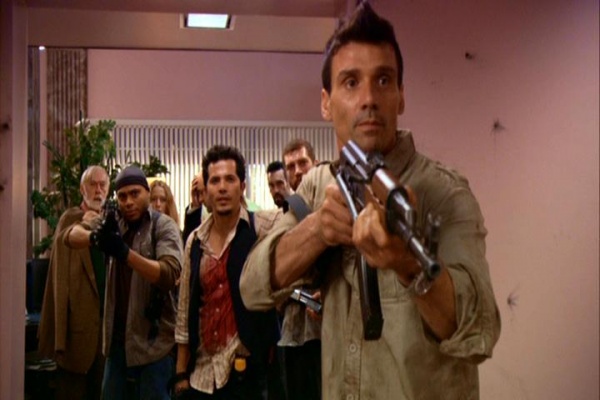
The robber Albert "Mr. Pig" Roman (Frank Grillo) can be seen carrying a MAC-11 as his weapon of choice through most of the series. One of the hostages, Ashley Beck (Christine Evangelista), gets ahold of it when she and some of the other hostages make a bid to overpower their captors, but loses her nerve when faced with the prospect of actually using the weapon and ends up letting "Mr. Pig" retake it, foiling their plans.
- If this gun is anything like the rest of the assault weapons used on the show, it's not a real Ingram. More likely one of the RPB MAC clones made in the early-80s (before the Cobray M11/9 was introduced). -MT2008
Heckler & Koch SP89
The leader of the robbers, Jake "Mr. Wolf" Mendez (John Leguizamo), can be seen using a Heckler & Koch SP89, a civilian variant of the Heckler & Koch MP5K with two magazines taped together 'jungle style' and converted to fire full auto. One of the hostages named Rocko (Adam Cantor) is seen with it when disguised as "Mr. Wolf" when it seems like Ashley Beck is going to be released, and later gets ahold of it briefly when some of the hostages stage an ill-fated bid to overpower their captors.
Smith & Wesson Model 10 HB
When the robbers first take over the bank, the security guard Henry (Adam Kroloff) has a Smith & Wesson Model 10 HB revolver, which is quickly taken from him by "Mr. Pig" who then holds it on the other bystanders in the bank along with his MAC-11, though isn't seen with it after the first episode.
Smith & Wesson Model 36
the Pittsburg Police negotiator, Captain Horst Cali (Donnie Wahlberg) carries a stainless steel Smith & Wesson Model 36 revolver as his sidearm, in contrast to his fellow officers who carry Glocks. He rarely uses it, preferring to employ his negotiating skills instead. He most notably has it drawn when chasing Mr. Wolf through the tunnel beneath the bank as Mr. Wolf flees back inside.

AR-15 A2 HBAR
Pittsburg Police officers responding to the robbery and an armored van driver can be seen using Colt AR-15 A2 HBAR rifles, the civilian version of the M16A2, during the first shootout. Another AR-15 A2 can be seen in the hands of one of the men brought in as backup during the final shootout, but he is taken out by SWAT before he can use it.
Glock 17
Pittsburg Police officers and SWAT members responding to the robbery and FBI Agent Carrie Southwell, who is fatally wounded during the first shootout, can be seen wielding 2nd and 3rd Glock 17 pistols. "Mr. Wolf" can be seen holding a Glock in promotional material as seen above, but never uses one on-screen.

Micro Uzi
The robber Marshall "Mr. Cat" O'Brien, Jr. (J.D. Williams) can be seen wielding a Micro Uzi with a custom shoulder sling. One of the hostages, an elderly man named Bernard (Bingo O'Malley) later gets ahold of the weapon in an ill-fated attempt to overpower their captors. Another Micro Uzi can be seen in the hands of one of the men brought in as backup during the final shootout, holding Cpt. Cali's wife Lucy Cali (Laurel Brooke Johnson) at gunpoint with it before being killed by Quincy.
Remington 870
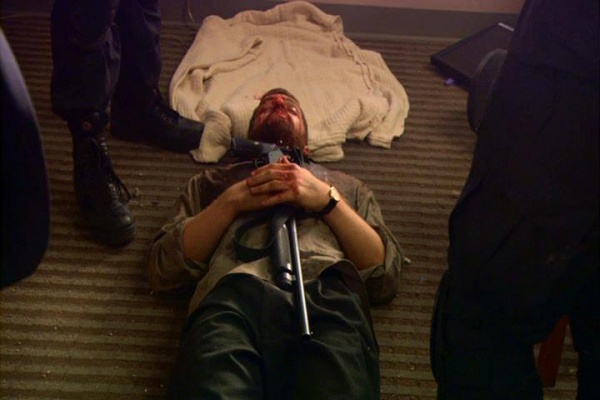
The robber Henry "Mr. Rabbit" Roman (Jeremy Davidson) and Pittsburg Police officers responding to the robbery as well as one of the armored van drivers can be seen using Remington 870 shotguns. The one used by "Mr. Rabbit" has a pachymar revolver-style pistol grip in place of the stock. He is last seen with it when his body is found in the bank, having been killed during a brawl with "Mr. Wolf" when the two came to blows about how to resolve the siege.
M4A1 Carbine
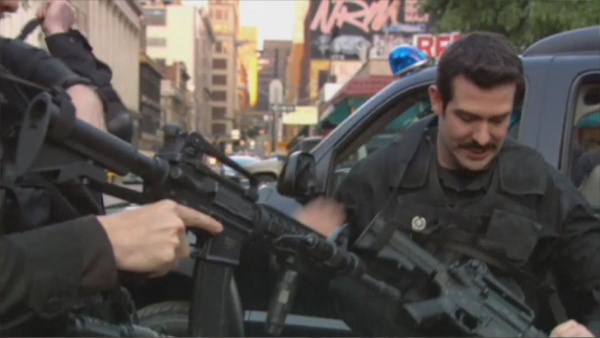
Pittsburgh Police SWAT officers responding to the bank robbery can be seen carrying M4A1 carbines fitted with various accessories including RIS foregrips and tactical flashlights, one of them having a Surefire M500AB weaponlight. Due to the heavy SWAT presence, the weapon is one of the most common in scenes outside the bank. It should be noted that the M4A1s used in the show for non-firing scenes appear to be airsoft M4A1s. However, every time the "M4s" are fired, they magically turn into Colt AR-15 Sporter 1 carbines, as described below. Yet more evidence of this show's tendency to use older model civilian "assault weapons" (many of which are no longer sold/manufactured in the United States) for all of the characters - "good" guys and "bad" guys.
Colt AR-15 Sporter-1 Carbine
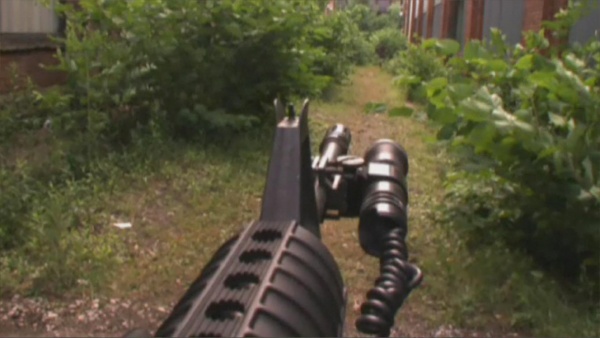
In scenes where Pittsburgh P.D. SWAT officers fire their M4A1 carbines, the weapons switch to Colt AR-15 SP1 carbines with 16" barrels, fitted with Surefire M500AB weaponlights.
Blaser 93 Sniper Rifle
One of the Pittsburg Police SWAT snipers named Quincy (Michael K. Williams) can be seen using a Blaser 93 sniper rifle with a folding bipod. He gets to fire it twice in the last episode, killing one of the thugs brought in as backup who is holding Cpt. Cali's wife hostage at the start of the last shootout, and another thug brandishing a Norinco Type 56-1.
Remington 700PSS Sniper Rifle
Some of the Pittsburg Police SWAT snipers outside the bank can be seen using Remington 700PSS sniper rifles fitted with Harris bipods.
M84 Stun Grenade
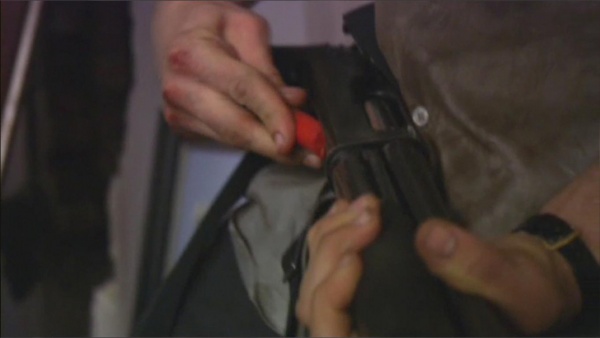
When the SWAT team makes their ill-fated attempt to storm the bank, they use an M84 stun grenade to cover their retreat.
Ruger All-Weather Mark II Model 77 Rifle
In one episode, a hitman hired by Alan Beck (Tobin Bell) can be seen assembling a suppressed Ruger All-Weather Mark II Model 77 sniper rifle that he had been carrying in a suitcase. He fires it on one of the robbers who turns out to be Rocko disguised as "Mr. Wolf", hitting him in the ear before other members of Platoon 10-13 operating outside the bank can kill the sniper.
Norinco Type 56-1
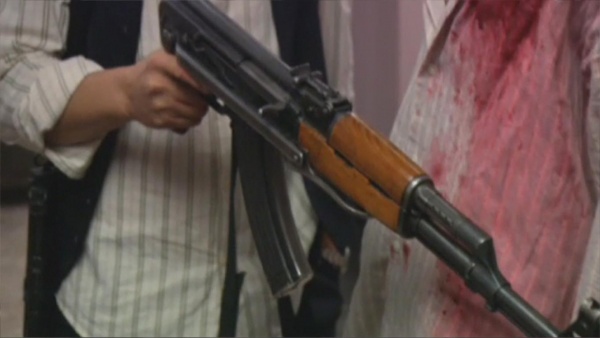
The robber "Mr. Mouse" (Leo Fitzpatrick) can be seen carrying a Norinco Type 56-1 with an AKM-style slant compensator as his weapon of choice. "Mr. Wolf" can also be seen holding it with the magazine removed soon after "Mr. Mouse" accidentally shoots one of the hostages with it. "Mr. Pig" later uses it briefly after "Mr. Mouse" becomes overcome with delusion due to infection of a gunshot wound he sustained during the first shootout. One of the men brought in as backup during the final shootout can also be seen with a Type 56-1 before being taken out by SWAT.
AKS-47
On a couple of occasions, the Type 56-1 used by "Mr. Mouse" will occasionally switch to an AKS-47, distinguishable by the open front sight design and the lack of the AKM-style muzzle brake seen on the Type 56-1.
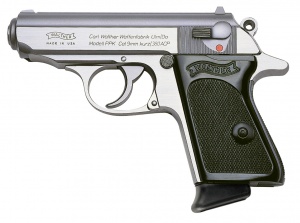
Walther PPK
One of the hostages, Leroy Barnes (Ryan Sands), can be seen hiding a stainless steel Walther PPK in a potted plant in the bank. He later recovers it and holds it on "Mr. Rabbit" when the hostages make an ill-fated bid to overpower their captors, forcing him to drop his weapon, then pistol-whipping him with the pistol. He then loses it when the attempt fails, "Mr. Rabbit" taking it from him.
Kimel AP-9
The robbers' getaway driver, Deke Quinlan, (Steve Cirbus) can be seen using a two-tone Kimel AP-9 during the first shootout, and can be seen with it on the bed of his apartment while watching the standoff on television. He has it again during the final shootout, last seen with it after being killed by Cpt. Cali.
Desert Eagle
When Deke Quinlan and other members of Platoon 10-13 are forming a plan to get the robbers out of the bank from a nearby building, Leon (Nick Koesters) can be seen be seen brandishing a two-tone Desert Eagle. It can also be seen on the table as they're talking.
Steyr AUG
In the final episode, Mr. Wolf can be seen with a Steyr AUG, loading it while riding with Cpt. Cali to the site of the final shootout wherein he runs out of ammo and abandons the weapon, but not before wounding the SWAT commander, Lt. Connie Reubens (Michael Hyatt) with a shot to the shoulder from the rifle.
Beretta 92FS
During the final shootout, Cpt. Cali gets ahold of a Beretta 92FS from one of Deke Quinlan's slain henchmen, having lost his revolver when he was taken with the robbers. He uses it in a shootout with Deke Quinlan, killing him with it and rescuing his wife who was being held hostage, and then in the final faceoff with Mr. Wolf, fatally wounding him with a shot to the chest from the Beretta.
Heckler & Koch USC
During the final shootout, Mr. Cat can be seen using a Heckler & Koch USC in place of his Micro Uzi. He uses it to try to provide cover fire so Wolf can escape, but is ultimately gunned down by the police.
Daewoo K1A
The only robber to survive the final shootout, "Mr. Pig" can be seen with a semi-automatic civilian carbine version of the Daewoo K1A1 in place of the MAC-11 he carried before, discarding it when he boards a passing train, making him the only one of the robbers to escape.
Smith & Wesson 5904
When approaching the ambulance used by the robbers to escape the bank, a Pittsburg P.D. officer can be seen with a Smith & Wesson 5904 at the ready, one of the few police personnel besides Cpt. Cali to use a handgun other than a Glock.
Jericho 941
After leaving the bank, "Mr. Wolf" procures a stainless steel Jericho 941, using it as a backup to the Steyr AUG in the final shootout, and the ensuing faceoff with Cpt. Cali, using it to force Cali to fatally shoot him, calling Cali's act "a righteous kill". (This is a reference to the fact that both John Leguizamo, who plays Wolf, and Donnie Wahlberg, who plays Cali, were partnered as detectives in the Al Pacino/Robert De Niro film Righteous Kill.)
Smith & Wesson Model 5906
During the final shootout, "Mr. Cat" can be seen with a Smith & Wesson 5906 with ambidextrous safety selector as backup to his Heckler & Koch USC.
Benelli M3 Super 90
A Benelli M3 Super 90 fitted with a Surefire dedicated forend weaponlight can be seen in the hands of a SWAT officer during the subway shootout.
Ruger KP94
A Ruger KP94 can be briefly seen in the hands of Derzius (Joshua Elijah Reese), one of the 10-13 members that tried to help in the escape in the subway.
Wilkinson Arms Linda Pistol
One of the 10-13 members, Big Stan (Jeff Hochendoner) has a Wilkinson Arms Linda Pistol during the subway shootout. Ray Wilkinson of Wilkinson Arms made both pistols and carbines named after his daughters. It seems to have the flash hider from the Terry carbine, though.
