| If you have been locked out of your account you can request a password reset here. |
Difference between revisions of "Gallipoli (1981)"
| Line 32: | Line 32: | ||
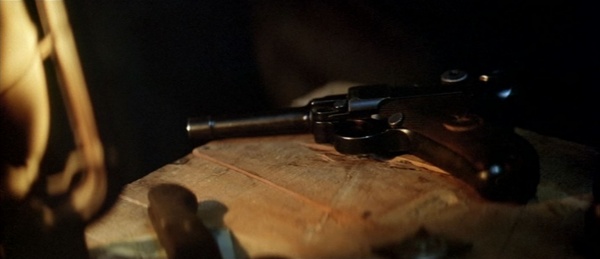
[[Image:P08Luger1917.jpg|thumb|none|300px|Luger P08 Pistol - 9mm]] | [[Image:P08Luger1917.jpg|thumb|none|300px|Luger P08 Pistol - 9mm]] | ||
[[Image:Gallipoli 3.jpg|thumb|none|600px|A captured [[Luger P08]] pistol sitting on a table.]] | [[Image:Gallipoli 3.jpg|thumb|none|600px|A captured [[Luger P08]] pistol sitting on a table.]] | ||
| − | [[Image:Gallipoli_lug.jpg|thumb|none|600px|Frank | + | [[Image:Gallipoli_lug.jpg|thumb|none|600px|The pistol in Frank's hand.]] |
==Webley Mk VI== | ==Webley Mk VI== | ||
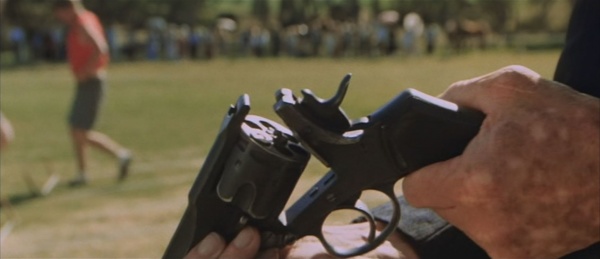
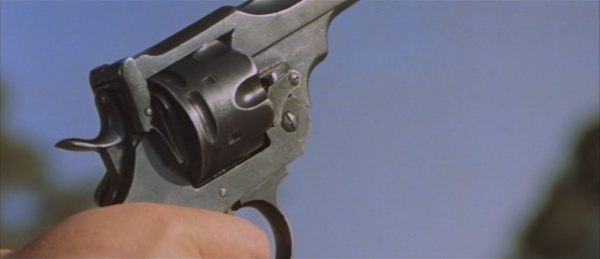
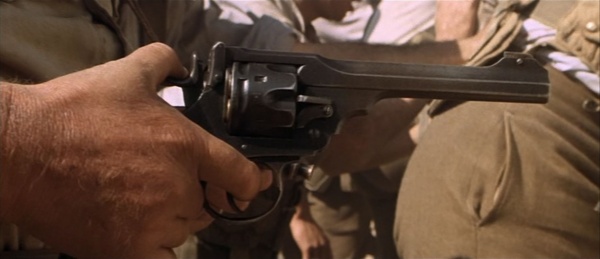
| − | A [[Webley Mk VI]] Revolver is drawn from a holster by Major Barton (Bill Hunter) | + | A [[Webley Mk VI]] Revolver is drawn from a holster by Major Barton (Bill Hunter) as he readies the ANZAC troops for the charge. It's also used by a referee during the first race of Archy and Frank at the beginning. |
| − | [[Image:Webley.JPG|thumb|none| | + | [[Image:Webley.JPG|thumb|none|300px|Webley Mk VI Revolver - .455 Webley]] |
| − | [[Image:Gallipoli_web1.jpg|thumb|none|600px| | + | [[Image:Gallipoli_web1.jpg|thumb|none|600px|After loading a single round the referee closes the revolver.]] |
| − | [[Image:Gallipoli_web2.jpg|thumb|none|600px|He | + | [[Image:Gallipoli_web2.jpg|thumb|none|600px|He gives the signal to start the race.]] |
| − | [[Image:Gallipoli 6.jpg|thumb|none|600px|A | + | [[Image:Gallipoli 6.jpg|thumb|none|600px|A Webley Mk VI being raised by Major Barton (Bill Hunter) to ready the charge.]] |
=Rifles= | =Rifles= | ||
| Line 46: | Line 46: | ||
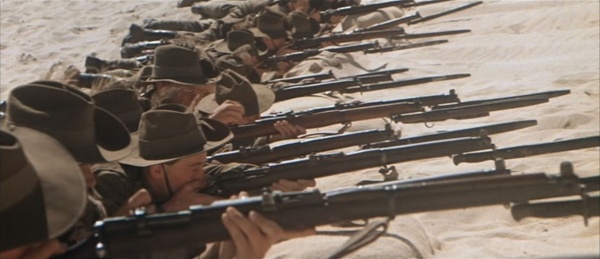
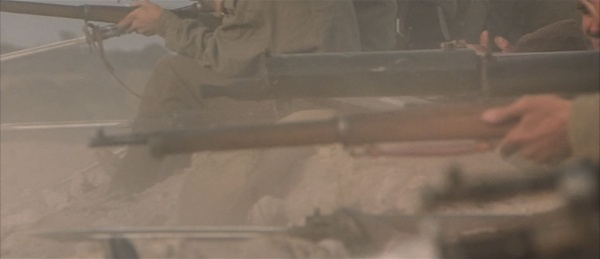
ANZAC soldiers including Archy Hamilton ([[Mark Lee]]) are seen with [[Lee-Enfield No.1 Mk.III]] rifles. Recognizable by the magazine cutoff. | ANZAC soldiers including Archy Hamilton ([[Mark Lee]]) are seen with [[Lee-Enfield No.1 Mk.III]] rifles. Recognizable by the magazine cutoff. | ||
[[File:SMLE Mark III.jpg|thumb|none|450px|Lee-Enfield No.1 Mk.III - .303 British]] | [[File:SMLE Mark III.jpg|thumb|none|450px|Lee-Enfield No.1 Mk.III - .303 British]] | ||
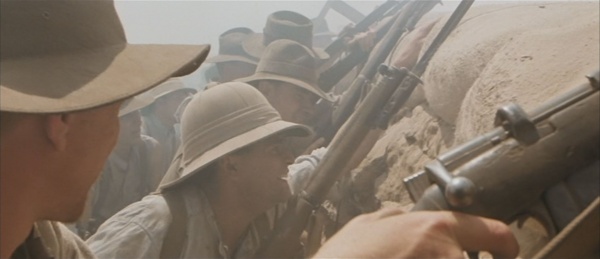
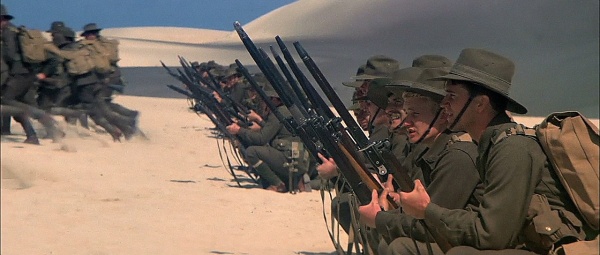
| − | [[Image:Gallipoli_smle1.jpg|thumb|none|600px|ANZAC soldiers during the training. The second is | + | [[Image:Gallipoli_smle1.jpg|thumb|none|600px|ANZAC soldiers during the training. The second is an Mk.III.]] |
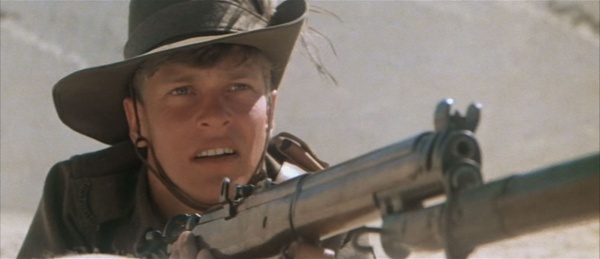
[[Image:Gallipoli_smle2.jpg|thumb|none|600px|Archy Hamilton ([[Mark Lee]]) holds the SMLE during the training.]] | [[Image:Gallipoli_smle2.jpg|thumb|none|600px|Archy Hamilton ([[Mark Lee]]) holds the SMLE during the training.]] | ||
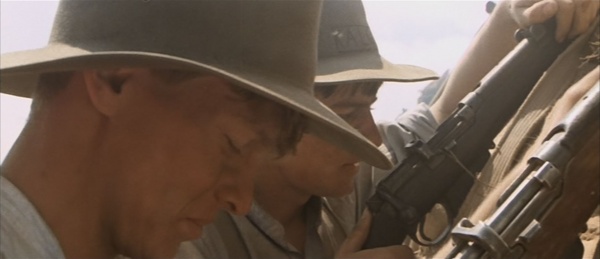
[[Image:Gallipoli_smle3.jpg|thumb|none|600px|Archy and his comrade with the rifles before the last assault.]] | [[Image:Gallipoli_smle3.jpg|thumb|none|600px|Archy and his comrade with the rifles before the last assault.]] | ||
| Line 55: | Line 55: | ||
[[Image:SMLE.jpg|thumb|none|450px|Lee-Enfield No.1 Mk.III* - .303 British]] | [[Image:SMLE.jpg|thumb|none|450px|Lee-Enfield No.1 Mk.III* - .303 British]] | ||
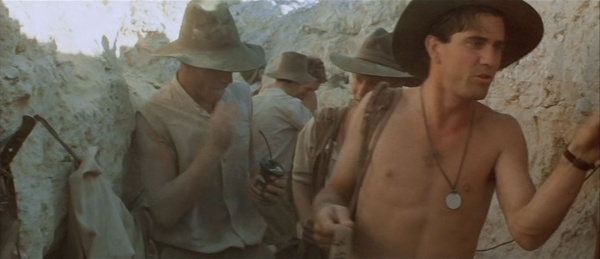
[[Image:Gallipoli001.jpg|thumb|none|600px|Frank Dunne ([[Mel Gibson]]) trains with the Lee-Enfield with the rest of the ANZAC troops.]] | [[Image:Gallipoli001.jpg|thumb|none|600px|Frank Dunne ([[Mel Gibson]]) trains with the Lee-Enfield with the rest of the ANZAC troops.]] | ||
| − | [[Image:Gallipoli 1.jpg|thumb|none|600px| ANZAC Light Horse troops training with [[Short Magazine Lee-Enfield (SMLE)|Lee-Enfield No.1 Mk.III*]]s.]] | + | [[Image:Gallipoli 1.jpg|thumb|none|600px|ANZAC Light Horse troops training with [[Short Magazine Lee-Enfield (SMLE)|Lee-Enfield No.1 Mk.III*]]s.]] |
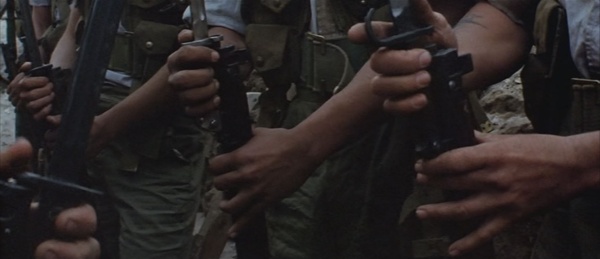
[[Image:Gallipoli_smle4.jpg|thumb|none|600px|ANZAC soldiers fixing their bayonets.]] | [[Image:Gallipoli_smle4.jpg|thumb|none|600px|ANZAC soldiers fixing their bayonets.]] | ||
[[Image:Gallipoli_smle5.jpg|thumb|none|600px|Australians holding their SMLEs before the first assault.]] | [[Image:Gallipoli_smle5.jpg|thumb|none|600px|Australians holding their SMLEs before the first assault.]] | ||
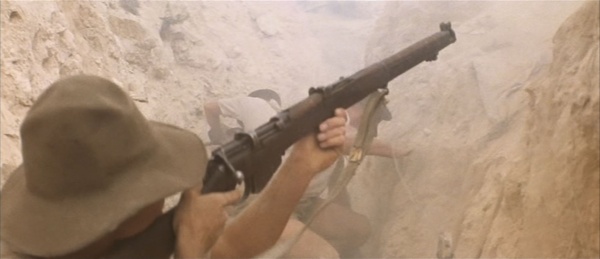
| − | [[Image:Gallipoli_smle6.jpg|thumb|none|600px|An ANZAC fires his SMLE at a Turk.]] | + | [[Image:Gallipoli_smle6.jpg|thumb|none|600px|An ANZAC fires his SMLE at a Turk while covering his mate who repairs a telephone wire.]] |
==Turkish 1903 Mauser== | ==Turkish 1903 Mauser== | ||
| − | Turkish troops are seen firing [[Mauser_Rifle_Series#1903_Turkish_Mauser|Mauser 1903 Rifles]] with | + | Turkish troops are seen firing [[Mauser_Rifle_Series#1903_Turkish_Mauser|Mauser 1903 Rifles]] with at ANZAC troops. |
[[Image:1903TurkishMauser.jpg|thumb|none|450px|Turkish 1903 Mauser Rifle - 7.92 x 57mm]] | [[Image:1903TurkishMauser.jpg|thumb|none|450px|Turkish 1903 Mauser Rifle - 7.92 x 57mm]] | ||
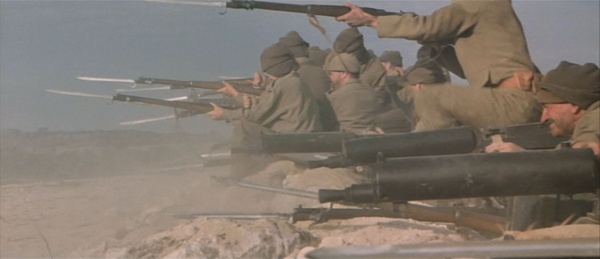
[[Image:Gallipoli 4.jpg|thumb|none|600px|Turkish troops firing [[Mauser_Rifle_Series#1903_Turkish_Mauser|Mauser 1903 Rifles]] at ANZAC troops]] | [[Image:Gallipoli 4.jpg|thumb|none|600px|Turkish troops firing [[Mauser_Rifle_Series#1903_Turkish_Mauser|Mauser 1903 Rifles]] at ANZAC troops]] | ||
| Line 75: | Line 75: | ||
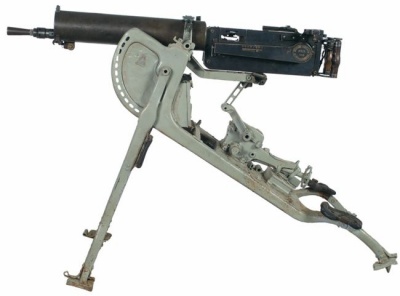
The [[Maxim|Maxim MG08]] is used to devastating effect against the ANZAC troops. | The [[Maxim|Maxim MG08]] is used to devastating effect against the ANZAC troops. | ||
[[Image:MaximMG08.jpg|thumb|none|400px|Maxim MG08 Machine Gun - 7.92 x 57mm]] | [[Image:MaximMG08.jpg|thumb|none|400px|Maxim MG08 Machine Gun - 7.92 x 57mm]] | ||
| − | [[Image:Gallipoli 2.jpg|thumb|none|600px| A [[Maxim|Maxim MG08 Machine Gun]] firing from a bunker]] | + | [[Image:Gallipoli 2.jpg|thumb|none|600px|A [[Maxim|Maxim MG08 Machine Gun]] firing from a bunker]] |
| − | [[Image:Gallipoli 5.jpg|thumb|none|600px| A [[Maxim|Maxim MG08 Machine Gun]] firing at charging ANZAC troops]] | + | [[Image:Gallipoli 5.jpg|thumb|none|600px|A [[Maxim|Maxim MG08 Machine Gun]] firing at charging ANZAC troops]] |
=Hand Grenades= | =Hand Grenades= | ||
| Line 83: | Line 83: | ||
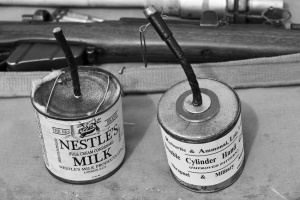
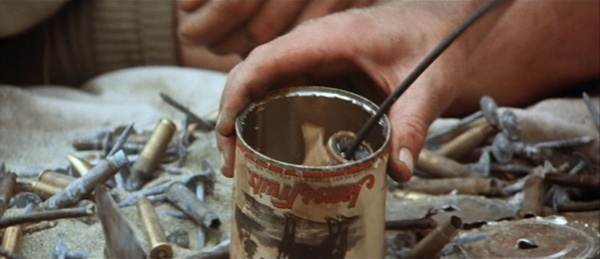
ANZAC soldiers use [[Jam Tin Grenade]]s. | ANZAC soldiers use [[Jam Tin Grenade]]s. | ||
[[File:Gws-jamtinbomb.jpg|thumb|none|300px|Jam Tin Grenade]] | [[File:Gws-jamtinbomb.jpg|thumb|none|300px|Jam Tin Grenade]] | ||
| − | [[Image:Gallipoli_jam1.jpg|thumb|none|600px|"''Morning Abdul!''"]] | + | [[Image:Gallipoli_jam1.jpg|thumb|none|600px|An ANZAC ignites a Jam Tin with his cigarette and greets the Turks with "''Morning Abdul!''".]] |
| − | [[Image:Gallipoli_jam2.jpg|thumb|none|600px| | + | [[Image:Gallipoli_jam2.jpg|thumb|none|600px|Jam Tin Grenade being prepared by Australians.]] |
| − | [[Image:Gallipoli_jam3.jpg|thumb|none|600px|Several grenades.]] | + | [[Image:Gallipoli_jam3.jpg|thumb|none|600px|Several more grenades.]] |
=Other= | =Other= | ||
==10.5 cm leFH 16== | ==10.5 cm leFH 16== | ||
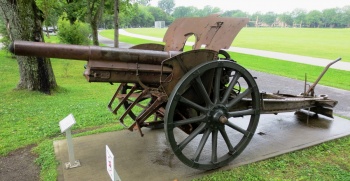
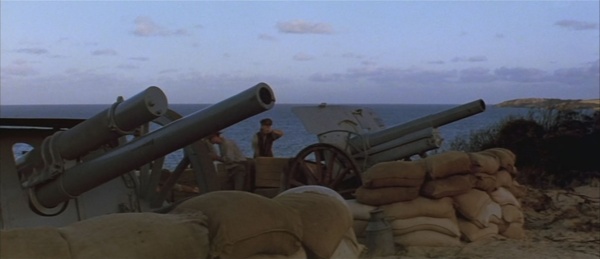
| − | ANZAC soldiers fire a anachronistic German 10.5 cm leichte Feldhaubitze 16 before the first assault | + | ANZAC soldiers fire a anachronistic German 10.5 cm leichte Feldhaubitze 16 before the first assault. |
[[File:LeFH 16.jpg|thumb|none|350px|10.5 cm leichte Feldhaubitze 16.]] | [[File:LeFH 16.jpg|thumb|none|350px|10.5 cm leichte Feldhaubitze 16.]] | ||
| − | [[Image:Gallipoli_feld1.jpg|thumb|none|600px|The ''Feldhaubitze '' on the right | + | [[Image:Gallipoli_feld1.jpg|thumb|none|600px|The ''Feldhaubitze'' on the right.]] |
| − | |||
| + | ==Ordnance QF 18-pounder Field Gun== | ||
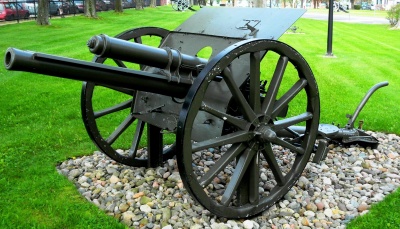
| + | A British Ordnance QF 18-pounder Mk. II Field Gun can be seen next to the ''Feldhaubitze''. | ||
| + | [[Image:British 18 Pounder.jpg|thumb|none|400px|Ordnance QF 18-pounder Field Gun Mk II, Halifax, Nova Scotia]] | ||
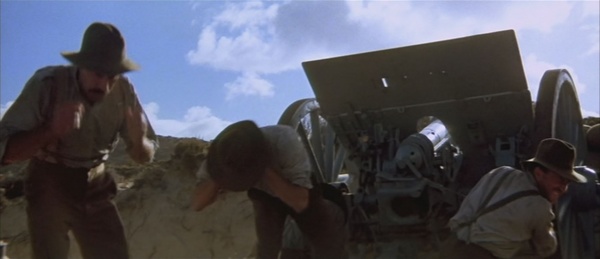
| + | [[Image:Gallipoli_feld1.jpg|thumb|none|600px|The 18-pounder on the left. Note the folded shield.]] | ||
| + | [[Image:Gallipoli_feld2.jpg|thumb|none|600px|Rear view on the receiver and the now-folded up shield.]] | ||
| + | |||
| + | ==Bayonets== | ||
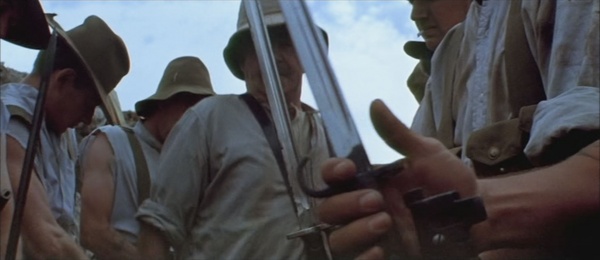
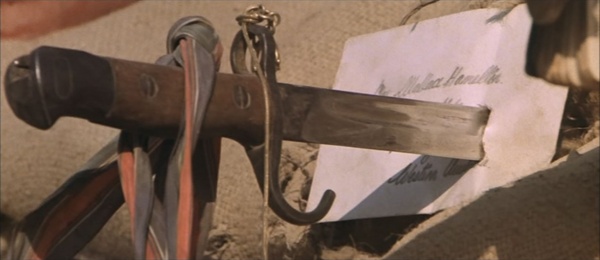
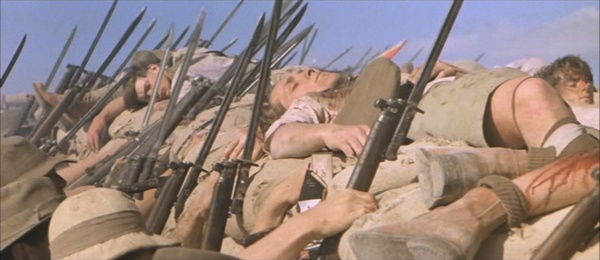
| + | The Bayonets of the SMLEs are Pattern 1907 of a mix of early hooked Quillon and later common variant without the hook. The Turkish Mausers are fitted with Model 1890 Mauser Bayonets. | ||
| + | [[Image:P1907hookbayonet.jpg|thumb|none|400px|Pattern 1907 sword hooked Quillon bayonet.]] | ||
| + | [[Image:Gallipoli-Bayonet1.jpg|thumb|none|600px|ANZACs fixing their sword bayonets.]] | ||
| + | [[Image:Gallipoli-Bayonet2.jpg|thumb|none|600px|Archy's hooked Quillon P07 in a close-up.]] | ||
| + | [[Image:Gallipoli-Bayonet3.jpg|thumb|none|600px|SMLEs with fixed P07s without the hook.]] | ||
| + | [[Image:Gallipoli TM.jpg|thumb|none|600px|Closer view of a Turkish Mauser bayonet.]] | ||
[[Category:Movie]] | [[Category:Movie]] | ||
Revision as of 09:27, 16 August 2019
| ||||||||||||||||||||||||||||||
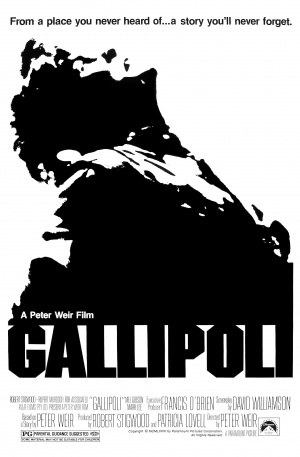
Gallipoli is the 1981 Australian World War I film directed by Peter Weir and starring Mark Lee and Mel Gibson as two young men who meet at a race and become friends who put aside their dreams to join the war effort. Their friendship grows as they go to Gallipoli peninsula in Turkey to fight with the rest of the Australian Light Horse troops. They endure the hardships and boredom of the trench warfare at Gallipoli. Their unit is then ordered to charge Turkish lines as a diversion for the British landings. The Light Horse charges toward enemy lines with devastating effects on the ANZAC troops. The cast included Bill Kerr, Harold Hopkins, and Charles Lathalu Yunipingli.
The following weapons were used in the film Gallipoli (1981):
Handguns
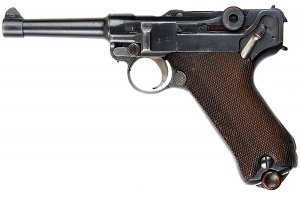
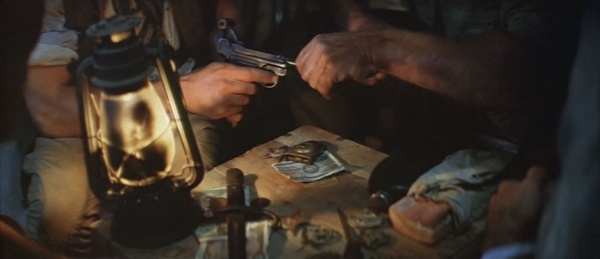
Luger P08
A captured Luger P08 pistol is glimpsed resting on a table. Frank Dunne (Mel Gibson) briefly holds it.
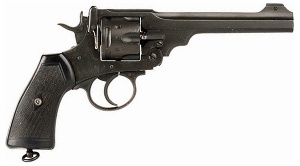
Webley Mk VI
A Webley Mk VI Revolver is drawn from a holster by Major Barton (Bill Hunter) as he readies the ANZAC troops for the charge. It's also used by a referee during the first race of Archy and Frank at the beginning.
Rifles
Lee-Enfield No.1 Mk.III
ANZAC soldiers including Archy Hamilton (Mark Lee) are seen with Lee-Enfield No.1 Mk.III rifles. Recognizable by the magazine cutoff.
Lee-Enfield No.1 Mk.III*
The Lee-Enfield No.1 Mk.III* is also carried by ANZAC Light Horse troops including Frank Dunne (Mel Gibson) and Les McCann (Harold Hopkins).

Turkish 1903 Mauser
Turkish troops are seen firing Mauser 1903 Rifles with at ANZAC troops.
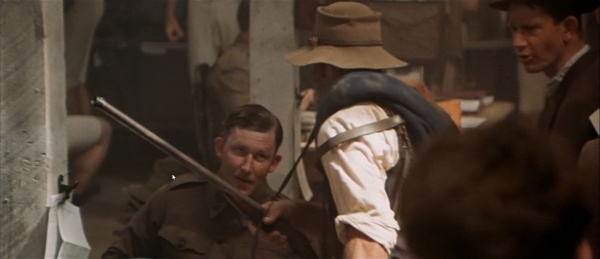
Sharps Rifle
The Sharps rifle is briefly glimpsed when the men are seen enlisting.
Machine Guns
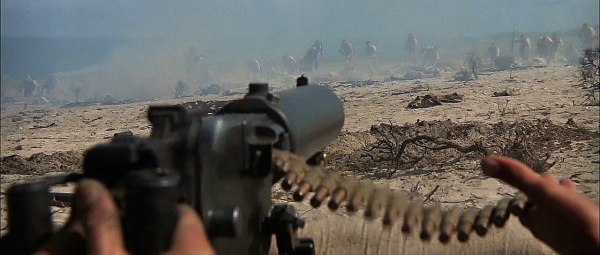
Maxim MG08
The Maxim MG08 is used to devastating effect against the ANZAC troops.

Hand Grenades
Jam Tin Grenade
ANZAC soldiers use Jam Tin Grenades.
Other
10.5 cm leFH 16
ANZAC soldiers fire a anachronistic German 10.5 cm leichte Feldhaubitze 16 before the first assault.
Ordnance QF 18-pounder Field Gun
A British Ordnance QF 18-pounder Mk. II Field Gun can be seen next to the Feldhaubitze.
Bayonets
The Bayonets of the SMLEs are Pattern 1907 of a mix of early hooked Quillon and later common variant without the hook. The Turkish Mausers are fitted with Model 1890 Mauser Bayonets.
