| If you have been locked out of your account you can request a password reset here. |
Difference between revisions of "The Lighthorsemen"
| Line 41: | Line 41: | ||
=Handguns= | =Handguns= | ||
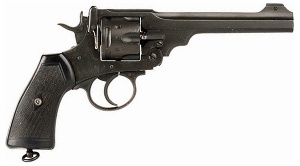
==Webley Mk VI Revolver== | ==Webley Mk VI Revolver== | ||
| − | [[Image:Webley.JPG|thumb|none| | + | [[Image:Webley.JPG|thumb|none|300px|Webley Mk VI Revolver - .455 Webley]] |
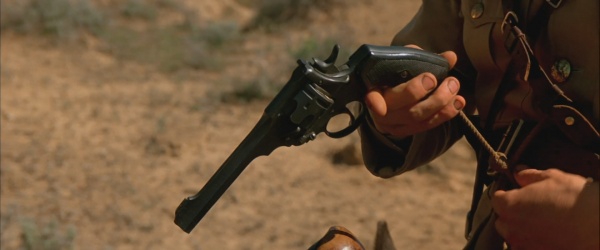
| − | [[Image:Lighthorsemen-Webley.jpg|thumb|none| | + | [[Image:Lighthorsemen-Webley.jpg|thumb|none|600px|Major Richard Meinertzhagen ([[Anthony Andrews]]) gives his [[Webley Mk VI]] to Colonel Murray Bourchier ([[Tony Bonner]]).]] |
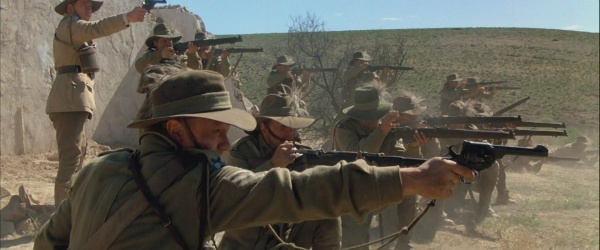
| − | [[Image:Lighthorsemen-Webley2.jpg|thumb|none| | + | [[Image:Lighthorsemen-Webley2.jpg|thumb|none|600px|Australian Sergeant fires his Webley Mk VI at Turkish troops.]] |
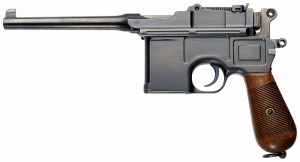
==Mauser C96 "Broomhandle"== | ==Mauser C96 "Broomhandle"== | ||
| − | [[File:C96Pistol.jpg|thumb|none| | + | [[File:C96Pistol.jpg|thumb|none|300px|Mauser C96 "Broomhandle" - 7.63x25mm Mauser.]] |
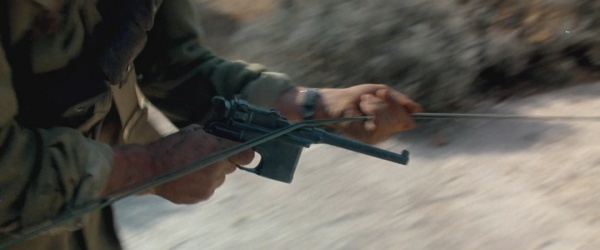
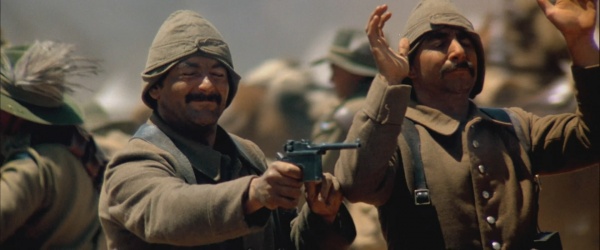
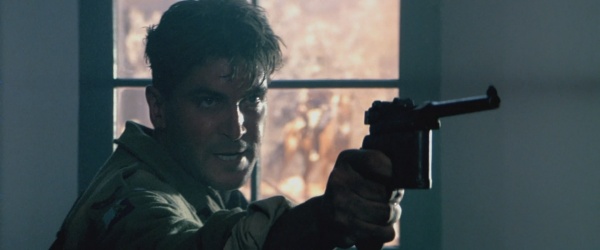
| − | [[Image:Lighthorsemen-C96.jpg|thumb|none| | + | [[Image:Lighthorsemen-C96.jpg|thumb|none|600px|Turkish soldier fires his [[Mauser C96]].]] |
| − | [[Image:Lighthorsemen-C96-2.jpg|thumb|none| | + | [[Image:Lighthorsemen-C96-2.jpg|thumb|none|600px|]] |
| − | [[Image:Lighthorsemen-C96-3.jpg|thumb|none| | + | [[Image:Lighthorsemen-C96-3.jpg|thumb|none|600px|Scotty ([[Jon Blake]]) holds captured Mauser C96.]] |
=Rifles= | =Rifles= | ||
==Lee-Enfield No. 1 Mk III== | ==Lee-Enfield No. 1 Mk III== | ||
[[Lee-Enfield No. 1 Mk III]]s are the mainstay weapon of the Australian and British troops. | [[Lee-Enfield No. 1 Mk III]]s are the mainstay weapon of the Australian and British troops. | ||
| − | [[Image:SMLE Mark III.jpg|thumb|none| | + | [[Image:SMLE Mark III.jpg|thumb|none|450px|Lee-Enfield No. 1 Mk III - .303 British]] |
| − | [[Image:Lighthorsemen-SMLE.jpg|thumb|none| | + | [[Image:Lighthorsemen-SMLE.jpg|thumb|none|600px|Frank ([[Gary Sweet]]) preparing to mercy kill his wounded horse.]] |
| − | [[Image:Lighthorsemen-SMLE-2.jpg|thumb|none| | + | [[Image:Lighthorsemen-SMLE-2.jpg|thumb|none|600px|Dave Mitchell ([[Peter Phelps]]) holds his SMLE rifle.]] |
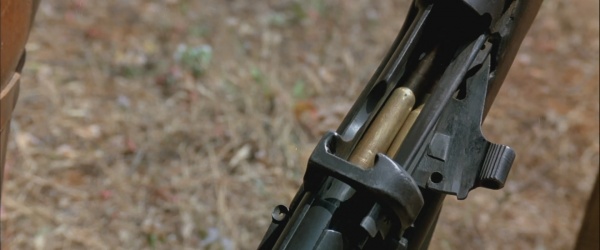
| − | [[Image:Lighthorsemen-SMLE-3.jpg|thumb|none| | + | [[Image:Lighthorsemen-SMLE-3.jpg|thumb|none|600px|Closeup of SMLE. The open chamber with the magazine cut-off can be seen.]] |
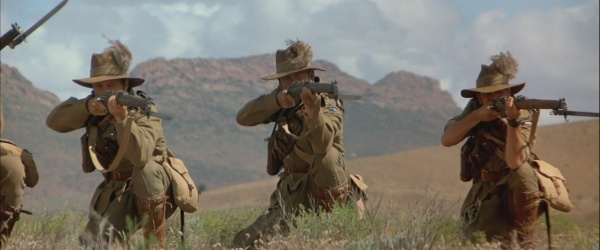
| − | [[Image:Lighthorsemen-SMLE-4.jpg|thumb|none| | + | [[Image:Lighthorsemen-SMLE-4.jpg|thumb|none|600px|Australian light horsemen fire their SMLE rifles with bayonets.]] |
| − | |||
| − | |||
| − | |||
| − | |||
| − | |||
| − | |||
| − | |||
| − | |||
| + | ==Turkish Mauser 1903/30== | ||
| + | [[Mauser Rifle Series#1903 Turkish Mauser|Mauser 1903/30 Rifles]], identify by the notch on top the receiver, are the mainstay weapon of the Turkish troops. | ||
| + | [[Image:TurkishMauser03-30.jpg|thumb|none|450px|Turkish Mauser 1903/30 - 7.92x57mm]] | ||
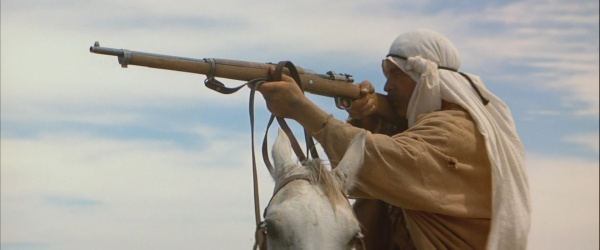
| + | [[Image:Lighthorsemen-Mauser.jpg|thumb|none|600px|Bedouin fires his Mauser rifle at Frank.]] | ||
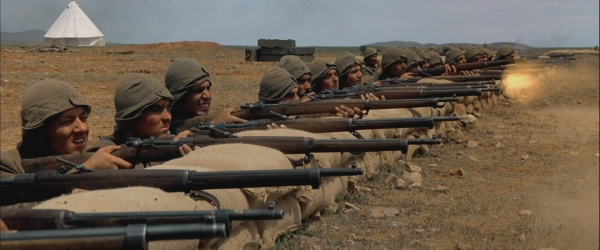
| + | [[Image:Lighthorsemen-Mauser2.jpg|thumb|none|600px|Turkish soldiers fire their Mauser rifles at Australian troops.]] | ||
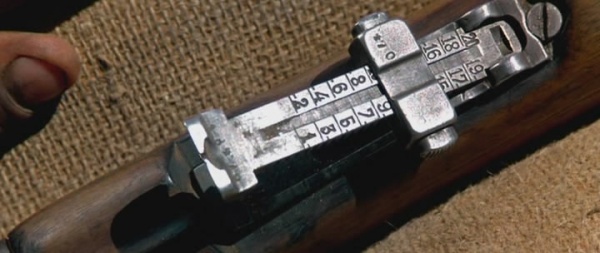
| + | [[Image:Lighthorsemen-Mauser3.jpg|thumb|none|600px|Closeup of Turkish 1903/30 Mauser rifle rear sights.]] | ||
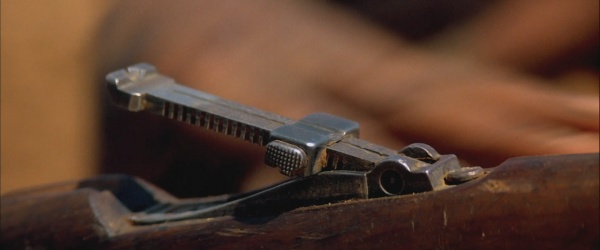
| + | [[Image:Lighthorsemen-Mauser4.jpg|thumb|none|600px|Another view.]] | ||
=Machine Guns= | =Machine Guns= | ||
==Lewis Machine Gun== | ==Lewis Machine Gun== | ||
[[File:Lewis gun.JPG|thumb|none|400px|Lewis Gun - .303 British]] | [[File:Lewis gun.JPG|thumb|none|400px|Lewis Gun - .303 British]] | ||
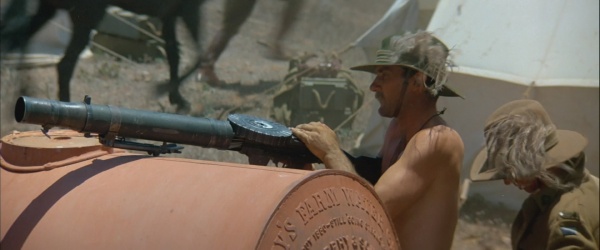
| − | [[Image:Lighthorsemen-Lewis.jpg|thumb|none| | + | [[Image:Lighthorsemen-Lewis.jpg|thumb|none|600px|Australian soldier holds the [[Lewis Gun#Infantry|Lewis Machine Gun]].]] |
==Vickers MK1== | ==Vickers MK1== | ||
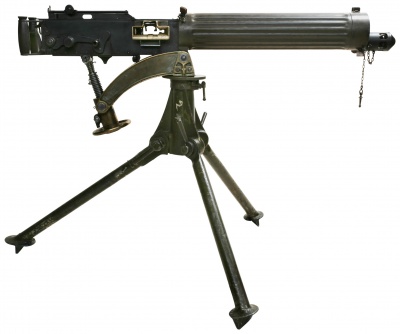
[[Image:Vickers gun.JPG|thumb|none|400px|Vickers Mark 1 Machine Gun with ribbed water jacket - .303 British]] | [[Image:Vickers gun.JPG|thumb|none|400px|Vickers Mark 1 Machine Gun with ribbed water jacket - .303 British]] | ||
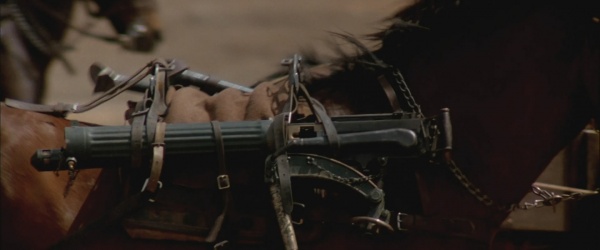
| − | [[Image:Lighthorsemen-Vickers.jpg|thumb|none| | + | [[Image:Lighthorsemen-Vickers.jpg|thumb|none|600px|The horse carries [[Vickers#Vickers MK1 Machine Gun|Vickers MK1]] machine gun.]] |
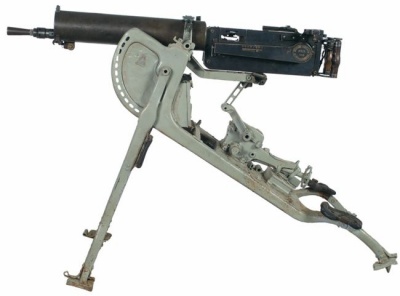
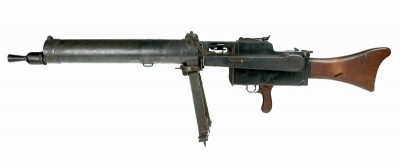
==Maxim MG08== | ==Maxim MG08== | ||
[[Image:MaximMG08.jpg|thumb|none|400px|Maxim MG08 Machine Gun - 7.92 x 57mm]] | [[Image:MaximMG08.jpg|thumb|none|400px|Maxim MG08 Machine Gun - 7.92 x 57mm]] | ||
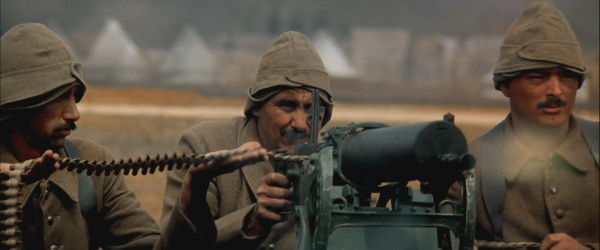
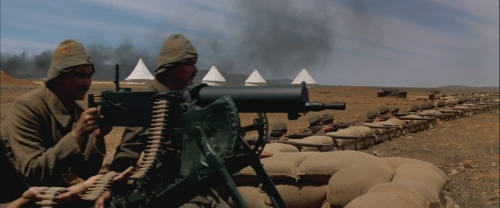
| − | [[Image:Lighthorsemen-MG08.jpg|thumb|none|500px|Turkish soldiers use the [[Maxim#Maxim MG08|Maxim MG08]] machine gun during the attack of Australian light horse troops]] | + | [[Image:Lighthorsemen-MG08.jpg|thumb|none|500px|Turkish soldiers use the [[Maxim#Maxim MG08|Maxim MG08]] machine gun during the attack of Australian light horse troops.]] |
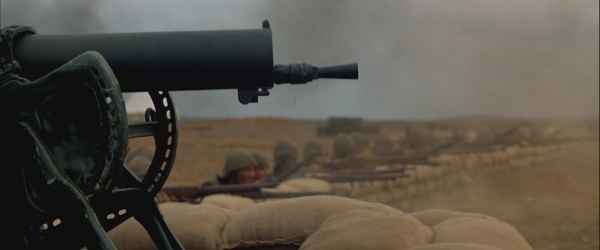
| − | [[Image:Lighthorsemen-MG08-2.jpg|thumb|none| | + | [[Image:Lighthorsemen-MG08-2.jpg|thumb|none|600px|]] |
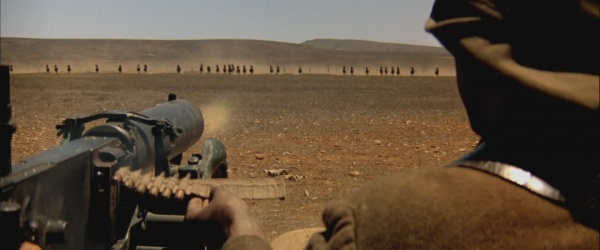
| − | [[Image:Lighthorsemen-MG08-3.jpg|thumb|none| | + | [[Image:Lighthorsemen-MG08-3.jpg|thumb|none|600px|]] |
| − | [[Image:Lighthorsemen-MG08-4.jpg|thumb|none| | + | [[Image:Lighthorsemen-MG08-4.jpg|thumb|none|600px|]] |
==Maxim MG08/15== | ==Maxim MG08/15== | ||
[[Image:Maxim MG08-15.jpg|thumb|none|400px|Maxim MG08/15 - 7.92x57mm Mauser]] | [[Image:Maxim MG08-15.jpg|thumb|none|400px|Maxim MG08/15 - 7.92x57mm Mauser]] | ||
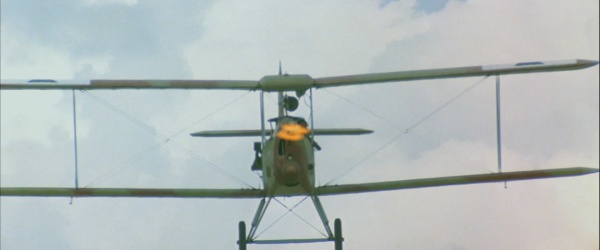
| − | [[Image:Lighthorsemen-MG08-5.jpg|thumb|none| | + | [[Image:Lighthorsemen-MG08-5.jpg|thumb|none|600px|German reconnaissance aircraft fires MG-08/15 fixed machine gun.]] |
==Parabellum MG17== | ==Parabellum MG17== | ||
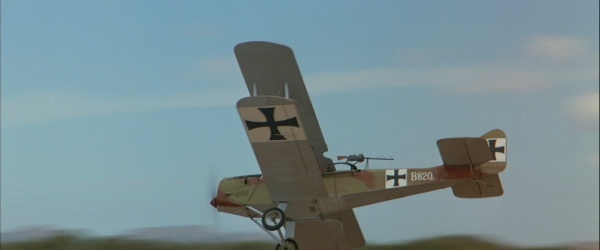
[[Image:Parabellum MG17.jpg|thumb|none|400px|Parabellum MG17 aircraft machine Gun - 7.92 x 57mm]] | [[Image:Parabellum MG17.jpg|thumb|none|400px|Parabellum MG17 aircraft machine Gun - 7.92 x 57mm]] | ||
| − | [[Image:Lighthorsemen-MG14.jpg|thumb|none| | + | [[Image:Lighthorsemen-MG14.jpg|thumb|none|600px|German reconnaissance aircraft armed with the Parabellum MG17 in observer's cockpit.]] |
=Hand Grenades= | =Hand Grenades= | ||
==Model 17 Stielhandgranate== | ==Model 17 Stielhandgranate== | ||
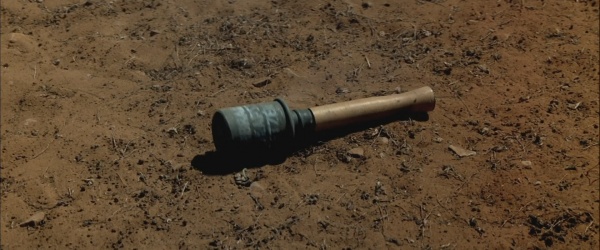
[[Image:German_ww1_hand_grenade.jpg|thumb|none|200px|Model 17 Stielhandgranate "Potato Masher" high-explosive fragmentation hand grenade]] | [[Image:German_ww1_hand_grenade.jpg|thumb|none|200px|Model 17 Stielhandgranate "Potato Masher" high-explosive fragmentation hand grenade]] | ||
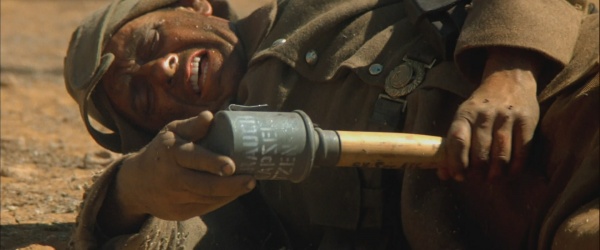
| − | [[Image:Lighthorsemen-Stielhandgranate.jpg|thumb|none| | + | [[Image:Lighthorsemen-Stielhandgranate.jpg|thumb|none|600px|Wounded Turkish soldier holds an earlier version of [[Model 17 Stielhandgranate]]. Note the belt clip.]] |
| − | [[Image:Lighthorsemen-Stielhandgranate2.jpg|thumb|none| | + | [[Image:Lighthorsemen-Stielhandgranate2.jpg|thumb|none|600px|]] |
=Other= | =Other= | ||
| Line 103: | Line 102: | ||
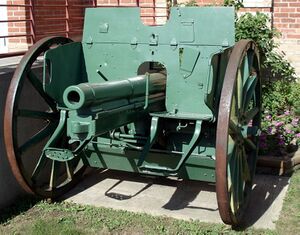
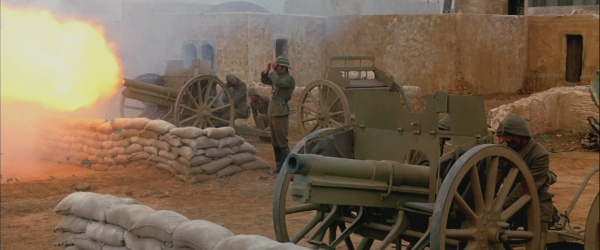
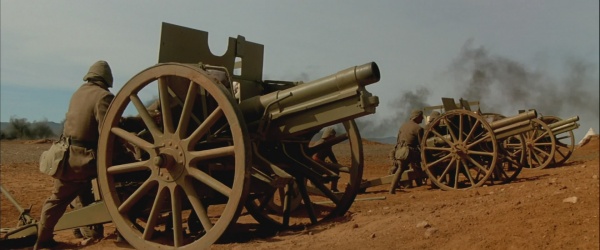
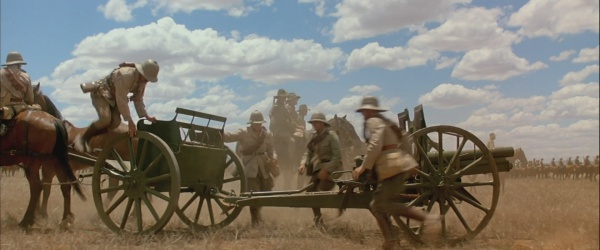
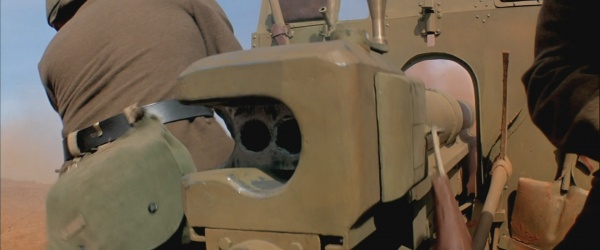
Turkish troops use German [[7,7 cm Feldkanone 96 n. A.]] field guns. Australian troops use these guns also. | Turkish troops use German [[7,7 cm Feldkanone 96 n. A.]] field guns. Australian troops use these guns also. | ||
[[File:800px-7.7 cm Feldkanone 16 IMG 6414b.jpg|thumb|none|300px|7,7 cm Feldkanone 96 n. A.]] | [[File:800px-7.7 cm Feldkanone 16 IMG 6414b.jpg|thumb|none|300px|7,7 cm Feldkanone 96 n. A.]] | ||
| − | [[Image:Lighthorsemen-FK 96.jpg|thumb|none| | + | [[Image:Lighthorsemen-FK 96.jpg|thumb|none|600px|Turkish gunners firing the 7.7 cm FK 96 field guns.]] |
| − | [[Image:Lighthorsemen-FK 96-2.jpg|thumb|none| | + | [[Image:Lighthorsemen-FK 96-2.jpg|thumb|none|600px|]] |
| − | [[Image:Lighthorsemen-FK 96-3.jpg|thumb|none| | + | [[Image:Lighthorsemen-FK 96-3.jpg|thumb|none|600px|Australian gunners.]] |
| − | [[Image:Lighthorsemen-FK 96-4.jpg|thumb|none| | + | [[Image:Lighthorsemen-FK 96-4.jpg|thumb|none|600px|Close up of the 7.7 cm FK 96 n.A. breech.]] |
==Aerial bomb== | ==Aerial bomb== | ||
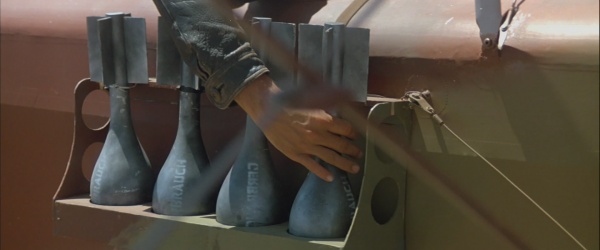
German reconnaissance aircraft carries small aerial bombs. | German reconnaissance aircraft carries small aerial bombs. | ||
| − | [[Image:Lighthorsemen-bombs.jpg|thumb|none| | + | [[Image:Lighthorsemen-bombs.jpg|thumb|none|600px|]] |
==Mark IV tank== | ==Mark IV tank== | ||
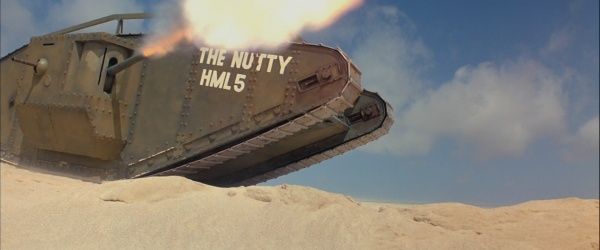
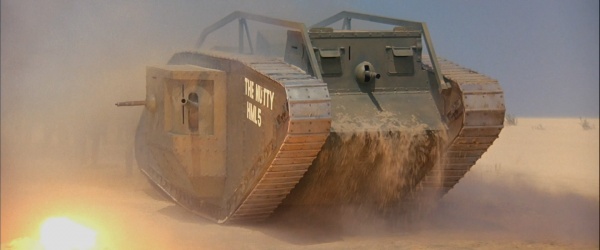
| − | British troops use tanks during the Second Battle of Gaza | + | British troops use tanks during the Second Battle of Gaza. |
| − | [[Image:Lighthorsemen-MarkV.jpg|thumb|none| | + | [[Image:Lighthorsemen-MarkV.jpg|thumb|none|600px|]] |
| − | [[Image:Lighthorsemen-MarkV-2.jpg|thumb|none| | + | [[Image:Lighthorsemen-MarkV-2.jpg|thumb|none|600px|]] |
==Explosive== | ==Explosive== | ||
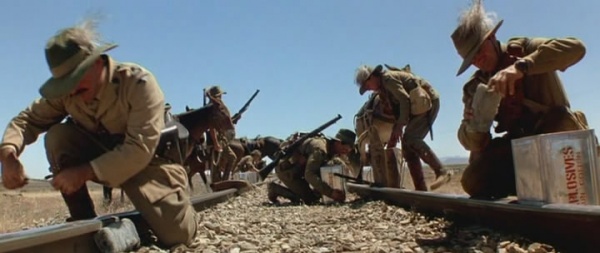
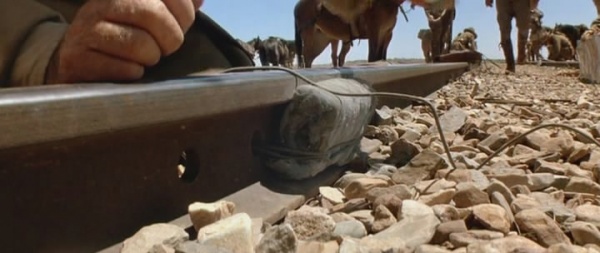
| − | Australian troops used explosives to destroy the Turkish railway | + | Australian troops used explosives to destroy the Turkish railway. |
| − | [[Image:Lighthorsemen-Explosive.jpg|thumb|none| | + | [[Image:Lighthorsemen-Explosive.jpg|thumb|none|600px|]] |
| − | [[Image:Lighthorsemen-Explosive-2.jpg|thumb|none| | + | [[Image:Lighthorsemen-Explosive-2.jpg|thumb|none|600px|]] |
Revision as of 11:07, 28 June 2020
| ||||||||||||||||||||||||||||
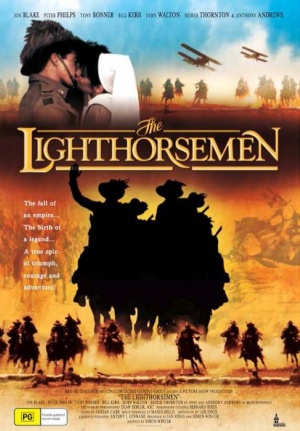
The Lighthorsemen is a 1987 Australian World War I film directed by Simon Wincer. The film tells about the men of the Australian Light Horse who were involved in the 1917 Battle of Beersheeba.
Several pieces of footage from the film were re-used for the episode "Palestine 1917" of The Young Indiana Jones Chronicles (re-released on video and DVD under the title "Daredevils of the Desert"), which Wincer also directed.
The following weapons are featured in the film The Lighthorsemen:
Handguns
Webley Mk VI Revolver
Mauser C96 "Broomhandle"
Rifles
Lee-Enfield No. 1 Mk III
Lee-Enfield No. 1 Mk IIIs are the mainstay weapon of the Australian and British troops.

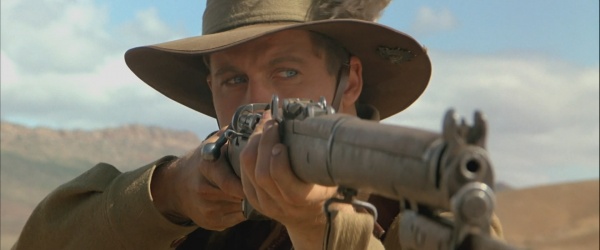
Turkish Mauser 1903/30
Mauser 1903/30 Rifles, identify by the notch on top the receiver, are the mainstay weapon of the Turkish troops.
Machine Guns
Lewis Machine Gun
Vickers MK1
Maxim MG08
Maxim MG08/15
Parabellum MG17
Hand Grenades
Model 17 Stielhandgranate
Other
7.7 cm FK 96 n.A.
Turkish troops use German 7,7 cm Feldkanone 96 n. A. field guns. Australian troops use these guns also.
Aerial bomb
German reconnaissance aircraft carries small aerial bombs.
Mark IV tank
British troops use tanks during the Second Battle of Gaza.
Explosive
Australian troops used explosives to destroy the Turkish railway.
