| If you have been locked out of your account you can request a password reset here. |
Difference between revisions of "Receiver 2"
ShermanJumbo (talk | contribs) |
|||
| (2 intermediate revisions by the same user not shown) | |||
| Line 87: | Line 87: | ||
[[File:P226R.jpg|350px|thumb|none|SIG-Sauer P226R - 9x19mm Parabellum ]] | [[File:P226R.jpg|350px|thumb|none|SIG-Sauer P226R - 9x19mm Parabellum ]] | ||
[[File:Receiver2 P226 1.jpg|600px|thumb|none|''"The SIG-Sauer P226 is a popular choice for special forces, with a high-capacity 9mm magazine and no safety switch to worry about."'' <br> The P226 as it appears in the game's help menu. ]] | [[File:Receiver2 P226 1.jpg|600px|thumb|none|''"The SIG-Sauer P226 is a popular choice for special forces, with a high-capacity 9mm magazine and no safety switch to worry about."'' <br> The P226 as it appears in the game's help menu. ]] | ||
| + | [[File:Receiver2 P226 2.jpg|600px|thumb|none|Perched atop a catwalk, the player holds one of the P226R's magazines.]] | ||
| + | [[File:Receiver2 P226 3.jpg|600px|thumb|none|Holding the P226 at the hip. ]] | ||
| + | [[File:Receiver2 P226 4.jpg|600px|thumb|none|Performing a press check reveals the lack of a round in the SIG's chamber. ]] | ||
| + | [[File:Receiver2 P226 5.jpg|600px|thumb|none|Racking the slide to chamber a round. Contrary to popular belief, handguns are typically more effective as combat weapons when they can actually fire.]] | ||
| + | [[File:Receiver2 P226 6.jpg|600px|thumb|none|Operating the decocker, which is bound to the "safety" button (V). This safely drops the hammer (as opposed to the risky grab hammer, pull trigger, lower hammer procedure used on other handguns), allowing the player to holster the pistol without fear.]] | ||
| + | [[File:Receiver2 P226 7.jpg|600px|thumb|none|After manually pulling back the hammer for a lighter trigger pull, the player gets uncomfortably close to a turret to line up a shot.]] | ||
=Revolvers= | =Revolvers= | ||
| Line 107: | Line 113: | ||
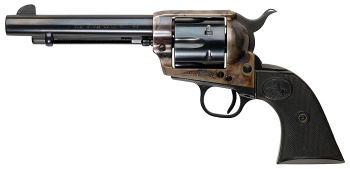
[[File:ColtSingleActionArmy.jpg|350px|thumb|none|Colt Single Action Army with 5.5" barrel - .45 Long Colt ]] | [[File:ColtSingleActionArmy.jpg|350px|thumb|none|Colt Single Action Army with 5.5" barrel - .45 Long Colt ]] | ||
[[File:Rec2-SAA.jpg|600px|thumb|none|''"The Peacemaker revolver is an enduring icon of the Wild West, and is a good test of modern shooters' reloading skills."'' <br> The Single Action Army as it appears in the help menu. ]] | [[File:Rec2-SAA.jpg|600px|thumb|none|''"The Peacemaker revolver is an enduring icon of the Wild West, and is a good test of modern shooters' reloading skills."'' <br> The Single Action Army as it appears in the help menu. ]] | ||
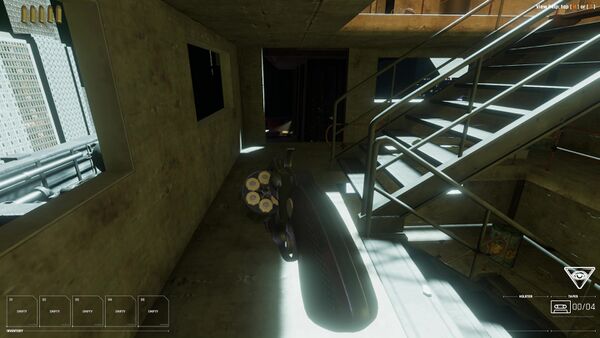
| + | [[File:Receiver2 SAA 1.jpg|600px|thumb|none|Flashlight in one hand and half-cocked Colt in the other, the player investigates a construction site. ]] | ||
| + | [[File:Receiver2 SAA 2.jpg|600px|thumb|none|After fiddling around a bit with the revolver's hammer, the player opens the Single Action Army's loading gate. The misaligned cylinders, however, remind the player that the revolver must be at half-cock to insert new rounds.]] | ||
| + | [[File:Receiver2 SAA 3.jpg|600px|thumb|none|A quick tap of the "hammer" button (F) half-cocks the weapon, readying it for a half-dozen rounds of .45 Long Colt.]] | ||
| + | [[File:Receiver2 SAA 4.jpg|600px|thumb|none|Inserting a round. This is done with the "Z" button on the keyboard while the cylinder can be rotated with the mouse wheel. ]] | ||
| + | [[File:Receiver2 SAA 5.jpg|600px|thumb|none|"Press checking" the SAA. Pressing the "T" and "R" buttons at the same time (the default bind for checking the chamber of an automatic pistol), causes the player to hold the Colt up to their face. While this can be used to check if if rimmed cartridges can be seen in the chambers of the revolver, it is of little practical use.]] | ||
| + | [[File:Receiver2 SAA 6.jpg|600px|thumb|none|Some time later, the player pulls back on the SAA's hammer, steeling themselves as they prepare to dispense some frontier justice. ]] | ||
| + | [[File:Receiver2 SAA 7.jpg|600px|thumb|none|The player sights up a drone with the Single Action Army's less-than-stellar irons...]] | ||
| + | [[File:Receiver2 SAA 8.jpg|600px|thumb|none|...and drops the hammer with a click of the left mouse button. The drone, however, remains unfazed.]] | ||
| + | [[File:Receiver2 SAA 9.jpg|600px|thumb|none|Pulling back on the hammer while aiming down sights, the player prepares to put the machine down for good.]] | ||
| + | [[File:Receiver2 SAA 10.jpg|600px|thumb|none|After firing two shots, the player opens the loading gate, revealing a spent casing. ]] | ||
| + | [[File:Receiver2 SAA 11.jpg|600px|thumb|none|Knocking out the brass with the ejector. ]] | ||
==Smith & Wesson Model 10== | ==Smith & Wesson Model 10== | ||
| Line 112: | Line 129: | ||
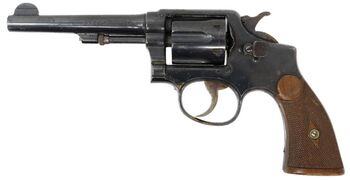
[[File:S&W Model M&P.jpg|350px|thumb|none|Smith & Wesson Model M&P Revolver with 5" Barrel - .38 Special]] | [[File:S&W Model M&P.jpg|350px|thumb|none|Smith & Wesson Model M&P Revolver with 5" Barrel - .38 Special]] | ||
[[File:Rec2-M10.jpg|600px|thumb|none|''"The Model 10 set the pattern for all modern revolvers."'' <br> The Model 10 as it appears in the help menu. ]] | [[File:Rec2-M10.jpg|600px|thumb|none|''"The Model 10 set the pattern for all modern revolvers."'' <br> The Model 10 as it appears in the help menu. ]] | ||
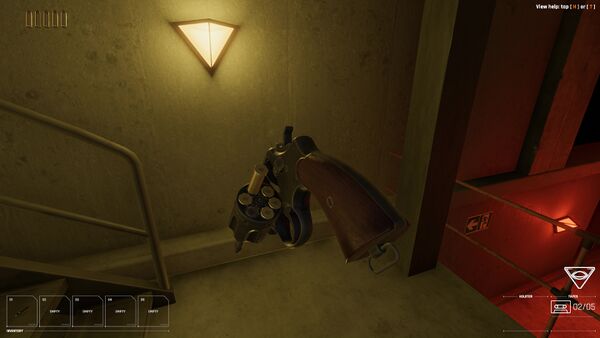
| + | [[File:Receiver2 Model10 1.jpg|600px|thumb|none|Taking shelter within the concrete frame of a half-finished building, the player basks in the yellow light of a wall lamp while holding the Model 10.]] | ||
| + | [[File:Receiver2 Model10 2.jpg|600px|thumb|none|Opening the cylinder reveals a mixed bag: two spent rounds, three unfired rounds, and one blocked chamber.]] | ||
| + | [[File:Receiver2 Model10 3.jpg|600px|thumb|none|The player smacks the ejector while holding the "pick up item" key (G), which causes them to "catch" the unfired rounds as they leave the cylinder. This skips the most embarrasing step of reloading a revolver, having to scrabble around on your hands and knees after a partial reload.]] | ||
| + | [[File:Receiver2 Model10 4.jpg|600px|thumb|none|All that's left to do is insert some new ammunition...]] | ||
| + | [[File:Receiver2 Model10 5.jpg|600px|thumb|none|...and carefully spin the cylinder to align the blocked chamber with the barrel. This means that the first pull of the trigger will bring the blocked chamber out of the path of the barrel, ensuring five successful shots in a row.]] | ||
| + | [[File:Receiver2 Model10 6.jpg|600px|thumb|none|After closing the cylinder, the player pulls back on the hammer. The glint of brass and primer that can be seen under the hammer indicates that the blocked chamber was, indeed, aligned correctly.]] | ||
| + | [[File:Receiver2 Model10 7.jpg|600px|thumb|none|Squinting at the side of the Smith & Wesson apparently constitutes a "revolver press check". As ineffective as this may seem, it has one advantage over checking the cylinder normally in that the hammer does not have to be lowered. ]] | ||
| + | [[File:Receiver2 Model10 8.jpg|600px|thumb|none|The player lines up a precise shot on the camera of a turret while utilizing the Harries technique, a method of shooting while holding a flashlight that involves pressing the backs of one's hands together to increase stability.]] | ||
| + | |||
{{Receiver Series}} | {{Receiver Series}} | ||
[[Category:First-Person Shooter]] | [[Category:First-Person Shooter]] | ||
Latest revision as of 02:34, 27 April 2024
Work In Progress This article is still under construction. It may contain factual errors. See Talk:Receiver 2 for current discussions. Content is subject to change. |
|
Released in 2020 as a sequel to 2012's Receiver, Receiver 2 is a first-person shooter with an emphasis on realistic firearms handling published and developed by Wolfire Games. The player, a "Receiver", is given a random weapon and tasked with navigating a procedurally-generated urban environment while evading hostile Killdrones and collecting cassette tapes. As in the first game, Receiver 2 has a complex weapons handling system where each function of the weapon (hammer, safety, slide release, slide, magazine release, ect.) is mapped to a different button, which effectively requires the player to execute long series of inputs to reload a firearm. To further complicate gameplay, the player's firearms can also experience various malfunctions, such as double-feeds and failure-to-ejects, and the magazines/cylinders of their weapons can be partially blocked off, restricting their capacities.
The following weapons appear in the video game Receiver 2:
Automatic Pistols
Automatic pistols (or, alternatively, self-loading pistols) are ALWAYS a better choice than revolvers. Their greatest advantage is their superior magazine capacity, as all of the game's automatic pistols can hold more (sometimes much more) than 6 rounds. Reloading is also a comparatively streamlined experience; a player with multiple loaded magazines can reload extremely quickly, while a player with just one magazine still has the benefit of not needing to worry about cylinder rotation or blocked chambers.
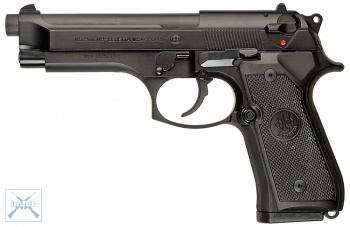
Beretta M9
The Beretta M9 appears as an available handgun in-game. With its generously-sized 15-round magazine and toggleable safety (which also functions as a decocker), the M9 is both an effective and relatively safe option. The design of its safety allows the player to manipulate the slide to chamber a round or perform a press check, for example, without having to put the firearm in a condition where it could potentially fire, which both wastes ammunition and risks personal injury.


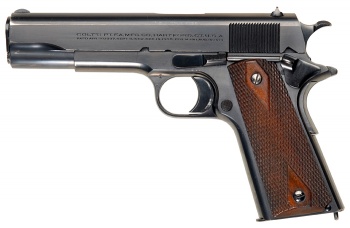
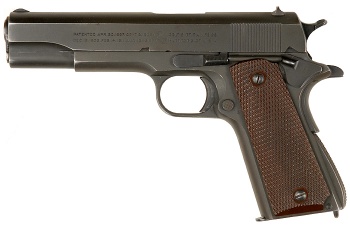
Colt M1911/A1 Hybrid
The "Colt M1911" featured in Receiver 2 is a hybrid of the M1911 and the M1911A1. The weapon notably features the checkered grips, larger hammer spur, and markings of the M1911 while possessing the larger ejection port, curved mainspring housing, shorter trigger, and trigger frame cuts of the M1911A1. It holds only 7 rounds per magazine, which is low for an automatic pistol, but its relatively simple operation and manual safety make it an easy weapon to use effectively.

The hybrid 1911 in the help menu. Note the combination of M1911 (diamond grips, larger hammer, slide markings) and M1911A1 (short trigger + cutaways, curved spring housing, larger ejection port) features.
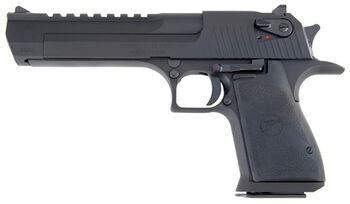
Desert Eagle Mark XIX
The Desert Eagle Mark XIX in .50 AE is the most powerful of the game's firearms. Holding 7+1 rounds, the Desert Eagle is capable of dealing immense damage to turrets and drones, frequently destroying multiple components or completely disabling the machine with just a single shot. Shot placement still matters, however, and the Desert Eagle is dead last in the "ease of making a quick follow-up shot" department. Its magazine size, joint worst in the game, also leaves a lot to be desired.

The Desert Eagle Mark XIX as it appears in the game's help menu.


Glock 17
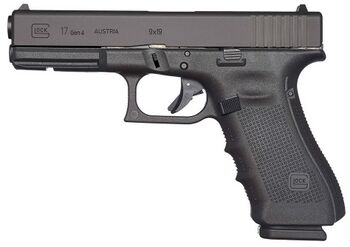
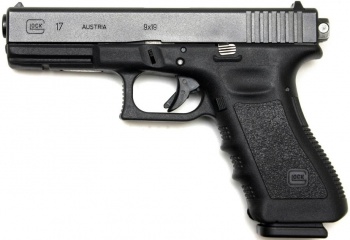
A 4th Generation Glock 17 with a select-fire conversion device ("Glock switch") fitted appears as one of the available sidearms in-game. The highest capacity handgun (17+1 rounds) on offer, the Glock 17 is also the most unsafe weapon, as its trigger safety is not functional in-game. This means that it is only possible to safely holster the Glock 17 if it has an empty chamber, which significantly increases the amount of time required to "reset" the handgun in-between fights (as the player must remove the magazine, rack the slide, grab the ejected round, and reinsert the mag). The Glock 17 can be fired semi-automatically or, thanks to an illegal modification, fully-automatic, but the latter is of extremely questionable utility considering the limited amount of ammunition available to the player.
Hi-Point C9
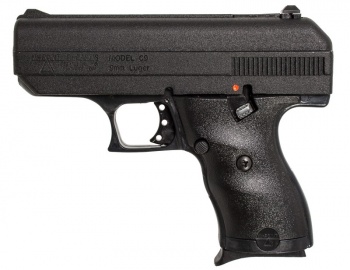
The Hi-Point C9 is one of the guns the player can randomly be granted at the start of a new level. The C9 is a relatively simple striker-fired handgun (and thus lacks an exposed hammer, which simplifies handling) with an 8-round magazine. It lacks a slide release, which means that the player cannot manually lock the slide open and, after firing all their rounds, must pull back on the slide to unlock it, which can mess with the player's muscle memory. With its somewhat poor sights and stiff double-action trigger, the C9 is often not the best tool for a situation, but, like any other, can be made to work with enough patience and knowledge.
SIG-Sauer P226R
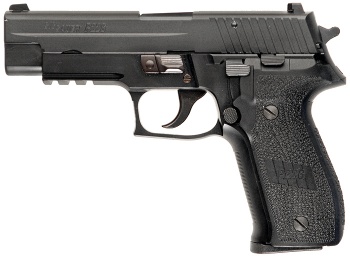
The SIG-Sauer P226R appears in-game. The P226R, with its 15 round magazine and SA/DA operation, performs very similarly to the Beretta M9. The main difference between the two rests in their safeties; while the Beretta features a slide-mounted toggle, the SIG is equipped with a manual decocker. Pressing the "safety" button (V) lowers the hammer, allowing the handgun to be holstered safely even with a round in the chamber; the pistol's sufficiently heavy double-action trigger pull works to prevent negligent discharges. Unlike a more traditional safety, however, it does not completely eliminate the possibility of an ND (as pulling the trigger hard and long enough will still cause the gun to shoot), so some care must still be taken.
Revolvers
Revolvers are ALWAYS a better choice than automatic pistols. The greatest point in favor of the revolvers is their simple method of operation; they cannot experience malfunctions, and clearing a blocked chamber is as easy as pulling the trigger again. The DA/SA revolvers can also be fired in single-action by pulling back on the hammer before firing a shot, giving them a very light trigger pull and comparatively high first-shot accuracy.
Colt Detective Special
The player can occasionally spawn with the Colt Detective Special as their sidearm. Its cylinder rotates clockwise, so any blocked chambers are best aligned to the right of the barrel. Its short barrel makes the revolver faster to pull from a holster but makes longer shots less reliable.
Colt Single Action Army
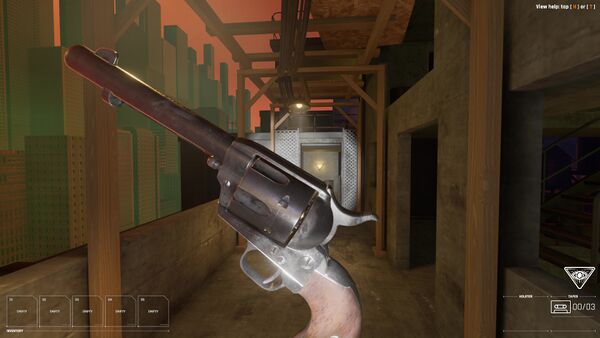
The Colt Single Action Army is unlocked by completing the fourth level for the first time, making it the last weapon the player can unlock. As a vintage single-action revolver, the SAA is significantly harder to use than any other weapon in the game. Time-consuming reload notwithstanding, the Single Action Army's greatest shortcoming is its lack of a transfer bar safety, which means that the hammer either needs to be at half-cock or resting over an empty chamber to safely holster. Failing to do so can result in the revolver misfiring (directly into the player's leg) after a fall.
Smith & Wesson Model 10
The Smith & Wesson Model 10 is one of the weapons that the player can spawn with. In contrast to the Detective Special, the Model 10's cylinder spins counter-clockwise; this means that any blocked chambers should be placed to the left of the barrel. The Model 10's long barrel gives it superior accuracy but makes it slower on the draw.

