| If you have been locked out of your account you can request a password reset here. |
Difference between revisions of "A Bridge Too Far"
m (It might be a good idea to have the Gewehr 98 for comparison.) |
StanTheMan (talk | contribs) |
||
| Line 7: | Line 7: | ||
{{Film Title}} | {{Film Title}} | ||
__TOC__<br clear=all> | __TOC__<br clear=all> | ||
| + | |||
=Allied Weapons= | =Allied Weapons= | ||
| − | + | ==Rifles / Carbines== | |
| − | + | ===Lee-Enfield No 4 Mk 1*=== | |
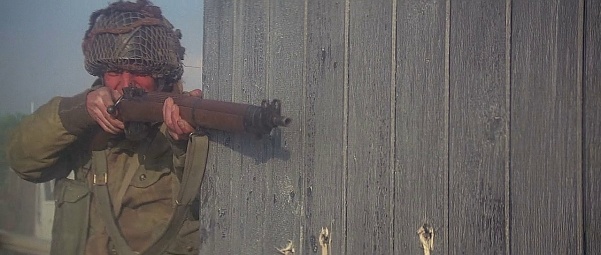
| − | ==Lee-Enfield No 4 Mk 1*== | + | The [[Lee-Enfield No.4 Mk 1*]] is the rifle seen carried by the majority of the British troops, mostly the Grenadier Guards in the Armored Column as well as the British 1st Airborne Division when they were trapped in Arnhem. The No.4 Mk 1* rifle was also seen in the hands of the Polish Airborne brigade troops. Colonel John Frost ([[Anthony Hopkins]]) was also seen using a No.4 rifle during the later stages of the battle for Arnhem. |
| − | The [[Lee-Enfield No.4 Mk 1*]] is the rifle seen carried by the majority of the British troops, mostly the Grenadier Guards in the Armored Column as well as the British 1st Airborne Division when they were trapped in Arnhem. The | ||
[[Image:LeeEnfield4Rifle.jpg|thumb|none|500px|Lee-Enfield No.4 Mk 1 - .303 British]] | [[Image:LeeEnfield4Rifle.jpg|thumb|none|500px|Lee-Enfield No.4 Mk 1 - .303 British]] | ||
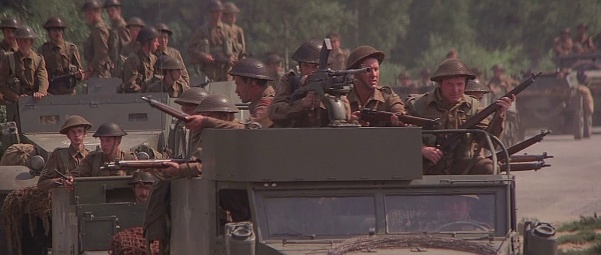
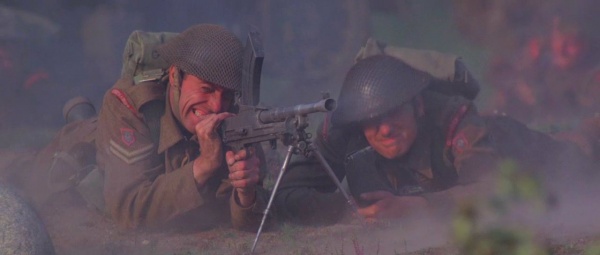
[[Image:BTF-Bren&No4A.jpg|thumb|none|601px|British troops from the XXX Armored Corps advance with a variety of weapons including the No.4 Mk 1.]] | [[Image:BTF-Bren&No4A.jpg|thumb|none|601px|British troops from the XXX Armored Corps advance with a variety of weapons including the No.4 Mk 1.]] | ||
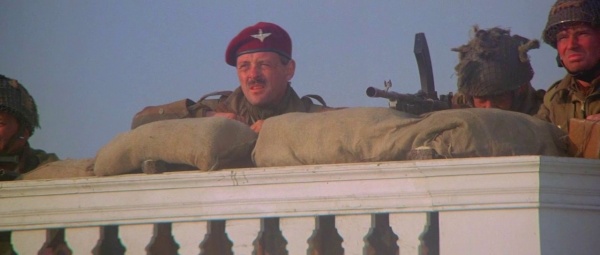
[[Image:BTF-N4Mk1 05A.jpg|thumb|none|601px|As Colonel John Frost ([[Anthony Hopkins]]) prepares to enter the street, British 1st Airborne Brigade in Arnhem are seen armed with No.4 Mk 1 rifles.]] | [[Image:BTF-N4Mk1 05A.jpg|thumb|none|601px|As Colonel John Frost ([[Anthony Hopkins]]) prepares to enter the street, British 1st Airborne Brigade in Arnhem are seen armed with No.4 Mk 1 rifles.]] | ||
| − | [[Image:BTF-No4Mk1a.jpg |thumb|none|601px|British 1st Airborne soldier fires his No.4 Mk 1 rifle before he gets shot by German soldiers.]] | + | [[Image:BTF-No4Mk1a.jpg |thumb|none|601px|British 1st Airborne soldier fires his [[Lee-Enfield No.4 Mk 1*]] rifle before he gets shot by German soldiers.]] |
| − | == M1 Garand == | + | ===M1 Garand=== |
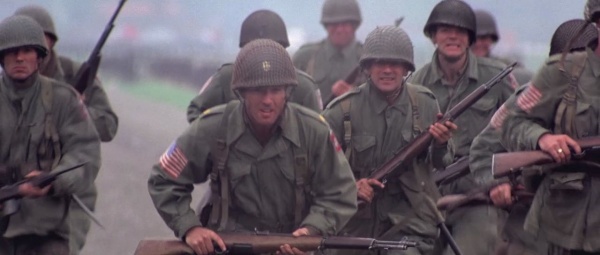
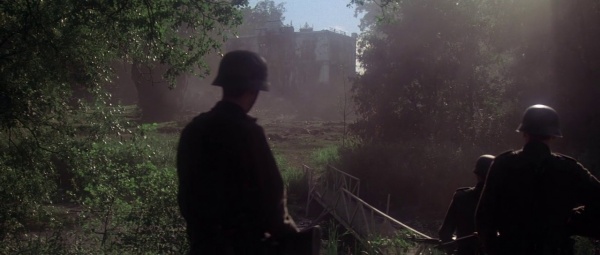
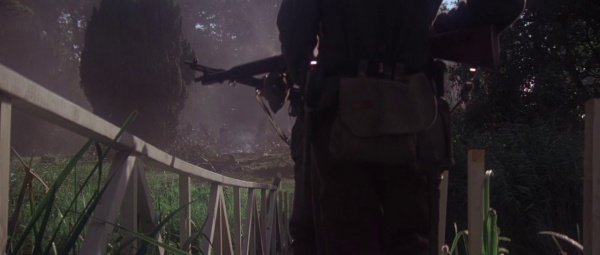
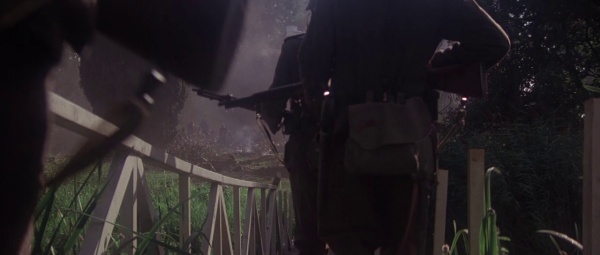
| − | The main rifle used by US Airborne troops in the film is the [[M1 Garand]]. A gas operated clip fed semi-automatic shoulder weapon, it served as the primary American weapon from 1942-1957 and notably used by Major Julian Cook ([[Robert Redford]]) of the 82nd Airborne while leading his men to capture the Njmegen bridge. | + | The main rifle used by US Airborne troops in the film is the [[M1 Garand]]. A gas-operated clip-fed semi-automatic shoulder weapon, it served as the primary American weapon from 1942-1957 and notably used by Major Julian Cook ([[Robert Redford]]) of the 82nd Airborne while leading his men to capture the Njmegen bridge. In what appears to be a continuity error, German troops crossing a small bridge appear to be carrying M1 Garands. |
[[Image:M1 Garand.jpg|thumb|none|500px|M1 Garand - .30-06]] | [[Image:M1 Garand.jpg|thumb|none|500px|M1 Garand - .30-06]] | ||
[[File:BridgeTooFar 2027.jpg|thumb|none|600px|Brigadier General James Gavin ([[Ryan O'Neal]]) takes the cover off of his M1 Garand after landing in Holland.]] | [[File:BridgeTooFar 2027.jpg|thumb|none|600px|Brigadier General James Gavin ([[Ryan O'Neal]]) takes the cover off of his M1 Garand after landing in Holland.]] | ||
| Line 25: | Line 25: | ||
[[Image:Bridge 13.jpg|thumb|none|600px|Major Cook with his M1 Garand.]] | [[Image:Bridge 13.jpg|thumb|none|600px|Major Cook with his M1 Garand.]] | ||
[[Image:BTF-M1 Garand 02A.jpg |thumb|none|600px|Major Cook hunkers down with his [[M1 Garand]].]] | [[Image:BTF-M1 Garand 02A.jpg |thumb|none|600px|Major Cook hunkers down with his [[M1 Garand]].]] | ||
| − | [[File:BridgeTooFar 2040.jpg|thumb|none|600px]] | + | [[File:BridgeTooFar 2040.jpg|thumb|none|600px|German soldiers appear to carry M1 Garand rifles.]] |
| − | [[File:BridgeTooFar 2042.jpg|thumb|none|600px]] | + | [[File:BridgeTooFar 2042.jpg|thumb|none|600px|German soldiers move across the bridge while carrying Garands.]] |
| − | [[File:BridgeTooFar 2043.jpg|thumb|none|600px]] | + | [[File:BridgeTooFar 2043.jpg|thumb|none|600px|German soldiers with M1 Garands.]] |
| − | ==M1 Carbine== | + | ===M1 Carbine=== |
| − | The [[ | + | The [[M1 Carbine]] is also seen used by US Airborne officers and NCO's in the film. Most notably seen when Sergeant Eddie Dohun ([[James Caan]]) pulls one out of its Jeep mount when he is hiding from a German Patrol in the forest. Also used by Col. Stout ([[Elliott Gould]]) when leading the charge to capture the Son bridge. |
| − | [[Image:M1-Carbine.jpg|thumb|none|500px|World War II Era | + | [[Image:M1-Carbine.jpg|thumb|none|500px|World War II Era M1 Carbine, with Dark Walnut Stock, 'L' peep sight and no bayonet lug - correct for most of WW2, shown with khaki sling and Magazine pouch for buttstock - .30 Carbine]] |
[[Image:BTF-M1Carbine 01A.jpg |thumb|none|600px|Col. Robert Stout ([[Elliott Gould]]) leads 101st Airborne paratroopers in his charge to capture the Son bridge. Stout carries a correct World War II era M1 Carbine. The character of Col. Stout was based on Colonel Robert Sink (portrayed by [[Dale Dye]] in the miniseries ''[[Band of Brothers]]''), commander of the 506th Parachute Infantry Regiment, which was about to seize the Son River bridge when the Germans managed to blow it up just before they got there.]] | [[Image:BTF-M1Carbine 01A.jpg |thumb|none|600px|Col. Robert Stout ([[Elliott Gould]]) leads 101st Airborne paratroopers in his charge to capture the Son bridge. Stout carries a correct World War II era M1 Carbine. The character of Col. Stout was based on Colonel Robert Sink (portrayed by [[Dale Dye]] in the miniseries ''[[Band of Brothers]]''), commander of the 506th Parachute Infantry Regiment, which was about to seize the Son River bridge when the Germans managed to blow it up just before they got there.]] | ||
| − | [[Image:M1CarbineLateModel.jpg|thumb|none|500px| | + | [[Image:M1CarbineLateModel.jpg|thumb|none|500px|M1 Carbine, late 1945 issue - .30 Carbine. Usually referred to as the Korean War Era M1 Carbine, since it saw the most US military action in that campaign. Also there are no Wartime photographs of Soldiers carrying this model Carbine during World War II, however occupation troops have them. It has the adjustable rear sight and a bayonet lug.]] |
[[Image:BTF-M1-CarbineA.jpg |thumb|none|600px|An exhausted 101st Airborne MP points the way with his M1 Carbine. Note that though the "L" peep sight is correct, but the bayonet lug is Korean War Issue.]] | [[Image:BTF-M1-CarbineA.jpg |thumb|none|600px|An exhausted 101st Airborne MP points the way with his M1 Carbine. Note that though the "L" peep sight is correct, but the bayonet lug is Korean War Issue.]] | ||
| − | + | [[Image:BTF-M1-Carbine 02A.jpg|thumb|none|600px|Sgt. Eddie Dohun ([[James Caan]]) readies his [[M1 Carbine]]. The M1 Carbine is a Post World War II variant with a bayonet lug and an adjustable rear sight.]] | |
| − | [[Image:BTF-M1-Carbine 02A.jpg|thumb|none|600px|Sgt. Eddie Dohun ([[James Caan]]) readies his M1 Carbine. | ||
[[Image:BTF-M1-Carbine 03A.jpg|thumb|none|600px|Closer shot of Sgt. Eddie Dohun with his anachronistic Korean War vintage M1 Carbine.]] | [[Image:BTF-M1-Carbine 03A.jpg|thumb|none|600px|Closer shot of Sgt. Eddie Dohun with his anachronistic Korean War vintage M1 Carbine.]] | ||
| − | ==M1A1 Paratrooper Carbine== | + | ===M1A1 'Paratrooper' Carbine=== |
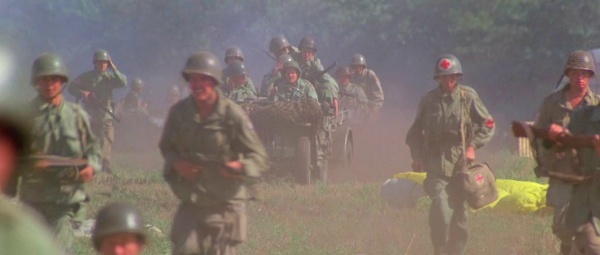
| − | A folding stock version of the M1 Carbine, | + | A folding stock version of the M1 Carbine, the [[M1_Carbine#M1.2FM1A1_Carbine|M1A1 Carbine]] ''should'' have been more prevalent among the US Airborne troops, however only a few samples are ever seen in the film, most notably during large scenes of massing troops. |
| − | [[Image:M1A1Carbine.jpg|thumb|none|500px|M1A1 | + | [[Image:M1A1Carbine.jpg|thumb|none|500px|M1A1 Carbine with original L style rear sights, and side-folding stock, often referred to as the 'Paratrooper' carbine - .30 Carbine]] |
[[Image:BTF-M1A1CarbineA.jpg|thumb|none|600px|The US Airborne troops on the far left are seen carrying the M1A1 Carbine - .30 carbine]] | [[Image:BTF-M1A1CarbineA.jpg|thumb|none|600px|The US Airborne troops on the far left are seen carrying the M1A1 Carbine - .30 carbine]] | ||
| − | == | + | ==Handguns== |
| − | The [[ | + | ===M1911A1=== |
| − | [[Image:M1911Colt.jpg|thumb|none|300px | + | The [[M1911A1]] is used throughout the movie, especially by Sgt. Eddie Dohun ([[James Caan]]) when threatening an Army combat surgeon (Arthur Hill) in order to get him to treat his wounded captain ([[Nicholas Campbell]]). The handgun is also seen, albeit briefly, holstered amongst American officers, NCOs and Military Police. |
| + | [[Image:M1911Colt.jpg|thumb|none|300px|M1911A1 - .45 ACP]] | ||
[[Image:BridgeTooFar 2000.jpg|thumb|none|600px|Sgt. Eddie Dohun ([[James Caan]]) cleans his M1911A1.]] | [[Image:BridgeTooFar 2000.jpg|thumb|none|600px|Sgt. Eddie Dohun ([[James Caan]]) cleans his M1911A1.]] | ||
[[Image:BTF-M1911 03A.jpg|thumb|none|600px|Sgt. Eddie Dohun ([[James Caan]]) threatens the combat surgeon (Arthur Hill) to convince him to treat his friend and commanding officer.]] | [[Image:BTF-M1911 03A.jpg|thumb|none|600px|Sgt. Eddie Dohun ([[James Caan]]) threatens the combat surgeon (Arthur Hill) to convince him to treat his friend and commanding officer.]] | ||
| − | == | + | ===M1911=== |
Apparently, the widespread issue of Browning Hi Power pistols (the iconic handgun of elite British Military units in World War II) to British Airborne units only started after Operation Market Garden, so it is appropriate that they are seen using another handgun. A likely candidate in this case is the [[M1911]] chambered in .455 Webley, issued to members of the R.A.F. In the film, the British M1911 is used by British 1st Airborne General Roy Urquhart ([[Sean Connery]]) and several other Airborne officers as they try to evade capture by Waffen SS forces. | Apparently, the widespread issue of Browning Hi Power pistols (the iconic handgun of elite British Military units in World War II) to British Airborne units only started after Operation Market Garden, so it is appropriate that they are seen using another handgun. A likely candidate in this case is the [[M1911]] chambered in .455 Webley, issued to members of the R.A.F. In the film, the British M1911 is used by British 1st Airborne General Roy Urquhart ([[Sean Connery]]) and several other Airborne officers as they try to evade capture by Waffen SS forces. | ||
| − | [[Image:M1911-RAFIssue455.jpg|thumb|none| | + | [[Image:M1911-RAFIssue455.jpg|thumb|none|300px|Colt M1911 - .455 Webley, a licensed handgun to the British Armed Forces after World War 1, issued to members of the R.A.F. (and possibly by association, members of the Army Airborne.)]] |
| − | [[Image:Bridge 09.jpg|thumb|none|600px|British 1st Airborne General Roy Urquhart ([[Sean Connery]]) holds an | + | [[Image:Bridge 09.jpg|thumb|none|600px|British 1st Airborne General Roy Urquhart ([[Sean Connery]]) holds an M1911 Variant.]] |
[[Image:BTF-ConneryPistolA.jpg|thumb|none|600px|Urquhart ([[Sean Connery]]) fires an M1911 Variant, quite possibly the .455 Webley Version of the Colt M1911.]] | [[Image:BTF-ConneryPistolA.jpg|thumb|none|600px|Urquhart ([[Sean Connery]]) fires an M1911 Variant, quite possibly the .455 Webley Version of the Colt M1911.]] | ||
| − | == | + | ==Submachine Guns== |
| − | The [[ | + | ===Sten Mk V=== |
| + | The [[Sten Mk V]] is the standard submachine gun for British and Polish Airborne units in the film, most featured had the forward pistol grip removed as was the case for operation 'Market Garden'. | ||
| + | [[Image:Sten Mk5.JPG|thumb|none|450px|Sten Mk V - 9x19mm]] | ||
| + | [[File:BridgeTooFar 2026.jpg|thumb|none|600px|The British trooper on the left carries the Sten Mk V that still is fitted with a forward pistol grip.]] | ||
| + | [[Image:BTF-StenA.jpg|thumb|none|600px|Brigadier Lathbury carries a Sten Mk V with what looks to be a skeleton stock, rather than the standard fixed stock. It can still be recognized as a Mk V and not the earlier Mk II due the forward iron sights (same as those on the Enfield No.4 MkI* rifle).]] | ||
| + | [[Image:BTF-Sten 06A.jpg |thumb|none|600px|The Sten seen used by British Paratroopers.]] | ||
| + | [[Image:BTF-Sten 009A.jpg |thumb|none|600px|British Paratrooper yells for Col. Frost to run, carrying a [[Sten Mk V]].]] | ||
| + | [[Image:Bridge too far sten.jpg |thumb|none|600px|A shot of Colonel Frost and some of his paratroopers, one of which carries a Sten.]] | ||
| − | [[Image:M1sb.jpg|thumb|none| | + | ===M1A1 Thompson=== |
| + | The [[M1A1 Thompson]] is seen only briefly in the hands of US Airborne troops during the drop into Holland. Strangely, the Thompson is not prominently featured in the film despite being one of the primary weapons carried by the US Airborne along with M1 Garands and M1A1 folding stock Carbines. | ||
| + | [[Image:M1sb.jpg|thumb|none|450px|M1A1 Thompson - .45 ACP]] | ||
[[Image:BTF-M1A1 02a.jpg|thumb|none|600px|A 101st Airborne trooper (seen to the left of the jeep) runs off with an M1A1 Thompson.]] | [[Image:BTF-M1A1 02a.jpg|thumb|none|600px|A 101st Airborne trooper (seen to the left of the jeep) runs off with an M1A1 Thompson.]] | ||
[[Image:BridgeTooFar 2016.jpg|thumb|none|600px|The trooper on the right holds a M1A1 Thompson.]] | [[Image:BridgeTooFar 2016.jpg|thumb|none|600px|The trooper on the right holds a M1A1 Thompson.]] | ||
| − | ==M1928A1 Thompson== | + | ===M1928A1 Thompson=== |
| − | |||
At least one [[M1928A1 Thompson]] is seen being carried by one of the US Airborne troopers. | At least one [[M1928A1 Thompson]] is seen being carried by one of the US Airborne troopers. | ||
| − | + | [[Image:M1928-A1_T.jpg|thumb|none|450px|M1928A1 Thompson with 30-round magazine - .45 ACP. This variant has the 'simplified' rear sight that would be adopted for the M1 Thompson.]] | |
| − | [[Image:M1928-A1_T.jpg|thumb|none| | ||
[[Image:BTF-M1A1a.jpg|thumb|none|600px|An 101st Airborne paratrooper on the right runs across with an M1928 Thompson, noted by the top actuator (Wartime-produced M1/M1A1 Thompsons have side actuators). This seems to be the only case where a M1928 appears in the film, however.]] | [[Image:BTF-M1A1a.jpg|thumb|none|600px|An 101st Airborne paratrooper on the right runs across with an M1928 Thompson, noted by the top actuator (Wartime-produced M1/M1A1 Thompsons have side actuators). This seems to be the only case where a M1928 appears in the film, however.]] | ||
| − | ==Browning Automatic Rifle== | + | ==Machine Guns== |
| + | ===M1918 Browning Automatic Rifle=== | ||
The [[Browning Automatic Rifle]] is carried by US Airborne troops in the film, notably by 82nd Airborne troops during the assault on the Nijemegen Bridge. | The [[Browning Automatic Rifle]] is carried by US Airborne troops in the film, notably by 82nd Airborne troops during the assault on the Nijemegen Bridge. | ||
| − | [[File:BARearlymodel.jpg|thumb|none|501px|Early Browning Automatic Rifle - .30-06]] | + | [[File:BARearlymodel.jpg|thumb|none|501px|Early-version (M1918) Browning Automatic Rifle - .30-06]] |
| − | [[Image:BTF-BARA.jpg |thumb|none|600px|An 82nd Airborne trooper with a modified BAR ready to provide cover for Major Cook during the assault on the Nijmegen Bridge.]] | + | [[Image:BTF-BARA.jpg |thumb|none|600px|An 82nd Airborne trooper with a modified BAR ready to provide cover for Major Cook during the assault on the Nijmegen Bridge. This appears to be an older model M1918 BAR, rather than the M1918A1 or M1918A2, noted by the particular early handguard and lack of bipod.]] |
| − | ==Browning M2HB== | + | ===Bren Mk I=== |
| + | [[Bren Mk I]] light machine guns are also used by the British Grenadier Guards of XXX Corps. | ||
| + | [[Image:Bren gun.JPG|thumb|none|500px|Bren Mk I light machine gun - .303 British]] | ||
| + | [[Image:BTF-BrenA.jpg|thumb|none|600px|British Grenadier Guards fight with a Bren.]] | ||
| + | [[Image:Bridge 4506.jpg|thumb|none|600px|British 1st Airborne ready to fire a Bren.]] | ||
| + | |||
| + | ===Browning M2HB=== | ||
The [[Browning M2HB]] is used by British Armored troops mounted to their Lend-Lease Sherman Tanks and half-tracks. | The [[Browning M2HB]] is used by British Armored troops mounted to their Lend-Lease Sherman Tanks and half-tracks. | ||
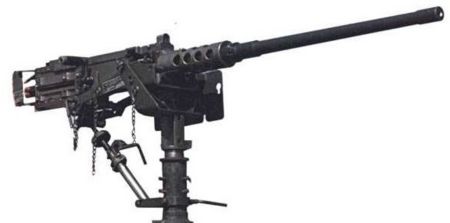
| − | [[Image:BrowningM2.jpg|thumb|none| | + | [[Image:BrowningM2.jpg|thumb|none|450px|Browning M2HB on vehicle mount - .50 BMG]] |
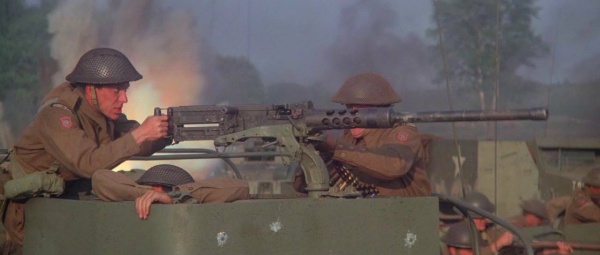
[[Image:BTF-BrowningM2A.jpg |thumb|none|600px|Grenadier Guard fires his Browning M2. (Note: In the movie, the sound effect for the .50 cal gun is that of an MG42!]] | [[Image:BTF-BrowningM2A.jpg |thumb|none|600px|Grenadier Guard fires his Browning M2. (Note: In the movie, the sound effect for the .50 cal gun is that of an MG42!]] | ||
| − | == | + | ===Vickers Machine Gun=== |
| − | The [[ | + | The [[Vickers]] Machine Gun is used by the Irish Guards of XXX Corps. |
| − | [[Image: | + | [[Image:VickersMk1.jpg|thumb|none|400px|Example of a Vickers Mk1 machine gun used in film - .303 British]] |
| − | + | [[Image:BTF-VickersA.jpg|thumb|none|600px|Irish Guards fire the Vickers.]] | |
| − | |||
| − | |||
| − | |||
| − | |||
| − | |||
| − | |||
| − | |||
| − | |||
| − | [[Image:BTF- | ||
| − | == PIAT == | + | ==Other== |
| + | ===PIAT=== | ||
The [[PIAT]] (''Projector Infantry Anti-Tank'') spigot mortar is seen throughout the movie being used by British and Polish airborne units (who were similarly equipped). This weapon fired a 3 lb. hollow charge warhead via means of a powerful spring which ignited its propellant. The weapon had a powerful recoil, which necessitated it being fired prone since any other position would knock the user flat down. Seen especially during the repulse of the initial German assault on Arnhem bridge. | The [[PIAT]] (''Projector Infantry Anti-Tank'') spigot mortar is seen throughout the movie being used by British and Polish airborne units (who were similarly equipped). This weapon fired a 3 lb. hollow charge warhead via means of a powerful spring which ignited its propellant. The weapon had a powerful recoil, which necessitated it being fired prone since any other position would knock the user flat down. Seen especially during the repulse of the initial German assault on Arnhem bridge. | ||
| − | [[Image:PIAT_bomb.jpg|thumb|none| | + | [[Image:PIAT_bomb.jpg|thumb|none|400px|Projector, Infantry, Anti Tank (PIAT) - 3.25 in]] |
[[Image:BTF-PIAT-2A.jpg |thumb|none|600px|British 1st Airborne prepares to defend Arnhem with PIATs]] | [[Image:BTF-PIAT-2A.jpg |thumb|none|600px|British 1st Airborne prepares to defend Arnhem with PIATs]] | ||
[[Image:BTF-PIat 04A.jpg |thumb|none|600px|British 1st Airborne uses a PIAT]] | [[Image:BTF-PIat 04A.jpg |thumb|none|600px|British 1st Airborne uses a PIAT]] | ||
[[Image:Bridge 4501.jpg |thumb|none|600px|A trooper tries to use the PIAT to hit the rear of a German tank.]] | [[Image:Bridge 4501.jpg |thumb|none|600px|A trooper tries to use the PIAT to hit the rear of a German tank.]] | ||
| + | ===No2 Portable Flamethrower=== | ||
| + | A [[No2 Portable Flamethrower]] is used in the attack on the German bunker on Arnhem bridge. This weapon, known as the "Lifebuoy" for its resemblance to a lifesaver, was the standard British flamethrower. | ||
| + | [[Image:Flame1.JPG|thumb|none|400px|No2 Portable Flamethrower]] | ||
| + | [[Image:BTF-Flame 02A.jpg|thumb|none|600px|Cpl. Davies ([[Alun Armstrong]]) with the No.2 Portable Flamethrower. Note the "Life Saver" shape of the fuel reservoir.]] | ||
| − | = | + | ===Mk II Hand Grenade=== |
| − | |||
| − | |||
| − | |||
| − | |||
| − | |||
| − | |||
| − | |||
| − | |||
| − | |||
| − | |||
| − | == Mk II Hand Grenade == | ||
The [[Mk II Hand Grenade]] is used by several paratroopers in the film. | The [[Mk II Hand Grenade]] is used by several paratroopers in the film. | ||
[[Image:MK2 grenade DoD.jpg|thumb|none|150px|Mk II hand grenade.]] | [[Image:MK2 grenade DoD.jpg|thumb|none|150px|Mk II hand grenade.]] | ||
| Line 118: | Line 117: | ||
=Axis Weapons= | =Axis Weapons= | ||
| − | == Mauser Karabiner 98k == | + | ==Rifles== |
| + | ===Mauser Karabiner 98k=== | ||
The Mauser [[Karabiner 98k]] was the standard weapon for all German ground forces during World War II. Several of the rifles used in the film appear to be shortened [[Gewehr 98]] rifles, based on the prominent ''Lange-Visier'' rear sight. This is a very uncommon conversion; most Gew.98-to-Kar98k conversions used the tangent-leaf sight of the Weimar-refurbished Gew.98. | The Mauser [[Karabiner 98k]] was the standard weapon for all German ground forces during World War II. Several of the rifles used in the film appear to be shortened [[Gewehr 98]] rifles, based on the prominent ''Lange-Visier'' rear sight. This is a very uncommon conversion; most Gew.98-to-Kar98k conversions used the tangent-leaf sight of the Weimar-refurbished Gew.98. | ||
[[Image:Karabiner-98K.jpg|thumb|none|500px|Karabiner 98k - German manufacture 1937 date - 7.92x57mm]] | [[Image:Karabiner-98K.jpg|thumb|none|500px|Karabiner 98k - German manufacture 1937 date - 7.92x57mm]] | ||
[[Image:Mauser g98.jpg|thumb|none|500px|Mauser Gewehr 1898 - 7.92x57mm Mauser, for comparison.]] | [[Image:Mauser g98.jpg|thumb|none|500px|Mauser Gewehr 1898 - 7.92x57mm Mauser, for comparison.]] | ||
| − | [[Image:BTF K98 05A.jpg|thumb|none|600px|German SS-Soldiers defend the Nijmegen Bridge with their | + | [[Image:BTF K98 05A.jpg|thumb|none|600px|German SS-Soldiers defend the Nijmegen Bridge with their K98s. Note the two nearest rifles have the distinctive ''Lange-Visier'' rear sight of the Gew.98.]] |
| − | [[Image:BTF-K98 06A.jpg |thumb|none|600px|German SS-Soldiers fight for the Nijmegen Bridge with their | + | [[Image:BTF-K98 06A.jpg |thumb|none|600px|German SS-Soldiers fight for the Nijmegen Bridge with their K98k rifles.]] |
| − | [[Image:BTF-K98 07A.jpg|thumb|none|600px|German defenders of the bridge with the | + | [[Image:BTF-K98 07A.jpg|thumb|none|600px|German defenders of the bridge with the [[Karabiner 98k]].]] |
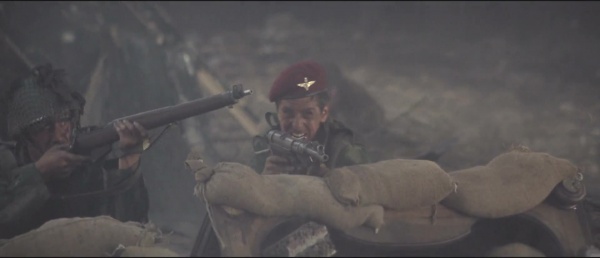
| − | [[Image:BTF-K98A.jpg |thumb|none|600px|A boy drafted into the SS fights the Americans with his | + | [[Image:BTF-K98A.jpg |thumb|none|600px|A boy drafted into the SS fights the Americans with his Mauser rifle. The distinctive ''Lange-Visier'' rear sight of the Gew.98 can be seen.]] |
| − | ==Karabiner 98 Sniper== | + | ===Karabiner 98 Sniper=== |
| − | The Kar98's scoped sniper | + | The Kar98's scoped sniper variant is used by Wehrmacht (German Army) designated marksmen and snipers. |
[[Image:Mauser g98 Sniper.jpg|thumb|none|500px|Karabiner 98k Sniper - 7.92x57mm Mauser]] | [[Image:Mauser g98 Sniper.jpg|thumb|none|500px|Karabiner 98k Sniper - 7.92x57mm Mauser]] | ||
[[Image:BTF-MauserSniperA.jpg |thumb|none|600px|German soldier aims his K98 sniper rifle before get shot by Major Cook.]] | [[Image:BTF-MauserSniperA.jpg |thumb|none|600px|German soldier aims his K98 sniper rifle before get shot by Major Cook.]] | ||
| − | == MP40 == | + | ==Submachine Guns== |
| + | ===MP40=== | ||
The [[MP40]] is used by German troops in this film. A British paratrooper uses a captured MP40 during the chaotic urban combat in Arnhem. | The [[MP40]] is used by German troops in this film. A British paratrooper uses a captured MP40 during the chaotic urban combat in Arnhem. | ||
| − | [[Image:MP40Side.jpg|thumb|none| | + | [[Image:MP40Side.jpg|thumb|none|450px|MP40 Submachine Gun - 9x19mm]] |
| − | [[Image:BTF-MP40A.jpg |thumb|none|600px|Closeup of an MP40.]] | + | [[Image:BTF-MP40A.jpg |thumb|none|600px|Closeup of an [[MP40]].]] |
[[Image:BridgeTooFar 2032.jpg |thumb|none|600px|MP40s are seen in hands of German soldiers.]] | [[Image:BridgeTooFar 2032.jpg |thumb|none|600px|MP40s are seen in hands of German soldiers.]] | ||
[[Image:BTF-MP40 00A.jpg|thumb|none|600px|A British 1st Airborne soldier uses a captured MP40 during the battle for Arnhem.]] | [[Image:BTF-MP40 00A.jpg|thumb|none|600px|A British 1st Airborne soldier uses a captured MP40 during the battle for Arnhem.]] | ||
[[Image:BTF-MP40 05A.jpg|thumb|none|600px|Lieutenant General Wilhelm Bittrich's ([[Maximilian Schell]]) guards carry MP40 SMGs.]] | [[Image:BTF-MP40 05A.jpg|thumb|none|600px|Lieutenant General Wilhelm Bittrich's ([[Maximilian Schell]]) guards carry MP40 SMGs.]] | ||
| − | == | + | ==Machine Guns== |
| − | + | ===MG34=== | |
| − | |||
| − | |||
| − | |||
| − | ==MG34== | ||
The most commonly seen machine gun used by German troops in the film is the [[MG34]]. | The most commonly seen machine gun used by German troops in the film is the [[MG34]]. | ||
| − | [[Image:Mg34hb.jpg|thumb|none|500px|Example of a | + | [[Image:Mg34hb.jpg|thumb|none|500px|Example of a MG34 used in film - 7.92x57mm Mauser]] |
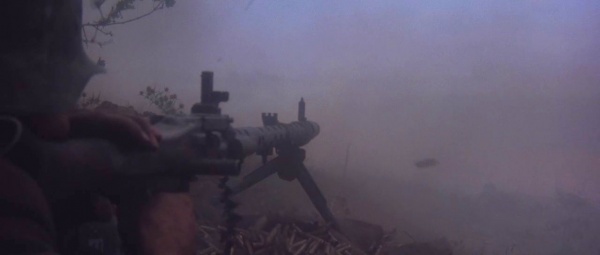
[[Image:BTF-MG34a.jpg|thumb|none|600px|German Soldier in the woods scans for US Paratroopers with his MG34.]] | [[Image:BTF-MG34a.jpg|thumb|none|600px|German Soldier in the woods scans for US Paratroopers with his MG34.]] | ||
[[Image:BTF-MG34 04A.jpg |thumb|none|600px|German soldier opens fire with the MG34 on the 82nd Airborne troops assaulting the Nijemegen Bridge.]] | [[Image:BTF-MG34 04A.jpg |thumb|none|600px|German soldier opens fire with the MG34 on the 82nd Airborne troops assaulting the Nijemegen Bridge.]] | ||
| − | [[Image:BTF-MG34 02A.jpg|thumb|none|600px|German Panzer Grenadier (wearing anachronistic West German 1960s experimental Camo pattern) aims his MG34.]] | + | [[Image:BTF-MG34 02A.jpg|thumb|none|600px|German Panzer Grenadier (wearing anachronistic West German 1960s experimental Camo pattern) aims his [[MG34]].]] |
[[File:BridgeTooFar 2037.jpg|thumb|none|600px|German soldier opens fire with the MG34 on the Polish troops landing in Holland.]] | [[File:BridgeTooFar 2037.jpg|thumb|none|600px|German soldier opens fire with the MG34 on the Polish troops landing in Holland.]] | ||
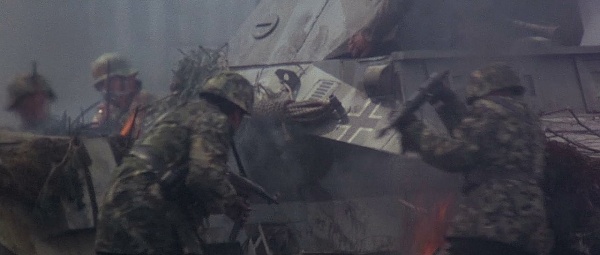
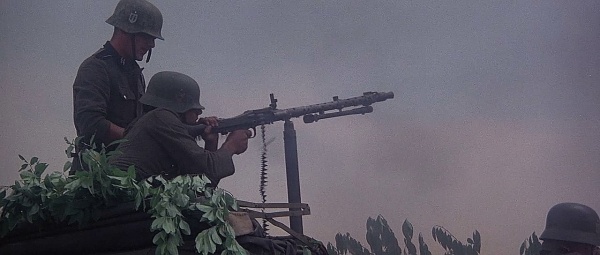
[[Image:Bridge 4505.jpg |thumb|none|600px|An MG34 is seen atop a modified Leopard 1 Tank.]] | [[Image:Bridge 4505.jpg |thumb|none|600px|An MG34 is seen atop a modified Leopard 1 Tank.]] | ||
| + | |||
| + | ===MG42=== | ||
| + | The [[MG42]] is used by German troops. | ||
| + | [[File:MG42 Left.jpg|thumb|none|500px|MG42 with sling and bipod collapsed - 7.92mm Mauser]] | ||
| + | [[Image:BTF-MG42A.jpg |thumb|none|600px|An MG42 is carried by a retreating German soldier.]] | ||
=Allied and Axis Armor= | =Allied and Axis Armor= | ||
Revision as of 18:47, 28 December 2014
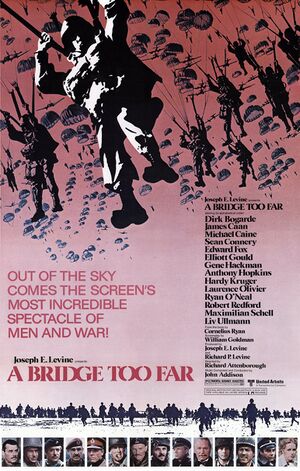
A Bridge Too Far is the 1977 World War II film based on the 1974 bestselling book by Cornelius Ryan and was directed by Sir Richard Attenborough, who was known for his work both in front of the camera (The Great Escape) as well as behind the camera (Gandhi) and perhaps is better known to younger viewers for his portrayal of "John Hammond" in the films Jurassic Park and The Lost World: Jurassic Park. Featuring an all-star cast, the film follows the events surrounding Operation Market Garden, an audacious military plan to end the war in Europe by landing Allied paratroopers along a series of bridges in Holland in order to allow an armored column to pass into Germany.
See the Discussion section for some trivia on the film.
The following weapons were used in the film A Bridge Too Far:
Allied Weapons
Rifles / Carbines
Lee-Enfield No 4 Mk 1*
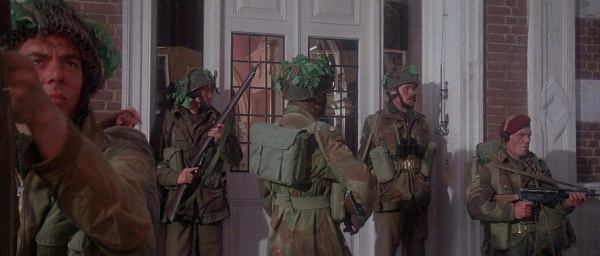
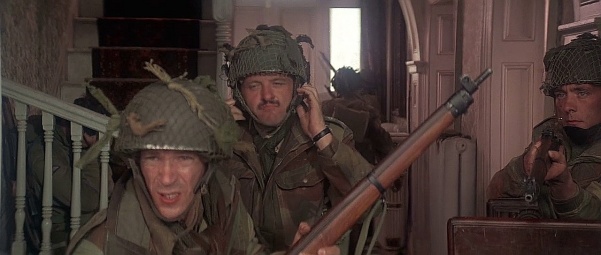
The Lee-Enfield No.4 Mk 1* is the rifle seen carried by the majority of the British troops, mostly the Grenadier Guards in the Armored Column as well as the British 1st Airborne Division when they were trapped in Arnhem. The No.4 Mk 1* rifle was also seen in the hands of the Polish Airborne brigade troops. Colonel John Frost (Anthony Hopkins) was also seen using a No.4 rifle during the later stages of the battle for Arnhem.
M1 Garand
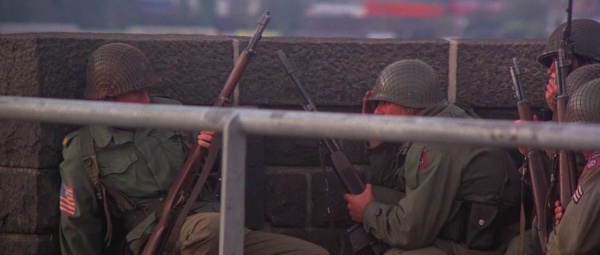
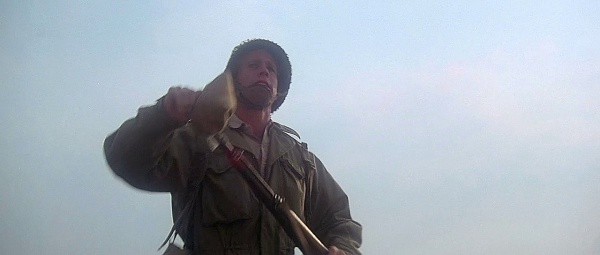
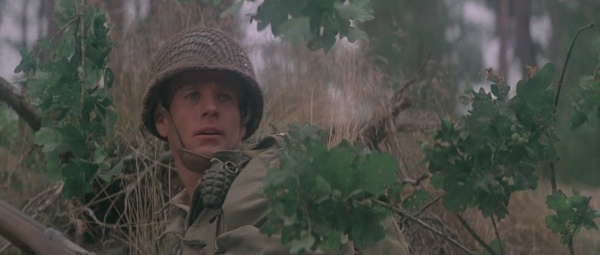
The main rifle used by US Airborne troops in the film is the M1 Garand. A gas-operated clip-fed semi-automatic shoulder weapon, it served as the primary American weapon from 1942-1957 and notably used by Major Julian Cook (Robert Redford) of the 82nd Airborne while leading his men to capture the Njmegen bridge. In what appears to be a continuity error, German troops crossing a small bridge appear to be carrying M1 Garands.


M1 Carbine
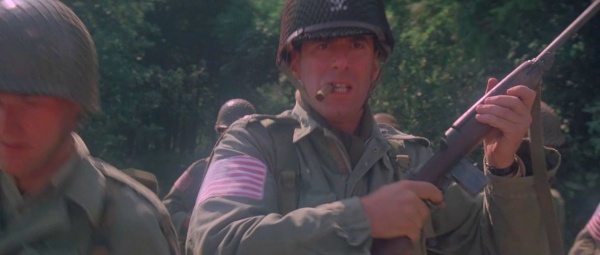
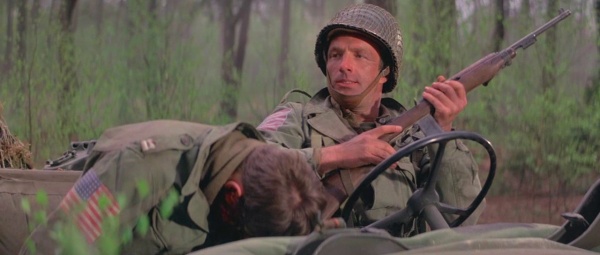
The M1 Carbine is also seen used by US Airborne officers and NCO's in the film. Most notably seen when Sergeant Eddie Dohun (James Caan) pulls one out of its Jeep mount when he is hiding from a German Patrol in the forest. Also used by Col. Stout (Elliott Gould) when leading the charge to capture the Son bridge.

M1A1 'Paratrooper' Carbine
A folding stock version of the M1 Carbine, the M1A1 Carbine should have been more prevalent among the US Airborne troops, however only a few samples are ever seen in the film, most notably during large scenes of massing troops.
Handguns
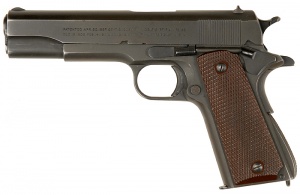
M1911A1
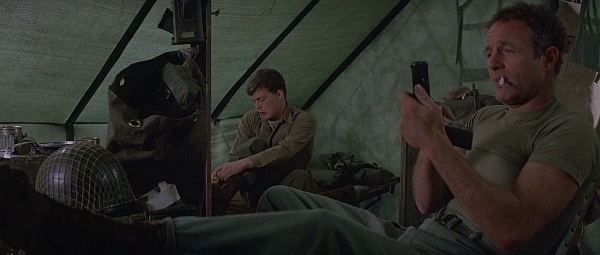
The M1911A1 is used throughout the movie, especially by Sgt. Eddie Dohun (James Caan) when threatening an Army combat surgeon (Arthur Hill) in order to get him to treat his wounded captain (Nicholas Campbell). The handgun is also seen, albeit briefly, holstered amongst American officers, NCOs and Military Police.

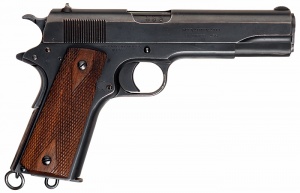
M1911
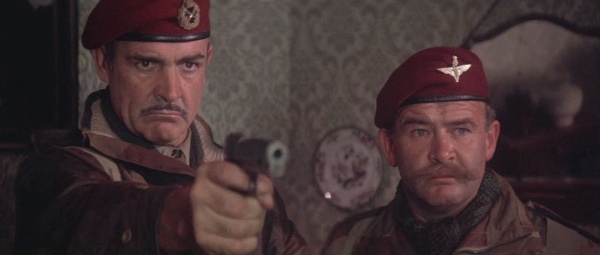
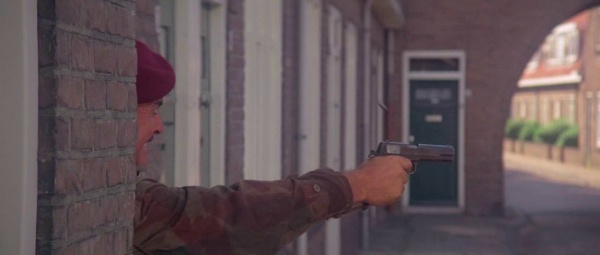
Apparently, the widespread issue of Browning Hi Power pistols (the iconic handgun of elite British Military units in World War II) to British Airborne units only started after Operation Market Garden, so it is appropriate that they are seen using another handgun. A likely candidate in this case is the M1911 chambered in .455 Webley, issued to members of the R.A.F. In the film, the British M1911 is used by British 1st Airborne General Roy Urquhart (Sean Connery) and several other Airborne officers as they try to evade capture by Waffen SS forces.
Submachine Guns
Sten Mk V
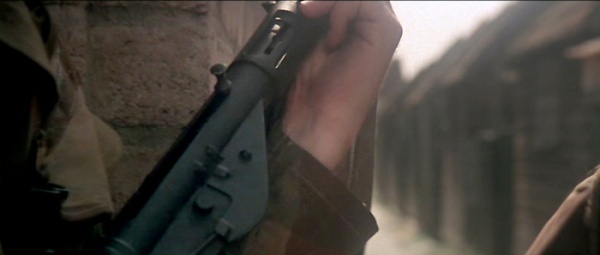
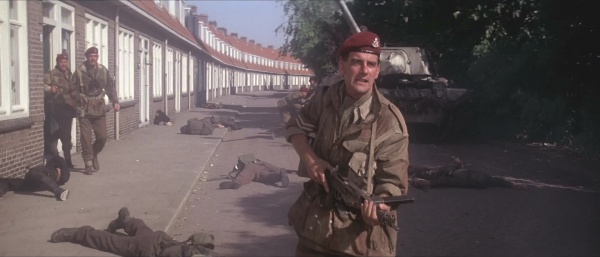
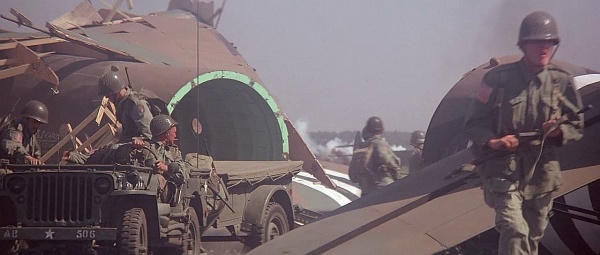
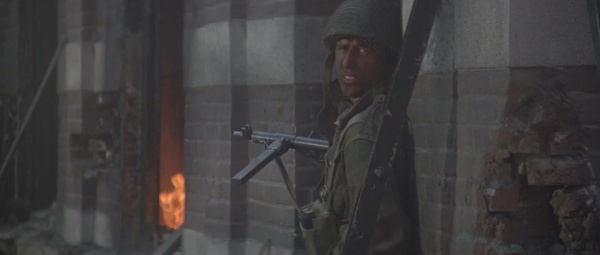
The Sten Mk V is the standard submachine gun for British and Polish Airborne units in the film, most featured had the forward pistol grip removed as was the case for operation 'Market Garden'.
M1A1 Thompson
The M1A1 Thompson is seen only briefly in the hands of US Airborne troops during the drop into Holland. Strangely, the Thompson is not prominently featured in the film despite being one of the primary weapons carried by the US Airborne along with M1 Garands and M1A1 folding stock Carbines.
M1928A1 Thompson
At least one M1928A1 Thompson is seen being carried by one of the US Airborne troopers.
Machine Guns
M1918 Browning Automatic Rifle
The Browning Automatic Rifle is carried by US Airborne troops in the film, notably by 82nd Airborne troops during the assault on the Nijemegen Bridge.
Bren Mk I
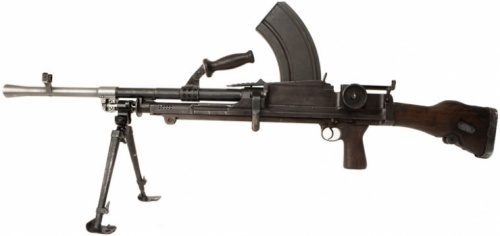
Bren Mk I light machine guns are also used by the British Grenadier Guards of XXX Corps.
Browning M2HB
The Browning M2HB is used by British Armored troops mounted to their Lend-Lease Sherman Tanks and half-tracks.
Vickers Machine Gun
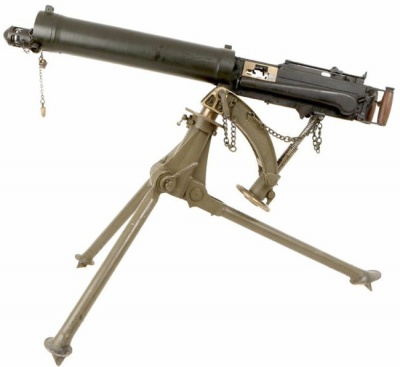
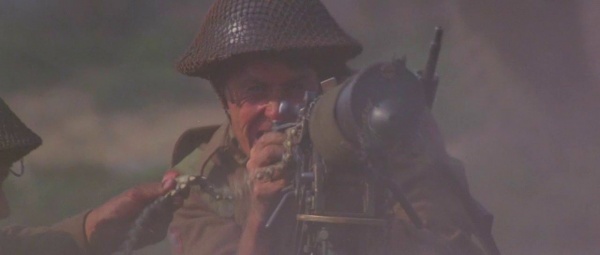
The Vickers Machine Gun is used by the Irish Guards of XXX Corps.
Other
PIAT
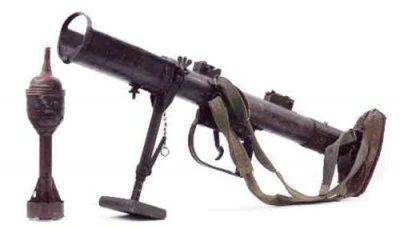
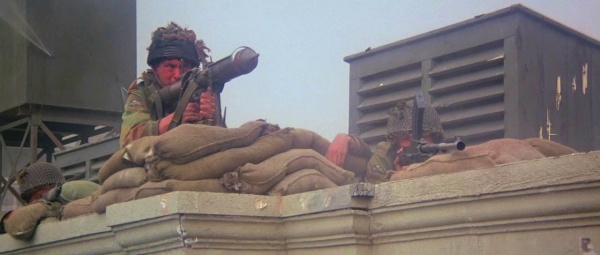
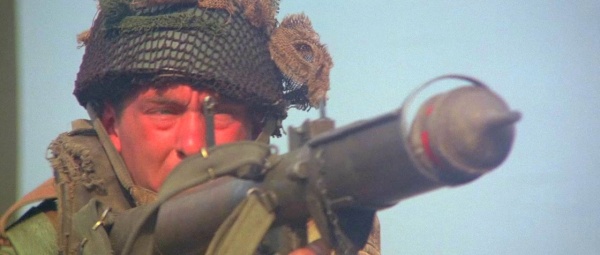
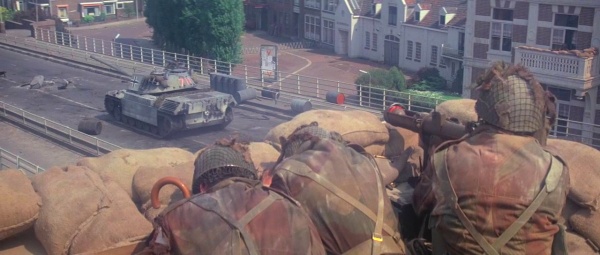
The PIAT (Projector Infantry Anti-Tank) spigot mortar is seen throughout the movie being used by British and Polish airborne units (who were similarly equipped). This weapon fired a 3 lb. hollow charge warhead via means of a powerful spring which ignited its propellant. The weapon had a powerful recoil, which necessitated it being fired prone since any other position would knock the user flat down. Seen especially during the repulse of the initial German assault on Arnhem bridge.
No2 Portable Flamethrower
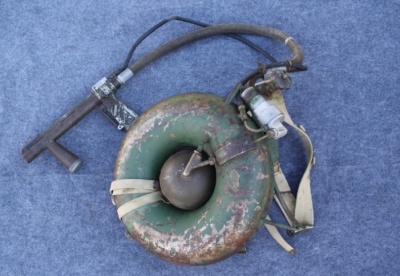
A No2 Portable Flamethrower is used in the attack on the German bunker on Arnhem bridge. This weapon, known as the "Lifebuoy" for its resemblance to a lifesaver, was the standard British flamethrower.

Mk II Hand Grenade
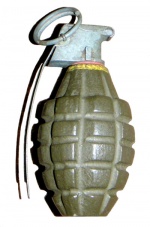
The Mk II Hand Grenade is used by several paratroopers in the film.
Axis Weapons
Rifles
Mauser Karabiner 98k
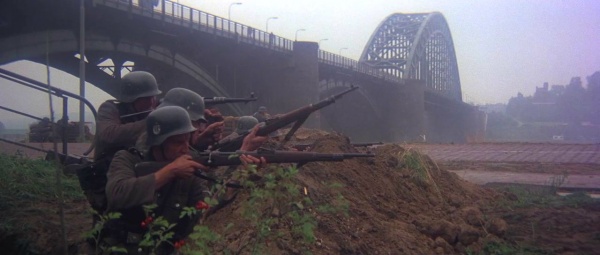
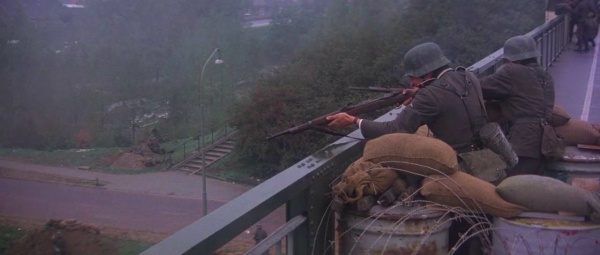
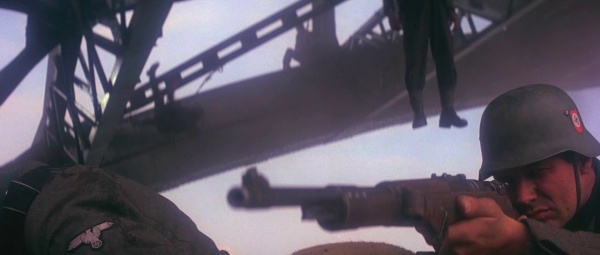
The Mauser Karabiner 98k was the standard weapon for all German ground forces during World War II. Several of the rifles used in the film appear to be shortened Gewehr 98 rifles, based on the prominent Lange-Visier rear sight. This is a very uncommon conversion; most Gew.98-to-Kar98k conversions used the tangent-leaf sight of the Weimar-refurbished Gew.98.
Karabiner 98 Sniper
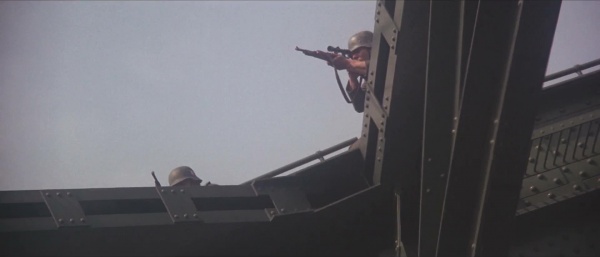
The Kar98's scoped sniper variant is used by Wehrmacht (German Army) designated marksmen and snipers.
Submachine Guns
MP40
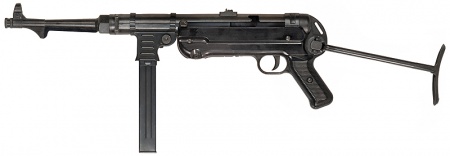
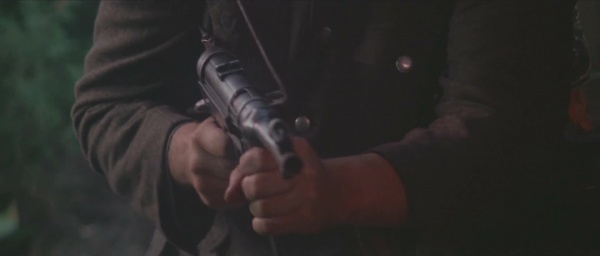
The MP40 is used by German troops in this film. A British paratrooper uses a captured MP40 during the chaotic urban combat in Arnhem.
Machine Guns
MG34
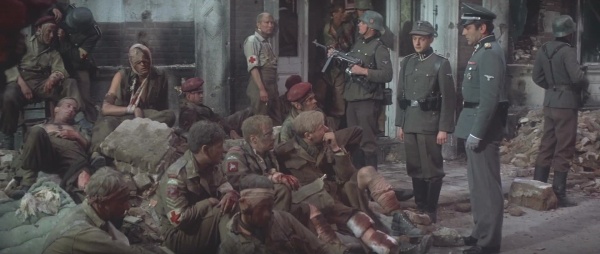
The most commonly seen machine gun used by German troops in the film is the MG34.
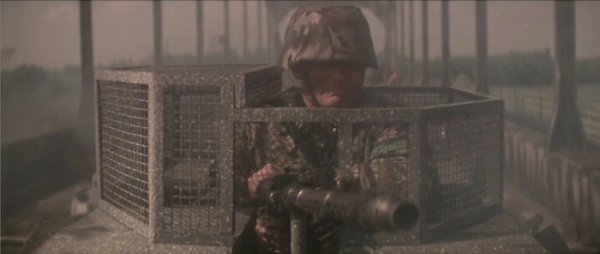
MG42
The MG42 is used by German troops.
Allied and Axis Armor
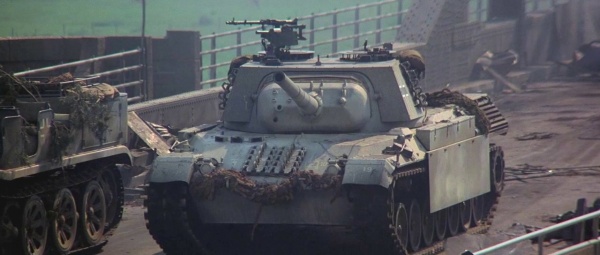
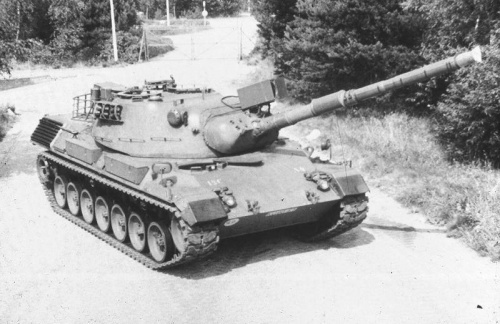
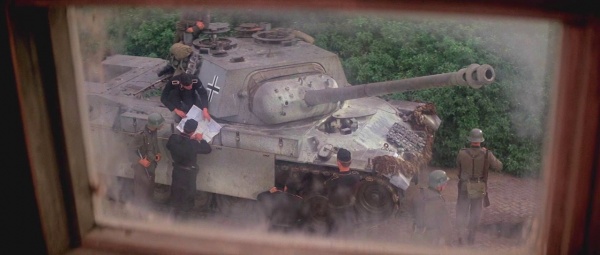
Leopard I Main Battle Tank (mocked up as a German Panther)
1960s Vintage Leopard I tanks were mocked up to resemble the World War II German Panther tank. The Leopard 1 tanks had 105mm main guns and two 7.62x51mm machineguns (FN MAGS). What is interesting is that supposedly all of the original cast hull Leopard 1 tanks were converted into the newer Leopard 1A1 during the 1970s (with upgraded armor, track skirts and thermal jacket on the gun barrel), however, despite the 'movie' modifications to make it look like a Panther, this is an original and unconverted Leopard 1. Since the film was mostly shot on location in the Netherlands (where many of the original battles took place), this is most likely a Dutch Army Leopard, one of the batch purchased from West Germany in 1969 (when the Netherlands officially adopted the Leopard as its main battle tank).
Sherman Tanks
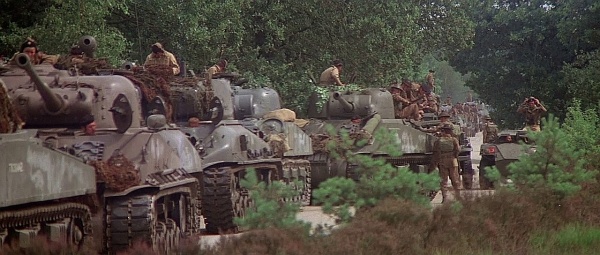
In order to supplement the actual tanks used in the depiction of the XXX Corps' column, several of the Shermans were actually mockups that were placed over VW Beetles.
