| If you have been locked out of your account you can request a password reset here. |
Difference between revisions of "High School of the Dead"
Alex T Snow (talk | contribs) (Going to do a bluray overhaul soon and add a couple missed guns) |
|||
| (59 intermediate revisions by 4 users not shown) | |||
| Line 1: | Line 1: | ||
| − | The world is overtaken with a very deadly disease that turns humans into zombies. In Japan, several students of Fujimi High School, and the school nurse, band together to survive the present apocalypse. The story follows Takashi Komuro, one of the students who survived | + | The world is overtaken with a very deadly disease that turns humans into zombies. In Japan, several students of Fujimi High School, and the school nurse, band together to survive the present apocalypse. The story follows Takashi Komuro, one of the students who survived the initial outbreak. |
| + | |||
| + | [[File:HOTD DVDBD cover.jpg|400px|thumb|right|''High School of the Dead'' (2010)]] | ||
| + | |||
| + | {{Anime Title|High School of the Dead}} | ||
| − | |||
| − | |||
__TOC__<br clear="all"> | __TOC__<br clear="all"> | ||
| − | == | + | ==Revolvers== |
=== Smith & Wesson Model 37 === | === Smith & Wesson Model 37 === | ||
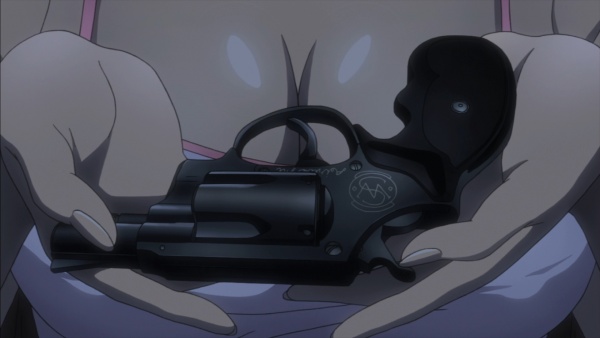
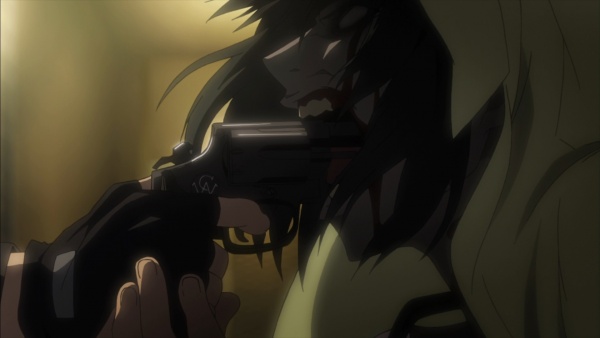
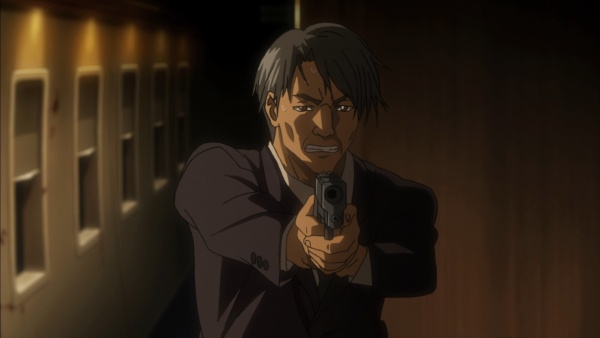
| − | + | Takashi Komuro and Rei Miyamoto find two [[Smith & Wesson Model 37 Airweight|Smith & Wesson Model 37]]s on a pair of dead police officers, though one has its handle broken (the broken one is not seen on screen). Takashi comments on the gun having only five shots as most revolvers have six, and while inexperienced with firearms, knows to keep his finger off the trigger when not intending to shoot. Takashi later hands the revolver to Kohta Hirano due to the latter's expertise with firearms. Several police officers are seen firing their M37s at zombies trying to breach their roadblocks and a senior officer uses his to execute an anarchist inciting a unruly mob on live television. The author commented on how the [[Nambu Model 60]] was no longer the official sidearm for all Japanese police officers and therefore chose the Smith & Wesson to show the unique choice of weapon for each department. This is correct since the NPA imported Model 37s from America to outfit officers who are going to be armed with revolvers. | |
| − | Takashi Komuro and Rei Miyamoto find two [[Smith & Wesson Model 37 Airweight|Smith & Wesson Model | ||
| − | |||
[[Image:M37AirRight.jpg|thumb|none|400px|Smith and Wesson Model 37 Airweight, right side - .38 Special]] | [[Image:M37AirRight.jpg|thumb|none|400px|Smith and Wesson Model 37 Airweight, right side - .38 Special]] | ||
| − | [[Image:Smith & Wesson M37.jpg| | + | [[File:TanakaM37AirsoftRevolver.jpg|thumb|none|400px|Tanaka S&W M37 Airsoft revolver]] |
| − | [[Image:Hotd04m361.JPG| | + | [[Image:Smith & Wesson M37.jpg|600px|thumb|none|Takashi armed with the M37 in the opening credits. Note the incredible detail despite this shot being a fraction of a second long.]] |
| − | [[Image:Hotd04m362.JPG| | + | [[Image:HOTD 3-1.jpg|600px|thumb|none|On a news broadcast officers fire their M37s at zombies that are already in body bags.]] |
| − | [[Image:Hotd04m363.JPG| | + | [[Image:Hotd04m361.JPG|600px|thumb|none|The M37 taken with a pair of handcuffs and a baton from a dead officer's duty belt.]] |
| − | [[Image:Hotd04m364.JPG| | + | [[Image:Hotd04m362.JPG|600px|thumb|none|Takashi holding the M37; note the rubber grips, which all of the M37's in the show are seen with.]] |
| − | [[Image:Hotd05sw371.JPG| | + | [[Image:Hotd04m363.JPG|600px|thumb|none|Takashi opens the cylinder to examine the number of shots he has at his disposal.]] |
| − | [[Image:Hotd06sw.JPG|thumb|none| | + | [[Image:Hotd04m364.JPG|600px|thumb|none|Takashi presses the M37's barrel against a crazy survivor and cocks the hammer. Note the "Smith & Wesson" on the barrel.]] |
| − | [[Image:Hotd07sw1.JPG|thumb|none| | + | [[Image:Hotd05sw371.JPG|600px|thumb|none|Kohta using the M37 to gun down a zombie.]] |
| + | [[Image:HOTD 6-10.jpg|600px|thumb|none|A panicked officer on the bridge opens fire without being ordered to. The cylinder spins and the hammer moves as well. S&W trades on the barrel again.]] | ||
| + | [[Image:HOTD 6-11.jpg|600px|thumb|none|A line of officers fire their M37s, again the cylinders and hammers are animated.]] | ||
| + | [[Image:Hotd06sw.JPG|thumb|none|600px|The senior police officer executes the mob leader, as per the order given to "do whatever is necessary" to hold the bridge against zombies and panicked/unruly refugees.]] | ||
| + | [[Image:Hotd07sw1.JPG|thumb|none|600px|Rei hands Takashi the M37 as he goes on a rescue mission to save another survivor. The S&W logo is visible, as is the "Airweight" inscription.]] | ||
| + | [[Image:HOTD 7-10.jpg|600px|thumb|none|Takashi takes out a zombie that was sneaking up behind him with his M37.]] | ||
| − | === | + | ==Pistols== |
| − | |||
| − | |||
| − | |||
| − | |||
| − | |||
=== Luger P08 === | === Luger P08 === | ||
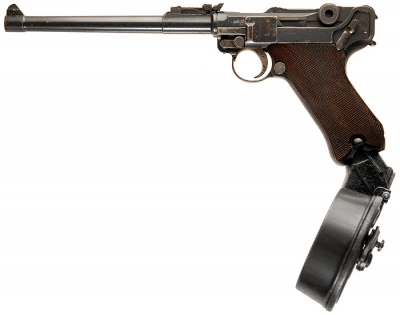
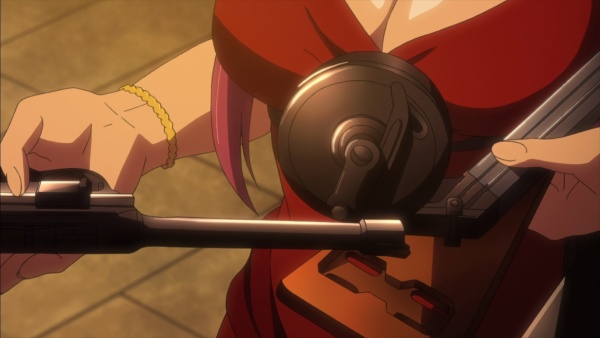
| − | Saya Takagi's mother, Yuriko Takagi, hands her daughter a Navy model [[Luger P08]] complete with a 32 round "snail" drum magazine and a stock | + | Saya Takagi's mother, Yuriko Takagi, hands her daughter a Navy model [[Luger P08]], complete with a 32 round "snail" drum magazine and a stock (both more commonly used on the long barrel Artillery model). Kohta notes that it's one made for the Dutch military, and in the manga the marking associated with that is visible on the ejection port section. |
| − | [[Image:Luger-P08ArtilleryWDrum.jpg|thumb|none|400px|Luger | + | [[Image:Luger P08 Marine.jpg|thumb|none|400px|Marine Luger P08 with 150mm barrel - 9x19mm]] |
| − | [[Image:Hotd12p08.JPG|thumb|none| | + | [[Image:Luger-P08ArtilleryWDrum.jpg|thumb|none|400px|Luger LP08 "Artillery" model with the ''Trommelmagazin 08'' snail drum magazine, for reference.]] |
| − | [[Image: | + | [[Image:Hotd12p08.JPG|thumb|none|600px|Yuriko hands her daughter the Luger P08...]] |
| + | [[Image:HOTD 12-12.jpg|thumb|none|600px|And then the 'snail' drum magazine and the attachable stock.]] | ||
| + | [[Image:HOTD 12-23.jpg|thumb|none|600px|Saya shoulders the P08...]] | ||
| + | [[Image:HOTD 12-24.jpg|thumb|none|600px|Aims it at the zombie on the ground...]] | ||
| + | [[Image:HOTD 12-25.jpg|thumb|none|600px|And executes it with a single shot, splattering herself and the gun with blood.]] | ||
| − | === | + | === SIG-Sauer P226R === |
| − | + | In Episode 8; "The Dead Way Home", a Secret Service agent uses [[SIG-Sauer P220 pistol series#SIG P226 |SIG P226Rs]] to gun down zombies trying to reach the wounded President and Chairman of the Joint Chiefs alongside a few remaining staff members on board Air Force One. Another staff member armed with a P226R uses it to shoot the wounded Chairman in the head upon the latter's request after he shows signs of zombification. Rika Minami uses a P226R fitted with a scope mount, small red dot sight, and flashlight as her sidearm, however because the battle at the offshore airport didn't happen on-screen in the anime, it's only seen in the opening sequence and in her leg holster. | |
| − | [[Image: | + | [[Image:P226R.jpg|thumb|none|400px|SIG-Sauer P226R - 9x19mm ]] |
| − | [[Image: | + | [[Image:Hotd06guns.JPG|thumb|none|600px|Rika's customized P226R in the opening credits at the upper left and in the middle.]] |
| + | [[Image:HOTD 5-3.jpg|thumb|none|600px|Rika's P226R in her leg holster as she fires her PSG-1.]] | ||
| + | [[Image:HOTD 5-5.jpg|thumb|none|600px|Rika rests her hand on her P226R as she and her partner Tajima watch a 747 take off. Tajima doesn't carry a sidearm.]] | ||
| + | [[Image:HOTD 8-1.jpg|thumb|none|600px|A Secret Service agent holds his P226R... while pointing it at a colleague with his finger on the trigger.]] | ||
| + | [[Image:Hotd082261.JPG|thumb|none|600px|Another Secret Service agent firing his P226R at zombies, covering his wounded colleagues.]] | ||
| + | [[Image:Hotd082262.JPG|thumb|none|600px|A staff member preparing to execute the Chairman after he shows signs of turning into a zombie.]] | ||
=== Browning M1910 === | === Browning M1910 === | ||
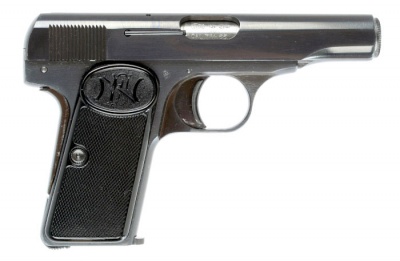
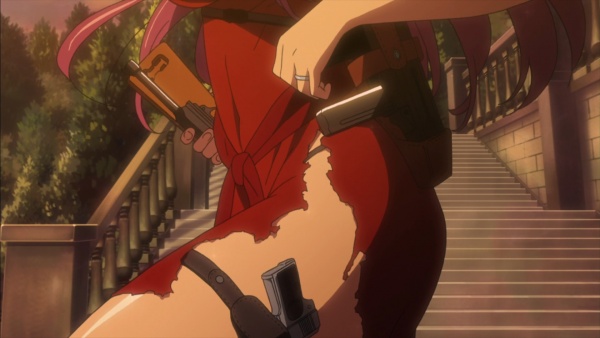
Yuriko's [[FN Model 1910/1922|Browning M1910]] is seen in the opening sequence, and it is seen in the show proper in her leg holster. | Yuriko's [[FN Model 1910/1922|Browning M1910]] is seen in the opening sequence, and it is seen in the show proper in her leg holster. | ||
[[Image:FN Model 1910 1616.jpg|thumb|none|400px|FN Model 1910 .380 ACP]] | [[Image:FN Model 1910 1616.jpg|thumb|none|400px|FN Model 1910 .380 ACP]] | ||
| − | [[Image:Hotd06guns.JPG|thumb|none| | + | [[Image:Hotd06guns.JPG|thumb|none|600px|The Browning M1910 in the opening credits at both the upper right and lower left corners.]] |
| + | [[Image:HOTD 12-10.jpg|thumb|none|600px|Yuriko's M1910 strapped to her leg; she's never seen using it. Her holstered Vz. 83 is also visible, and she's holding the P08 she's about to give to Saya.]] | ||
| + | |||
| + | === M1911A1 === | ||
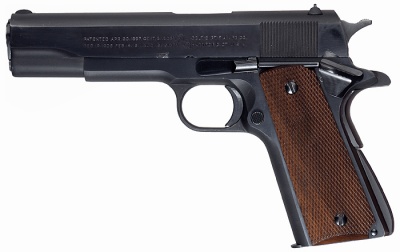
| + | Two Right Wing members (or Nationalists) are seen firing a [[M1911A1]]s at the approaching zombie horde during the final battle at the Takagi estate with the zombies. Saya's mother, Yuriko, used one during a training course years ago when she worked on Wall Street, before she met Saya's father, Souichiro. | ||
| + | [[Image:Colt1911A1PreWar.jpg|thumb|none|400px|Colt M1911A1 - .45 ACP]] | ||
| + | [[Image:NickelM1911A1.jpg|thumb|none|400px|Nickel M1911A1 - .45 ACP]] | ||
| + | [[Image:HOTD 12-13.jpg|thumb|none|600px|A much younger Yuriko training with a stainless M1911A1. Yes, that's Takashi's hair in the foreground at the bottom.]] | ||
| + | [[Image:HOTD 12-7.jpg|thumb|none|600px|A Nationalist carrying an M1911 flees back to the Takagi estate.]] | ||
| + | [[Image:HOTD 12-8.jpg|thumb|none|600px|He fires the pistol. A shell casing can be seen in front of his face, beside the gate's bar.]] | ||
| + | [[Image:HOTD 12-9.jpg|thumb|none|600px|He turns to run, giving the best view of the pistol. Looking at all three pictures, it can be identified as an M1911.]] | ||
| + | [[Image:Hotd1216a11911.JPG|thumb|none|600px|A Nationalist is seen firing his M1911A1 at the approaching zombie horde during the final battle. In a rare firearm-related error in the show, this M1911's hammer is down, when it should be cocked.]] | ||
== Shotguns == | == Shotguns == | ||
| + | |||
| + | === Ithaca M37 === | ||
| + | An [[Ithaca 37]] is found in Rika's household, in a firearms locker which Takashi and Kohta break into. Kohta initially uses it before handing it to Takashi, who uses it as his main weapon for the rest of the show. Kohta instructs Takashi on how to slamfire the M37 (holding the trigger down and pumping the shotgun, causing it to fire as soon as it's back in battery) when the group is cornered at the wire blockade, and Saya uses the dropped M37 later in the same scene. Takashi later uses it a melee weapon after running away from the wire blockade. The M37 is fitted with a rail and Aimpoint CompM2, which is later disabled by the EMP due to it being powered by a 3-Volt Lithium Battery. A couple Nationalists at the Takagi estate are seen using standard M37s. | ||
| + | [[Image:IthacaModel37.jpg|thumb|none|400px|Ithaca 37 - 12 Gauge]] | ||
| + | [[Image:Hotd06m37.JPG|thumb|none|600px|Happy camper indeed.]] | ||
| + | [[Image:Hotd06m371.jpg|thumb|none|600px|Takashi pumps the shotgun. It's his first time handling it.]] | ||
| + | [[Image:Hotd06ar1037m1a.JPG|thumb|none|600px|The M37 sits with everything else they took from the lockers.]] | ||
| + | [[Image:Hotd08m372.JPG|thumb|none|600px|Takashi aiming at the approaching zombies with the M37, using the CompM2.]] | ||
| + | [[Image:Hotd06m37ar10.JPG|thumb|none|600px|This is what happens when Kohta instructs Takashi to "aim for the chest".]] | ||
| + | [[Image:Hotd07m37.JPG|thumb|none|600px|Saya picks up Takashi's empty M37 and reloads it.]] | ||
| + | [[Image:Hotd08m37m1a.JPG|thumb|none|600px|Saya fires the shotgun...]] | ||
| + | [[Image:Hotd08m373.JPG|thumb|none|600px|And tries to use it as a club when she too runs out of ammo.]] | ||
| + | [[Image:Hotd12m372.JPG|thumb|none|600px|Takashi and Saeko Busujima defend the Takagi estate.]] | ||
| + | [[Image:Hotd12m37ar.JPG|thumb|none|600px|Takashi squeezes off a few more rounds at the zombie horde as the group makes their escape from the Takagi estate.]] | ||
| + | [[Image:Hotd1216a11911.JPG|thumb|none|600px|The furthest Nationalist is using a standard M37.]] | ||
| + | [[Image:Hotd12m371.JPG|thumb|none|600px|Takashi's M37 slung over his shoulder as the group passes the picture wall seen in the closing credits of every episode.]] | ||
=== Remington 870 === | === Remington 870 === | ||
| − | Yakuza members and several civilians are seen running amok with [[Remington Model 870 Shotgun|Remington 870s]]. A flashback reveals that Kohta trained with | + | Yakuza members and several civilians are seen running amok with [[Remington Model 870 Shotgun|Remington 870s]]. Another Yakuza gang member is seen using a Remington 870 Field Shotgun with the barrel (presumably) cut down for easier handling. A flashback reveals that Kohta trained with a black 870 while on vacation in the U.S. undergoing a firearm training course. |
[[Image:Remington870NewModel.jpg |thumb|none|400px|Remington 870 Police Magnum with Black Synthetic Furniture - 12 Gauge]] | [[Image:Remington870NewModel.jpg |thumb|none|400px|Remington 870 Police Magnum with Black Synthetic Furniture - 12 Gauge]] | ||
| − | [[Image: | + | [[Image:Remington870Fieldgun.jpg|thumb|none|400px|Remington 870 Field Gun with raised barrel ribbing and 28" barrel - 12 Gauge]] |
| − | + | [[Image:Hotd068701.JPG|thumb|none|600px|Kohta receiving training from an "Ex-Delta Force Master Sergeant Blackwater Operator", while on vacation.]] | |
| − | [[Image:Hotd068701.JPG|thumb|none| | + | [[Image:Hotd068702.JPG|thumb|none|600px|Kohta firing the 870 at an outdoor shooting range.]] |
| − | [[Image:Hotd068702.JPG|thumb|none| | + | [[Image:Hotd058701.JPG|600px|thumb|none|An armed civilian holding a Remington 870 with wood furniture.]] |
| − | + | [[Image:Hotd058703.JPG|600px|thumb|none|Another armed civilian holding an identical Remington 870, being told of Takashi and Rei's approach.]] | |
| − | + | [[Image:HOTD 5-13.jpg|600px|thumb|none|The same civilian pumps his 870.]] | |
| − | + | [[Image:Hotd058702.JPG|600px|thumb|none|A Yakuza member firing his sawed-off Remington Field Shotgun at nearby zombies.]] | |
| − | [[Image: | ||
| − | [[Image: | ||
| − | |||
| − | |||
| − | |||
| − | |||
| − | [[Image: | ||
| − | |||
| − | [[Image: | ||
| − | |||
| − | |||
| − | |||
| − | |||
| − | |||
| − | |||
| − | |||
| − | |||
| − | |||
| − | |||
| − | |||
=== Over and Under Shotgun === | === Over and Under Shotgun === | ||
A citizen is seen firing an [[12 Gauge Double Barreled Shotgun#Over and Under Shotgun (O/U)|over and under shotgun]], but fumbles in loading the shells and is promptly surrounded and devoured by zombies. | A citizen is seen firing an [[12 Gauge Double Barreled Shotgun#Over and Under Shotgun (O/U)|over and under shotgun]], but fumbles in loading the shells and is promptly surrounded and devoured by zombies. | ||
| − | [[Image:Browning 0-U.jpg|thumb|none| | + | [[Image:Browning 0-U.jpg|thumb|none|400px|Browning O/U - 12 gauge.]] |
| − | [[Image:Hotd07ds1.JPG|thumb|none| | + | [[Image:HOTD 7-1.jpg|thumb|none|600px|Ejecting the first pair of shells.]] |
| − | [[Image:Hotd07ds2.JPG|thumb|none| | + | [[Image:Hotd07ds1.JPG|thumb|none|600px|Firing the second pair. Cocky bastard are we?]] |
| + | [[Image:Hotd07ds2.JPG|thumb|none|600px|At least until that bottom shell gets dropped... oops.]] | ||
| − | === Remington | + | === Remington 1100 === |
| − | + | What looks like a [[Remington 1100]] is used by a Nationalist member outside the Takagi estate. It differs in a few details, mainly that enormous front sight ring. | |
[[Image:1100 classicfield-1-.jpg|thumb|none|400px|Remington 1100 - 12 gauge]] | [[Image:1100 classicfield-1-.jpg|thumb|none|400px|Remington 1100 - 12 gauge]] | ||
| − | [[Image:Hotd12m1100.JPG|thumb|none| | + | [[Image:Hotd12m1100.JPG|thumb|none|600px|A Nationalist member in charge of roadblocking against zombies is seen using his Remington 1100 against the approaching horde. His partner is the one running back with an M1911, seen above.]] |
| − | + | [[Image:HOTD 12-6.jpg|thumb|none|600px|A side view of the shotgun as he yells at his partner for running.]] | |
== Submachine Guns == | == Submachine Guns == | ||
| − | === | + | === Vz. 83 Skorpion === |
| − | + | Yuriko is seen fighting zombies with a [[Sa. Vz. 83 Skorpion]] as her primary weapon. She only uses it set to semi-auto, a wise decision considering the number of zombies, and that a headshot is required to kill them. | |
| − | [[Image: | + | [[Image:Vz83.jpg|thumb|400px|none|Vz. 83 Skorpion w/ 30-round magazine - .380 ACP]] |
| − | [[Image: | + | [[Image:HOTD 12-21.jpg|thumb|none|600px|Yuriko hipfires her Vz. 83 Skorpion in semi-automatic while running, and still scores a headshot every time.]] |
| + | [[Image:Hotd12vz611.JPG|thumb|none|600px|Yuriko using her Skorpion against the zombie horde, while her husband Souichiro prefers using his sword.]] | ||
| + | [[Image:Hotd12vz612.JPG|thumb|none|600px|You know this picture is totally badass.]] | ||
| − | === | + | === Heckler & Koch MP5 === |
| − | + | Riot Police (機動隊 <i>Kidotai</i>) officers are seen firing [[Heckler & Koch MP5]]s fitted with Aimpoint sights at zombies. They are presumibly MP5Fs, standard issue in reality. | |
| − | [[Image: | + | [[Image:MP5A3_F_stock.jpg|thumb|none|400px|Heckler & Koch MP5A3 with Navy trigger group and MP5F stock - 9x19mm]] |
| − | [[Image: | + | [[Image:HOTD_MP5.jpg|thumb|none|600px|Riot police officers manning a road block fire their MP5 submachine guns at the approaching zombies.]] |
| − | [[Image: | + | [[Image:HOTD 4-2.jpg|thumb|none|600px|When they shift their aim, the side of the MP5s become visible, showing more of their features.]] |
| − | == Rifles == | + | == Battle Rifles == |
=== Springfield Super Match M1A === | === Springfield Super Match M1A === | ||
| − | A [[M14 Rifle#Super Match M1A|Springfield Super Match M1A]] is found in Rika's household, and is used by Rei as her main weapon. It has an OD stock and is fitted with a standard M14 flash hider (which has a bayonet mount), M14 DMR cheek riser, KAC rail system, custom-fitted lower rail, KAC QD sling mount, Surefire M900V foregrip/light combo, Aimpoint CompM2 red dot sight with a killflash, its magazines are fitted with Magpuls, and the rifle is later fitted with an M6 bayonet to complement Rei's fighting style. As with the CompM2 on the M37, this one is also later disabled by the EMP. In episode 7, Takashi handles the rifle to shoot at zombies about to eat Rei. Kohta, like in the | + | A [[M14 Rifle#Super Match M1A|Springfield Super Match M1A]] is found in Rika's household, and is used by Rei as her main weapon. It has an OD stock and is fitted with a standard M14 flash hider (which has a bayonet mount), M14 DMR cheek riser, KAC rail system, custom-fitted lower rail, KAC QD sling mount, Surefire M900V foregrip/light combo, Aimpoint CompM2 red dot sight with a killflash, its magazines are fitted with Magpuls, and the rifle is later fitted with an M6 bayonet to complement Rei's fighting style. As with the CompM2 on the M37, this one is also later disabled by the EMP. In episode 7, Takashi handles the rifle to shoot at zombies about to eat Rei. Kohta, like in the manga, incorrectly calls it an M1A1 with the extra number 1. |
| − | [[Image:M1ASM.jpg|thumb|none| | + | [[Image:M1ASM.jpg|thumb|none|400px|Springfield Armory M1A - 7.62x51mm NATO]] |
| − | [[Image:Hotdopm1a.JPG| | + | [[Image:Hotdopm1a.JPG|600px|thumb|none|Rei holding the M1A in the opening sequence with Takashi next to her. Note that she keeps the rifle on a one-point sling which is wrapped around the rifle between the stock and pistol grip area, despite the rifle having a QD sling mount attached to the left rail.]] |
| − | [[Image: | + | [[Image:Hotd06m1a3.JPG|thumb|none|600px|The M1A with the AR-10(T) and M37 in the locker.]] |
| − | [[Image:Hotd06m1a1.JPG|thumb|none| | + | [[Image:Hotd06m1a1.JPG|thumb|none|600px|Kohta cocking the M1A. Note the cocking handle is extremely oversized in this particular shot.]] |
| − | [[Image:Hotd06m1a2.JPG|thumb|none| | + | [[Image:Hotd06m1a2.JPG|thumb|none|600px|Kohta handling the rifle. That wicked grin on his face certainly shows how much of a happy camper he is in that moment.]] |
| − | + | [[Image:Hotd08m1a1.JPG|thumb|none|600px|SPARKLES!]] | |
| − | + | [[Image:High School of the Dead rifle.jpg|thumb|none|600px|With the rifle still attached to Rei, Takashi is stuck shooting like this.]] | |
| − | + | [[Image:Hotd07m1a.JPG|thumb|none|600px|Takashi disengages the safety, as instructed by Kohta.]] | |
| − | [[Image:Hotd08m1a1.JPG|thumb|none| | + | [[Image:Hotd08m1a3.JPG|thumb|none|600px|While Takashi most definitely likes his new bipod, Rei must be really regretting not using that QD sling mount right about now.]] |
| − | [[Image: | + | [[Image:Hotd08m1a2.JPG|thumb|none|600px|Takashi fires the rifle.]] |
| − | [[Image: | + | [[Image:Hotd11m1a1.JPG|thumb|none|600px|The muzzle flash.]] |
| − | [[Image:Hotd08m1a3.JPG|thumb|none| | + | [[Image:Hotd11m1a2.JPG|thumb|none|600px|Rei points the M1A's M6 bayonet at her corrupt teacher as she contemplates killing him for making her fail a grade because Rei's father (who is a police officer) was investigating a scandal involving her teacher's father (who was a corrupt politician).]] |
| − | [[Image: | + | [[Image:HOTD 12-4.jpg|thumb|none|600px|A view through the rifle's CompM2 as Rei checks it after the EMP. Saya is not thrilled it was pointed at her.]] |
| − | [[Image:Hotd11m1a1.JPG|thumb|none| | + | [[Image:Hotd12m1a1.JPG|thumb|none|600px|Rei uses the M1A in the final battle against the zombie horde at the Takagi estate. Rei apparently didn't learn from the last time she didn't use the proper sling mount, and the rifle being tied to her gets her into ''another'' sticky situation moments later.]] |
| − | [[Image:Hotd11m1a2.JPG|thumb|none| | ||
| − | [[Image:Hotd12m1a1.JPG|thumb|none| | ||
=== Armalite AR-10(T) === | === Armalite AR-10(T) === | ||
| − | An [[Armalite AR-10#Armalite AR-10 A4|Armalite AR-10(T)]] modified to resemble a [[Knight's Armament SR-25]] is found in Rika's household, and due to the aftermarket parts Kohta initially mistakes for the latter rifle. It is fitted with a Knight's Armament rail system and rail covers, Leupold M3A scope with a sunshade, and a bipod; Kohta uses it as his primary weapon. The author comments Rika seduced an American soldier to import the illegal rifle into Japan via the American military air service, avoiding customs. An error in the English dubbing | + | An [[Armalite AR-10#Armalite AR-10 A4|Armalite AR-10(T)]] modified to resemble a [[Knight's Armament SR-25]] is found in Rika's household, and due to the aftermarket parts Kohta initially mistakes for the latter rifle. It is fitted with a Knight's Armament rail system and rail covers, Leupold M3A scope with a sunshade, and a bipod; Kohta uses it as his primary weapon. The author comments Rika seduced an American soldier to import the illegal rifle into Japan via the American military air service, avoiding customs. An error in the English dubbing causes Kohta to misidentify it as an "AR-110" instead of an AR-10. |
| + | [[Image: Armalite_AR-10(T).jpg |thumb|none|400px|Armalite AR-10(T) - 7.62x51mm]] | ||
| + | [[Image:SR25.jpg|thumb|none|400px|Knight's Armament - SR-25 7.62x51mm NATO]] | ||
| + | [[Image:Hotdopar10.JPG|600px|thumb|none|Closeup of the AR-10(T)'s markings in the opening credits.]] | ||
| + | [[Image:Hotd06ar10m37.JPG|thumb|none|600px|Kohta riding on the Humvee with the AR-10(T) in the opening credits.]] | ||
| + | [[Image:Hotd06ar101.JPG|thumb|none|600px|Kohta's such a happy camper.]] | ||
| + | [[Image:Hotd07ar102.JPG|thumb|none|600px|Kohta, Saeko, and Takashi observe the chaos outside, specifically the civilian with the over and under shotgun being eaten.]] | ||
| + | [[Image:Hotd12ar101.JPG|thumb|none|600px|Kohta prepares to 'Rock-'N-Roll!']] | ||
| + | [[Image:Hotd07ar101.JPG|thumb|none|600px|Sniping a zombie, earning a headshot with his first shot.]] | ||
| + | [[Image:Hotd12ar103.JPG|thumb|none|600px|A view through the Leupold M3A as Kohta protects Alice Maresato.]] | ||
| + | [[Image:HOTD 7-9.jpg|thumb|none|600px|Kohta swaps mags, hitting the bolt catch afterwards.]] | ||
| + | [[Image:Hotd08ar101.JPG|thumb|none|600px|Kohta firing at zombies from in the Humvee near the wire blockade.]] | ||
| + | [[Image:HOTD 8-12.jpg|thumb|none|600px|Alice hands Kohta a pair of magazines at the wire blockade.]] | ||
| + | [[Image:Hotd10all.JPG|thumb|none|600px|Kohta grips the AR-10 when he refuses to give up the firearms his group acquired to the adults.]] | ||
| + | [[Image:Hotd12ar102.JPG|thumb|none|600px|Kohta takes aim while defending the Takagi estate.]] | ||
| − | + | ==Assault Rifles== | |
| − | |||
| − | |||
| − | |||
| − | |||
| − | |||
| − | |||
| − | |||
| − | |||
| − | |||
| − | |||
| − | |||
| − | |||
| − | |||
| − | |||
=== Howa Type 89 === | === Howa Type 89 === | ||
| − | JGSDF soldiers are seen wielding [[Howa Type 89|Howa Type 89s]] as their service rifle, | + | JGSDF soldiers are seen wielding [[Howa Type 89|Howa Type 89s]] as their service rifle, as well as one being used by Kohta in his imaginary FPS. Rika's personal rifle is a highly customized Type 89 with an entire M4A1 front end, including the barrel, front sight and picatinny rail system, as well as an M4A1 LE stock, and is fitted with an Aimpoint CompM2 and Surefire M900 foregrip/light. However, due to the airport battle, where she used this as her primary, not appearing on-screen in the anime, it's only seen in the opening credits. |
| − | [[ | + | |
| − | + | [[File:Howa Type 89-F folded stock.jpg|thumb|500px|none|Howa Type 89-F with red dot on railed receiver - 5.56x45mm.]] | |
| − | + | [[File:Hotd03guns.JPG|thumb|none|600px|Rika's highly customized Type 89 in the opening credits.]] | |
| − | + | [[Image:Hotd06guns.JPG|thumb|none|600px|Also in the opening credits, the stock of one can be seen at the bottom right, while the bottom part of another can be seen up top.]] | |
| − | [[File:Hotd03guns.JPG|thumb|none| | ||
| − | [[Image:Hotd06guns.JPG|thumb|none| | ||
| − | + | [[Image:HowaType89FullStock.jpg|thumb|400px|none|Howa Type 89 - 5.56x45mm NATO]] | |
| − | + | [[Image:HOTD 1-1.jpg|600px|thumb|none|Japanese Ground Self-Defense Force Blackhawks filled with Type 89-wielding soldiers fly over Rei, Hisashi Igou, and Takashi (the latter being off-screen).]] | |
| − | [[Image: | + | [[Image:HOTD_JGSDF_1.jpg|600px|thumb|none|JGSDF soldiers protecting a roadblock from zombies in Saya's explanation of the zombie outbreak in Japan.]] |
| − | [[Image: | + | [[Image:HOTD_JGSDF_3.jpg|600px|thumb|none|Another shot of a JGSDF soldier with a Type 89.]] |
| − | [[Image: | + | [[Image:Hotd05ak74.JPG|600px|thumb|none|Kohta pretending to see himself firing a Type 89 at an enemy soldier. His enemy's rifle is not identifiable.]] |
| − | [[Image: | ||
| − | === | + | ===Colt M16A1 === |
| − | + | Many Nationalists are seen firing [[M16#M16A1 Rifle|M16A1s]] at the approaching zombie horde during the final battle at the Takagi Estate. | |
| − | [[ | + | [[Image:M16A1.jpg|thumb|none|400px|M16A1 with 20 round magazine - 5.56x45mm.]] |
| − | [[ | + | [[Image:Hotd1216a11.jpg|thumb|none|600px|A Nationalist member guards the remaining survivors with an M16A1 as the zombie horde approaches.]] |
| + | [[Image:Hotd1216a12.JPG|thumb|none|600px|The two Nationalist members alongside Takagi's father are seen armed with M16A1s as they prepare to take on the zombie horde.]] | ||
| + | [[Image:Hotd1216a11911.JPG|thumb|none|600px|Another Nationalist fires his M16A1 at the approaching zombie horde in the final battle at the Takagi estate. Note that the thinner, rear part of the carry handle was incorrectly drawn as transparent.]] | ||
| + | [[Image:HOTD 12-20.jpg|thumb|none|600px|The Nationalist beside Souichiro aims his M16A1. The one to his right appears to have another Ithaca M37.]] | ||
| − | == Sniper | + | == Sniper Rifles == |
=== Heckler & Koch PSG-1 === | === Heckler & Koch PSG-1 === | ||
Rika uses a [[Heckler & Koch G3#Heckler & Koch PSG-1|Heckler & Koch PSG-1]] fitted with a Harris bipod in her role as a Special Assault Team sniper, clearing an airport of zombies wandering around its runways. Very notable is that she correctly fires the full load of six rounds in this scene; proper magazine capacities are usually the first thing ignored in fiction, however attention to detail in this regard is seen throughout the show. | Rika uses a [[Heckler & Koch G3#Heckler & Koch PSG-1|Heckler & Koch PSG-1]] fitted with a Harris bipod in her role as a Special Assault Team sniper, clearing an airport of zombies wandering around its runways. Very notable is that she correctly fires the full load of six rounds in this scene; proper magazine capacities are usually the first thing ignored in fiction, however attention to detail in this regard is seen throughout the show. | ||
| − | [[Image:H&KPSG01.jpg|thumb|none| | + | [[Image:H&KPSG01.jpg|thumb|none|400px|Heckler & Koch PSG-1 - 7.62x51mm NATO]] |
| − | [[Image:Hotd06guns.JPG|thumb|none| | + | [[Image:Hotd06guns.JPG|thumb|none|600px|The H&K PSG-1 at the bottom in the opening credits.]] |
| − | [[Image:HOTD_PSG_1.jpg| | + | [[Image:HOTD_PSG_1.jpg|600px|thumb|none|Rika aiming the PSG-1 at zombie stragglers. This shot was made from two screencaps (thus the extra sun rays), and the camera pans slightly down (thus the small blank parts in the bottom left/top right), but the rifle looks excellent!]] |
| − | [[Image:HOTD_PSG_2.jpg| | + | [[Image:HOTD_PSG_2.jpg|600px|thumb|none|Rika fires the PSG-1.]] |
| − | [[Image:HOTD_PSG_3.jpg| | + | [[Image:HOTD_PSG_3.jpg|600px|thumb|none|The empty PSG-1 resting on its bipod after being fired.]] |
== Machine Guns == | == Machine Guns == | ||
| + | |||
| + | === M240C === | ||
| + | The [[FN MAG#M240 Machine Gun|M240C machine gun]] is coaxially mounted on both the LAV-25 IFV and M1 Abrams MBT seen in Times Square in a "CMN" news report. | ||
| + | [[Image:M240C.jpg|thumb|none|400px|M240C machine gun - 7.62x51mm NATO]] | ||
| + | [[Image:HOTD 3-2.jpg|thumb|none|600px|Though not visible from this angle, both armored vehicles would have a coaxial M240C.]] | ||
| + | |||
| + | === M242 Bushmaster === | ||
| + | The [[M242 Bushmaster chaingun]] is the main gun of the LAV-25. | ||
| + | [[Image:M242 25mm gun.jpg|thumb|none|400px|M242 Bushmaster chaingun - 25mm]] | ||
| + | [[Image:HOTD 3-2.jpg|thumb|none|600px|The LAV-25 is on the left. The soldiers' rifles are not identifiable, but they are both firing them, as the muzzle flashes and shell casings are visible.]] | ||
=== Sumitomo Minimi === | === Sumitomo Minimi === | ||
A Sumitomo Minimi, the Japanese-licensed version of the [[FN Minimi]], is seen mounted on a JGSDF Type 82 reconnaissance vehicle. | A Sumitomo Minimi, the Japanese-licensed version of the [[FN Minimi]], is seen mounted on a JGSDF Type 82 reconnaissance vehicle. | ||
| − | [[ | + | |
| − | [[Image:HOTD_JGSDF_2.jpg| | + | [[File:Sumitomo Minimi bipod.jpg|thumb|500px|none|Sumitomo Minimi on bipod - 5.56x45mm]] |
| + | [[Image:HOTD_JGSDF_2.jpg|600px|thumb|none|A Sumitomo Minimi mounted on top of a Type 82 at a roadblock.]] | ||
=== Sumitomo Type 74 === | === Sumitomo Type 74 === | ||
A [[Sumitomo NTK-62|Type 74]] is mounted on a JGSDF Type 10 MBT as its coaxial machine gun. | A [[Sumitomo NTK-62|Type 74]] is mounted on a JGSDF Type 10 MBT as its coaxial machine gun. | ||
| − | [[Image:Type74MG.jpg|thumb|none| | + | [[Image:Type74MG.jpg|thumb|none|400px|Vehicle-mounted Type 74 machine gun - 7.62x51mm NATO]] |
| − | [[Image:Hotd05m2.JPG|thumb|none| | + | [[Image:Hotd05m2.JPG|thumb|none|600px|The port for the Type 74 is seen beside the main cannon of a Type 10 MBT manning a roadblock in Saya's explanation of the zombie outbreak in Japan.]] |
=== Sumitomo M2 === | === Sumitomo M2 === | ||
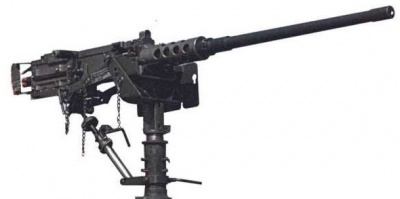
A Sumitomo M2, the Japanese-licensed version of the [[Browning M2]], is seen mounted on a JGSDF Type 10 MBT. | A Sumitomo M2, the Japanese-licensed version of the [[Browning M2]], is seen mounted on a JGSDF Type 10 MBT. | ||
| − | [[Image:BrowningM2.jpg|thumb|none| | + | [[Image:BrowningM2.jpg|thumb|none|400px|Browning M2 - 12.7x99mm NATO]] |
| − | [[Image:Hotd05m2.JPG|thumb|none| | + | [[Image:Hotd05m2.JPG|thumb|none|600px|Sumitomo M2 mounted on a Type 10 MBT.]] |
| + | |||
| + | === M61 Vulcan === | ||
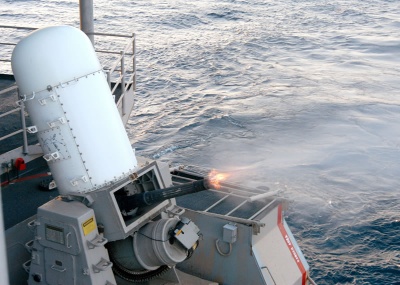
| + | [[M61 Vulcan#General Dynamics / Raytheon Phalanx Close-In Weapon System|M61 Vulcan]]s are seen in Phalanx installations on Japanese and American warships. | ||
| + | [[Image:M61vulcan.jpg|thumb|none|400px|M61 Vulcan - 20mm]] | ||
| + | [[Image:Phalanx.jpg|thumb|none|400px|Phalanx CIWS - 20mm]] | ||
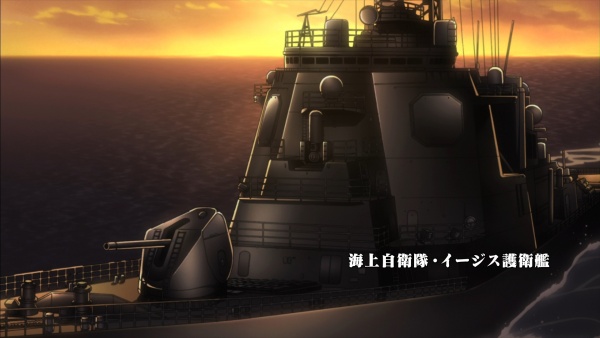
| + | [[Image:HOTD 12-1.jpg|thumb|none|600px|The JDS Kongou (DDG-173) has a pair of Phalanx installations, one just forward of the bridge and the other just forward of the helipad.]] | ||
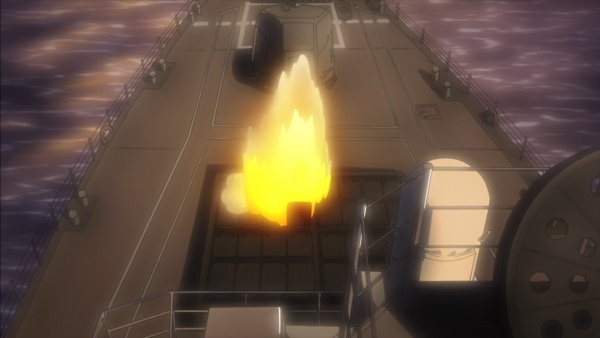
| + | [[Image:HOTD 12-2.jpg|thumb|none|600px|The Kongou's forward Phalanx again as the ship fires an SM-3 anti-ballistic missile missile. The SM-3 is named as such in the show.]] | ||
| + | [[Image:HOTD 12-3.jpg|thumb|none|600px|The USS Curtis Wilbur (DDG-54) is also fitted with a pair of Phalanxes.]] | ||
| + | [[Image:SM3 from JDS Kongo.jpg|thumb|none|500px|Here's the ''real'' JDS Kongou firing an SM-3; even better is that this photo is used for [http://en.wikipedia.org/wiki/Japan_Self-Defense_Forces#Anti-ballistic_missile_deployment Wikipedia's "Anti-ballistic missile deployment" entry on the Japan Self-Defense Forces page]]] | ||
| + | == Opening Credits == | ||
| + | A few guns appear only in the opening credits. | ||
| + | [[Image:Hotd04guns.JPG|thumb|none|600px|Top to bottom, the rifles are an [[AUG]], an [[AK-47]], an [[M16|AR-15 variant]], and another AUG. The pistols are an [[M1911 pistol series|M1911]], a revolver, and another M1911.]] | ||
| + | [[Image:HOTD 0-2.jpg|thumb|none|600px|Mi-24 Hinds with their [[Yakushev-Borzov Yak-B|Yak-B]] chin guns.]] | ||
[[Category:Anime]] | [[Category:Anime]] | ||
Latest revision as of 21:53, 28 May 2022
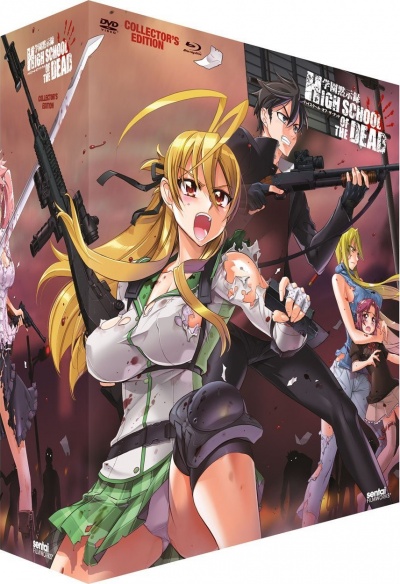
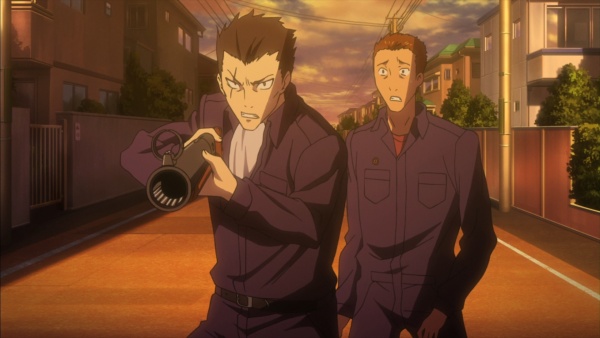
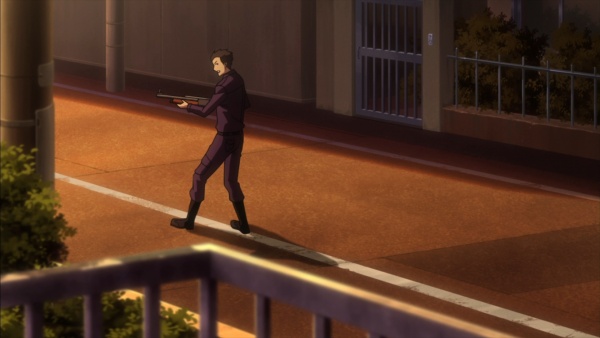
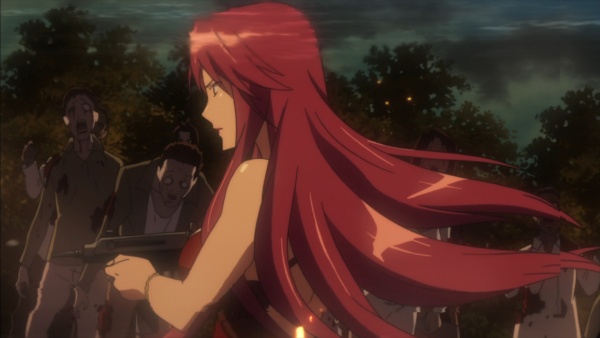
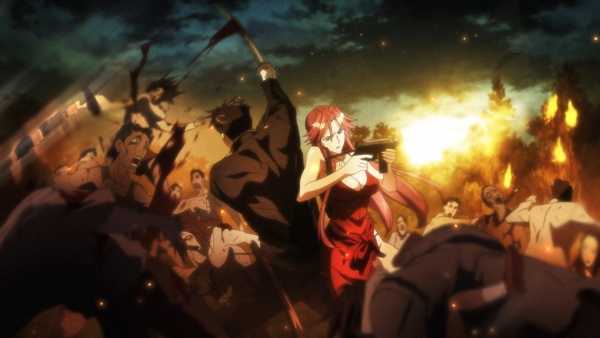
The world is overtaken with a very deadly disease that turns humans into zombies. In Japan, several students of Fujimi High School, and the school nurse, band together to survive the present apocalypse. The story follows Takashi Komuro, one of the students who survived the initial outbreak.
The following weapons were used in the anime series High School of the Dead:
Revolvers
Smith & Wesson Model 37
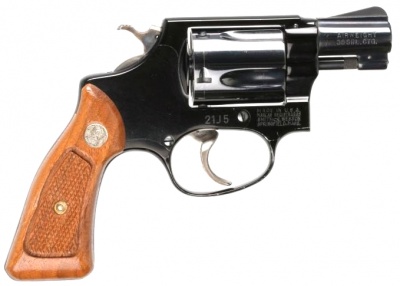
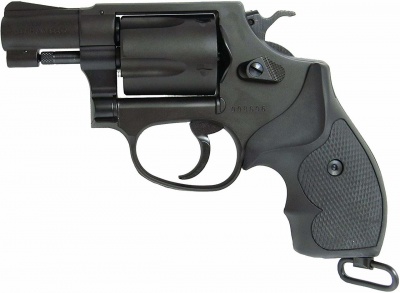
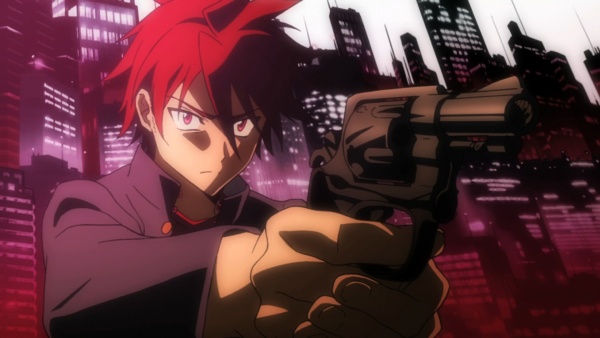
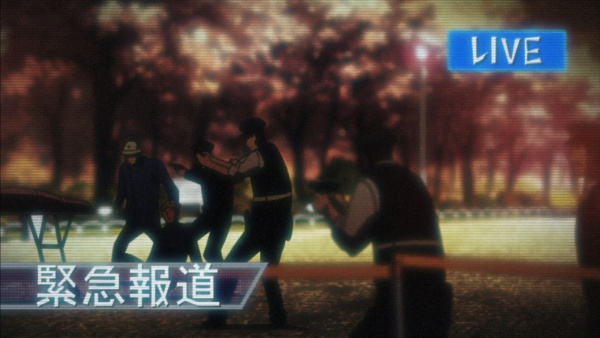
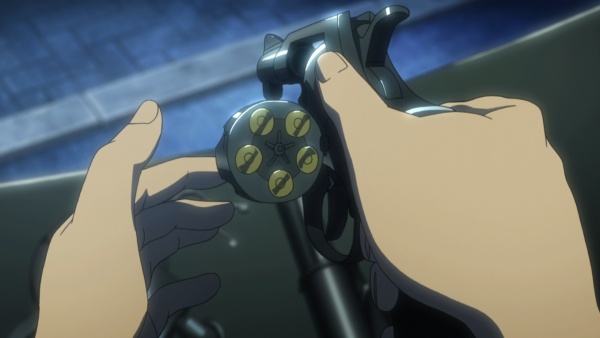
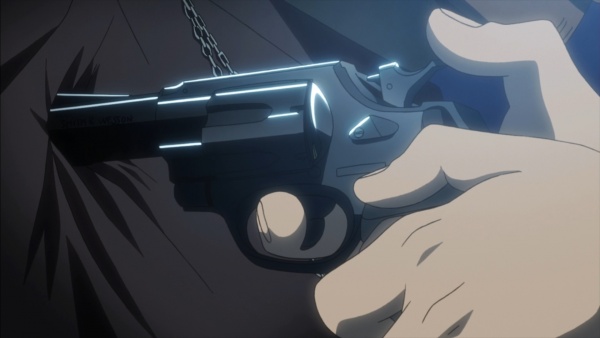
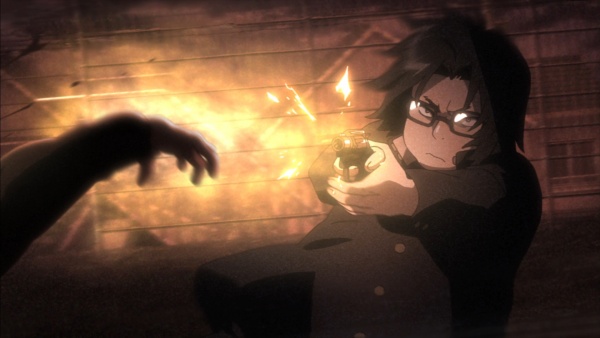
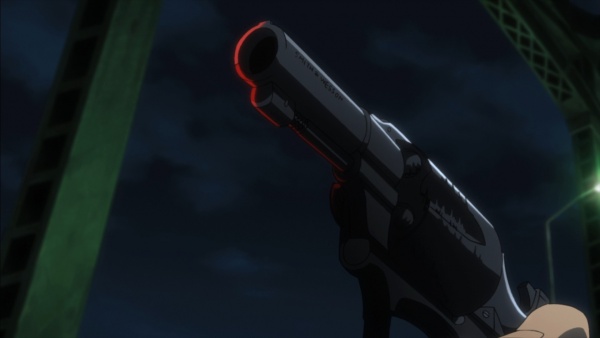
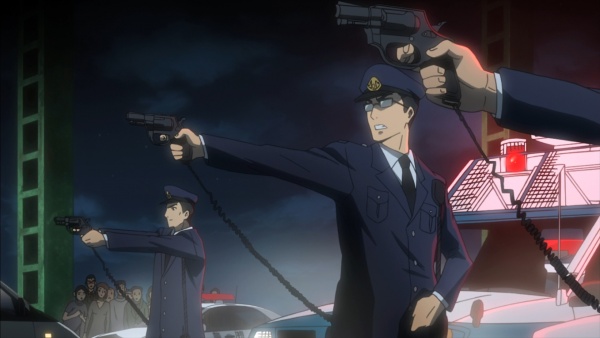
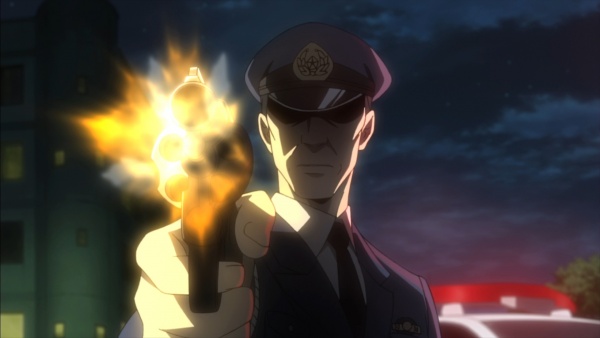
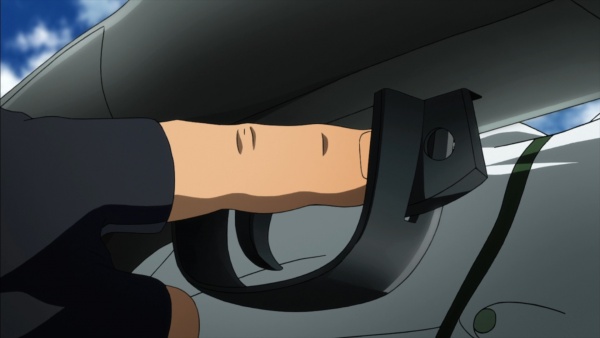
Takashi Komuro and Rei Miyamoto find two Smith & Wesson Model 37s on a pair of dead police officers, though one has its handle broken (the broken one is not seen on screen). Takashi comments on the gun having only five shots as most revolvers have six, and while inexperienced with firearms, knows to keep his finger off the trigger when not intending to shoot. Takashi later hands the revolver to Kohta Hirano due to the latter's expertise with firearms. Several police officers are seen firing their M37s at zombies trying to breach their roadblocks and a senior officer uses his to execute an anarchist inciting a unruly mob on live television. The author commented on how the Nambu Model 60 was no longer the official sidearm for all Japanese police officers and therefore chose the Smith & Wesson to show the unique choice of weapon for each department. This is correct since the NPA imported Model 37s from America to outfit officers who are going to be armed with revolvers.
Pistols
Luger P08
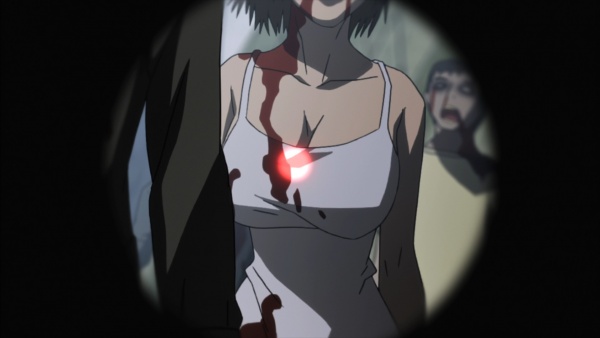
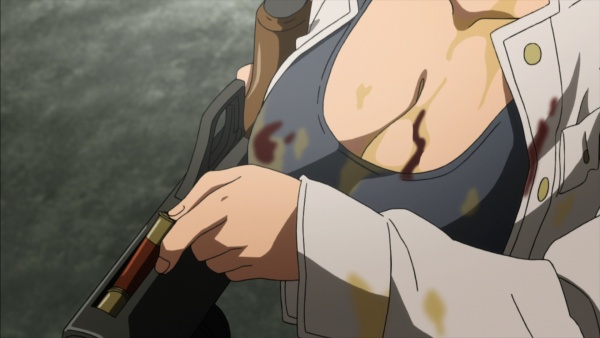
Saya Takagi's mother, Yuriko Takagi, hands her daughter a Navy model Luger P08, complete with a 32 round "snail" drum magazine and a stock (both more commonly used on the long barrel Artillery model). Kohta notes that it's one made for the Dutch military, and in the manga the marking associated with that is visible on the ejection port section.
SIG-Sauer P226R
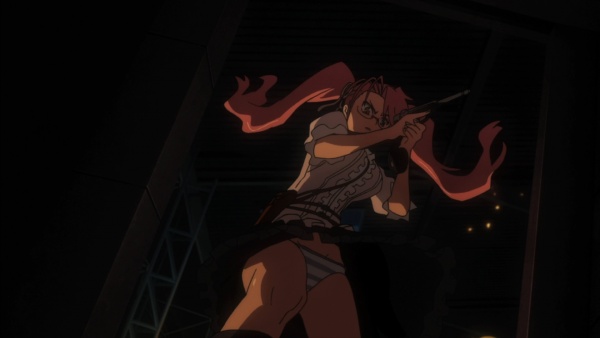
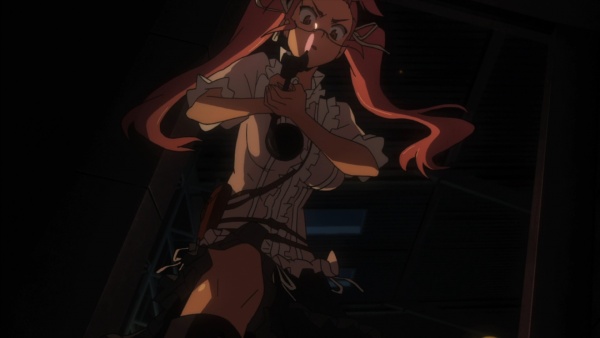
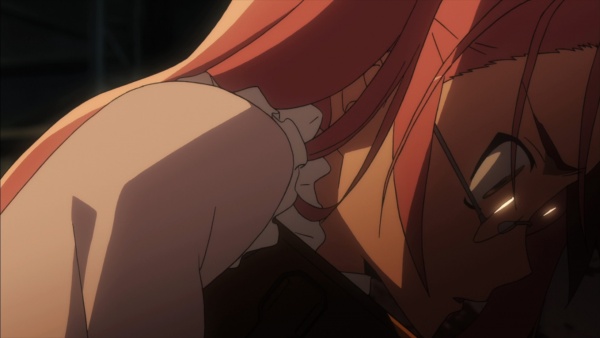
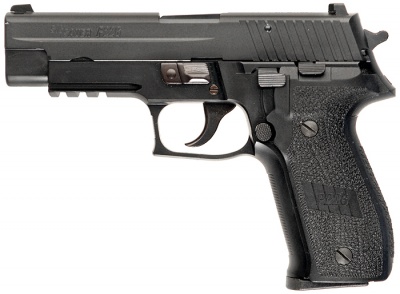
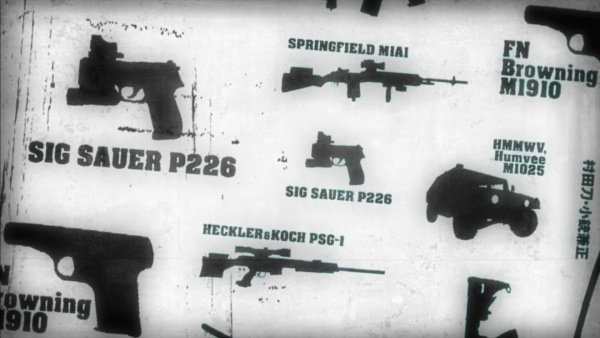
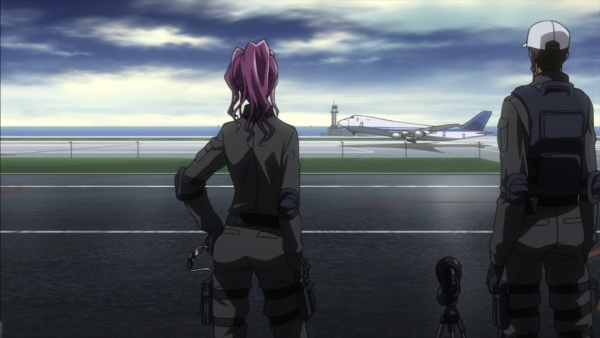
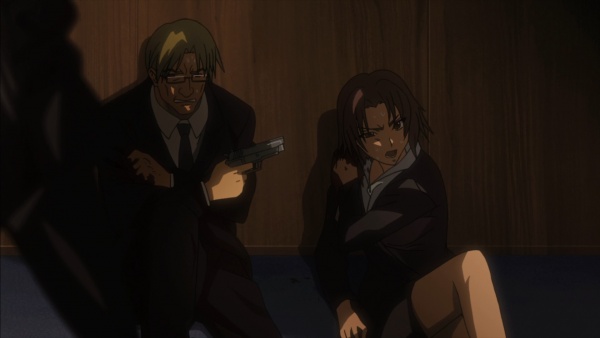
In Episode 8; "The Dead Way Home", a Secret Service agent uses SIG P226Rs to gun down zombies trying to reach the wounded President and Chairman of the Joint Chiefs alongside a few remaining staff members on board Air Force One. Another staff member armed with a P226R uses it to shoot the wounded Chairman in the head upon the latter's request after he shows signs of zombification. Rika Minami uses a P226R fitted with a scope mount, small red dot sight, and flashlight as her sidearm, however because the battle at the offshore airport didn't happen on-screen in the anime, it's only seen in the opening sequence and in her leg holster.
Browning M1910
Yuriko's Browning M1910 is seen in the opening sequence, and it is seen in the show proper in her leg holster.
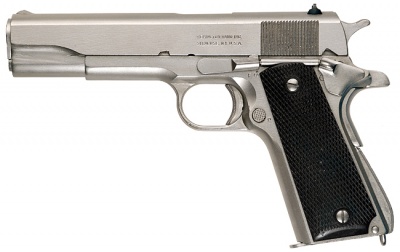
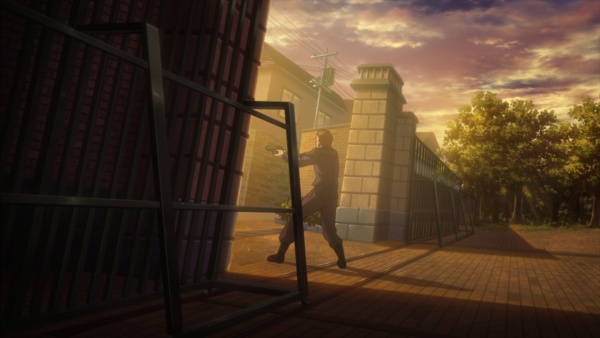
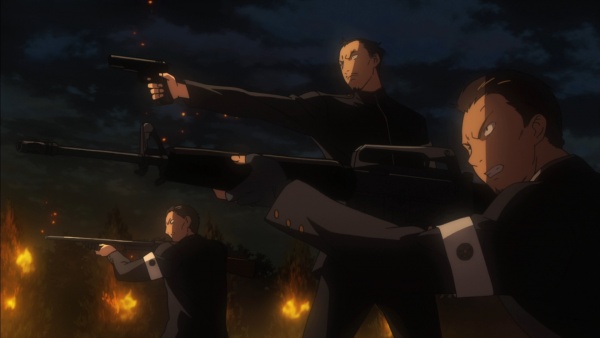
M1911A1
Two Right Wing members (or Nationalists) are seen firing a M1911A1s at the approaching zombie horde during the final battle at the Takagi estate with the zombies. Saya's mother, Yuriko, used one during a training course years ago when she worked on Wall Street, before she met Saya's father, Souichiro.
Shotguns
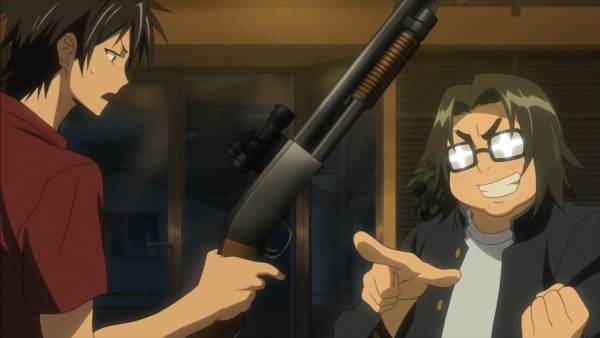
Ithaca M37
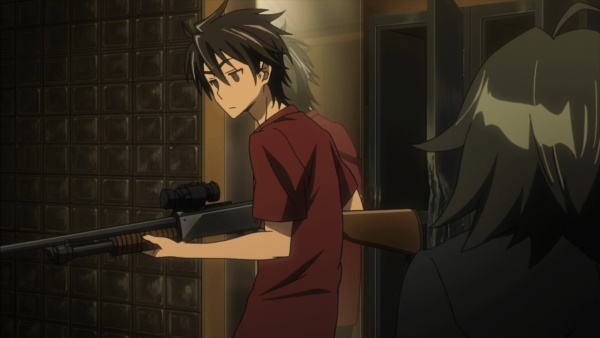
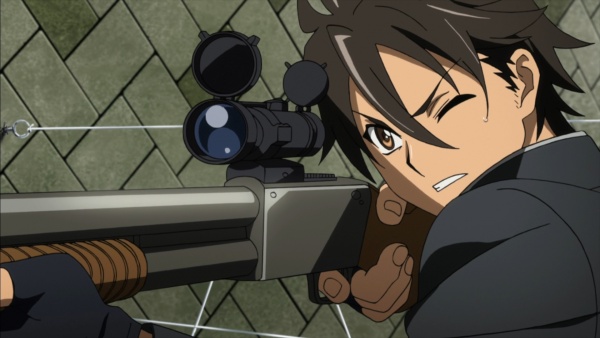
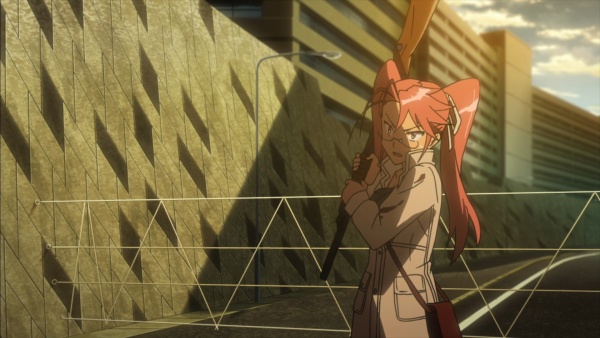
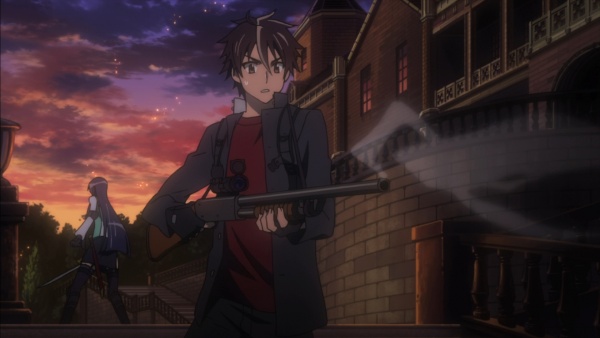
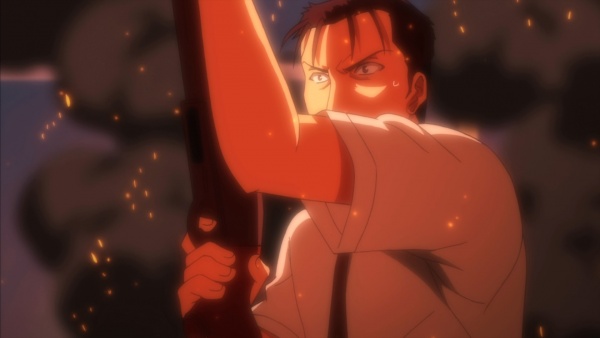
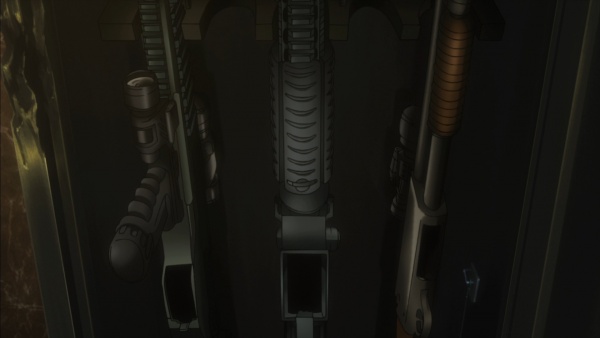
An Ithaca 37 is found in Rika's household, in a firearms locker which Takashi and Kohta break into. Kohta initially uses it before handing it to Takashi, who uses it as his main weapon for the rest of the show. Kohta instructs Takashi on how to slamfire the M37 (holding the trigger down and pumping the shotgun, causing it to fire as soon as it's back in battery) when the group is cornered at the wire blockade, and Saya uses the dropped M37 later in the same scene. Takashi later uses it a melee weapon after running away from the wire blockade. The M37 is fitted with a rail and Aimpoint CompM2, which is later disabled by the EMP due to it being powered by a 3-Volt Lithium Battery. A couple Nationalists at the Takagi estate are seen using standard M37s.
Remington 870
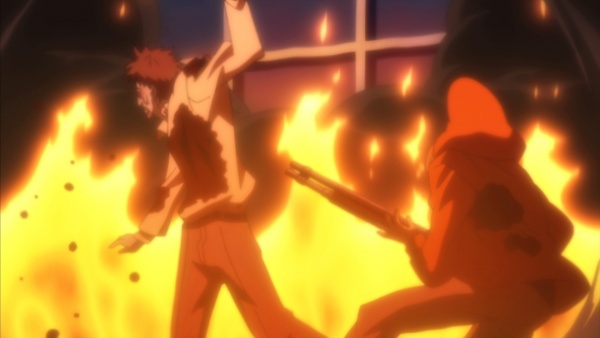
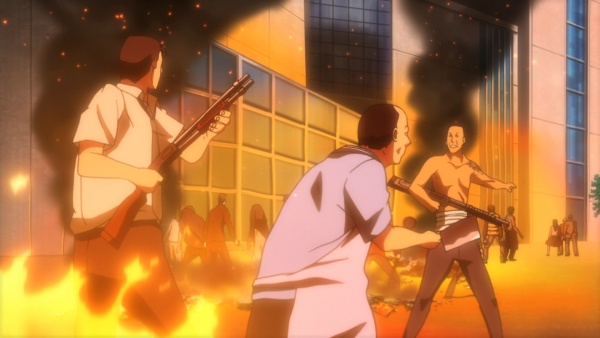
Yakuza members and several civilians are seen running amok with Remington 870s. Another Yakuza gang member is seen using a Remington 870 Field Shotgun with the barrel (presumably) cut down for easier handling. A flashback reveals that Kohta trained with a black 870 while on vacation in the U.S. undergoing a firearm training course.
Over and Under Shotgun
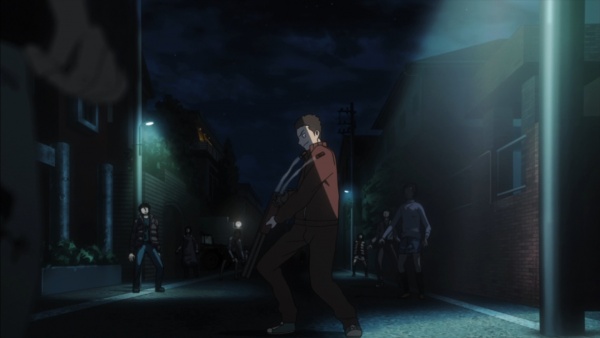
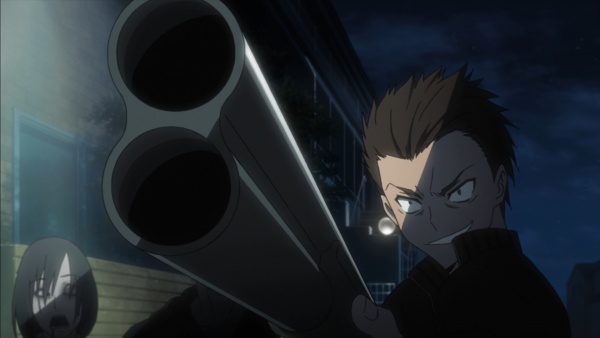
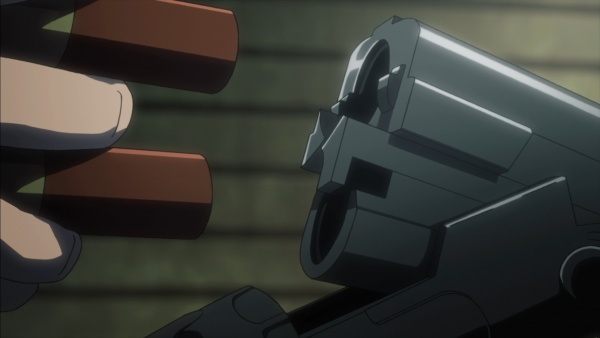
A citizen is seen firing an over and under shotgun, but fumbles in loading the shells and is promptly surrounded and devoured by zombies.
Remington 1100
What looks like a Remington 1100 is used by a Nationalist member outside the Takagi estate. It differs in a few details, mainly that enormous front sight ring.
Submachine Guns
Vz. 83 Skorpion
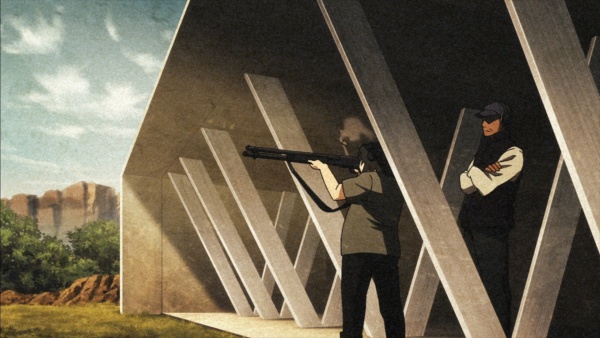
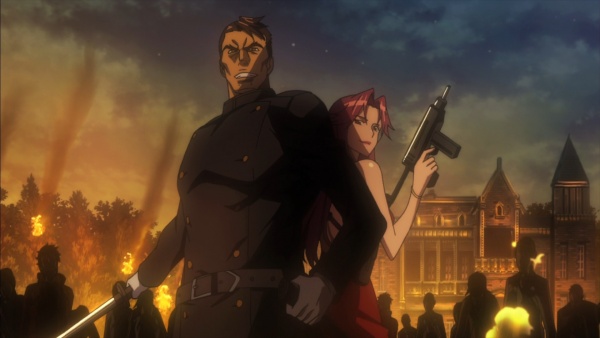
Yuriko is seen fighting zombies with a Sa. Vz. 83 Skorpion as her primary weapon. She only uses it set to semi-auto, a wise decision considering the number of zombies, and that a headshot is required to kill them.
Heckler & Koch MP5
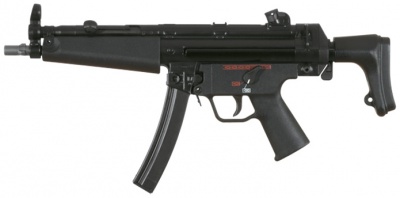
Riot Police (機動隊 Kidotai) officers are seen firing Heckler & Koch MP5s fitted with Aimpoint sights at zombies. They are presumibly MP5Fs, standard issue in reality.
Battle Rifles
Springfield Super Match M1A
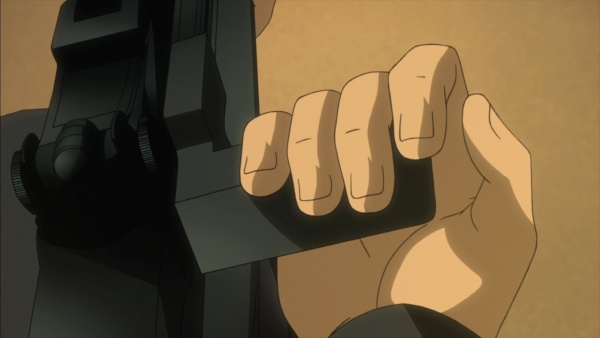
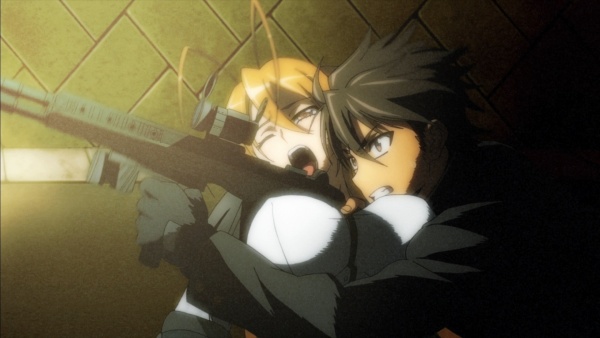
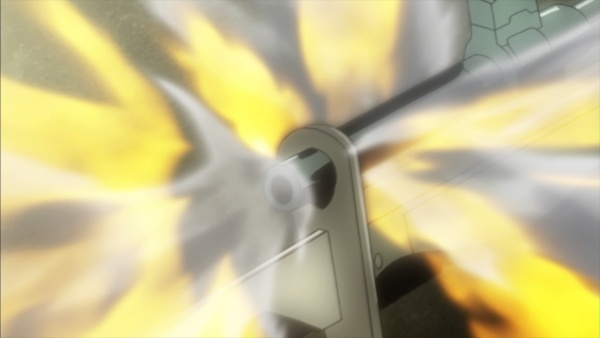
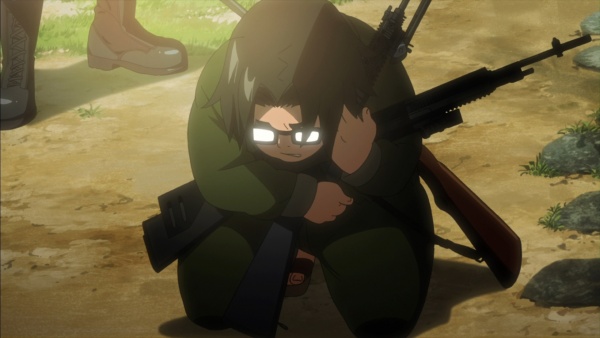
A Springfield Super Match M1A is found in Rika's household, and is used by Rei as her main weapon. It has an OD stock and is fitted with a standard M14 flash hider (which has a bayonet mount), M14 DMR cheek riser, KAC rail system, custom-fitted lower rail, KAC QD sling mount, Surefire M900V foregrip/light combo, Aimpoint CompM2 red dot sight with a killflash, its magazines are fitted with Magpuls, and the rifle is later fitted with an M6 bayonet to complement Rei's fighting style. As with the CompM2 on the M37, this one is also later disabled by the EMP. In episode 7, Takashi handles the rifle to shoot at zombies about to eat Rei. Kohta, like in the manga, incorrectly calls it an M1A1 with the extra number 1.
Armalite AR-10(T)
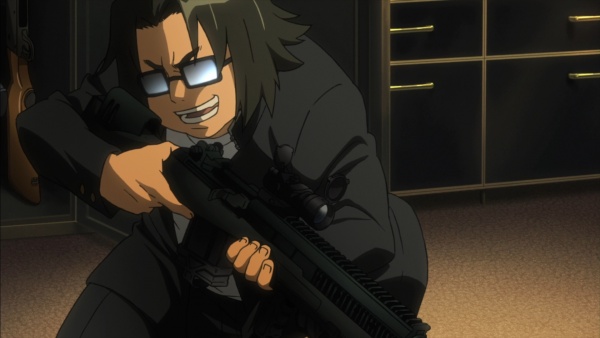
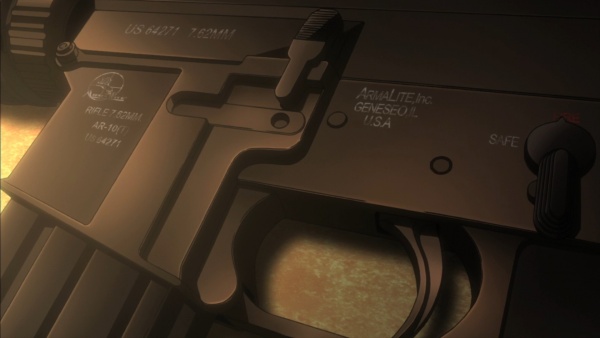
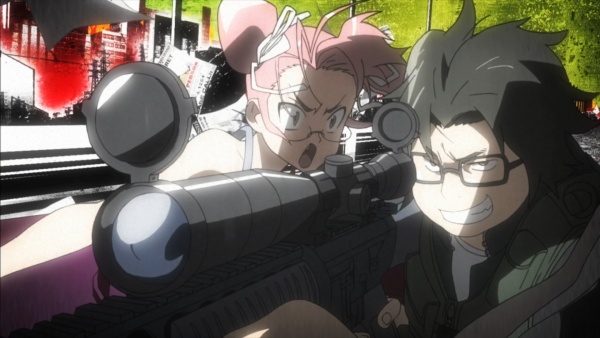
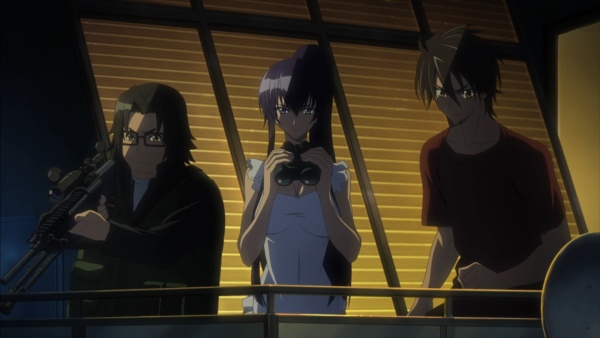
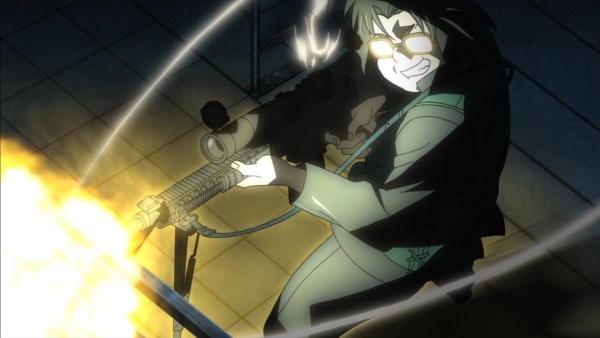
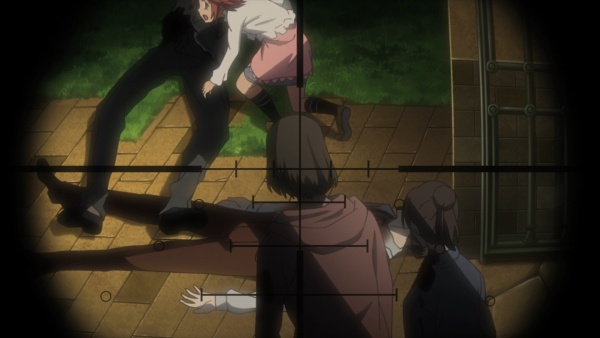
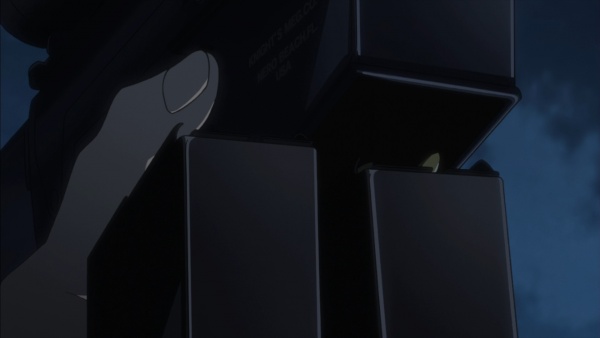
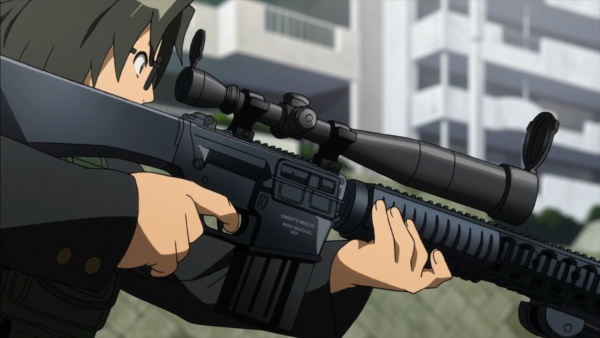
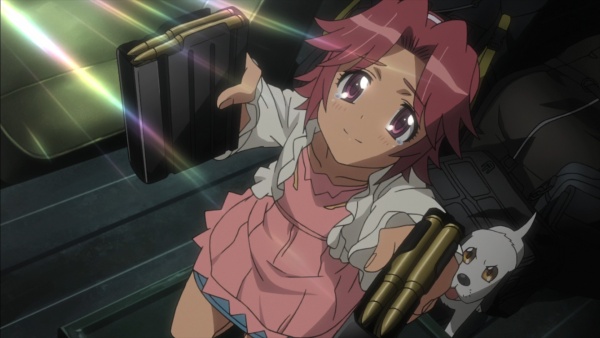
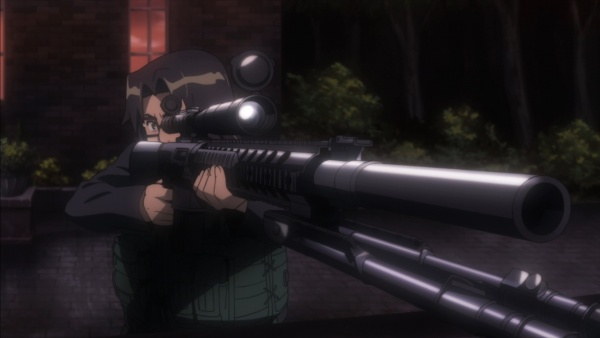
An Armalite AR-10(T) modified to resemble a Knight's Armament SR-25 is found in Rika's household, and due to the aftermarket parts Kohta initially mistakes for the latter rifle. It is fitted with a Knight's Armament rail system and rail covers, Leupold M3A scope with a sunshade, and a bipod; Kohta uses it as his primary weapon. The author comments Rika seduced an American soldier to import the illegal rifle into Japan via the American military air service, avoiding customs. An error in the English dubbing causes Kohta to misidentify it as an "AR-110" instead of an AR-10.
Assault Rifles
Howa Type 89
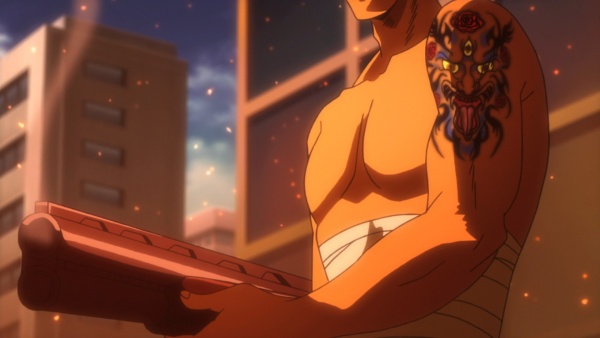
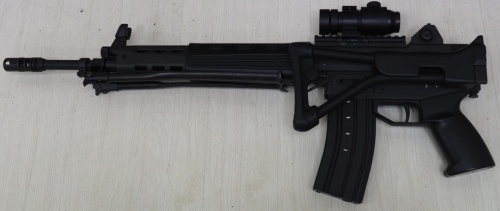
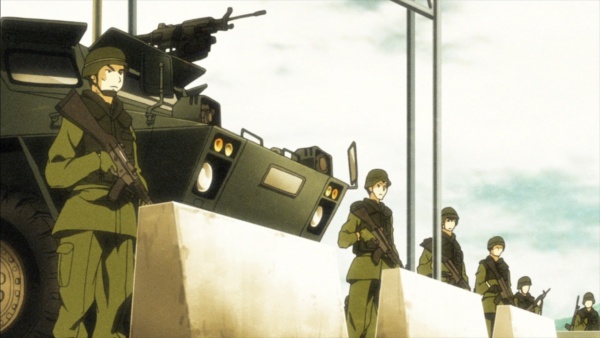
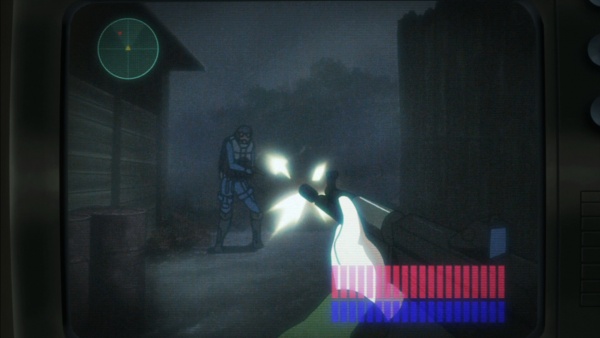
JGSDF soldiers are seen wielding Howa Type 89s as their service rifle, as well as one being used by Kohta in his imaginary FPS. Rika's personal rifle is a highly customized Type 89 with an entire M4A1 front end, including the barrel, front sight and picatinny rail system, as well as an M4A1 LE stock, and is fitted with an Aimpoint CompM2 and Surefire M900 foregrip/light. However, due to the airport battle, where she used this as her primary, not appearing on-screen in the anime, it's only seen in the opening credits.
Colt M16A1
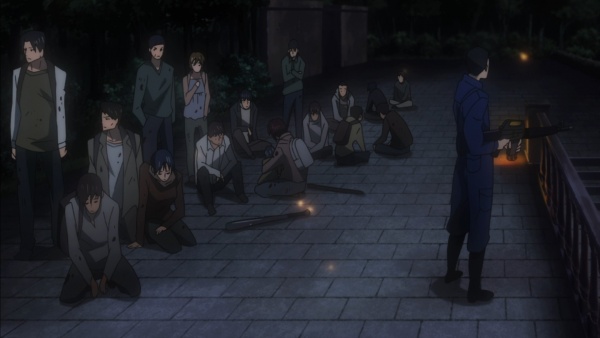
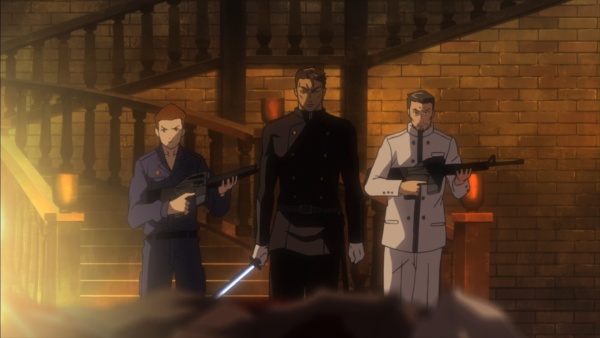
Many Nationalists are seen firing M16A1s at the approaching zombie horde during the final battle at the Takagi Estate.
Sniper Rifles
Heckler & Koch PSG-1
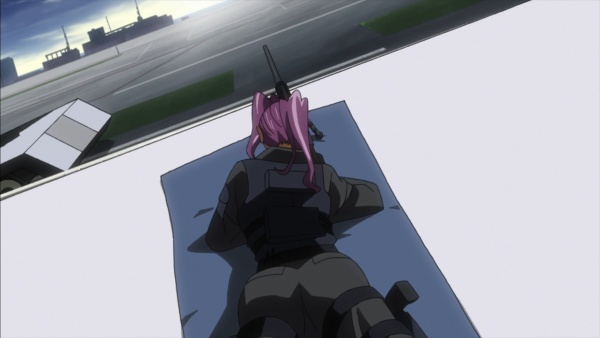
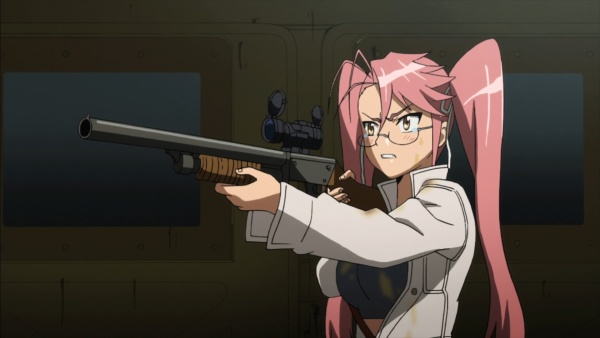
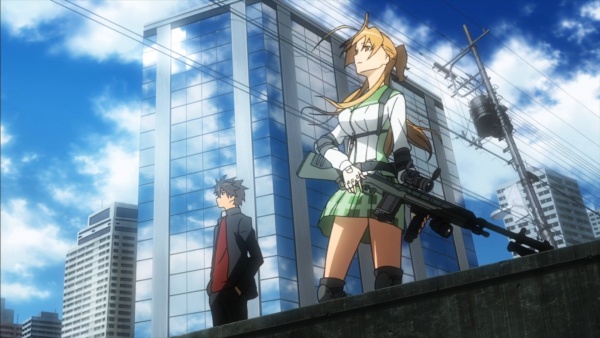
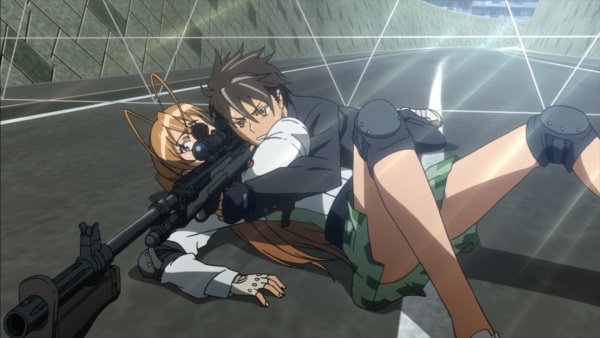
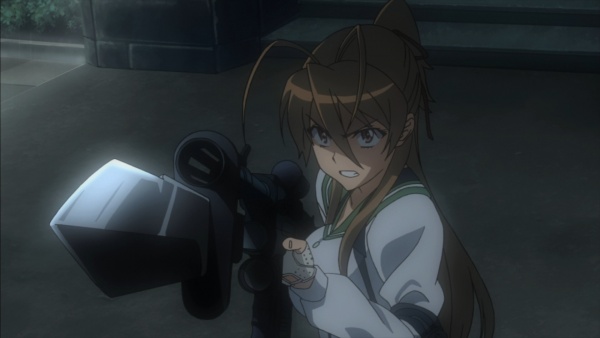
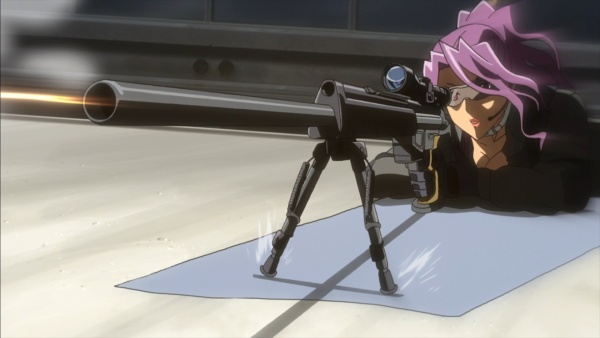
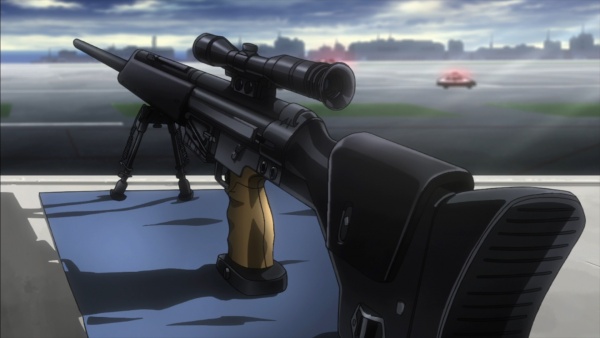
Rika uses a Heckler & Koch PSG-1 fitted with a Harris bipod in her role as a Special Assault Team sniper, clearing an airport of zombies wandering around its runways. Very notable is that she correctly fires the full load of six rounds in this scene; proper magazine capacities are usually the first thing ignored in fiction, however attention to detail in this regard is seen throughout the show.
Machine Guns
M240C
The M240C machine gun is coaxially mounted on both the LAV-25 IFV and M1 Abrams MBT seen in Times Square in a "CMN" news report.
M242 Bushmaster
The M242 Bushmaster chaingun is the main gun of the LAV-25.
Sumitomo Minimi
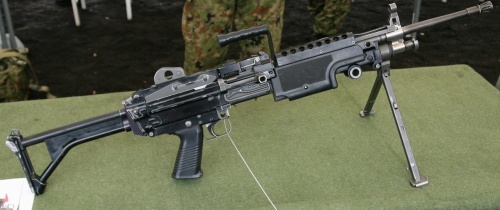
A Sumitomo Minimi, the Japanese-licensed version of the FN Minimi, is seen mounted on a JGSDF Type 82 reconnaissance vehicle.
Sumitomo Type 74
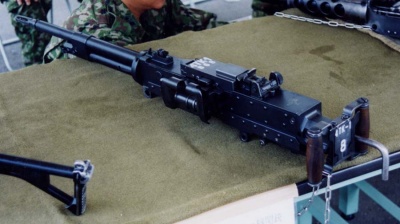
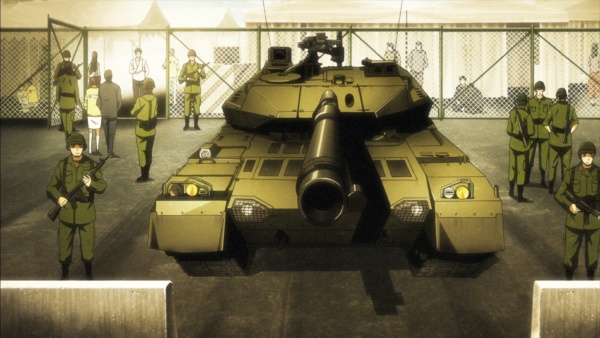
A Type 74 is mounted on a JGSDF Type 10 MBT as its coaxial machine gun.
Sumitomo M2
A Sumitomo M2, the Japanese-licensed version of the Browning M2, is seen mounted on a JGSDF Type 10 MBT.
M61 Vulcan
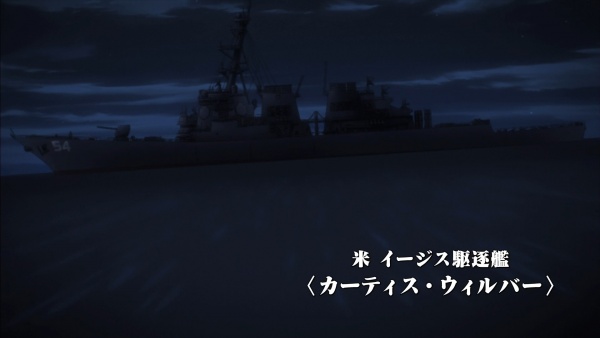
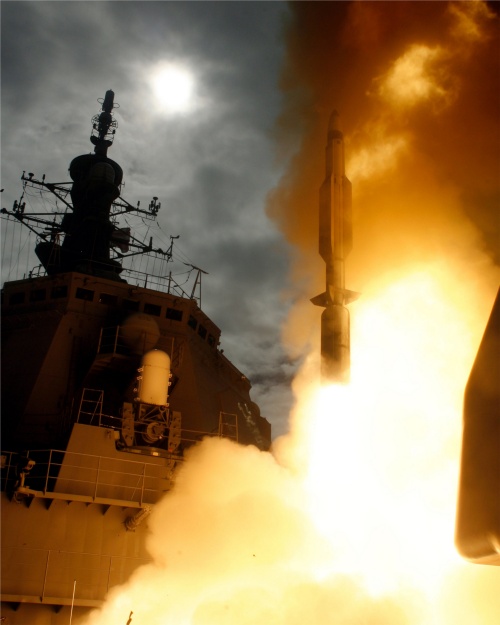
M61 Vulcans are seen in Phalanx installations on Japanese and American warships.
Opening Credits
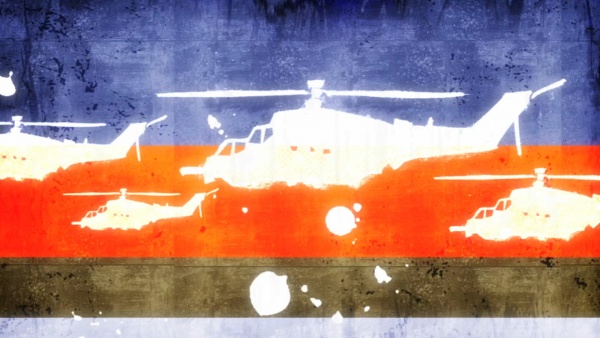
A few guns appear only in the opening credits.

