| If you have been locked out of your account you can request a password reset here. |
Difference between revisions of "Ghost in the Shell Stand Alone Complex 2nd Gig"
PistolJunkie (talk | contribs) |
|||
| (36 intermediate revisions by 4 users not shown) | |||
| Line 1: | Line 1: | ||
| − | [[Image: | + | [[Image:GITS 2nd GIG UK Complete Collection DVD.jpg|thumb|right|300px|''Ghost in the Shell Stand Alone Complex 2nd Gig'' - (2004 - 2005)]] |
| − | [[ | + | [[File:GITS Individual Eleven BR cover.jpg|thumb|right|300px|''Ghost in the Shell Stand Alone Complex 2nd Gig - Individual Eleven'' (2005)]] |
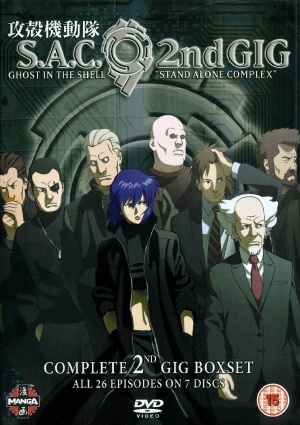
''Ghost in the Shell Stand Alone Complex 2nd Gig'' is a 26 episode anime series based on the manga of the same name by Masamune Shirow (''[[Appleseed]]'', ''[[New Dominion Tank Police]]'') and is a direct sequel to ''[[Ghost in the Shell Stand Alone Complex]]''. The series consists of three groups of episodes; "Individual" (IN) episodes which cover the Individual Eleven storyline, "Dividual" (DI) episodes that have independent storylines, and "Dual" (DU) episodes that cover the Cabinet Intelligence Service & Gouda storyline. In 2007, the "Individual" episodes were recut into a single film called ''Ghost in the Shell Stand Alone Complex 2nd Gig - Individual Eleven''. | ''Ghost in the Shell Stand Alone Complex 2nd Gig'' is a 26 episode anime series based on the manga of the same name by Masamune Shirow (''[[Appleseed]]'', ''[[New Dominion Tank Police]]'') and is a direct sequel to ''[[Ghost in the Shell Stand Alone Complex]]''. The series consists of three groups of episodes; "Individual" (IN) episodes which cover the Individual Eleven storyline, "Dividual" (DI) episodes that have independent storylines, and "Dual" (DU) episodes that cover the Cabinet Intelligence Service & Gouda storyline. In 2007, the "Individual" episodes were recut into a single film called ''Ghost in the Shell Stand Alone Complex 2nd Gig - Individual Eleven''. | ||
| Line 6: | Line 6: | ||
PLEASE NOTE: Although the title is commonly given a colon and Gig represented in uppercase ("2nd GIG"), the correct title of this series is "Ghost in the Shell Stand Alone Complex 2nd Gig", ''without a colon and with only initial capitals''. Please correct any links that appear incorrectly. | PLEASE NOTE: Although the title is commonly given a colon and Gig represented in uppercase ("2nd GIG"), the correct title of this series is "Ghost in the Shell Stand Alone Complex 2nd Gig", ''without a colon and with only initial capitals''. Please correct any links that appear incorrectly. | ||
| − | {{Anime Title | + | {{Anime Title}} |
__TOC__<br clear=all> | __TOC__<br clear=all> | ||
| − | = | + | =Pistols= |
==Seburo M5== | ==Seburo M5== | ||
| − | As with ''Stand Alone Complex'', Section 9's standard sidearm is the fictitious Seburo M5, a compact semiautomatic SA/DA concealed-carry handgun that uses a locked-breech operating via a rotating barrel (a system similar to the [[Beretta Cougar]]). It | + | As with ''Stand Alone Complex'', Section 9's standard sidearm is the fictitious Seburo M5, a compact semiautomatic SA/DA concealed-carry handgun that uses a locked-breech operating via a rotating barrel (a system similar to the [[Beretta Cougar]]). It's chambered for 5.45x18mm rounds, and feeds from a double-stack magazine with a total capacity of 19+1 rounds. |
| − | [[Image:Seburom5l.jpg|thumb|none|400px|Seburo M5 | + | |
| + | However, a lawyer in episode 10 claims that the M5 holds 21 5.7mm rounds, conflicting with the official specs on the M5 (of course there's always the possibility that the lawyer was just mistaken the specs with those of the [[FN Five-seveN]].) | ||
| + | |||
| + | [[Image:Seburom5l.jpg|thumb|none|400px|Poseidon model replica of the Seburo M5.]] | ||
[[Image:GITSSAC2NDGIGM51.jpg|thumb|none|500px|Kusanagi fires her Seburo M5 at Hideo Kuze.]] | [[Image:GITSSAC2NDGIGM51.jpg|thumb|none|500px|Kusanagi fires her Seburo M5 at Hideo Kuze.]] | ||
[[Image:GITSSAC2NDGIGM52.jpg|thumb|none|500px|Kusanagi with her Seburo M5.]] | [[Image:GITSSAC2NDGIGM52.jpg|thumb|none|500px|Kusanagi with her Seburo M5.]] | ||
[[Image:GITSSAC2NDGIGM53.jpg|thumb|none|500px|A cyborg Triad guard gets an eyeful of Kusanagi's M5.]] | [[Image:GITSSAC2NDGIGM53.jpg|thumb|none|500px|A cyborg Triad guard gets an eyeful of Kusanagi's M5.]] | ||
| − | |||
| − | |||
| − | |||
| − | |||
| − | |||
| − | |||
| − | |||
| − | |||
| − | |||
==FN Browning BDA M-7== | ==FN Browning BDA M-7== | ||
| Line 57: | Line 51: | ||
==.22 Pocket Pistol== | ==.22 Pocket Pistol== | ||
The .22 caliber pocket pistol used by Marshall MacLachlan in ''Stand Alone Complex'' makes a return in episode 2 in Gino's gun collection. The design is fictitious, but draws heavily from the [[Beretta 3032 Tomcat]]. | The .22 caliber pocket pistol used by Marshall MacLachlan in ''Stand Alone Complex'' makes a return in episode 2 in Gino's gun collection. The design is fictitious, but draws heavily from the [[Beretta 3032 Tomcat]]. | ||
| − | [[ | + | [[File:GITS SAC pocket pistol.jpg|thumb|none|400px|An excerpt from the official S.A.C. artbook where Sinobu Tsuneki (the Mechanical Designer for S.A.C.) details MacLachlan's pistol]] |
[[Image:556g1.jpg|thumb|500px|none|The .22 pistol can be seen in the holster in the middle.]] | [[Image:556g1.jpg|thumb|500px|none|The .22 pistol can be seen in the holster in the middle.]] | ||
| Line 66: | Line 60: | ||
[[Image:GITSSAC2NDGIGDerringer2.jpg|none|thumb|500px|A closeup of the derringer and Cash Eye's business card.]] | [[Image:GITSSAC2NDGIGDerringer2.jpg|none|thumb|500px|A closeup of the derringer and Cash Eye's business card.]] | ||
| − | == | + | ==Heckler & Koch Mark 23== |
| − | The | + | The Section 1 agents seen in episode 8 carry a pair of [[Heckler & Koch Mark 23]]s equipped with sound suppressors, according to the 2nd GIG Visual Book lineart. |
| + | [[File:Mk 23 Phase 2 OHWS.jpg|thumb|400px|none|Heckler & Koch Mk 23 Mod 0 Phase II Prototype - .45 ACP]] | ||
| + | [[File:GITS 2G S1 pistol.jpg|thumb|none|500px|Official lineart of the suppressed HK Mark 23 with brass catchers attached from the Ghost in the Shell: Stand Alone Complex 2nd GIG Visual Book.]] | ||
[[Image:GITSSAC2NDGIGSDPistol1.jpg|none|thumb|500px|S1 agents fire their suppressed pistols.]] | [[Image:GITSSAC2NDGIGSDPistol1.jpg|none|thumb|500px|S1 agents fire their suppressed pistols.]] | ||
| − | == | + | ==Izumi's hybrid pistol== |
| − | + | Izumi in episode 10 uses a pistol that's a cross between a Beretta 92F and a CZ 75 outfitted with a beaver-tail tang, custom grips, ring hammer, a compensator and a laser sight. | |
| − | [[ | + | [[File:GITS 2G Izumi pistol.jpg|thumb|none|500px|Official lineart of Izumi's hybrid pistol from the Ghost in the Shell: Stand Alone Complex 2nd GIG Visual Book.]] |
[[Image:GITSSAC1911laser1.jpg|thumb|none|500px|Laser sight.]] | [[Image:GITSSAC1911laser1.jpg|thumb|none|500px|Laser sight.]] | ||
[[Image:GITSSAC1911laser2.jpg|thumb|none|500px|Close up of the pistol's hammer and slide.]] | [[Image:GITSSAC1911laser2.jpg|thumb|none|500px|Close up of the pistol's hammer and slide.]] | ||
| − | [[Image:GITSSAC1911laser3.jpg|thumb|none|500px|The pistol held by | + | [[Image:GITSSAC1911laser3.jpg|thumb|none|500px|The pistol held by Izumi.]] |
=="First Model" CZ 75== | =="First Model" CZ 75== | ||
| Line 88: | Line 84: | ||
[[File:C96carbine.jpg|thumb|none|400px|C96 carbine - 7.63x25mm.]] | [[File:C96carbine.jpg|thumb|none|400px|C96 carbine - 7.63x25mm.]] | ||
[[Image:GITSSAC2NDGIGC961.jpg|thumb|none|500px|The refugee fires her C96 carbine (second from right)]] | [[Image:GITSSAC2NDGIGC961.jpg|thumb|none|500px|The refugee fires her C96 carbine (second from right)]] | ||
| − | |||
| − | |||
| − | |||
| − | |||
| − | |||
| − | |||
==Beretta 92FS Compact== | ==Beretta 92FS Compact== | ||
| Line 106: | Line 96: | ||
[[Image:P229.jpg|thumb|none|400px|SIG-Sauer P229 w/ crimson trace grips - .357 SIG]] | [[Image:P229.jpg|thumb|none|400px|SIG-Sauer P229 w/ crimson trace grips - .357 SIG]] | ||
[[Image:GITSSAC2NDGIGSIG1.jpg|thumb|none|500px|The P229 aimed at Ishikawa after he gets out of the hospital.]] | [[Image:GITSSAC2NDGIGSIG1.jpg|thumb|none|500px|The P229 aimed at Ishikawa after he gets out of the hospital.]] | ||
| + | |||
| + | =Revolvers= | ||
| + | |||
| + | ==Mateba 2008M== | ||
| + | Togusa still carries his Mateba 2008M from ''Stand Alone Complex''. The 2008M is a fictional variant of the [[Mateba Autorevolver]], and features the frame design of a Mateba Model 6 Unica and the barrel assembly of the [[Mateba 2006M]]. The Mateba is a semiautomatic revolver with uses the recoil of firing to revolve the cylinder and cock the hammer. Togusa's weapon is chambered in .357 Magnum (Kusanagi refers to it as a 9mm, which is technically correct as the bullet diameter on a .357 is 9 millimeters). In a memorable scene in episode 10, a lawyer is seen presenting another Mateba as evidence. Save for the synthetic grips the Mateba used in the trial is identical to Togusa's. Togusa can also be seen firing the Mateba during the opening credits sequence. | ||
| + | [[Image:Pistol Italian Mateba Unica in .44 Rem. Mag. with muzzle break.jpg|thumb|none|400px|Mateba Model 6 Unica - .44 Remington Magnum]] | ||
| + | [[Image:Mateba 2006.jpg|thumb|none|400px|Mateba 2006M]] | ||
| + | [[File:GITS SAC M-2008.jpg|thumb|none|400px|Official lineart of the Mateba M2008 from the Official Log #1.]] | ||
| + | [[File:Mateba M2008.jpg|thumb|none|400px|Poseidon model replica of the Mateba 2008M from ''[[Ghost in the Shell Stand Alone Complex]]''.]] | ||
| + | [[File:GITS SAC 2G OP 01.jpg|thumb|none|600px|Togusa fires his Mateba M2008 twice in the OP sequence, "Rise".]] | ||
| + | [[Image:GITSSAC2NDGIG2008M.jpg|thumb|none|500px|Togusa draws his 2008M.]] | ||
| + | [[Image:GITSSAC2NDGIG2008M1.jpg|thumb|none|500px|Togusa aims his 2008M at a suicide bomber.]] | ||
| + | [[Image:GITSSAC2NDGIG2008M2.jpg|thumb|none|500px|Togusa reloads his Mateba with a speed-loader. Note that in this scene, the cylinder lacks recessed chambers, as the rims of the cartridges visibly "stick out" past the back of the cylinder. But in scenes where the gun is seen from the side, the back of the cylinder is flush with the frame, and no rims are visible, which is only possible if the gun has recessed chambers. The real Mateba 6 Unica has recessed chambers, while the real Mateba 2006M does not.]] | ||
| + | [[Image:GITSSAC2NDGIG2008M3.jpg|thumb|none|500px|'''Lawyer:''''' "See this? Can you tell the courtroom what it is, Mr. Togusa?"'' <br>'''Togusa:''' ''"Yes, it's a gun. A revolver of the same make and model that I use while I'm on duty."'' <br>'''Lawyer:''''' "That's correct. This is a replica of a Mateba Firearms Autorevolver."'']] | ||
| + | |||
| + | ==Smith & Wesson Model 37 Airweight== | ||
| + | In episode 24, it is revealed that Aramaki carries a nickel [[Smith & Wesson Model 37 Airweight]] in an ankle holster, which he gives to Togusa after his weapon is confiscated. | ||
| + | [[Image:SWM37.jpg|thumb|none|400px|Smith & Wesson Model 37 .38 Special]] | ||
| + | [[Image:GITSSAC2NDGIGSW371.jpg|thumb|none|500px|Aramaki reveals the Model 37 in his ankle holster.]] | ||
| + | [[Image:GITSSAC2NDGIGSW372.jpg|thumb|none|500px|Togusa checks the cylinder on the Model 37.]] | ||
=Submachine Guns= | =Submachine Guns= | ||
| − | == | + | ==Sa vz. 61 Skorpion== |
| − | Several of the "Individual Eleven" who infiltrate the Chinese embassy in the first episode are armed with [[ | + | Several of the "Individual Eleven" who infiltrate the Chinese embassy in the first episode are armed with [[Sa vz. 61 Skorpion]]s. During the Dejima uprising, several refugees are seen with vz. 61s as well. |
| − | [[Image:CZ Vz.61.jpg|thumb|none|400px| | + | [[Image:CZ Vz.61.jpg|thumb|none|400px|Sa vz. 61 Skorpion - .32 ACP]] |
[[Image:556skor.jpg|thumb|none|500px|The terrorist covers an elevator with his Skorpion.]] | [[Image:556skor.jpg|thumb|none|500px|The terrorist covers an elevator with his Skorpion.]] | ||
| − | [[Image:GITSSAC2NDGIGVZ611.jpg|thumb|none|500px|A group of armed Dejima refugees. The man in the center is armed with a | + | [[Image:GITSSAC2NDGIGVZ611.jpg|thumb|none|500px|A group of armed Dejima refugees. The man in the center is armed with a vz. 61.]] |
==Heckler & Koch MP7== | ==Heckler & Koch MP7== | ||
| Line 144: | Line 154: | ||
==Police Bullpup Submachine Gun== | ==Police Bullpup Submachine Gun== | ||
| − | The fictional submachine gun used by the Metropolitan Police SWAT team in ''Stand Alone Complex'' is carried over into ''2nd Gig''. It bears a striking aesthetic resemblance to the [[Enfield L85 rifle series]], but differs in almost every detail upon closer examination (the MP5 style iron sight, for example). Chambered with 9x19mm rounds. | + | The fictional submachine gun used by the Metropolitan Police SWAT team in ''Stand Alone Complex'' is carried over into ''2nd Gig''. It bears a striking aesthetic resemblance to the [[Enfield L85 rifle series]], but differs in almost every detail upon closer examination (the MP5 style iron sight, for example). Chambered with 9x19mm rounds. |
| + | |||
| + | Pazu is seen with the weapon in the OP sequence, "Rise". | ||
| + | |||
| + | [[File:GITS SAC 2G SWAT rifle.jpg|thumb|none|500px|Official lineart of the Police SMG from the Ghost in the Shell: 2nd GIG Visual Book.]] | ||
| + | [[File:GITS SAC 2G OP 00.jpg|thumb|none|600px|Pazu takes cover behind a car in the OP sequenec, "Rise".]] | ||
[[Image:GITSSAC2NDGIGPoliceRifle1.jpg|thumb|none|500px|A squad of SWAT officers armed with the fictional bullpup submachine gun stack up inside a stairway.]] | [[Image:GITSSAC2NDGIGPoliceRifle1.jpg|thumb|none|500px|A squad of SWAT officers armed with the fictional bullpup submachine gun stack up inside a stairway.]] | ||
[[Image:GITSSAC2NDGIGPoliceRifle2.jpg|thumb|none|500px|SWAT officers corner a terrorist with a hostage.]] | [[Image:GITSSAC2NDGIGPoliceRifle2.jpg|thumb|none|500px|SWAT officers corner a terrorist with a hostage.]] | ||
| + | |||
| + | ==AE CIA SMG briefcase== | ||
| + | Near the end of 2nd GIG, American Empire CIA agents helping Goda leave Niihama were equipped with briefcases that have built-in submachine guns. | ||
| + | |||
| + | [[File:GITS 2G CIA suitcase SMG.jpg|thumb|none|500px|Official lineart of the briefcase SMG from the Ghost in the Shell: Stand Alone Complex 2nd GIG Visual Book.]] | ||
=Assault Rifles= | =Assault Rifles= | ||
| Line 152: | Line 172: | ||
As with ''Stand Alone Complex'', the primary weapon for Section 9 operatives is the fictional Seburo C26A assault rifle. The C26A uses a crooked 50 round box magazine that feeds 5.45x45mm rounds in a bullpup pattern, entering the gun at 45 degrees from the bore and slanting to lie parallel to the barrel, locking into the front grip. Fired cartridge cases eject into a permanently mounted brass catcher mounted on top of the gun. Its ergonomics are similar to the [[FN F2000]], with the trigger protected by a large loop that serves as a grip for the off hand. It is occasionally seen with a two-stage silencer attachment. ''2nd GIG'' also grants a look at a previously unseen feature of the C26A; a laser sight built into the body just above the muzzle. | As with ''Stand Alone Complex'', the primary weapon for Section 9 operatives is the fictional Seburo C26A assault rifle. The C26A uses a crooked 50 round box magazine that feeds 5.45x45mm rounds in a bullpup pattern, entering the gun at 45 degrees from the bore and slanting to lie parallel to the barrel, locking into the front grip. Fired cartridge cases eject into a permanently mounted brass catcher mounted on top of the gun. Its ergonomics are similar to the [[FN F2000]], with the trigger protected by a large loop that serves as a grip for the off hand. It is occasionally seen with a two-stage silencer attachment. ''2nd GIG'' also grants a look at a previously unseen feature of the C26A; a laser sight built into the body just above the muzzle. | ||
[[Image:Seburoc26a.jpg|thumb|none|400px|Seburo C26A - 5.45x45mm]] | [[Image:Seburoc26a.jpg|thumb|none|400px|Seburo C26A - 5.45x45mm]] | ||
| + | [[File:GITS SAC Seburo C-26A rifle.jpg|thumb|none|400px|Official lineart of the Seburo C26A from the Official Log #1.]] | ||
| + | [[File:GITS SAC 2G OP 00.jpg|thumb|none|600px|Batou opens fire with the C26A in the OP sequenec, "Rise".]] | ||
[[Image:GITS2NDGIGC261.jpg|thumb|none|500px|Pazu readies his C26A before an operation.]] | [[Image:GITS2NDGIGC261.jpg|thumb|none|500px|Pazu readies his C26A before an operation.]] | ||
[[Image:GITS2NDGIGC262.jpg|thumb|none|500px|Major Kusanagi loads a fresh magazine into her C26A.]] | [[Image:GITS2NDGIGC262.jpg|thumb|none|500px|Major Kusanagi loads a fresh magazine into her C26A.]] | ||
| Line 161: | Line 183: | ||
The Seburo C30, a variant of the C26A designed for overtly offensive missions, makes a return, this time in the hands of the Section 4 operators sent to apprehend the Section 9 members in Dejima. The C30 is built around a C26A receiver and features an added optical sight as well as a jacket with a brass catcher. Unlike the C30s seen in ''Stand Alone Complex'', these lack a grenade launcher or an extended barrel. | The Seburo C30, a variant of the C26A designed for overtly offensive missions, makes a return, this time in the hands of the Section 4 operators sent to apprehend the Section 9 members in Dejima. The C30 is built around a C26A receiver and features an added optical sight as well as a jacket with a brass catcher. Unlike the C30s seen in ''Stand Alone Complex'', these lack a grenade launcher or an extended barrel. | ||
| − | [[ | + | [[File:GITS SAC Seburo C-30.jpg|thumb|none|500px|Official line of the Seburo C30 from the Ghost in the Shell: Stand Alone Complex Visual Book]] |
[[Image:GITSSAC2NDGIGC301.jpg|thumb|none|500px|The C30 in the hands of a S4 operator.]] | [[Image:GITSSAC2NDGIGC301.jpg|thumb|none|500px|The C30 in the hands of a S4 operator.]] | ||
[[Image:GITSSAC2NDGIGC302.jpg|thumb|none|500px|Another shot of the C30.]] | [[Image:GITSSAC2NDGIGC302.jpg|thumb|none|500px|Another shot of the C30.]] | ||
| Line 173: | Line 195: | ||
==Conglomeration Rifle== | ==Conglomeration Rifle== | ||
| − | The soldiers in the Ground Self Defense Army (GSDA) are seen using this fictional rifle. This weapon draws several features from other weapons, primarily the [[Howa Type 89]] and [[M16 rifle series]]. | + | The soldiers in the Ground Self Defense Army (GSDA) or JGSDF (according to Japanese dialog) are seen using this fictional rifle. This weapon draws several features from other weapons, primarily the [[Howa Type 89]] and [[M16 rifle series]]. |
| + | |||
| + | [[File:GITS 2G JGSDF rifle.jpg|thumb|none|500px|Official lineart of the hybrid JGSDF assault rifle from the Ghost in the Shell: Stand Alone Complex 2nd GIG Visual Book.]] | ||
| + | [[File:GITS SAC 2G OP 05.jpg|thumb|none|600px|Armed JGSDF soldiers march on a Niihama expressway in the OP sequence, "Rise".]] | ||
[[Image:GITSSAC2NDGIGMixedRifle1.jpg|thumb|none|500px|Several soldiers with their unnamed rifles in episode 4.]] | [[Image:GITSSAC2NDGIGMixedRifle1.jpg|thumb|none|500px|Several soldiers with their unnamed rifles in episode 4.]] | ||
[[Image:Snapshot20101017010226.jpg|thumb|none|500px|Several GSDA soldiers guard an excavated power plant in episode 6.]] | [[Image:Snapshot20101017010226.jpg|thumb|none|500px|Several GSDA soldiers guard an excavated power plant in episode 6.]] | ||
| Line 210: | Line 235: | ||
Members of the JGSDF are shown using a futurized [[Howa Type 89|Howa Type 89-F]] rifles outfitted with underbarrel [[M203 grenade launcher|M203 grenade launchers]]. The Type 89s all have barrels and handguards that are shorter than current variants, and the number of air vents on the handguard has been reduced to two on each side. In addition to these modifications, each rifle is outfitted with an electronic sight interface designed to connect directly to the soldier's cyberbrain. | Members of the JGSDF are shown using a futurized [[Howa Type 89|Howa Type 89-F]] rifles outfitted with underbarrel [[M203 grenade launcher|M203 grenade launchers]]. The Type 89s all have barrels and handguards that are shorter than current variants, and the number of air vents on the handguard has been reduced to two on each side. In addition to these modifications, each rifle is outfitted with an electronic sight interface designed to connect directly to the soldier's cyberbrain. | ||
| − | [[File:Howa Type 89 | + | [[File:Howa Type 89-F with M203 UBGL.jpg|thumb|500px|none|Howa Type 89-F with M203 grenade launcher - 5.56x45mm.]] |
| − | |||
[[Image:Sac2t8.jpg|thumb|500px|none|Ishikawa with a futurized Type 89-F during a flashback]] | [[Image:Sac2t8.jpg|thumb|500px|none|Ishikawa with a futurized Type 89-F during a flashback]] | ||
[[Image:Sac2type89.jpg|thumb|500px|none|Another shot of the Type 89-F. This one has a red dot scope on its upper receiver.]] | [[Image:Sac2type89.jpg|thumb|500px|none|Another shot of the Type 89-F. This one has a red dot scope on its upper receiver.]] | ||
| Line 221: | Line 245: | ||
[[Image:ColtM4commando.jpg|thumb|none|400px|Colt Model 933 - 5.56x45mm.]] | [[Image:ColtM4commando.jpg|thumb|none|400px|Colt Model 933 - 5.56x45mm.]] | ||
[[Image:M203.jpg|thumb|none|400px|M203 grenade launcher - 40mm]] | [[Image:M203.jpg|thumb|none|400px|M203 grenade launcher - 40mm]] | ||
| − | [[Image:GITSSAC2NDGIGAR1.jpg|thumb|500px|none|A pair of | + | [[Image:GITSSAC2NDGIGAR1.jpg|thumb|500px|none|A pair of AE soldiers with their Colt Model 933s.]] |
| − | [[Image:GITSSAC2NDGIGAR2.jpg|thumb|500px|none|An | + | [[Image:GITSSAC2NDGIGAR2.jpg|thumb|500px|none|An AE soldier peeks over a barricade, giving the audience a better view of the front end of his rifle.]] |
| − | [[Image:Sac2M4.jpg|thumb|500px|none|An | + | [[Image:Sac2M4.jpg|thumb|500px|none|An AE soldier fires his Model 933]] |
==Futurized L85A2 with M203== | ==Futurized L85A2 with M203== | ||
| Line 236: | Line 260: | ||
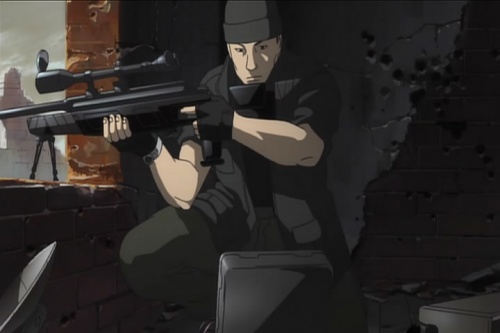
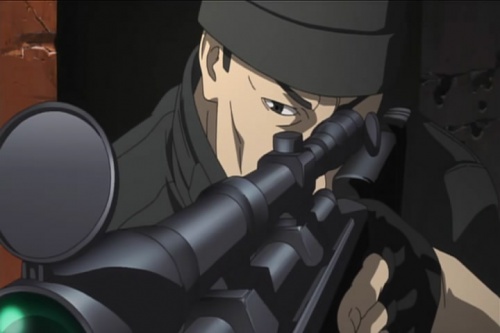
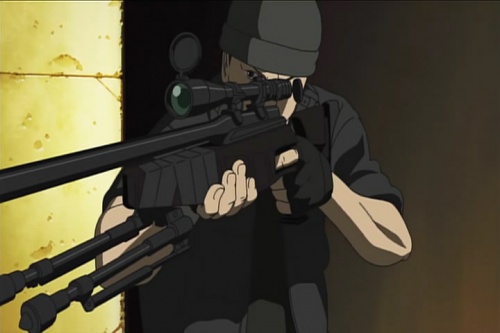
During the flashback story in episode 14, Saito's rifle during the 2020 Mexico engagement is a [[Blaser 93 sniper rifle|Blaser R93 LRS2]]. It is notable that he alone in this episode uses an "old-fashioned" purely optical sighting system on his rifle. He also appears to have used tape to affix a Harris bipod to the front of the stock. | During the flashback story in episode 14, Saito's rifle during the 2020 Mexico engagement is a [[Blaser 93 sniper rifle|Blaser R93 LRS2]]. It is notable that he alone in this episode uses an "old-fashioned" purely optical sighting system on his rifle. He also appears to have used tape to affix a Harris bipod to the front of the stock. | ||
[[Image:BlaserR93WithHarrisBipod.jpg|thumb|none|400px|Blaser R93 with Harris bipod .338 Lapua Magnum]] | [[Image:BlaserR93WithHarrisBipod.jpg|thumb|none|400px|Blaser R93 with Harris bipod .338 Lapua Magnum]] | ||
| + | [[File:GITS SAC 2G OP ALT 00.jpg|thumb|none|600px|Saito opens fire with the R93 in the alternate OP sequence, "Christmas in the Silent Forest", which was only available in Japan when it aired on Japanese TV stations.]] | ||
[[Image:Gitssac2sn.jpg|thumb|500px|none|Saito handling the Blaser R93.]] | [[Image:Gitssac2sn.jpg|thumb|500px|none|Saito handling the Blaser R93.]] | ||
[[Image:GITSSAC2NDGIGR931.jpg|thumb|500px|none|Aiming through the scope.]] | [[Image:GITSSAC2NDGIGR931.jpg|thumb|500px|none|Aiming through the scope.]] | ||
| Line 251: | Line 276: | ||
==Seburo Sniper Rifle== | ==Seburo Sniper Rifle== | ||
Saito's preferred bolt-action .50-caliber rifle from ''Stand Alone Complex'' makes a return for ''2nd Gig''. | Saito's preferred bolt-action .50-caliber rifle from ''Stand Alone Complex'' makes a return for ''2nd Gig''. | ||
| + | |||
| + | [[File:GITS Seburo SR.jpg|thumb|none|500px|Official lineart of Saito's sniper rifle from the Ghost in the Shell: Stand Alone Complex 2nd GIG Visual Book.]] | ||
| + | [[File:GITS SAC 2G OP 02.jpg|thumb|none|600px|Saito scopes a target with his personal sniper rifle in the OP sequence, "Rise".]] | ||
[[Image:GITSSAC2NDGIGSaitoSniper1.jpg|thumb|none|500px|Saito with his sniper rifle.]] | [[Image:GITSSAC2NDGIGSaitoSniper1.jpg|thumb|none|500px|Saito with his sniper rifle.]] | ||
==Anti-Armor Sniper Rifle== | ==Anti-Armor Sniper Rifle== | ||
Saito uses this massive rifle to disable a runaway attack helicopter in episode 4. | Saito uses this massive rifle to disable a runaway attack helicopter in episode 4. | ||
| + | |||
| + | [[File:GITS 2G AA SR.jpg|thumb|none|500px|Official lineart of the AASR used by Saito from the Ghost in the Shell: Stand Alone Complex 2nd GIG Visual Book.]] | ||
[[Image:GITSSAC2NDGIGBigRifle1.jpg|thumb|none|500px|Saito preps his rifle for firing.]] | [[Image:GITSSAC2NDGIGBigRifle1.jpg|thumb|none|500px|Saito preps his rifle for firing.]] | ||
[[Image:GITSSAC2NDGIGBigRifle2.jpg|thumb|none|500px|Saito zeros in on the helicopter. Note his shooting platform; a massive, invisible talking tank suspended 30 stories from the ground. Improvisation is key for Section 9.]] | [[Image:GITSSAC2NDGIGBigRifle2.jpg|thumb|none|500px|Saito zeros in on the helicopter. Note his shooting platform; a massive, invisible talking tank suspended 30 stories from the ground. Improvisation is key for Section 9.]] | ||
==Seburo Anti-Tank Rifle== | ==Seburo Anti-Tank Rifle== | ||
| − | First seen in the second episode of ''Stand Alone Complex'', Saito's 20mm anti- | + | First seen in the second episode of ''Stand Alone Complex'', Saito's 20mm anti-materiel rifle makes a reappearance in during the flashback to the 2020 Mexican War. This rifle is fictitious, but draws upon several real-world designs, primarily the [[Mechem NTW-20]] and the [[Lahti L-39]]. Saito loads it with a single round and uses a remote trigger mechanism to blow up a car and cause a diversion so that he can attack from another angle. |
| + | [[File:GITS 2G Saito SR Mexico.jpg|thumb|none|500px|Official lineart of the ATR from the Ghost in the Shell: Stand Alone Complex 2nd GIG Visual Book.]] | ||
[[Image:GITSSAC2NDGIG20MM1.jpg|thumb|none|500px|The unmanned Seburo anti-tank rifle.]] | [[Image:GITSSAC2NDGIG20MM1.jpg|thumb|none|500px|The unmanned Seburo anti-tank rifle.]] | ||
[[Image:Sac220mm.jpg|thumb|500px|none|Another shot of the weapon.]] | [[Image:Sac220mm.jpg|thumb|500px|none|Another shot of the weapon.]] | ||
| Line 275: | Line 306: | ||
The Jigabachi attack helicopters are armed with [[M61 Vulcan]] cannons. The gun is mounted on a pod at the rear of the aircraft that swings down like a wasps' stinger, hence the name "Jigabachi" (the Japanese name for the Sand Wasp). | The Jigabachi attack helicopters are armed with [[M61 Vulcan]] cannons. The gun is mounted on a pod at the rear of the aircraft that swings down like a wasps' stinger, hence the name "Jigabachi" (the Japanese name for the Sand Wasp). | ||
[[Image:M61vulcan.jpg|thumb|none|400px|M61 Vulcan 20mm]] | [[Image:M61vulcan.jpg|thumb|none|400px|M61 Vulcan 20mm]] | ||
| + | [[File:GITS SAC 2G OP 03.jpg|thumb|none|600px|The Jigabachi gunships fly by over Niihama in the OP sequence, "Rise".]] | ||
[[Image:GITSSAC2NDGIGM1341.jpg|thumb|none|500px|A Jigabachi helicopter opens up with its Vulcan.]] | [[Image:GITSSAC2NDGIGM1341.jpg|thumb|none|500px|A Jigabachi helicopter opens up with its Vulcan.]] | ||
| Line 281: | Line 313: | ||
[[Image:Phalanx.jpg|thumb|none|300px|Phalanx CIWS 20mm]] | [[Image:Phalanx.jpg|thumb|none|300px|Phalanx CIWS 20mm]] | ||
| + | |||
| + | ==Tachikoma Claw Machine Gun== | ||
| + | The Tachikoma's claws are equipped with built-in machine gun when they encounter enemies in close quarters. | ||
| + | |||
| + | [[File:GITS SAC 2G OP 04.jpg|thumb|none|600px|A Tachikoma engages a JGSDF Type 1 Arm Suit in one of Niihama's many expressways in the OP sequence, "Rise".]] | ||
==Tachikoma's Shortened M134 Minigun== | ==Tachikoma's Shortened M134 Minigun== | ||
| Line 297: | Line 334: | ||
==General Dynamics GAU-19/A== | ==General Dynamics GAU-19/A== | ||
| − | The JGSDA | + | The JGSDA Arm Suits in episode 20 are equipped with [[General Dynamics GAU-19/A|GAU-19]] rotary guns. The forward barrel brace is circular as opposed to the GAU-19's typical triangular brace. An even shorter GAU-19 is seen mounted inside the claws of the HAW-206 tanks used by the JGSDA. |
[[Image:GAU19.jpg|thumb|none|400px|General Dynamics GAU-19/A - .50 BMG]] | [[Image:GAU19.jpg|thumb|none|400px|General Dynamics GAU-19/A - .50 BMG]] | ||
| + | [[File:GITS SAC 2G OP 06.jpg|thumb|none|600px|A JGSDF Arm Suit chaes after the Tachikomas in the OP sequence, "Rise".]] | ||
[[Image:GITSSAC2NDGIGGAU1.jpg|thumb|none|500px|A JGSDA power suit fires its GAU-19]] | [[Image:GITSSAC2NDGIGGAU1.jpg|thumb|none|500px|A JGSDA power suit fires its GAU-19]] | ||
| − | [[Image:GITSSAC2NDGIGGAU2.jpg|thumb|none|500px|A closeup of a combat suit's GAU-19]][[Image:GITSSAC2NDGIGGAU3.jpg|thumb|none|500px|A HAW-206 fires its GAU-19s]] | + | [[Image:GITSSAC2NDGIGGAU2.jpg|thumb|none|500px|A closeup of a combat suit's GAU-19]] |
| + | [[Image:GITSSAC2NDGIGGAU3.jpg|thumb|none|500px|A HAW-206 fires its GAU-19s]] | ||
==Futurized Type 98 Anti Aircraft Cannon== | ==Futurized Type 98 Anti Aircraft Cannon== | ||
| Line 309: | Line 348: | ||
[[Image:GITSSAC2NDGIGT993.jpg|thumb|none|500px|A refugee handles the Type 98.]] | [[Image:GITSSAC2NDGIGT993.jpg|thumb|none|500px|A refugee handles the Type 98.]] | ||
[[Image:GITSSAC2NDGIGT994.jpg|thumb|none|500px|The Type 98 prior to being fired.]] | [[Image:GITSSAC2NDGIGT994.jpg|thumb|none|500px|The Type 98 prior to being fired.]] | ||
| + | |||
| + | =Grenade Launchers= | ||
| + | |||
| + | ==Tachikoma Grenade Launcher== | ||
| + | The Tachikomas have a grenade launcher in their snout region. | ||
| + | |||
| + | [[File:GITS SAC 2G OP 07.jpg|thumb|none|600px|The Tachikomas fire their grenade launchers at the incoming JGSDF Type 1 Arm Suit in one of Niihama's many expressways in the OP sequence, "Rise".]] | ||
=Rocket Launchers= | =Rocket Launchers= | ||
| Line 322: | Line 368: | ||
Dejima Refugees use several [[FIM-92A Stinger]] missiles simultaneously to shoot down the JSDF AWACS plane above the island that is jamming communications. The use of several missiles at once overwhelms the anti-missile countermeasures, and the depiction of the explosion is accurate in that the warhead explodes short of the target, destroying it with projected shrapnel from the missile's HE-Frag warhead. | Dejima Refugees use several [[FIM-92A Stinger]] missiles simultaneously to shoot down the JSDF AWACS plane above the island that is jamming communications. The use of several missiles at once overwhelms the anti-missile countermeasures, and the depiction of the explosion is accurate in that the warhead explodes short of the target, destroying it with projected shrapnel from the missile's HE-Frag warhead. | ||
| − | [[ | + | [[File:FIM-92 Stinger.jpg|thumb|none|400px|FIM-92A Stinger 70mm]] |
[[Image:GITSSAC2NDGIGStinger1.jpg|thumb|none|500px|The Stinger as handled by Kuze.]] | [[Image:GITSSAC2NDGIGStinger1.jpg|thumb|none|500px|The Stinger as handled by Kuze.]] | ||
[[Image:GITSSAC2NDGIGStinger2.jpg|thumb|none|500px|A refugee prepares to fire the Stinger.]] | [[Image:GITSSAC2NDGIGStinger2.jpg|thumb|none|500px|A refugee prepares to fire the Stinger.]] | ||
==M141 SMAW-D== | ==M141 SMAW-D== | ||
| − | The weapon dealers in episode 7 also possess at least one [[Mk 153 | + | The weapon dealers in episode 7 also possess at least one [[Mk 153 SMAW#M141 SMAW-D|M141 SMAW-D]]. |
[[Image:Image004.jpg|thumb|none|400px|M141 SMAW-D launcher and HEDP rocket 83mm]] | [[Image:Image004.jpg|thumb|none|400px|M141 SMAW-D launcher and HEDP rocket 83mm]] | ||
Latest revision as of 17:15, 21 January 2024
Ghost in the Shell Stand Alone Complex 2nd Gig is a 26 episode anime series based on the manga of the same name by Masamune Shirow (Appleseed, New Dominion Tank Police) and is a direct sequel to Ghost in the Shell Stand Alone Complex. The series consists of three groups of episodes; "Individual" (IN) episodes which cover the Individual Eleven storyline, "Dividual" (DI) episodes that have independent storylines, and "Dual" (DU) episodes that cover the Cabinet Intelligence Service & Gouda storyline. In 2007, the "Individual" episodes were recut into a single film called Ghost in the Shell Stand Alone Complex 2nd Gig - Individual Eleven.
PLEASE NOTE: Although the title is commonly given a colon and Gig represented in uppercase ("2nd GIG"), the correct title of this series is "Ghost in the Shell Stand Alone Complex 2nd Gig", without a colon and with only initial capitals. Please correct any links that appear incorrectly.
The following weapons were used in the anime series Ghost in the Shell Stand Alone Complex 2nd Gig:
Pistols
Seburo M5
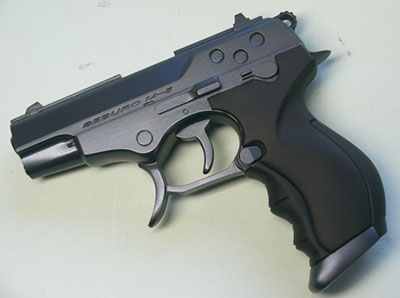
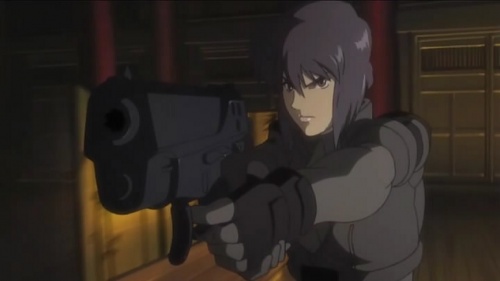
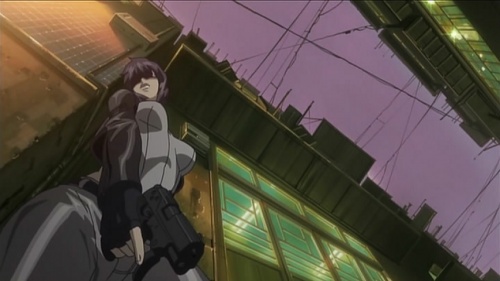
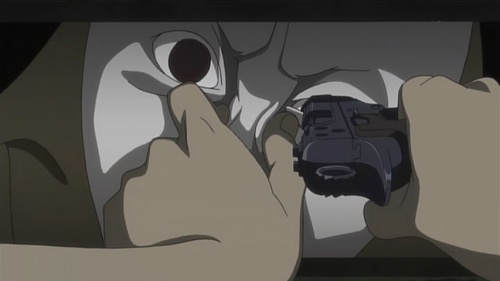
As with Stand Alone Complex, Section 9's standard sidearm is the fictitious Seburo M5, a compact semiautomatic SA/DA concealed-carry handgun that uses a locked-breech operating via a rotating barrel (a system similar to the Beretta Cougar). It's chambered for 5.45x18mm rounds, and feeds from a double-stack magazine with a total capacity of 19+1 rounds.
However, a lawyer in episode 10 claims that the M5 holds 21 5.7mm rounds, conflicting with the official specs on the M5 (of course there's always the possibility that the lawyer was just mistaken the specs with those of the FN Five-seveN.)
FN Browning BDA M-7
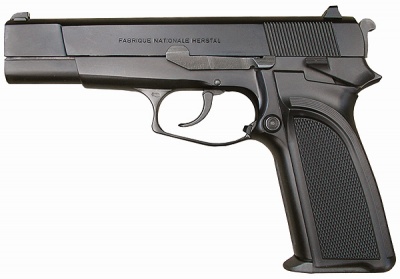
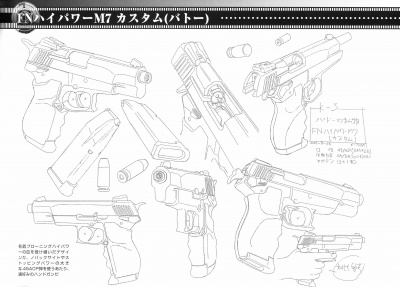
Batou still carries his M-7 from Stand Alone Complex. The M-7 is a fictional FN Browning BDA variant chambered for .45ACP. The M-7 is intended to be a future BDA variant (similar to Batou's Jericho 942 in the original Ghost in the Shell film). The most notable differences between the M-7 and the BDA is the M-7's shortened slide and barrel and the horned hammer.
Desert Eagle
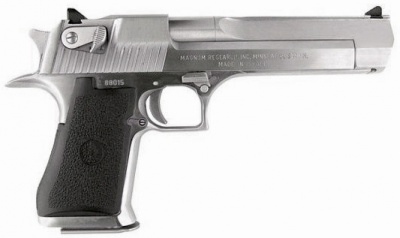
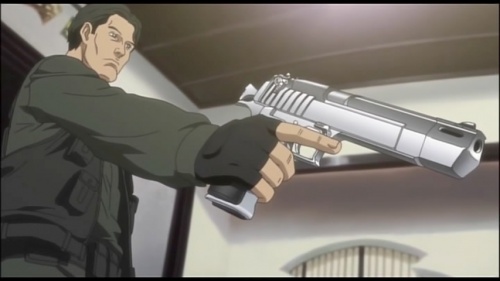
Gino, the immigrant Helicopter pilot who is the focus of episode 2, periodically carries and dreams about his nickel-plated, .44 caliber Desert Eagle MK VIII, which has been customized with a ported muzzle and enlarged hammer spur. On a side note, both the character Gino as well as the entire episode are a homage to Taxi Driver.
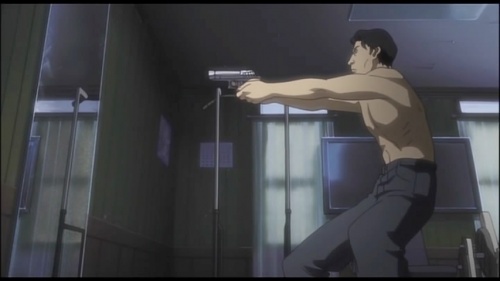
Tokarev TT-33
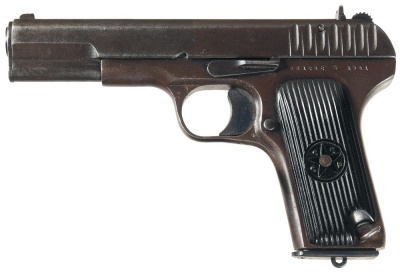
Several Tokarev TT-33 pistols are seen throughout the series, usually in the hands of criminals.
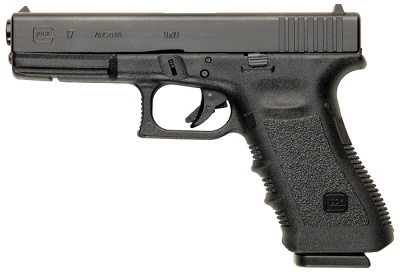
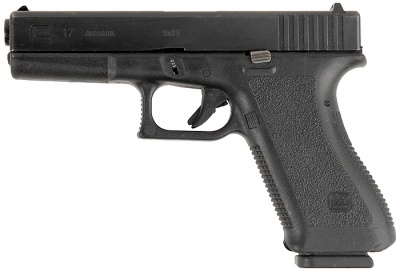
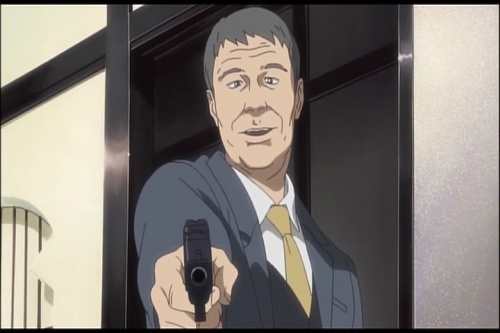
Glock 17
A 3rd generation Glock 17 can be seen in Gino's gun collection in episode 2. Another Glock 17 is seen in one of Gino's dreams, where it is used by the CEO that Gino fantasizes about killing. A 2nd generation Glock 17 is seen in episode 17 in the hands of the terrorist "Angel's Feathers".
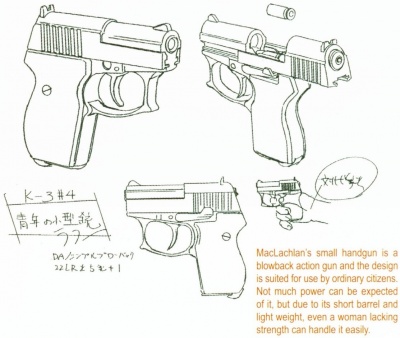
.22 Pocket Pistol
The .22 caliber pocket pistol used by Marshall MacLachlan in Stand Alone Complex makes a return in episode 2 in Gino's gun collection. The design is fictitious, but draws heavily from the Beretta 3032 Tomcat.
Derringer
Machine-fetishist executive Kazunoto carries a long-barreled, two-barreled O/U derringer-style pistol in episode 3. It is a fictional design that borrows heavily from the Bond Arms Derringer.
Heckler & Koch Mark 23
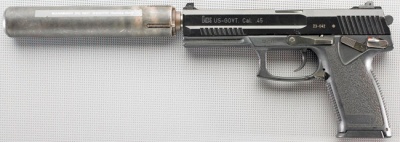
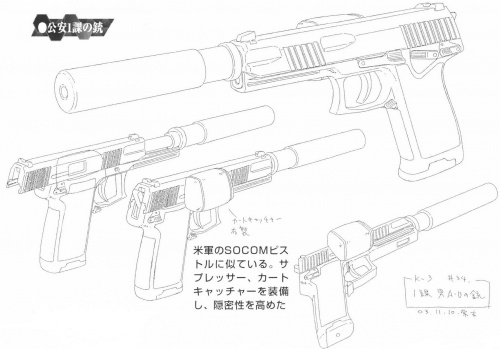
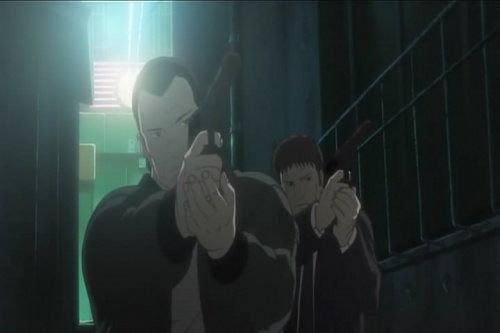
The Section 1 agents seen in episode 8 carry a pair of Heckler & Koch Mark 23s equipped with sound suppressors, according to the 2nd GIG Visual Book lineart.
Izumi's hybrid pistol
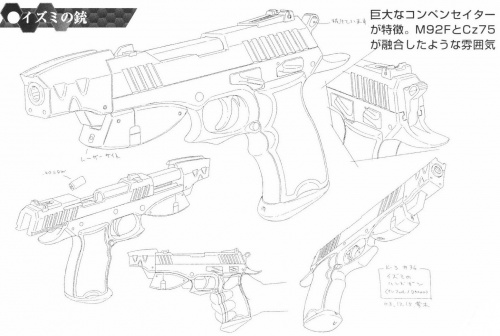
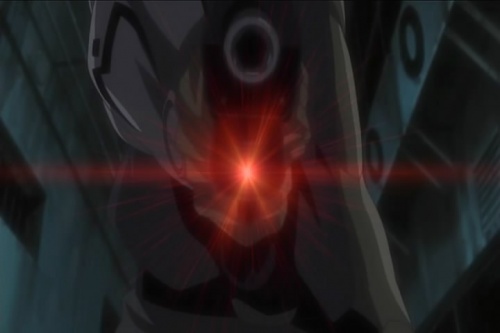
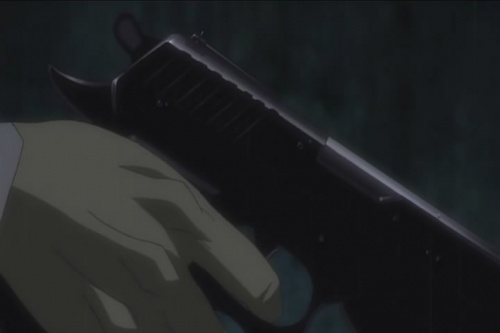
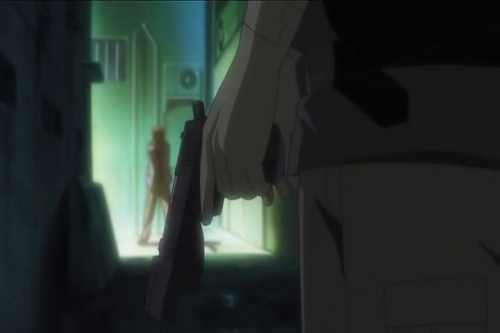
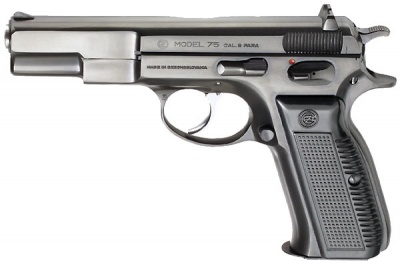
Izumi in episode 10 uses a pistol that's a cross between a Beretta 92F and a CZ 75 outfitted with a beaver-tail tang, custom grips, ring hammer, a compensator and a laser sight.
"First Model" CZ 75
During the flashback to the 2020 Mexican War in episode 14, Saito is seen carrying a "First Model" CZ 75.
Mauser C96 Carbine
A Single refugee on the Dejima Bridge barricade in episode 23 is seen using a Mauser C96 Carbine.
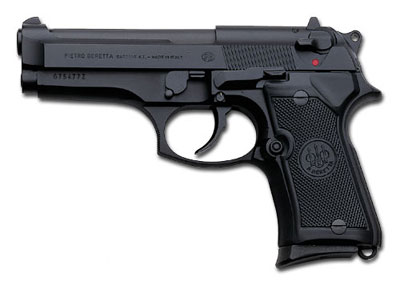
Beretta 92FS Compact
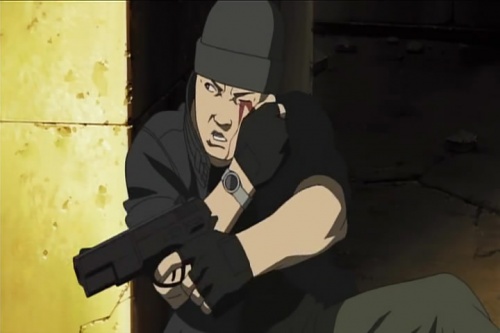
The agents tasked with detaining the Prime Minister near the end of the series all carry Beretta 92FS Compact pistols. In episode 25, Togusa manages to catch two of the agents by surprise and takes one of their weapons.
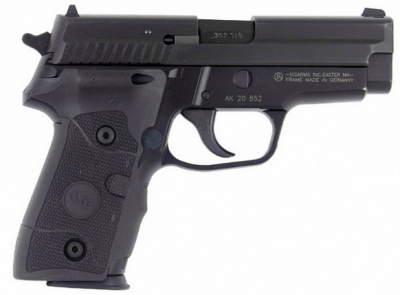
SIG-Sauer P229
Gouda's CIS agent crony who threatens Ishikawa in episode 26 carries a SIG-Sauer P229.
Revolvers
Mateba 2008M
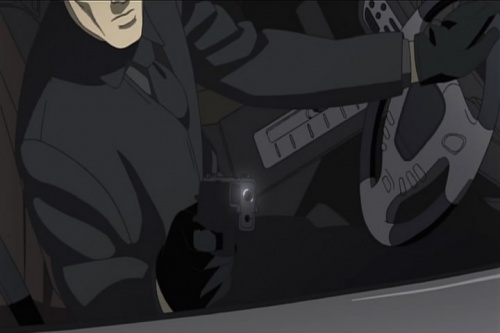
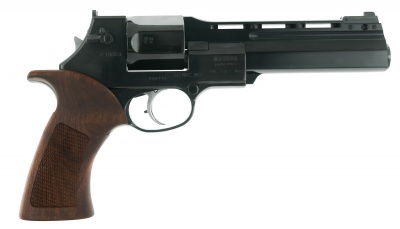
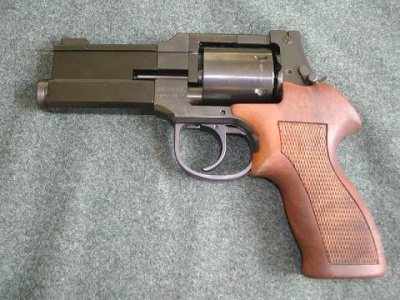
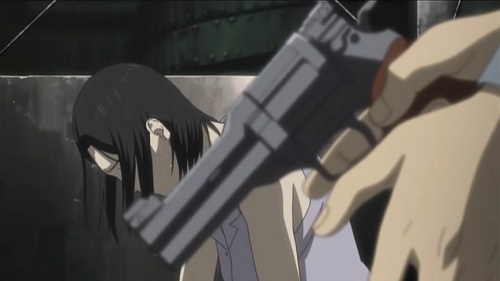
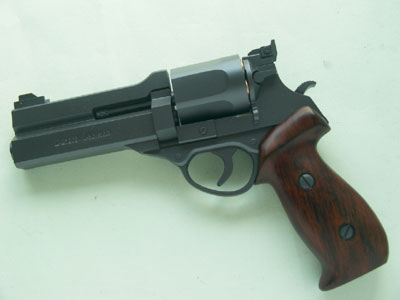
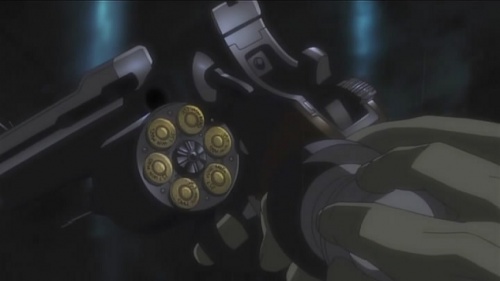
Togusa still carries his Mateba 2008M from Stand Alone Complex. The 2008M is a fictional variant of the Mateba Autorevolver, and features the frame design of a Mateba Model 6 Unica and the barrel assembly of the Mateba 2006M. The Mateba is a semiautomatic revolver with uses the recoil of firing to revolve the cylinder and cock the hammer. Togusa's weapon is chambered in .357 Magnum (Kusanagi refers to it as a 9mm, which is technically correct as the bullet diameter on a .357 is 9 millimeters). In a memorable scene in episode 10, a lawyer is seen presenting another Mateba as evidence. Save for the synthetic grips the Mateba used in the trial is identical to Togusa's. Togusa can also be seen firing the Mateba during the opening credits sequence.
Smith & Wesson Model 37 Airweight
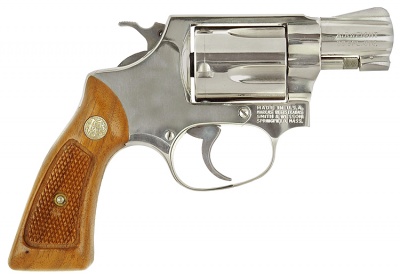
In episode 24, it is revealed that Aramaki carries a nickel Smith & Wesson Model 37 Airweight in an ankle holster, which he gives to Togusa after his weapon is confiscated.
Submachine Guns
Sa vz. 61 Skorpion
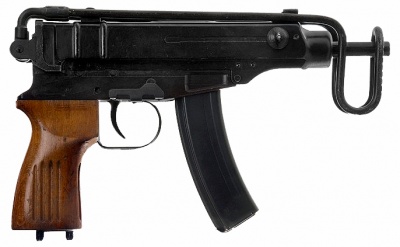
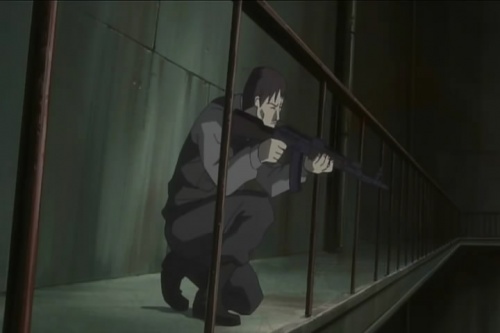
Several of the "Individual Eleven" who infiltrate the Chinese embassy in the first episode are armed with Sa vz. 61 Skorpions. During the Dejima uprising, several refugees are seen with vz. 61s as well.
Heckler & Koch MP7
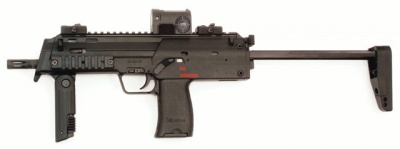
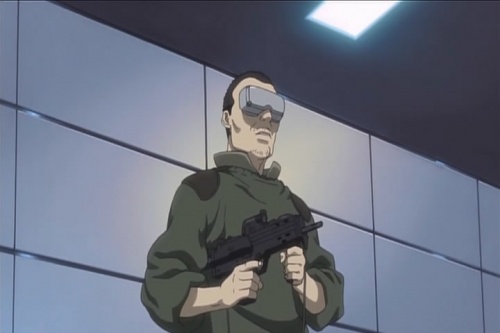
Others among the Chinese embassy invaders are armed with MP7s. The Japanese Coast Guardsmen in episode 7 were also seen using MP7s while making a sting aboard a refugee vessel.
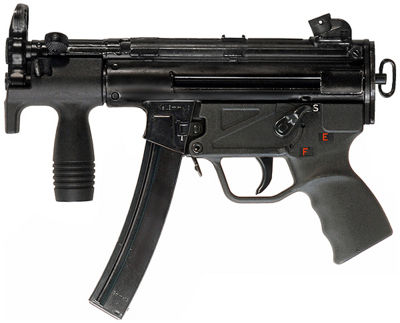
Heckler & Koch MP5K
A combat android used in a training exercise in episode 4 is seen using a Heckler & Koch MP5K.
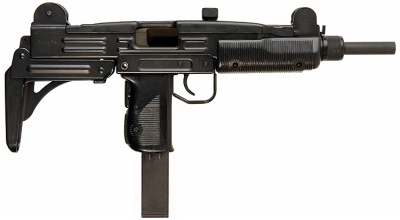
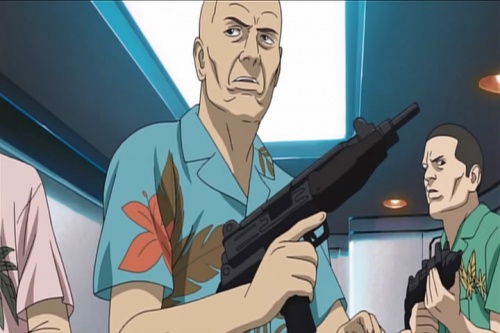
IMI Uzi
Several IMI Uzi submachine guns are seen throughout the series.
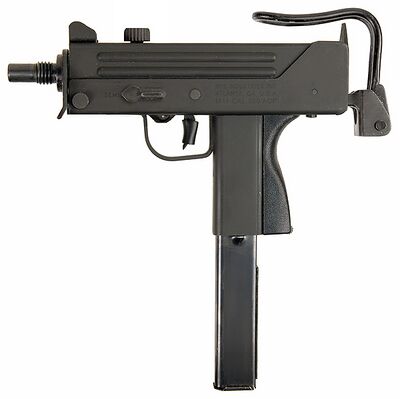
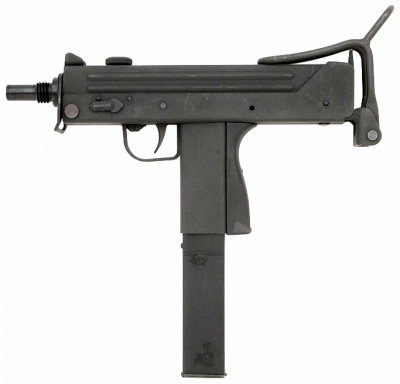
MAC-11
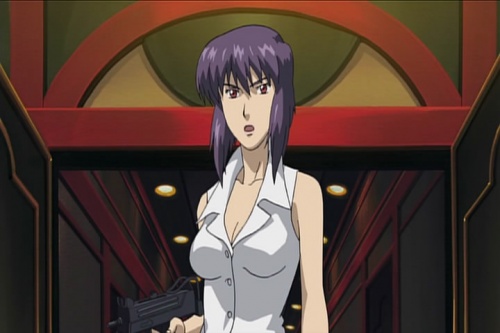
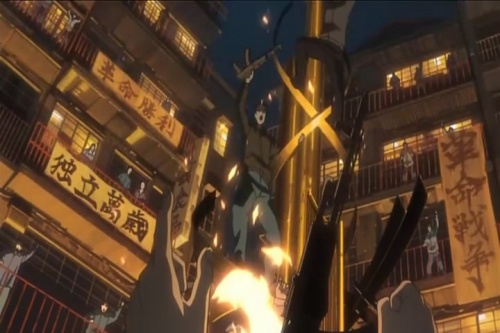
In episode 17, Kusanagi is threatened by a Triad member with a MAC-11. She quickly disarms him and takes the weapon for herself, dual-wielding it alongside her Seburo M5.
Cobray M11/9
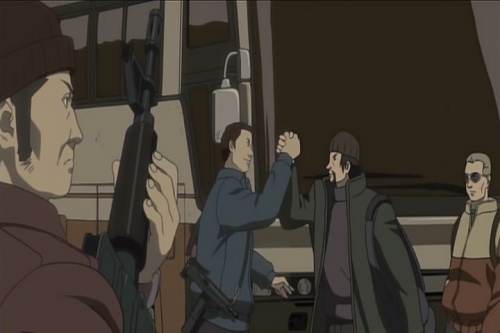
One of the Dejima refugees seen in episode 23 is armed with what appears to be a Cobray M11/9 with a folding stock.
Police Bullpup Submachine Gun
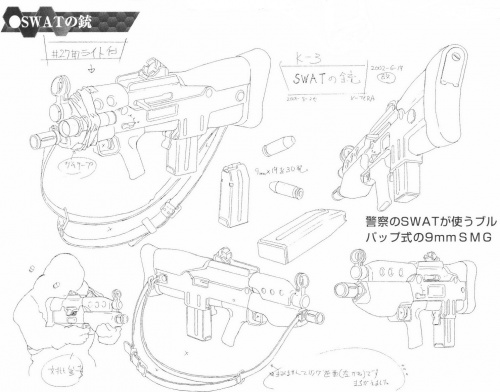
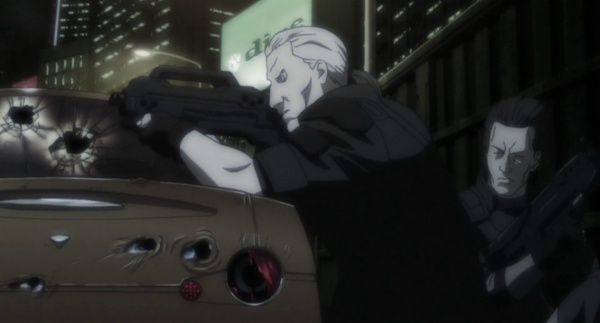
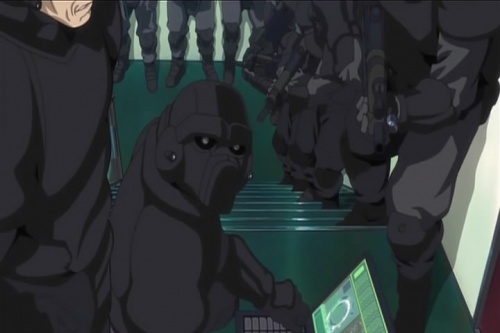
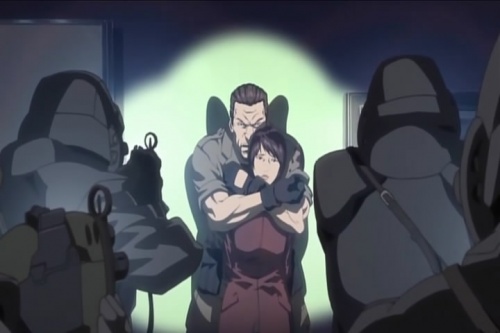
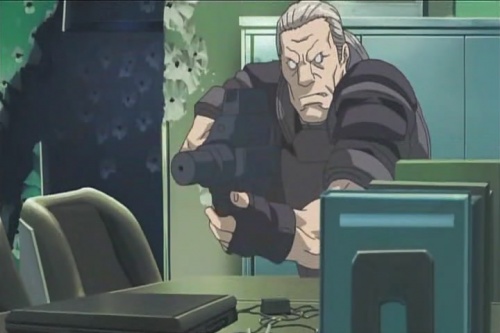
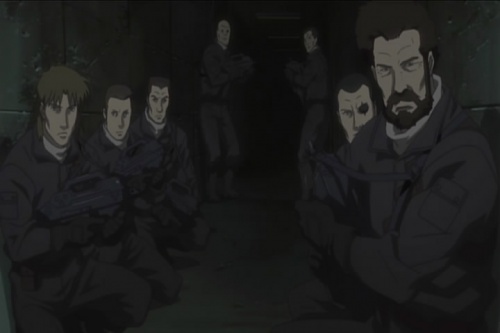
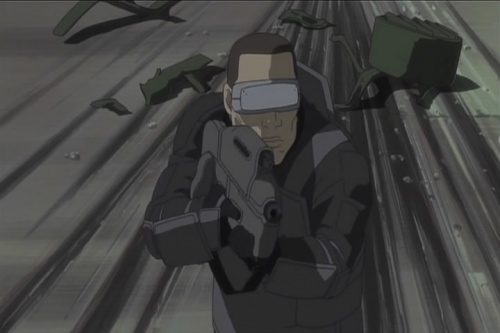
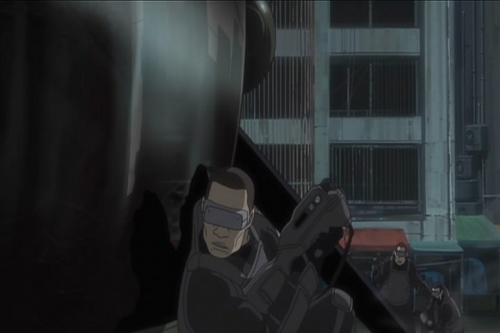
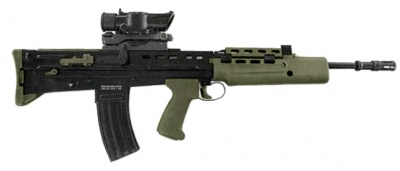
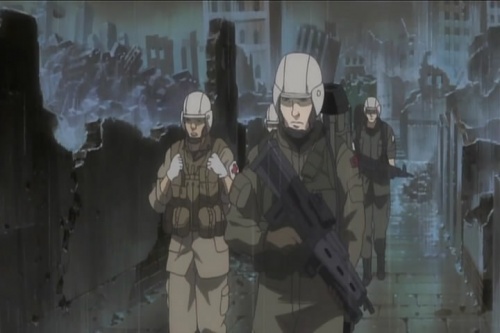
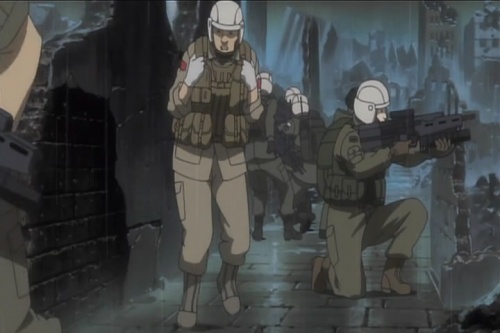
The fictional submachine gun used by the Metropolitan Police SWAT team in Stand Alone Complex is carried over into 2nd Gig. It bears a striking aesthetic resemblance to the Enfield L85 rifle series, but differs in almost every detail upon closer examination (the MP5 style iron sight, for example). Chambered with 9x19mm rounds.
Pazu is seen with the weapon in the OP sequence, "Rise".
AE CIA SMG briefcase
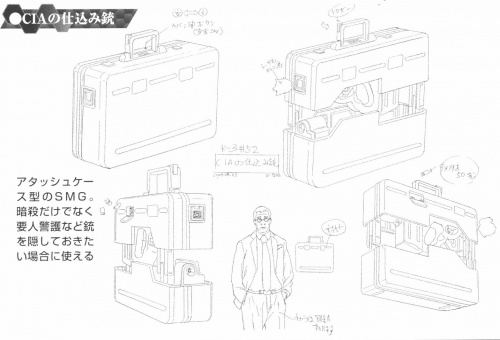
Near the end of 2nd GIG, American Empire CIA agents helping Goda leave Niihama were equipped with briefcases that have built-in submachine guns.
Assault Rifles
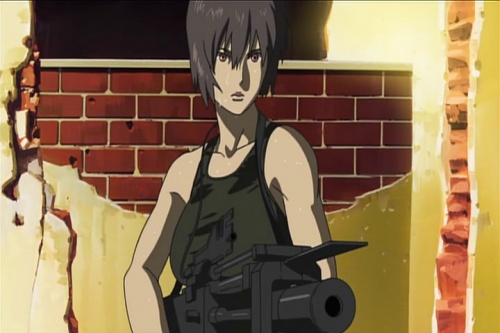
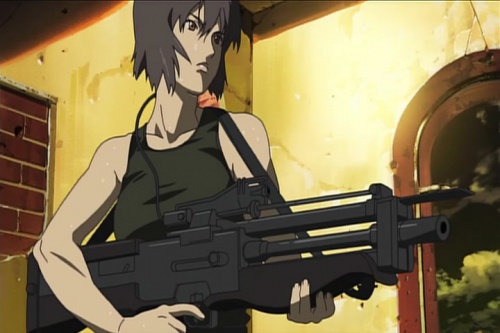
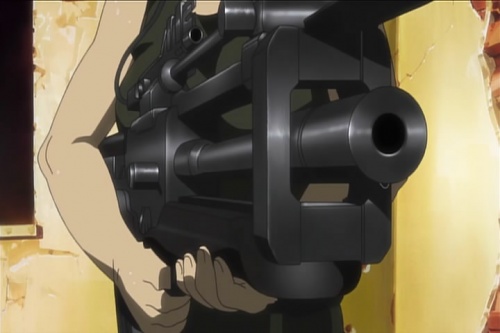
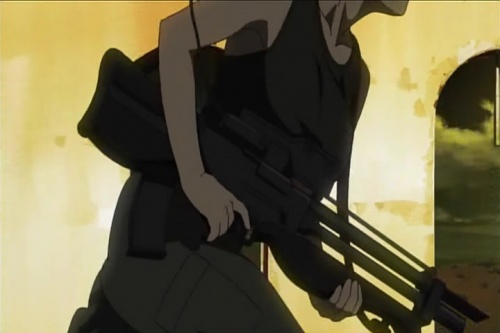
Seburo C26A
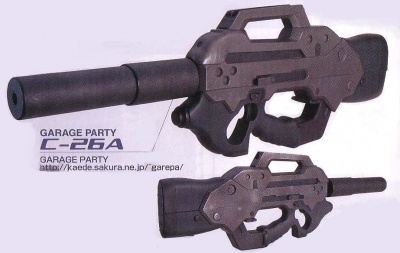
As with Stand Alone Complex, the primary weapon for Section 9 operatives is the fictional Seburo C26A assault rifle. The C26A uses a crooked 50 round box magazine that feeds 5.45x45mm rounds in a bullpup pattern, entering the gun at 45 degrees from the bore and slanting to lie parallel to the barrel, locking into the front grip. Fired cartridge cases eject into a permanently mounted brass catcher mounted on top of the gun. Its ergonomics are similar to the FN F2000, with the trigger protected by a large loop that serves as a grip for the off hand. It is occasionally seen with a two-stage silencer attachment. 2nd GIG also grants a look at a previously unseen feature of the C26A; a laser sight built into the body just above the muzzle.
Seburo C30
The Seburo C30, a variant of the C26A designed for overtly offensive missions, makes a return, this time in the hands of the Section 4 operators sent to apprehend the Section 9 members in Dejima. The C30 is built around a C26A receiver and features an added optical sight as well as a jacket with a brass catcher. Unlike the C30s seen in Stand Alone Complex, these lack a grenade launcher or an extended barrel.
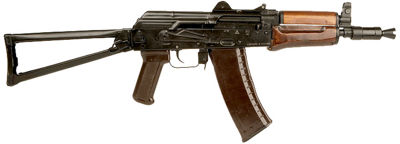
AKS-74U
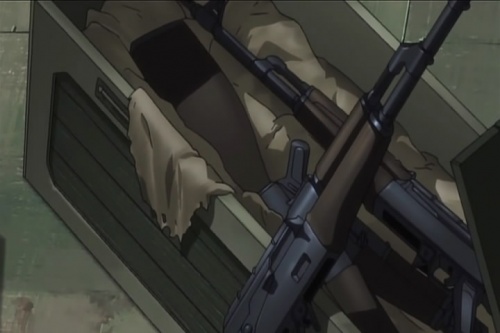
The AKS-74U is quite a popular weapon among terrorists in the first episode.
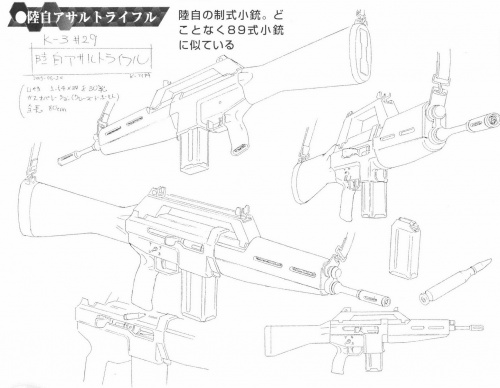
Conglomeration Rifle
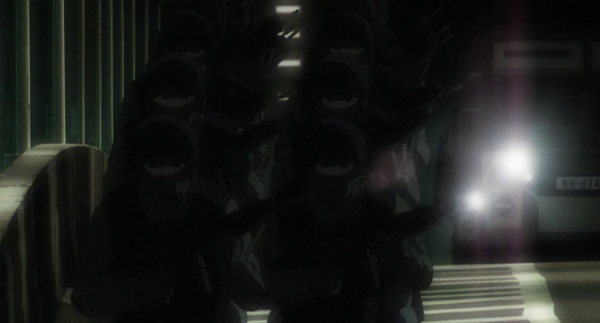
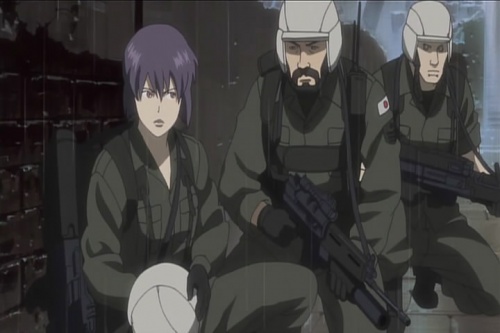
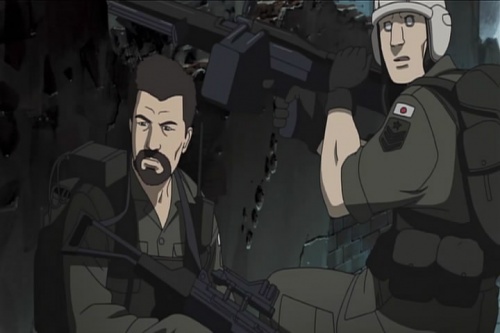
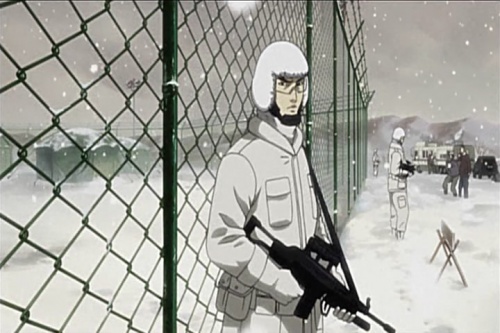
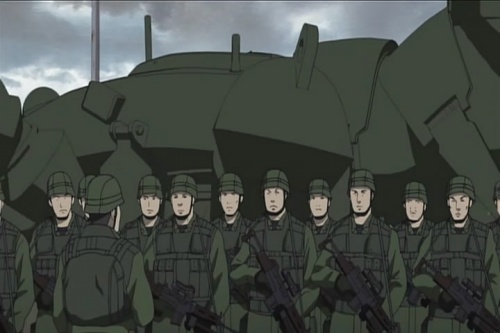
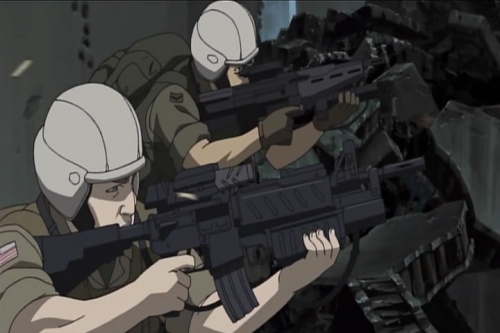
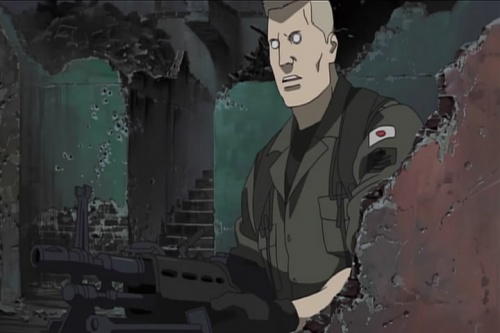
The soldiers in the Ground Self Defense Army (GSDA) or JGSDF (according to Japanese dialog) are seen using this fictional rifle. This weapon draws several features from other weapons, primarily the Howa Type 89 and M16 rifle series.
AK-74
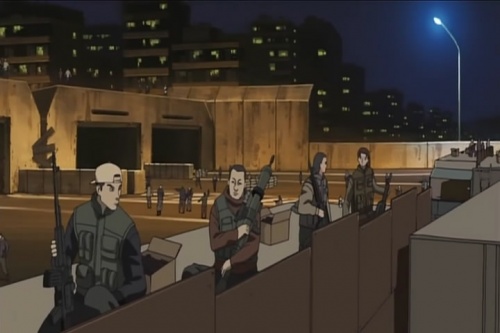
In episode 19, several Dejima refugees buy several crates of AK-74 rifles, and are seen using the rifles for the rest of the series.
AK-74M
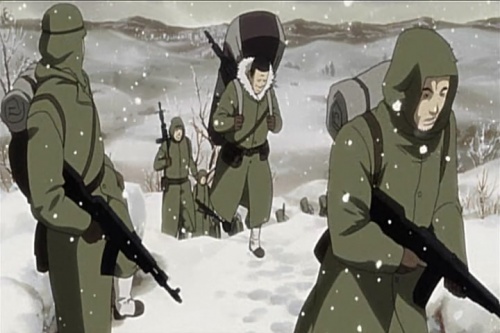
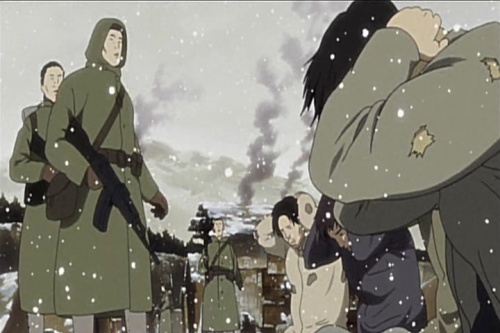
Korean People's Army soldiers seen during the flashback in episode 16 are seen carrying AK-74M rifles.
AKS-74
In episode 23, a single refugee can be seen raising an AKS-74 during the uprising.
Colt Model 933
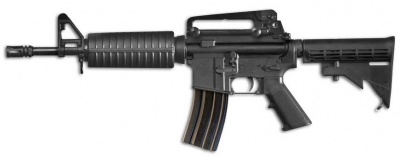
A few of the Dejima refugees are seen carrying Colt Model 933 carbines during the Dejima Uprising.
Futurized Type 89-F with M203
Members of the JGSDF are shown using a futurized Howa Type 89-F rifles outfitted with underbarrel M203 grenade launchers. The Type 89s all have barrels and handguards that are shorter than current variants, and the number of air vents on the handguard has been reduced to two on each side. In addition to these modifications, each rifle is outfitted with an electronic sight interface designed to connect directly to the soldier's cyberbrain.
Futurized Colt Model 933 with M203
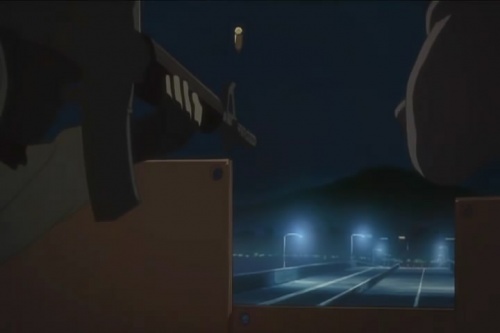
During the 2020 Mexican War flashback in episode 14, all of the American Empire soldiers in Kusanagi's multinational UN peacekeeper squad carry futurized Colt Model 933 rifles (distinguishable by their 11.5 inch barrels). Each rifle is outfitted with a M203 grenade launcher as well as a futuristic stock and handguard. As with the Japanese Type 89-Fs, each rifle is also equipped with a sight system designed to interface with the user's cyberbrain, implying that American Empire troops also undergo cyborg conversions before deployment.
Futurized L85A2 with M203
The British troops in Kusanagi's squad in episode 14's flashback to Mexico all carry Enfield L85A2 rifles that have undergone similar transformations to the previously described Type 89-F and Colt Model 933 rifles. Each L85 is given a futuristic handguard and barrel assembly, is outfitted with a M203 grenade launcher, and is equipped with a cyberbrain-interface targeting system, suggesting that all of the British troops have undergone full cyborg conversions.
Sniper Rifles
Blaser R93 LRS2
During the flashback story in episode 14, Saito's rifle during the 2020 Mexico engagement is a Blaser R93 LRS2. It is notable that he alone in this episode uses an "old-fashioned" purely optical sighting system on his rifle. He also appears to have used tape to affix a Harris bipod to the front of the stock.
Walther WA 2000
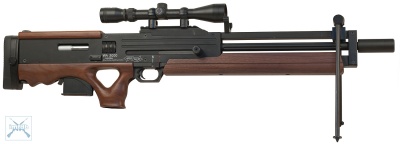
During the flashback to the 2020 engagement in Mexico, Kusanagi carries a Walther WA 2000 with black polymer furniture and an extended magazine. Kusanagi, in contrast to Saito, has had the optical sight replaced by a purely cybernetic sight that interfaces directly with her cyberbrain via the QRS port on her neck.
Seburo Sniper Rifle
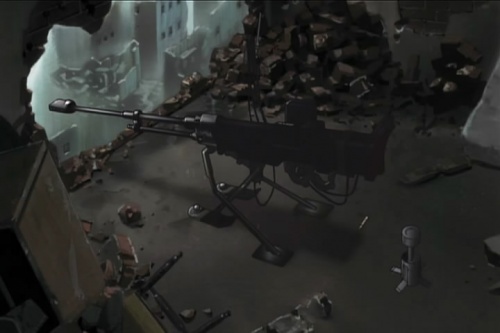
Saito's preferred bolt-action .50-caliber rifle from Stand Alone Complex makes a return for 2nd Gig.
Anti-Armor Sniper Rifle
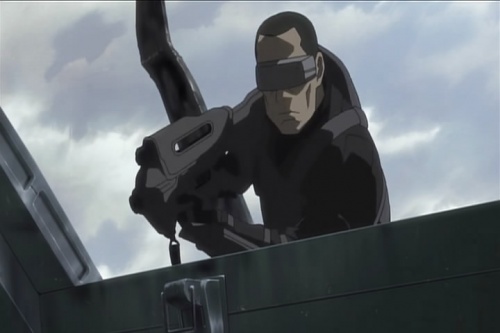
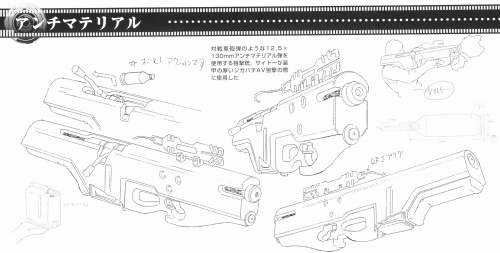
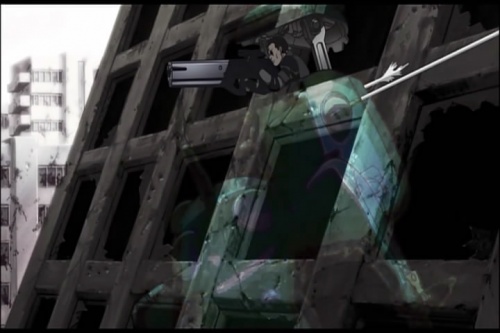
Saito uses this massive rifle to disable a runaway attack helicopter in episode 4.
Seburo Anti-Tank Rifle
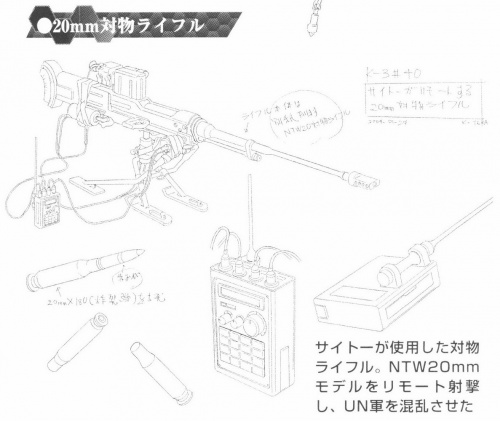
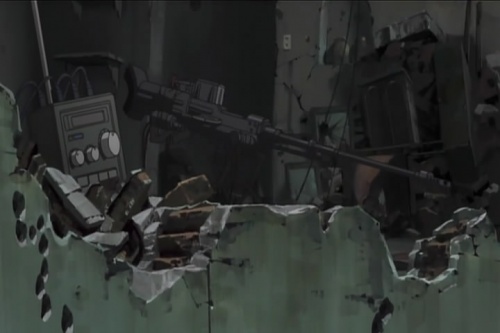
First seen in the second episode of Stand Alone Complex, Saito's 20mm anti-materiel rifle makes a reappearance in during the flashback to the 2020 Mexican War. This rifle is fictitious, but draws upon several real-world designs, primarily the Mechem NTW-20 and the Lahti L-39. Saito loads it with a single round and uses a remote trigger mechanism to blow up a car and cause a diversion so that he can attack from another angle.
Norinco Type 84S Target Rifle
A Dejima refugee on the Dejima Bridge barricade is seen using a sniper rifle built from a Kalashnikov rifle. Based on the long barrel and the ammunition box behind him labeled "5.56 NATO", it is likely that this rifle is a Norinco Type 84S Target Rifle.
Machine Guns
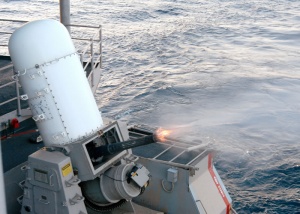
M61 Vulcan
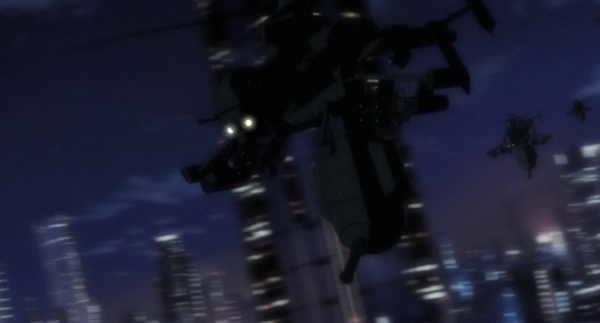
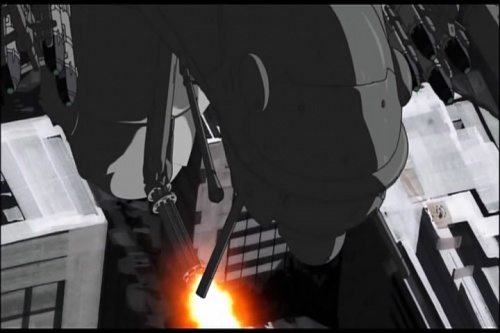
The Jigabachi attack helicopters are armed with M61 Vulcan cannons. The gun is mounted on a pod at the rear of the aircraft that swings down like a wasps' stinger, hence the name "Jigabachi" (the Japanese name for the Sand Wasp).
Phalanx CIWS
In episode 24, several Phalanx CIWS installations can be seen on a helicopter carrier operating off the coast of Dejima, particularly when Rangers from Section 4 are deployed.
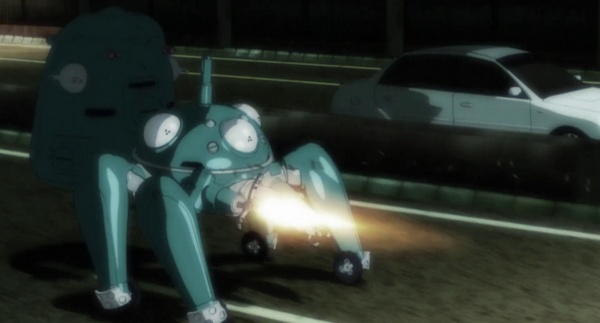
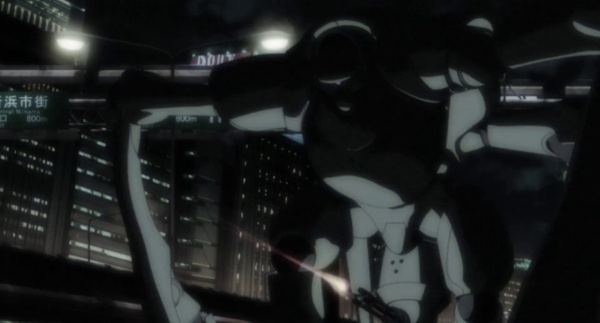
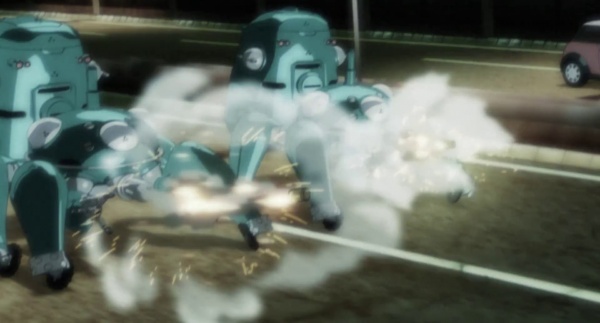
Tachikoma Claw Machine Gun
The Tachikoma's claws are equipped with built-in machine gun when they encounter enemies in close quarters.
Tachikoma's Shortened M134 Minigun
The Tachikoma's extremely short-barreled M134 from Stand Alone Complex makes a brief return during several of the Tachikomatic Days skits that follow every episode when one of the Tachikomas proposes a second version of its "Amphibious Tachikoma" design. The Tachikoma has attached the Minigun to the back of the proposed Tachikoma's head so that it faces the think-tank's pod, and offers up a rather unusual reason why.
Power-Suit Machine Gun
The MSDF Type 303 power suits from Stand Alone Complex return for the sequel, an bring their appropriately-sized machine gun / grenade launcher combination weapons with them.
Futurized M60
A young Batou is shown during the Mexico 2020 flashback using a M60 machine gun. Like the Type 89-F, Colt Model 933, and L85, this modern weapon has been given a futuristic look to fit with the setting, although this weapon's modifications appear to be limited to the handguard.
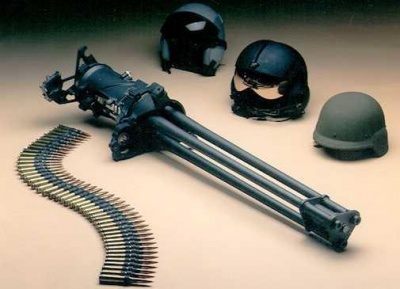
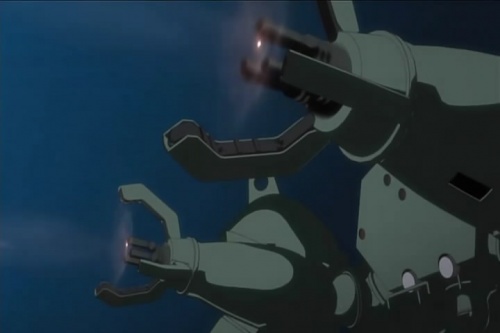
General Dynamics GAU-19/A
The JGSDA Arm Suits in episode 20 are equipped with GAU-19 rotary guns. The forward barrel brace is circular as opposed to the GAU-19's typical triangular brace. An even shorter GAU-19 is seen mounted inside the claws of the HAW-206 tanks used by the JGSDA.
Futurized Type 98 Anti Aircraft Cannon
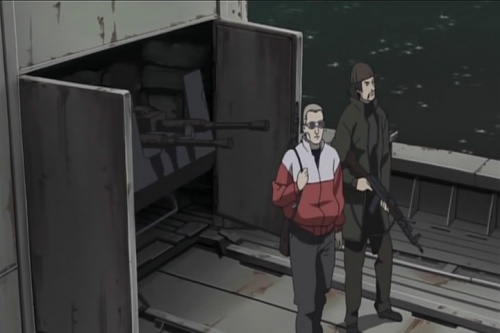
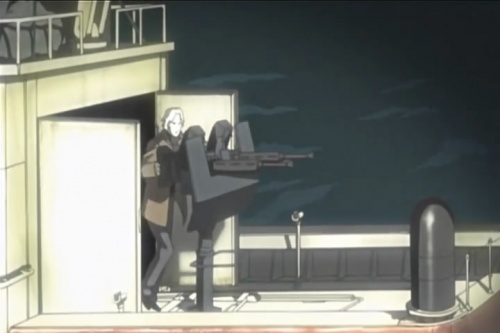
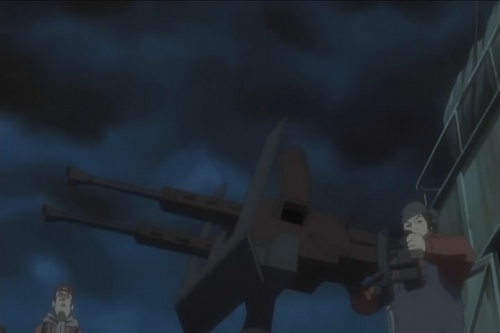
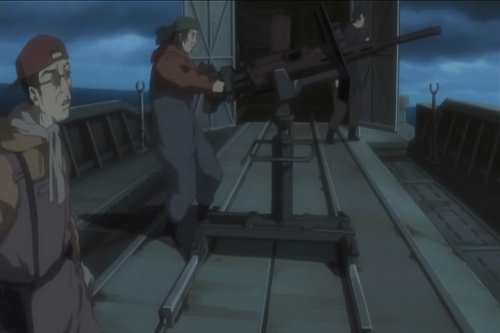
The fishing trawlers used by the Dejima refugees are often equipped with an anti-aircraft battery consisting of a shield and two Type 98 20mm anti-aircraft cannons with futuristic barrel shrouds.
Grenade Launchers
Tachikoma Grenade Launcher
The Tachikomas have a grenade launcher in their snout region.
Rocket Launchers
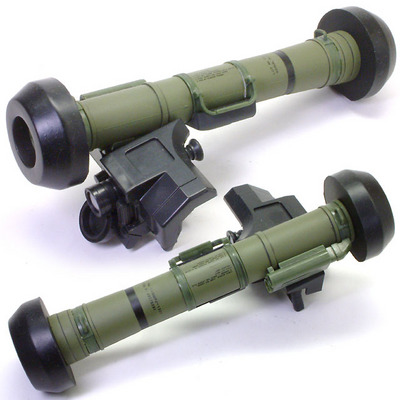
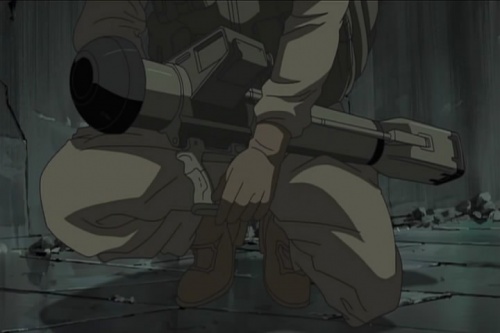
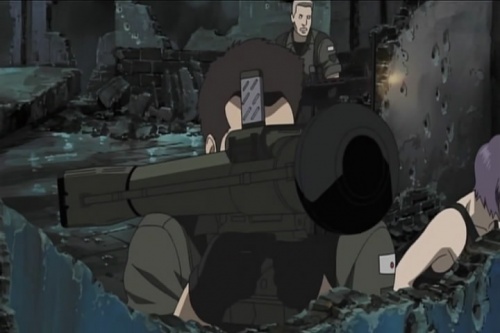
FGM-148 Javelin
Several of the American soldiers seen in the 2020 Mexican War flashback carry FGM-148 Javelin missile launchers. These launchers have been slightly altered from their real-world counterparts, suggesting that they too are intended to be future variants.
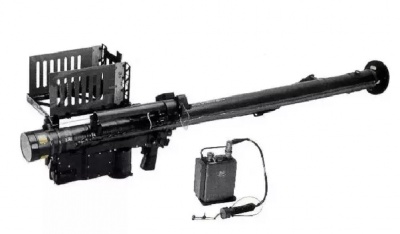
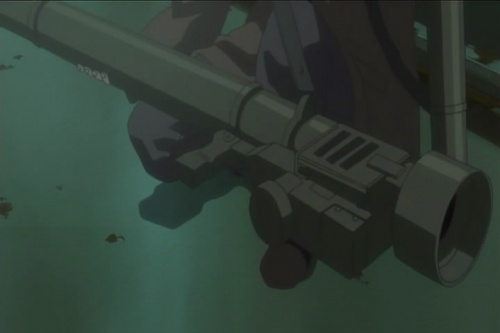
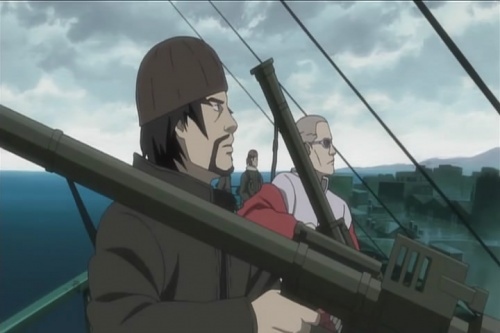
FIM-92A Stinger
Dejima Refugees use several FIM-92A Stinger missiles simultaneously to shoot down the JSDF AWACS plane above the island that is jamming communications. The use of several missiles at once overwhelms the anti-missile countermeasures, and the depiction of the explosion is accurate in that the warhead explodes short of the target, destroying it with projected shrapnel from the missile's HE-Frag warhead.
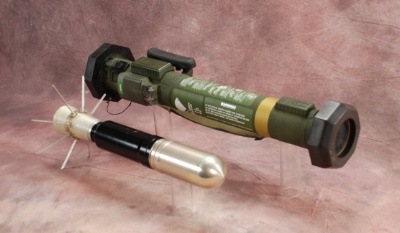
M141 SMAW-D
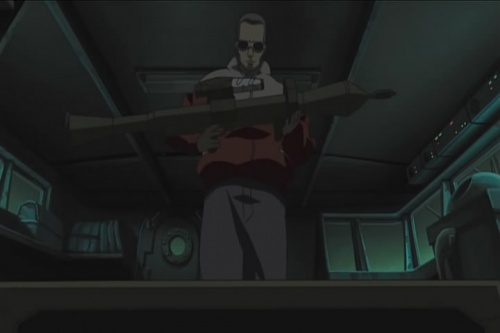
The weapon dealers in episode 7 also possess at least one M141 SMAW-D.
Unidentified Rocket Launchers
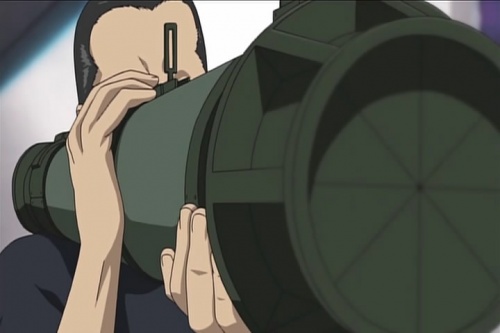
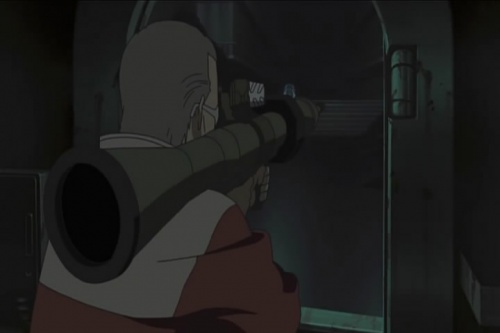
A handful of the Dejima refugees are carrying unidentified anti-tank RPG launchers. The warheads used strongly resemble those of the the Panzerfaust 3 and the rear port resembles that of an RPG-7.
Other Weapons
Prosthetic Shotguns
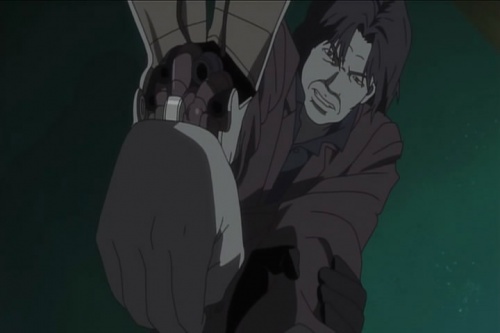
The terrorist "Angel's Feathers" has several shotguns built into his arm that all fire simultaneously.
