| If you have been locked out of your account you can request a password reset here. |
Difference between revisions of "The Big Gundown"
Jump to navigation
Jump to search

Doctor Luika (talk | contribs) |
|||
| Line 8: | Line 8: | ||
==Single Action Army== | ==Single Action Army== | ||
[[image:ColtSAALongBarrel.jpg|thumb|none|400px|Colt Single Action Army with 7.5" Barrel - .45 Long Colt]] | [[image:ColtSAALongBarrel.jpg|thumb|none|400px|Colt Single Action Army with 7.5" Barrel - .45 Long Colt]] | ||
| − | |||
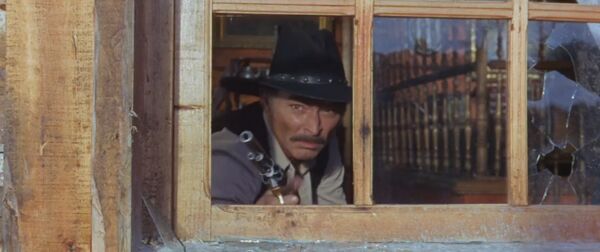
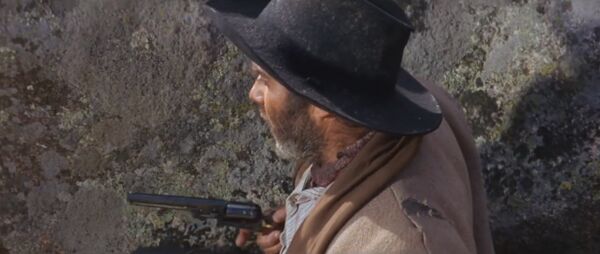
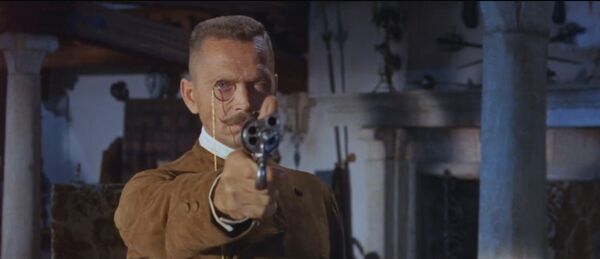
[[Image:T.B.G Colt S.A.A-2.jpg|thumb|none|600px|Jonatan Corbett ([[Lee Van Cleef]]) defend himself with the [[Colt Single Action Army]]]] | [[Image:T.B.G Colt S.A.A-2.jpg|thumb|none|600px|Jonatan Corbett ([[Lee Van Cleef]]) defend himself with the [[Colt Single Action Army]]]] | ||
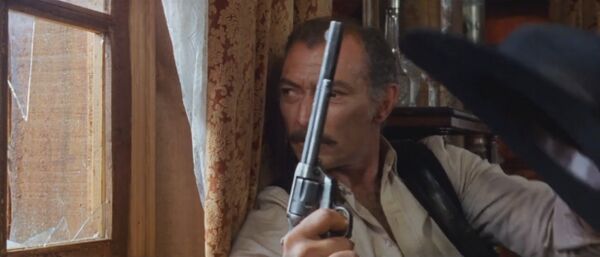
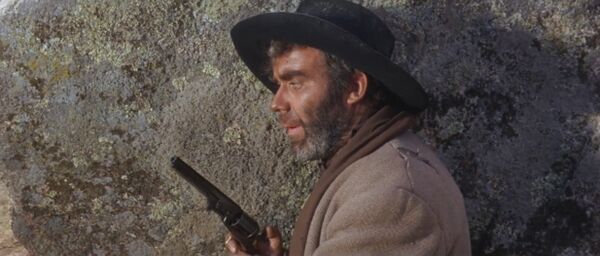
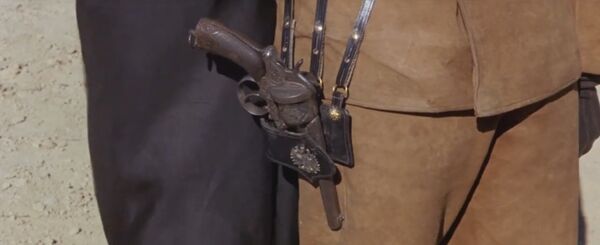
[[Image:T.B.G Colt S.A.A-3.jpg|thumb|none|600px|Another view of the [[Colt Single Action Army]]]] | [[Image:T.B.G Colt S.A.A-3.jpg|thumb|none|600px|Another view of the [[Colt Single Action Army]]]] | ||
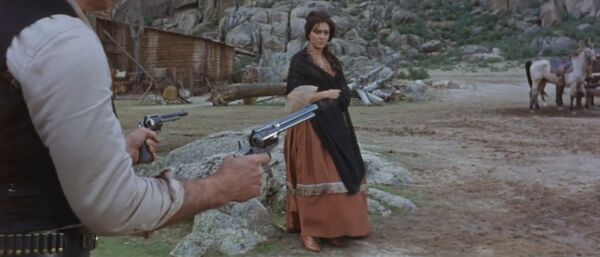
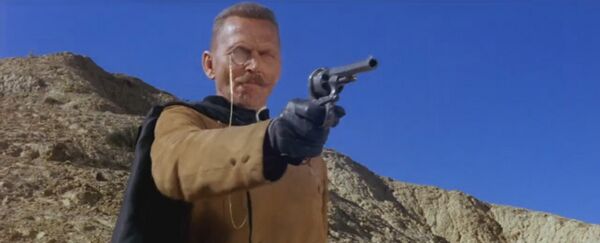
| − | [[Image:T.B.G Colt S.A.A-4.jpg|thumb|none|600px|]] | + | [[Image:T.B.G Colt S.A.A-4.jpg|thumb|none|600px|Jonatan Corbett ([[Lee Van Cleef]]) use his [[Colt Single Action Army]] when his going for "Cuchillo" ([[Tomas Milian]])]] |
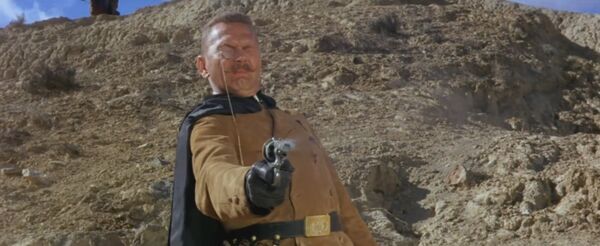
| − | [[Image:T.B.G Colt S.A.A-5.jpg|thumb|none|600px|]] | + | [[Image:T.B.G Colt S.A.A-5.jpg|thumb|none|600px|But Jonatan reject pull the trigger]] |
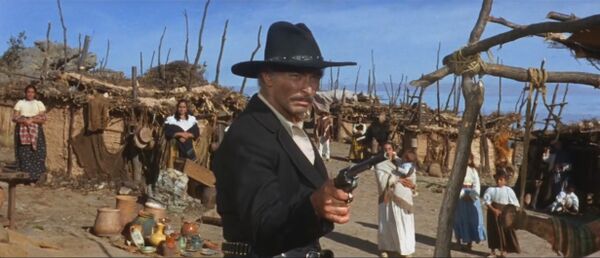
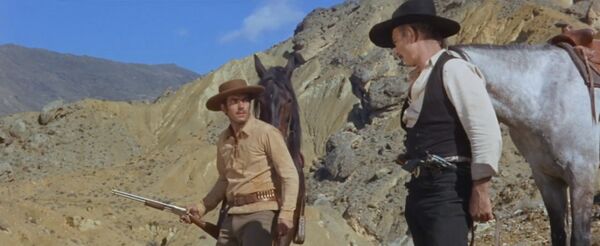
| − | [[Image:T.B.G Colt S.A.A-6.jpg|thumb|none|600px|]] | + | [[Image:T.B.G Colt S.A.A-6.jpg|thumb|none|600px|Jonatan Corbett ([[Lee Van Cleef]]) aims his [[Colt Single Action Army]] when finds "Cuchillo" in a lagoon]] |
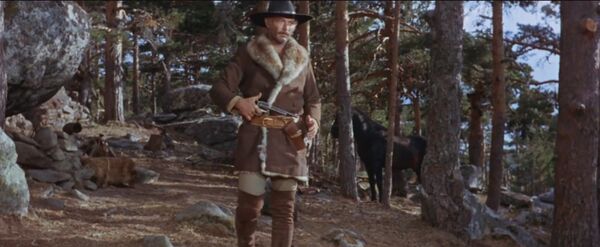
| − | [[Image:T.B.G Colt S.A.A-8.jpg|thumb|none|600px|]] | + | [[Image:T.B.G Colt S.A.A-8.jpg|thumb|none|600px|a Rancher carries a [[Colt Single Action Army]]]] |
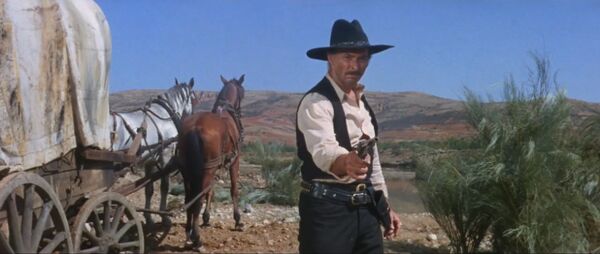
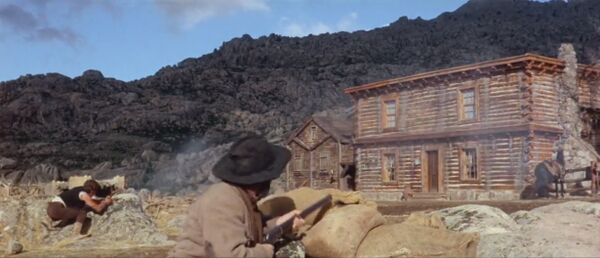
| − | [[Image:T.B.G Colt S.A.A-9.jpg|thumb|none|600px|]] | + | [[Image:T.B.G Colt S.A.A-9.jpg|thumb|none|600px|Throughout, Corbett use his [[Colt Single Action Army]] to defend himself against the ranchers]] |
| − | [[Image:T.B.G Colt S.A.A-10.jpg|thumb|none|600px|]] | + | [[Image:T.B.G Colt S.A.A-10.jpg|thumb|none|600px|Corbett use the [[Colt Single Action Army]] and his hat to fool the ranchers]] |
| − | [[Image:T.B.G Colt S.A.A-11.jpg|thumb|none|600px|]] | + | [[Image:T.B.G Colt S.A.A-11.jpg|thumb|none|600px|Another view of a [[Colt Single Action Army]]]] |
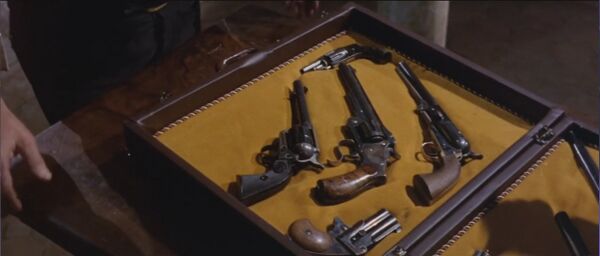
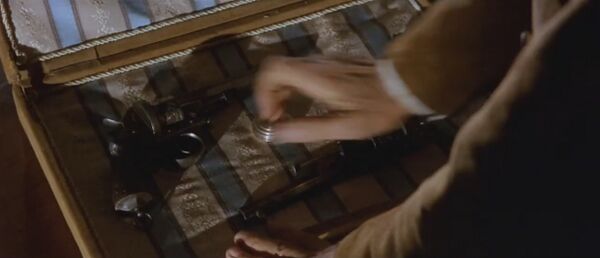
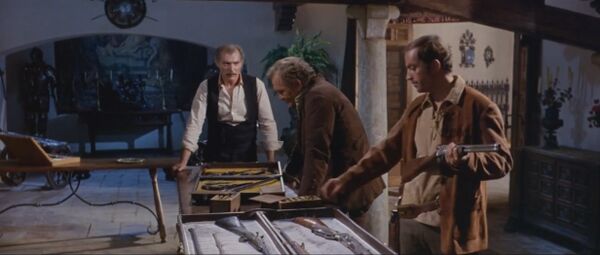
| − | [[Image:T.B.G Colt S.A.A-13-2.jpg|thumb|none|600px|]] | + | [[Image:T.B.G Colt S.A.A-13-2.jpg|thumb|none|600px|The [[Colt Single Action Army]] in the case with the [[Colt 1851 Navy]], [[Smith & Wesson No.3 Russian Model]] and the [[Remington 1866 Derringer]]]] |
[[image:ColtSingleActionArmy.jpg|thumb|none|400px|Colt Single Action Army with 5.5" Barrel - .45 Long Colt]] | [[image:ColtSingleActionArmy.jpg|thumb|none|400px|Colt Single Action Army with 5.5" Barrel - .45 Long Colt]] | ||
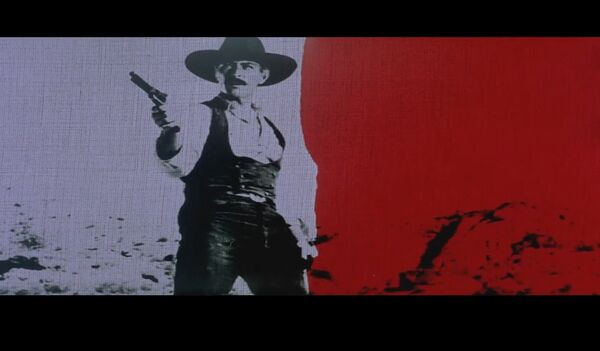
| − | [[Image:T.B.G Colt S.A.A-7.jpg|thumb|none|600px|]] | + | [[Image:T.B.G Colt S.A.A-1.jpg|thumb|none|600px|The [[Colt Single Action Army]] in the introuction]] |
| − | [[File:T.B.G Colt S.A.A & Lightning_Rifle-1.jpg|thumb|none|600px|]] | + | [[Image:T.B.G Colt S.A.A-7.jpg|thumb|none|600px|Jonatan Corbett ([[Lee Van Cleef]]) use two [[Colt Single Action Army]], One of these a [[Colt Single Action Army]] with 5.5" Barrel]] |
| + | [[File:T.B.G Colt S.A.A & Lightning_Rifle-1.jpg|thumb|none|600px|Corbett carries the same [[Colt Single Action Army]] with 5.5" Barrel]] | ||
[[image:ColtSAA475barrel.jpg|thumb|none|400px|Colt Single Action Army with 4.75" Barrel - .45 Long Colt]] | [[image:ColtSAA475barrel.jpg|thumb|none|400px|Colt Single Action Army with 4.75" Barrel - .45 Long Colt]] | ||
| − | [[Image:T.B.G Colt S.A.A-12.jpg|thumb|none|600px|]] | + | [[Image:T.B.G Colt S.A.A-12.jpg|thumb|none|600px|one of the "Mexican Mercenaries" fires a 4.75" Barrel, But "Cuchillo" ([[Tomas Milian]]) kill him]] |
==Colt 1851 Navy== | ==Colt 1851 Navy== | ||
[[Image:1851Navy.jpg|thumb|none|400px|Colt 1851 Navy - .36 Caliber]] | [[Image:1851Navy.jpg|thumb|none|400px|Colt 1851 Navy - .36 Caliber]] | ||
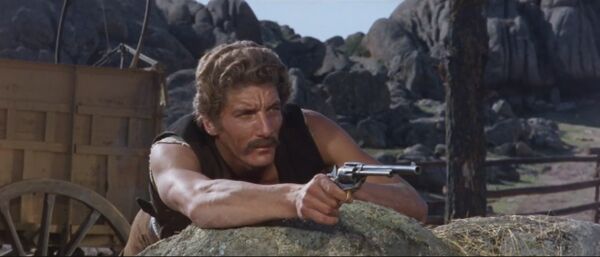
| − | [[Image:T.B.G 1851 Navy-1.jpg|thumb|none|600px|]] | + | [[Image:T.B.G 1851 Navy-1.jpg|thumb|none|600px|the Bounty Hunter of [[The Good, the Bad and the Ugly]] use the [[Colt 1851 Navy]]]] |
| − | [[Image:T.B.G 1851 Navy-2.jpg|thumb|none|600px|]] | + | [[Image:T.B.G 1851 Navy-2.jpg|thumb|none|600px|a Better View of the [[Colt 1851 Navy]]]] |
| − | [[Image:T.B.G Colt S.A.A-13-2.jpg|thumb|none|600px|]] | + | [[Image:T.B.G Colt S.A.A-13-2.jpg|thumb|none|600px|The [[Colt 1851 Navy]] in the case with the [[Colt Single Action Army]], [[Smith & Wesson No.3 Russian Model]] and the [[Remington 1866 Derringer]]]] |
==Smith & Wesson No.3 Russian Model== | ==Smith & Wesson No.3 Russian Model== | ||
[[Image:S&w russian.jpg|thumb|none|400px|Smith & Wesson No.3 Russian Model - .44 Russian]] | [[Image:S&w russian.jpg|thumb|none|400px|Smith & Wesson No.3 Russian Model - .44 Russian]] | ||
| − | [[Image:T.B.G Colt S.A.A-13-2.jpg|thumb|none|600px|]] | + | [[Image:T.B.G Colt S.A.A-13-2.jpg|thumb|none|600px|The [[Smith & Wesson No.3 Russian Model]] in the case with the [[Colt Single Action Army]], [[Colt 1851 Navy]] and the [[Remington 1866 Derringer]]]] |
==Smith & Wesson Model 320 Revolving Rifle (Without Stock)== | ==Smith & Wesson Model 320 Revolving Rifle (Without Stock)== | ||
[[Image:S&w320.jpg|thumb|none|500px|Smith & Wesson Model 320 Revolving Rifle - .32 Caliber]] | [[Image:S&w320.jpg|thumb|none|500px|Smith & Wesson Model 320 Revolving Rifle - .32 Caliber]] | ||
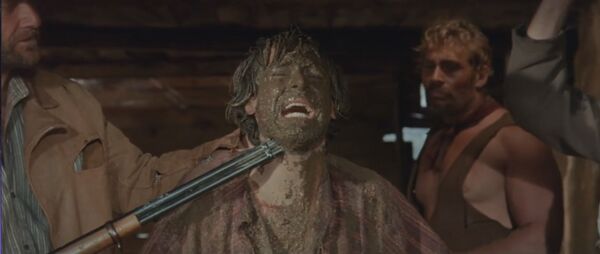
| − | [[Image:T.B.G S&W320.jpg|thumb|none|600px|]] | + | [[Image:T.B.G S&W320.jpg|thumb|none|600px|Brockston ([[Walter Barnes]]) grabs a [[Smith & Wesson Model 320 Revolving Rifle]], But him never use it. Note that the [[Smith & Wesson Model 320 Revolving Rifle]] has the stock decoupled]] |
==Lefaucheux Model 1858== | ==Lefaucheux Model 1858== | ||
[[Image:Lefaucheux Model 1858.jpg|thumb|none|400px|Lefaucheux Model 1858 - 12mm Pinfire]] | [[Image:Lefaucheux Model 1858.jpg|thumb|none|400px|Lefaucheux Model 1858 - 12mm Pinfire]] | ||
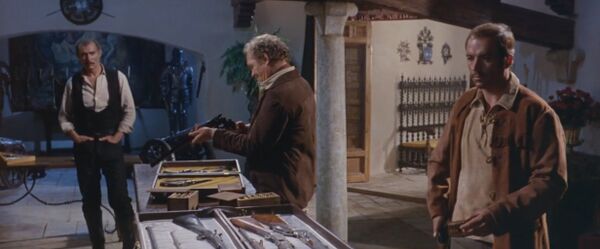
| − | [[Image:T.B.G Lefaucheux-1.jpg|thumb|none|600px|]] | + | [[Image:T.B.G Lefaucheux-1.jpg|thumb|none|600px|Baron Von Schulemberg ([[Gérald Herter]]) open his case with the [[Lefaucheux Model 1858]]]] |
| − | [[Image:T.B.G Lefaucheux-2.jpg|thumb|none|600px|]] | + | [[Image:T.B.G Lefaucheux-2.jpg|thumb|none|600px|Schulemberg check his revolver]] |
| − | [[Image:T.B.G Lefaucheux-3.jpg|thumb|none|600px|]] | + | [[Image:T.B.G Lefaucheux-3.jpg|thumb|none|600px|Schulemberg aim his [[Lefaucheux Model 1858]] to Corbett]] |
| − | [[Image:T.B.G Lefaucheux-4.jpg|thumb|none|600px|]] | + | [[Image:T.B.G Lefaucheux-4.jpg|thumb|none|600px|Schulemberg shows his Revolver in the duel]] |
| − | [[Image:T.B.G Lefaucheux-5.jpg|thumb|none|600px|]] | + | [[Image:T.B.G Lefaucheux-5.jpg|thumb|none|600px|a Close-Up view of the [[Lefaucheux Model 1858]]]] |
| − | [[Image:T.B.G Lefaucheux-6.jpg|thumb|none|600px|]] | + | [[Image:T.B.G Lefaucheux-6.jpg|thumb|none|600px|Schulemberg fires his [[Lefaucheux Model 1858]]]] |
| − | [[Image:T.B.G Lefaucheux-7.jpg|thumb|none|600px|]] | + | [[Image:T.B.G Lefaucheux-7.jpg|thumb|none|600px|a hurted Schulemberg still firing his [[Lefaucheux Model 1858]]]] |
==Unknown Revolver== | ==Unknown Revolver== | ||
| − | [[Image:T.B.G Colt S.A.A-13-2.jpg|thumb|none|600px|The Unknown Revolver in the case with the [[Colt Single Action Army]], [[Remington 1866 Derringer]], [[Smith & Wesson No.3 Russian Model]] and the [[Colt 1851 Navy]]]] | + | [[Image:T.B.G Colt S.A.A-13-2.jpg|thumb|none|600px|The [[Unknown Revolver]] in the case with the [[Colt Single Action Army]], [[Remington 1866 Derringer]], [[Smith & Wesson No.3 Russian Model]] and the [[Colt 1851 Navy]]]] |
=Pistols= | =Pistols= | ||
| Line 60: | Line 60: | ||
==Colt Lightning Rifle== | ==Colt Lightning Rifle== | ||
[[File:Colt_Lightning_Rifle_Nickel_Plated.jpg|thumb|none|500px|Colt Lightning Rifle with Nickel Plated Finish - .38-56 WCF]] | [[File:Colt_Lightning_Rifle_Nickel_Plated.jpg|thumb|none|500px|Colt Lightning Rifle with Nickel Plated Finish - .38-56 WCF]] | ||
| − | [[Image:T.B.G S&W320.jpg|thumb|none|600px|The Colt Lightning Rifle in the case]] | + | [[Image:T.B.G S&W320.jpg|thumb|none|600px|The [[Colt Lightning Rifle]] in the case]] |
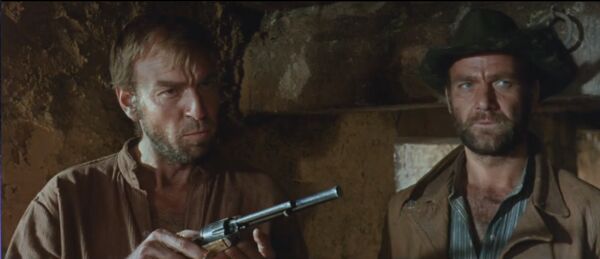
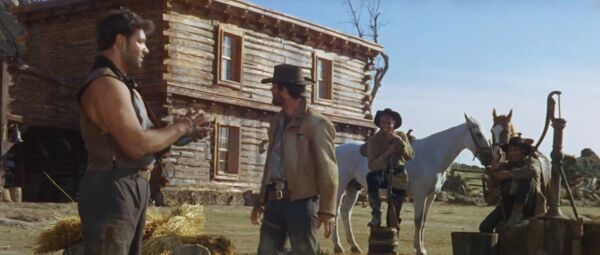
| − | [[File:T.B.G Colt_Lightning_Rifle-1.jpg|thumb|none|600px|]] | + | [[File:T.B.G Colt_Lightning_Rifle-1.jpg|thumb|none|600px|Chet Miller ([[Ángel del Pozo]]) grab his [[Colt Lightning Rifle]]]] |
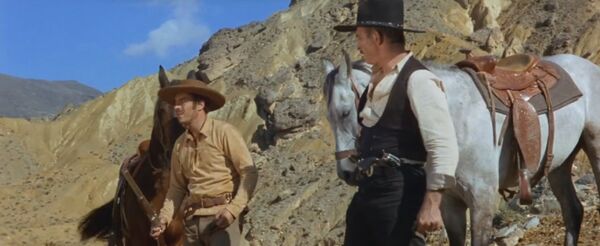
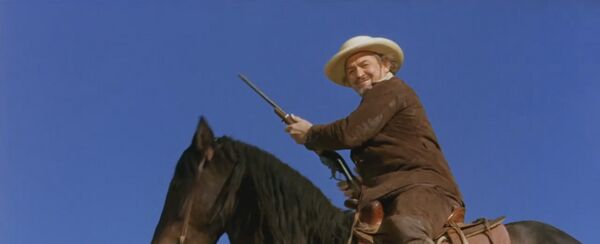
| − | [[File:T.B.G Colt_Lightning_Rifle-3.jpg|thumb|none|600px|]] | + | [[File:T.B.G Colt_Lightning_Rifle-3.jpg|thumb|none|600px|a distant view of Chet Miller, his Horse & his Rifle]] |
| − | [[File:T.B.G Colt S.A.A & Lightning_Rifle- | + | [[File:T.B.G Colt S.A.A & Lightning_Rifle-2.jpg|thumb|none|600px|Chet Miller with his [[Colt Lightning Rifle]]]] |
| − | [[ | ||
==Spencer 1860 Repeating Rifle== | ==Spencer 1860 Repeating Rifle== | ||
| Line 71: | Line 70: | ||
==Winchester Model 1894== | ==Winchester Model 1894== | ||
| − | [[File:PheonixentWinchester1894.jpg|thumb|none|500px|Winchester Model 1894 - .30-30]] | + | [[File:PheonixentWinchester1894.jpg|thumb|none|500px|Winchester Model 1894 - .30-30 WCF]] |
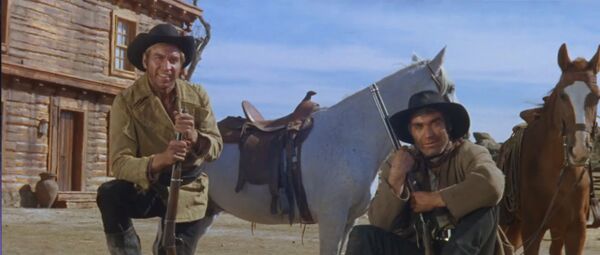
| − | [[File:T.B.G Winchester Saddler Ring-1.jpg|thumb|none|600px|The Winchester Model 1894 in hands of the | + | [[File:T.B.G Winchester Saddler Ring-1.jpg|thumb|none|600px|The [[Winchester Model 1894]] in hands of the 3rt Rancher]] |
| − | [[File:T.B.G Winchester Saddler Ring-2.jpg|thumb|none|600px|]] | + | [[File:T.B.G Winchester Saddler Ring-2.jpg|thumb|none|600px|a Better View of the [[Winchester Model 1894]]]] |
| − | [[File:T.B.G Winchester Saddler Ring-5.jpg|thumb|none|600px|]] | + | [[File:T.B.G Winchester Saddler Ring-5.jpg|thumb|none|600px|The Rancher aims his [[Winchester Model 1894]] to "Cuchillo"]] |
| − | [[File:T.B.G Winchester Saddler Ring-8.jpg|thumb|none|600px|]] | + | [[File:T.B.G Winchester Saddler Ring-8.jpg|thumb|none|600px|"They're using Rifles, Be careful"]] |
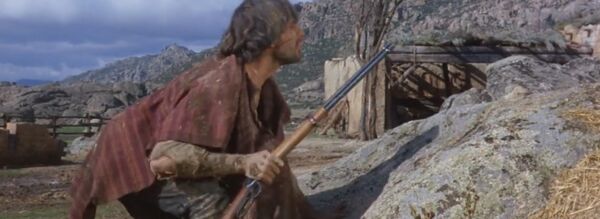
| − | [[File:T.B.G Winchester Saddler Ring-9.jpg|thumb|none|600px|]] | + | [[File:T.B.G Winchester Saddler Ring-9.jpg|thumb|none|600px|"Cuchillo" ([[Tomas Milian]]) grab the [[Winchester Model 1894]], But never shot it]] |
==Winchester Model 1892 Saddler Ring Carbine== | ==Winchester Model 1892 Saddler Ring Carbine== | ||
| − | [[File:WinchesterModel1892.jpg|thumb|none|500px|]] | + | [[File:WinchesterModel1892.jpg|thumb|none|500px|Winchester Model 1892 Saddle Ring Carbine - .40-44 WCF]] |
| − | [[File:T.B.G Winchester Saddler Ring-1.jpg|thumb|none|600px|]] | + | [[File:T.B.G Winchester Saddler Ring-1.jpg|thumb|none|600px|The 4th Rancher holds his [[Winchester Model 1892]]]] |
| − | [[File:T.B.G Winchester Saddler Ring-2.jpg|thumb|none|600px|]] | + | [[File:T.B.G Winchester Saddler Ring-2.jpg|thumb|none|600px|a Better View of the [[Winchester Model 1892]]]] |
| − | [[File:T.B.G Winchester Saddler Ring-3.jpg|thumb|none|600px|]] | + | [[File:T.B.G Winchester Saddler Ring-3.jpg|thumb|none|600px|the 4th Rancher fire the [[Winchester Model 1892]] to Kill Corbett]] |
[[File:T.B.G Winchester Saddler Ring-4.jpg|thumb|none|600px|]] | [[File:T.B.G Winchester Saddler Ring-4.jpg|thumb|none|600px|]] | ||
[[File:T.B.G Winchester Saddler Ring-6.jpg|thumb|none|600px|]] | [[File:T.B.G Winchester Saddler Ring-6.jpg|thumb|none|600px|]] | ||
| Line 89: | Line 88: | ||
==Evans Repeating Rifle== | ==Evans Repeating Rifle== | ||
[[image:EvansB.jpg|thumb|none|500px|Evans Repeating Rifle - .44 Evans]] | [[image:EvansB.jpg|thumb|none|500px|Evans Repeating Rifle - .44 Evans]] | ||
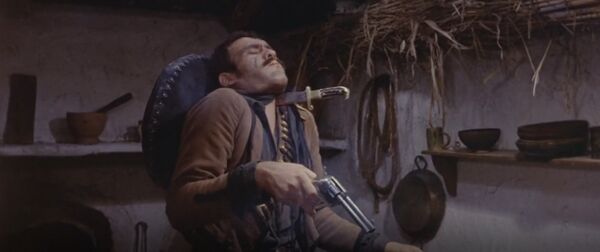
| − | [[image:T.B.G Evans Repeating Rifle-1.jpg|thumb|none|600px|]] | + | [[image:T.B.G Evans Repeating Rifle-1.jpg|thumb|none|600px|Brockston use the [[Evans Repeating Rifle]] to fire against Corbett]] |
| − | [[image:T.B.G Evans Repeating Rifle-2.jpg|thumb|none|600px|]] | + | [[image:T.B.G Evans Repeating Rifle-2.jpg|thumb|none|600px|a Hurted Brockston tries to aim his rifle, But it can't]] |
==Unknown Rifles== | ==Unknown Rifles== | ||
| − | [[File:T.B.G Unknown Rifles.jpg|thumb|none|600px|]] | + | [[File:T.B.G Unknown Rifles.jpg|thumb|none|600px|Unidentified rifles in the Mexican Police Station]] |
Revision as of 19:25, 12 June 2023
 Work In Progress This article is still under construction. It may contain factual errors. See Talk:The Big Gundown for current discussions. Content is subject to change. |

The following weapons were used in the film The Big Gundown:
Revolvers
Single Action Army


Another view of the Colt Single Action Army

Jonatan Corbett (Lee Van Cleef) use his Colt Single Action Army when his going for "Cuchillo" (Tomas Milian)


a Rancher carries a Colt Single Action Army

Throughout, Corbett use his Colt Single Action Army to defend himself against the ranchers

Corbett use the Colt Single Action Army and his hat to fool the ranchers

Another view of a Colt Single Action Army

The Colt Single Action Army in the case with the Colt 1851 Navy, Smith & Wesson No.3 Russian Model and the Remington 1866 Derringer


The Colt Single Action Army in the introuction

Jonatan Corbett (Lee Van Cleef) use two Colt Single Action Army, One of these a Colt Single Action Army with 5.5" Barrel

Corbett carries the same Colt Single Action Army with 5.5" Barrel


one of the "Mexican Mercenaries" fires a 4.75" Barrel, But "Cuchillo" (Tomas Milian) kill him


a Better View of the Colt 1851 Navy
The Colt 1851 Navy in the case with the Colt Single Action Army, Smith & Wesson No.3 Russian Model and the Remington 1866 Derringer
Smith & Wesson No.3 Russian Model

The Smith & Wesson No.3 Russian Model in the case with the Colt Single Action Army, Colt 1851 Navy and the Remington 1866 Derringer
Smith & Wesson Model 320 Revolving Rifle (Without Stock)


Brockston (Walter Barnes) grabs a Smith & Wesson Model 320 Revolving Rifle, But him never use it. Note that the Smith & Wesson Model 320 Revolving Rifle has the stock decoupled
Lefaucheux Model 1858


Schulemberg aim his Lefaucheux Model 1858 to Corbett


a Close-Up view of the Lefaucheux Model 1858

Schulemberg fires his Lefaucheux Model 1858

a hurted Schulemberg still firing his Lefaucheux Model 1858
Unknown Revolver
The Unknown Revolver in the case with the Colt Single Action Army, Remington 1866 Derringer, Smith & Wesson No.3 Russian Model and the Colt 1851 Navy
Pistols
Remington Derringer 1866

The Remington 1866 Derringer in the case with the Colt Single Action Army, Smith & Wesson No.3 Russian Model and the Colt 1851 Navy
Rifles
Colt Lightning Rifle

The Colt Lightning Rifle in the case


Chet Miller with his Colt Lightning Rifle
Spencer 1860 Repeating Rifle


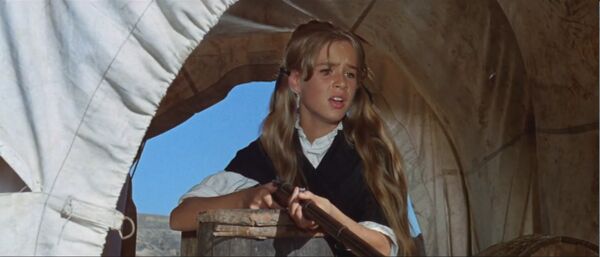
Sarah fires the Spencer 1860 to Corbett
Winchester Model 1894


The Winchester Model 1894 in hands of the 3rt Rancher

a Better View of the Winchester Model 1894

The Rancher aims his Winchester Model 1894 to "Cuchillo"


Winchester Model 1892 Saddler Ring Carbine

The 4th Rancher holds his Winchester Model 1892
a Better View of the Winchester Model 1892

the 4th Rancher fire the Winchester Model 1892 to Kill Corbett


Evans Repeating Rifle


Brockston use the Evans Repeating Rifle to fire against Corbett

