| If you have been locked out of your account you can request a password reset here. |
Difference between revisions of "Branded to Kill"
Orca1 9904 (talk | contribs) |
Alex T Snow (talk | contribs) |
||
| (9 intermediate revisions by 4 users not shown) | |||
| Line 1: | Line 1: | ||
| − | [[Image: | + | {{unidentified}} |
| + | {{Infobox Movie | ||
| + | |name = Branded to Kill | ||
| + | |picture =Branded to Kill Original Poster.jpg | ||
| + | |caption =''Original Japanese theatrical poster'' | ||
| + | |country = [[Image:Japan.jpg|25px]] Japan | ||
| + | |director =Seijun Suzuki | ||
| + | |date=1967 | ||
| + | |language=Japanese<br>English | ||
| + | |studio= Nikkatsu | ||
| + | |distributor= | ||
| + | |character1=Goro Hanada | ||
| + | |actor1=[[Jô Shishido]] | ||
| + | |character2=Number One Killer | ||
| + | |actor2=Koji Nanbara | ||
| + | |character3=Michihiko Yabuhara | ||
| + | |actor3=Isao Tamagawa | ||
| + | |character4=Misako Nakajo | ||
| + | |actor4=Annu Mari | ||
| + | |character5=Mami Hanada | ||
| + | |actor5=Mariko Ogawa | ||
| + | |character6=Gihei Kasuga | ||
| + | |actor6=Hiroshi Minami | ||
| + | }} | ||
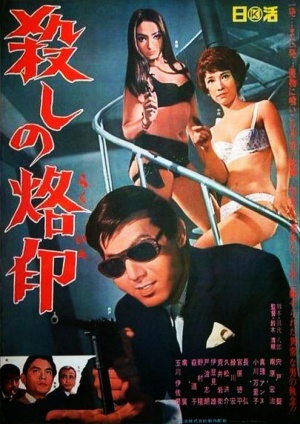
| − | ''Branded to Kill'' (directed by Seijun Suzuki | + | '''''Branded to Kill''''' (殺しの烙印, ''Koroshi no rakuin'') is a 1967 Japanese crime thriller directed by Seijun Suzuki. The plot depicts Goro Hanada ([[Jô Shishido]]), the Japanese yakuza Number Three Killer with a fetish for the smell of boiling rice. In his attempts to climb to the very top in the bloody business Hanada meets and falls in love with a mysterious woman named Misako, who recruits him for a mission that Hanada fails. Due to this, he becomes a target for the Number One Killer. |
| − | + | This low budget, surrealistic and absurdist movie originally was a commercial and critical disappointment for the studio. But over time ''Branded to Kill'' was recognized as a cult classic and made influence for notable filmmakers, among which are Jim Jarmusch, John Woo, Chan-wook Park and Quentin Tarantino. | |
| − | + | {{Film Title}} | |
| − | = | + | __TOC__<br clear="all"> |
| − | == Mauser | + | '''''Note!!''''' Most, if not all guns in the movie turn out to be not real weapons but rather replicas, likely flashpaper guns. These guns are named by the models they are based on (when possible), with mentioning the features that allow to tell they are not real. |
| − | The main | + | |
| − | [[ | + | = Handguns = |
| − | [[ | + | == Custom Mauser C96 == |
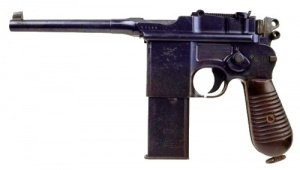
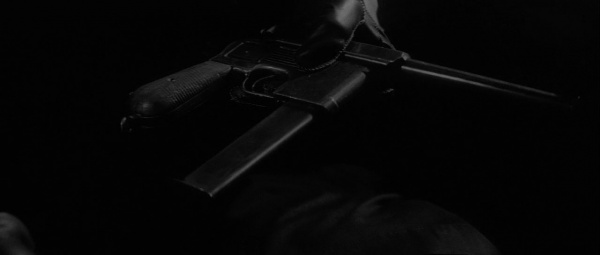
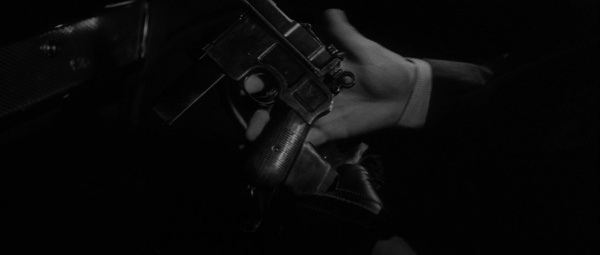
| − | [[Image:Branded-to- | + | Goro Hanada uses a flashpaper replica of custom [[Mauser C96]] pistol, modified for using twenty-round detachable magazine, like [[Mauser M712 Schnellfeuer]]. The main non-standard feature of this gun is the lack of any kind of safety. Other oddities are the large ring hammer that is positioned lower than on standard early C96s with this feature, smooth slide rails that are common for "Prewar Commercial" version, and no markings on the frame. In action Hanada's Mauser fires in full auto mode despite it lacks the selector switch of ''Schnellfeuer'' model. |
| − | [[Image: | + | [[File:MauserM712Schnellfeuer.jpg|thumb|none|300px|For comparison: Mauser M712 ''Schnellfeuer'' - 7.63x25mm Mauser]] |
| + | [[File:C96STOCK.jpg|thumb|none|400px|For comparison: Mauser C96 fitted with holster/stock combo - 7.63x25mm Mauser]] | ||
| + | [[File:Branded to Kill-Mauser-1.jpg|thumb|none|600px|Hanada readies his gun when performing a mission to escort a client in a car ride.]] | ||
| + | [[File:Branded to Kill-Mauser-2.jpg|thumb|none|600px|A good view of Hanada's Mauser. Note the incorrectly placed large ring hammer, the lack of the safety, smooth slide rails and the lack of markings.]] | ||
| + | [[File:Branded to Kill-Mauser-3.jpg|thumb|none|600px|]] | ||
| + | [[File:Branded to Kill-Mauser-4.jpg|thumb|none|600px|Hanada attaches the holster-stock to his gun.]] | ||
| + | [[File:Branded to Kill-Mauser-6.jpg|thumb|none|600px|Hanada fires his gun in full-auto mode.]] | ||
| + | [[File:Branded to Kill-Mauser-7.jpg|thumb|none|600px|Hanada with the Mauser.]] | ||
| + | [[File:Branded to Kill-Mauser-8.jpg|thumb|none|600px|Hanada holds the Mauser with attached holster-stock during the duel with Sakura, Number Two Killer.]] | ||
| + | [[File:Branded to Kill-Mauser-9.jpg|thumb|none|600px|Hanada prepares to shoot one of his targets up through a pipe drain (possibly a reference to a famous legend about a ninja assassin who killed Uesugi Kenshin in the lavatory by thrusting a spear from below).]] | ||
| + | [[Image:Branded-to-kill 02p.jpg|thumb|none|400px|Goro Hanada ([[Jô Shishido]]) posing with his Mauser on a promotional image.]] | ||
| + | |||
| + | == Colt Model 1903 / Ruby Style Pistol 1 == | ||
| + | A hammerless pistol, resembling [[Colt Model 1903]] (but with shorter barrel and more angular shapes) or pistols of the [[Ruby]] family, is seen in numerous scenes. A single prop is reused, while these are different guns according to the story. Misako Nakajo (Annu Mari) holds a pistol during the failed assassination. Further same looking pistol is seen in hands of Mami Hanada (Mariko Ogawa). After she drops the gun and runs away, Hamada picks up the gun and uses it as his main gun until the final. | ||
| + | [[Image:Colt_Model_1903.jpg|thumb|none|300px|For comparison: Colt Model 1903 Pocket Hammerless Pistol Blued - .32 ACP]] | ||
| + | [[File:Garate Ruby R.jpg|thumb|none|300px|For comparison: Garate, Anitua y Cia Ruby-Type Pistol - .32 ACP]] | ||
| + | [[File:Branded to Kill-Pistol1-1.jpg|thumb|none|600px|The pistol is seen in the opening scene in hands of the client whom Hanada escorts (his identity is revealed later). Note the lack of the external extractor that is used on Colt Model 1903, Ruby and other similar Browning system hammerless pistols.]] | ||
| + | [[File:Branded to Kill-Pistol1-2.jpg|thumb|none|600px|Misako, firing her pistol, is seen through the sniper scope. The slide doesn't cycle when the gun fires.]] | ||
| + | [[File:Branded to Kill-Pistol1-4.jpg|thumb|none|600px|A decent view of the pistol in Hanada's hands.]] | ||
| + | [[File:Branded to Kill-Pistol1-5.jpg|thumb|none|600px|A view of the muzzle.]] | ||
| + | [[File:Branded to Kill-Pistol1-6.jpg|thumb|none|600px|Misako gets the pistol but Hanada disarms her.]] | ||
| + | [[File:Branded to Kill-Pistol1-7.jpg|thumb|none|600px|Hanada fires at his wife (the nudity is censored). The slide doesn't cycle when the gun fires, and the muzzle flame is a typical flashpaper effect.]] | ||
| + | [[File:Branded to Kill-Pistol1-8.jpg|thumb|none|600px|The heel of the pistol is seen.]] | ||
| + | [[File:Branded to Kill-Pistol1-10.jpg|thumb|none|600px|Hanada's pistol and Number One's [[FN Model 1910]] on the table.]] | ||
| + | [[File:Branded to Kill-Pistol1-11.jpg|thumb|none|600px|Hanada takes the pistol.]] | ||
| + | |||
| + | == Colt Model 1903 / Ruby Style Pistol 2 == | ||
| + | In the climactic scene Hanada's pistol switches to another gun, of roughtly same appearance but without any kind of magazine, even the fake one. | ||
| + | [[File:Branded to Kill-Pistol1-12.jpg|thumb|none|600px|A close-up of Hanada's pistol in the climactic scene. The grip is a single detail without any kind of magazine.]] | ||
| + | |||
| + | == FN Model 1910 == | ||
| + | Number One Killer (Koji Nanbara) is armed with an [[FN Model 1910]]. Unlike most other guns in the movie, this one looks quite authentic (at least Hanada opens the slide and extracts the magazine). The FN 1910 isn't used in action. | ||
| + | [[Image:FN Model 1910 1616.jpg|thumb|none|300px|FN Model 1910 - .380 ACP]] | ||
| + | [[File:Branded to Kill-FN1910-1.jpg|thumb|none|600px|Number One in standoff with Hanada.]] | ||
| + | [[File:Branded to Kill-FN1910-2.jpg|thumb|none|600px|Another view of the same scene.]] | ||
| + | [[File:Branded to Kill-Pistol1-10.jpg|thumb|none|600px|Hanada's and Number One's pistols on the table.]] | ||
| + | [[File:Branded to Kill-FN1910-4.jpg|thumb|none|600px|The grips with FN logo can be seen.]] | ||
| + | [[File:Branded to Kill-FN1910-5.jpg|thumb|none|600px|Hanada pickes up Number One's pistol.]] | ||
| + | [[File:Branded to Kill-FN1910-6.jpg|thumb|none|600px|He finds a note in the unloaded magazine.]] | ||
| + | |||
| + | == Smith & Wesson Model 10 Snub Nose Style == | ||
| + | Gihei Kasuga (Hiroshi Minami) carries a snub nose revolver. His gun is based on [[Smith & Wesson Model 10 Snub Nose]] but differs in details, such as the shape of the front sight, the simplified details of the cylinder and seemingly too thin walls of the barrel. | ||
| + | [[Image:S&WModel10Snub.jpg|thumb|300px|none|Smith & Wesson Model 10 snub nose revolver - .38 Special]] | ||
| + | [[File:Branded to Kill-SW-1.jpg|thumb|none|600px|Kasuga draws his revolver during the conflict with Hanada.]] | ||
| + | [[File:Branded to Kill-SW-2.jpg|thumb|none|600px|Another view of the revolver. The trigger guard is seen better.]] | ||
| + | [[File:Branded to Kill-SW-3.jpg|thumb|none|600px|Kasuga holds the revolver when the car is ambushed.]] | ||
| + | [[File:Branded to Kill-SW-4.jpg|thumb|none|600px|Kasuga hides behind the car.]] | ||
| + | |||
| + | == Luger P08 Style == | ||
| + | During the ambush on the road, one of the rival criminals is armed with a pistol, styled like [[Luger P08]]. | ||
| + | [[Image:LugerP08Pistol.jpg|thumb|none|300px|For comparison: Luger P08 - 9x19mm]] | ||
| + | [[File:Branded to Kill-Luger-4.jpg|thumb|none|600px|An ambusher fires a Luger-style pistol.]] | ||
| + | [[File:Branded to Kill-Luger-6.jpg|thumb|none|600px|He is gunned down. This view allows to see how the screen gun differs from the real Luger.]] | ||
| + | |||
| + | == Luger P04 "Marine" Style == | ||
| + | Another ambusher is armed with a pistol, styled like [[Luger P04|Luger P04 "Marine"]] with 15cm barrel. | ||
| + | [[Image:Luger P08 Marine.jpg|thumb|none|300px|For comparison: Luger P04 "Marine" model - 9x19mm]] | ||
| + | [[File:Branded to Kill-Luger-1.jpg|thumb|none|600px|One of the ambushers is armed with a pistol that looks similar to long-barreled Luger P04 "Marine".]] | ||
| + | [[File:Branded to Kill-Luger-2.jpg|thumb|none|600px|The rear part of the pistol is seen when the ambusher brawls with Kasuga. It only marginally matches Luger.]] | ||
| + | [[File:Branded to Kill-Luger-7.jpg|thumb|none|600px|A long-barreled "pseudo Luger" is used by the Number One Killer when he taunts Hanada, showing the positions where he can fire from.]] | ||
| + | |||
| + | == Luger LP08 "Artillery" Style == | ||
| + | Koh (uncredited), the Number Four Killer, uses a pistol, styled like [[Luger LP08 "Artillery"]], during the shootout with Kasuga. | ||
| + | [[Image:LugerP08Artillery.jpg|thumb|none|300px|For comparison: Luger LP08 "Artillery" model - 9x19mm]] | ||
| + | [[File:Branded to Kill-Luger-3.jpg|thumb|none|600px|Koh fires at Kasuga. The barrel length resembles the "Artillery" model but the pistol lacks the front sight.]] | ||
| + | |||
| + | = Rifles = | ||
| + | == Stirling Model 20 == | ||
| + | Hanada uses a [[Stirling Model 20]] .22 semi auto rifle with sniper scope for two assassinations. Later same rifle (according to the plot, this is a different weapon) is used by Misako. After Misako's abduction, Hanada takes her rifle and uses it, fitted with the sniper scope, for the shootout on the breakwater and during the confrontation with Number One Killer. | ||
| + | [[File:Stirling Model 20.jpg|thumb|none|400px|Stirling Model 20 with the muzzle brake (Squires Bingham production) - .22LR]] | ||
| + | [[File:Branded to Kill-Rifle2-1.jpg|thumb|none|600px|Hanada attaches the sniper scope to his rifle.]] | ||
| + | [[File:Branded to Kill-Rifle2-2.jpg|thumb|none|600px|Hanada spots the target.]] | ||
| + | [[File:Branded to Kill-Rifle2-3.jpg|thumb|none|600px|A butterfly lands on the barrel, spoiling the shot.]] | ||
| + | [[File:Branded to Kill-Rifle2-4.jpg|thumb|none|600px|The barrel with the muzzle brake is seen.]] | ||
| + | [[File:Branded to Kill-Rifle3-1.jpg|thumb|none|600px|Hanada finds the rifle hidden in Misako's apartments.]] | ||
| + | [[File:Branded to Kill-Rifle3-2.jpg|thumb|none|600px|Misako aims at Hanada.]] | ||
| + | [[File:Branded to Kill-Rifle3-3.jpg|thumb|none|600px|Another view of the same scene.]] | ||
| + | [[File:Branded to Kill-Rifle3-4.jpg|thumb|none|600px|Hanada takes the rifle with the sniper scope when he goes on the breakwater.]] | ||
| + | [[File:Branded to Kill-Rifle3-5.jpg|thumb|none|600px|He uses the front sight of the rifle to pull a rope.]] | ||
| + | [[File:Branded to Kill-Rifle3-6.jpg|thumb|none|600px|Hanada fires. A mirror is attached to the barrel that allows him to spot an enemy behind him.]] | ||
| + | [[File:Branded to Kill-Rifle3-9.jpg|thumb|none|600px|The rifle is leaning against a chair. The muzzle brake is seen.]] | ||
| + | [[File:Branded to Kill-Rifle3-10.jpg|thumb|none|600px|The rifle is damaged by a precious shot of Number One.]] | ||
| + | |||
| + | == Remington Nylon 66 == | ||
| + | During the ambush in the wartime fort, Sakura (uncredited), the Number Two Killer, is armed with a [[Remington Nylon 66]] rifle. | ||
| + | [[Image:remington66nylon.jpg|thumb|400px|none|Remington Nylon 66 - .22 LR]] | ||
| + | [[File:Branded to Kill-Rifle1-1.jpg|thumb|none|600px|Sakura fires at Hanada's car.]] | ||
| + | [[File:Branded to Kill-Rifle1-2.jpg|thumb|none|600px|]] | ||
| + | [[File:Branded to Kill-Rifle1-3.jpg|thumb|none|600px|Another view of the same scene.]] | ||
| + | [[File:Branded to Kill-Rifle1-4.jpg|thumb|none|600px|The muzzle is seen.]] | ||
| + | |||
| + | == Ruger 10/22 == | ||
| + | During the shootout on the breakwater, one of Number One's henchmen is armed with a [[Ruger 10/22]] semi-auto rifle. | ||
| + | [[Image:Ruger10 22.jpg|thumb|none|400px|Ruger 10/22 (Pre 2005 model) - .22 LR]] | ||
| + | [[File:Branded to Kill-Rifle4-1.jpg|thumb|none|600px|A henchman covers under Hanada's gunfire.]] | ||
| + | [[File:Branded to Kill-Rifle4-2.jpg|thumb|none|600px|He raises the rifle...]] | ||
| + | [[File:Branded to Kill-Rifle4-3.jpg|thumb|none|600px|...but is gunned down.]] | ||
| + | |||
| + | == Number One's Henchmen's Rifle == | ||
| + | The second henchman is armed with an unidentified rifle with a sniper scope. | ||
| + | [[File:Branded to Kill-Rifle4-4.jpg|thumb|none|600px|Another henchman aims a rifle with sniper scope.]] | ||
| + | [[File:Branded to Kill-Rifle4-5.jpg|thumb|none|600px|Another view of the henchman's rifle.]] | ||
| + | [[File:Branded to Kill-Rifle4-6.jpg|thumb|none|600px|He is also gunned down by Hanada.]] | ||
| + | |||
| + | = Trivia = | ||
| + | [[File:Branded to Kill-Navy-1.jpg|thumb|none|600px|A ship that is seen at the background left is most likely the JN ''Amatsukaze'' guided missile destroyer.]] | ||
| + | [[File:Branded to Kill-Navy-2.jpg|thumb|none|600px|US Navy aircraft carrier enters a Japanese port.]] | ||
| + | [[File:Btk.jpg|thumb|none|300px|English language release cover.]] | ||
[[Category:Movie]] | [[Category:Movie]] | ||
| + | [[Category:B&W]] | ||
| + | [[Category:Action Movie]] | ||
[[Category:Crime]] | [[Category:Crime]] | ||
| + | [[Category:Thriller]] | ||
[[Category:Japanese Produced/Filmed]] | [[Category:Japanese Produced/Filmed]] | ||
Latest revision as of 23:27, 15 February 2024
| Unidentified This article currently has one or more unidentified weapons. |
| ||||||||||||||||||||||||||||||
Branded to Kill (殺しの烙印, Koroshi no rakuin) is a 1967 Japanese crime thriller directed by Seijun Suzuki. The plot depicts Goro Hanada (Jô Shishido), the Japanese yakuza Number Three Killer with a fetish for the smell of boiling rice. In his attempts to climb to the very top in the bloody business Hanada meets and falls in love with a mysterious woman named Misako, who recruits him for a mission that Hanada fails. Due to this, he becomes a target for the Number One Killer.
This low budget, surrealistic and absurdist movie originally was a commercial and critical disappointment for the studio. But over time Branded to Kill was recognized as a cult classic and made influence for notable filmmakers, among which are Jim Jarmusch, John Woo, Chan-wook Park and Quentin Tarantino.
The following weapons were used in the film Branded to Kill:
Note!! Most, if not all guns in the movie turn out to be not real weapons but rather replicas, likely flashpaper guns. These guns are named by the models they are based on (when possible), with mentioning the features that allow to tell they are not real.
Handguns
Custom Mauser C96
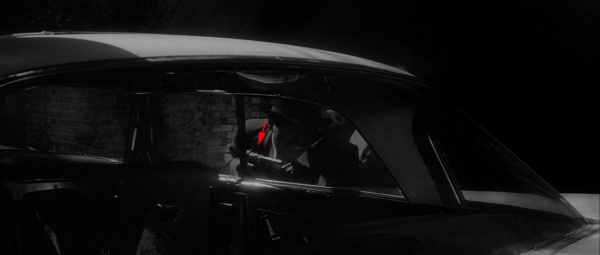
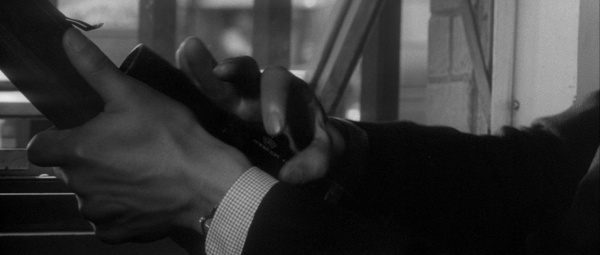
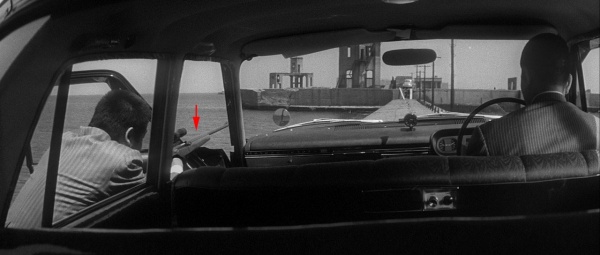
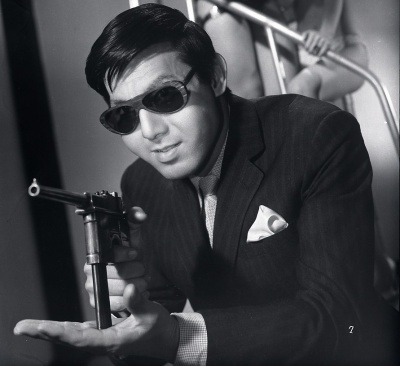
Goro Hanada uses a flashpaper replica of custom Mauser C96 pistol, modified for using twenty-round detachable magazine, like Mauser M712 Schnellfeuer. The main non-standard feature of this gun is the lack of any kind of safety. Other oddities are the large ring hammer that is positioned lower than on standard early C96s with this feature, smooth slide rails that are common for "Prewar Commercial" version, and no markings on the frame. In action Hanada's Mauser fires in full auto mode despite it lacks the selector switch of Schnellfeuer model.
Colt Model 1903 / Ruby Style Pistol 1
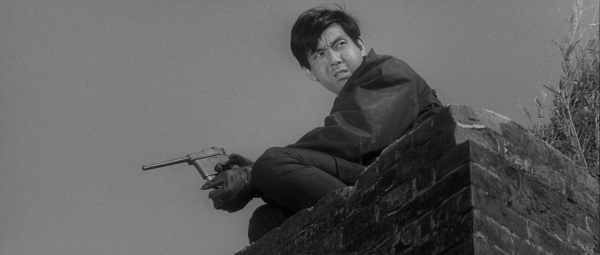
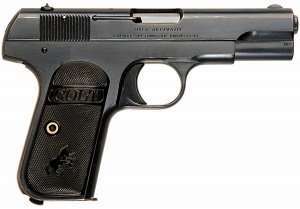
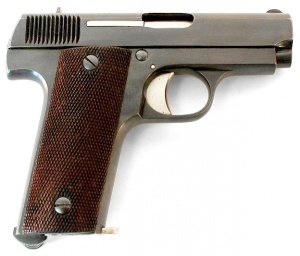
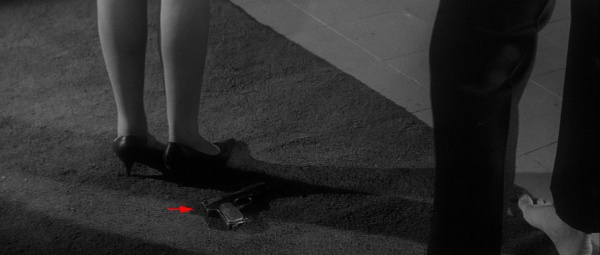
A hammerless pistol, resembling Colt Model 1903 (but with shorter barrel and more angular shapes) or pistols of the Ruby family, is seen in numerous scenes. A single prop is reused, while these are different guns according to the story. Misako Nakajo (Annu Mari) holds a pistol during the failed assassination. Further same looking pistol is seen in hands of Mami Hanada (Mariko Ogawa). After she drops the gun and runs away, Hamada picks up the gun and uses it as his main gun until the final.

Colt Model 1903 / Ruby Style Pistol 2
In the climactic scene Hanada's pistol switches to another gun, of roughtly same appearance but without any kind of magazine, even the fake one.
FN Model 1910
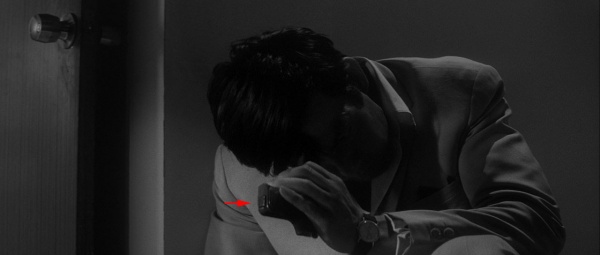
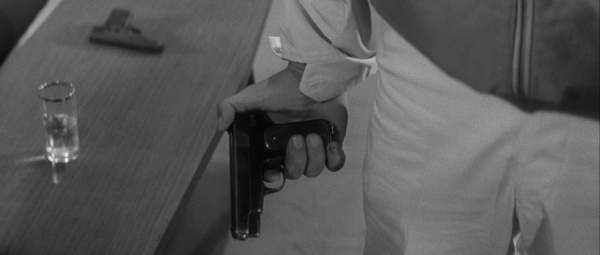
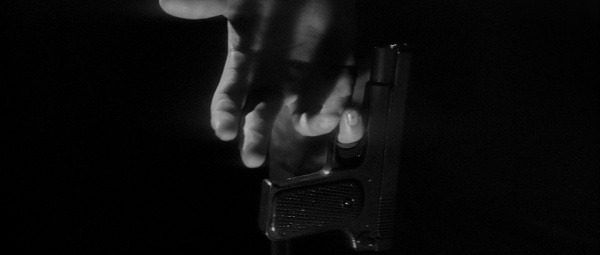
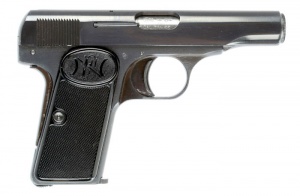
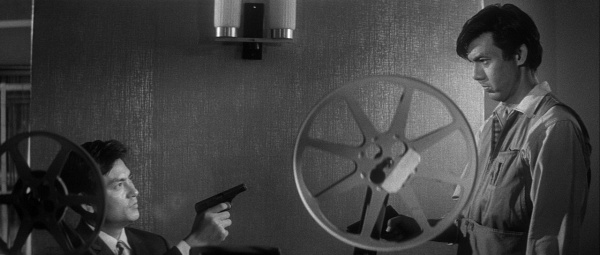
Number One Killer (Koji Nanbara) is armed with an FN Model 1910. Unlike most other guns in the movie, this one looks quite authentic (at least Hanada opens the slide and extracts the magazine). The FN 1910 isn't used in action.
Smith & Wesson Model 10 Snub Nose Style
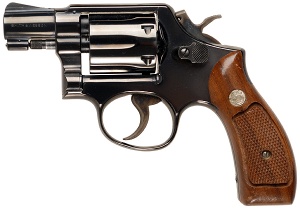
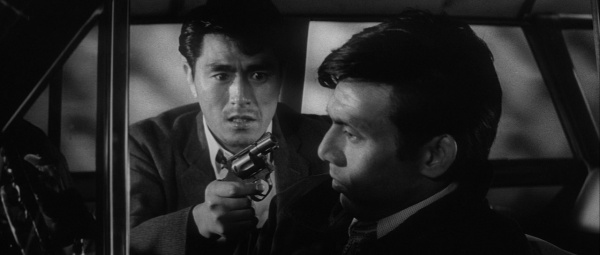
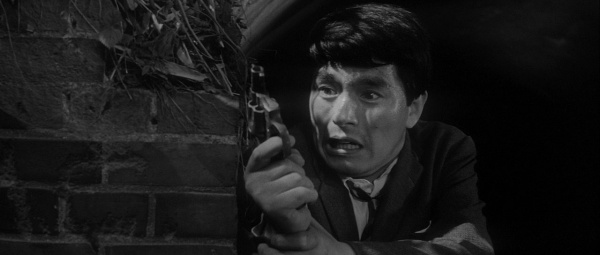
Gihei Kasuga (Hiroshi Minami) carries a snub nose revolver. His gun is based on Smith & Wesson Model 10 Snub Nose but differs in details, such as the shape of the front sight, the simplified details of the cylinder and seemingly too thin walls of the barrel.
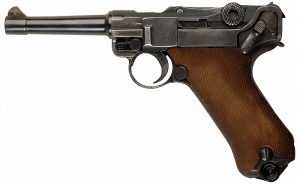
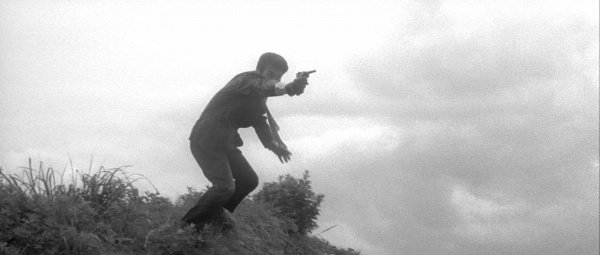
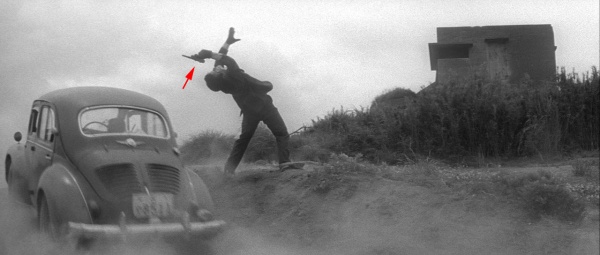
Luger P08 Style
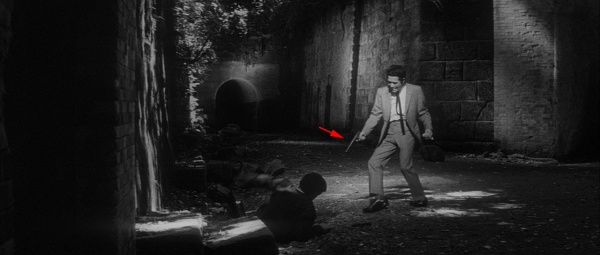
During the ambush on the road, one of the rival criminals is armed with a pistol, styled like Luger P08.
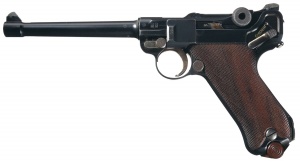
Luger P04 "Marine" Style
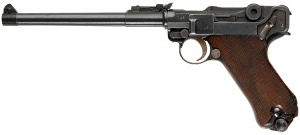
Another ambusher is armed with a pistol, styled like Luger P04 "Marine" with 15cm barrel.
Luger LP08 "Artillery" Style
Koh (uncredited), the Number Four Killer, uses a pistol, styled like Luger LP08 "Artillery", during the shootout with Kasuga.
Rifles
Stirling Model 20
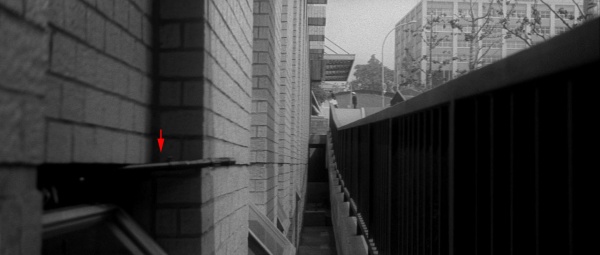
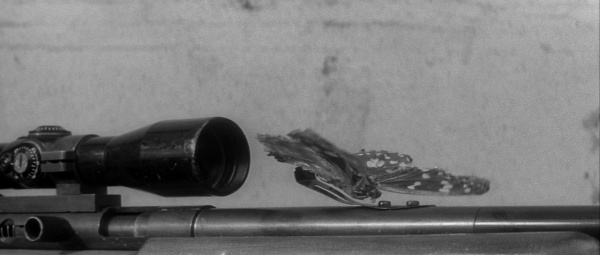
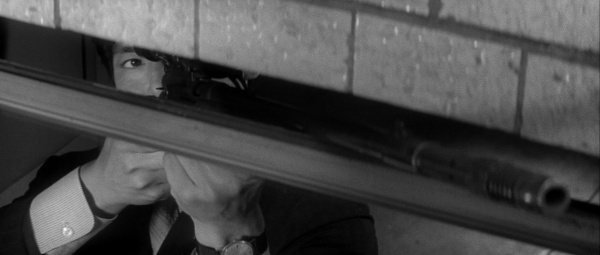
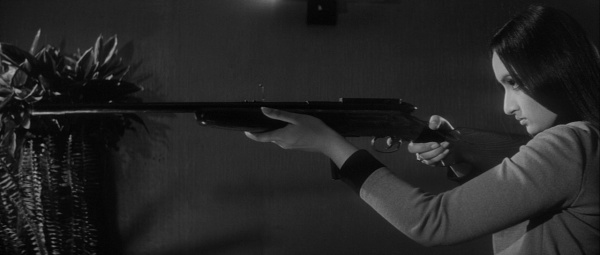
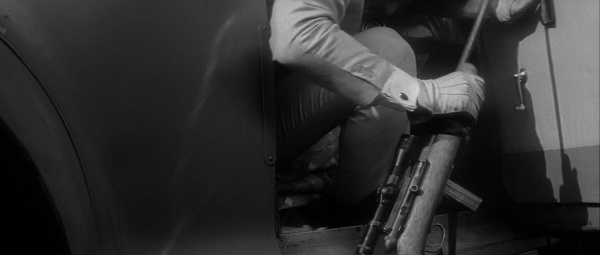
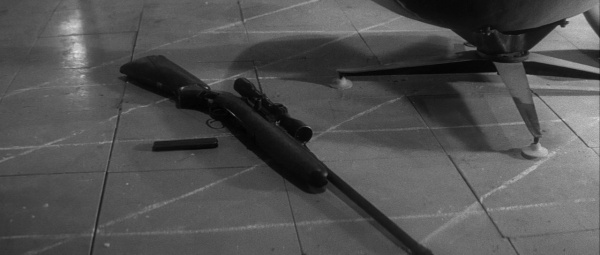
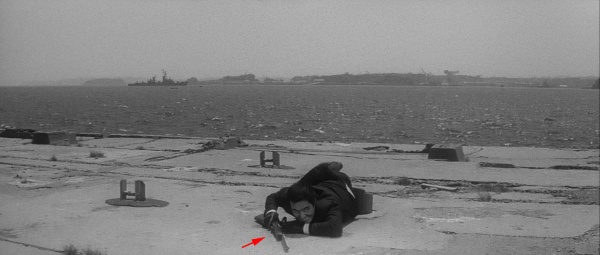
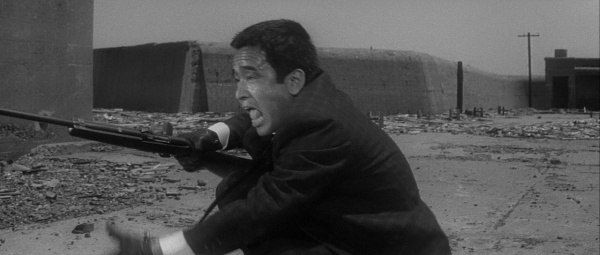
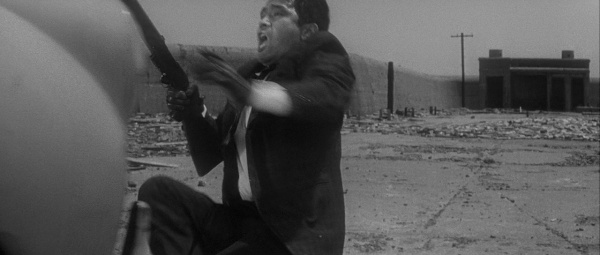
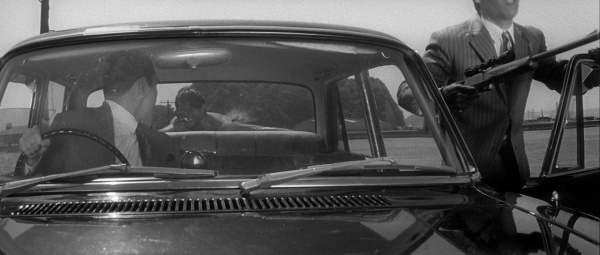
Hanada uses a Stirling Model 20 .22 semi auto rifle with sniper scope for two assassinations. Later same rifle (according to the plot, this is a different weapon) is used by Misako. After Misako's abduction, Hanada takes her rifle and uses it, fitted with the sniper scope, for the shootout on the breakwater and during the confrontation with Number One Killer.
Remington Nylon 66
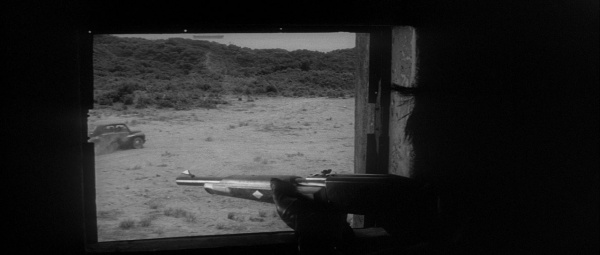
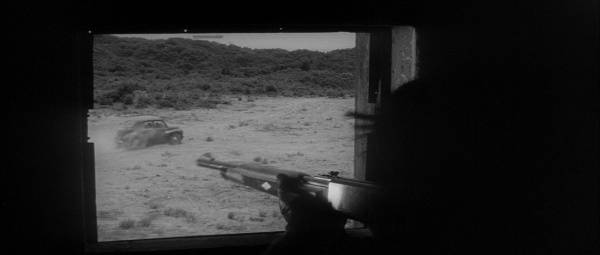
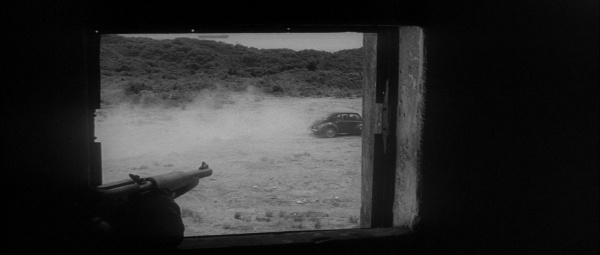
During the ambush in the wartime fort, Sakura (uncredited), the Number Two Killer, is armed with a Remington Nylon 66 rifle.
Ruger 10/22
During the shootout on the breakwater, one of Number One's henchmen is armed with a Ruger 10/22 semi-auto rifle.
Number One's Henchmen's Rifle
The second henchman is armed with an unidentified rifle with a sniper scope.


