| If you have been locked out of your account you can request a password reset here. |
Difference between revisions of "Tears of the Sun"
| Line 1: | Line 1: | ||
[[Image:Tears of the Sun DVD.jpg|thumb|right|300px|''Tears of the Sun'' (2003)]] | [[Image:Tears of the Sun DVD.jpg|thumb|right|300px|''Tears of the Sun'' (2003)]] | ||
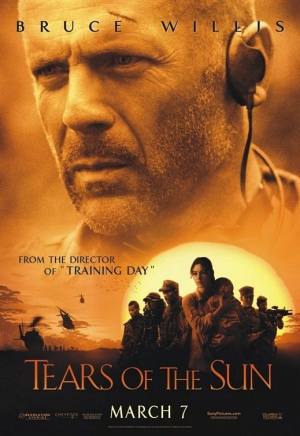
| − | '''''Tears of the Sun''''' is a 2003 action film starring [[Bruce Willis]] as LT A.K. Waters, a US Navy SEAL commander who leads his team into Nigeria during a coup to extract Lena Kendricks ([[Monica Bellucci]]), an American doctor. When she goes with the team to the extraction site along with | + | '''''Tears of the Sun''''' is a 2003 action film starring [[Bruce Willis]] as LT A.K. Waters, a US Navy SEAL commander who leads his team into Nigeria during a coup to extract Lena Kendricks ([[Monica Bellucci]]), an American doctor. When she goes with the team to the extraction site along with 80 refugees from her village, Lena discovers that the SEALs' mission is only to take her. After a change of heart, Waters and his SEAL team then become determined to get the doctor and the refugees to the border before the rebel militants can find them. The film was directed by [[Antoine Fuqua]] and retired Navy SEAL [[Harry Humphries]] served as the chief military technical advisor. |
{{Film Title}} | {{Film Title}} | ||
| Line 7: | Line 7: | ||
{{Spoilers}} | {{Spoilers}} | ||
| + | |||
=Pistols= | =Pistols= | ||
==Heckler & Koch MK23== | ==Heckler & Koch MK23== | ||
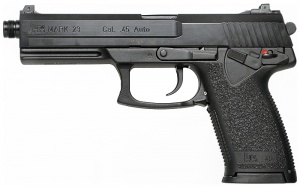
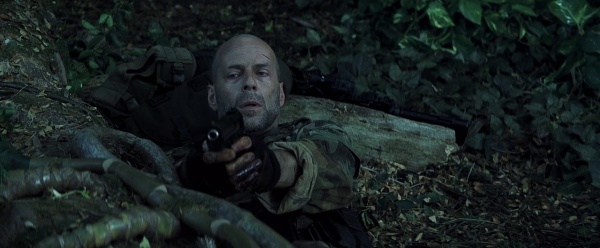
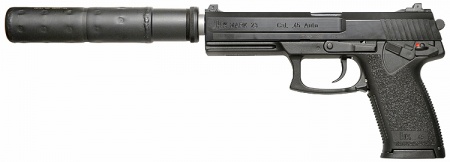
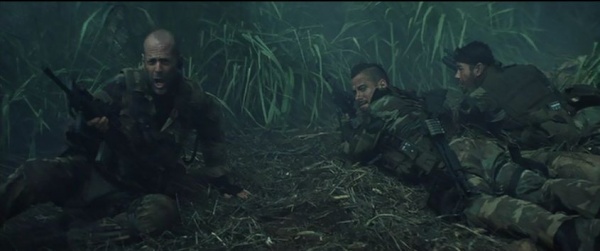
The pistol designed especially for US SOCOM, the [[Heckler & Koch Mark 23]] is seen used by several Navy SEALs, including Lieutenant A.K. Waters ([[Bruce Willis]]), Ellis 'Zee' Pettigrew ([[Eamonn Walker]]), James 'Red' Atkins ([[Cole Hauser]]), Jason 'Flea' Mabry ([[Chad Smith]]), Kelly Lake ([[Johnny Messner]]), and Michael 'Slo' Slowenski ([[Nick Chinlund]]). | The pistol designed especially for US SOCOM, the [[Heckler & Koch Mark 23]] is seen used by several Navy SEALs, including Lieutenant A.K. Waters ([[Bruce Willis]]), Ellis 'Zee' Pettigrew ([[Eamonn Walker]]), James 'Red' Atkins ([[Cole Hauser]]), Jason 'Flea' Mabry ([[Chad Smith]]), Kelly Lake ([[Johnny Messner]]), and Michael 'Slo' Slowenski ([[Nick Chinlund]]). | ||
[[Image:Mk23.jpg|thumb|none|300px|Heckler & Koch Mk 23 Mod 0 - .45 ACP]] | [[Image:Mk23.jpg|thumb|none|300px|Heckler & Koch Mk 23 Mod 0 - .45 ACP]] | ||
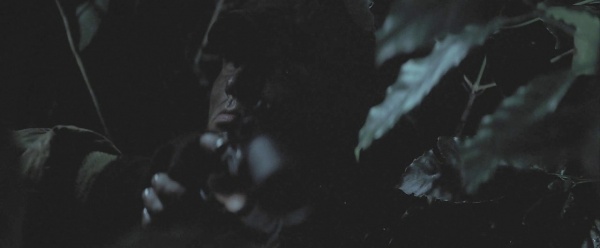
| − | [[Image:003TOS Bruce Willis 050.jpg|thumb|none|600px| Waters awakes with his MK23 in | + | [[Image:003TOS Bruce Willis 050.jpg|thumb|none|600px|Waters awakes with his MK23 in hand.]] |
| − | [[Image:H&KMk23ModwKnightsSuppressor.jpg |thumb|none|450px| | + | [[Image:H&KMk23ModwKnightsSuppressor.jpg |thumb|none|450px|Heckler & Koch Mk 23 Mod 0 with (real) Knights Armament suppressor - .45 ACP]] |
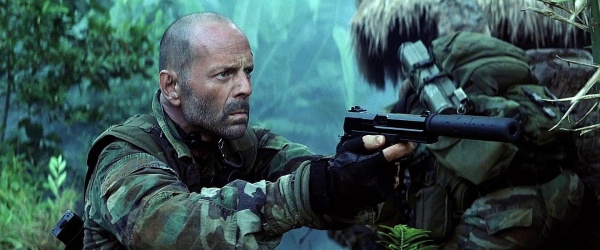
| − | [[Image:TOTS MK23.jpg|thumb|none|600px|Suppressed MK23 in | + | [[Image:TOTS MK23.jpg|thumb|none|600px|Suppressed MK23 in hand.]] |
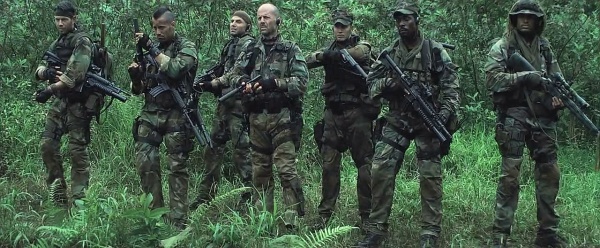
| + | [[Image:TOTS MISC.jpg|thumb|none|600px|The team with their weapons, several of them readying their Mark 23 pistols.]] | ||
[[Image:TOTS MK23-2.jpg|thumb|none|600px|LT Waters with his MK23.]] | [[Image:TOTS MK23-2.jpg|thumb|none|600px|LT Waters with his MK23.]] | ||
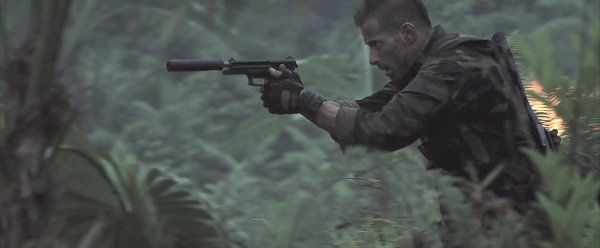
| − | [[Image:Tears of the Sun MK23 1.jpg|thumb|none|600px|LT A.K. Waters wields a suppressed H&K Mark 23 while engaging militia fighters in the village]] | + | [[Image:Tears of the Sun MK23 1.jpg|thumb|none|600px|LT A.K. Waters wields a suppressed H&K Mark 23 while engaging militia fighters in the village.]] |
| − | [[Image:TOTS MK23-3.jpg|thumb|none|600px|Red prepares to enter a | + | [[Image:TOTS MK23-3.jpg|thumb|none|600px|Red prepares to enter a shack with his MK23.]] |
[[Image:TOTS MK23-4.jpg|thumb|none|600px|Rack the slide on your MK23, Lake! This is a continuity shot as it only happens for a second.]] | [[Image:TOTS MK23-4.jpg|thumb|none|600px|Rack the slide on your MK23, Lake! This is a continuity shot as it only happens for a second.]] | ||
| − | |||
==SIG-Sauer P226== | ==SIG-Sauer P226== | ||
| Line 25: | Line 26: | ||
[[Image:TOTS SIG.jpg|thumb|none|600px|Doc crawls towards the village.]] | [[Image:TOTS SIG.jpg|thumb|none|600px|Doc crawls towards the village.]] | ||
[[Image:TOTS SIG-2.jpg|thumb|none|600px|Doc makes an entry with his P226 at the ready.]] | [[Image:TOTS SIG-2.jpg|thumb|none|600px|Doc makes an entry with his P226 at the ready.]] | ||
| − | [[Image:TOTS SIG-3.jpg|thumb|none|600px|Doc wields his SIG during the final shootout.]] | + | [[Image:TOTS SIG-3.jpg|thumb|none|600px|Doc wields his SIG-Sauer during the final shootout.]] |
| − | [[Image:TOTS SIG-4.jpg|thumb|none|600px|Silk fires his SIG when his M1A runs dry.]] | + | [[Image:TOTS SIG-4.jpg|thumb|none|600px|Silk fires his SIG-Sauer when his M1A runs dry.]] |
| − | ==M1911A1== | + | ==Colt M1911A1== |
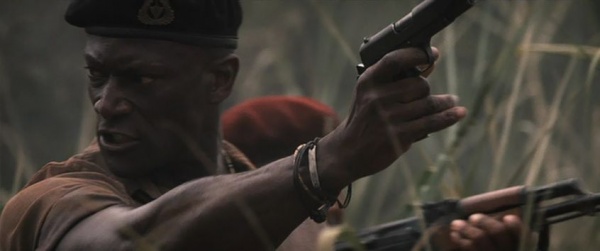
| − | The [[M1911A1]] appears in the hands of two senior officers of the Nigerian Militants including Terwase ([[Peter Mensah]]). | + | The [[Colt M1911A1]] appears in the hands of two senior officers of the Nigerian Militants including Terwase ([[Peter Mensah]]). |
| − | [[Image:M1911Colt.jpg|thumb|300px|none|M1911A1 - .45 ACP]] | + | [[Image:M1911Colt.jpg|thumb|300px|none|Colt M1911A1 - .45 ACP]] |
| − | [[Image:TOTS 1911.jpg|thumb|none|600px|The officer far left has what looks like a M1911A1.]] | + | [[Image:TOTS 1911.jpg|thumb|none|600px|The officer on the far left has what looks like a M1911A1.]] |
[[Image:TOTS 1911-2.jpg|thumb|none|600px|The second in command Terwase charges the fleeing SEALs with his M1911A1.]] | [[Image:TOTS 1911-2.jpg|thumb|none|600px|The second in command Terwase charges the fleeing SEALs with his M1911A1.]] | ||
| − | [[Image:TOTS 1911-3.jpg|thumb|none|600px|Terwase ([[Peter Mensah]]) orders his men forward, M1911A1 in | + | [[Image:TOTS 1911-3.jpg|thumb|none|600px|Terwase ([[Peter Mensah]]) orders his men forward, M1911A1 in hand.]] |
==Beretta 92FS== | ==Beretta 92FS== | ||
| Line 47: | Line 48: | ||
=Rifles / Carbines= | =Rifles / Carbines= | ||
==M4A1== | ==M4A1== | ||
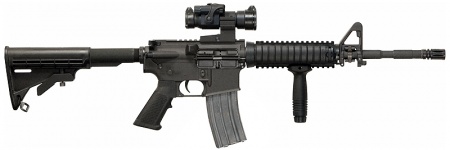
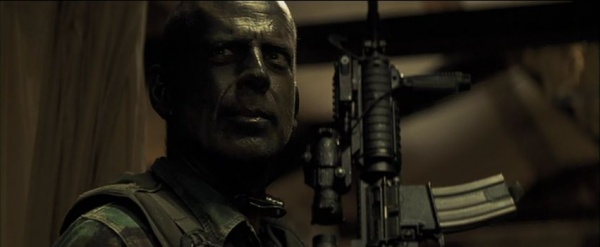
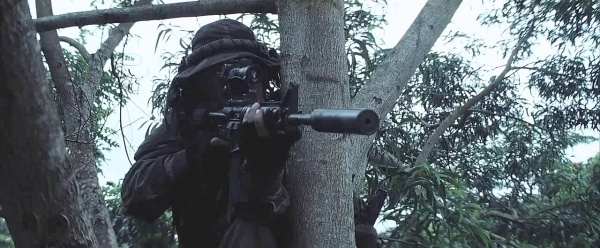
| − | Lieutenant Waters ([[Bruce Willis]]), Flea ([[Chad Smith]]), and Lake ([[Johnny Messner]]) use [[M4A1 Carbine]]s as their primary weapons. Team corpsman Doc ([[Paul Francis]]) and radioman Zee ([[Eamonn Walker]]) also have accessorized M4 carbines (with M203 grenade launchers mounted). | + | Lieutenant Waters ([[Bruce Willis]]), Flea ([[Chad Smith]]), and Lake ([[Johnny Messner]]) use [[M4A1 Carbine]]s as their primary weapons. Team corpsman Doc ([[Paul Francis]]) and radioman Zee ([[Eamonn Walker]]) also have accessorized M4 carbines (with M203 grenade launchers mounted). Flea has a Combat Military Optics LTD Marksman Series Model 100 scope on the carry handle, a cheek pad on the stock, a suppressor, and a custom paintjob of green and black. Flea and Lake have suppressors on their carbines. Both Lake and LT Waters have M68 Aimpoint scopes fitted on their weapons. When the team first arrives in Africa, their M4A1s are fitted with PVS-14 night-vision scopes which are removed once morning arrives. LT Waters' also has a D-LAP Laser sight, essentially a more compact PEQ-2A. It is worth noting that they use the correct, modern flash hiders rather than the A1 style used in so many movies M4A1s and M16A2s. |
| − | [[Image:ColtM4.jpg|thumb|none| | + | [[Image:ColtM4.jpg|thumb|none|450px|M4A1 with M68 Aimpoint scope and RIS foregrip - 5.56x45mm]] |
| − | [[Image:TOTS M4.jpg|thumb|none|600px|LT Waters meets Dr. Lena | + | [[Image:TOTS M4.jpg|thumb|none|600px|LT Waters meets Dr. Lena Kendricks. Note the M68 Aimpoint is mounted backwards in this shot.]] |
| + | [[Image:TOTS M4-2.jpg|thumb|none|600px|Flea and Lake search the village shacks with their suppressed M4s.]] | ||
| + | [[Image:TOTS MISC.jpg|thumb|none|600px|The team with their weapons. Doc, Lake, LT, and Zee with their M4s.]] | ||
| + | [[Image:TOTS M4-4.jpg|thumb|none|600px|Flea takes a sniper position in a tree while the other team members raid the village.]] | ||
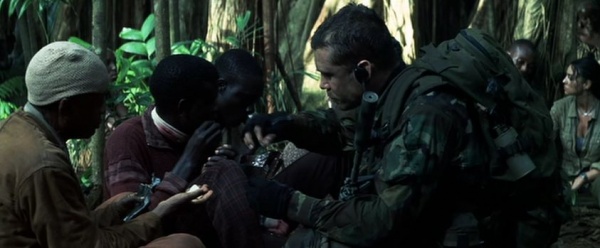
| + | [[Image:TOTS M4-3.jpg|thumb|none|600px|Flea hands out the contents of his MRE to refugees.]] | ||
[[Image:Tears ok the Sun LT Waters.jpg|thumb|600px|none|Lieutenant A.K. Waters ([[Bruce Willis]]) with his M4A1 with M68 Aimpoint scope and RIS foregrip.]] | [[Image:Tears ok the Sun LT Waters.jpg|thumb|600px|none|Lieutenant A.K. Waters ([[Bruce Willis]]) with his M4A1 with M68 Aimpoint scope and RIS foregrip.]] | ||
| − | [[Image:TOTS M4- | + | [[Image:TOTS M4-6.jpg|thumb|none|600px|Lake fires his M4. He is firing from this awkward position due to having been shot in the shoulder minutes earlier.]] |
| − | [[Image:TOTS M4- | + | [[Image:TOTS M4-Lake.jpg||thumb|none|600px|After being wounded, Lake uses his left arm to hold the M4A1.]] |
| − | |||
[[Image:TOTS 1211.jpg|thumb|none|600px|Flea ([[Chad Smith]]) fires his suppressed M4.]] | [[Image:TOTS 1211.jpg|thumb|none|600px|Flea ([[Chad Smith]]) fires his suppressed M4.]] | ||
| − | + | [[Image:TOTS M4-7.jpg|thumb|none|600px|Red ([[Cole Hauser]]) fires LT Waters' M4 after he drops it.]] | |
| − | [[Image:TOTS M4-7.jpg|thumb|none|600px|Red | ||
| − | |||
| − | |||
==Springfield M1A== | ==Springfield M1A== | ||
| − | A [[Springfield M1A]] with an aftermarket scope mount is carried by Silk ([[Charles Ingram]]). It is covered in heavy custom camo and mounts a Leupold & Stevens Mark 4 LR/T 10x40 M1 rifle scope. He uses the weapon throughout the | + | A [[Springfield M1A]] with an aftermarket scope mount is carried by Silk ([[Charles Ingram]]). It is covered in heavy custom camo and mounts a Leupold & Stevens Mark 4 LR/T 10x40 M1 rifle scope. He uses the weapon throughout the film. It is noted as being of an M1A not a [[M14_Rifle#M21.2FM25_Sniper_Rifle|M25 Sniper Rifle]] by the notch which would normally contain the fire-selector switch. M21/25 rifles are fitted with a selector lock, preventing the Selective fire mechanism from working in anything other than semi-automatic. When a Civilian M1A is put into a Military M14 stock there is a great big empty notch in the stock where the selector lock should be. |
| − | [[Image:Springfield_M1A.jpg|thumb|none| | + | [[Image:Springfield_M1A.jpg|thumb|none|450px|Springfield M1A with scope - .308 Winchester. You can notice the notch in the stock where the selector lock is missing.]] |
[[Image:TOTS M1A.jpg|thumb|none|600px|Silk with the M1A rifle. Note the open notch for the selector switch (which would be filled with the selector notch if it was a real M21/M25).]] | [[Image:TOTS M1A.jpg|thumb|none|600px|Silk with the M1A rifle. Note the open notch for the selector switch (which would be filled with the selector notch if it was a real M21/M25).]] | ||
[[Image:TOTS M1A-2.jpg|thumb|none|600px|Silk ([[Charles Ingram]]) readies to shoot the refugee carrying the transmitter with his M1A.]] | [[Image:TOTS M1A-2.jpg|thumb|none|600px|Silk ([[Charles Ingram]]) readies to shoot the refugee carrying the transmitter with his M1A.]] | ||
| − | [[Image:TOTS M1A-3.jpg|thumb|none|600px|Red and Silk make their final stand, firing LT | + | [[Image:TOTS M1A-3.jpg|thumb|none|600px|Red and Silk make their final stand, firing LT Waters' M4 and the M1A.]] |
==AKM== | ==AKM== | ||
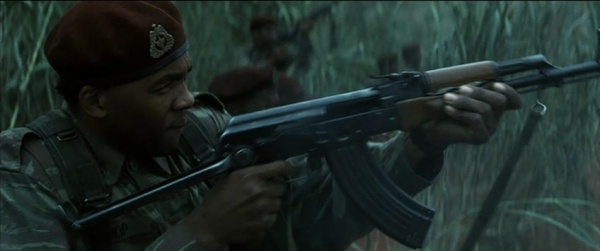
The most commonly used assault rifle on the African continent, [[AKM]] rifles are seen in the hands of militants and refugees. | The most commonly used assault rifle on the African continent, [[AKM]] rifles are seen in the hands of militants and refugees. | ||
| − | [[Image:AKMRifle.jpg|thumb| | + | [[Image:AKMRifle.jpg|thumb|450px|none|AKM - 7.62x39mm]] |
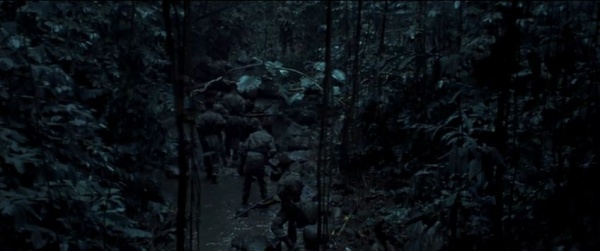
[[Image:TOTS AK.jpg|thumb|none|600px|A rebel fighter walks through the jungle with his AKM.]] | [[Image:TOTS AK.jpg|thumb|none|600px|A rebel fighter walks through the jungle with his AKM.]] | ||
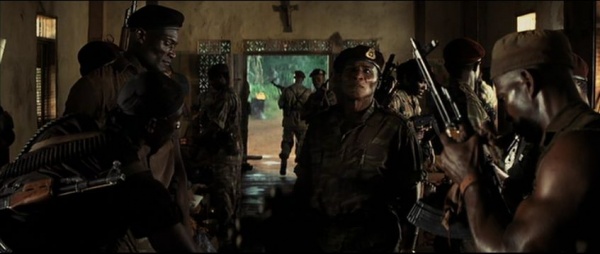
| − | [[Image:TOTS AK-2.jpg|thumb|none|600px|Rebels enter the mission with their | + | [[Image:TOTS AK-2.jpg|thumb|none|600px|Rebels enter the mission with their AKM rifles.]] |
| + | [[Image:TOTS AK-3.jpg|thumb|none|600px|The rifle on the left is a Type 56, but the rifle on the right is an AKM, noted by its muzzle brake and front sight post.]] | ||
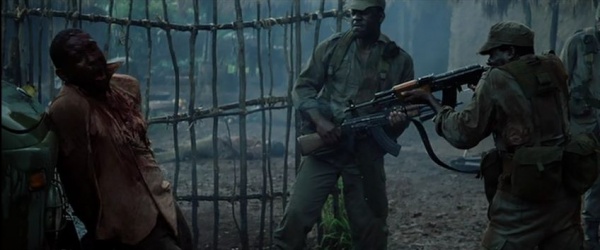
[[Image:TOTS AK-6.jpg|thumb|none|600px|A rebel executes a villager with his AKM.]] | [[Image:TOTS AK-6.jpg|thumb|none|600px|A rebel executes a villager with his AKM.]] | ||
| − | |||
==AK-47== | ==AK-47== | ||
The predecessor to the AKM, the [[AK-47]], or more simply "AK", is seen. They can be noted by their milled receivers and lack of slanted muzzle brakes. Some may be [[Norinco Type 56]] rifles. Used by militants, refugees and Doc ([[Paul Francis]]), who took it from a dead militant. He is never seen using it, but after the village raid, he most likely gave it to a refugee, as they acquired a lot of them then. | The predecessor to the AKM, the [[AK-47]], or more simply "AK", is seen. They can be noted by their milled receivers and lack of slanted muzzle brakes. Some may be [[Norinco Type 56]] rifles. Used by militants, refugees and Doc ([[Paul Francis]]), who took it from a dead militant. He is never seen using it, but after the village raid, he most likely gave it to a refugee, as they acquired a lot of them then. | ||
| − | [[File:TypeIII AK47.jpg|thumb|none| | + | [[File:TypeIII AK47.jpg|thumb|none|450px|Final Production version of the Type III AK-47 with cleaning rod removed and laminated stock - 7.62x39mm]] |
| − | [[Image:TOTS AK-4.jpg|thumb|none|600px|Doc | + | [[Image:TOTS AK-4.jpg|thumb|none|600px|Doc Kelley ([[Paul Francis]]) sits with his AK slung over his shoulder. Note the more curved style of stock. The weapon was acquired from a dead militant.]] |
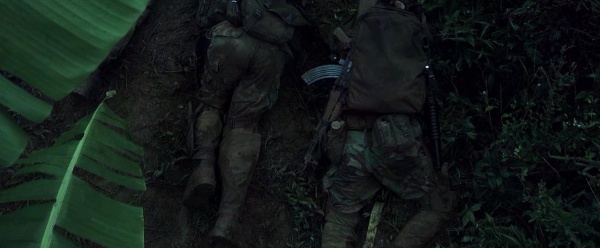
[[Image:TOTS AK-5.jpg|thumb|none|600px|Doc crawls towards the village with his AK slung over his shoulder. Note the milled receiver.]] | [[Image:TOTS AK-5.jpg|thumb|none|600px|Doc crawls towards the village with his AK slung over his shoulder. Note the milled receiver.]] | ||
[[Image:TOTS AK-7.jpg|thumb|none|600px|A refugee obtains a pair of boots and an AK-47 from a dead rebel.]] | [[Image:TOTS AK-7.jpg|thumb|none|600px|A refugee obtains a pair of boots and an AK-47 from a dead rebel.]] | ||
| Line 84: | Line 85: | ||
==AKMSU== | ==AKMSU== | ||
| − | A few soldiers are seen wielding the [[AKMSU]]. | + | A few rebel soldiers are seen wielding the [[AKMSU]]. |
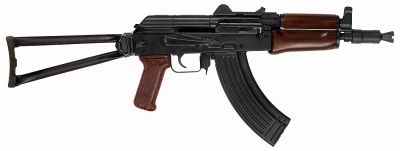
| − | [[Image:AK-Krinkov.jpg|thumb|none| | + | [[Image:AK-Krinkov.jpg|thumb|none|400px|AKMSU Krinkov - 7.62x39mm. This is a blank adapted full auto transferable AKM pistol that was converted into a Krinkov via parts kit.]] |
[[Image:TOTS AKSU.jpg|thumb|none|600px|Rebel soldiers advancing. They are armed with a variety of AKs including AKMSUs.]] | [[Image:TOTS AKSU.jpg|thumb|none|600px|Rebel soldiers advancing. They are armed with a variety of AKs including AKMSUs.]] | ||
==M16A2== | ==M16A2== | ||
A few of the Marines disembarking the helicopter in the beginning of the film are carrying [[M16A2]] rifles, as well as a few Marines at the end of the film. | A few of the Marines disembarking the helicopter in the beginning of the film are carrying [[M16A2]] rifles, as well as a few Marines at the end of the film. | ||
| − | [[Image:M16A2.jpg|thumb| | + | [[Image:M16A2.jpg|thumb|450px|none|M16A2 Rifle - 5.56x45mm. Select Fire rifle (Safe/Semi/3 round Burst Only).]] |
[[Image:TOTS M16A2.jpg|thumb|none|600px|Marine behind the others is carrying a M16A2.]] | [[Image:TOTS M16A2.jpg|thumb|none|600px|Marine behind the others is carrying a M16A2.]] | ||
[[Image:TOTS M16A2-2.jpg|thumb|none|600px|The Marine in the background is carrying a M16A2.]] | [[Image:TOTS M16A2-2.jpg|thumb|none|600px|The Marine in the background is carrying a M16A2.]] | ||
| Line 96: | Line 97: | ||
==FN FAL== | ==FN FAL== | ||
Actual footage of the violence in Africa is seen in the beginning of the film and one scene shows several soldiers carrying [[FN_FAL#FN_FAL|FN FAL]] rifles. | Actual footage of the violence in Africa is seen in the beginning of the film and one scene shows several soldiers carrying [[FN_FAL#FN_FAL|FN FAL]] rifles. | ||
| − | [[Image:Fal_para-1-.jpg|thumb|none| | + | [[Image:Fal_para-1-.jpg|thumb|none|450px|FN FAL 50.63 Paratrooper with 18" barrel - 7.62x51mm NATO]] |
| − | [[Image:TOTS FN FAL.jpg|thumb|none|600px|The soldier far right has a FN FAL | + | [[Image:TOTS FN FAL.jpg|thumb|none|600px|The soldier on the far right has a FN FAL Paratrooper.]] |
| − | [[Image:TOTS FN FAL-2.jpg|thumb|none|600px|The soldier also has a FN FAL | + | [[Image:TOTS FN FAL-2.jpg|thumb|none|600px|The soldier also has a FN FAL Paratrooper.]] |
==Norinco Type 56-1== | ==Norinco Type 56-1== | ||
| − | The [[Norinco Type 56]] is | + | The [[Norinco Type 56]] is used by several rebel soldiers. Some are full-stocked variants while others are under-folding stocked Type 56-1s. |
| − | [[Image:Type56S.jpg|thumb|none| | + | [[Image:Type56S.jpg|thumb|none|450px|Norinco Type 56-1 (under-folding stock variant) - 7.62x39mm]] |
[[Image:TOTS AKS.jpg|thumb|none|600px|A rebel fires upon the fleeing SEALs with his Type 56-1.]] | [[Image:TOTS AKS.jpg|thumb|none|600px|A rebel fires upon the fleeing SEALs with his Type 56-1.]] | ||
==Karabiner 98k== | ==Karabiner 98k== | ||
What appears to be a WWII-vintage [[Karabiner 98k]] is seen in the hands of at least two militants. They are never given explicit detail, sadly. | What appears to be a WWII-vintage [[Karabiner 98k]] is seen in the hands of at least two militants. They are never given explicit detail, sadly. | ||
| − | [[Image:Karabiner-98K.jpg|thumb|none| | + | [[Image:Karabiner-98K.jpg|thumb|none|450px|Karabiner 98k - 7.92x57mm Mauser]] |
| − | [[Image:TOTS Kar98.jpg|thumb|none|600px|The rebel bottom center is carrying a | + | [[Image:TOTS Kar98.jpg|thumb|none|600px|The rebel in bottom center is carrying a Kar98k.]] |
| − | [[Image:TOTS Kar98-2.jpg|thumb|none|600px|A rebel armed with what appears to be a 98k moves to investigate the body the transmitter-carrying refugee.]] | + | [[Image:TOTS Kar98-2.jpg|thumb|none|600px|A rebel armed with what appears to be a 98k moves to investigate the body of the transmitter-carrying refugee.]] |
==SKS== | ==SKS== | ||
| − | Several rebels and refugees are seen carrying [[SKS rifle]]s. | + | Several rebels and refugees are seen carrying [[SKS rifle]]s. |
| − | [[Image:Simonov-Russian-SKS45.jpg|thumb|none| | + | [[Image:Simonov-Russian-SKS45.jpg|thumb|none|450px|SKS rifle - 7.62x39mm]] |
[[Image:TOTS SKS.jpg|thumb|none|600px|The point man of the rebel squad walks through the jungle, carrying an SKS.]] | [[Image:TOTS SKS.jpg|thumb|none|600px|The point man of the rebel squad walks through the jungle, carrying an SKS.]] | ||
[[Image:TOTS SKS-2.jpg|thumb|none|600px|One of the refugees (later found out to be Colonel Okeze ([[Benjamin Ochieng]]), Arthur Azuka's bodyguard) saves LT Waters.]] | [[Image:TOTS SKS-2.jpg|thumb|none|600px|One of the refugees (later found out to be Colonel Okeze ([[Benjamin Ochieng]]), Arthur Azuka's bodyguard) saves LT Waters.]] | ||
| Line 120: | Line 121: | ||
==L1A1== | ==L1A1== | ||
At the end of the film, one of the Cameroon border guards can be briefly seen armed with an [[L1A1 SLR]] instead of an AK variant. | At the end of the film, one of the Cameroon border guards can be briefly seen armed with an [[L1A1 SLR]] instead of an AK variant. | ||
| − | [[Image:L1A1-SLR.jpg|thumb|none| | + | [[Image:L1A1-SLR.jpg|thumb|none|450px|L1A1 SLR - 7.62x51mm NATO]] |
[[Image:TOS L1A1.JPG|thumb|none|600px|A Cameroon border guard behind Captain Bill Rhodes ([[Tom Skerritt]]) brandishes an L1A1 rifle.]] | [[Image:TOS L1A1.JPG|thumb|none|600px|A Cameroon border guard behind Captain Bill Rhodes ([[Tom Skerritt]]) brandishes an L1A1 rifle.]] | ||
==M16A1== | ==M16A1== | ||
| − | [[M16A1]] rifles are | + | [[M16A1]] rifles are held by Nigerian soldiers in the opening scene of the director's cut of the film. |
| − | [[Image:M16A1.jpg|thumb| | + | [[Image:M16A1.jpg|thumb|450px|none|M16A1 with 20-round magazine - 5.56x45mm]] |
[[Image:M16.jpg|thumb|600px|none|Nigerian soldiers with Vietnam-era M16A1 rifles.]] | [[Image:M16.jpg|thumb|600px|none|Nigerian soldiers with Vietnam-era M16A1 rifles.]] | ||
[[Image:M16_2.jpg|thumb|600px|none|Nigerian soldiers standing guard with M16A1s.]] | [[Image:M16_2.jpg|thumb|600px|none|Nigerian soldiers standing guard with M16A1s.]] | ||
| Line 131: | Line 132: | ||
=Machine Guns= | =Machine Guns= | ||
| − | ==M249 SAW | + | ==M249 SAW Paratrooper== |
| − | Slo ([[Nick Chinlund]]), the team's designated heavy-gunner and tech-guy is seen with his paratrooper version of the [[FN Minimi#M249-E1 / M249-E2 / M249 Paratrooper SAW|M249 SAW]] throughout the | + | Slo ([[Nick Chinlund]]), the team's designated heavy-gunner and tech-guy is seen with his paratrooper version of the [[FN Minimi#M249-E1 / M249-E2 / M249 Paratrooper SAW|M249 SAW]] throughout the film, until he is killed in a shootout with the rebels. Silk ([[Charles Ingram]]) then uses the weapon during the climax firefight. |
| − | [[Image:M249ParaWAmmo.jpg|thumb|none|450px|M249 SAW | + | [[Image:M249ParaWAmmo.jpg|thumb|none|450px|M249 SAW Paratrooper version with 200-round ammo drum and accessory rail on feed tray cover - 5.56x45mm]] |
[[Image:TOTS SAW.jpg|thumb|none|600px|Slo ([[Nick Chinlund]]) with his SAW.]] | [[Image:TOTS SAW.jpg|thumb|none|600px|Slo ([[Nick Chinlund]]) with his SAW.]] | ||
| − | [[Image:TOTS SAW-2.jpg|thumb|none|600px|Silk fires the SAW | + | [[Image:TOTS SAW-2.jpg|thumb|none|600px|Silk fires the SAW Paratrooper.]] |
[[Image:TOTS SAW-3.jpg|thumb|none|600px|Silk ([[Charles Ingram]]) with the SAW. Note the blank rounds on the ammo belt.]] | [[Image:TOTS SAW-3.jpg|thumb|none|600px|Silk ([[Charles Ingram]]) with the SAW. Note the blank rounds on the ammo belt.]] | ||
==M60E4== | ==M60E4== | ||
Red ([[Cole Hauser]]), the team’s designated heavy-gunner is seen armed with a [[M60 machine gun#M60E4 Machine Gun|M60E4 machine gun]] throughout the film, which has a "duckbill" flash hider on the muzzle. Doc ([[Paul Francis]]) wields the weapon when Red runs to set-up a Claymore. Another Navy SEAL who accompanies Captain Bill Rhodes ([[Tom Skerritt]]) also wields a M60E4. | Red ([[Cole Hauser]]), the team’s designated heavy-gunner is seen armed with a [[M60 machine gun#M60E4 Machine Gun|M60E4 machine gun]] throughout the film, which has a "duckbill" flash hider on the muzzle. Doc ([[Paul Francis]]) wields the weapon when Red runs to set-up a Claymore. Another Navy SEAL who accompanies Captain Bill Rhodes ([[Tom Skerritt]]) also wields a M60E4. | ||
| − | [[Image:M60E4.jpg|thumb|none| | + | [[Image:M60E4.jpg|thumb|none|450px|M60E4 machine gun - 7.62x51mm NATO]] |
| − | [[Image:TOTS M60E4.jpg|thumb|none|600px|Red is seen in the background after dismounting from the helicopter, M60E4 in | + | [[Image:TOTS M60E4.jpg|thumb|none|600px|Red is seen in the background after dismounting from the helicopter, M60E4 in hand.]] |
[[Image:TOTS M60E4-2.jpg|thumb|none|600px|Red directs the refugees with his M60E4.]] | [[Image:TOTS M60E4-2.jpg|thumb|none|600px|Red directs the refugees with his M60E4.]] | ||
[[Image:TOTS M60E4-3.jpg|thumb|none|600px|Doc mans Red's M60E4.]] | [[Image:TOTS M60E4-3.jpg|thumb|none|600px|Doc mans Red's M60E4.]] | ||
| Line 147: | Line 148: | ||
==M60D== | ==M60D== | ||
| − | The [[M60 machine gun#M60D Machine Gun|M60D machine gun]] is seen mounted on | + | The [[M60 machine gun#M60D Machine Gun|M60D machine gun]] is seen mounted on SH-60B Seahawk helicopter, but it is never fired. |
| − | [[Image:M60d.jpg|thumb|none| | + | [[Image:M60d.jpg|thumb|none|450px|M60D machine gun - 7.62x51mm NATO]] |
| − | [[Image:TOTS M60D.jpg|thumb|none|600px|An M60D machine gun door-mounted on a Navy SH-60B Seahawk helicopter]] | + | [[Image:TOTS M60D.jpg|thumb|none|600px|An M60D machine gun door-mounted on a Navy SH-60B Seahawk helicopter.]] |
==DShK== | ==DShK== | ||
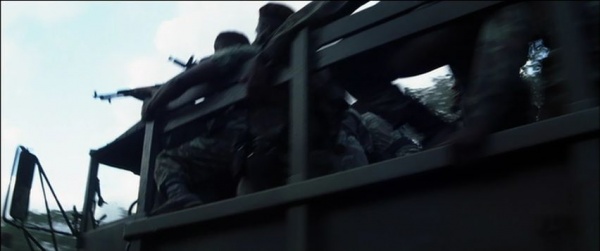
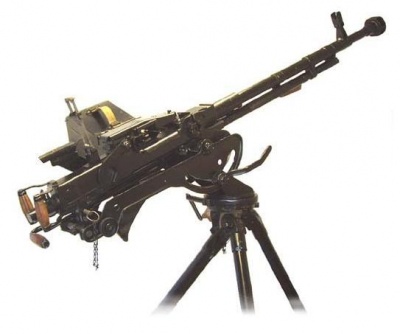
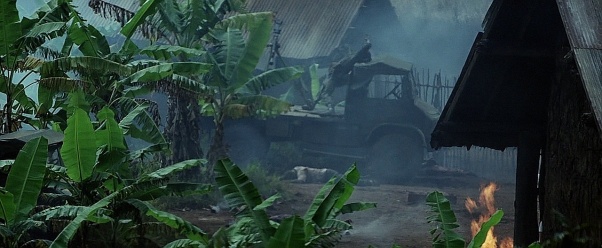
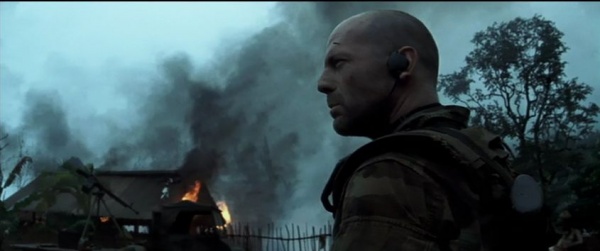
A [[DShK heavy machine gun]] is seen on a mounted platform of a flatbed truck. It’s hard to determine if this is a genuine DShK or a [[Browning M2]] mocked-up as a DShK. | A [[DShK heavy machine gun]] is seen on a mounted platform of a flatbed truck. It’s hard to determine if this is a genuine DShK or a [[Browning M2]] mocked-up as a DShK. | ||
| − | [[Image:DSHK.jpg|thumb|none| | + | [[Image:DSHK.jpg|thumb|none|400px|DShK heavy machine gun - 12.7x108mm]] |
[[Image:TOTS DSHK.jpg|thumb|none|602px|The machine gun can be seen on the truck.]] | [[Image:TOTS DSHK.jpg|thumb|none|602px|The machine gun can be seen on the truck.]] | ||
[[Image:TOTS DSHK-2.jpg|thumb|none|600px|The barrel is seen mildly clearly here.]] | [[Image:TOTS DSHK-2.jpg|thumb|none|600px|The barrel is seen mildly clearly here.]] | ||
==FN MAG 58== | ==FN MAG 58== | ||
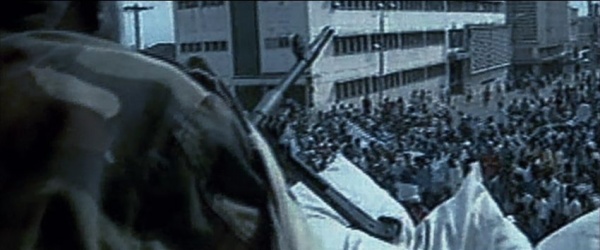
| − | Seen in the actual footage at the beginning, a government soldier is seen with what looks to be a [[FN MAG#FN MAG 58|FN MAG]]. | + | Seen in the actual footage at the beginning of the film, a government soldier is seen with what looks to be a [[FN MAG#FN MAG 58|FN MAG 58]]. |
| − | [[Image:FNMAG.jpg|thumb|none| | + | [[Image:FNMAG.jpg|thumb|none|450px|FN MAG 58 - 7.62x51mm NATO]] |
| − | [[Image:TOTS FN MAG.jpg|thumb|none|600px|The soldier stands behind a FN MAG in the actual footage.]] | + | [[Image:TOTS FN MAG.jpg|thumb|none|600px|The soldier stands behind a FN MAG 58 in the actual footage.]] |
==RPD== | ==RPD== | ||
| − | A | + | A rebel is seen with an [[RPD light machine gun]]. |
| − | [[Image:RPD-Light-Machine-Gun.jpg|thumb|none| | + | [[Image:RPD-Light-Machine-Gun.jpg|thumb|none|450px|RPD light machine gun - 7.62x39mm]] |
| − | [[Image:TOTS RPK.jpg|thumb|none|600px|One of the rebels left of center can be seen armed with an RPD light machine gun]] | + | [[Image:TOTS RPK.jpg|thumb|none|600px|One of the rebels on the left of center can be seen armed with an RPD light machine gun.]] |
=Shotguns= | =Shotguns= | ||
==Remington 870== | ==Remington 870== | ||
| − | The team’s forward scout, Lake ([[Johnny Messner]]) carries a [[Remington Model 870 Shotgun#Remington 870|Remington 870]] in addition to his [[M4A1]]. The shotgun is equipped with an extended magazine tube, a side saddle shell holder, and a "duckbill" muzzle attachment ( | + | The team’s forward scout, Lake ([[Johnny Messner]]) carries a [[Remington Model 870 Shotgun#Remington 870|Remington 870]] in addition to his [[M4A1]]. The shotgun is equipped with an extended magazine tube, a side saddle shell holder, and a "duckbill" muzzle attachment (designed to make the shot spray into a horizontal pattern). The team’s designated marksman, Flea ([[Chad Smith]]), takes the shotgun after Lake is shot, but the weapon was dropped and Flea switches back to his M4A1. |
| − | [[Image:Remington870NewModel.jpg|thumb|none| | + | [[Image:Remington870NewModel.jpg|thumb|none|450px|Remington 870 with synthetic furniture and extended magazine tube - 12 Gauge]] |
[[Image:TOTS 870.jpg|thumb|none|600px|Lake ([[Johnny Messner]]) leads the way with his Remington 870 at the ready.]] | [[Image:TOTS 870.jpg|thumb|none|600px|Lake ([[Johnny Messner]]) leads the way with his Remington 870 at the ready.]] | ||
[[Image:TOTS 870-2.jpg|thumb|none|600px|Lake runs through the jungle with his Remington 870.]] | [[Image:TOTS 870-2.jpg|thumb|none|600px|Lake runs through the jungle with his Remington 870.]] | ||
| Line 180: | Line 181: | ||
==Uzi== | ==Uzi== | ||
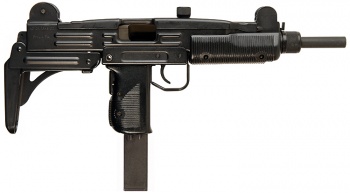
A rebel soldier standing on a flatbed truck appears to be armed with a full size [[Uzi]] before he is taken out. | A rebel soldier standing on a flatbed truck appears to be armed with a full size [[Uzi]] before he is taken out. | ||
| − | [[File:Uzi.jpg|thumb|none| | + | [[File:Uzi.jpg|thumb|none|350px|Uzi submachine gun - 9x19mm]] |
[[File:Tears SomeGun.jpg|thumb|none|601px|A rebel soldier standing on a flatbed truck appears to be armed with a full size [[Uzi]] before he is taken out.]] | [[File:Tears SomeGun.jpg|thumb|none|601px|A rebel soldier standing on a flatbed truck appears to be armed with a full size [[Uzi]] before he is taken out.]] | ||
=Launchers= | =Launchers= | ||
==M203 Grenade Launcher== | ==M203 Grenade Launcher== | ||
| − | + | The team's corpsman, Doc, and radioman, Zee, both carry M4A1 Carbines with [[M203 grenade launcher]]s mounted. | |
| − | [[Image:Sopmod m4 m203 06.jpg|thumb|none| | + | [[Image:Sopmod m4 m203 06.jpg|thumb|none|450px|M4A1 Carbine 5.56x45mm with M68 Aimpoint red dot scope, flip-up rear sight, and [[M203 grenade launcher]] - 40x46mm]] |
| + | [[Image:TOTS MISC.jpg|thumb|none|600px|Doc and Zee ready their pistols, while slinging their M4/M203 combos.]] | ||
[[Image:TOTS M4-5.jpg|thumb|none|600px|Zee ([[Eamonn Walker]]) lays down cover fire with his M4/M203.]] | [[Image:TOTS M4-5.jpg|thumb|none|600px|Zee ([[Eamonn Walker]]) lays down cover fire with his M4/M203.]] | ||
| − | |||
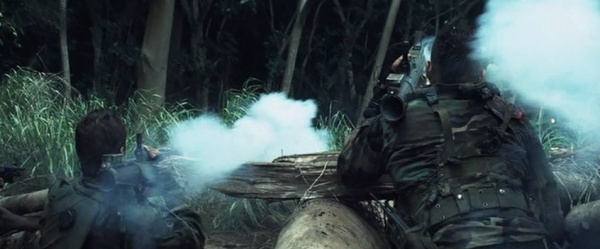
==M72 LAW== | ==M72 LAW== | ||
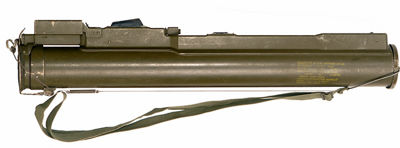
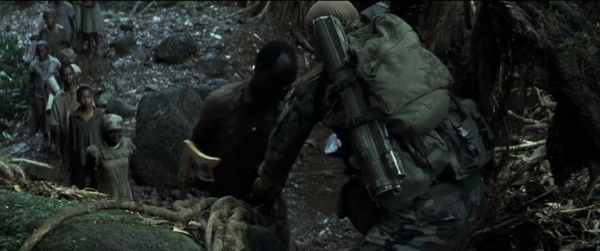
| − | The [[M72 LAW]] (Light Anti-Tank Weapon) is | + | The [[M72 LAW]] (Light Anti-Tank Weapon) is carried by Silk ([[Charles Ingram]]) and Slo ([[Nick Chinlund]]). The two weapons are fired by Lake ([[Johnny Messner]]) and Flea ([[Chad Smith]]). |
| − | [[Image:M72A2LAW.jpg|thumb|none| | + | [[Image:M72A2LAW.jpg|thumb|none|400px|M72A2 LAW - 66mm]] |
[[Image:TOTS LAW.jpg|thumb|none|600px|Slo helps refugees up a hill with his M72 strapped into his pack.]] | [[Image:TOTS LAW.jpg|thumb|none|600px|Slo helps refugees up a hill with his M72 strapped into his pack.]] | ||
| − | [[Image:TOTS LAW-2.jpg|thumb|none|600px|Flea ([[Chad Smith]]) readies | + | [[Image:TOTS LAW-2.jpg|thumb|none|600px|Flea ([[Chad Smith]]) readies the M72.]] |
| − | [[Image:TOTS LAW-3.jpg|thumb|none|600px|Flea and Lake fire | + | [[Image:TOTS LAW-3.jpg|thumb|none|600px|Flea and Lake fire the LAWs.]] |
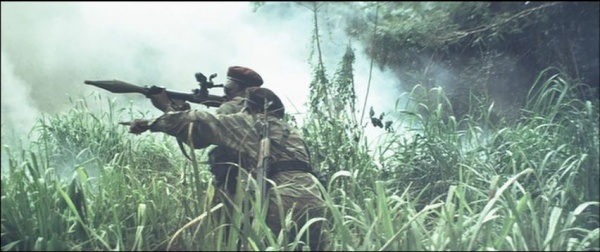
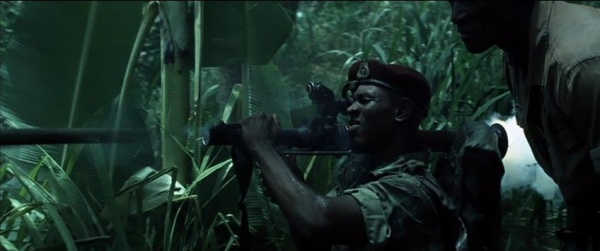
==Type 69 RPG== | ==Type 69 RPG== | ||
| − | The Chinese-replica [[Type 69 RPG]] is seen in the hands of several | + | The Chinese-replica [[Type 69 RPG]] is seen in the hands of several rebels throughout the film, fitted with the PGO-7 scope. |
| − | [[Image:Type69RPG.jpg|thumb|none| | + | [[Image:Type69RPG.jpg|thumb|none|450px|Type 69 RPG - 40mm]] |
| − | [[Image:TOTS RPG.jpg|thumb|none|600px|The rebels enter the mission, the one on the far | + | [[Image:TOTS RPG.jpg|thumb|none|600px|The rebels enter the mission, the one on the far right brandishing a Type 69 RPG.]] |
| − | [[Image:TOTS RPG-2.jpg|thumb|none|600px|An RPG team prepares to engage the SEALs with a Type 69]] | + | [[Image:TOTS RPG-2.jpg|thumb|none|600px|An RPG team prepares to engage the SEALs with a Type 69.]] |
[[Image:TOTS RPG-3.jpg|thumb|none|600px|I'd imagine that black eye hurts, huh?]] | [[Image:TOTS RPG-3.jpg|thumb|none|600px|I'd imagine that black eye hurts, huh?]] | ||
| − | = | + | =Others= |
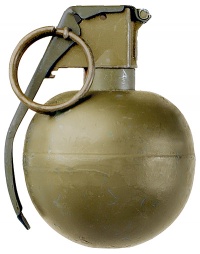
==M67 Hand Grenade== | ==M67 Hand Grenade== | ||
All of the SEALs carry and use [[M67 hand grenade]]s throughout the mission. | All of the SEALs carry and use [[M67 hand grenade]]s throughout the mission. | ||
| − | [[Image:M67.jpg|thumb|none| | + | [[Image:M67.jpg|thumb|none|200px|M67 High-Explosive Fragmentation hand grenade.]] |
| − | [[Image:TOTS M67.jpg|thumb|none|600px|LT Waters pulls an M67 grenade from a pouch during a shootout with the rebels]] | + | [[Image:TOTS M67.jpg|thumb|none|600px|LT Waters pulls an M67 grenade from a pouch during a shootout with the rebels.]] |
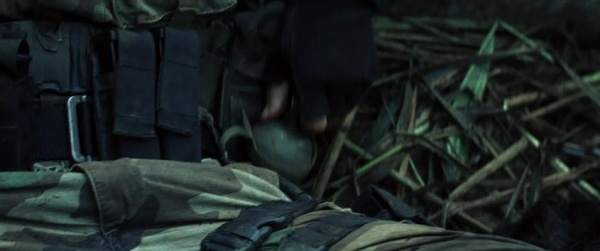
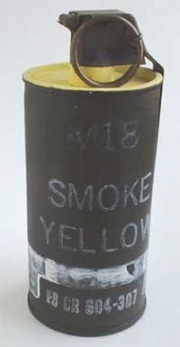
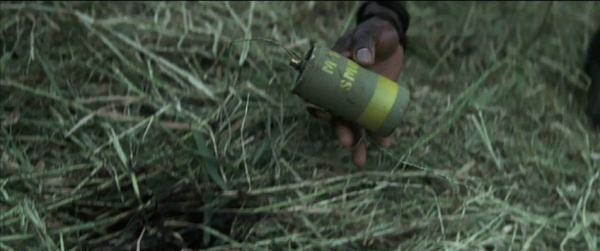
==M18 Smoke Grenade== | ==M18 Smoke Grenade== | ||
| − | The team | + | The team use a yellow [[M18 Smoke Grenade]] to signal the landing zone for their extraction. It is later found by the pursuing rebel forces. |
| − | [[File:M18yellow actual.jpg|thumb| | + | [[File:M18yellow actual.jpg|thumb|180px|none|M18 smoke grenade - Yellow.]] |
[[Image:TOTS M18.jpg|thumb|none|600px|Used yellow M18 Smoke Grenade picked up by the rebel forces' second-in-command.]] | [[Image:TOTS M18.jpg|thumb|none|600px|Used yellow M18 Smoke Grenade picked up by the rebel forces' second-in-command.]] | ||
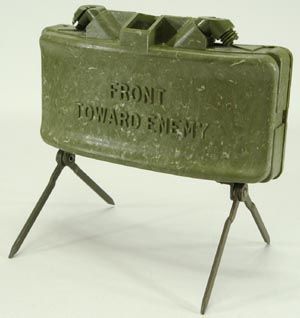
==M18A1 Claymore== | ==M18A1 Claymore== | ||
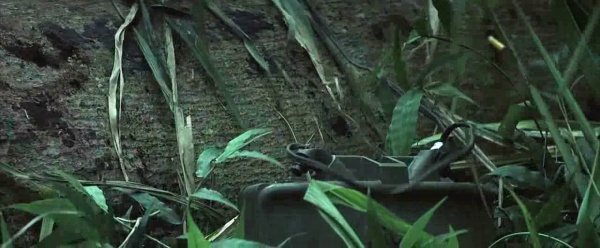
| − | The team’s demolition man, Red ([[Cole Hauser]]), carried three [[M18A1 Claymore]]s into the field with him. He uses two to ambush the | + | The team’s demolition man, Red ([[Cole Hauser]]), carried three [[M18A1 Claymore]]s into the field with him. He uses two to ambush the rebels and later uses the last one to hold back enemy troops. |
| − | [[Image:M18a1 07.jpg|thumb|none|300px|M18A1 Claymore anti-personnel mine]] | + | [[Image:M18a1 07.jpg|thumb|none|300px|M18A1 Claymore anti-personnel mine.]] |
[[Image:TOTS claymore.jpg|thumb|none|600px|Red sets up his final Claymore as a volley of gunfire hits the log.]] | [[Image:TOTS claymore.jpg|thumb|none|600px|Red sets up his final Claymore as a volley of gunfire hits the log.]] | ||
==M61 Vulcan== | ==M61 Vulcan== | ||
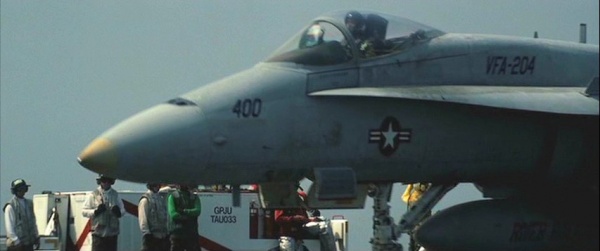
At the climax of the film, a pair of F/A-18A Hornets are launched to provide close air support for the SEALs, the Hornets being armed with [[M61 Vulcan]]s as secondary armament, though the Hornets engage the rebels with air-to-ground missiles instead of their guns. | At the climax of the film, a pair of F/A-18A Hornets are launched to provide close air support for the SEALs, the Hornets being armed with [[M61 Vulcan]]s as secondary armament, though the Hornets engage the rebels with air-to-ground missiles instead of their guns. | ||
| − | [[Image:M61vulcan.jpg|thumb|none|450px|M61 Vulcan - | + | [[Image:M61vulcan.jpg|thumb|none|450px|M61 Vulcan - 20x102mm]] |
| − | [[Image:TOTS VulcanHornet.JPG|thumb|none|600px|As an F/A-18A Hornet launches from the carrier USS ''John C. Stennis'', the firing port for the M61 Vulcan is visible near the nose of the aircraft]] | + | [[Image:TOTS VulcanHornet.JPG|thumb|none|600px|As an F/A-18A Hornet launches from the carrier USS ''John C. Stennis'', the firing port for the M61 Vulcan is visible near the nose of the aircraft.]] |
| − | |||
[[Category:Movie]] | [[Category:Movie]] | ||
[[Category:War]] | [[Category:War]] | ||
| + | [[Category:Action]] | ||
| + | [[Category:Action Movie]] | ||
| + | [[Category:Thriller]] | ||
[[Category:Antoine Fuqua]] | [[Category:Antoine Fuqua]] | ||
Revision as of 05:02, 22 October 2018
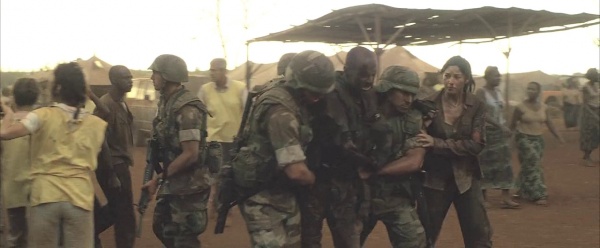
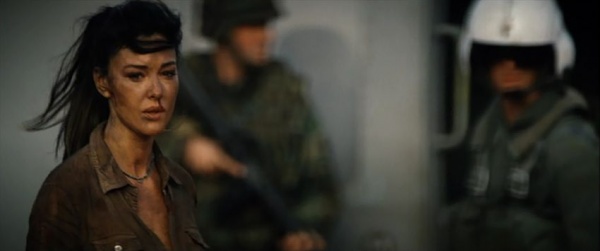
Tears of the Sun is a 2003 action film starring Bruce Willis as LT A.K. Waters, a US Navy SEAL commander who leads his team into Nigeria during a coup to extract Lena Kendricks (Monica Bellucci), an American doctor. When she goes with the team to the extraction site along with 80 refugees from her village, Lena discovers that the SEALs' mission is only to take her. After a change of heart, Waters and his SEAL team then become determined to get the doctor and the refugees to the border before the rebel militants can find them. The film was directed by Antoine Fuqua and retired Navy SEAL Harry Humphries served as the chief military technical advisor.
The following weapons were used in the film Tears of the Sun:
![]() WARNING! THIS PAGE CONTAINS SPOILERS!
WARNING! THIS PAGE CONTAINS SPOILERS!
Pistols
Heckler & Koch MK23
The pistol designed especially for US SOCOM, the Heckler & Koch Mark 23 is seen used by several Navy SEALs, including Lieutenant A.K. Waters (Bruce Willis), Ellis 'Zee' Pettigrew (Eamonn Walker), James 'Red' Atkins (Cole Hauser), Jason 'Flea' Mabry (Chad Smith), Kelly Lake (Johnny Messner), and Michael 'Slo' Slowenski (Nick Chinlund).
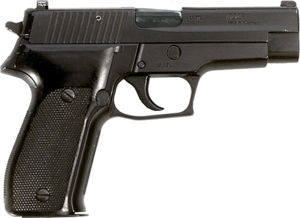
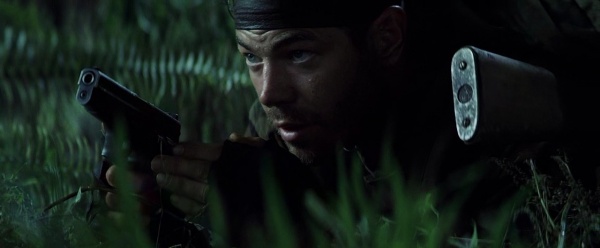
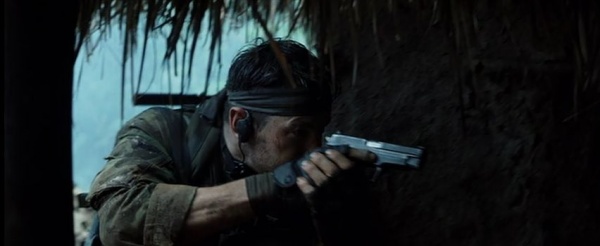
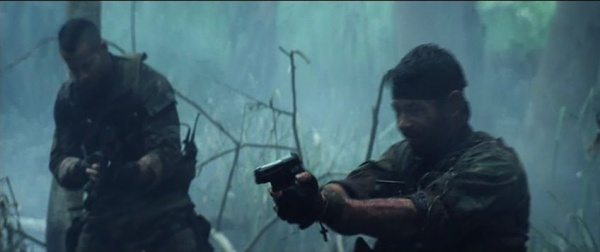
SIG-Sauer P226
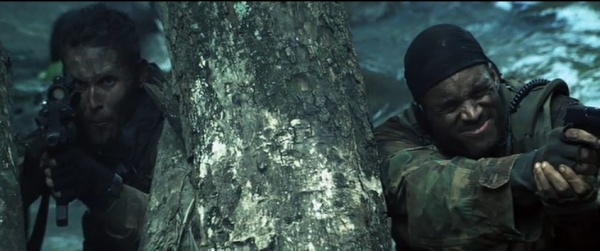
Another real-life favored handgun of the Navy SEALs, the SIG-Sauer P226 is seen in the hands of Danny 'Doc' Kelley (Paul Francis) and Demetrius 'Silk' Owens (Charles Ingram).
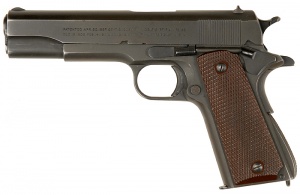
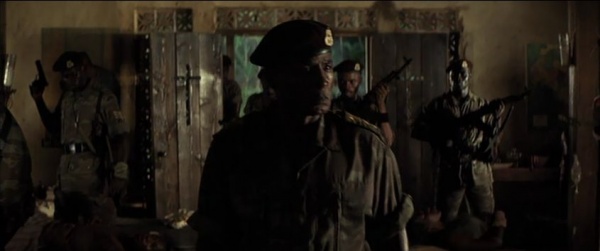
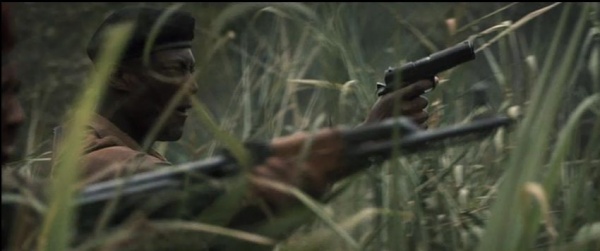
Colt M1911A1
The Colt M1911A1 appears in the hands of two senior officers of the Nigerian Militants including Terwase (Peter Mensah).
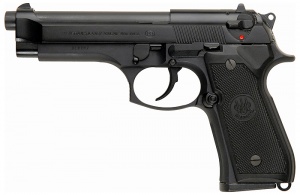
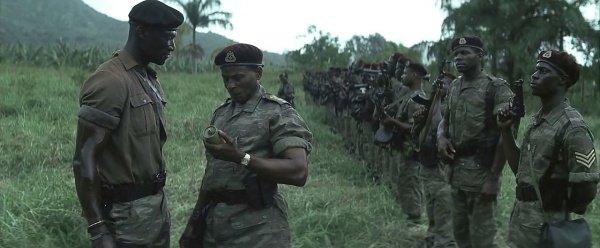
Beretta 92FS
A Beretta 92FS is seen in the hands of a militant sergeant.
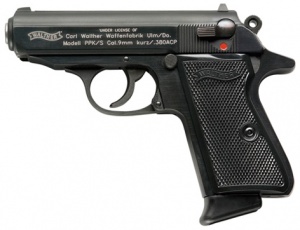
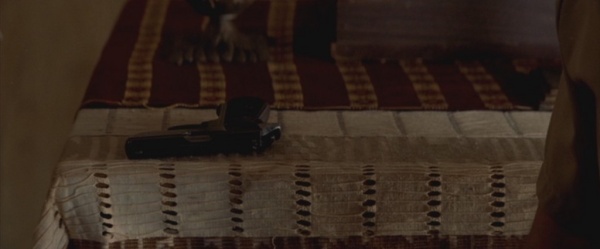
Walther PPK/S
In a scene added to the extended director's cut, LT Waters leaves the priest running the hospital a Walther PPK/S, telling him he may wish to use it on himself rather than be captured by the rebels.
Rifles / Carbines
M4A1
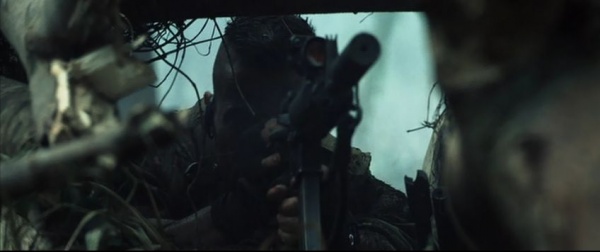
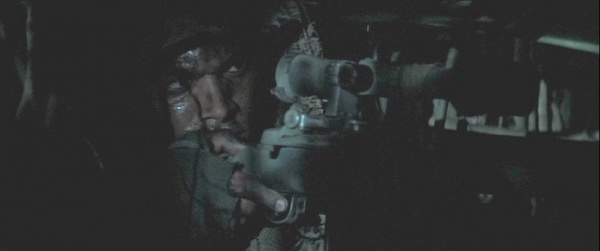
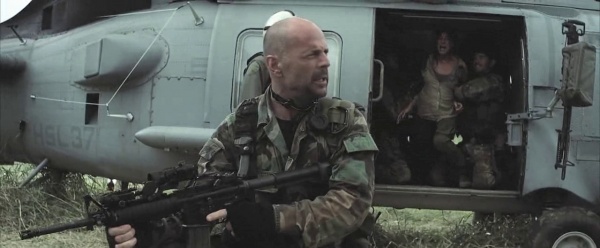
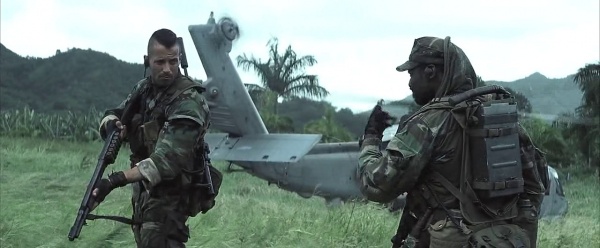
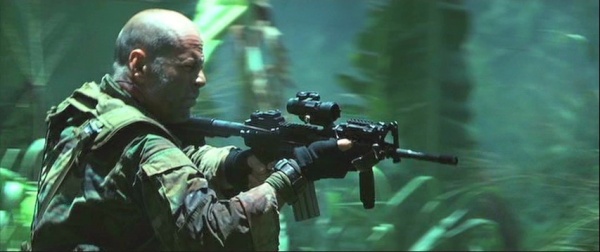
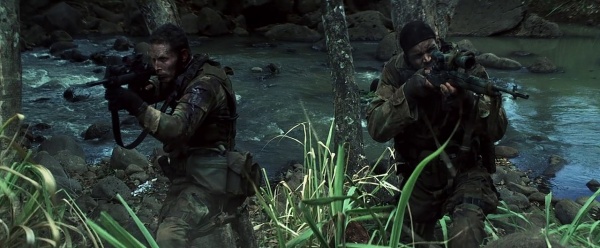
Lieutenant Waters (Bruce Willis), Flea (Chad Smith), and Lake (Johnny Messner) use M4A1 Carbines as their primary weapons. Team corpsman Doc (Paul Francis) and radioman Zee (Eamonn Walker) also have accessorized M4 carbines (with M203 grenade launchers mounted). Flea has a Combat Military Optics LTD Marksman Series Model 100 scope on the carry handle, a cheek pad on the stock, a suppressor, and a custom paintjob of green and black. Flea and Lake have suppressors on their carbines. Both Lake and LT Waters have M68 Aimpoint scopes fitted on their weapons. When the team first arrives in Africa, their M4A1s are fitted with PVS-14 night-vision scopes which are removed once morning arrives. LT Waters' also has a D-LAP Laser sight, essentially a more compact PEQ-2A. It is worth noting that they use the correct, modern flash hiders rather than the A1 style used in so many movies M4A1s and M16A2s.

Springfield M1A
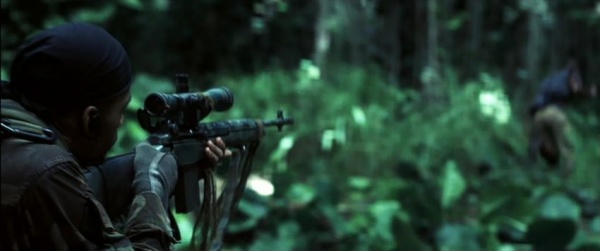
A Springfield M1A with an aftermarket scope mount is carried by Silk (Charles Ingram). It is covered in heavy custom camo and mounts a Leupold & Stevens Mark 4 LR/T 10x40 M1 rifle scope. He uses the weapon throughout the film. It is noted as being of an M1A not a M25 Sniper Rifle by the notch which would normally contain the fire-selector switch. M21/25 rifles are fitted with a selector lock, preventing the Selective fire mechanism from working in anything other than semi-automatic. When a Civilian M1A is put into a Military M14 stock there is a great big empty notch in the stock where the selector lock should be.
AKM
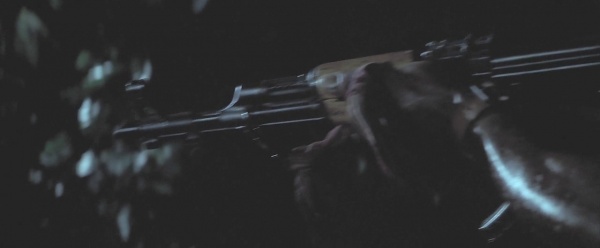
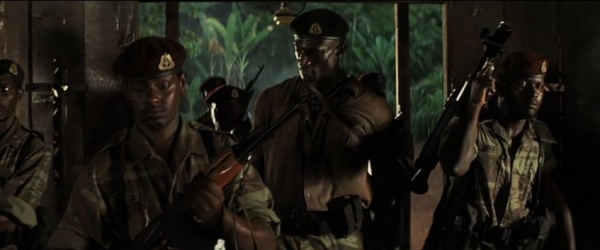
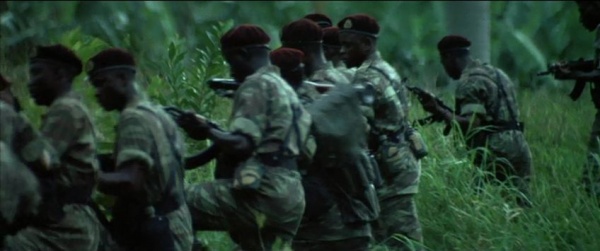
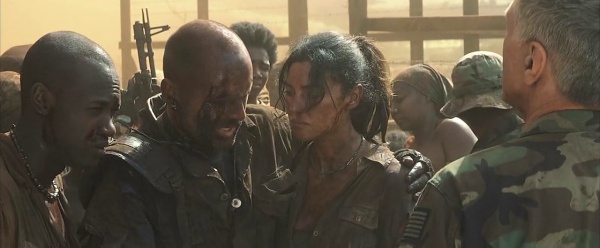
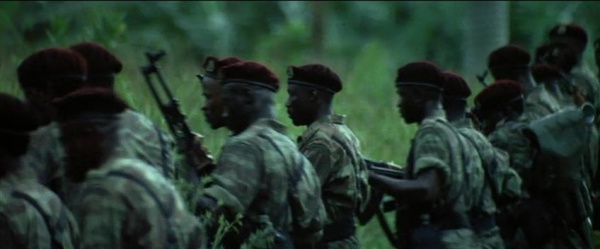
The most commonly used assault rifle on the African continent, AKM rifles are seen in the hands of militants and refugees.
AK-47
The predecessor to the AKM, the AK-47, or more simply "AK", is seen. They can be noted by their milled receivers and lack of slanted muzzle brakes. Some may be Norinco Type 56 rifles. Used by militants, refugees and Doc (Paul Francis), who took it from a dead militant. He is never seen using it, but after the village raid, he most likely gave it to a refugee, as they acquired a lot of them then.

AKMSU
A few rebel soldiers are seen wielding the AKMSU.
M16A2
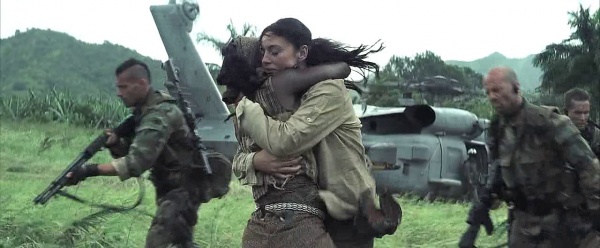
A few of the Marines disembarking the helicopter in the beginning of the film are carrying M16A2 rifles, as well as a few Marines at the end of the film.
FN FAL
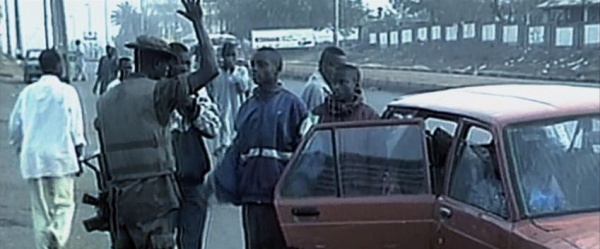
Actual footage of the violence in Africa is seen in the beginning of the film and one scene shows several soldiers carrying FN FAL rifles.
Norinco Type 56-1
The Norinco Type 56 is used by several rebel soldiers. Some are full-stocked variants while others are under-folding stocked Type 56-1s.
Karabiner 98k
What appears to be a WWII-vintage Karabiner 98k is seen in the hands of at least two militants. They are never given explicit detail, sadly.
SKS
Several rebels and refugees are seen carrying SKS rifles.

L1A1
At the end of the film, one of the Cameroon border guards can be briefly seen armed with an L1A1 SLR instead of an AK variant.
M16A1
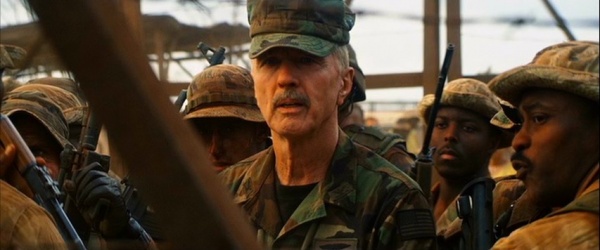
M16A1 rifles are held by Nigerian soldiers in the opening scene of the director's cut of the film.
Machine Guns
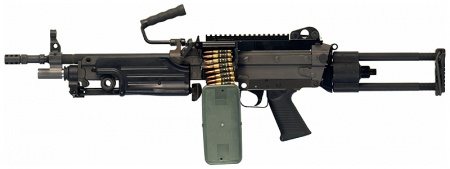
M249 SAW Paratrooper
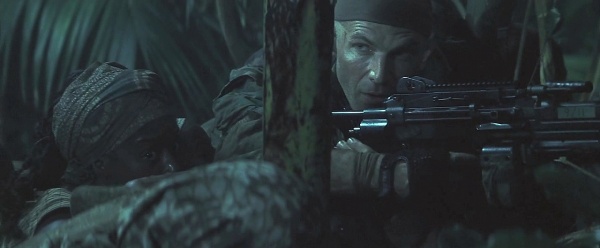
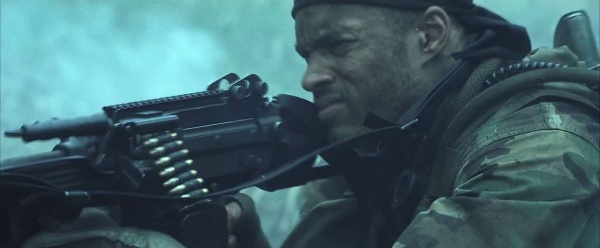
Slo (Nick Chinlund), the team's designated heavy-gunner and tech-guy is seen with his paratrooper version of the M249 SAW throughout the film, until he is killed in a shootout with the rebels. Silk (Charles Ingram) then uses the weapon during the climax firefight.
M60E4
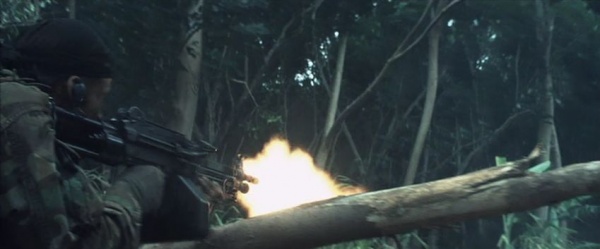
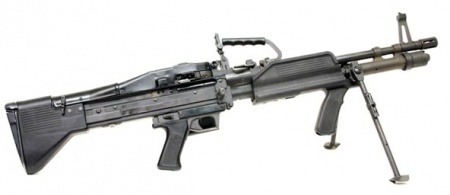
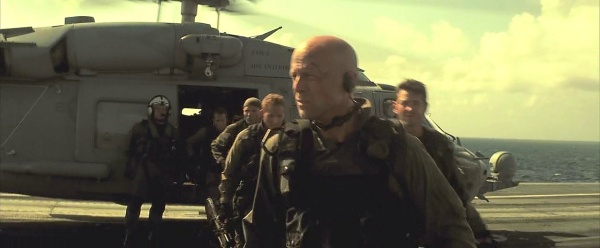
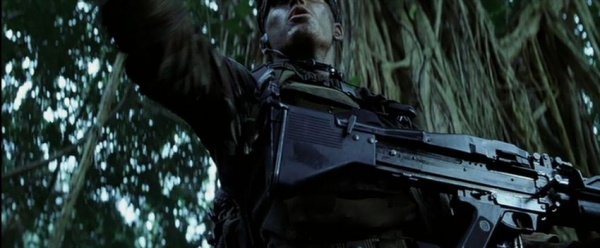
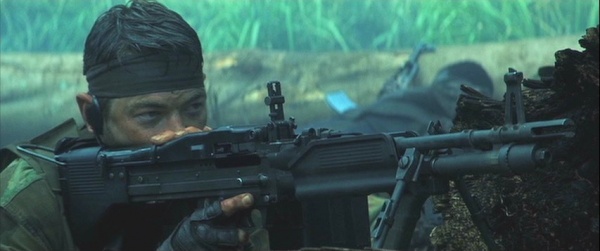
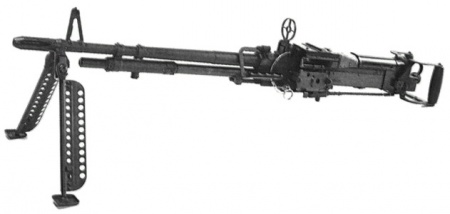
Red (Cole Hauser), the team’s designated heavy-gunner is seen armed with a M60E4 machine gun throughout the film, which has a "duckbill" flash hider on the muzzle. Doc (Paul Francis) wields the weapon when Red runs to set-up a Claymore. Another Navy SEAL who accompanies Captain Bill Rhodes (Tom Skerritt) also wields a M60E4.
M60D
The M60D machine gun is seen mounted on SH-60B Seahawk helicopter, but it is never fired.
DShK
A DShK heavy machine gun is seen on a mounted platform of a flatbed truck. It’s hard to determine if this is a genuine DShK or a Browning M2 mocked-up as a DShK.
FN MAG 58
Seen in the actual footage at the beginning of the film, a government soldier is seen with what looks to be a FN MAG 58.
RPD
A rebel is seen with an RPD light machine gun.
Shotguns
Remington 870
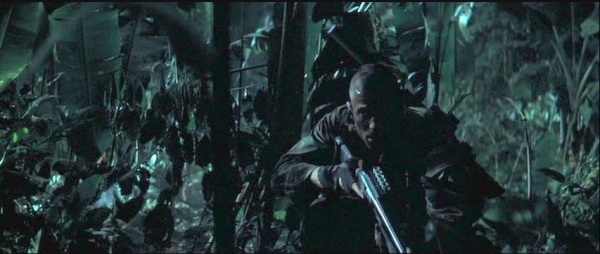
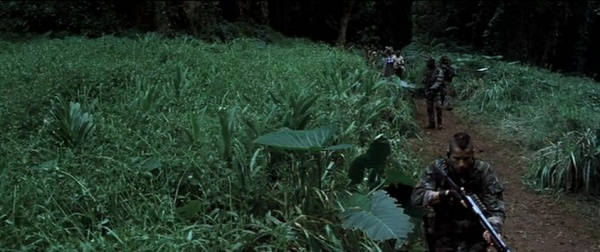
The team’s forward scout, Lake (Johnny Messner) carries a Remington 870 in addition to his M4A1. The shotgun is equipped with an extended magazine tube, a side saddle shell holder, and a "duckbill" muzzle attachment (designed to make the shot spray into a horizontal pattern). The team’s designated marksman, Flea (Chad Smith), takes the shotgun after Lake is shot, but the weapon was dropped and Flea switches back to his M4A1.
Submachine Guns
Uzi
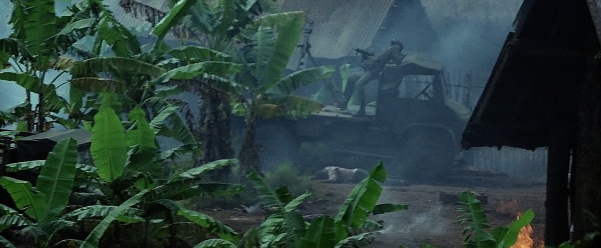
A rebel soldier standing on a flatbed truck appears to be armed with a full size Uzi before he is taken out.
Launchers
M203 Grenade Launcher
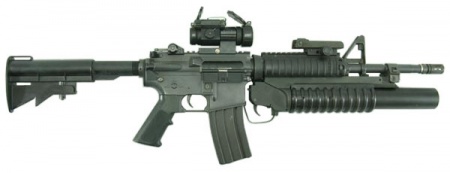
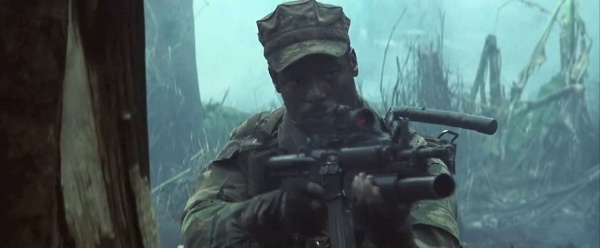
The team's corpsman, Doc, and radioman, Zee, both carry M4A1 Carbines with M203 grenade launchers mounted.
M72 LAW
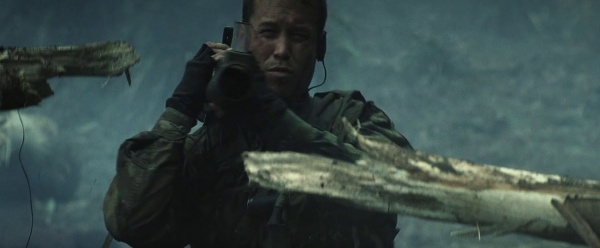
The M72 LAW (Light Anti-Tank Weapon) is carried by Silk (Charles Ingram) and Slo (Nick Chinlund). The two weapons are fired by Lake (Johnny Messner) and Flea (Chad Smith).
Type 69 RPG
The Chinese-replica Type 69 RPG is seen in the hands of several rebels throughout the film, fitted with the PGO-7 scope.
Others
M67 Hand Grenade
All of the SEALs carry and use M67 hand grenades throughout the mission.
M18 Smoke Grenade
The team use a yellow M18 Smoke Grenade to signal the landing zone for their extraction. It is later found by the pursuing rebel forces.
M18A1 Claymore
The team’s demolition man, Red (Cole Hauser), carried three M18A1 Claymores into the field with him. He uses two to ambush the rebels and later uses the last one to hold back enemy troops.
M61 Vulcan
At the climax of the film, a pair of F/A-18A Hornets are launched to provide close air support for the SEALs, the Hornets being armed with M61 Vulcans as secondary armament, though the Hornets engage the rebels with air-to-ground missiles instead of their guns.
