| If you have been locked out of your account you can request a password reset here. |
Difference between revisions of "The Spy Who Loved Me"
m (→Llama Comanche III: It's George Leech) |
|||
| (43 intermediate revisions by 12 users not shown) | |||
| Line 1: | Line 1: | ||
| − | + | {{Infobox Movie|{{PAGENAME}} | |
| − | [[Image: | + | |name = ''The Spy Who Loved Me'' |
| + | |picture = TSWLMPCA.jpg | ||
| + | |caption = ''Movie poster'' | ||
| + | |country = [[Image:UKD.jpg|border|23px]] United Kingdom | ||
| + | |director = Lewis Gilbert | ||
| + | |date= 1977 | ||
| + | |language = English | ||
| + | |distributor=United Artists | ||
| + | |character1=James Bond | ||
| + | |actor1=[[Roger Moore]] | ||
| + | |character2=Major Anya Amasova/Agent XXX | ||
| + | |actor2=[[Barbara Bach]] | ||
| + | |character3=Karl Stromberg | ||
| + | |actor3=[[Curd Jürgens]] | ||
| + | |character4=Q. | ||
| + | |actor4=Desmond Llewelyn | ||
| + | |character5=M. | ||
| + | |actor5=[[Bernard Lee]] | ||
| + | |character6=Miss Moneypenny | ||
| + | |actor6=[[Lois Maxwell]] | ||
| + | |character7=Jaws | ||
| + | |actor7=[[Richard Kiel]] | ||
| + | }} | ||
| + | |||
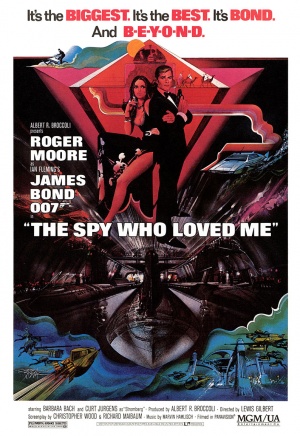
| + | '''''The Spy Who Loved Me''''' is the 10th installment in the official [[James Bond]] film series. [[Roger Moore]] returns as Agent 007 for the 1977 sequel, as Bond finds himself reluctantly working with a rival KGB agent ([[Barbara Bach]]) to investigate the disappearance of two nuclear submarines. The film was directed by Lewis Gilbert, who also directed the Bond films ''[[You Only Live Twice]]'' and ''[[Moonraker]]''. | ||
| + | |||
| + | {{Film Title|The Spy Who Loved Me}} | ||
__TOC__<br clear=all> | __TOC__<br clear=all> | ||
| + | {{Spoilers}} | ||
=Handguns= | =Handguns= | ||
== Walther PPK == | == Walther PPK == | ||
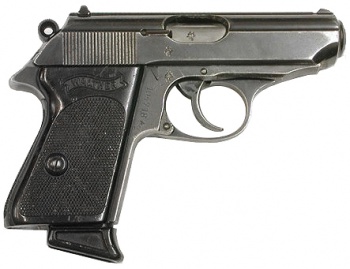
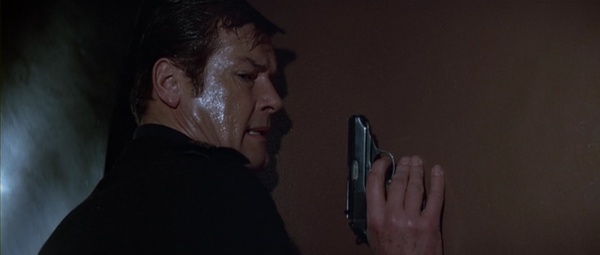
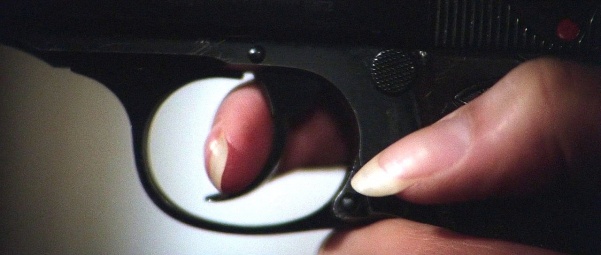
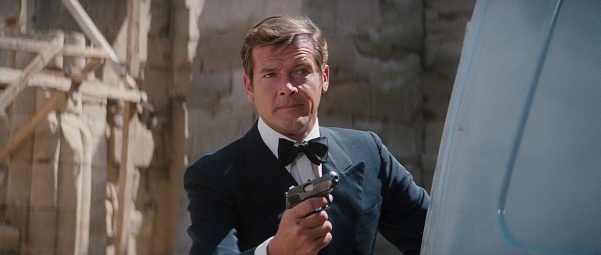
| − | + | James Bond ([[Roger Moore]]) continues to carry a [[Walther PPK]] as his sidearm. The pistol also is seen in the hands of Major Anya Amasova, aka "Agent XXX" ([[Barbara Bach]]). | |
[[Image:Walther-PPK.jpg|thumb|350px|none|Walther PPK in .32 ACP]] | [[Image:Walther-PPK.jpg|thumb|350px|none|Walther PPK in .32 ACP]] | ||
| − | [[Image:Swlm-ppk1.jpg|thumb|none| | + | [[Image:Swlm-ppk1.jpg|thumb|none|601px|James Bond ([[Roger Moore]]) at the pyramids with his PPK.]] |
| − | [[Image:Tswlm-ppk1.jpg|thumb|none| | + | [[Image:Tswlm-ppk1.jpg|thumb|none|601px|Bond turns to Anya, PPK in his hand]] |
| − | [[Image:Swlm-ppk2.jpg|thumb|none| | + | [[Image:Swlm-ppk2.jpg|thumb|none|601px|Bond puts his PPK into a gun tube.]] |
| − | [[Image:Tswlm-ppk2.jpg|thumb|none| | + | [[Image:Tswlm-ppk2.jpg|thumb|none|601px|Looking at the ejection port, it can be noted that Bond's PPK has a stove-pipe jam with a blank after he fires a shot into the gun tube. The pistol is seen being fired twice in this scene, and both times the pistol experiences the jam. Moments after this, Bond fires several more shots into Stromberg without clearing a jam or reloading.]] |
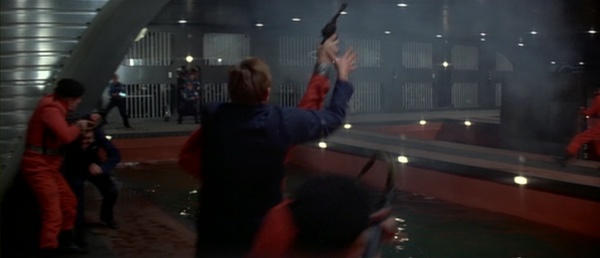
[[Image:Tswlm-ppk3.jpg|thumb|none|600px|Bond with his PPK while trying to escape Atlantis.]] | [[Image:Tswlm-ppk3.jpg|thumb|none|600px|Bond with his PPK while trying to escape Atlantis.]] | ||
| − | [[Image:Swlm-ppk3.jpg|thumb|none| | + | [[Image:Swlm-ppk3.jpg|thumb|none|601px|The pistol is seen in the hands of Major Anya Amasova, aka "Agent XXX" ([[Barbara Bach]]).]] |
| − | [[Image:Tswlm-ppk4.jpg|thumb|none| | + | [[Image:Tswlm-ppk4.jpg|thumb|none|601px|Anya's finger on the trigger of Bond's PPK.]] |
| − | == | + | == Smith & Wesson Model 10 == |
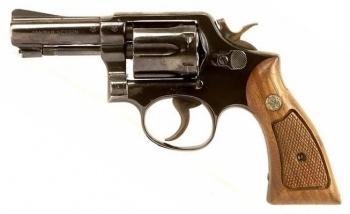
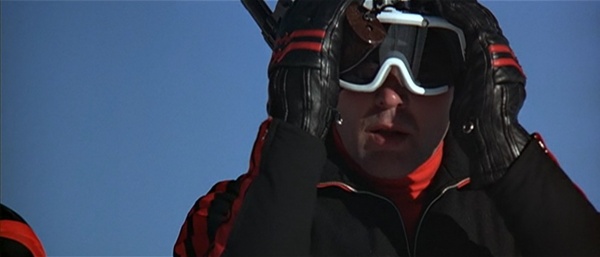
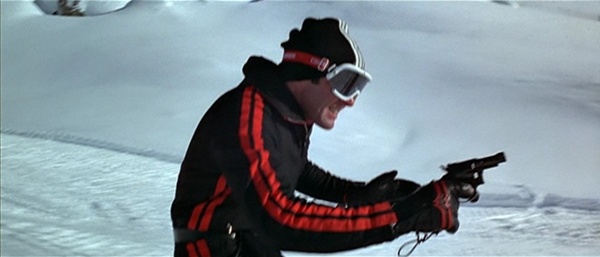
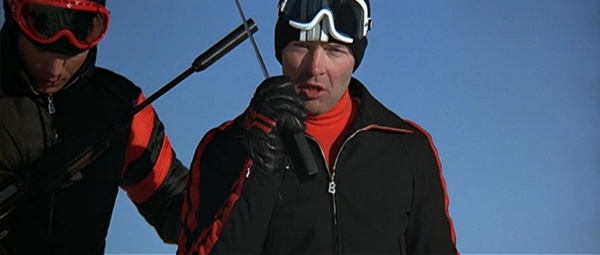
| − | + | Sergei Barzov ([[Michael Billington]]), one of the KGB skiing assassins sent to kill Bond in the pre-credits sequence, carries a [[Smith & Wesson Model 10]]. | |
| − | [[Image: | + | [[Image:SW103inch.jpg|thumb|350px|none|Smith & Wesson Model 10 with 3 inch barrel - .38 Special]] |
| − | [[Image:Tswlm- | + | [[Image:Tswlm-sw10a.jpg|thumb|none|600px|Sergei with his Model 10 as he prepares to pursue Bond.]] |
| − | [[Image:Tswlm- | + | [[Image:Tswlm-sw10b.jpg|thumb|none|600px|Sergei fires his Model 10 at Bond.]] |
| − | == Beretta | + | == Luger == |
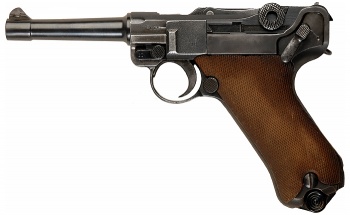
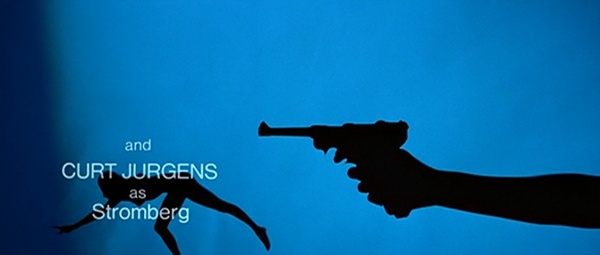
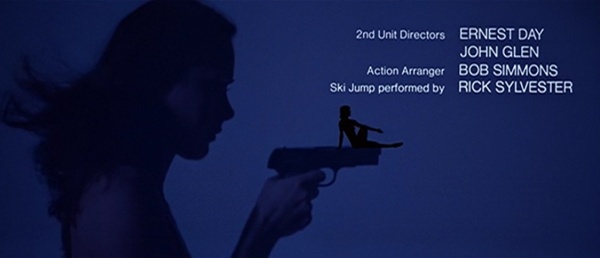
| − | In a | + | In addition to a Walther PPK and a shortened Beretta Minx, Maurice Binder's opening titles sequence features women doing acrobatics on a [[Luger P08|Luger]] and a Colt Pocket Hammerless. |
| − | [[Image:Helwan-Brigadier.jpg|thumb|none|350px|Brigadier - Egyptian licensed copy of Beretta | + | [[Image:LugerP08Pistol.jpg|thumb|none|350px|Luger - 9x19mm]] |
| + | [[Image:Tswlm-luger1.jpg|thumb|none|600px|A Luger in the opening credits.]] | ||
| + | |||
| + | == Colt Pocket Hammerless == | ||
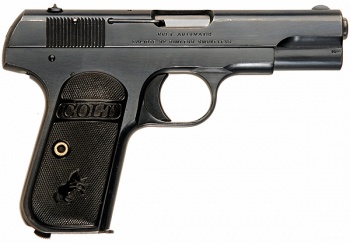
| + | In addition to a Walther PPK, a shortened Beretta Minx, and a Luger, Maurice Binder's opening titles sequence features women doing acrobatics on a [[Colt Model 1903/1908|Colt Pocket Hammerless]] pistol. | ||
| + | [[Image:Colt_Model_1903.jpg|thumb|none|350px|Colt Pocket Hammerless - .32 ACP]] | ||
| + | [[Image:Tswlm-colt03a.jpg|thumb|none|600px|A Colt Pocket Hammerless in the opening credits.]] | ||
| + | |||
| + | == Beretta 951 == | ||
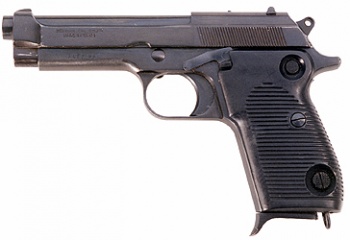
| + | Sandor ([[Milton Reid]]) is seen with a [[Beretta M951|Beretta 951]] when firing it at Bond and when Bond chases him to the rooftop at Fekkesh's home in Cairo. | ||
| + | [[Image:Helwan-Brigadier.jpg|thumb|none|350px|Brigadier - Egyptian licensed copy of Beretta 951 - 9mm]] | ||
| + | [[Image:Tswlm-1911a.jpg|thumb|none|600px|Sandor aims and fires the Beretta.]] | ||
[[Image:Tswlm-ber51a.jpg|thumb|none|600px|Sandor and Bond struggle.]] | [[Image:Tswlm-ber51a.jpg|thumb|none|600px|Sandor and Bond struggle.]] | ||
| − | == Beretta | + | == Beretta 70 == |
| − | In a continuity error, Bond ([[Roger Moore]]) is seen with a .32-caliber [[Beretta Model 70]] rather than his usual Walther PPK when he investigates the pyramids, looking for Fekkesh. This is also the weapon seen carried by Bond on promotional material and the DVD cover. | + | In a continuity error, Bond ([[Roger Moore]]) is seen with a .32-caliber [[Beretta Model 70|Beretta 70]] rather than his usual Walther PPK when he investigates the pyramids, looking for Fekkesh. This is also the weapon seen carried by Bond on promotional material and the DVD cover. |
| − | [[Image:Beretta 70.jpg|thumb|none|350px|Beretta | + | [[Image:Beretta 70.jpg|thumb|none|350px|Beretta 70 - .32 ACP]] |
[[Image:Tswlm-ber70a.jpg|thumb|none|600px|Bond draws the Beretta outside the pyramids.]] | [[Image:Tswlm-ber70a.jpg|thumb|none|600px|Bond draws the Beretta outside the pyramids.]] | ||
[[Image:Tswlm-ber70b.jpg|thumb|none|600px|Bond looks for Fekkesh.]] | [[Image:Tswlm-ber70b.jpg|thumb|none|600px|Bond looks for Fekkesh.]] | ||
| − | == Beretta 950 | + | == Beretta 950 Minx == |
| − | Maj. Anya Amasova, "Agent XXX" ([[Barbara Bach]]), carries a .25 ACP [[Beretta 950 Jetfire]] throughout the movie. | + | Maj. Anya Amasova, "Agent XXX" ([[Barbara Bach]]), carries a shortened .25 ACP [[Beretta 950 Jetfire|Beretta 950 Minx]] throughout the movie. |
[[Image:Spirit950Jetfire.JPG|thumb|none|350px|A nickel Beretta 950 Jetfire (.25 ACP) as used in ''[[The Spirit]]''. The weapon pictured here was [[Eva Mendes]]'s actual pistol in the film.]] | [[Image:Spirit950Jetfire.JPG|thumb|none|350px|A nickel Beretta 950 Jetfire (.25 ACP) as used in ''[[The Spirit]]''. The weapon pictured here was [[Eva Mendes]]'s actual pistol in the film.]] | ||
| − | [[Image:Swlm-jet1.jpg|thumb|none| | + | [[Image:Swlm-jet1.jpg|thumb|none|601px|Anya holds her shortened Minx on Jaws.]] |
| − | [[Image:Swlm-jet2.jpg|thumb|none| | + | [[Image:Swlm-jet2.jpg|thumb|none|601px|Anya, Beretta in hand, bends down to pick up the microfilm at Jaws' feet.]] |
| − | [[Image:Tswlm-berjet1.jpg|thumb|none|600px|Anya loads a magazine into her Beretta | + | [[Image:Tswlm-berjet1.jpg|thumb|none|600px|Anya loads a magazine into her Beretta Minx aboard the U.S.S. ''Wayne'']] |
| − | == Astra | + | == Astra Cadix == |
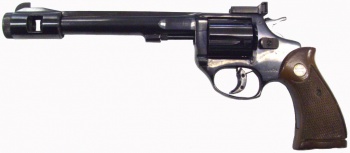
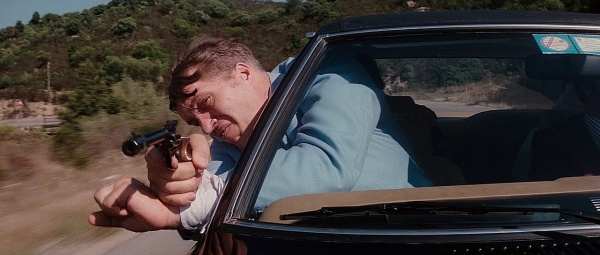
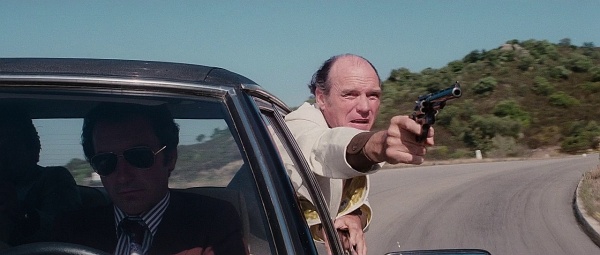
| − | Jaws ([[Richard Kiel]]) fires a | + | Jaws ([[Richard Kiel]]) fires a .38 Spl [[Astra Cadix]] target revolver at Bond and XXX during the car chase. |
| − | [[Image: | + | [[Image:IMGP7712.jpg|thumb|none|350px|Astra Cadix - .38 Special. Six inch target model.]] |
| − | [[Image:Swlm-rev1.jpg|thumb|none|600px|Jaws fires | + | [[Image:Swlm-rev1.jpg|thumb|none|600px|Jaws fires his Astra Cadix target revolver upon Bond and Anya.]] |
| − | == Astra | + | == Astra 902 == |
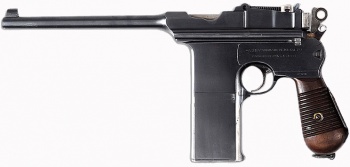
| − | Judging by the fixed internal twenty-round magazine, Jaws ([[Richard Kiel]]) fires at Bond and XXX from a car with an [[Astra | + | Judging by the fixed internal twenty-round magazine, Jaws ([[Richard Kiel]]) fires at Bond and XXX from a car with an [[Mauser C96|Astra 902]] while riding with Stromberg's henchmen. It is also heard firing in fully automatic, although as this is never seen in close-up it could just be an illusion created by sound effects. |
| − | [[Image: | + | [[Image:52690a1x1 (1).jpg|thumb|none|350px|Astra 902]] |
| − | [[Image:Swlm-c96.jpg|thumb|none|600px|Jaws grabs an Astra | + | [[Image:Swlm-c96.jpg|thumb|none|600px|Jaws grabs an Astra 902 from one of his henchmen to fire at Bond. Note the extended fixed magazine.]] |
== Llama Comanche III == | == Llama Comanche III == | ||
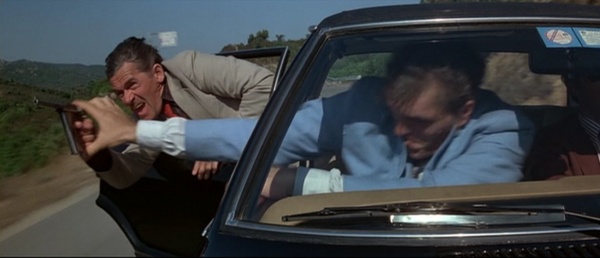
One of the other henchmen with Jaws in the car fires a what appears to be a [[Llama Comanche III]] at Bond and Anya. | One of the other henchmen with Jaws in the car fires a what appears to be a [[Llama Comanche III]] at Bond and Anya. | ||
[[Image:LlamaComancheIII.jpg|thumb|none|350px|Llama Comanche III - .357 Magnum]] | [[Image:LlamaComancheIII.jpg|thumb|none|350px|Llama Comanche III - .357 Magnum]] | ||
| − | [[Image:Swlm-rev2.jpg|thumb|none|600px|Another henchman fires a Llama Comanche III from the car | + | [[Image:Swlm-rev2.jpg|thumb|none|600px|Another henchman (stuntman George Leech) fires a Llama Comanche III from the car.]] |
| − | |||
| − | |||
| − | |||
| − | |||
| − | |||
| − | |||
== Webley Mk VI == | == Webley Mk VI == | ||
| Line 65: | Line 97: | ||
[[Image:Tswlm-webley1.jpg|thumb|none|600px|The crewman tackles the henchman, grabbing his Webley.]] | [[Image:Tswlm-webley1.jpg|thumb|none|600px|The crewman tackles the henchman, grabbing his Webley.]] | ||
| − | = | + | =Rifles= |
| − | |||
| − | |||
| − | |||
| − | |||
| − | |||
| − | == | + | == FN FAL (probable) == |
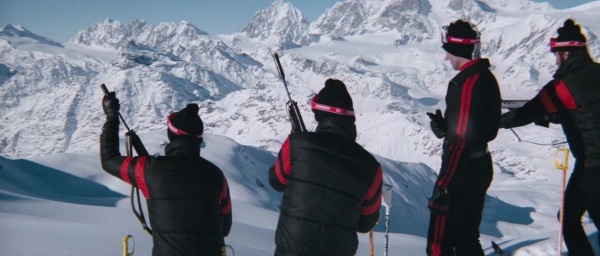
| − | Some of the KGB skiing assassins sent to kill Bond in the pre-credits sequence on the Austrian Alps | + | Some of the KGB skiing assassins sent to kill Bond in the pre-credits sequence on the Austrian Alps seem to be carrying some version of the FN FAL rifle. They appear to be fitted with suppressors, although the gunshots heard are not suppressed in any way. |
| − | [[ | + | [[Image:FN FAL 50 00.jpg|thumb|none|500px|FN FAL 50.00]] |
| − | [[Image:Tswlm-ar18a.jpg|thumb|none|600px|One of the KGB assassins with a suppressed | + | [[File:SpyWhoLovedMeRifle01.jpg|thumb|none|600px|Note the FN FAL characteristic holes in the forward grip on the weapon far right.]] |
| − | [[Image:Tswlm-ar18b.jpg|thumb|none| | + | [[Image:Tswlm-ar18a.jpg|thumb|none|600px|One of the KGB assassins with a suppressed FN FAL.]] |
| − | [[Image:Tswlm-ar18c.jpg|thumb|none| | + | [[Image:Tswlm-ar18b.jpg|thumb|none|601px|The KGB assassins prepare to pursue Bond.]] |
| − | [[Image:Tswlm-ar18d.jpg|thumb|none| | + | [[Image:Tswlm-ar18c.jpg|thumb|none|601px|Two assassins with FN FALs follow Sergei, armed with a S&W Model 10.]] |
| + | [[Image:Tswlm-ar18d.jpg|thumb|none|601px|Bond (in yellow) runs over a KGB assassin holding his FN FAL.]] | ||
== MGC M16 == | == MGC M16 == | ||
| − | The British, Soviet and | + | The British, Soviet, and US submarine officers and crewmembers also take several [[M16 rifle series#Non Firing Replicas of the M16 Rifle|MGC M-16 Model Gun Corp Replica Rifle]]s from Stromberg's armory on the ''Liparus''. This assault rifle is also used by Stromberg's henchmen. |
| − | [[Image:MGC16.jpg|thumb|none|450px|The MGC M16 | + | [[Image:MGC16.jpg|thumb|none|450px|The MGC M16 rifle: a non-firing metal replica built by the Model Gun Corp of Japan and one of the most used non-firing replicas of the M16 in movies and television.]] |
[[File:Slmm161.jpg|thumb|none|600px|Stromberg's man on the far left holds his M16, while they encircle the ''U.S.S. Wayne'']] | [[File:Slmm161.jpg|thumb|none|600px|Stromberg's man on the far left holds his M16, while they encircle the ''U.S.S. Wayne'']] | ||
| − | [[Image:Swlm-arm.jpg|thumb|none|600px|British, Soviet, and | + | [[Image:Swlm-arm.jpg|thumb|none|600px|British, Soviet, and US officers grab MGC Replica M16A1 rifles from the ''Liparus'' armory.]] |
[[File:Slmm162.jpg|thumb|none|600px|A M16 can be seen on the ground, after the Stromberg-man using it is shot dead by a Soviet sailor.]] | [[File:Slmm162.jpg|thumb|none|600px|A M16 can be seen on the ground, after the Stromberg-man using it is shot dead by a Soviet sailor.]] | ||
[[File:Slmm163.jpg|thumb|none|600px|One of Stromberg's men takes cover behind some barrels (big mistake) with his M16, while the others carry Sterlings.]] | [[File:Slmm163.jpg|thumb|none|600px|One of Stromberg's men takes cover behind some barrels (big mistake) with his M16, while the others carry Sterlings.]] | ||
| − | [[File:Slmm164.jpg|thumb|none|600px|Two | + | [[File:Slmm164.jpg|thumb|none|600px|Two US submariners on the left carry weapons: On the far left, there is an M16, the right one holds an unidentified weapon.]] |
=Submachine Guns= | =Submachine Guns= | ||
== Sterling L2A3 == | == Sterling L2A3 == | ||
| − | Bond ([[Roger Moore]]) leads the British, Soviet and | + | Bond ([[Roger Moore]]) leads the British, Soviet, and US submarine officers and crewmembers into Stromberg's armory, where he and many of the sailors arm themselves with 9 mm [[Sterling SMG|Sterling L2A3]]s. It is also used by many of Stromberg's henchmen. |
[[Image:SterlingSMG.jpg|thumb|none|350px|Sterling Submachine Gun 9x19mm]] | [[Image:SterlingSMG.jpg|thumb|none|350px|Sterling Submachine Gun 9x19mm]] | ||
[[File:Bond77sterling1.jpg|thumb|none|600px|Stromberg's men guard the ''U.S.S. Wayne''.]] | [[File:Bond77sterling1.jpg|thumb|none|600px|Stromberg's men guard the ''U.S.S. Wayne''.]] | ||
| Line 98: | Line 126: | ||
[[File:Bond77sterling2.jpg|thumb|none|600px|Close view of the Sterling's barrel.]] | [[File:Bond77sterling2.jpg|thumb|none|600px|Close view of the Sterling's barrel.]] | ||
[[File:Bond77sterling3.jpg|thumb|none|600px|One of Stromberg's men drops his Sterling when being killed by Bond.]] | [[File:Bond77sterling3.jpg|thumb|none|600px|One of Stromberg's men drops his Sterling when being killed by Bond.]] | ||
| − | [[Image:Tswlm-sterling2.jpg|thumb|none|600px|Stromberg's men are shot while firing Sterlings.]] | + | [[Image:Tswlm-sterling2.jpg|thumb|none|600px|Stromberg's men are shot while firing Sterlings. The scene is actually mirrored which is revealed by the magazines portrudes from the right side of the weapon.]] |
| − | [[Image:Tswlm-sterling3.jpg|thumb|none| | + | [[Image:Tswlm-sterling3.jpg|thumb|none|601px|A group of freed submarine crewmen take Sterlings from the ''Liparus'' armory.]] |
[[File:Bond77sterling4.jpg|thumb|none|600px|Stromberg's men try to stop the uprising on the ''Liparus''.]] | [[File:Bond77sterling4.jpg|thumb|none|600px|Stromberg's men try to stop the uprising on the ''Liparus''.]] | ||
[[Image:Swlm-sterling.jpg|thumb|none|600px|Bond fires a Sterling during the battle on board the ''Liparus''.]] | [[Image:Swlm-sterling.jpg|thumb|none|600px|Bond fires a Sterling during the battle on board the ''Liparus''.]] | ||
| Line 106: | Line 134: | ||
== Sten Mk II == | == Sten Mk II == | ||
| − | One of | + | One of Stromberg's henchmen is seen shooting a Sten Mk II during the shootout. |
[[Image:Sten.jpg|thumb|none|350px|Sten Mk II - 9x19mm]] | [[Image:Sten.jpg|thumb|none|350px|Sten Mk II - 9x19mm]] | ||
[[File:Spywholovedmestenmk2.jpg|thumb|none|600px|The man at the bottom left nearest the camera is using a Sten Mk II.]] | [[File:Spywholovedmestenmk2.jpg|thumb|none|600px|The man at the bottom left nearest the camera is using a Sten Mk II.]] | ||
| Line 117: | Line 145: | ||
The ammo crates are UK military (painted in RAF-issue gray with black letters) and are clearly marked '''[[Mills Bomb|No. 36 MK 1 (DET MK 7)]]''', meaning the grenades are stand-ins for Mills Bombs. Although the box says it holds 12 grenades, the area in the middle for the MK 7 fuzes tin has been removed and an additional wooden peg added so it can hold a total of 16 grenades. The Mk.2 grenades are also too tall for the packing crate, as the fuze assembly would get damaged. | The ammo crates are UK military (painted in RAF-issue gray with black letters) and are clearly marked '''[[Mills Bomb|No. 36 MK 1 (DET MK 7)]]''', meaning the grenades are stand-ins for Mills Bombs. Although the box says it holds 12 grenades, the area in the middle for the MK 7 fuzes tin has been removed and an additional wooden peg added so it can hold a total of 16 grenades. The Mk.2 grenades are also too tall for the packing crate, as the fuze assembly would get damaged. | ||
[[Image:MKIITrainingGrenade.jpg|thumb|none|200px|Mk 2 hand grenade|Mk 2 training grenade (the blue training color has been painted to look like live Mk II) and also note the slight difference between the training dummy's body shape and the real thing. This is the most common version seen in films since no movie uses live ordnance and many productions don't bother trying to get mockups that look exactly like the live Mk II.]] | [[Image:MKIITrainingGrenade.jpg|thumb|none|200px|Mk 2 hand grenade|Mk 2 training grenade (the blue training color has been painted to look like live Mk II) and also note the slight difference between the training dummy's body shape and the real thing. This is the most common version seen in films since no movie uses live ordnance and many productions don't bother trying to get mockups that look exactly like the live Mk II.]] | ||
| − | [[Image:Tswlm-mk1.jpg|thumb|none| | + | [[Image:Tswlm-mk1.jpg|thumb|none|601px|Freed submarine crew members grab grenades from the armory]] |
[[Image:Tswlm-mk2.jpg|thumb|none|600px|A grenade thrown by Bond ([[Roger Moore]]) destroys a personnel carrier aboard the ''Liparus''.]] | [[Image:Tswlm-mk2.jpg|thumb|none|600px|A grenade thrown by Bond ([[Roger Moore]]) destroys a personnel carrier aboard the ''Liparus''.]] | ||
[[Image:Tswlm-mk3.jpg|thumb|none|600px|A grenade rolls out from the hand of the dead British Commander Talbot ([[Bryan Marshall]]).]] | [[Image:Tswlm-mk3.jpg|thumb|none|600px|A grenade rolls out from the hand of the dead British Commander Talbot ([[Bryan Marshall]]).]] | ||
| − | = | + | =Other= |
| + | == Table gun == | ||
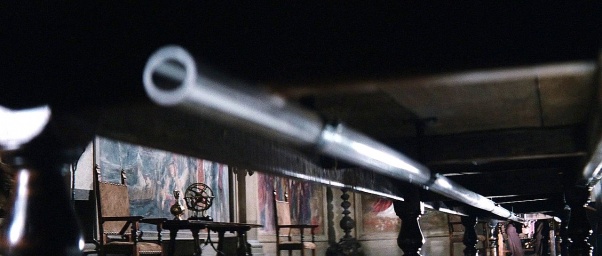
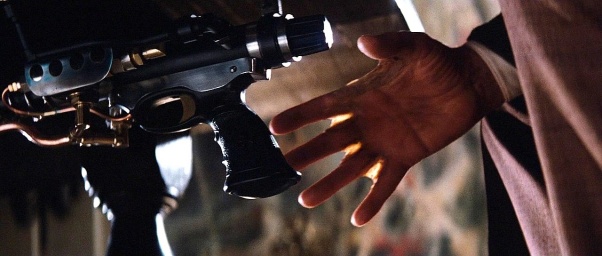
| + | Karl Stromberg ([[Curt Jürgens]]) has a launcher underneath his dining table for anyone who gets on his wrong side, with a perspex tube to guide the explosive projectile. It seems to be built on a speargun, possibly a Nemrod. | ||
| + | [[Image:Tswlm-table1.jpg|thumb|none|602px|The tube end of Stromberg's table gun.]] | ||
| + | [[Image:Tswlm-table2.jpg|thumb|none|602px|Stromberg reaches for his table gun.]] | ||
| + | |||
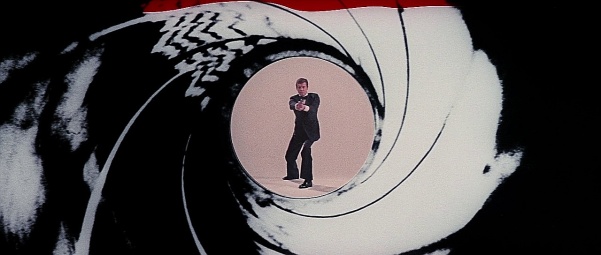
| + | ==The Gunbarrel== | ||
| + | [[File:TSWLM 102.jpg|thumb|none|601px]] | ||
| − | |||
| − | |||
| − | |||
| − | |||
{{James Bond Series}} | {{James Bond Series}} | ||
[[Category:Movie]] | [[Category:Movie]] | ||
Revision as of 00:18, 8 January 2019
| ||||||||||||||||||||||||||||||||
The Spy Who Loved Me is the 10th installment in the official James Bond film series. Roger Moore returns as Agent 007 for the 1977 sequel, as Bond finds himself reluctantly working with a rival KGB agent (Barbara Bach) to investigate the disappearance of two nuclear submarines. The film was directed by Lewis Gilbert, who also directed the Bond films You Only Live Twice and Moonraker.
The following weapons were used in the film The Spy Who Loved Me:
![]() WARNING! THIS PAGE CONTAINS SPOILERS!
WARNING! THIS PAGE CONTAINS SPOILERS!
Handguns
Walther PPK
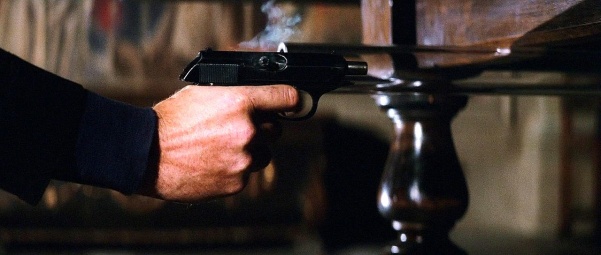
James Bond (Roger Moore) continues to carry a Walther PPK as his sidearm. The pistol also is seen in the hands of Major Anya Amasova, aka "Agent XXX" (Barbara Bach).
Smith & Wesson Model 10
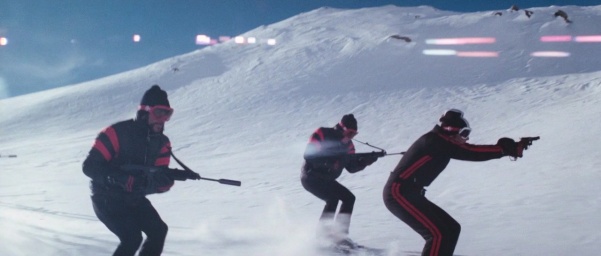
Sergei Barzov (Michael Billington), one of the KGB skiing assassins sent to kill Bond in the pre-credits sequence, carries a Smith & Wesson Model 10.
Luger
In addition to a Walther PPK and a shortened Beretta Minx, Maurice Binder's opening titles sequence features women doing acrobatics on a Luger and a Colt Pocket Hammerless.
Colt Pocket Hammerless
In addition to a Walther PPK, a shortened Beretta Minx, and a Luger, Maurice Binder's opening titles sequence features women doing acrobatics on a Colt Pocket Hammerless pistol.
Beretta 951
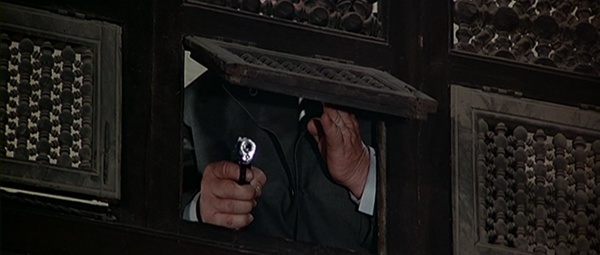
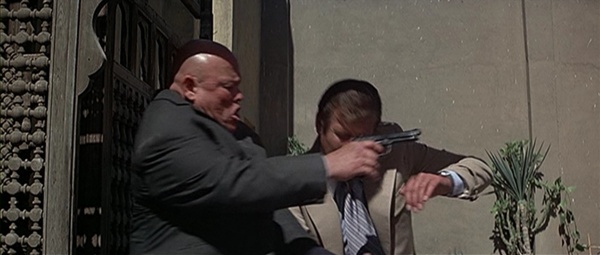
Sandor (Milton Reid) is seen with a Beretta 951 when firing it at Bond and when Bond chases him to the rooftop at Fekkesh's home in Cairo.
Beretta 70
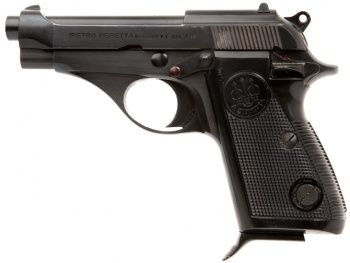
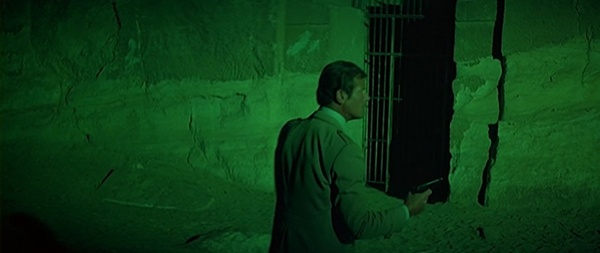
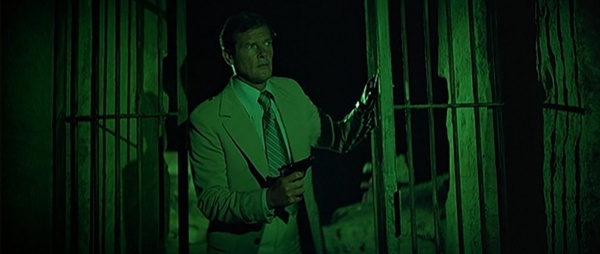
In a continuity error, Bond (Roger Moore) is seen with a .32-caliber Beretta 70 rather than his usual Walther PPK when he investigates the pyramids, looking for Fekkesh. This is also the weapon seen carried by Bond on promotional material and the DVD cover.
Beretta 950 Minx
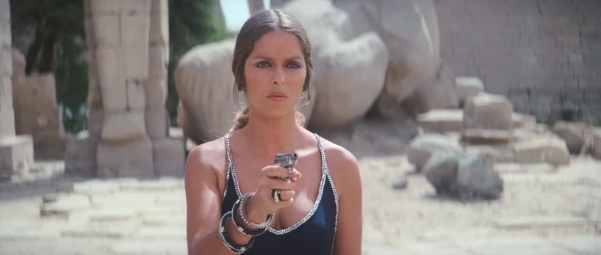
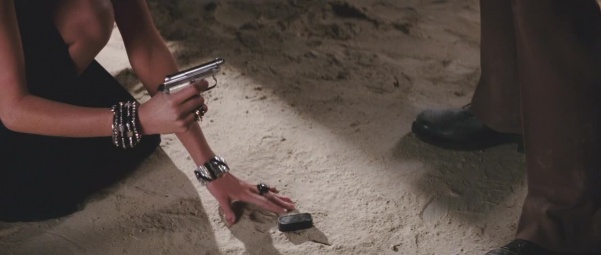
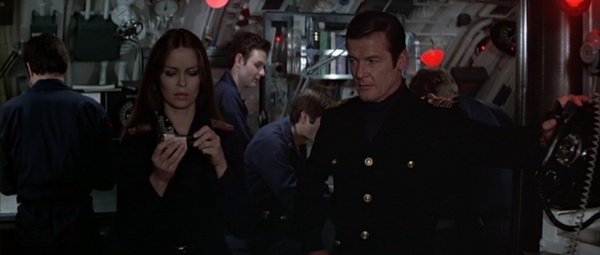
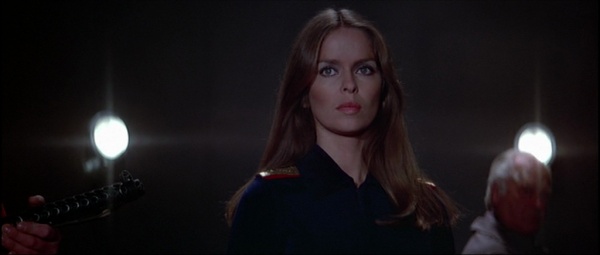
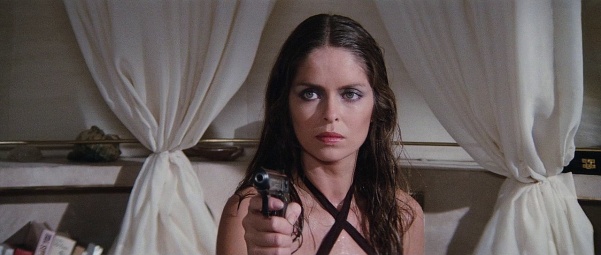
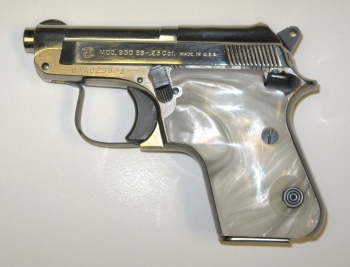
Maj. Anya Amasova, "Agent XXX" (Barbara Bach), carries a shortened .25 ACP Beretta 950 Minx throughout the movie.
Astra Cadix
Jaws (Richard Kiel) fires a .38 Spl Astra Cadix target revolver at Bond and XXX during the car chase.
Astra 902
Judging by the fixed internal twenty-round magazine, Jaws (Richard Kiel) fires at Bond and XXX from a car with an Astra 902 while riding with Stromberg's henchmen. It is also heard firing in fully automatic, although as this is never seen in close-up it could just be an illusion created by sound effects.
Llama Comanche III
One of the other henchmen with Jaws in the car fires a what appears to be a Llama Comanche III at Bond and Anya.
Webley Mk VI
A British crewman grabs a Webley Mk VI from one of Stromberg's henchmen on board the Liparus.
Rifles
FN FAL (probable)
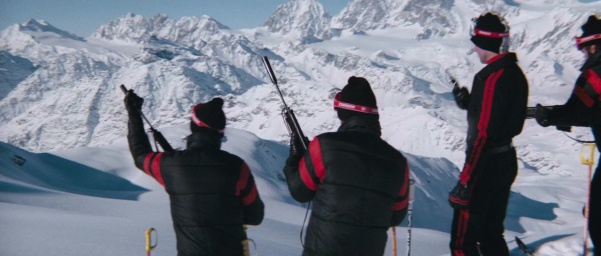
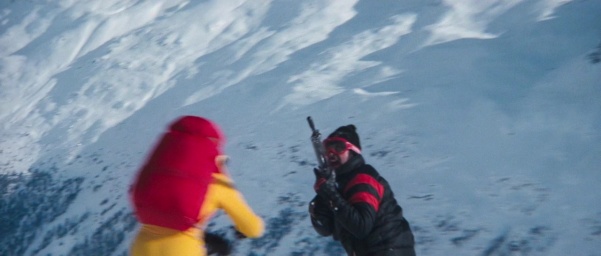
Some of the KGB skiing assassins sent to kill Bond in the pre-credits sequence on the Austrian Alps seem to be carrying some version of the FN FAL rifle. They appear to be fitted with suppressors, although the gunshots heard are not suppressed in any way.
MGC M16
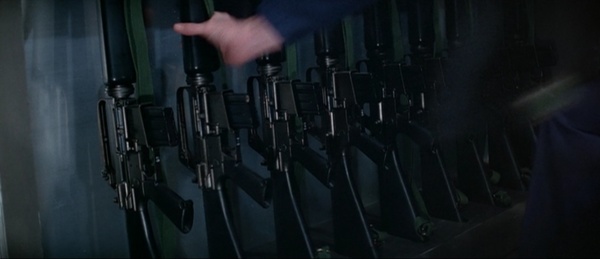
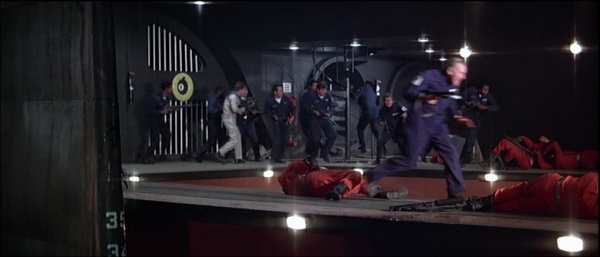
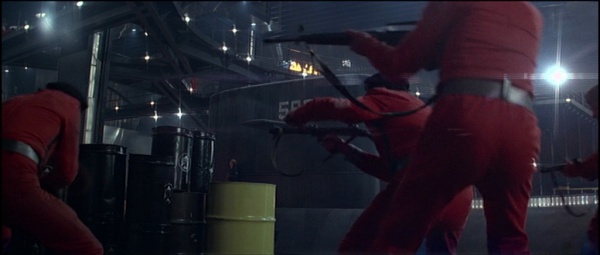
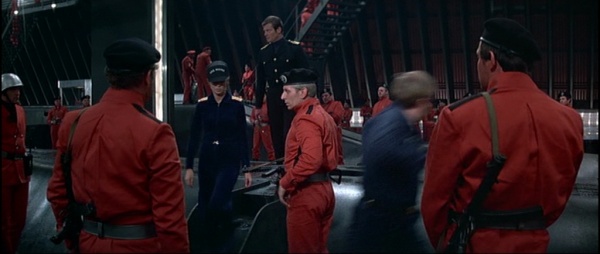
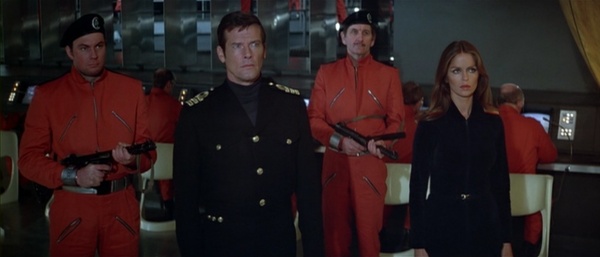
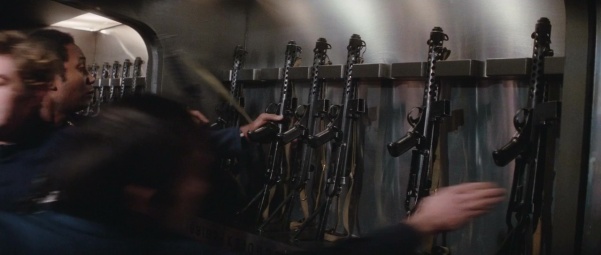
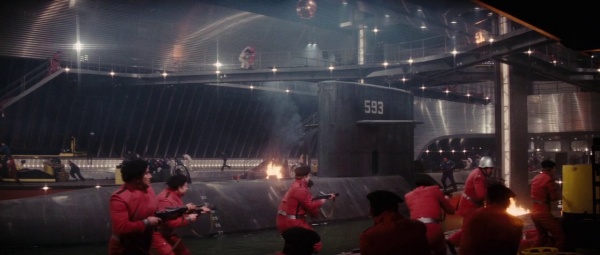
The British, Soviet, and US submarine officers and crewmembers also take several MGC M-16 Model Gun Corp Replica Rifles from Stromberg's armory on the Liparus. This assault rifle is also used by Stromberg's henchmen.
Submachine Guns
Sterling L2A3
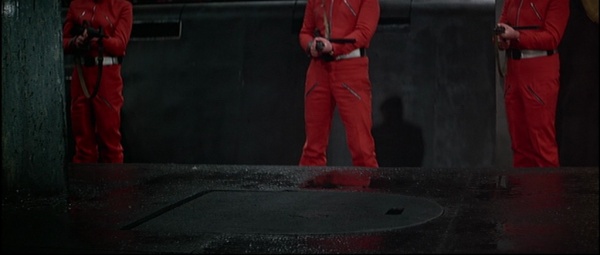
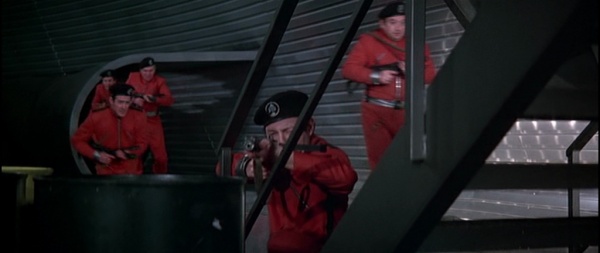
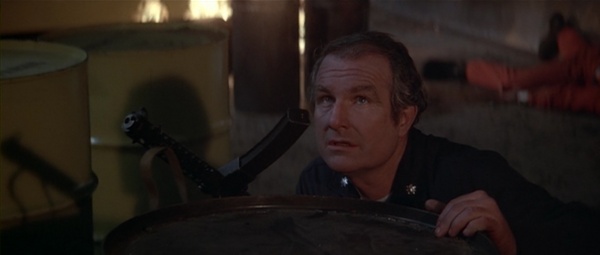
Bond (Roger Moore) leads the British, Soviet, and US submarine officers and crewmembers into Stromberg's armory, where he and many of the sailors arm themselves with 9 mm Sterling L2A3s. It is also used by many of Stromberg's henchmen.
Sten Mk II
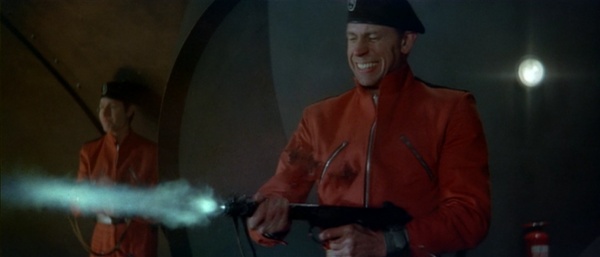
One of Stromberg's henchmen is seen shooting a Sten Mk II during the shootout.
Grenades
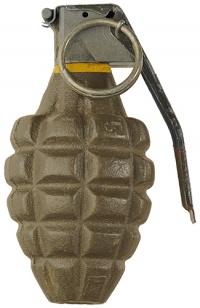
Mk 2 hand grenade
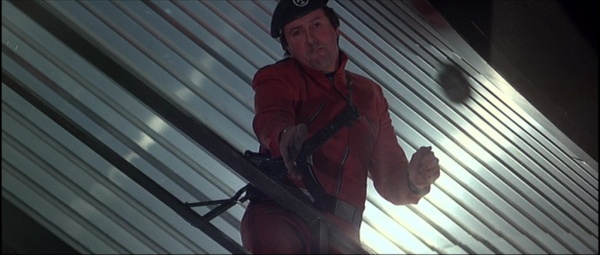
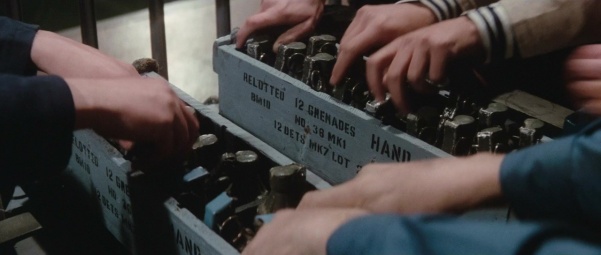
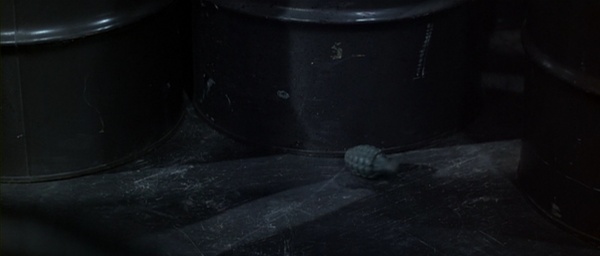
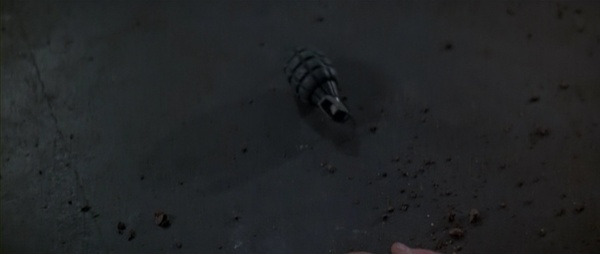
Both the submarine officers and Stromberg's henchmen use Mk 2 hand grenades taken from Stromburg's armory during the Liparus battle.
The ammo crates are UK military (painted in RAF-issue gray with black letters) and are clearly marked No. 36 MK 1 (DET MK 7), meaning the grenades are stand-ins for Mills Bombs. Although the box says it holds 12 grenades, the area in the middle for the MK 7 fuzes tin has been removed and an additional wooden peg added so it can hold a total of 16 grenades. The Mk.2 grenades are also too tall for the packing crate, as the fuze assembly would get damaged.
Other
Table gun
Karl Stromberg (Curt Jürgens) has a launcher underneath his dining table for anyone who gets on his wrong side, with a perspex tube to guide the explosive projectile. It seems to be built on a speargun, possibly a Nemrod.
