| If you have been locked out of your account you can request a password reset here. |
Difference between revisions of "Saving Private Ryan"
| (46 intermediate revisions by 12 users not shown) | |||
| Line 1: | Line 1: | ||
| − | [[Image: | + | {{Infobox Movie|{{PAGENAME}} |
| − | '''''Saving Private Ryan''''' is | + | |name = Saving Private Ryan |
| + | |picture = Saving Private Ryan poster.jpg | ||
| + | |caption = Film Poster | ||
| + | |country = [[Image:USA.jpg|25px]] United States | ||
| + | |director = [[Steven Spielberg]] | ||
| + | |date = 1998 | ||
| + | |language = English | ||
| + | |studio = Amblin Entertainment<br>Mutual Film Company | ||
| + | |distributor = DreamWorks Pictures (United States)<br>Paramount Pictures (International) | ||
| + | |character1=Captain John H. Miller | ||
| + | |actor1=[[Tom Hanks]] | ||
| + | |character2=Private James Ryan | ||
| + | |actor2=[[Matt Damon]] | ||
| + | |character3=Sergeant Mike Horvath | ||
| + | |actor3=[[Tom Sizemore]] | ||
| + | |character4=Private First Class Richard Reiben | ||
| + | |actor4=[[Edward Burns]] | ||
| + | |character5=Private Daniel Jackson | ||
| + | |actor5=[[Barry Pepper]] | ||
| + | |character6=Private Stanley Mellish | ||
| + | |actor6=[[Adam Goldberg]] | ||
| + | |character7=Private Adrian Caparzo | ||
| + | |actor7=[[Vin Diesel]] | ||
| + | |character8=Medic Irwin Wade | ||
| + | |actor8=[[Giovanni Ribisi]] | ||
| + | |character9=Sergeant Hill | ||
| + | |actor9=[[Paul Giamatti]] | ||
| + | |character10=Lieutenant Colonel Walter Anderson | ||
| + | |actor10=[[Dennis Farina]] | ||
| + | |character11=Captain Fred Hamill | ||
| + | |actor11=[[Ted Danson]] | ||
| + | }} | ||
| + | '''''Saving Private Ryan''''' is a 1998 World War II film directed by [[Steven Spielberg]] that stars [[Tom Hanks]] as a US Army Ranger captain who leads a squad of men into Normandy to bring home a paratrooper from the 101st Airborne Division who had just lost his three brothers in combat. The film was especially notable for its unflinching depiction of the D-Day landing on Omaha Beach. | ||
{{Film Title}} | {{Film Title}} | ||
| + | |||
__TOC__<br clear=all> | __TOC__<br clear=all> | ||
| − | '''See the [[Talk:Saving Private Ryan|Discussion]] for more details on non-firearms weapons used in the film.''' | + | '''See the [[Talk:Saving Private Ryan|Discussion]] for more details on non-firearms weapons used in the film.''' |
| + | {{Spoiler}} | ||
=Rifles & Carbines= | =Rifles & Carbines= | ||
| − | + | ==M1 Garand== | |
| − | == M1 Garand == | + | The [[M1 Garand]] is used by the majority of U.S. soldiers in the film. ''Saving Private Ryan'' is also one of few films that correctly depicts the easily identifiable "ping" sound the Garand makes after the last round is fired and the en bloc clip is ejected. In some scenes, soldiers can be seen holding their Garands with relative ease, making these Garands most likely lightweight prop models. |
| − | + | [[Image:M1 Garand.jpg|thumb|none|450px|M1 Garand semi-automatic rifle with leather M1917 sling - .30-06]] | |
| − | The [[M1 Garand]] is used by the majority of | + | [[Image:SPRM1Garand.jpg|thumb|none|500px|An M1 Garand prop rifle with M1 bayonet used in the film during the D-Day scene. The stock still has sand stuck in it from the beach.]] |
| − | [[Image:M1 Garand.jpg|thumb|none| | + | [[Image:SPRM1Garand-1.jpg|thumb|none|600px|A U.S. soldier carrying an M1 Garand rather easily with his right hand during the landing on Omaha Beach. In reality, the Garand weighed 9 1/2 lbs and the rifle seen in the screenshot is likely a lightweight replica.]] |
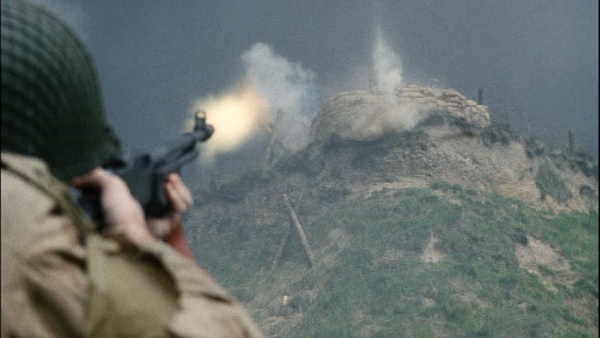
| − | [[Image:SPRM1Garand.jpg|thumb|none|500px|An M1 Garand prop rifle with M1 bayonet used in the film during the D-Day scene. The | + | [[Image:SPRM1Garand-3.jpg|thumb|none|600px|Private Stanley Mellish ([[Adam Goldberg]]) fires his M1 Garand at a German bunker.]] |
| − | [[Image:SPRM1Garand-1.jpg|thumb|none|600px|A U.S. soldier | + | [[Image:SPRM1Garand-4.jpg|thumb|none|600px|*PING!* - Private Adrian Caparzo ([[Vin Diesel]]) fires his M1 Garand. The ejected empty en bloc clip can be seen in this shot.]] |
| − | [[Image:SPRM1Garand-3.jpg|thumb|none|600px| | ||
| − | [[Image:SPRM1Garand-4.jpg|thumb|none|600px|PING! Private Adrian Caparzo ([[Vin Diesel]]) fires his M1 Garand.]] | ||
[[Image:SPR 303.jpg|thumb|none|600px|Mellish and Caparzo approach a German bunker on Omaha Beach with their M1 Garands.]] | [[Image:SPR 303.jpg|thumb|none|600px|Mellish and Caparzo approach a German bunker on Omaha Beach with their M1 Garands.]] | ||
| − | [[Image:SPRM1Garand-5.jpg|thumb|none| | + | [[Image:SPRM1Garand-5.jpg|thumb|none|600px|Mellish fires his M1 Garand at a fleeing German soldier.]] |
| − | [[Image:SPRM1Garand-6.jpg|thumb|none|600px|"Look! I washed for supper!" A U.S. soldier of low morals holds an M1 Garand with cuts in the stock for an ammo pouch to sling through like an M1 Carbine. This is a strange stock for a Garand. Also note how he can easily hold it with one hand since it is lighter than a real Garand.]] | + | [[Image:SPRM1Garand-6.jpg|thumb|none|600px|''"Look! I washed for supper!"'' - A U.S. soldier of low morals holds an M1 Garand with cuts in the stock for an ammo pouch to sling through like an M1 Carbine. This is a strange stock for a Garand. Also note how he can easily hold it with one hand since it is lighter than a real Garand.]] |
| − | [[Image:SPR 305.jpg|thumb|none|600px|Caparzo, Mellish and | + | [[Image:SPR 305.jpg|thumb|none|600px|Caparzo, Mellish and Corporal Timothy Upham ([[Jeremy Davies]]) with their M1 Garands.]] |
[[Image:SPRM1Garand-12.jpg|thumb|none|600px|Sergeant Hill ([[Paul Giamatti]]) holding his M1 Garand.]] | [[Image:SPRM1Garand-12.jpg|thumb|none|600px|Sergeant Hill ([[Paul Giamatti]]) holding his M1 Garand.]] | ||
| − | [[Image:SPRM1Garand-7.jpg|thumb|none|600px| | + | [[Image:SPRM1Garand-7.jpg|thumb|none|600px|Captain John H. Miller ([[Tom Hanks]]) pulls the trigger groupings out of M1 Garands marking dead G.I. graves so they are rendered useless should any Germans try to capture them.]] |
| − | [[Image:SPRM1Garand-8.jpg|thumb|none|600px|A U.S. paratrooper loads up his M1 Garand before the battle in Ramelle.]] | + | [[Image:SPRM1Garand-8.jpg|thumb|none|600px|A U.S. paratrooper loads up his M1 Garand before the battle in Ramelle. Note how he has to slap his bolt shut, while the bolt is supposed to snap forwards automatically after the clip is loaded, bad field conditions can cause the mechanism to fail, in which case slapping the operating handle will shut it easily and safely.]] |
| + | [[Image:SPRM1Garand-10.jpg|thumb|none|600px|*PING!* - Private James Ryan ([[Matt Damon]]) firing his M1 Garand.]] | ||
[[Image:SPRM1Garand-9.jpg|thumb|none|600px|Mellish fires his M1 Garand and then claims it jams, despite the fact it is clearly still in battery.]] | [[Image:SPRM1Garand-9.jpg|thumb|none|600px|Mellish fires his M1 Garand and then claims it jams, despite the fact it is clearly still in battery.]] | ||
| − | [[Image:SPRM1Garand- | + | [[Image:SPRM1Garand-11.jpg|thumb|none|600px|Cpl. Upham ([[Jeremy Davies]]) points his M1 Garand at a group of fleeing German soldiers including Steamboat Willie.]] |
| − | + | [[Image:SPR 311.jpg|thumb|none|600px|Cpl. Upham with his M1 Garand.]] | |
| − | [[Image:SPR 311.jpg|thumb|none|600px|Cpl. Upham | ||
| − | == M1 Carbine == | + | ==M1 Carbine== |
| − | The [[M1 Carbine]] appears | + | The [[M1 Carbine]] appears as the main weapon of Technician Sergeant Mike Horvath ([[Tom Sizemore]]). It is fitted with a double magazine pouch strapped to the buttstock. |
| − | [[Image:M1-Carbine.jpg|thumb|none| | + | [[Image:M1-Carbine.jpg|thumb|none|450px|M1 Carbine - .30 Carbine]] |
| − | [[Image:SPRM1Carbine-1.jpg|thumb|none| | + | [[Image:SPRM1Carbine-1.jpg|thumb|none|600px|''"Gather weapons and ammo!"'' - TSgt. Mike Horvath ([[Tom Sizemore]]) with his M1 Carbine on Omaha Beach, Dog Green Sector.]] |
[[Image:SPRM1Carbine-2.jpg|thumb|none|600px|TSgt. Horvath firing his M1 Carbine.]] | [[Image:SPRM1Carbine-2.jpg|thumb|none|600px|TSgt. Horvath firing his M1 Carbine.]] | ||
| − | [[Image:SPRM1Carbine-3.jpg|thumb|none|600px| | + | [[Image:SPRM1Carbine-3.jpg|thumb|none|600px|Horvath with his M1 Carbine as Dog One is opened.]] |
| − | [[Image:SPRM1Carbine-4.jpg|thumb|none|600px| | + | [[Image:SPRM1Carbine-4.jpg|thumb|none|600px|Horvath racks the bolt on his M1 Carbine before facing the German machine gun nest.]] |
[[Image:SPRM1Carbine-5.jpg|thumb|none|600px|TSgt. Horvath with his M1 Carbine.]] | [[Image:SPRM1Carbine-5.jpg|thumb|none|600px|TSgt. Horvath with his M1 Carbine.]] | ||
==M1A1 Carbine== | ==M1A1 Carbine== | ||
| − | Several | + | Several paratroopers of the 101st Airborne Division as well as other Airborne units carry the folding stock variant [[M1A1 Carbine]]. |
| − | [[Image:M1A1Carbine.jpg|thumb|none| | + | [[Image:M1A1Carbine.jpg|thumb|none|450px|Paratrooper M1A1 Carbine - .30 Carbine]] |
| − | [[Image:SPRM1A1Carbine-1.jpg|thumb|none| | + | [[Image:SPRM1A1Carbine-1.jpg|thumb|none|600px|On the right, Private Goldman ([[Raffaello Degruttola]]) with his M1A1 Carbine.]] |
| − | [[Image:SPRM1A1Carbine-2.jpg|thumb|none| | + | [[Image:SPRM1A1Carbine-2.jpg|thumb|none|600px|A paratrooper kills a German tank crewman with his M1A1 Carbine and then holds the hatch open with it. (Close inspection reveals the hatch appears to be made of lightweight material and easy to move)]] |
| − | ==Springfield | + | ==M1903A4 Springfield== |
| − | The squad's sharpshooter, Private Daniel Jackson ([[Barry Pepper]]), carries the sniper | + | The squad's sharpshooter, Private Daniel Jackson ([[Barry Pepper]]), carries the sniper variant of the M1903 Springfield, the [[M1903_Springfield#M1903A4_Springfield|M1903A4 Sniper Rifle]]. The differences include the deletion of the front sight, and the addition of a scope. Jackson is heard quoting religious scriptures before firing his weapon. There is also a notable scene where Jackson shoots a German sniper through that sniper's own scope, a feat similar to one accomplished by Gunnery Sergeant Carlos Hathcock during the Vietnam War. However, in this film, the bullet drop at 400yds would make it impossible to clear all the scope lenses, while Hathcock was far closer to his target, as well as looking down at said target (Hathcock was on a hill, while the enemy sniper was at the base). Jackson clearly has trouble cycling the gun throughout the film due to him being left-handed and the gun being built for right-handed shooters. |
| − | + | [[Image:Rifle Springfield M1903A4 with M84 sight.jpg|thumb|none|450px|M1903A4 Springfield sniper variant with M84 scope - .30-06]] | |
| − | [[Image:Rifle Springfield M1903A4 with M84 sight.jpg|thumb|none| | + | [[Image:SPR1903A4.jpg|thumb|none|600px|Pvt. Daniel Jackson ([[Barry Pepper]]) aims his M1903A4 Springfield.]] |
| − | [[Image:SPR1903A4.jpg|thumb|none|600px|Pvt. Daniel Jackson ([[Barry Pepper]]) aims his Springfield | + | [[Image:SPR1903A4-1.jpg|thumb|none|600px|Pvt. Jackson fires his M1903A4.]] |
| − | [[Image:SPR1903A4-1.jpg|thumb|none|600px|Pvt. Jackson fires his | + | [[Image:SPR1903A4-2.jpg|thumb|none|600px|Jackson fits an 8x Unertl scope on his M1903A4 to face the German sniper (although he doesn't zero it to the gun, which would make his incredible shot even more impossible). Here, he is seen adjusting his scope for elevation, even though he claims it is for windage. Also, his hand is the only thing moving, the front of the scope never twists.]] |
| − | [[Image:SPR1903A4-2.jpg|thumb|none|600px|Jackson fits an 8x Unertl scope on his | + | [[Image:SPR1903A4-3.jpg|thumb|none|600px|Jackson takes aim at the German sniper with his M1903A4.]] |
| − | [[Image:SPR1903A4-3.jpg|thumb|none|600px|Jackson takes aim at the sniper with his | + | [[Image:SPR1903A4-4.jpg|thumb|none|600px|Jackson with his M1903A4 during the standoff. Note that he's using a different scope than the 8x Unertl he uses in most other scenes.]] |
| − | [[Image:SPR1903A4-4.jpg|thumb|none|600px|Jackson with his | ||
[[Image:SPR1903A4-5.jpg|thumb|none|600px|Cpl. Upham looks through Jackson's rifle scope and despite which way he turns it, the reticle is always perfectly centered.]] | [[Image:SPR1903A4-5.jpg|thumb|none|600px|Cpl. Upham looks through Jackson's rifle scope and despite which way he turns it, the reticle is always perfectly centered.]] | ||
| − | [[Image:SPR1903a4-6.jpg|thumb|none|600px|Jackson ejects a shell (which is clearly a blank) from his | + | [[Image:SPR-sniperFPS.jpg|thumb|none|600px|An angle view of Jackson's M1903A4 Springfield.]][[Image:SPR1903a4-6.jpg|thumb|none|600px|Jackson ejects a shell (which is clearly a blank) from his M1903A4.]] |
[[Image:SPR1903A4-7.jpg|thumb|none|600px|Note how the free-bolt safety is clearly on in this shot.]] | [[Image:SPR1903A4-7.jpg|thumb|none|600px|Note how the free-bolt safety is clearly on in this shot.]] | ||
| − | |||
===Faulty Scope=== | ===Faulty Scope=== | ||
During the bell tower sequence, Jackson's Unertl scope appears to be very off from where the bullets hit, likely because he didn't zero it when switching it with his other scope. | During the bell tower sequence, Jackson's Unertl scope appears to be very off from where the bullets hit, likely because he didn't zero it when switching it with his other scope. | ||
| − | |||
[[Image:SPRfaltyscope-1.jpg|thumb|none|600px|Jackson clearly led his target but the gun still shot too far left and likely hit this soldier by luck.]] | [[Image:SPRfaltyscope-1.jpg|thumb|none|600px|Jackson clearly led his target but the gun still shot too far left and likely hit this soldier by luck.]] | ||
[[Image:SPRfaltyscope-2.jpg|thumb|none|600px|This shot went ''way'' left and ''way'' low.]] | [[Image:SPRfaltyscope-2.jpg|thumb|none|600px|This shot went ''way'' left and ''way'' low.]] | ||
| − | [[Image:SPRfaltyscope-3.jpg|thumb|none|600px|This shot went ''way'' right and way low.]] | + | [[Image:SPRfaltyscope-3.jpg|thumb|none|600px|This shot went ''way'' right and ''way'' low.]] |
| − | == Karabiner 98k == | + | ==Karabiner 98k== |
| − | + | As common with the German forces as the M1 Garand is with the Americans, the [[Karabiner 98k]] bolt-action rifle is the standard-issue weapon of the German military. SS Grenadiers during the battle in Ramelle line up armed almost entirely with Kar98k rifles, including 'Steamboat Willie' (Joerg Stadler), who mortally wounds Cpt. Miller with his 98k rifle. Also note how most of the rifles lack the hooded sights and cleaning rods which usually indicates Russian captures. | |
| − | As common with the German | + | [[Image:Karabiner-98K.jpg|thumb|none|450px|Karabiner 98k - German manufacture 1937 date - 7.92x57mm Mauser]] |
| − | [[Image:Karabiner-98K.jpg|thumb|none| | + | [[Image:SPRKar98K-1.jpg|thumb|none|600px|Heer soldiers armed with Kar98k rifles and MP40 submachine guns during the standoff.]] |
| − | [[Image:SPRKar98K-1.jpg|thumb|none|600px| | + | [[Image:SPRKAr98K-2.jpg|thumb|none|600px|SS Grenadiers run to the bridge in Ramelle armed with Kar98k rifles. The device behind the soldier in the foreground is a 60cm SW-36 searchlight on an Sd.Ah.51 trailer.]] |
| − | [[Image:SPRKAr98K-2.jpg|thumb|none|600px|SS Grenadiers run to the bridge in Ramelle armed with | + | [[Image:SPRKAr98k-3.jpg|thumb|none|600px|'Steamboat Willie' (Joerg Stadler) fires his Karabiner 98k.]] |
| − | [[Image:SPRKAr98k-3.jpg|thumb|none|600px|'Steamboat Willie' fires his | ||
[[Image:SPR 310.jpg|thumb|none|600px|Steamboat Willie's Kar98k recoils after he shoots a paratrooper.]] | [[Image:SPR 310.jpg|thumb|none|600px|Steamboat Willie's Kar98k recoils after he shoots a paratrooper.]] | ||
| − | [[Image:SPR 308.jpg|thumb|none|600px|Steamboat Willie chambers his Kar98k. You can see the bullet in the chamber and the ejected brass flying in front of his fellow | + | [[Image:SPR 308.jpg|thumb|none|600px|Steamboat Willie chambers his Kar98k. You can see the bullet in the chamber and the ejected brass flying in front of his fellow soldier's face.]] |
| − | == | + | ==Karabiner 98k Sniper Rifle== |
| − | A | + | A Heer sniper is armed with a [[Karabiner 98k]] sniper rifle fitted with a Zeiss ZF42 scope with a rubber light blocking eye cover (which despite goof reports, ''is'' at proper eye relief with him resting his eye on it) and covered in makeshift burlap camouflage. He mortally wounds PFC Adrian Caparzo ([[Vin Diesel]]) before being killed himself by Private Daniel Jackson ([[Barry Pepper]]). Jackson shoots this German sniper through his scope, a reference to a shot made by legendary Marine Corps sniper [http://en.wikipedia.org/wiki/Carlos_Hathcock Carlos Norman Hathcock II] during the Vietnam War. |
| − | [[Image:tur3.jpg|thumb|none| | + | [[Image:tur3.jpg|thumb|none|450px|Karabiner 98k sniper rifle with Zeiss ZF42 scope - 7.92x57mm Mauser]] |
| − | [[Image:SPRKar98Ksniper.jpg|thumb|none|600px| | + | [[Image:SPRKar98Ksniper.jpg|thumb|none|600px|A Heer sniper aims his Karabiner 98k sniper rifle.]] |
=Submachine Guns= | =Submachine Guns= | ||
| − | + | ==M1A1 Thompson== | |
| − | == M1A1 Thompson == | + | The [[M1A1 Thompson]] aka the "Tommy Gun" or "fast gun" is carried by Captain John H. Miller ([[Tom Hanks]]). The Thompson is also used by other soldiers, notably Captain Fred Hamill ([[Ted Danson]]) to end a standoff between Miller's squad and a group of German soldiers they had stumbled upon. |
| − | + | [[Image:M1sb.jpg|thumb|none|400px|M1A1 Thompson - .45 ACP]] | |
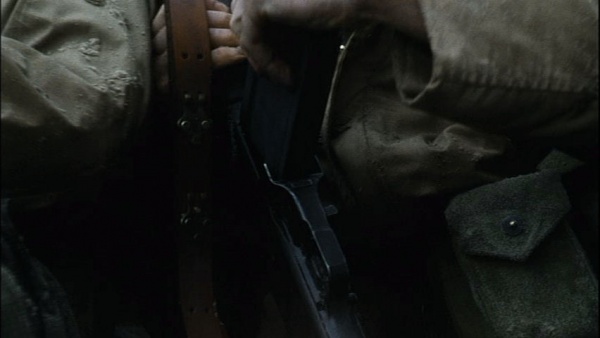
| − | The [[ | + | [[Image:SPRM1A1Thompson-1.jpg|thumb|none|600px|Capt. John H. Miller ([[Tom Hanks]]) removes his M1A1 Thompson from its clear protective bag. The clear material has often been mistakenly identified as plastic (which was not introduced until after the war), but is rather a material known as PLIOFILM.]] |
| − | |||
| − | [[Image:M1sb.jpg|thumb|none|400px | ||
| − | [[Image:SPRM1A1Thompson-1.jpg|thumb|none| | ||
[[Image:SPR 302.jpg|thumb|none|600px|Cpt. Miller covering a bunker with his Thompson.]] | [[Image:SPR 302.jpg|thumb|none|600px|Cpt. Miller covering a bunker with his Thompson.]] | ||
| − | [[Image:SPRM1A1Thompson-7.jpg|thumb|none|600px|Captain Fred Hamill ([[Ted Danson]]), left, and one of his men holding freshly fired | + | [[Image:SPRM1A1Thompson-7.jpg|thumb|none|600px|Captain Fred Hamill ([[Ted Danson]]), on the left, and one of his men holding freshly fired M1A1 Thompsons.]] |
| − | [[Image:SPRM1A1Thompson-2.jpg|thumb|none|600px| | + | [[Image:SPRM1A1Thompson-2.jpg|thumb|none|600px|Miller reloads his Thompson before the battle in Ramelle, despite having been clearly seen reloading it the scene before when facing the half-track. This could be due to nervous habit.]] |
| − | [[Image:SPRM1A1Thompson-3.jpg|thumb|none|600px| | + | [[Image:SPRM1A1Thompson-3.jpg|thumb|none|600px|Capt. Miller ([[Tom Hanks]]) with his Thompson at the ready.]] |
| − | [[Image:SPRM1A1Thompson-4.jpg|thumb|none|600px| | + | [[Image:SPRM1A1Thompson-4.jpg|thumb|none|600px|Miller fires his Thompson through the driver's viewport of a "Tiger" tank.]] |
| − | [[Image:SPRM1A1Thompson-5.jpg|thumb|none|600px| | + | [[Image:SPRM1A1Thompson-5.jpg|thumb|none|600px|Capt. Miller firing his Thompson.]] |
| − | [[Image:SPRM1A1Thompson-6.jpg|thumb|none|600px| | + | [[Image:SPRM1A1Thompson-6.jpg|thumb|none|600px|Cpl. Fred Henderson ([[Max Martini]]) fires his Thompson at a German through the wall. Note the holes are perpendicular to the wall but Henderson is at an angle.]] |
==MP40== | ==MP40== | ||
| − | The [[MP40]] is also used by German forces | + | The [[MP40]] is also used by German forces, notably in the scene where Miller's squad stumbles upon a group of German soldiers, as well as during the defense of the bridge at Ramelle. |
| − | [[Image:MP40.jpg|thumb|none|400px| | + | [[Image:MP40.jpg|thumb|none|400px|MP40 - 9x19mm]] |
| − | [[Image:SPRMP-40-1.jpg|thumb|none|600px|A beach defender fires | + | [[Image:SPRMP-40-1.jpg|thumb|none|600px|A German beach defender fires his MP40 on Omaha Beach, hiding behind an MG42 nest.]] |
| − | [[Image:SPRKar98K-1.jpg|thumb|none|600px|A | + | [[Image:SPRKar98K-1.jpg|thumb|none|600px|A Heer soldier armed with an MP40 during the standoff.]] |
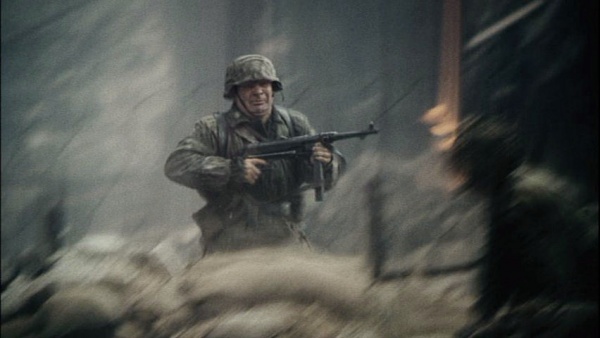
| − | [[Image:SPRMP-40-2.jpg|thumb|none|600px|An SS Grenadier armed with a | + | [[Image:SPRMP-40-2.jpg|thumb|none|600px|An SS Grenadier armed with a RPzB 54 has an MP40 slung over his back.]] |
| − | [[Image:SPRMP-40-3.jpg|thumb|none|600px| | + | [[Image:SPRMP-40-3.jpg|thumb|none|600px|An SS Grenadier blind-fires his MP40 in the room before being taken down by Pvt. Mellish.]] |
[[Image:SPRMP-40-4.jpg|thumb|none|600px|An SS Grenadier armed with an MP40 leads a charge during the battle of Ramelle while Cpl. Upham hides nearby.]] | [[Image:SPRMP-40-4.jpg|thumb|none|600px|An SS Grenadier armed with an MP40 leads a charge during the battle of Ramelle while Cpl. Upham hides nearby.]] | ||
[[Image:SPRMP-40-5.jpg|thumb|none|600px|An SS Grenadier armed with an MP40 charges a paratrooper but gets a rifle butt to the face before he can use it.]] | [[Image:SPRMP-40-5.jpg|thumb|none|600px|An SS Grenadier armed with an MP40 charges a paratrooper but gets a rifle butt to the face before he can use it.]] | ||
| − | =Machine Guns | + | =Machine Guns & Automatic Rifles= |
| − | + | ==M1918A2 Browning Automatic Rifle== | |
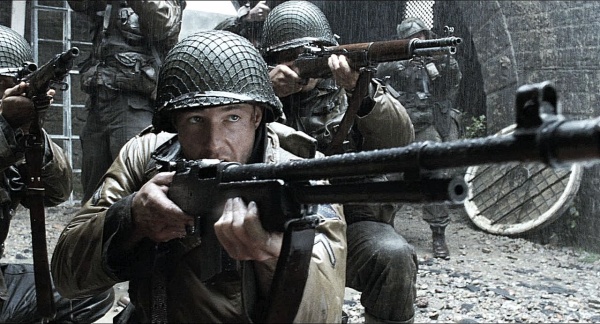
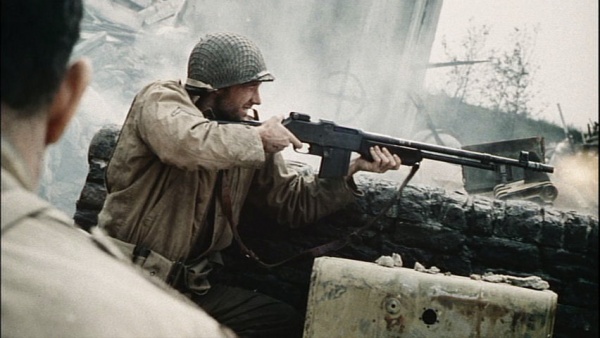
| − | ==Browning Automatic Rifle | + | As the squad's support gunner, Private First Class Richard Reiben ([[Edward Burns]]) carries an [[Browning Automatic Rifle|M1918A2 Browning Automatic Rifle]] or "B.A.R." as his main weapon. The B.A.R. Reiben carries is not his originally issued one, which he claims he lost during the start of the D-Day landing to keep from drowning, and has the bipod removed, making it more into an assault rifle instead of a light machine gun. Further supporting this theory is how he fires it on the faster of the B.A.R.'s two full-auto fire modes, instead of the more efficient slow auto-fire used for support. Reports have said that, like the M1 Garands in the film, this B.A.R. was lightened for easier use by the actors, making it far easier to shoulder fire the weapon as an assault rifle. |
| − | + | [[Image:BAR.jpg|thumb|450px|none|M1918A2 Browning Automatic Rifle - .30-06]] | |
| − | As the squad's support gunner, | + | [[Image:SPRBAR-1.jpg|thumb|none|600px|Private First Class Richard Reiben sets the bullets in his magazine by tapping it on his helmet and then loads it into his B.A.R.]] |
| − | [[Image:BAR.jpg|thumb| | + | [[Image:SPRBAR-2.jpg|thumb|none|600px|PFC. Reiben gives supporting fire on an MG42 nest with his Browning Automatic Rifle.]] |
| − | [[Image:SPRBAR-1.jpg|thumb|none|600px|Private First Class Richard Reiben sets the bullets in his | + | [[Image:SPR-BARholding.jpg|thumb|none|600px|Reiben ([[Edward Burns]]) with his B.A.R. while talking to his squadmates.]] |
| − | [[Image:SPRBAR-2.jpg|thumb|none|600px|PFC. Reiben gives supporting fire on | ||
| − | [[Image:SPR-BARholding.jpg|thumb|none|600px|Reiben with his B.A.R. while talking to his squadmates.]] | ||
[[Image:SPRBAR-4.jpg|thumb|none|600px|Reiben with his B.A.R. during the standoff.]] | [[Image:SPRBAR-4.jpg|thumb|none|600px|Reiben with his B.A.R. during the standoff.]] | ||
[[File:SPR 791.jpg|thumb|none|600px|Reiben with his B.A.R. while in the town.]] | [[File:SPR 791.jpg|thumb|none|600px|Reiben with his B.A.R. while in the town.]] | ||
| − | [[Image:SPRBAR-7.jpg|thumb|none|600px|Reiben racks the charging handle on his B.A.R. before being driven out as bait for the | + | [[Image:SPRBAR-7.jpg|thumb|none|600px|Reiben racks the charging handle on his B.A.R. before being driven out as bait for the company of mechanized SS.]] |
[[Image:SPRBAR-8.jpg|thumb|none|600px|Reiben with his B.A.R. at the ready.]] | [[Image:SPRBAR-8.jpg|thumb|none|600px|Reiben with his B.A.R. at the ready.]] | ||
[[Image:SPRBAR-9.jpg|thumb|none|600px|Reiben hip fires his B.A.R. on rapid auto-firing mode.]] | [[Image:SPRBAR-9.jpg|thumb|none|600px|Reiben hip fires his B.A.R. on rapid auto-firing mode.]] | ||
| − | [[Image:SPRBAR-10.jpg|thumb|none|600px|A shell-shocked | + | [[Image:SPRBAR-10.jpg|thumb|none|600px|A shell-shocked Capt. Miller watches Reiben fires his B.A.R.]] |
| − | == Browning M1919A4 == | + | ==Browning M1919A4== |
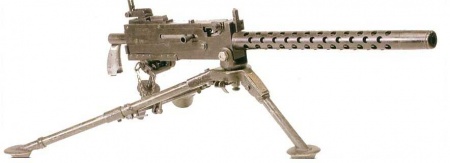
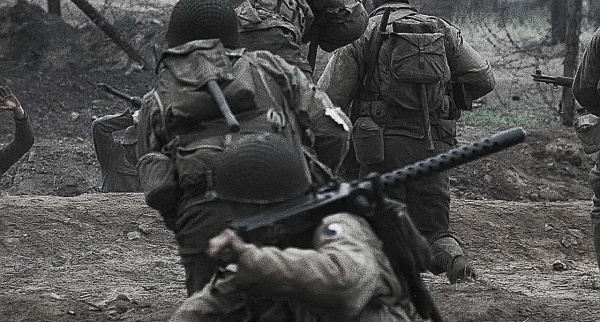
| − | The [[Browning M1919A4]] or "Browning .30 caliber" machine gun is briefly seen being lugged by a soldier during the | + | The [[Browning M1919A4]] or "Browning .30 caliber" machine gun is briefly seen being lugged by a U.S. soldier during the Omaha Beach scene. This machine gun is also among the weapons used by the defenders during the final battle at Ramelle. At Ramelle, one M1919A4 is manned by an Airborne trooper in the bell tower with Private Jackson and another is manned by Corporal Fred Henderson ([[Max Martini]]) and Private Stanley Mellish ([[Adam Goldberg]]). Both guns eventually run out of ammunition, their users being killed. The gun in the tower has a disintegrating belt and Mellish's gun has a fabric belt. |
| + | [[Image:M1919A4Browning.jpg|thumb|none|450px|Browning M1919A4 on M2 tripod - .30-06]] | ||
| + | [[Image:SPRM2M1919A4-1.jpg|thumb|none|600px|A U.S. soldier is seen lugging a Browning M1919A4 machine gun during the assault on Omaha Beach.]] | ||
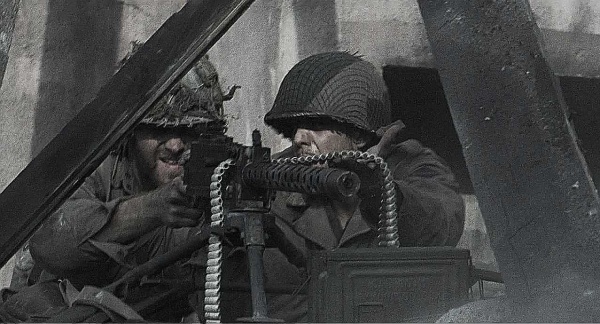
| + | [[Image:SPRM2M1919A4.jpg|thumb|none|600px|Cpl. Fred Henderson ([[Max Martini]]) and Pvt. Stanley Mellish ([[Adam Goldberg]]) load their Browning M1919A4 in preparation for battle. Note how it is loaded with a fabric ammo belt.]] | ||
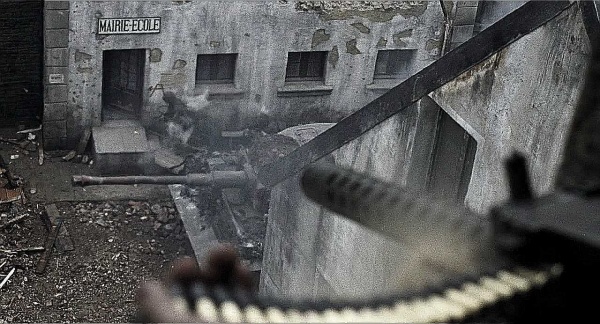
| + | [[Image:SPRM2M1919A4-3.jpg|thumb|none|600px|Henderson firing his Browning M1919A4, the fabric belt is seen.]] | ||
| + | [[Image:SPRM2M1919A4-4.jpg|thumb|none|600px|Henderson firing his Browning M1919A4.]] | ||
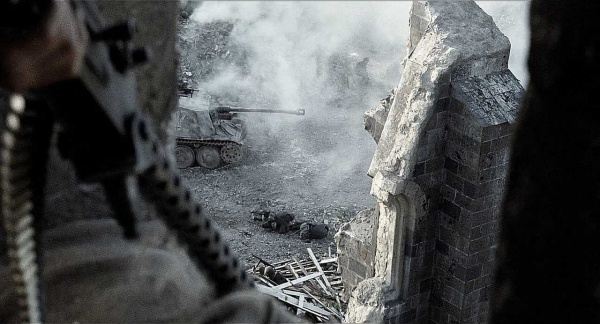
| + | [[Image:SPRM2M1919A4-2.jpg|thumb|none|600px|Pvt. Parker (Demetri Goritsas) firing his Browning M1919A4 from a bell tower. This machine gun is loaded with a disintegrating link belt.]] | ||
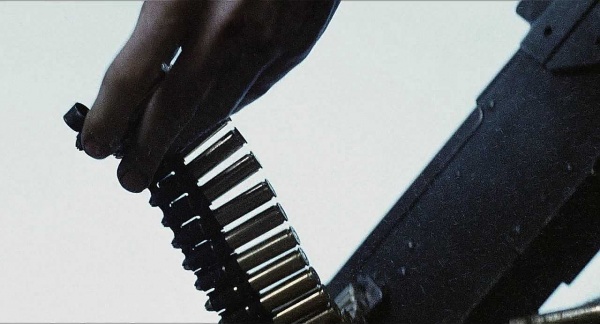
| + | [[Image:SPR 391.jpg|thumb|none|600px|Close-up of the disintegrating ammo belt. Note that the belt is loaded with blank crimp-nosed rounds.]] | ||
| + | [[Image:SPR 392.jpg|thumb|none|600px|Parker moves his M1919A4. Despite Parker saying he's out of .30 caliber, the ammo belt is still loaded on the left.]] | ||
| − | [[ | + | ==MG42== |
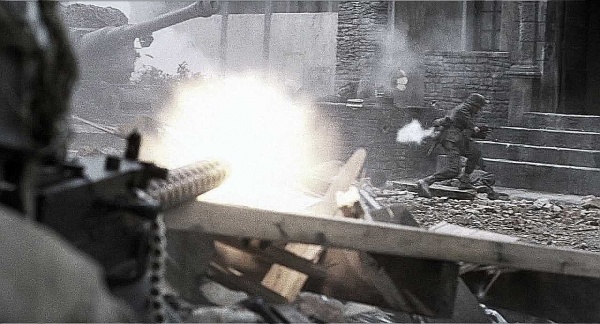
| − | + | Known by the Allies as "Hitler's Buzzsaw", the German [[MG42]] was perhaps the deadliest machine gun of World War II. Its extreme high rate of fire is accurately portrayed in the film. Its most notable appearance is during the Omaha Beach sequence, being fired from large pillboxes and sandbag positions overlooking the beach. Two pillboxes housing the MG42s are called 'Schnabelstand' and they were only used for observation and target spotting, not MG emplacement. However, there were none of these bunkers on the real Omaha Beach. The MG42 is later seen mounted on a lafette tripod, when Miller's squad encounter a German machine gun nest. | |
| − | + | [[Image:MG42.jpg|thumb|none|450px|MG42 - 7.92x57mm Mauser]] | |
| − | + | [[Image:SPRMG42.jpg|thumb|none|600px|A German beach defender firing the MG42 from his nest during the D-Day scene.]] | |
| − | [[Image: | + | [[Image:SPRMG42-1.jpg|thumb|none|600px|An MG42, mounted on a lafette tripod, still smoking from the recent firefight.]] |
| − | |||
| − | [[Image: | ||
| − | [[Image: | ||
| − | + | ==MG34 Panzerlauf== | |
| − | + | During the final battle, SS Tiger tanks (in reality mocked-up T34s) can be seen armed with [[MG34|MG34 Panzerlauf]] machine guns, mounted coaxially next to the main gun and in the bow of the hull next to the driver's compartment. | |
| − | + | [[Image:Mg34hb.jpg|thumb|none|450px|MG34 Panzerlauf with stock fitted - 7.92x57mm Mauser]] | |
| − | + | [[Image:MG34-SPr.jpg|thumb|none|600px|An MG34 (circled in red) bow-mounted on a "Tiger" tank (actually a visually modified T34).]] | |
| − | |||
| − | |||
| − | == MG34 Panzerlauf == | ||
| − | During the final battle, | ||
| − | |||
| − | [[Image:Mg34hb.jpg|thumb|none| | ||
| − | [[Image:MG34-SPr.jpg|thumb|none|600px|An MG34 (circled in red) bow-mounted on a | ||
=Pistols= | =Pistols= | ||
| + | ==Colt M1911A1== | ||
| + | The [[Colt M1911A1]] pistol is seen in the hands of TSgt. Horvath ([[Tom Sizemore]]), Pvt. Jackson ([[Barry Pepper]]), and Capt. Miller ([[Tom Hanks]]). Horvath uses it to threaten PFC Richard Reiben ([[Edward Burns]]) when he wants to abandon his squad, later throws it during a melee scuffle in the final battle. Captain Miller is seen firing it at one of "Tiger" tanks as he sits wounded on the bridge in one of the film's most memorable moments. | ||
| + | [[Image:M1911Colt.jpg|thumb|none|300px|Colt M1911A1 - .45 ACP]] | ||
| + | [[Image:Colt M1911 Flash.jpg|thumb|none|600px|A large muzzle flash is emitted from Jackson's Colt M1911A1.]] | ||
| + | [[Image:SPRM1911A1-1.jpg|thumb|none|600px|Pvt. Daniel Jackson ([[Barry Pepper]]) fires his M1911A1 into a German filled trench.]] | ||
| + | [[Image:SPRM1911A1-2.jpg|thumb|none|600px|Pvt. Jackson draws his M1911A1 when his squad first confronts Steamboat Willie (Joerg Stadler) and checks the magazine, which is clearly empty.]] | ||
| + | [[Image:SPRM1911A1-3.jpg|thumb|600px|none|Mike Horvath ([[Tom Sizemore]]) threatening to shoot PFC Richard Reiben ([[Edward Burns]]) with his M1911A1.]] | ||
| + | [[Image:SPRM1911A1-4.jpg|thumb|none|600px|A wounded Capt. Miller fires his M1911A1 at an advancing "Tiger" tank. Note how his pistol is clearly out of battery, but in perfect working order in the next shot.]] | ||
| + | [[Image:SPRMiller1911A1.JPG|thumb|none|600px|Miller fires his M1911A1 at the advancing tank.]] | ||
| + | [[Image:SPRM1911A1-5.jpg|thumb|none|600px|Miller in amazement after seeing the tank blow up after shooting it with his M1911A1 (which was actually blown up by a P-51 Mustang). In this sequence, the pistol was only loaded with six rounds instead of the fully-loaded seven which is not unusual since soldiers don't always 'top off' their magazines in the middle of a war zone after firing one or more rounds previously. It is also likely that since there are too many camera angle shots of Miller firing his pistol, the camera shot for the seventh round may be unused or misplaced.]] | ||
| − | == | + | ==Walther P38== |
| − | + | During the final battle in Ramelle, an SS Panzergrenadier can be seen using a [[Walther P38]] when confronting TSgt. Horvath and is killed but still manages to wound him with it. | |
| − | + | [[File:P38Black.jpg|thumb|none|300px|Walther P38 - World War II dated with black grips - 9x19mm]] | |
| − | + | [[Image:SPRLugerP08.jpg|thumb|none|600px|An SS Panzergrenadier fires his Walther P38 at Horvath.]] | |
| − | |||
| − | |||
| − | |||
| − | |||
| − | |||
| − | |||
| − | |||
| − | |||
| − | |||
| − | [[ | ||
| − | [[Image:SPRLugerP08.jpg|thumb|none|600px|An SS Panzergrenadier fires his | ||
| − | |||
| − | |||
| − | |||
| − | |||
| − | |||
| − | |||
| − | [[Image:M1A1 Bazooka.jpg|thumb|none| | + | =Launchers= |
| − | [[Image:SPRM1Bazooka.jpg|thumb|600px|none|Private James F. Ryan ([[Matt Damon]]) with | + | ==M1A1 Bazooka== |
| − | [[Image:SPRM1bazooka-1.jpg|thumb|none|600px| | + | The [[M1 Rocket Launcher "Bazooka"#M1A1 "Bazooka" (2.36" Rocket)|M1A1 Bazooka]] is used in some scenes. It is first seen in the hands of a U.S. soldier under the command of Captain Fred Hamill ([[Ted Danson]]). Later we see Private James F. Ryan ([[Matt Damon]]) uses an M1A1 Bazooka to destroy a German half-track. This same Bazooka is later used by Horvath during the final battle to destroy a Marder III self-propelled gun and again in an attempt to destroy a "Tiger" tank, but the rocket is deflected off the tank's heavy armor. |
| − | [[Image:SPRM1Bazooka-2.jpg|thumb|none|600px| | + | [[Image:M1A1 Bazooka.jpg|thumb|none|450px|M1A1 Bazooka - 2.36 inch]] |
| − | [[Image:SPRM1Bazooka-3.jpg|thumb|none|600px| | + | [[Image:SPRM1Bazooka.jpg|thumb|600px|none|Private James F. Ryan ([[Matt Damon]]) with the M1A1 Bazooka after destroying a German half-track.]] |
| + | [[Image:SPRM1bazooka-1.jpg|thumb|none|600px|TSgt. Horvath prepares to fire the M1A1 Bazooka at a Marder III.]] | ||
| + | [[Image:SPRM1Bazooka-2.jpg|thumb|none|600px|Capt. Miller attempts to use an M1A1 Bazooka before Horvath takes it.]] | ||
| + | [[Image:SPRM1Bazooka-3.jpg|thumb|none|600px|Horvath fires a shot at the Tiger tank, but it deflects off due to the combination of the rocket hitting the tank at a bad angle and the tank's heavy armor.]] | ||
| − | == | + | ==Raketenpanzerbüchse 54== |
| − | During the final battle, one of | + | During the final battle, one of SS Grenadiers can be seen carrying a Raketenpanzerbüchse (RPzB) 54 rocket launcher, better known as the "[[Panzerschreck]]", and fires at a group of retreating U.S. troops, sending one paratrooper through a glass window. Another Grenadier is also seen with a RPzB but is killed by Pvt. Ryan. |
| − | [[Image:Tank h5.jpg|thumb|none| | + | [[Image:Tank h5.jpg|thumb|none|450px|RPzB 54 "Panzerschreck" rocket launcher - 88mm]] |
| − | [[Image:SPRPAnzershreck-2.jpg|thumb|600px|none|An SS Grenadier carrying a | + | [[Image:SPRPAnzershreck-2.jpg|thumb|600px|none|An SS Grenadier carrying a RPzB 54 during the final battle. Note that the shield has slipped and is crooked.]] |
| − | [[Image:SPRPanzershreck.jpg|thumb|none|600px|The same Grenadier aims his | + | [[Image:SPRPanzershreck.jpg|thumb|none|600px|The same Grenadier aims his RPzB 54. The shield is now back in place.]] |
| − | [[Image:SPRPanzershreck-3.jpg|thumb|none|600px|An SS Grenadier runs out with a | + | [[Image:SPRPanzershreck-3.jpg|thumb|none|600px|An SS Grenadier runs out with a RPzB 54 before being pointed out and killed by Pvt. Ryan.]] |
=Grenades= | =Grenades= | ||
| − | + | ==Mk 2 Hand Grenade== | |
| − | == Mk 2 Hand Grenade == | + | During the attack on the German machine gun nest, Miller's squad uses [[Mk 2 hand grenade]]s to take out all but one of German soldiers throws the grenades back at them, though thankfully miss. Later, during the final battle in Ramelle, several Mk 2 hand grenades are tossed into a disabled German tank, killing the crew. |
| − | + | [[Image:MK2 grenade DoD.jpg|thumb|none|180px|Mk 2 High-Explosive Fragmentation hand grenade]] | |
| − | During the attack on the machine gun | + | [[Image:SPRMk2grenade-1.jpg|thumb|none|600px|PFC. Reiben hands Cpl. Medic Irwin Wade a Mk 2 grenade before rushing the machine gun nest.]] |
| − | + | [[Image:SPRMK2grenade-2.jpg|thumb|none|600px|A Mk 2 grenade is seen on this paratrooper's vest.]] | |
| − | [[Image:MK2 grenade DoD.jpg|thumb|none| | + | [[Image:SPR 307.jpg|thumb|none|600px|Paratroopers prepare to throw their Mk 2 grenades into the Tiger tank.]] |
| − | [[Image:SPRMk2grenade-1.jpg|thumb|none|600px|PFC. Reiben hands Cpl. Medic Wade a Mk | ||
| − | [[Image:SPRMK2grenade-2.jpg|thumb|none|600px|A Mk | ||
| − | [[Image:SPR 307.jpg|thumb|none| | ||
==M7 Rifle Grenade Launcher with M9A1 Rifle Grenade== | ==M7 Rifle Grenade Launcher with M9A1 Rifle Grenade== | ||
| − | During the | + | During the Omaha Beach scene, we can briefly see an [[M1 Garand]] mounted [[M7 Rifle Grenade Launcher]] being used to fire an [[M9A1 Rifle Grenade]] after the German line has been broken. |
| − | [[Image:M1 garand M7.jpg|thumb|none| | + | [[Image:M1 garand M7.jpg|thumb|none|350px|M7 rifle grenade launcher]] |
| − | [[Image:M9A1 Rifle Grenade.jpg|thumb|none| | + | [[Image:M9A1 Rifle Grenade.jpg|thumb|none|350px|M9A1 Rifle Grenade]] |
| − | [[Image:SPRM7grenade.jpg|thumb|none| | + | [[Image:SPRM7grenade.jpg|thumb|none|600px|An M9A1 grenade about to be fired from the M7 launcher of an M1 Garand. Note that this is likely a lightweight prop, as the stabilizer fin of the grenade has slid up the tail section to be directly behind the warhead.]] |
| − | [[Image:SPR 374.jpg|thumb|none| | + | [[Image:SPR 374.jpg|thumb|none|600px|An M9A1 grenade fired from the M7 launcher of an M1 Garand. While the combination of overcharged M3 grenade launcher cartridge and the heavy 19-ounce grenade was unpleasant, direct fire from the shoulder was safely possible.]] |
| − | |||
| − | |||
| − | |||
| − | |||
| − | [[ | + | ==Model 24 Stielhandgranate== |
| + | During the final battle, Private Stanley Mellish ([[Adam Goldberg]]) and Corporal Fred Henderson ([[Max Martini]]) get two [[Model 24 Stielhandgranate]]s thrown at them while manning one of M1919A4 machine guns. Thankfully the two are able to grab and toss the grenades clear before they detonate. | ||
| + | [[File:M24handgrenade.JPG|thumb|none|350px|Model 24 Stielhandgranate "Potato Masher" High-Explosive Fragmentation hand grenade]] | ||
[[Image:SPR24grenate.jpg|thumb|none|600px|Cpl. Henderson is hit in the chest with a Model 24 Stielhandgranate.]] | [[Image:SPR24grenate.jpg|thumb|none|600px|Cpl. Henderson is hit in the chest with a Model 24 Stielhandgranate.]] | ||
| − | = | + | =Others= |
| − | |||
==M1 Flamethrower== | ==M1 Flamethrower== | ||
| − | During the | + | During the Omaha Beach scene, Private First Class Doyle ([[Glenn Wrage]]) uses the [[M1 Flamethrower]] to clear one of German pillboxes (which are modeled after German 'Schnabelstand' observation posts in Étretat, France) overlooking the beach, turning the occupants into human torches. A group of U.S. soldiers are ordered to let them burn. During the opening of the scene, a flamethrower operator gets hit in the napalm tank and gets blown up along with his comrades around him. |
| − | + | [[Image:M1A1 Flamethrower.JPG|thumb|none|400px|M1 Flamethrower]] | |
| − | [[Image:M1A1 Flamethrower.JPG|thumb|none| | + | [[Image:SPRM1flamethrower.jpg|thumb|none|600px|A U.S. soldier with his M1 Flamethrower, seconds before being lit up by a single 7.92mm round.]] |
| − | [[Image:SPRM1flamethrower.jpg|thumb|none|600px|A | + | [[Image:SPRM1Flamethrower-1.jpg|thumb|none|600px|PFC. Doyle ([[Glenn Wrage]]) readies his flamethrower to burn the pillbox.]] |
| − | [[Image:SPRM1Flamethrower-1.jpg|thumb|none|600px|Doyle readies his flamethrower to burn the | ||
[[Image:SPRM1Flamethrower-2.jpg|thumb|none|600px|Doyle's flamethrower clears out the bunker with a burst of flame. How this burst of flame is so large in unknown. It may be possible that within the confines of the narrow cement hallways in the bunker, it amplifies the blast.]] | [[Image:SPRM1Flamethrower-2.jpg|thumb|none|600px|Doyle's flamethrower clears out the bunker with a burst of flame. How this burst of flame is so large in unknown. It may be possible that within the confines of the narrow cement hallways in the bunker, it amplifies the blast.]] | ||
==M1A1 Bangalore Torpedo== | ==M1A1 Bangalore Torpedo== | ||
| − | Captain John H. Miller ([[Tom Hanks]]) aids some soldiers in employing M1A1 Bangalore Torpedos to clear the barbed wire | + | Captain John H. Miller ([[Tom Hanks]]) aids some soldiers in employing M1A1 Bangalore Torpedos to clear the barbed wire seawall (which would have actually been made of concrete, wood timbers, and pebbles). This is an homage to Major General Norman "Dutch" Cota who fearlessly encouraged his men to use the Bangalores to clear the seawall. |
| − | [[Image:SPRBangalore-1.jpg|thumb|none|600px| | + | [[Image:SPRBangalore-1.jpg|thumb|none|600px|U.S. soldiers bring up M1A1 Bangalore Torpedoes to clear the seawall.]] |
| − | [[Image:SPRBangalore-2.jpg|thumb|none|600px| | + | [[Image:SPRBangalore-2.jpg|thumb|none|600px|U.S. soldiers passing up Bangalores. Note how the side reads "Bangalore M1A1".]] |
| − | [[Image:SPRBangalore-3.jpg|thumb|none|600px|A soldier lights the fuse on the Bangalore while | + | [[Image:SPRBangalore-3.jpg|thumb|none|600px|A soldier lights the fuse on the Bangalore while Capt. Miller holds it.]] |
| − | [[Image:SPRBangalore-4.jpg|thumb|none|600px|"FIRE IN THE HOLE!"]] | + | [[Image:SPRBangalore-4.jpg|thumb|none|600px|''"FIRE IN THE HOLE!"''.]] |
| − | == Flak 38 == | + | ==2 cm Flak 38== |
| − | A | + | A [[2cm FlaK 38|2 cm Flak 38]] is used by several SS Grenadiers during the final battle at Ramelle and delivers devastating 20mm Flak rounds on U.S. paratroopers. |
| − | [[Image:Flak38single.jpg|thumb|none| | + | [[Image:Flak38single.jpg|thumb|none|450px|2 cm Flak 38 in single mounting - 20x138mmB]] |
| − | [[Image:SPRFlak38.jpg|thumb|none| | + | [[Image:SPRFlak38.jpg|thumb|none|600px|The 2 cm Flak 38 being fired at the paratroopers.]] |
| − | [[Image:SPRFlak38-1.jpg|thumb|none| | + | [[Image:SPRFlak38-1.jpg|thumb|none|600px|20mm shells kick out of the 2 cm Flak 38.]] |
| − | [[Image:SPRFlak38-2.jpg|thumb|none| | + | [[Image:SPRFlak38-2.jpg|thumb|none|600px|The crew turns their 2 cm Flak 38 to Cpt. Miller's position.]] |
| − | [[Image:SPRFlak38-3.jpg|thumb|none| | + | [[Image:SPRFlak38-3.jpg|thumb|none|600px|The crew begins to reposition the gun before being flanked by Reiben's B.A.R.]] |
==M2 Mortar== | ==M2 Mortar== | ||
| − | + | During the final battle at Ramelle, Private Ryan ([[Matt Damon]]) and Captain Miller ([[Tom Hanks]]) arm 60mm [[M2 Mortar]] shells by banging them against the steel launching base of the mortar tube and throw them like hand grenades at advancing SS soldiers, scoring several kills. This scene is based on the real life tactics of Medal of Honor winner Charles "Commando" Kelly, who really used 60mm mortar shells as grenades during a firefight in Italy. | |
| − | During the final battle at Ramelle, Private Ryan ([[Matt Damon]]) and Captain Miller ([[Tom Hanks]]) arm 60mm [[M2 Mortar]] | + | [[Image:SPRmortar-1.jpg|thumb|none|600px|Pvt. Ryan ([[Matt Damon]]) arms a 60mm M2 Mortar shell by his hand.]] |
| − | |||
| − | [[Image:SPRmortar-1.jpg|thumb|none|600px|Pvt. Ryan ([[Matt Damon]]) arms a 60mm M2 Mortar | ||
[[Category:Movie]] | [[Category:Movie]] | ||
| + | [[Category:War]] | ||
| + | [[Category:Action]] | ||
| + | [[Category:Action Movie]] | ||
[[Category:Drama]] | [[Category:Drama]] | ||
| − | |||
[[Category:Steven Spielberg]] | [[Category:Steven Spielberg]] | ||
| + | [[Category:National Film Registry]] | ||
Revision as of 15:06, 27 September 2019
| ||||||||||||||||||||||||||||||||||||||||
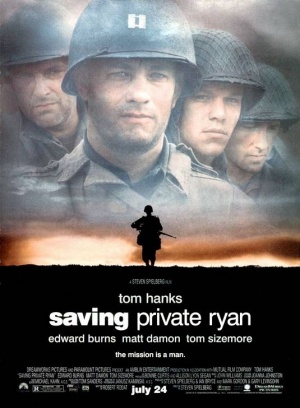
Saving Private Ryan is a 1998 World War II film directed by Steven Spielberg that stars Tom Hanks as a US Army Ranger captain who leads a squad of men into Normandy to bring home a paratrooper from the 101st Airborne Division who had just lost his three brothers in combat. The film was especially notable for its unflinching depiction of the D-Day landing on Omaha Beach.
The following weapons were used in the film Saving Private Ryan:
See the Discussion for more details on non-firearms weapons used in the film.
![]() WARNING! THIS PAGE CONTAINS SPOILERS!
WARNING! THIS PAGE CONTAINS SPOILERS!
Rifles & Carbines
M1 Garand
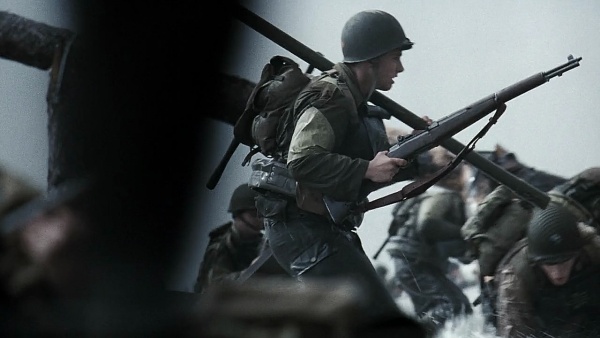
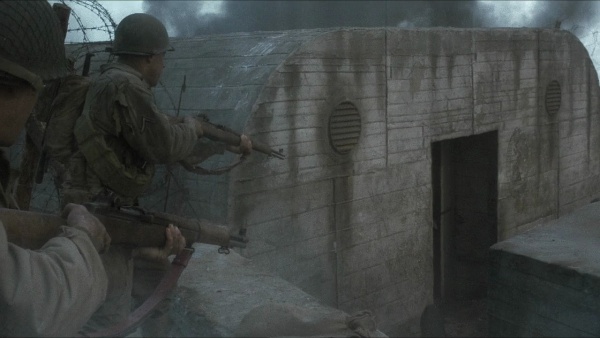
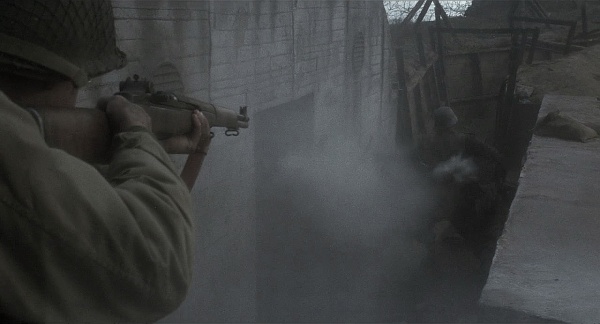
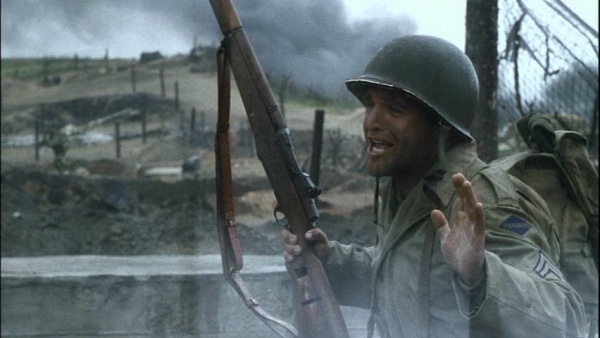
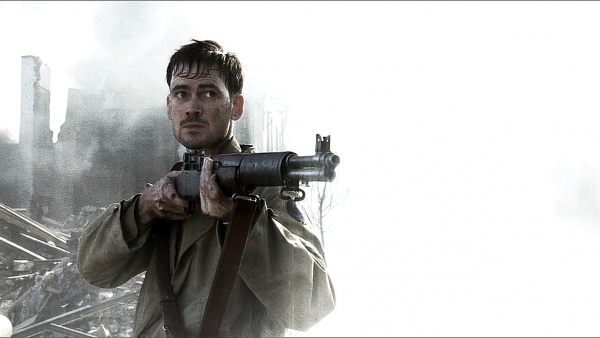
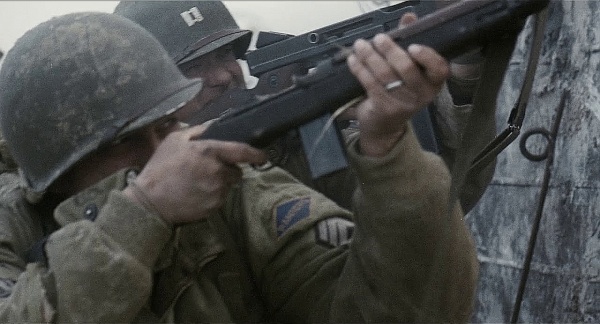
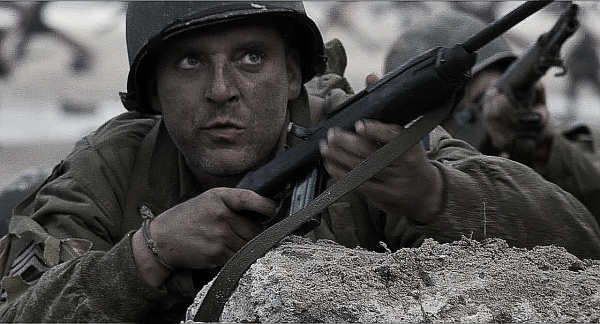
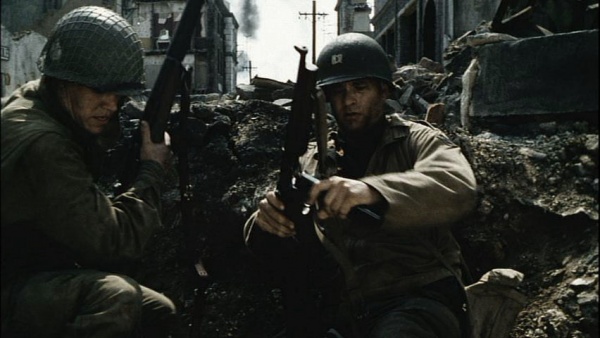
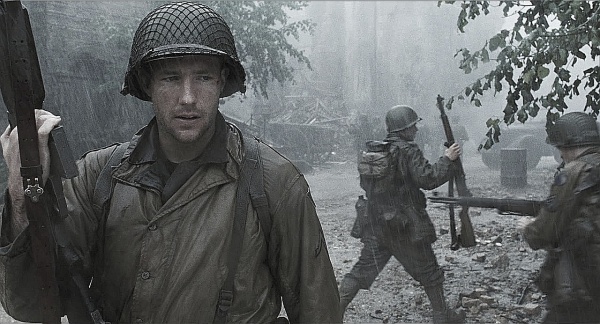
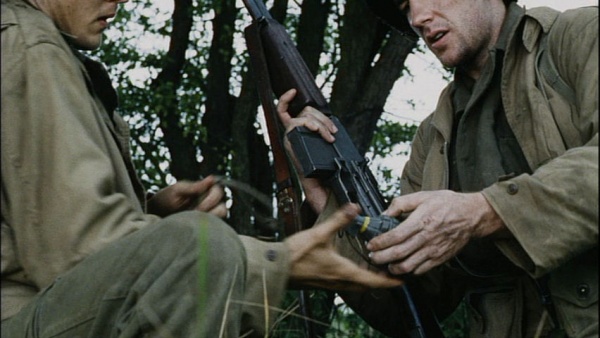
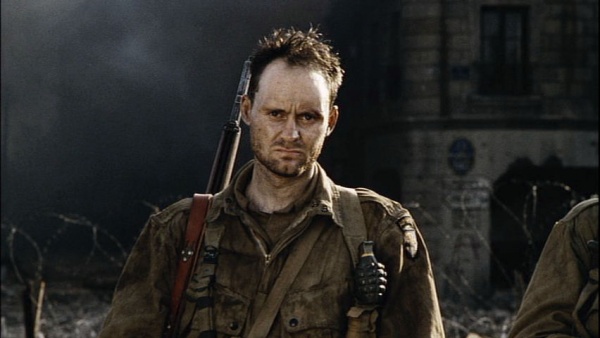
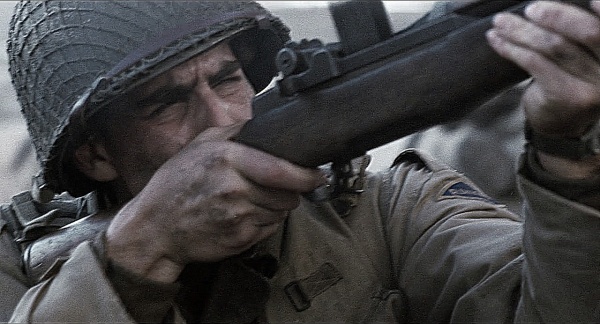
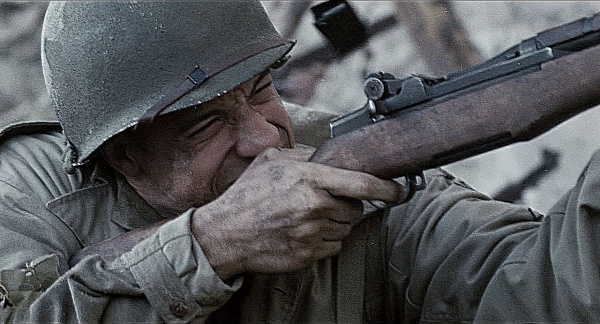
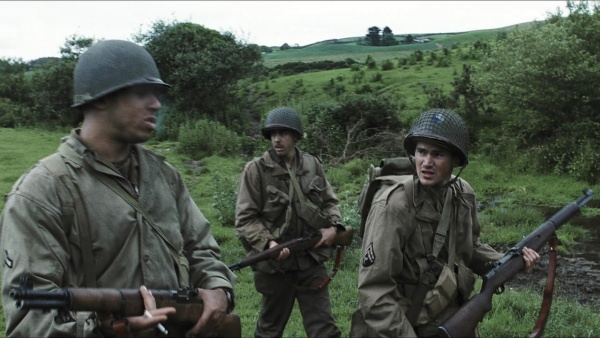
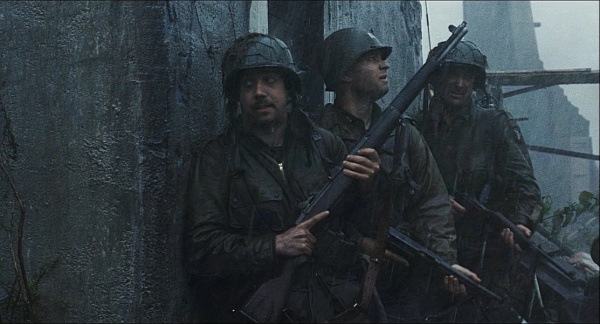
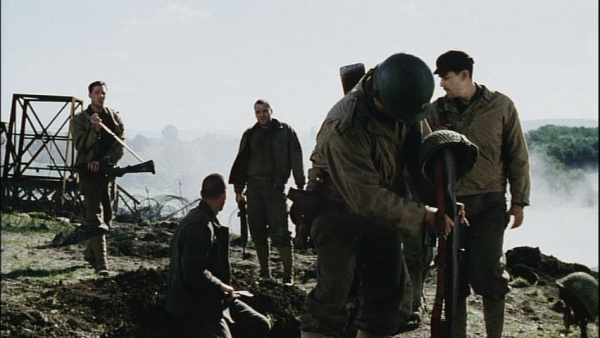
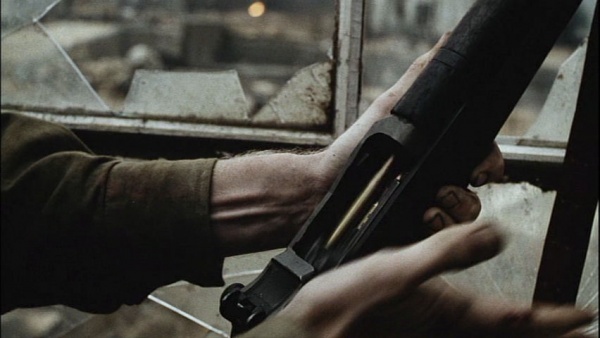
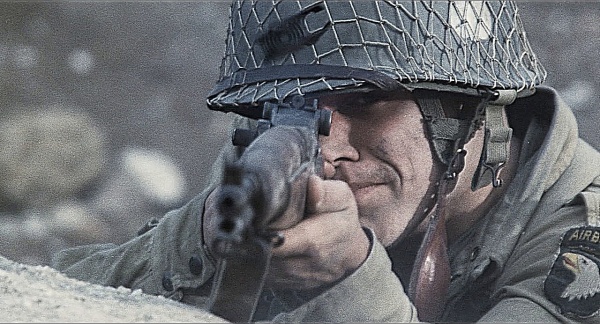
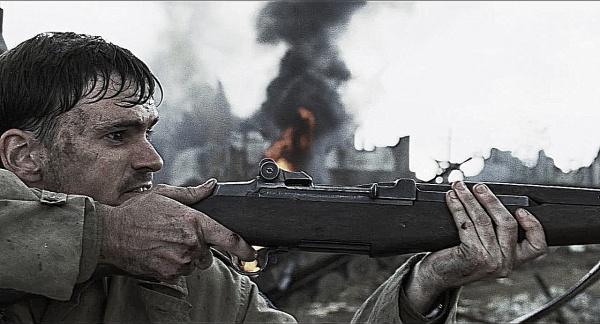
The M1 Garand is used by the majority of U.S. soldiers in the film. Saving Private Ryan is also one of few films that correctly depicts the easily identifiable "ping" sound the Garand makes after the last round is fired and the en bloc clip is ejected. In some scenes, soldiers can be seen holding their Garands with relative ease, making these Garands most likely lightweight prop models.
M1 Carbine
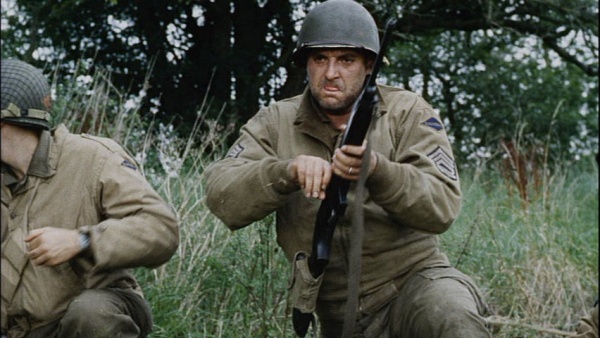
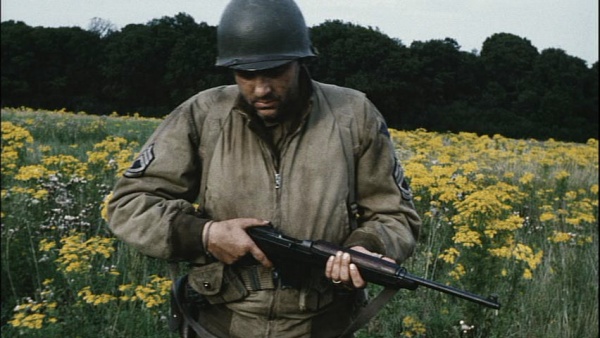
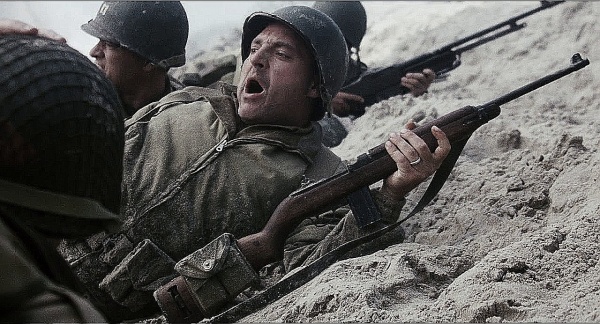
The M1 Carbine appears as the main weapon of Technician Sergeant Mike Horvath (Tom Sizemore). It is fitted with a double magazine pouch strapped to the buttstock.
M1A1 Carbine
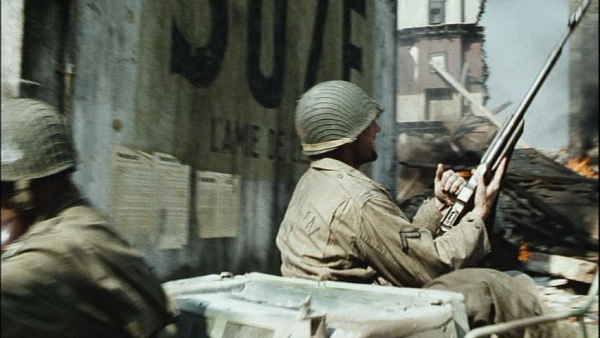
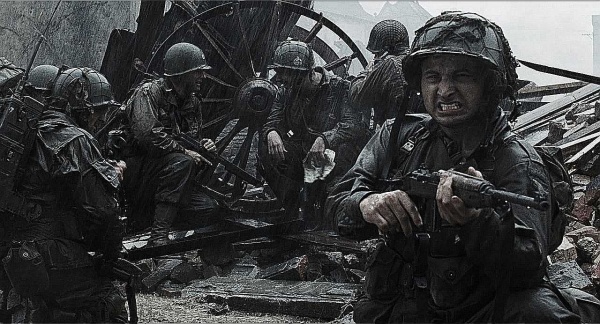
Several paratroopers of the 101st Airborne Division as well as other Airborne units carry the folding stock variant M1A1 Carbine.
M1903A4 Springfield
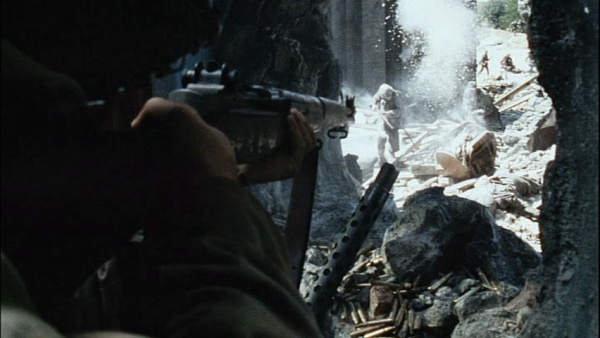
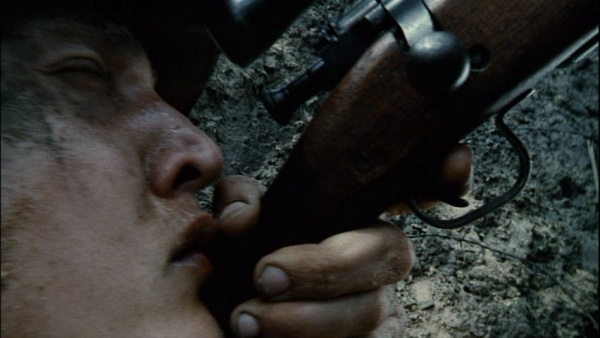
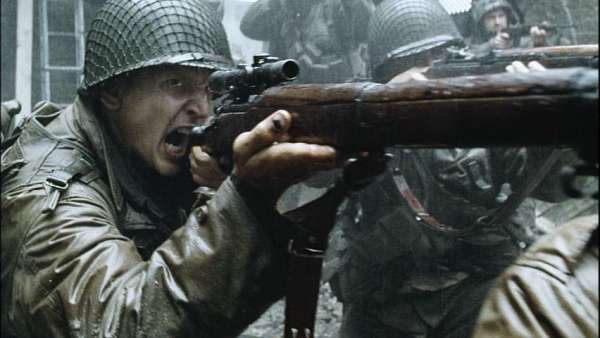
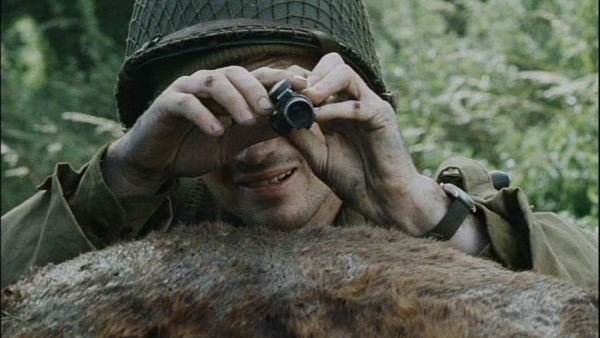
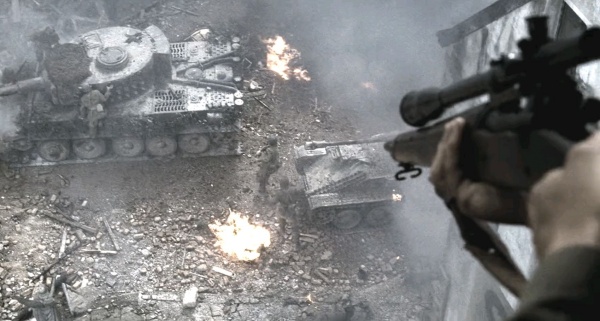
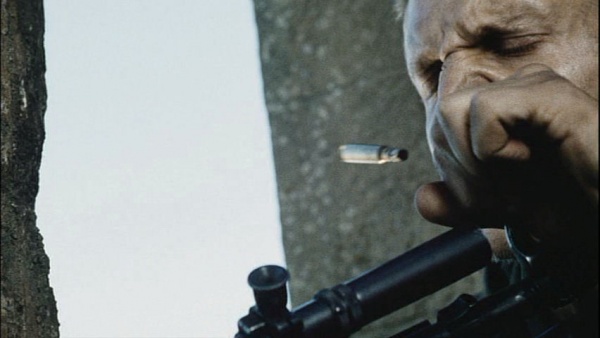
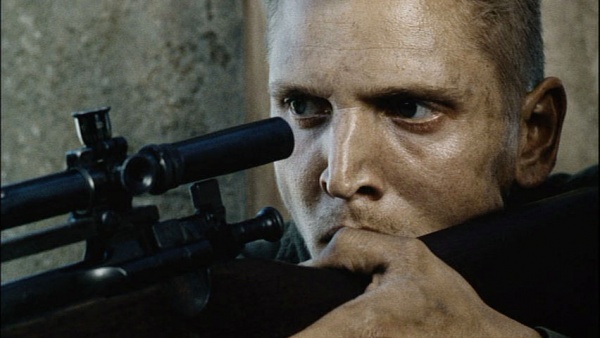
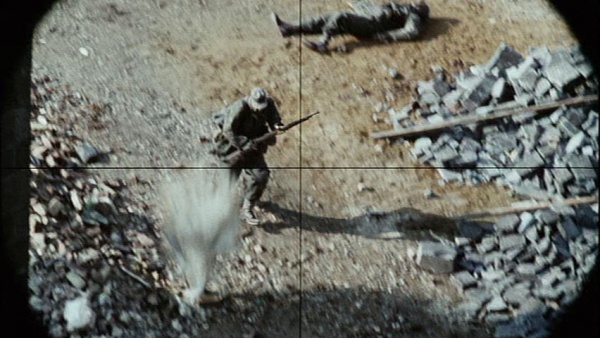
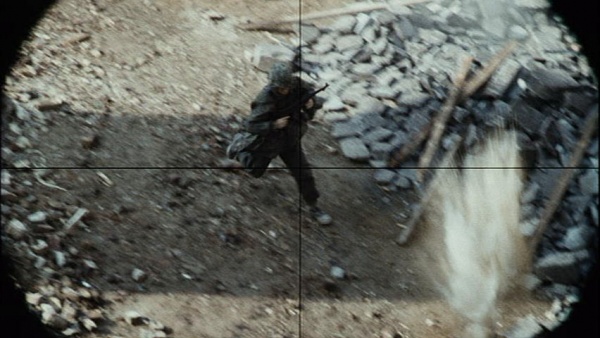
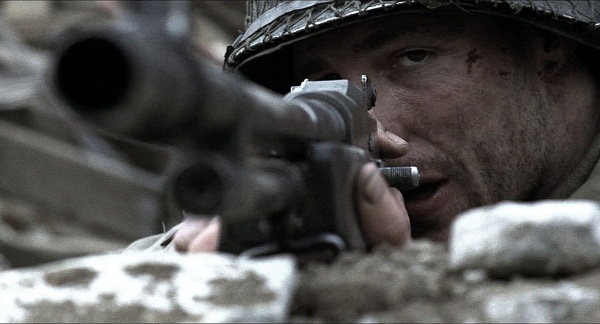
The squad's sharpshooter, Private Daniel Jackson (Barry Pepper), carries the sniper variant of the M1903 Springfield, the M1903A4 Sniper Rifle. The differences include the deletion of the front sight, and the addition of a scope. Jackson is heard quoting religious scriptures before firing his weapon. There is also a notable scene where Jackson shoots a German sniper through that sniper's own scope, a feat similar to one accomplished by Gunnery Sergeant Carlos Hathcock during the Vietnam War. However, in this film, the bullet drop at 400yds would make it impossible to clear all the scope lenses, while Hathcock was far closer to his target, as well as looking down at said target (Hathcock was on a hill, while the enemy sniper was at the base). Jackson clearly has trouble cycling the gun throughout the film due to him being left-handed and the gun being built for right-handed shooters.
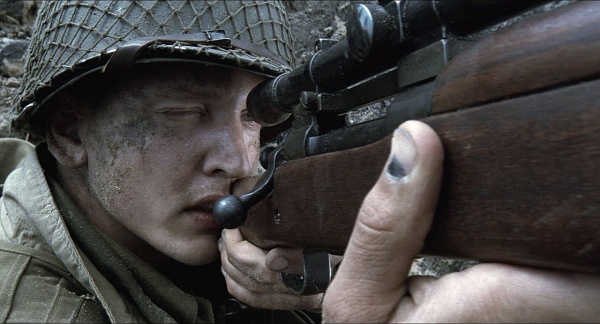
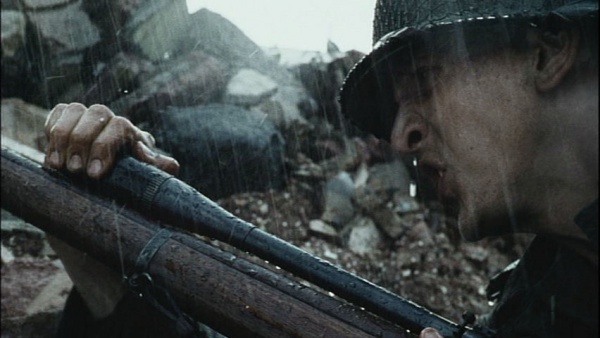
Faulty Scope
During the bell tower sequence, Jackson's Unertl scope appears to be very off from where the bullets hit, likely because he didn't zero it when switching it with his other scope.
Karabiner 98k
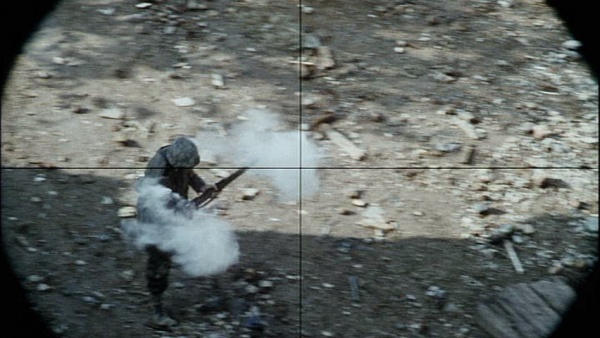
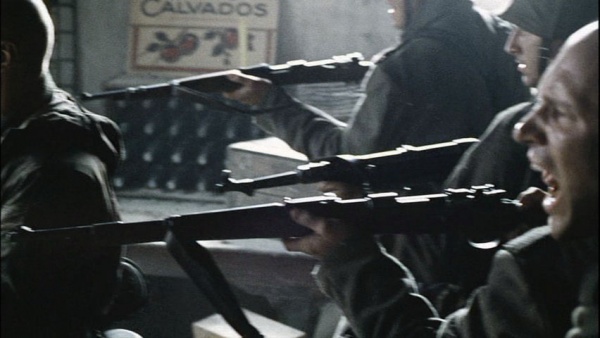
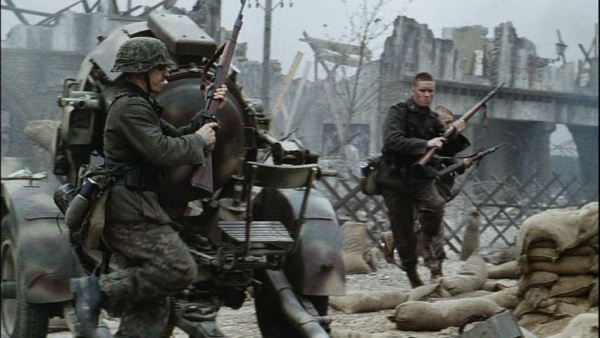
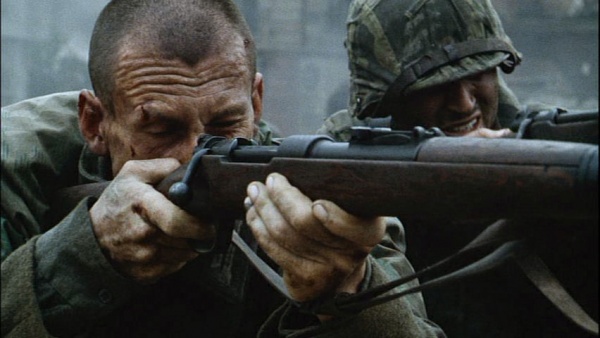
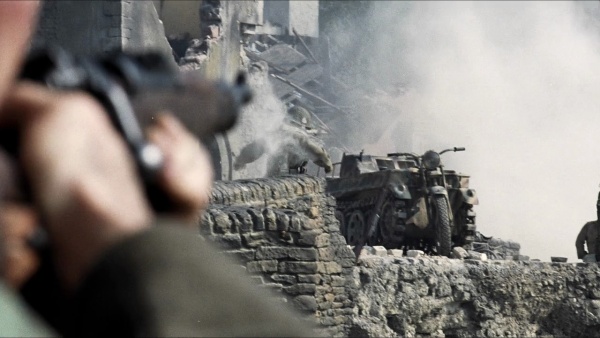
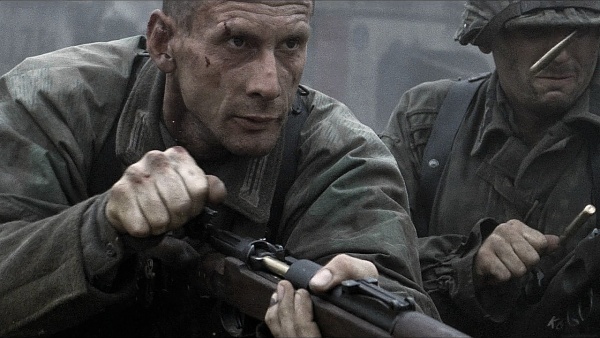
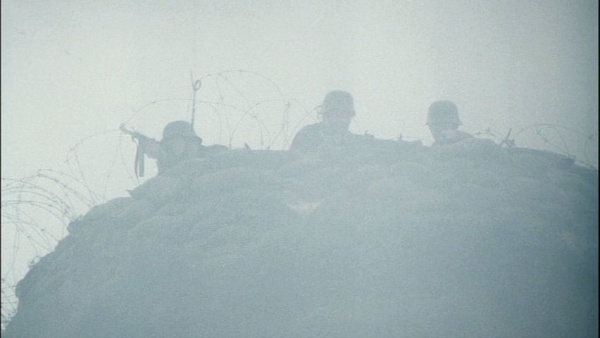
As common with the German forces as the M1 Garand is with the Americans, the Karabiner 98k bolt-action rifle is the standard-issue weapon of the German military. SS Grenadiers during the battle in Ramelle line up armed almost entirely with Kar98k rifles, including 'Steamboat Willie' (Joerg Stadler), who mortally wounds Cpt. Miller with his 98k rifle. Also note how most of the rifles lack the hooded sights and cleaning rods which usually indicates Russian captures.
Karabiner 98k Sniper Rifle
A Heer sniper is armed with a Karabiner 98k sniper rifle fitted with a Zeiss ZF42 scope with a rubber light blocking eye cover (which despite goof reports, is at proper eye relief with him resting his eye on it) and covered in makeshift burlap camouflage. He mortally wounds PFC Adrian Caparzo (Vin Diesel) before being killed himself by Private Daniel Jackson (Barry Pepper). Jackson shoots this German sniper through his scope, a reference to a shot made by legendary Marine Corps sniper Carlos Norman Hathcock II during the Vietnam War.
Submachine Guns
M1A1 Thompson
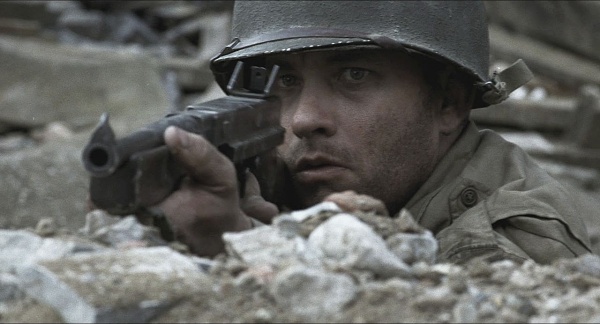
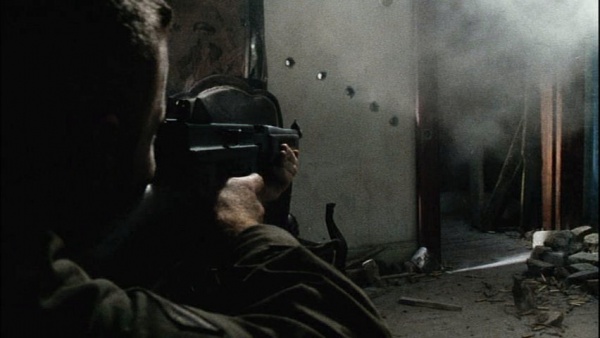
The M1A1 Thompson aka the "Tommy Gun" or "fast gun" is carried by Captain John H. Miller (Tom Hanks). The Thompson is also used by other soldiers, notably Captain Fred Hamill (Ted Danson) to end a standoff between Miller's squad and a group of German soldiers they had stumbled upon.


MP40
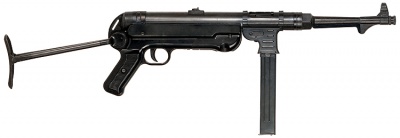
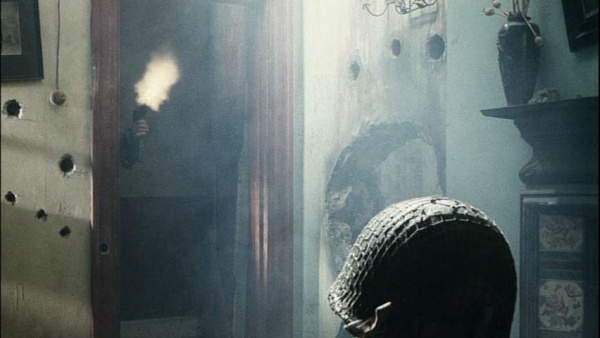
The MP40 is also used by German forces, notably in the scene where Miller's squad stumbles upon a group of German soldiers, as well as during the defense of the bridge at Ramelle.
Machine Guns & Automatic Rifles
M1918A2 Browning Automatic Rifle
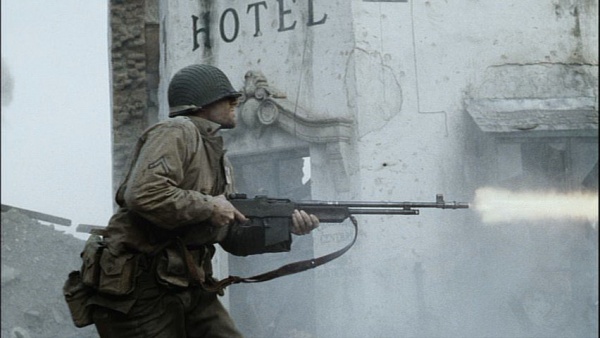
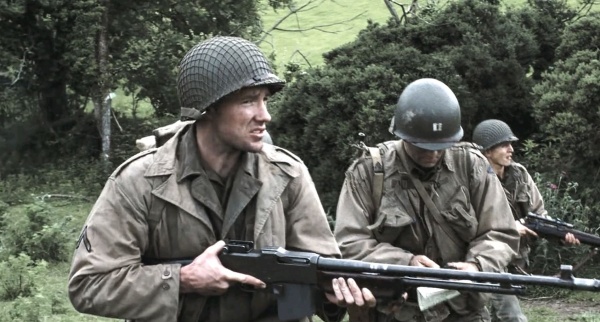
As the squad's support gunner, Private First Class Richard Reiben (Edward Burns) carries an M1918A2 Browning Automatic Rifle or "B.A.R." as his main weapon. The B.A.R. Reiben carries is not his originally issued one, which he claims he lost during the start of the D-Day landing to keep from drowning, and has the bipod removed, making it more into an assault rifle instead of a light machine gun. Further supporting this theory is how he fires it on the faster of the B.A.R.'s two full-auto fire modes, instead of the more efficient slow auto-fire used for support. Reports have said that, like the M1 Garands in the film, this B.A.R. was lightened for easier use by the actors, making it far easier to shoulder fire the weapon as an assault rifle.
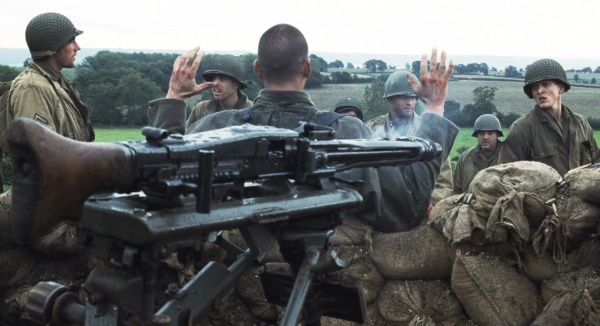
Browning M1919A4
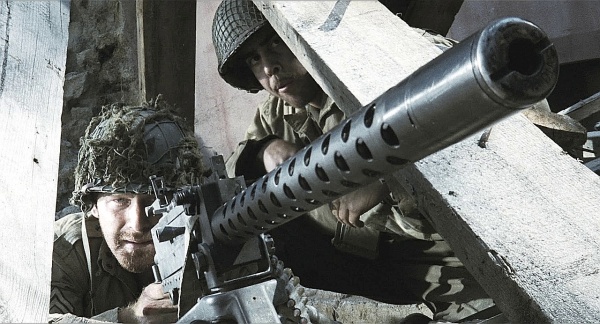
The Browning M1919A4 or "Browning .30 caliber" machine gun is briefly seen being lugged by a U.S. soldier during the Omaha Beach scene. This machine gun is also among the weapons used by the defenders during the final battle at Ramelle. At Ramelle, one M1919A4 is manned by an Airborne trooper in the bell tower with Private Jackson and another is manned by Corporal Fred Henderson (Max Martini) and Private Stanley Mellish (Adam Goldberg). Both guns eventually run out of ammunition, their users being killed. The gun in the tower has a disintegrating belt and Mellish's gun has a fabric belt.
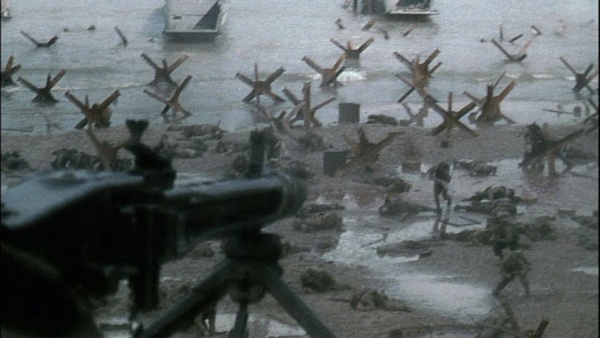
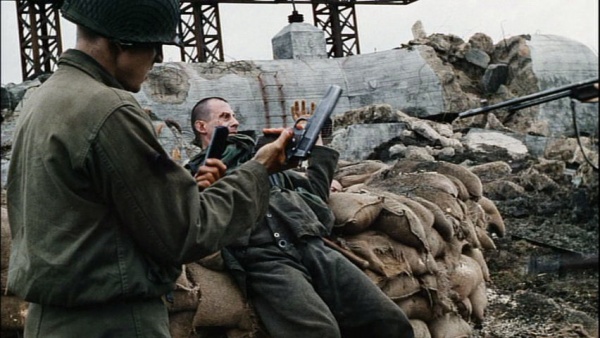
MG42
Known by the Allies as "Hitler's Buzzsaw", the German MG42 was perhaps the deadliest machine gun of World War II. Its extreme high rate of fire is accurately portrayed in the film. Its most notable appearance is during the Omaha Beach sequence, being fired from large pillboxes and sandbag positions overlooking the beach. Two pillboxes housing the MG42s are called 'Schnabelstand' and they were only used for observation and target spotting, not MG emplacement. However, there were none of these bunkers on the real Omaha Beach. The MG42 is later seen mounted on a lafette tripod, when Miller's squad encounter a German machine gun nest.
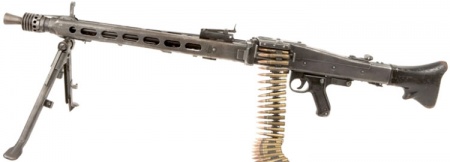
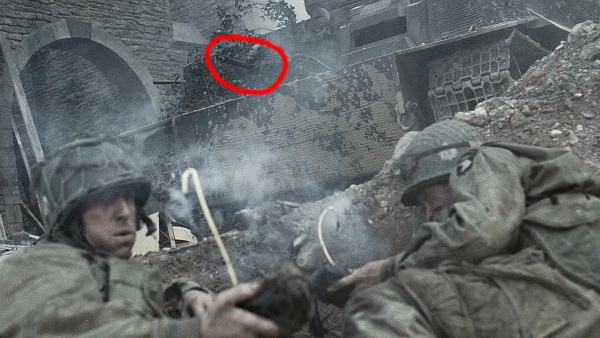
MG34 Panzerlauf
During the final battle, SS Tiger tanks (in reality mocked-up T34s) can be seen armed with MG34 Panzerlauf machine guns, mounted coaxially next to the main gun and in the bow of the hull next to the driver's compartment.
Pistols
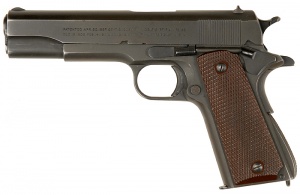
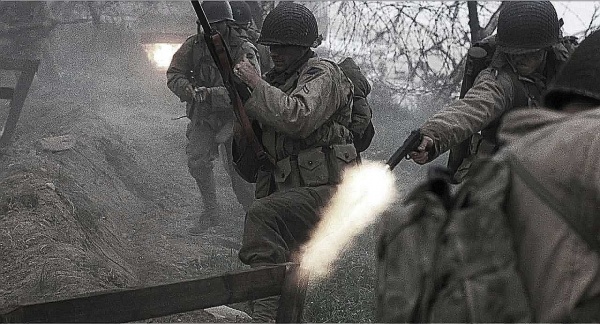
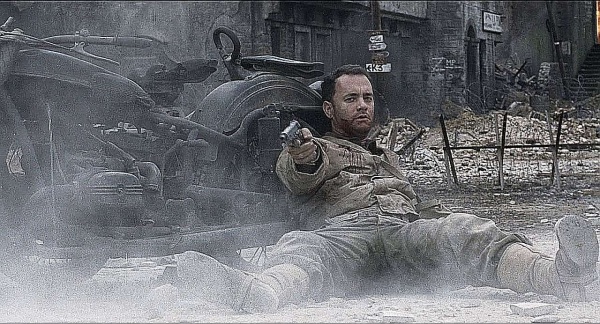
Colt M1911A1
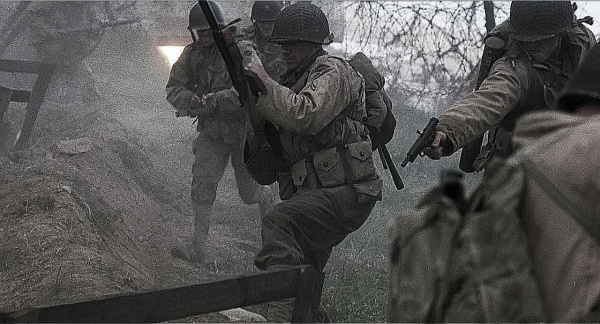
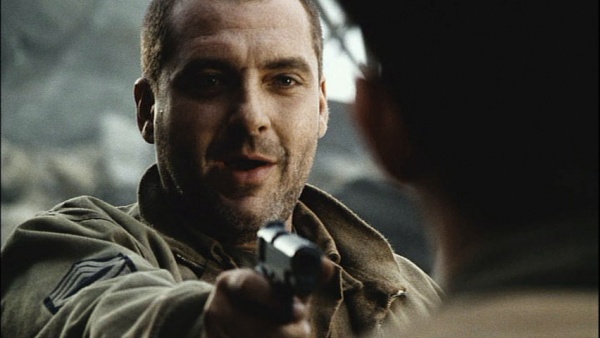
The Colt M1911A1 pistol is seen in the hands of TSgt. Horvath (Tom Sizemore), Pvt. Jackson (Barry Pepper), and Capt. Miller (Tom Hanks). Horvath uses it to threaten PFC Richard Reiben (Edward Burns) when he wants to abandon his squad, later throws it during a melee scuffle in the final battle. Captain Miller is seen firing it at one of "Tiger" tanks as he sits wounded on the bridge in one of the film's most memorable moments.

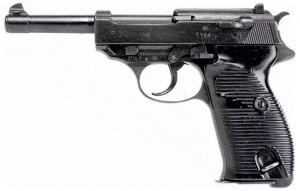
Walther P38
During the final battle in Ramelle, an SS Panzergrenadier can be seen using a Walther P38 when confronting TSgt. Horvath and is killed but still manages to wound him with it.
Launchers
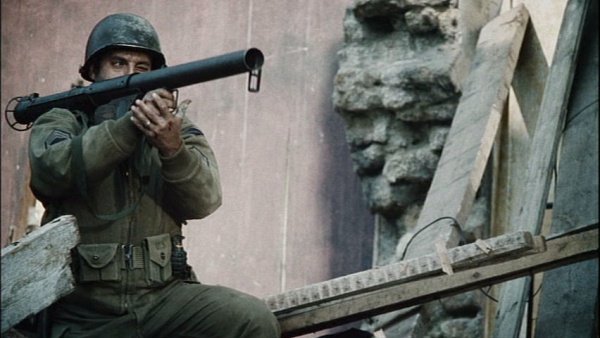
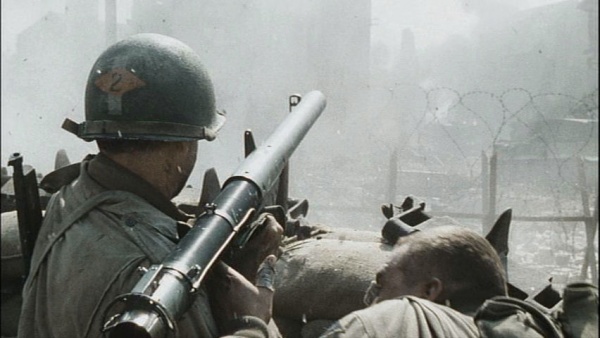
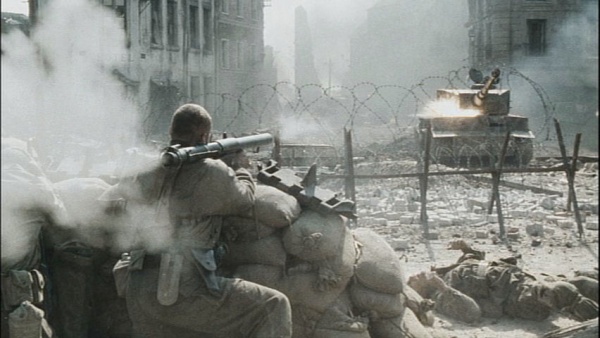
M1A1 Bazooka
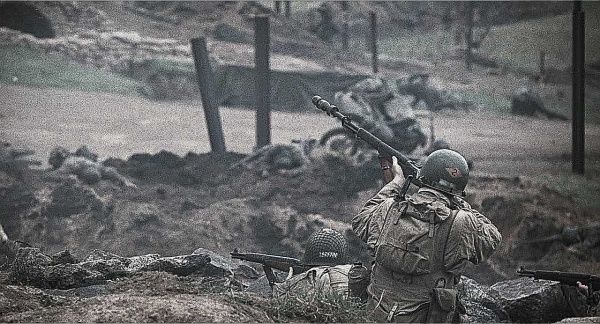
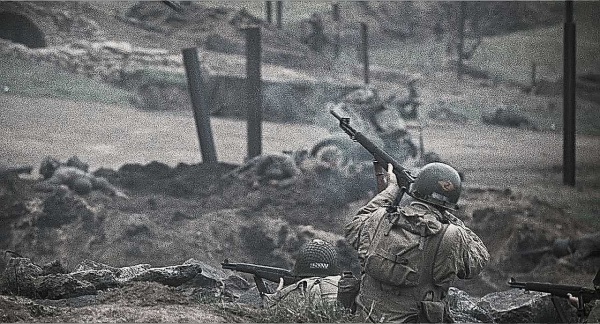
The M1A1 Bazooka is used in some scenes. It is first seen in the hands of a U.S. soldier under the command of Captain Fred Hamill (Ted Danson). Later we see Private James F. Ryan (Matt Damon) uses an M1A1 Bazooka to destroy a German half-track. This same Bazooka is later used by Horvath during the final battle to destroy a Marder III self-propelled gun and again in an attempt to destroy a "Tiger" tank, but the rocket is deflected off the tank's heavy armor.

Raketenpanzerbüchse 54
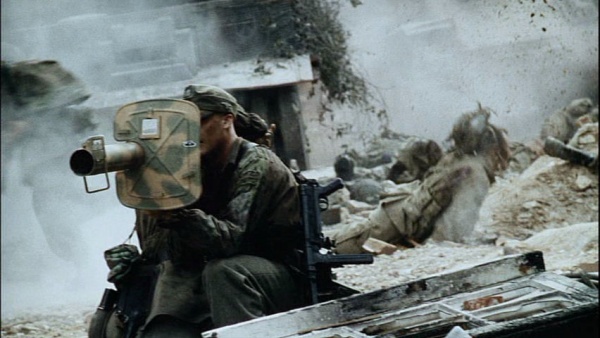
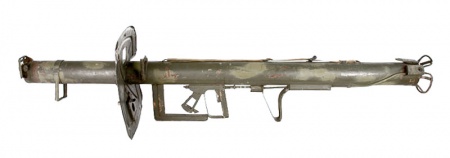
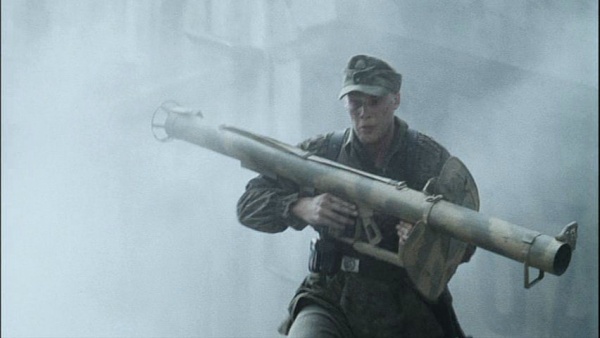
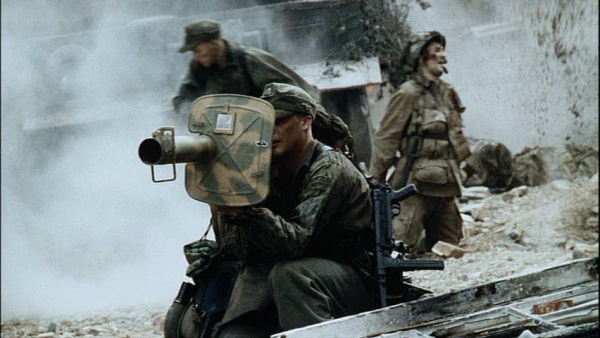
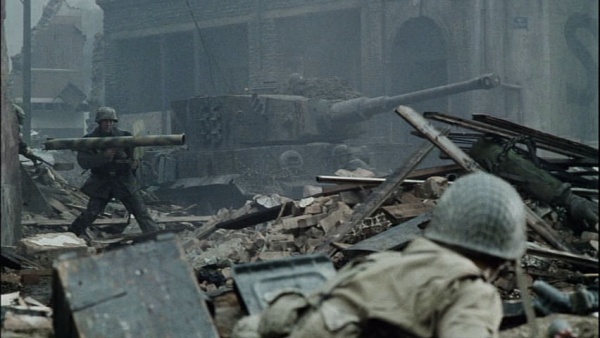
During the final battle, one of SS Grenadiers can be seen carrying a Raketenpanzerbüchse (RPzB) 54 rocket launcher, better known as the "Panzerschreck", and fires at a group of retreating U.S. troops, sending one paratrooper through a glass window. Another Grenadier is also seen with a RPzB but is killed by Pvt. Ryan.
Grenades
Mk 2 Hand Grenade
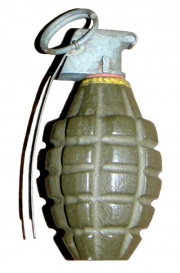
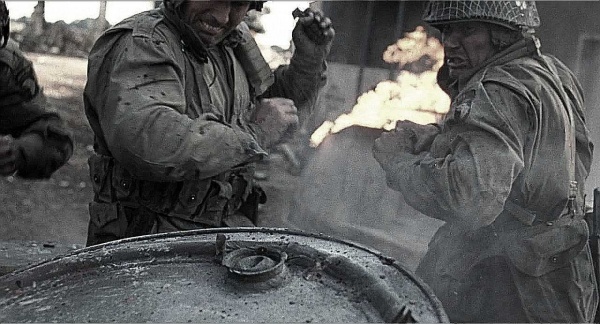
During the attack on the German machine gun nest, Miller's squad uses Mk 2 hand grenades to take out all but one of German soldiers throws the grenades back at them, though thankfully miss. Later, during the final battle in Ramelle, several Mk 2 hand grenades are tossed into a disabled German tank, killing the crew.
M7 Rifle Grenade Launcher with M9A1 Rifle Grenade
During the Omaha Beach scene, we can briefly see an M1 Garand mounted M7 Rifle Grenade Launcher being used to fire an M9A1 Rifle Grenade after the German line has been broken.
Model 24 Stielhandgranate
During the final battle, Private Stanley Mellish (Adam Goldberg) and Corporal Fred Henderson (Max Martini) get two Model 24 Stielhandgranates thrown at them while manning one of M1919A4 machine guns. Thankfully the two are able to grab and toss the grenades clear before they detonate.
Others
M1 Flamethrower
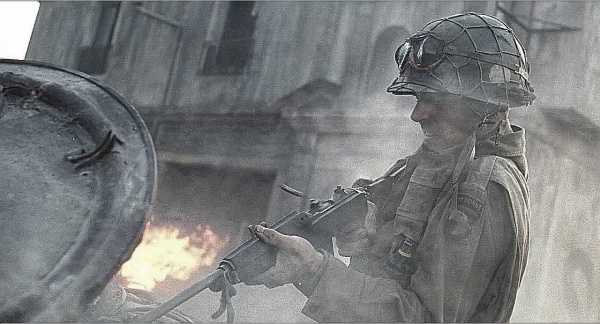
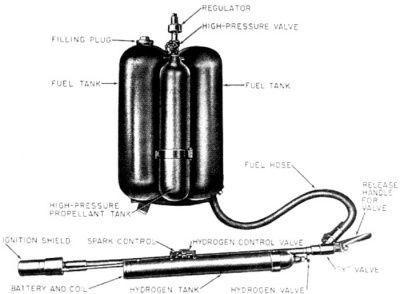
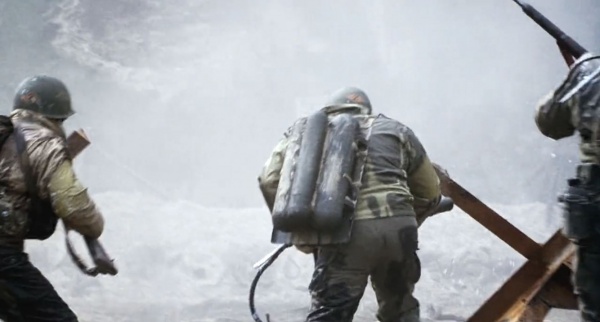
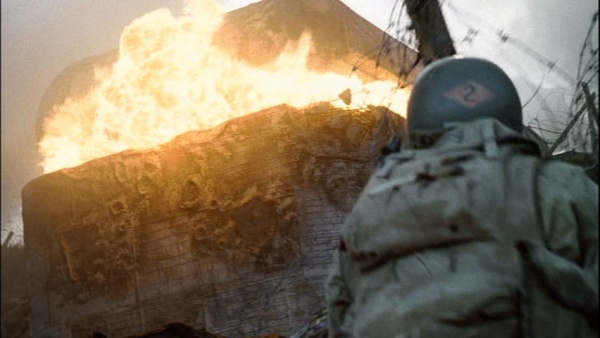
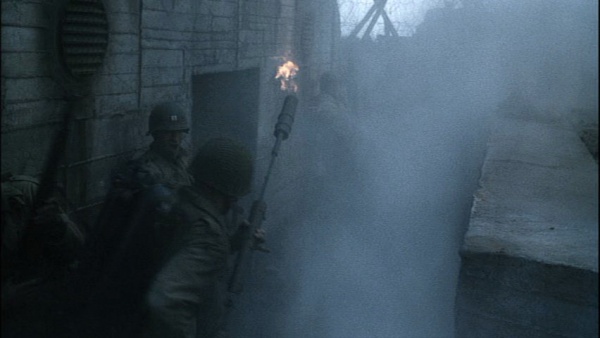
During the Omaha Beach scene, Private First Class Doyle (Glenn Wrage) uses the M1 Flamethrower to clear one of German pillboxes (which are modeled after German 'Schnabelstand' observation posts in Étretat, France) overlooking the beach, turning the occupants into human torches. A group of U.S. soldiers are ordered to let them burn. During the opening of the scene, a flamethrower operator gets hit in the napalm tank and gets blown up along with his comrades around him.
M1A1 Bangalore Torpedo
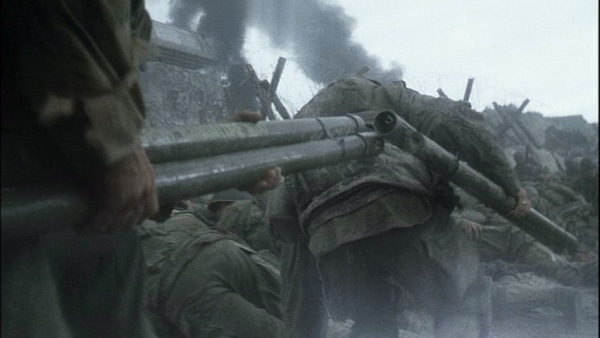
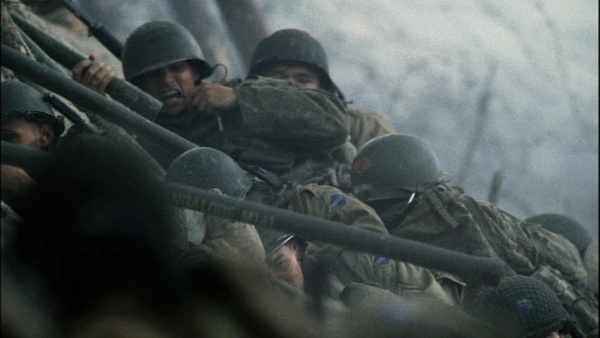
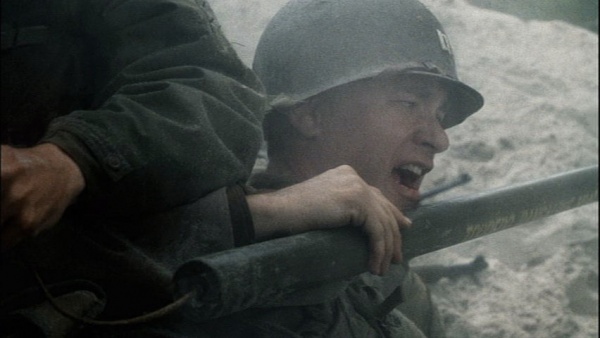
Captain John H. Miller (Tom Hanks) aids some soldiers in employing M1A1 Bangalore Torpedos to clear the barbed wire seawall (which would have actually been made of concrete, wood timbers, and pebbles). This is an homage to Major General Norman "Dutch" Cota who fearlessly encouraged his men to use the Bangalores to clear the seawall.
2 cm Flak 38
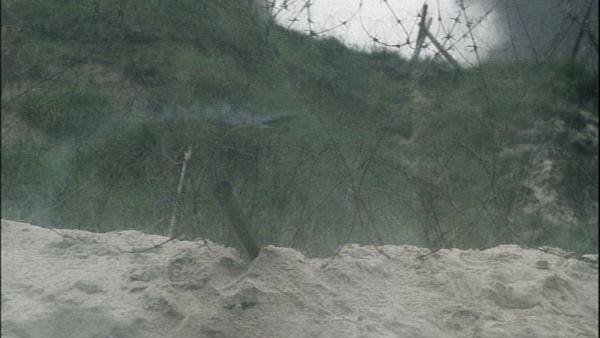
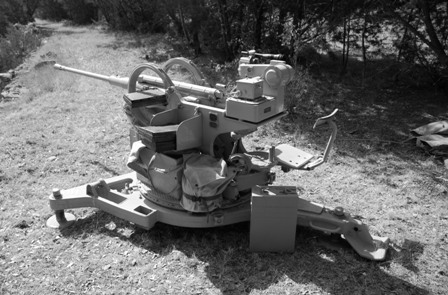
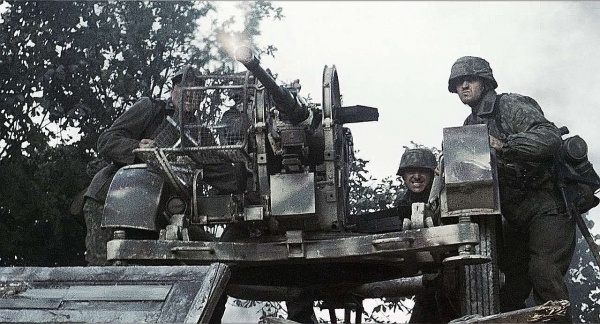
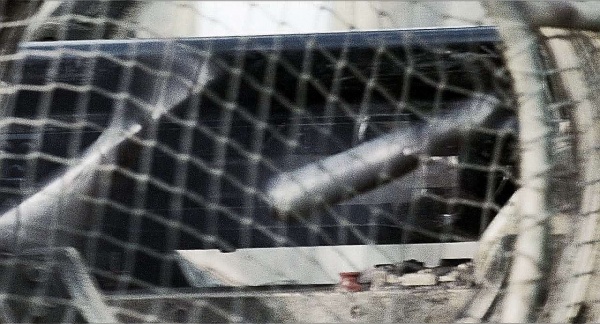
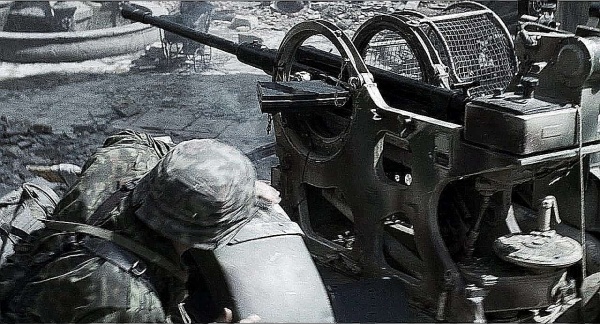
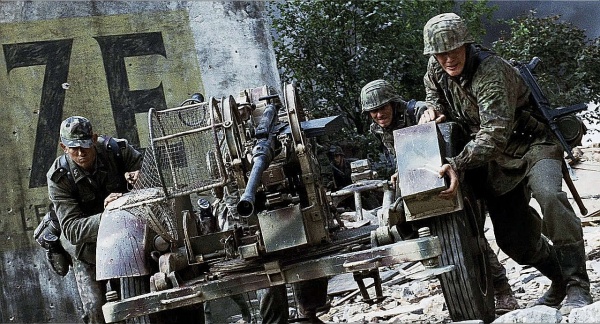
A 2 cm Flak 38 is used by several SS Grenadiers during the final battle at Ramelle and delivers devastating 20mm Flak rounds on U.S. paratroopers.
M2 Mortar
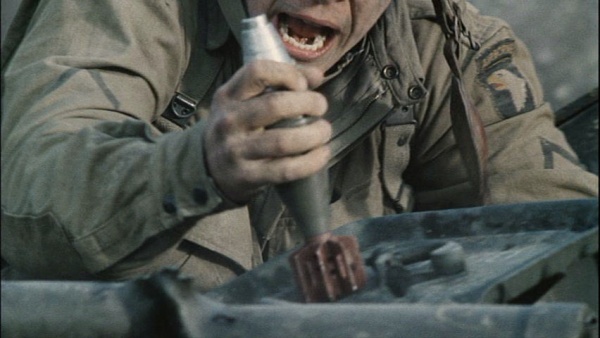
During the final battle at Ramelle, Private Ryan (Matt Damon) and Captain Miller (Tom Hanks) arm 60mm M2 Mortar shells by banging them against the steel launching base of the mortar tube and throw them like hand grenades at advancing SS soldiers, scoring several kills. This scene is based on the real life tactics of Medal of Honor winner Charles "Commando" Kelly, who really used 60mm mortar shells as grenades during a firefight in Italy.
