| If you have been locked out of your account you can request a password reset here. |
Difference between revisions of "Heat"
Leigh Burne (talk | contribs) (→Trivia) |
AgentGumby (talk | contribs) |
||
| (43 intermediate revisions by 17 users not shown) | |||
| Line 30: | Line 30: | ||
}} | }} | ||
| − | '''''Heat''''' is the 1995 crime drama | + | '''''Heat''''' is the 1995 crime drama directed by [[Michael Mann]] and marked the first onscreen pairing of legendary actors [[Al Pacino]] and [[Robert De Niro]]. Pacino stars in the film as Vincent Hanna, a relentless lieutenant in the LAPD's Robbery Homicide Division who is determined to take down a high end robbery crew led by master thief Neil McCauley (De Niro). Notable for its detailed depiction of the techniques used by both law enforcement and criminal elements, as well as exceptional and accurate gun handling, the film was first made as the 1989 television movie ''[[L.A. Takedown]]''. ''Heat'' also was reported to have been viewed repeatedly by the "High Incident Bandits" robbery duo involved in the infamous North Hollywood shootout (as depicted in the film ''[[44 Minutes: The North Hollywood Shootout]]''). |
{{Film Title}} | {{Film Title}} | ||
__TOC__<br clear="all"> | __TOC__<br clear="all"> | ||
| − | {{ | + | {{spoiler}} |
| − | = | + | =Pistols= |
==Colt M1991A1 Series 80 Officers ACP== | ==Colt M1991A1 Series 80 Officers ACP== | ||
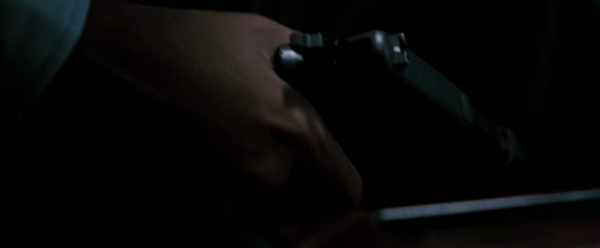
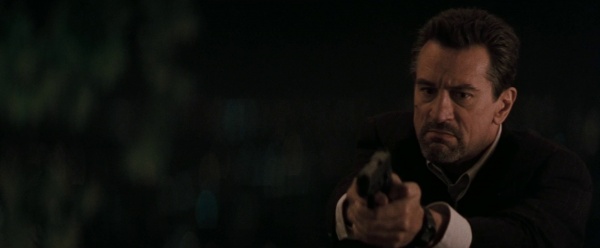
| − | Lieutenant Vincent Hanna ([[Al Pacino]]) carries an ivory-gripped [[ | + | Lieutenant Vincent Hanna ([[Al Pacino]]) carries an ivory-gripped [[Colt Officer's ACP|Colt M1991A1 Series 80 Colt Officers ACP]] with a full-sized trigger and ring hammer as his sidearm in the film. Hanna carries his pistol on his waist in a crossdraw holster. Hanna's choice of sidearm might also be a nod to his service with the Marine Corps. |
[[Image:Series80Heat.jpg|thumb|none|400px|The actual Colt Officers ACP used by [[Al Pacino]] during the film (picture supplied by Yourprops.com) - .45 ACP]] | [[Image:Series80Heat.jpg|thumb|none|400px|The actual Colt Officers ACP used by [[Al Pacino]] during the film (picture supplied by Yourprops.com) - .45 ACP]] | ||
[[Image:Heat-ACP.jpg|thumb|none|600px|Lt. Hanna ([[Al Pacino]]) picks up his Colt Officers ACP on the table. Note the screwdriver indent in the spring cover, which was one of the "improvements" made to the Series 80 1911s.]] | [[Image:Heat-ACP.jpg|thumb|none|600px|Lt. Hanna ([[Al Pacino]]) picks up his Colt Officers ACP on the table. Note the screwdriver indent in the spring cover, which was one of the "improvements" made to the Series 80 1911s.]] | ||
[[Image:HeatACP.jpg|thumb|none|600px|Hanna's Colt in a cross draw holster.]] | [[Image:HeatACP.jpg|thumb|none|600px|Hanna's Colt in a cross draw holster.]] | ||
[[Image:HeatColtOfficersACP-1.jpg|thumb|none|600px|Hanna brass checks his gun while he and Casals are heading up the elevator to apprehend Hugh Benny. This particular way of doing a brass check was also seen performed by [[James Caan]] in [[Michael Mann]]'s film ''[[Thief]]''.]] | [[Image:HeatColtOfficersACP-1.jpg|thumb|none|600px|Hanna brass checks his gun while he and Casals are heading up the elevator to apprehend Hugh Benny. This particular way of doing a brass check was also seen performed by [[James Caan]] in [[Michael Mann]]'s film ''[[Thief]]''.]] | ||
| − | [[Image:HeatOfficersACP-7.jpg|thumb|none|600px|Hanna is armed with the Colt as he searches for McCauley at the airfield.]] | + | [[Image:HeatOfficersACP-7.jpg|thumb|none|600px|Hanna is armed with the Colt Officer's ACP as he searches for McCauley at the airfield.]] |
[[Image:HeatOfficersACP-8.jpg|thumb|none|600px|Hanna searches for McCauley.]] | [[Image:HeatOfficersACP-8.jpg|thumb|none|600px|Hanna searches for McCauley.]] | ||
| − | [[Image:HeatColtCommander-2.jpg|thumb|none|600px|Hanna scans his surroundings | + | [[Image:HeatColtCommander-2.jpg|thumb|none|600px|Hanna scans his surroundings.]] |
==Heckler & Koch USP== | ==Heckler & Koch USP== | ||
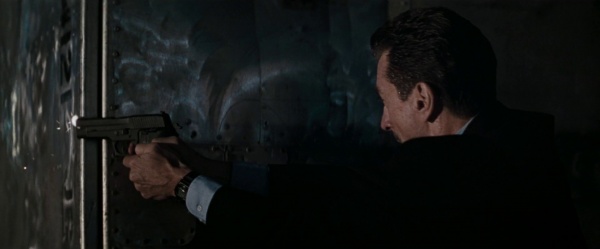
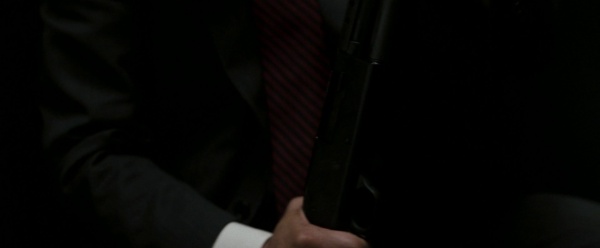
Neil McCauley ([[Robert De Niro]]) uses a [[Heckler & Koch USP]] as his sidearm in the early scenes of the film. It is first seen during the armored car robbery, when he carries it in a holster on his tactical vest (along with five spare magazines). Note the checkered back of the grip and the shape of the external thumb safety and slide release, all uncommon to a [[SIG-Sauer P220]]. It is usually not seen clearly during the film, but the shape of the slide can easily be discerned during the shootout at the drive-in (when McCauley fires the gun through the window of his sedan at the shooter with the [[Steyr TMP]]). Neil then dumps his USP for the SIG-Sauer P220, most likely to get rid of the evidence, since it was used during the drive-in theater shootout. | Neil McCauley ([[Robert De Niro]]) uses a [[Heckler & Koch USP]] as his sidearm in the early scenes of the film. It is first seen during the armored car robbery, when he carries it in a holster on his tactical vest (along with five spare magazines). Note the checkered back of the grip and the shape of the external thumb safety and slide release, all uncommon to a [[SIG-Sauer P220]]. It is usually not seen clearly during the film, but the shape of the slide can easily be discerned during the shootout at the drive-in (when McCauley fires the gun through the window of his sedan at the shooter with the [[Steyr TMP]]). Neil then dumps his USP for the SIG-Sauer P220, most likely to get rid of the evidence, since it was used during the drive-in theater shootout. | ||
| − | ''NOTE: IMFDB previously identified this USP as the .45 ACP model. This is likely inaccurate, because the USP-45 was not around at the time that the movie was filmed (it was introduced in May 1995, nearly two years after the USP-9 and USP-40, while ''[[Heat]]'' was filmed mostly during 1994). The USP in the movie is most likely a 9x19mm model, since most pistols in Hollywood's prop houses were chambered in this caliber at the time. Further evidence of the pistol's caliber can be seen during the armored car robbery; the magazines visible on McCauley's | + | ''NOTE: IMFDB previously identified this USP as the .45 ACP model. This is likely inaccurate, because the USP-45 was not around at the time that the movie was filmed (it was introduced in May 1995, nearly two years after the USP-9 and USP-40, while ''[[Heat]]'' was filmed mostly during 1994). The USP in the movie is most likely a 9x19mm model, since most pistols in Hollywood's prop houses were chambered in this caliber at the time. Further evidence of the pistol's caliber can be seen during the armored car robbery; the magazines visible on McCauley's vest are made out of polymer, consistent with the mags found only on full-size 9mm and .40-caliber USP magazines, whereas USP-45 magazines are metal and have ribbed sides.'' |
| − | [[Image:USP9mm.jpg |thumb|none| | + | [[Image:USP9mm.jpg |thumb|none|300px|Heckler & Koch USP - 9x19mm]] |
[[Image:HEATUSP.jpg|thumb|none|600px|Neil McCauley searches for Waingro at the truck stop with his H&K USP in hand after the meeting at the café.]] | [[Image:HEATUSP.jpg|thumb|none|600px|Neil McCauley searches for Waingro at the truck stop with his H&K USP in hand after the meeting at the café.]] | ||
[[Image:usp_compact.jpg|thumb|none|600px|McCauley lays his H&K USP on a table in his seaside house. Note the length of the grip, indicating it is NOT a USP-45.]] | [[Image:usp_compact.jpg|thumb|none|600px|McCauley lays his H&K USP on a table in his seaside house. Note the length of the grip, indicating it is NOT a USP-45.]] | ||
| − | [[Image:HeatUSP-1.jpg|thumb|none|600px|McCauley fires his USP at | + | [[Image:HeatUSP-1.jpg|thumb|none|600px|McCauley fires his USP at Van Zant's assassin through the windshield of his sedan. As many know, gunfire inside a small place such as a car is deafeningly loud.]] |
==SIG-Sauer P220== | ==SIG-Sauer P220== | ||
| Line 64: | Line 64: | ||
[[Image:HeatSIGP220 - .45.jpg|thumb|none|600px|McCauley hides his SIG-Sauer P220 under his leg when Hanna pulls him over and approaches his car.]] | [[Image:HeatSIGP220 - .45.jpg|thumb|none|600px|McCauley hides his SIG-Sauer P220 under his leg when Hanna pulls him over and approaches his car.]] | ||
[[Image:HeatSIGP220-7.jpg|thumb|none|600px|McCauley keeps his SIG-Sauer P220 tucked in his waist band during the bank heist.]] | [[Image:HeatSIGP220-7.jpg|thumb|none|600px|McCauley keeps his SIG-Sauer P220 tucked in his waist band during the bank heist.]] | ||
| − | [[Image:HeatSIGP220-2.jpg|thumb|none|600px|McCauley holds his | + | [[Image:HeatSIGP220-2.jpg|thumb|none|600px|McCauley holds his P220 on a dying man.]] |
| − | [[Image:HeatSIGP220-3.jpg|thumb|none|600px|At | + | [[Image:HeatSIGP220-3.jpg|thumb|none|600px|At the character's request, McCauley puts him out of his misery with his P220.]] |
[[Image:HeatSIGP220-9.jpg|thumb|none|600px|Before this shot, McCauley fires his P220 three times, after which it jams. After the change in angle, the gun is back in battery, however.]] | [[Image:HeatSIGP220-9.jpg|thumb|none|600px|Before this shot, McCauley fires his P220 three times, after which it jams. After the change in angle, the gun is back in battery, however.]] | ||
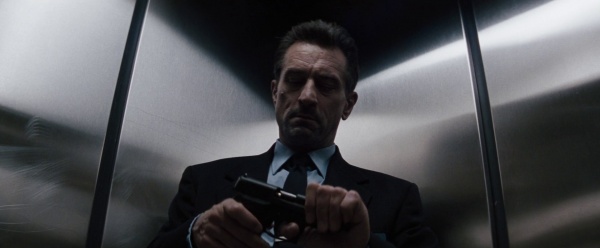
| − | [[Image:HeatSIGP220-1.jpg|thumb|none|600px|McCauley does a brass check on his P220 in | + | [[Image:HeatSIGP220-1.jpg|thumb|none|600px|McCauley does a brass check on his P220 in an elevator. Quite dangerously, he puts his hand over the muzzle with his thumb inside the trigger guard when pushing the slide back. When he releases the slide, the sound of it closing is far too loud for such a short release.]] |
| − | [[Image:Heat-P220.jpg|thumb|none|600px| | + | [[Image:Heat-P220.jpg|thumb|none|600px|''"Look at me!"'']] |
| − | [[Image:HeatSIGP220-4.jpg|thumb|none|600px|McCauley executes | + | [[Image:HeatSIGP220-4.jpg|thumb|none|600px|McCauley executes his target with a double tap to the chest and a shot to the head (this is Michael Mann's trademark execution, also referred to as a Failure Drill; this M.O. also is used by Cheritto when he executes the third guard during the armored car robbery).]] |
[[Image:HeatSIGP220-10.jpg|thumb|none|600px|McCauley fires his P220 at Hanna in the air field. This particular blank produced a long after-fire flame. Damp powder, perhaps?]] | [[Image:HeatSIGP220-10.jpg|thumb|none|600px|McCauley fires his P220 at Hanna in the air field. This particular blank produced a long after-fire flame. Damp powder, perhaps?]] | ||
[[Image:HeatSIGP220-11.jpg|thumb|none|600px|McCauley searches for Hanna at the airfield.]] | [[Image:HeatSIGP220-11.jpg|thumb|none|600px|McCauley searches for Hanna at the airfield.]] | ||
| Line 77: | Line 77: | ||
==Star Megastar== | ==Star Megastar== | ||
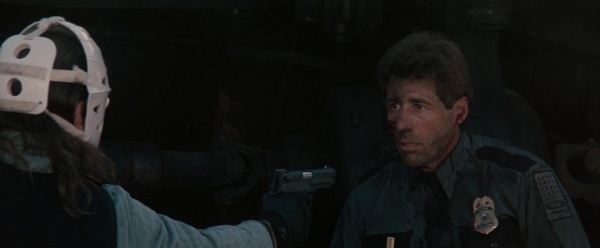
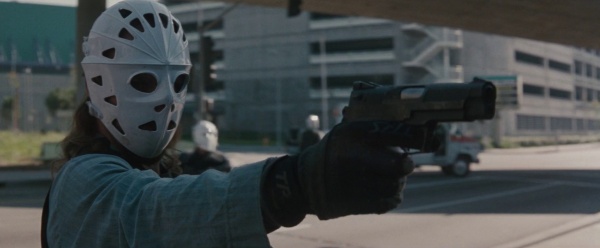
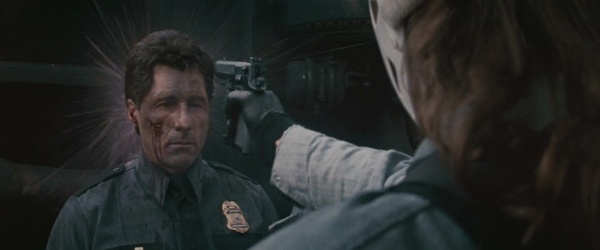
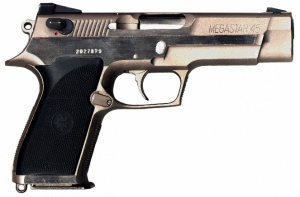
Waingro ([[Kevin Gage]]), the unstable newcomer to Neil McCauley's ([[Robert De Niro]]) crew, carries a blued [[Star Megastar]] during the armored car robbery. He uses this one to first pistol-whip and then execute the first guard (stuntman [[Rick Avery]]) by shooting him in the face at point-blank range. He also carries a nickel one when he answers the door at his hotel suite. | Waingro ([[Kevin Gage]]), the unstable newcomer to Neil McCauley's ([[Robert De Niro]]) crew, carries a blued [[Star Megastar]] during the armored car robbery. He uses this one to first pistol-whip and then execute the first guard (stuntman [[Rick Avery]]) by shooting him in the face at point-blank range. He also carries a nickel one when he answers the door at his hotel suite. | ||
| − | [[Image:Star-Megastar.jpg|thumb|none| | + | [[Image:Star-Megastar.jpg|thumb|none|300px|Blued Star Megastar - .45 ACP]] |
[[Image:Heat-Megastar.jpg|thumb|none|600px|Waingro pistol-whips the first guard, unaware that he is deaf.]] | [[Image:Heat-Megastar.jpg|thumb|none|600px|Waingro pistol-whips the first guard, unaware that he is deaf.]] | ||
[[Image:Heat-Megastar-2.jpg|thumb|none|600px|Waingro holds his gun on the guard.]] | [[Image:Heat-Megastar-2.jpg|thumb|none|600px|Waingro holds his gun on the guard.]] | ||
[[Image:HeatStarMegastar-1.jpg|thumb|none|600px|Waingro executes the first guard with his Star Megastar by shooting him in the face at point-blank range. The shot is faked with a CGI muzzle flash (animated after the fact) due to the dangerous nature of the shot. Firing a real blank this close to the face of an actor would result in either serious injury or death. A tell tale sign is that the hammer of the pistol remains cocked.]] | [[Image:HeatStarMegastar-1.jpg|thumb|none|600px|Waingro executes the first guard with his Star Megastar by shooting him in the face at point-blank range. The shot is faked with a CGI muzzle flash (animated after the fact) due to the dangerous nature of the shot. Firing a real blank this close to the face of an actor would result in either serious injury or death. A tell tale sign is that the hammer of the pistol remains cocked.]] | ||
| + | [[File:HeatStarMegastar07.jpg|thumb|none|600px|]] | ||
| + | [[File:Star Megastar.jpg|thumb|none|300px|Nickel Star Megastar - .45 ACP]] | ||
[[Image:Heat-Megastar-3.jpg|thumb|none|600px|Waingro answers the door armed with a nickel Star Megastar.]] | [[Image:Heat-Megastar-3.jpg|thumb|none|600px|Waingro answers the door armed with a nickel Star Megastar.]] | ||
| − | ==Beretta | + | ==Beretta 85FS== |
| − | Chris Shiherlis ([[Val Kilmer]]) is seen with a compact pistol in a holster next to him when McCauley walks in and sees him sleeping on the floor. He wakes up and then sticks the holstered gun in his pants. The closest gun it seems to resemble is a | + | Chris Shiherlis ([[Val Kilmer]]) is seen with a compact pistol in a holster next to him when McCauley walks in and sees him sleeping on the floor. He wakes up and then sticks the holstered gun in his pants. The closest gun it seems to resemble is a blued [[Beretta 85|Beretta 85FS "Cheetah"]] compact pistol. |
| − | [[Image:Beretta-85FS.jpg|thumb|none| | + | [[Image:Beretta-85FS.jpg|thumb|none|300px|Beretta 85FS - .380 ACP]] |
[[Image:HeatKilmerpistol-1.jpg|thumb|none|600px|Shiherlis sleeps with his possible Beretta Cheetah near by. That bruise on Val Kilmer's left elbow is the result of a stunt that went wrong while filming ''The Doors''.]] | [[Image:HeatKilmerpistol-1.jpg|thumb|none|600px|Shiherlis sleeps with his possible Beretta Cheetah near by. That bruise on Val Kilmer's left elbow is the result of a stunt that went wrong while filming ''The Doors''.]] | ||
| − | [[Image:HeatKilmerpistol-2.jpg|thumb|none|600px|Shiherlis gets up and | + | [[Image:HeatKilmerpistol-2.jpg|thumb|none|600px|Shiherlis gets up and stuffs his Beretta Cheetah in his pants.]] |
==Beretta 92FS== | ==Beretta 92FS== | ||
The LAPD patrol officers responding to the bank robbery return fire on Neil McCauley ([[Robert De Niro]]) and his crew with their standard issue [[Beretta 92FS]]s. | The LAPD patrol officers responding to the bank robbery return fire on Neil McCauley ([[Robert De Niro]]) and his crew with their standard issue [[Beretta 92FS]]s. | ||
| − | [[Image:BerettaM92FS.jpg|thumb|none| | + | [[Image:BerettaM92FS.jpg|thumb|none|300px|Beretta 92FS - 9x19mm]] |
[[Image:Heat-Beretta-92.jpg|thumb|none|600px|An LAPD patrolman opens fire with the Beretta, taking cover behind the Chevrolet Caprice police cruiser. The officer behind him is wielding a [[Mossberg 500]].]] | [[Image:Heat-Beretta-92.jpg|thumb|none|600px|An LAPD patrolman opens fire with the Beretta, taking cover behind the Chevrolet Caprice police cruiser. The officer behind him is wielding a [[Mossberg 500]].]] | ||
[[Image:HeatBeretta92FS-2.jpg|thumb|none|600px|An officer fires his Beretta 92FS at Cheritto.]] | [[Image:HeatBeretta92FS-2.jpg|thumb|none|600px|An officer fires his Beretta 92FS at Cheritto.]] | ||
==Beretta 92SB-C== | ==Beretta 92SB-C== | ||
| − | + | Sergeant Drucker ([[Mykelti Williamson]]) carries a [[Beretta 92SB-C]] as his sidearm, which is only drawn while he is pursuing Cheritto after running out of ammunition for his [[Mossberg 500]] shotgun. | |
| − | + | [[Image:92SB-C.jpg|thumb|none|300px|Beretta 92SB-C, compact model of the 92SB - 9x19mm]] | |
| − | |||
| − | [[Image:92SB-C.jpg|thumb|none| | ||
[[Image:HeatBeretta92FS-1.jpg|thumb|none|600px|After running out of ammo for his Mossberg, Sgt. Drucker ([[Mykelti Williamson]]) pursues Cheritto with his Beretta 92SB-C drawn.]] | [[Image:HeatBeretta92FS-1.jpg|thumb|none|600px|After running out of ammo for his Mossberg, Sgt. Drucker ([[Mykelti Williamson]]) pursues Cheritto with his Beretta 92SB-C drawn.]] | ||
[[Image:HeatBeretta92FS-4.jpg|thumb|none|600px|Sgt. Drucker ([[Mykelti Williamson]]) with his Beretta 92SB-C in his holster.]] | [[Image:HeatBeretta92FS-4.jpg|thumb|none|600px|Sgt. Drucker ([[Mykelti Williamson]]) with his Beretta 92SB-C in his holster.]] | ||
| Line 105: | Line 105: | ||
==M1911A1== | ==M1911A1== | ||
One of the SWAT officers checking Shiherlis' car has an unknown [[M1911A1]] pistol in his holster. Since Kimbers weren't issued yet to LAPD officers, it is doubtful it is a Kimber Custom II, the current sidearm of LAPD special weapons and tactical units. | One of the SWAT officers checking Shiherlis' car has an unknown [[M1911A1]] pistol in his holster. Since Kimbers weren't issued yet to LAPD officers, it is doubtful it is a Kimber Custom II, the current sidearm of LAPD special weapons and tactical units. | ||
| − | [[Image:ColtMkIVSeries70.jpg|thumb|none| | + | [[Image:ColtMkIVSeries70.jpg|thumb|none|300px|Colt MKIV Series 70 M1911A1 - .45 ACP]] |
[[Image:HeatM1911A1.jpg|thumb|none|600px|An unknown M1911A1 is seen in an SWAT officer's holster.]] | [[Image:HeatM1911A1.jpg|thumb|none|600px|An unknown M1911A1 is seen in an SWAT officer's holster.]] | ||
==Ruger KP90== | ==Ruger KP90== | ||
Michael Cheritto ([[Tom Sizemore]]) has a [[Ruger KP90]] in a crossdraw holster on his tac vest during the armored car robbery. This is NOT the P90, as sometimes claimed, but the stainless KP90. | Michael Cheritto ([[Tom Sizemore]]) has a [[Ruger KP90]] in a crossdraw holster on his tac vest during the armored car robbery. This is NOT the P90, as sometimes claimed, but the stainless KP90. | ||
| − | [[Image:RugerP90Side.jpg|thumb|none| | + | [[Image:RugerP90Side.jpg|thumb|none|300px|Ruger KP90 - .45 ACP]] |
[[Image:Small_177636-1-.jpg|thumb|none|600px|A Ruger KP90 can be seen on Cheritto's tac vest as he stands guard.]] | [[Image:Small_177636-1-.jpg|thumb|none|600px|A Ruger KP90 can be seen on Cheritto's tac vest as he stands guard.]] | ||
==Glock 19== | ==Glock 19== | ||
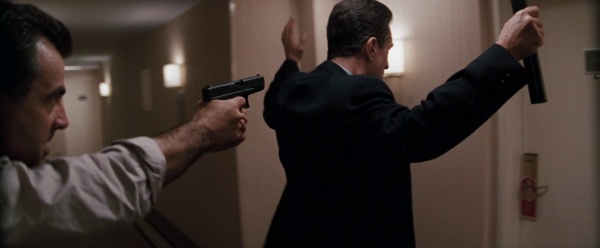
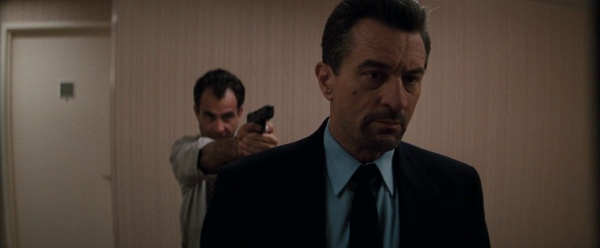
After McCauley executes Waingro, he leaves the room, and a detective working surveillance at the hotel draws a [[Glock 19]] on him. | After McCauley executes Waingro, he leaves the room, and a detective working surveillance at the hotel draws a [[Glock 19]] on him. | ||
| − | [[Image:Glock19 2ndGen.jpg|thumb|none| | + | [[Image:Glock19 2ndGen.jpg|thumb|none|300px|Glock 19 (2nd Generation) - 9x19mm]] |
[[Image:HeatGlock.jpg|thumb|none|600px|An LAPD detective aims his Glock 19 at McCauley.]] | [[Image:HeatGlock.jpg|thumb|none|600px|An LAPD detective aims his Glock 19 at McCauley.]] | ||
| − | [[Image:HeatGlock19.jpg|thumb|none|600px|The detective holds the Glock.]] | + | [[Image:HeatGlock19.jpg|thumb|none|600px|The detective holds the Glock 19.]] |
| + | |||
| + | ==Taurus PT92AFS== | ||
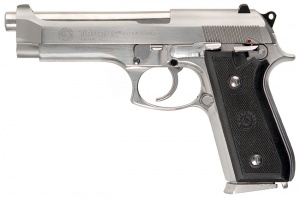
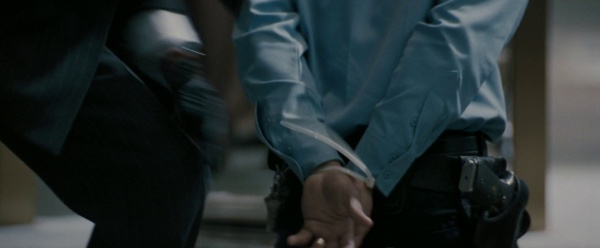
| + | A nickel [[Taurus PT92AFS]] can be seen in the holster of the bank guard that McCauley kicks to the floor during the start of the bank robbery. This may also be a [[PT99]], depending on the sights, which are not visible while the weapon is holstered. | ||
| − | + | [[Image:TaurusPT92AFSwBlack.jpg|thumb|none|300px|Taurus PT92AFS (nickel) (Pre-1998) with slimline black factory grips - 9x19mm]] | |
| − | |||
| − | [[Image:TaurusPT92AFSwBlack.jpg|thumb|none| | ||
[[Image:HeatTaurusPT92.jpg|thumb|none|600px|A Taurus PT92 AFS is seen in this security guard's holster at the beginning of the bank heist as McCauley binds his hands behind his back. Note that this Taurus seems to be fitted with Pachmayr grips.]] | [[Image:HeatTaurusPT92.jpg|thumb|none|600px|A Taurus PT92 AFS is seen in this security guard's holster at the beginning of the bank heist as McCauley binds his hands behind his back. Note that this Taurus seems to be fitted with Pachmayr grips.]] | ||
| + | =Revolvers= | ||
==Smith & Wesson Model 36== | ==Smith & Wesson Model 36== | ||
When Hanna and his men visit Alan Marciano ([[Hank Azaria]]) in Las Vegas to question him about his relationship with Charlene Shiherlis ([[Ashley Judd]]), Det. Casals ([[Wes Studi]]) is seen in the background holding a nickel [[Smith & Wesson Model 36]] snub nose revolver. | When Hanna and his men visit Alan Marciano ([[Hank Azaria]]) in Las Vegas to question him about his relationship with Charlene Shiherlis ([[Ashley Judd]]), Det. Casals ([[Wes Studi]]) is seen in the background holding a nickel [[Smith & Wesson Model 36]] snub nose revolver. | ||
| − | [[Image:StainlessS&WModel36.jpg|thumb|none| | + | [[Image:StainlessS&WModel36.jpg|thumb|none|300px|Smith & Wesson Model 36 (nickel) - .38 Special]] |
[[Image:HeatS&W60.jpg|thumb|none|600px|Det. Casals in the background is holding a stainless steel Smith & Wesson Model 36.]] | [[Image:HeatS&W60.jpg|thumb|none|600px|Det. Casals in the background is holding a stainless steel Smith & Wesson Model 36.]] | ||
==Smith & Wesson Model 38 "Bodyguard"== | ==Smith & Wesson Model 38 "Bodyguard"== | ||
During the armored car robbery, as soon as Waingro uses his [[Star Megastar]] to execute the first guard, McCauley guns down the second guard ([[Thomas Rosales Jr.]]) as he tries to grab a [[Smith & Wesson Model 38]] "Bodyguard" from his ankle holster. | During the armored car robbery, as soon as Waingro uses his [[Star Megastar]] to execute the first guard, McCauley guns down the second guard ([[Thomas Rosales Jr.]]) as he tries to grab a [[Smith & Wesson Model 38]] "Bodyguard" from his ankle holster. | ||
| − | [[Image:SWBodyguard.jpg|thumb|none| | + | [[Image:SWBodyguard.jpg|thumb|none|300px|Smith & Wesson Model 38 "Bodyguard" - .38 Special]] |
[[Image:Heat_1.jpg|thumb|none|600px|The second guard tries to draw a Smith & Wesson Model 38 "Bodyguard" before McCauley guns him down.]] | [[Image:Heat_1.jpg|thumb|none|600px|The second guard tries to draw a Smith & Wesson Model 38 "Bodyguard" before McCauley guns him down.]] | ||
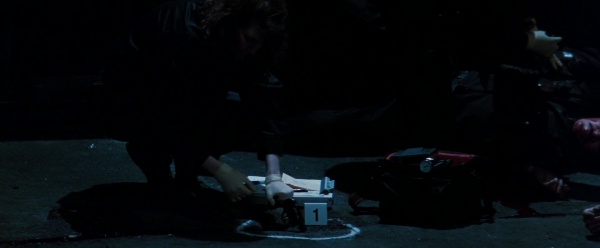
[[Image:HeatS&W38.jpg|thumb|none|600px|A crime scene technician picks up the Smith & Wesson Model 38 "Bodyguard".]] | [[Image:HeatS&W38.jpg|thumb|none|600px|A crime scene technician picks up the Smith & Wesson Model 38 "Bodyguard".]] | ||
=Submachine Guns & Machine Pistols= | =Submachine Guns & Machine Pistols= | ||
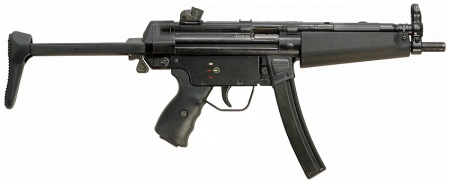
| − | ==Heckler & Koch MP5A3== | + | ==Heckler & Koch HK94A3 (mocked-up as MP5A3)== |
| − | [[Heckler & Koch MP5A3]]s are | + | |
| − | [[Image: | + | What appear to be [[Heckler & Koch MP5A3]]s are used by LAPD SWAT officers throughout the movie; however, close inspection reveals that they are actually the same partially-converted full-auto [[Heckler & Koch HK94|HK94A3]] carbines that have appeared in numerous other motion pictures (including ''[[Predator]]'', ''[[Lethal Weapon]]'', ''[[Die Hard]]'', etc.). One of these weapons is used by an officer in a hiding position during the stakeout scene at the precious metals repository. Another HK94A3 is used by a surveillance team watching for Shiherlis, and more of these weapons are used by the SWAT team that is sent to the hotel in the climax. |
| − | [[Image:HeatMP5A3-1.jpg|thumb|none|600px|An SIS surveillance unit member hides in a trash bin with an | + | |
| − | [[Image:HeatMP5A3-3.jpg|thumb|none|600px|An SWAT officer aims his | + | [[Image:H&K94Conversion.jpg|thumb|none|450px|A Heckler & Koch HK94A3 converted to a resemble an MP5A3, with a chopped barrel and converted to auto, with a third firing position added to the lower receiver.]] |
| − | [[Image:HeatMP5A3-4.jpg|thumb|none|600px|SWAT officers check Shiherlis' car, all armed with | + | [[Image:HeatMP5A3-1.jpg|thumb|none|600px|An SIS surveillance unit member hides in a trash bin with an HK94A3.]] |
| − | [[Image:HeatMP5A3.jpg|thumb|none|600px|After McCauley kills Waingro, SWAT officers climb the stairwells (because McCauley had pulled the fire alarm to disable the elevators) with | + | [[Image:HeatMP5A3-3.jpg|thumb|none|600px|An SWAT officer aims his HK94A3 at Shiherlis' approaching car.]] |
| + | [[Image:HeatMP5A3-4.jpg|thumb|none|600px|SWAT officers check Shiherlis' car, all armed with HK94A3s. The weapon on the left appears to lack the paddle magazine release.]] | ||
| + | [[Image:HeatMP5A3.jpg|thumb|none|600px|After McCauley kills Waingro, SWAT officers climb the stairwells (because McCauley had pulled the fire alarm to disable the elevators) with their HK94s in hand. Close inspection reveals that they lack the paddle magazine release and have the metal trigger pack, which characterizes the HK94.]] | ||
==Steyr TMP== | ==Steyr TMP== | ||
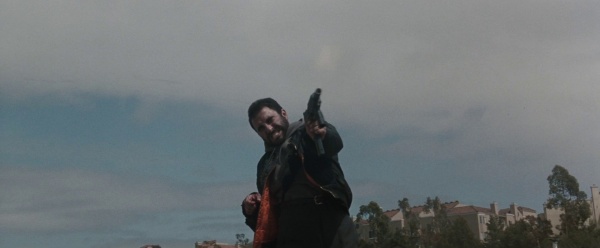
The assassin sent to the drive-in theater ([[Max Daniels]]) to kill McCauley brings a [[Steyr TMP]]. | The assassin sent to the drive-in theater ([[Max Daniels]]) to kill McCauley brings a [[Steyr TMP]]. | ||
| − | [[Image:SteyrTMP.jpg|thumb|none| | + | [[Image:SteyrTMP.jpg|thumb|none|350px|Steyr TMP - 9x19mm]] |
| + | [[File:HeatSteyrSMG1.jpg|thumb|none|600px|The Assassin moving in slowly to get a shot at an unsuspecting McCauley in his car.]] | ||
[[Image:Heat-TMP.jpg|thumb|none|600px|The drive-in theater shooter firing his Steyr TMP at McCauley's car just before Shiherlis shoots him in the back, allowing McCauley to shoot him from in front, killing him. Notice how he pulls the sling forward to tighten it and steady his aim. This is a well known technique for firing stockless guns. The expression on his face comes from McCauley having pinned his leg between his car and the pickup truck he came in.]] | [[Image:Heat-TMP.jpg|thumb|none|600px|The drive-in theater shooter firing his Steyr TMP at McCauley's car just before Shiherlis shoots him in the back, allowing McCauley to shoot him from in front, killing him. Notice how he pulls the sling forward to tighten it and steady his aim. This is a well known technique for firing stockless guns. The expression on his face comes from McCauley having pinned his leg between his car and the pickup truck he came in.]] | ||
[[Image:HeatTMP-1.jpg|thumb|none|600px|The shooter fires his Steyr TMP at McCauley.]] | [[Image:HeatTMP-1.jpg|thumb|none|600px|The shooter fires his Steyr TMP at McCauley.]] | ||
| Line 152: | Line 157: | ||
=Shotguns= | =Shotguns= | ||
==Benelli M3 Super 90== | ==Benelli M3 Super 90== | ||
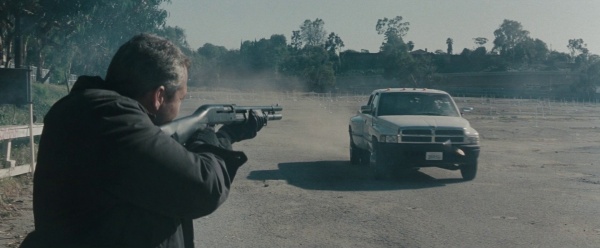
| − | After the assassin is gunned down at the drive-in-theater, the truck driver starts to drive towards the exit, but just as he reaches the gate, Cheritto steps out from behind cover and opens fire with a [[Benelli M3 Super 90]] 12 gauge shotgun. | + | After the assassin is gunned down at the drive-in-theater, the truck driver starts to drive towards the exit, but just as he reaches the gate, Cheritto steps out from behind cover and opens fire with a [[Benelli M3 Super 90]] 12 gauge shotgun. The shotgun is a both pump-action and semi-automatic but Cheritto uses pump-action only. |
| − | [[Image:Benelli_m3-1-.jpg|thumb|none|500px|Benelli M3 Super 90 with pistol grip stock - 12 | + | [[Image:Benelli_m3-1-.jpg|thumb|none|500px|Benelli M3 Super 90 with pistol grip stock - 12 gauge]] |
| − | [[Image:Heat-Benelli-M3.jpg|thumb|none|600px|Cheritto with a Benelli M3 | + | [[Image:Heat-Benelli-M3.jpg|thumb|none|600px|Cheritto with a Benelli M3.]] |
| − | [[Image:Heat0011-1-.jpg|thumb|none|600px|Cheritto fires | + | [[Image:Heat0011-1-.jpg|thumb|none|600px|Cheritto fires the Benelli M3 at close range, killing the driver.]] |
==Mossberg 590== | ==Mossberg 590== | ||
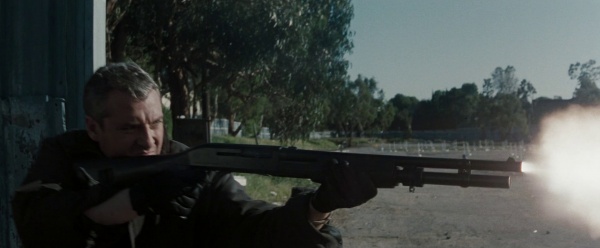
| − | Detective Casals ([[Wes Studi]]) brings a [[Mossberg 590]] to breach the door of Hugh Benny's ([[Henry Rollins]]) apartment. Sergeant Drucker ([[Mykelti Williamson]]) carries the exact same | + | Detective Casals ([[Wes Studi]]) brings a [[Mossberg 590]] to breach the door of Hugh Benny's ([[Henry Rollins]]) apartment. Sergeant Drucker ([[Mykelti Williamson]]) carries the exact same Mossberg 590 during the firefight outside the bank after the heist. Vincent Hanna later takes one from an officer towards the end of the film as he chases down McCauley on the tarmac. |
| − | [[Image:Mossberg 590.jpg|thumb|none|500px|Mossberg 590 with heat shield and bead sight - 12 | + | [[Image:Mossberg 590.jpg|thumb|none|500px|Mossberg 590 with heat shield and bead sight - 12 gauge]] |
[[Image:Heat-Mossberg-500-2.jpg|thumb|none|600px|Sergeant Drucker holds a Mossberg 590. In the foreground is Detective Casals ([[Wes Studi]]) with an M16A1 (with M16A2 handguard).]] | [[Image:Heat-Mossberg-500-2.jpg|thumb|none|600px|Sergeant Drucker holds a Mossberg 590. In the foreground is Detective Casals ([[Wes Studi]]) with an M16A1 (with M16A2 handguard).]] | ||
[[Image:HeatMossberg590-1.jpg|thumb|none|600px|Det. Casals holds a Mossberg 590 in the elevator.]] | [[Image:HeatMossberg590-1.jpg|thumb|none|600px|Det. Casals holds a Mossberg 590 in the elevator.]] | ||
| Line 167: | Line 172: | ||
[[Image:HeatMossberg590-4.jpg|thumb|none|600px|Det. Casals blows out the hinges of Hugh Benny's door with the 590, which is extremely loud in such tight quarters.]] | [[Image:HeatMossberg590-4.jpg|thumb|none|600px|Det. Casals blows out the hinges of Hugh Benny's door with the 590, which is extremely loud in such tight quarters.]] | ||
[[Image:HeatMossberg590-5.jpg|thumb|none|600px|Lt. Hanna takes a 590 from an officer before pursuing McCauley.]] | [[Image:HeatMossberg590-5.jpg|thumb|none|600px|Lt. Hanna takes a 590 from an officer before pursuing McCauley.]] | ||
| − | [[Image:HeatMossberg590.jpg|thumb|none|600px|Hanna fires his acquired 590 at a fleeing McCauley.]] | + | [[Image:HeatMossberg590.jpg|thumb|none|600px|Hanna fires his acquired Mossberg 590 at a fleeing McCauley.]] |
==Mossberg 500== | ==Mossberg 500== | ||
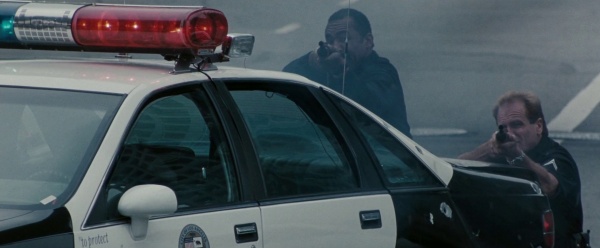
Some of the LAPD officers are seen armed with [[Mossberg 500]]s during the bank robbery shootout. | Some of the LAPD officers are seen armed with [[Mossberg 500]]s during the bank robbery shootout. | ||
| − | [[Image:Mossberg500.jpg|thumb|none|500px|Mossberg 500 - 12 | + | [[Image:Mossberg500.jpg|thumb|none|500px|Mossberg 500 - 12 gauge]] |
[[Image:HeatMossberg500-1.jpg|thumb|none|600px|An officer takes cover from Shiherlis' barrage with a Mossberg 500 in hand.]] | [[Image:HeatMossberg500-1.jpg|thumb|none|600px|An officer takes cover from Shiherlis' barrage with a Mossberg 500 in hand.]] | ||
[[Image:HeatMossberg500-2.jpg|thumb|none|600px|An officer fires a Mossberg 500 at Cheritto.]] | [[Image:HeatMossberg500-2.jpg|thumb|none|600px|An officer fires a Mossberg 500 at Cheritto.]] | ||
| Line 177: | Line 182: | ||
==Ithaca 37 "Stakeout"== | ==Ithaca 37 "Stakeout"== | ||
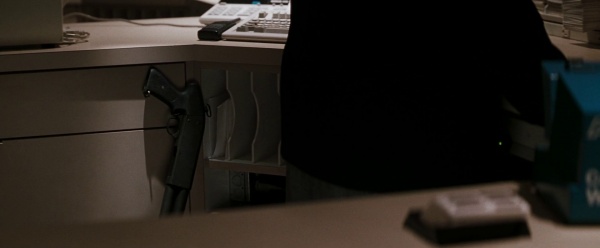
An [[Ithaca 37 "Stakeout"]] short-barreled shotgun can be seen resting behind a security desk when McCauley goes to kill Waingro in the hotel. | An [[Ithaca 37 "Stakeout"]] short-barreled shotgun can be seen resting behind a security desk when McCauley goes to kill Waingro in the hotel. | ||
| − | [[Image:Ithaca Stakeout Parkerized.jpg|thumb|none|400px|Ithaca 37 "Stakeout" Parkerized finish with Synthetic forearm - 12 | + | [[Image:Ithaca Stakeout Parkerized.jpg|thumb|none|400px|Ithaca 37 "Stakeout" Parkerized finish with Synthetic forearm - 12 gauge]] |
[[Image:HeatIthaca37Stakeout.jpg|thumb|none|600px|A Ithaca 37 "Stakeout" shotgun lies behind the desk.]] | [[Image:HeatIthaca37Stakeout.jpg|thumb|none|600px|A Ithaca 37 "Stakeout" shotgun lies behind the desk.]] | ||
==Remington 870== | ==Remington 870== | ||
Some of the LAPD officers are seen armed with [[Remington 870]]s during the bank robbery shootout. | Some of the LAPD officers are seen armed with [[Remington 870]]s during the bank robbery shootout. | ||
| − | [[Image:Remington870PoliceStd.jpg|thumb|none|500px|Remington 870 Police Magnum Riot Shotgun - 12 | + | [[Image:Remington870PoliceStd.jpg|thumb|none|500px|Remington 870 Police Magnum Riot Shotgun - 12 gauge]] |
[[Image:HeatRem870-1.jpg|thumb|none|600px|Two LAPD officers fire their Remington 870s during the shootout.]] | [[Image:HeatRem870-1.jpg|thumb|none|600px|Two LAPD officers fire their Remington 870s during the shootout.]] | ||
[[Image:Heat_3.jpg |thumb|none|600px|An LAPD officer pursues McCauley and Shiherlis with a Remington 870 in hand.]] | [[Image:Heat_3.jpg |thumb|none|600px|An LAPD officer pursues McCauley and Shiherlis with a Remington 870 in hand.]] | ||
| Line 188: | Line 193: | ||
=Rifles & Carbines= | =Rifles & Carbines= | ||
==Colt Model 654== | ==Colt Model 654== | ||
| − | During the armored car robbery, McCauley carries a [[Colt Model 654]] carbine, a 14.5" barreled predecessor to the M4, with M16A1-style lightweight barrel and sights. He uses his to execute the second guard (the one who tries to draw the [[Smith & Wesson Model 38]] Bodyguard in his ankle holster), who gets hit in his right arm, his shoulder and in his chest. Based on configuration it | + | During the armored car robbery, McCauley carries a [[Colt Model 654]] carbine, a 14.5" barreled predecessor to the [[M4A1 Carbine|M4]], with M16A1-style lightweight barrel and sights. He uses his to execute the second guard (the one who tries to draw the [[Smith & Wesson Model 38]] Bodyguard in his ankle holster), who gets hit in his right arm, his shoulder and in his chest. Based on configuration, it appears to be a 654 upper on a full-auto converted AR-15 SP1 carbine lower receiver group, with a drop-in autosear to allow it fire fully-automatic (as evidenced by the pivot pin at the front, which is the "screw hole" design). |
| − | [[Image:ColtM654.jpg |thumb|none|500px|Colt Model 654 - Export version of the 653 | + | [[Image:ColtM654.jpg |thumb|none|500px|Colt Model 654 - Export version of the Model 653 without forward assist - 5.56x45mm]] |
| − | [[Image:HeatColt654-1.jpg|thumb|none|600px|McCauley holds his | + | [[Image:HeatColt654-1.jpg|thumb|none|600px|McCauley holds his Colt Model 654 while watching the street. Close examination reveals that this is actually a 654 upper on an AR-15 SP1 carbine lower group (note pivot pin design).]] |
[[Image:HeatModel654.jpg|thumb|none|600px|McCauley holds his Model 654. Also note that he has his Heckler & Koch USP in a cross-draw holster on the vest (the back of the slide and grip are visible near the bottom of the picture).]] | [[Image:HeatModel654.jpg|thumb|none|600px|McCauley holds his Model 654. Also note that he has his Heckler & Koch USP in a cross-draw holster on the vest (the back of the slide and grip are visible near the bottom of the picture).]] | ||
| − | [[Image:HeatColt654-3.jpg|thumb|none|600px|"80 seconds left!" McCauley calls out to the others while holding his Colt Model 654. The Goodhew ambulance patches on his uniform establish that this is McCauley.]] | + | [[Image:HeatColt654-3.jpg|thumb|none|600px|''"80 seconds left!"'' McCauley calls out to the others while holding his Colt Model 654. The Goodhew ambulance patches on his uniform establish that this is McCauley.]] |
[[Image:HeatColt654-2.jpg|thumb|none|600px|McCauley gives Cheritto a nod to give him approval to execute the third guard.]] | [[Image:HeatColt654-2.jpg|thumb|none|600px|McCauley gives Cheritto a nod to give him approval to execute the third guard.]] | ||
[[Image:HeatColt654-4.jpg|thumb|none|601px|McCauley guns down the second guard]] | [[Image:HeatColt654-4.jpg|thumb|none|601px|McCauley guns down the second guard]] | ||
| − | [[Image:HeatColt654-5.jpg|thumb|none|601px|A view from over McCauley's shoulder.]] | + | [[Image:HeatColt654-5.jpg|thumb|none|601px|A view from over McCauley's shoulder. Note if you look closely, in the almost center of the image, you can see a cable running from the guard's pant leg. This would've been used to activate the a device to simulate a gunshot, blood splattering effect.]] |
==Colt Model 733== | ==Colt Model 733== | ||
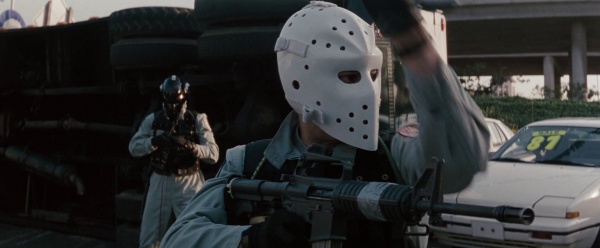
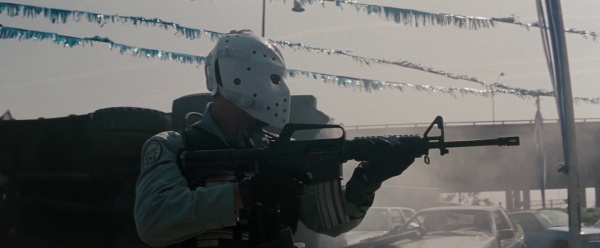
| Line 201: | Line 206: | ||
''Trivia: Allegedly, footage of Shiherlis expertly reloading his rifle during the bank robbery shootout has been shown to American Special Forces trainees, with the message from their instructor, "This is how I want you to reload."'' | ''Trivia: Allegedly, footage of Shiherlis expertly reloading his rifle during the bank robbery shootout has been shown to American Special Forces trainees, with the message from their instructor, "This is how I want you to reload."'' | ||
| − | |||
[[Image:Colt Model 733.jpg|thumb|none|500px|Colt Model 733 - 5.56x45mm]] | [[Image:Colt Model 733.jpg|thumb|none|500px|Colt Model 733 - 5.56x45mm]] | ||
| − | [[Image:HeatColtM733vanrobbery-1.jpg|thumb|none|600px|Shiherlis ([[Val Kilmer]]) with an | + | [[Image:HeatColtM733vanrobbery-1.jpg|thumb|none|600px|Shiherlis ([[Val Kilmer]]) with an Colt Model 733 during the armored car robbery. Shiherlis can be identified because he is wearing a black hockey mask, whereas all of the other men are wearing white hockey masks.]] |
| − | [[Image:HeatColtM733vanrobbery-2.jpg|thumb|none|600px|Shiherlis holds his | + | [[Image:HeatColtM733vanrobbery-2.jpg|thumb|none|600px|Shiherlis holds his Model 733 after retrieving the bearer bonds from the back of the armored car.]] |
| − | [[Image:HeatColt733-3.jpg|thumb|none|600px|McCauley with his | + | [[Image:HeatColt733-3.jpg|thumb|none|600px|McCauley with his Model 733 in the bank.]] |
| − | [[Image:HeatColt733-4.jpg|thumb|none|600px|Shiherlis fires his | + | [[Image:HeatColt733-4.jpg|thumb|none|600px|Shiherlis fires his Model 733 at Det. Bosko, who is taken down with a bullet to the neck.]] |
| − | [[Image:HeatColt733-1.jpg|thumb|none|600px|Shiherlis fires his | + | [[Image:HeatColt733-1.jpg|thumb|none|600px|Shiherlis fires his Model 733.]] |
| − | [[Image:HeatColt733-2.jpg|thumb|none|600px|McCauley ([[Robert De Niro]]) readies his | + | [[Image:HeatColt733-2.jpg|thumb|none|600px|McCauley ([[Robert De Niro]]) readies his Model 733 in the car.]] |
| − | [[Image:HeatM733-1.jpg|thumb|none|600px|McCauley fires his | + | [[Image:HeatM733-1.jpg|thumb|none|600px|McCauley fires his Model 733 through the windshield. With three men firing out of the car, everyone here would probably have suffered permanent hearing loss as the result of loud rifle reports.]] |
| − | [[Image:HeatColtM733-1.jpg|thumb|none|600px|Shiherlis fires his | + | [[Image:HeatColtM733-1.jpg|thumb|none|600px|Shiherlis fires his Model 733 down Fifth Street.]] |
| − | [[Image:HeatColt733-5.jpg|thumb|none|600px|Shiherlis fires his | + | [[Image:HeatColt733-5.jpg|thumb|none|600px|Shiherlis fires his Model 733.]] |
| − | [[Image:HeatM733-2.jpg|thumb|none|600px|Shiherlis reloads his | + | [[Image:HeatM733-2.jpg|thumb|none|600px|Shiherlis reloads his Model 733.<br>'''N.B.''' [[Val Kilmer]]'s reload was so fast and smooth that this clip was used in U.S. Marine Corps training videos, to show new recruits how it should be done in combat.]] |
| − | [[Image:HeatM733-3.jpg|thumb|none|600px|Shiherlis smacks the bolt release on his | + | [[Image:HeatM733-3.jpg|thumb|none|600px|Shiherlis smacks the bolt release on his Model 733.<br>'''N.B.''' The car license plate on the right, "2LUP382", is an in-joke: '''LUP''' is British Army (ex-SAS commandos were technical advisors for this film) terminology for '''L'''ying '''U'''p '''P'''osition. The ''2LUP'' indicates that this is the second location in which Shiherlis has paused to take cover during the shootout.]] |
| − | [[Image:HeatColtM733-2.jpg|thumb|none|600px|McCauley lays down suppressing fire with his | + | [[Image:HeatColtM733-2.jpg|thumb|none|600px|McCauley lays down suppressing fire with his Model 733.]] |
| − | [[Image:Heat-M16A2-3.jpg|thumb|none|600px|McCauley fires his | + | [[Image:Heat-M16A2-3.jpg|thumb|none|600px|McCauley fires his Model 733 on Fifth Street.]] |
| − | [[Image:HeatM733-4.jpg|thumb|none|600px|McCauley fires his | + | [[Image:HeatM733-4.jpg|thumb|none|600px|McCauley fires his Model 733.]] |
| − | [[Image:HeatColtM733-3.jpg|thumb|none|600px|McCauley fires his | + | [[Image:HeatColtM733-3.jpg|thumb|none|600px|McCauley fires his Model 733 at the police blockade.]] |
| − | [[Image:HeatM733-5.jpg|thumb|none|600px|McCauley drags the wounded Shiherlis through the parking lot while firing his | + | [[Image:HeatM733-5.jpg|thumb|none|600px|McCauley drags the wounded Shiherlis through the parking lot while firing his Model 733 at Hanna. Despite firing it one-handed, McCauley manages to hit one of the officers with his bursts.]] |
==FN FNC-80== | ==FN FNC-80== | ||
Lt. Vincent Hanna ([[Al Pacino]]) pulls out an [[FN FNC|FN FNC-80]] assault rifle during the shootout on Flower Street, and uses it to kill Cheritto when Cheritto - who is firing at Drucker and several other cops - grabs a little girl as a human shield. According to the on-set armorer, Hanna's rifle was a Select Fire FNC-80 assault rifle that was chopped down by the armorer to a Para length barrel, and an M16 style birdcage was attached. The FNC-80 was imported into the U.S. as a full automatic weapon and as a Semiautomatic Sporter rifle named the '''FNC 223 Sporter'''. Despite being a full auto weapon, Michael Mann instructed Al Pacino to fire only in semi-automatic mode, because Hanna and all of the other cops who were involved in the shootout would be concerned about the possibility of endangering bystanders. | Lt. Vincent Hanna ([[Al Pacino]]) pulls out an [[FN FNC|FN FNC-80]] assault rifle during the shootout on Flower Street, and uses it to kill Cheritto when Cheritto - who is firing at Drucker and several other cops - grabs a little girl as a human shield. According to the on-set armorer, Hanna's rifle was a Select Fire FNC-80 assault rifle that was chopped down by the armorer to a Para length barrel, and an M16 style birdcage was attached. The FNC-80 was imported into the U.S. as a full automatic weapon and as a Semiautomatic Sporter rifle named the '''FNC 223 Sporter'''. Despite being a full auto weapon, Michael Mann instructed Al Pacino to fire only in semi-automatic mode, because Hanna and all of the other cops who were involved in the shootout would be concerned about the possibility of endangering bystanders. | ||
| − | [[Image:FNC REM Sporter.jpg|thumb|500px|none|FN FNC | + | [[Image:FNC REM Sporter.jpg|thumb|500px|none|FN FNC-80 - 5.56x45mm. This semi automatic imported rifle is marked ''(FN FNC CAL 223 REM SPORTER)'' on the receiver.]] |
[[Image:heatstill-2.jpg|thumb|none|350px|[[Al Pacino]] holds the FN FNC-80 in a promotional still.]] | [[Image:heatstill-2.jpg|thumb|none|350px|[[Al Pacino]] holds the FN FNC-80 in a promotional still.]] | ||
[[Image:HeatFNFNC-3.jpg|thumb|none|600px|Hanna ([[Al Pacino]]) fires his FN FNC-80 at Shiherlis ([[Val Kilmer]]) as he gets into the getaway car.]] | [[Image:HeatFNFNC-3.jpg|thumb|none|600px|Hanna ([[Al Pacino]]) fires his FN FNC-80 at Shiherlis ([[Val Kilmer]]) as he gets into the getaway car.]] | ||
| Line 237: | Line 241: | ||
==FN FAL 50.61== | ==FN FAL 50.61== | ||
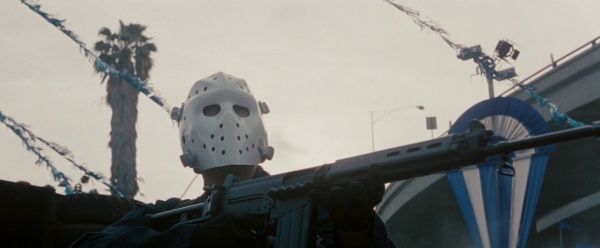
| − | During the armored car robbery, Michael Cheritto ([[Tom Sizemore]]) uses a 20" barreled [[FN FAL|FN FAL 50.61]] Paratrooper version with a side-folding stock. He uses his to execute the third guard with a double tap to the sternum and a third shot to the head. This is a military tactic known as | + | During the armored car robbery, Michael Cheritto ([[Tom Sizemore]]) uses a 20" barreled [[FN FAL#FN FAL|FN FAL 50.61]] Paratrooper version with a side-folding stock. He uses his to execute the third guard with a double tap to the sternum and a third shot to the head. This is a military tactic known as a Failure Drill or Mozambique Drill, and is a prominent feature in Michael Mann's movies (it appears twice in ''Heat'' - this incident, and then at the end, when McCauley executes Waingro in his hotel room). |
| − | [[Image:FN-FAL-50.61.jpg|thumb|500px|none|FN FAL 50.61 Paratrooper rifle with folding stock and 21" barrel - 7.62x51mm]] | + | [[Image:FN-FAL-50.61.jpg|thumb|500px|none|FN FAL 50.61 Paratrooper rifle with folding stock and 21" barrel - 7.62x51mm NATO]] |
| − | [[Image:Heat-FNFAL.jpg|thumb|none|600px|Cheritto stands guard with a FN FAL 50.61 rifle with a Para folding-stock | + | [[Image:Heat-FNFAL.jpg|thumb|none|600px|Cheritto stands guard with a FN FAL 50.61 rifle with a Para folding-stock.]] |
[[Image:HeatFN-FAL.jpg|thumb|none|600px|Cheritto advances on the last guard.]] | [[Image:HeatFN-FAL.jpg|thumb|none|600px|Cheritto advances on the last guard.]] | ||
| − | [[Image:HeatFNFAL-1.jpg|thumb|none|600px|Cheritto shoots the third guard in the chest with his FN FAL | + | [[Image:HeatFNFAL-1.jpg|thumb|none|600px|Cheritto shoots the third guard in the chest with his FN FAL "Para". Note if you look closely, to the lower right, you can see a cable running from the guard's pant leg. This would've been used to activate the a device to simulate a gunshot, blood splattering effect.]] |
[[Image:HeatFNFAL-2.jpg|thumb|none|601px|He then steps forward and shoots the guard in the head at point-blank range.]] | [[Image:HeatFNFAL-2.jpg|thumb|none|601px|He then steps forward and shoots the guard in the head at point-blank range.]] | ||
==Heckler & Koch HK91A2== | ==Heckler & Koch HK91A2== | ||
| − | Chris Shiherlis ([[Val Kilmer]]) covers McCauley ([[Robert De Niro]]) at the drive-in theater with a [[ | + | Chris Shiherlis ([[Val Kilmer]]) covers McCauley ([[Robert De Niro]]) at the drive-in theater with a [[Heckler & Koch HK91A2]] fitted with a bipod, and manages to take out the [[Steyr TMP]]-wielding assassin with a shot to the back. Shiherlis can be seen holding the HK91A2 on the film's poster. |
[[Image:HK_Model_91.jpg |thumb|none|500px|Heckler & Koch HK91A2 - 7.62x51mm NATO]] | [[Image:HK_Model_91.jpg |thumb|none|500px|Heckler & Koch HK91A2 - 7.62x51mm NATO]] | ||
| − | [[Image:HeatH&K.jpg|thumb|none|600px| | + | [[Image:HeatH&K.jpg|thumb|none|600px|''"Behind you, on the right!"'' Shiherlis, in cover with his HK91A2, spots the assassin and alerts McCauley.]] |
[[Image:Heat-HK91A2.jpg|thumb|none|600px|Shiherlis fires at the pickup truck.]] | [[Image:Heat-HK91A2.jpg|thumb|none|600px|Shiherlis fires at the pickup truck.]] | ||
| − | [[Image:HeatH&K_2.jpg|thumb|none| | + | [[Image:HeatH&K_2.jpg|thumb|none|601px|Shiherlis gets a clean shot and fires his HK91A2 at the TMP-wielding thug.]] |
| − | ==IMI Galil ARM | + | ==IMI Galil ARM == |
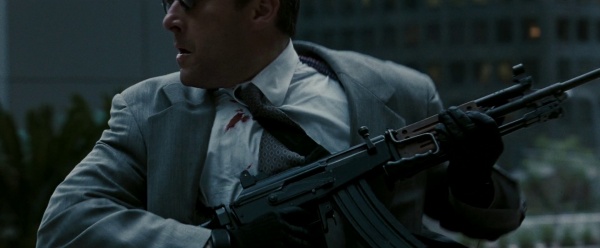
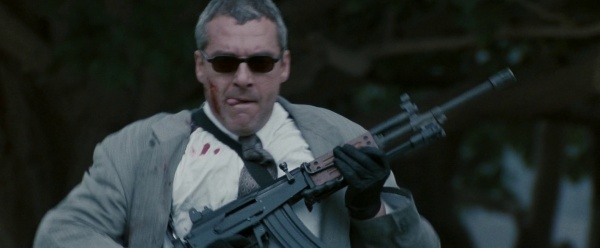
| − | Michael Cheritto ([[Tom Sizemore]]) uses an | + | Michael Cheritto ([[Tom Sizemore]]) uses an [[IMI Galil ARM]] Model 372 with a wooden handguard during the bank robbery and the shootout. ''While inside the bank, the stock is removed from the mounting bracket. However, it appears when he enters the car, an obvious continuity error.'' He gets separated from the rest of the crew during the gun battle but managed to wound one of Hanna's men, Detective Schwartz ([[Jerry Trimble]]) by shooting him in the shoulder by a transit bus. Oddly enough, Mann refers to the weapon as a 7.62mm in his audio commentary. |
| − | [[Image:GalilARM-2.jpg|thumb|none|501px|IMI Galil ARM - 5.56x45mm]] | + | [[Image:GalilARM-2.jpg|thumb|none|501px|IMI Galil ARM with wood handguard - 5.56x45mm]] |
| − | [[Image:Heat0013-1-.jpg|thumb|none|600px|Cheritto with an IMI Galil while inside the bank during the heist.]] | + | [[Image:Heat0013-1-.jpg|thumb|none|600px|Cheritto with an IMI Galil ARM while inside the bank during the heist.]] |
[[Image:HeatGalilARM-1.jpg|thumb|none|600px|Cheritto right before the shootout.]] | [[Image:HeatGalilARM-1.jpg|thumb|none|600px|Cheritto right before the shootout.]] | ||
| − | [[Image:HeatGalil-1.jpg|thumb|none|600px|Cheritto fires his | + | [[Image:HeatGalil-1.jpg|thumb|none|600px|Cheritto fires his Galil ARM through the windshield from the back seat.]] |
| − | [[Image:HeatGalil-2.jpg|thumb|none|600px|Cheritto fires his | + | [[Image:HeatGalil-2.jpg|thumb|none|600px|Cheritto fires his Galil ARM during the bank heist shootout.]] |
| − | [[Image:Heat-AK74.jpg|thumb|none|600px|After the heist, Cheritto flees the scene, with his | + | [[Image:HeatGalil-3.jpg|thumb|none|600px|Cheritto unfolds the stock on his Galil ARM during the shootout.]] |
| − | [[Image:HeatGalilARM-2.jpg|thumb|none|600px|Cheritto flees with his | + | [[Image:Heat-AK74.jpg|thumb|none|600px|After the heist, Cheritto flees the scene, with his Galil ARM.]] |
| + | [[Image:HeatGalilARM-2.jpg|thumb|none|600px|Cheritto flees with his Galil ARM in hand.]] | ||
==M16A1 (with M16A2 handguards)== | ==M16A1 (with M16A2 handguards)== | ||
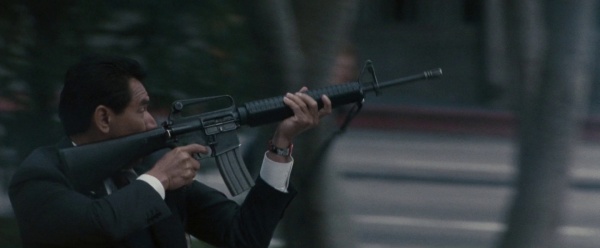
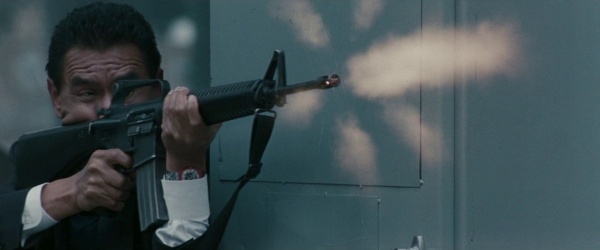
| − | Several [[M16A1]] assault rifles | + | Several [[M16A1]] assault rifles are featured prominently in the film, fitted with [[M16A2]]-style handguards and Rapidex type rear sight adjustment knobs. They are wielded by various L.A.P.D. detectives, including Detective Casals ([[Wes Studi]]), Detective Mike Bosko ([[Ted Levine]]) and Detective Schwartz ([[Jerry Trimble]]), and are also used by some of the SWAT officers. Casals uses one to assist in disabling the Lincoln Town Car being used as a getaway vehicle, and also manages to shoot and wound Shiherlis during the shootout. According to the on set armorer, the director wanted the actors to fire in semi-automatic mode only. The reason given was that the police would be less interested in 'suppressing fire' and more interested in controlled shots given the proximity of so many innocent bystanders. |
| − | [[Image:M16A1wA2Handguards.jpg|thumb|none|500px|M16A1 - outfitted with A2 handguards | + | |
| + | [[Image:M16A1wA2Handguards.jpg|thumb|none|500px|Colt M16A1 - outfitted with A2 handguards - 5.56x45mm]] | ||
[[Image:HeatM16A1-1.jpg|thumb|none|600px|An LAPD officer ([[Steven Ford]]) hides in a truck during the stakeout with an M16A1 with A2 handguards slung over his back.]] | [[Image:HeatM16A1-1.jpg|thumb|none|600px|An LAPD officer ([[Steven Ford]]) hides in a truck during the stakeout with an M16A1 with A2 handguards slung over his back.]] | ||
[[Image:HeatM16.jpg|thumb|none|600px|Det. Schwartz ([[Jerry Trimble]]) holds his M16A1 after the stakeout.]] | [[Image:HeatM16.jpg|thumb|none|600px|Det. Schwartz ([[Jerry Trimble]]) holds his M16A1 after the stakeout.]] | ||
[[Image:Heat_2.jpg |thumb|none|600px|Detective Bosko ([[Ted Levine]]) exchanges fire with Shiherlis, but the more experienced Shiherlis kills Bosko with a shot to the neck. Here you can see the Rapidex rear sight adjustment knob.]] | [[Image:Heat_2.jpg |thumb|none|600px|Detective Bosko ([[Ted Levine]]) exchanges fire with Shiherlis, but the more experienced Shiherlis kills Bosko with a shot to the neck. Here you can see the Rapidex rear sight adjustment knob.]] | ||
[[Image:Heat-Mossberg-500-2.jpg|thumb|none|600px|Sergeant Drucker ([[Mykelti Williamson]]) with a [[Mossberg 590]]. In the foreground is Detective Casals ([[Wes Studi]]) with an M16A1 (with M16A2 handguard). This shot clearly shows the Rapidex rear sight adjustment knob.]] | [[Image:Heat-Mossberg-500-2.jpg|thumb|none|600px|Sergeant Drucker ([[Mykelti Williamson]]) with a [[Mossberg 590]]. In the foreground is Detective Casals ([[Wes Studi]]) with an M16A1 (with M16A2 handguard). This shot clearly shows the Rapidex rear sight adjustment knob.]] | ||
| − | [[Image:HeatM16A1-A2-1.jpg|thumb|none|600px|Detective Casals readies his M16A1. This shot clearly shows the Rapidex rear sight adjustment knob.]] | + | [[Image:HeatM16A1-A2-1.jpg|thumb|none|600px|Detective Casals readies his modified M16A1. This shot clearly shows the Rapidex rear sight adjustment knob.]] |
| + | [[Image:Heat 962.jpg|thumb|none|600px|Detective Casals ([[Wes Studi]]) fires the rifle.]] | ||
[[Image:HeatM16A1-A2-2.jpg|thumb|none|600px|Detective Casals fires his M16A1 during the firefight outside the bank heist.]] | [[Image:HeatM16A1-A2-2.jpg|thumb|none|600px|Detective Casals fires his M16A1 during the firefight outside the bank heist.]] | ||
==Norinco Type 56-1== | ==Norinco Type 56-1== | ||
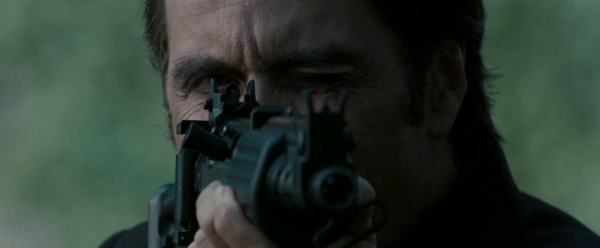
During the armored car robbery, Trejo ([[Danny Trejo]]) carries a Chinese [[Norinco Type 56-1]] assault rifle. | During the armored car robbery, Trejo ([[Danny Trejo]]) carries a Chinese [[Norinco Type 56-1]] assault rifle. | ||
| − | [[Image: | + | [[Image:Chinese56S.jpg|thumb|none|500px|Norinco Type 56-1 with AKM muzzle brake - 7.62x39mm]] |
[[Image:Heat56-1.jpg|thumb|none|600px|A closeup of Trejo's Norinco Type 56-1 as the call on the robbery goes out on the police scanner. The slanted [[AKM]] Style compensator is not standard on the military Type 56, however, manufacturers like Norinco and Poly Technologies added them on to their civilian rifles for export to the United States in the 1980s.]] | [[Image:Heat56-1.jpg|thumb|none|600px|A closeup of Trejo's Norinco Type 56-1 as the call on the robbery goes out on the police scanner. The slanted [[AKM]] Style compensator is not standard on the military Type 56, however, manufacturers like Norinco and Poly Technologies added them on to their civilian rifles for export to the United States in the 1980s.]] | ||
[[Image:Heat56-1zoomedin.jpg|thumb|none|600px|Trejo's Type 56-1 as seen while Trejo is deploying the spike strip.]] | [[Image:Heat56-1zoomedin.jpg|thumb|none|600px|Trejo's Type 56-1 as seen while Trejo is deploying the spike strip.]] | ||
| Line 280: | Line 287: | ||
A police sniper of the surveillance team watches over McCauley with a [[Heckler & Koch SR9(T)]] sniper rifle. This same sniper is seen during the stakeout for Shiherlis with the rifle. | A police sniper of the surveillance team watches over McCauley with a [[Heckler & Koch SR9(T)]] sniper rifle. This same sniper is seen during the stakeout for Shiherlis with the rifle. | ||
[[Image:H&KSR9T.jpg|thumb|500px|none|Heckler & Koch SR9(T) Sniper rifle - 7.62x51mm NATO]] | [[Image:H&KSR9T.jpg|thumb|500px|none|Heckler & Koch SR9(T) Sniper rifle - 7.62x51mm NATO]] | ||
| − | [[Image:HeatSR-9(TC).jpg|thumb|none|600px|A sniper aims his SRC-9(T) at McCauley but is ordered not to fire.]] | + | [[Image:HeatSR-9(TC).jpg|thumb|none|600px|A sniper aims his H&K SRC-9(T) at McCauley but is ordered not to fire.]] |
[[Image:HeatSR9(t)-2.jpg|thumb|none|600px|A police sniper watches Shiherlis through the scope of his SR9(T).]] | [[Image:HeatSR9(t)-2.jpg|thumb|none|600px|A police sniper watches Shiherlis through the scope of his SR9(T).]] | ||
=Trivia= | =Trivia= | ||
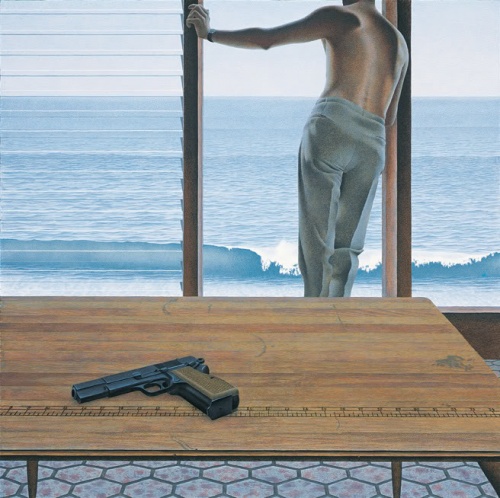
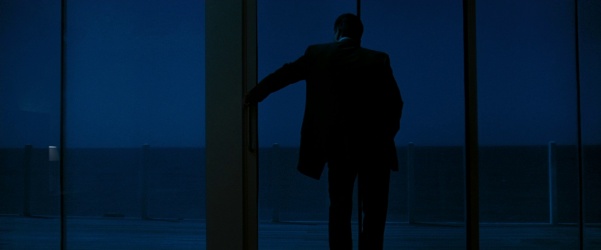
It appears that some of the shots composed for the film were inspired by several paintings. | It appears that some of the shots composed for the film were inspired by several paintings. | ||
| − | [[Image:Colville_032.jpg|thumb|none|500px|Alex Colville's ''Pacific'' (1967) that inspired the famous shot in ''Heat''.]] | + | [[Image:Colville_032.jpg|thumb|none|500px|Alex Colville's ''Pacific'' (1967) that inspired the famous shot in ''Heat''. The pistol shown is a [[Browning Hi-Power]].]] |
[[Image:Heat_Blue2.jpg|thumb|none|601px|Neil McCauley ([[Robert De Niro]]) looks out the window of his house; beforehand, he lays his USP on a counter nearby, although it is out of shot in this image.]] | [[Image:Heat_Blue2.jpg|thumb|none|601px|Neil McCauley ([[Robert De Niro]]) looks out the window of his house; beforehand, he lays his USP on a counter nearby, although it is out of shot in this image.]] | ||
Revision as of 03:25, 29 June 2022
| ||||||||||||||||||||||||||||||||||||||
Heat is the 1995 crime drama directed by Michael Mann and marked the first onscreen pairing of legendary actors Al Pacino and Robert De Niro. Pacino stars in the film as Vincent Hanna, a relentless lieutenant in the LAPD's Robbery Homicide Division who is determined to take down a high end robbery crew led by master thief Neil McCauley (De Niro). Notable for its detailed depiction of the techniques used by both law enforcement and criminal elements, as well as exceptional and accurate gun handling, the film was first made as the 1989 television movie L.A. Takedown. Heat also was reported to have been viewed repeatedly by the "High Incident Bandits" robbery duo involved in the infamous North Hollywood shootout (as depicted in the film 44 Minutes: The North Hollywood Shootout).
The following weapons were used in the film Heat:
![]() WARNING! THIS PAGE CONTAINS SPOILERS!
WARNING! THIS PAGE CONTAINS SPOILERS!
Pistols
Colt M1991A1 Series 80 Officers ACP
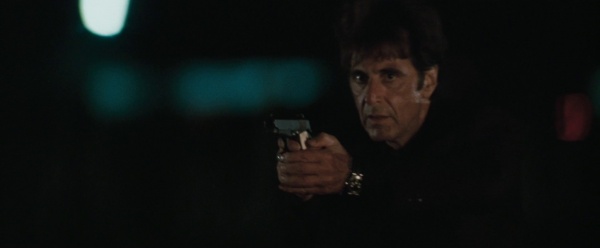
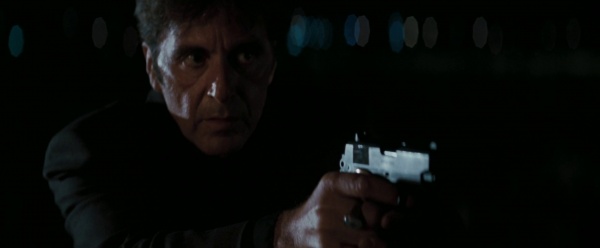
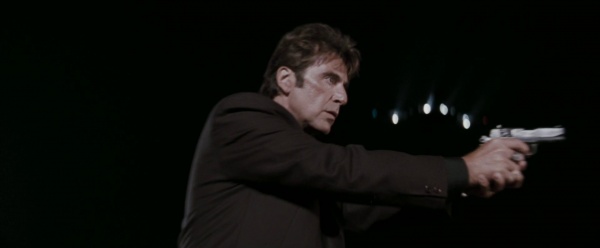
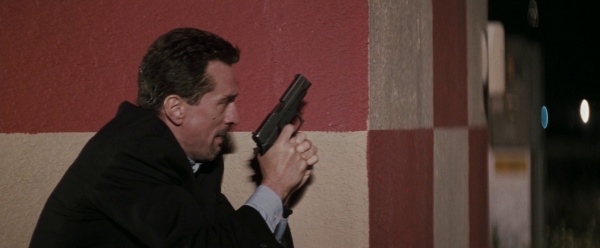
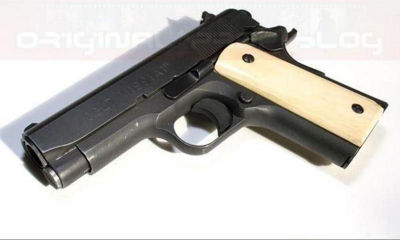
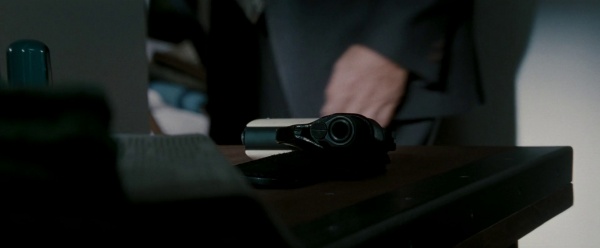
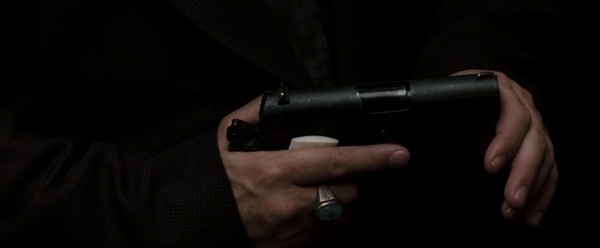
Lieutenant Vincent Hanna (Al Pacino) carries an ivory-gripped Colt M1991A1 Series 80 Colt Officers ACP with a full-sized trigger and ring hammer as his sidearm in the film. Hanna carries his pistol on his waist in a crossdraw holster. Hanna's choice of sidearm might also be a nod to his service with the Marine Corps.
Heckler & Koch USP
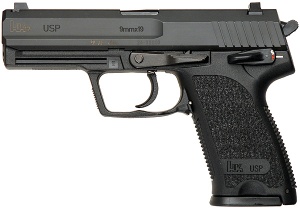
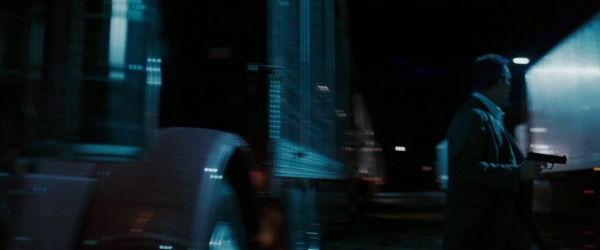
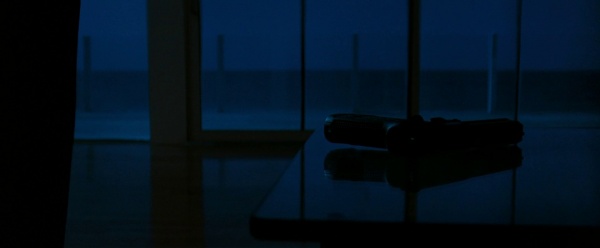
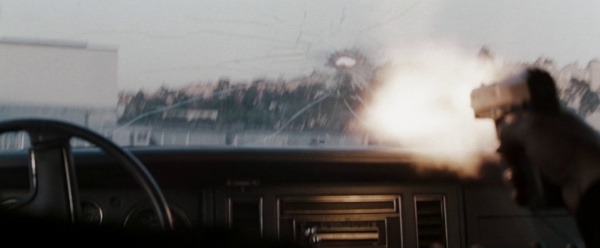
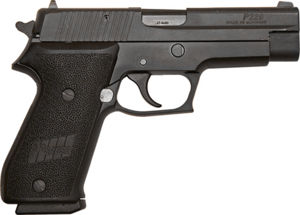
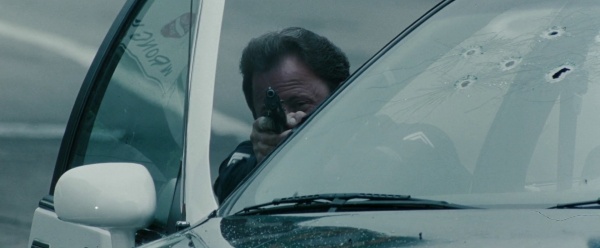
Neil McCauley (Robert De Niro) uses a Heckler & Koch USP as his sidearm in the early scenes of the film. It is first seen during the armored car robbery, when he carries it in a holster on his tactical vest (along with five spare magazines). Note the checkered back of the grip and the shape of the external thumb safety and slide release, all uncommon to a SIG-Sauer P220. It is usually not seen clearly during the film, but the shape of the slide can easily be discerned during the shootout at the drive-in (when McCauley fires the gun through the window of his sedan at the shooter with the Steyr TMP). Neil then dumps his USP for the SIG-Sauer P220, most likely to get rid of the evidence, since it was used during the drive-in theater shootout.
NOTE: IMFDB previously identified this USP as the .45 ACP model. This is likely inaccurate, because the USP-45 was not around at the time that the movie was filmed (it was introduced in May 1995, nearly two years after the USP-9 and USP-40, while Heat was filmed mostly during 1994). The USP in the movie is most likely a 9x19mm model, since most pistols in Hollywood's prop houses were chambered in this caliber at the time. Further evidence of the pistol's caliber can be seen during the armored car robbery; the magazines visible on McCauley's vest are made out of polymer, consistent with the mags found only on full-size 9mm and .40-caliber USP magazines, whereas USP-45 magazines are metal and have ribbed sides.
SIG-Sauer P220
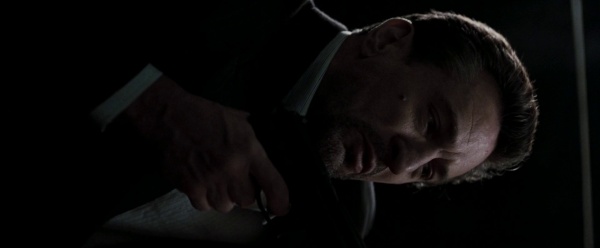
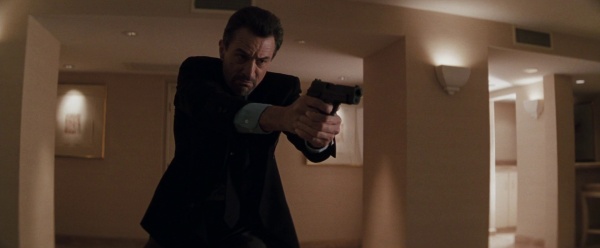
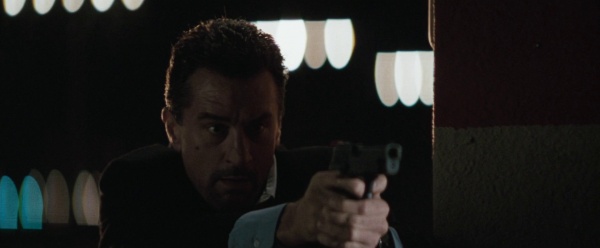
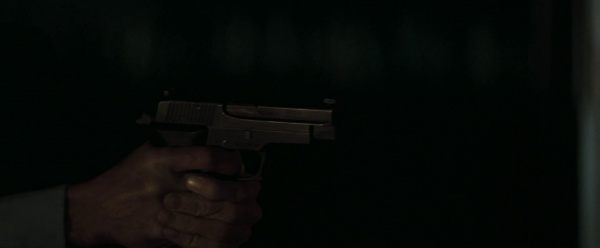
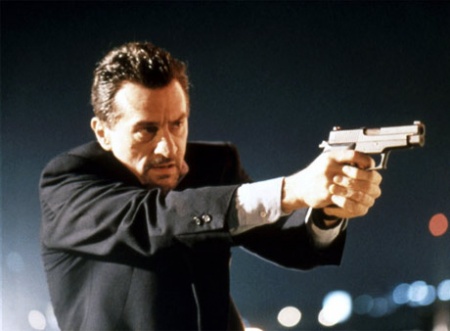
After dumping his H&K USP after the drive-in theater shootout, Neil McCauley (Robert De Niro) replaces his USP with a SIG-Sauer P220 in .45 ACP as his sidearm for the rest of the movie. In the script it is also mentioned that he holds a .45 caliber pistol.
Star Megastar
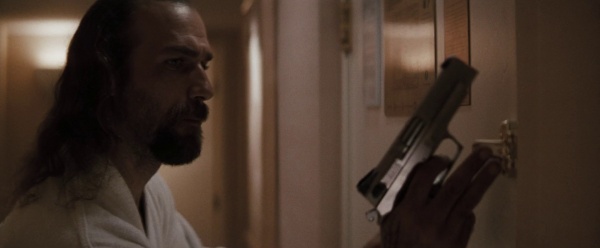
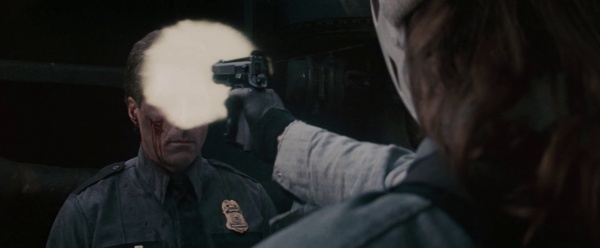
Waingro (Kevin Gage), the unstable newcomer to Neil McCauley's (Robert De Niro) crew, carries a blued Star Megastar during the armored car robbery. He uses this one to first pistol-whip and then execute the first guard (stuntman Rick Avery) by shooting him in the face at point-blank range. He also carries a nickel one when he answers the door at his hotel suite.
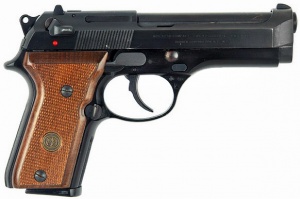
Beretta 85FS
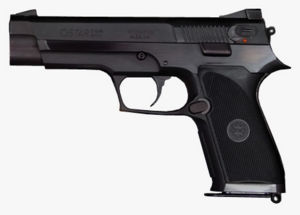
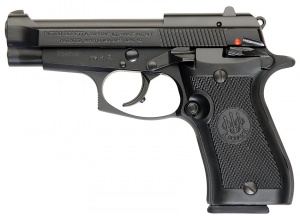
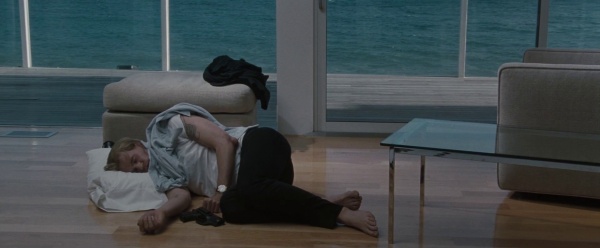
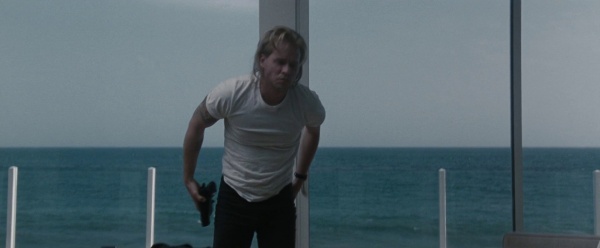
Chris Shiherlis (Val Kilmer) is seen with a compact pistol in a holster next to him when McCauley walks in and sees him sleeping on the floor. He wakes up and then sticks the holstered gun in his pants. The closest gun it seems to resemble is a blued Beretta 85FS "Cheetah" compact pistol.
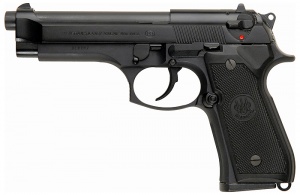
Beretta 92FS
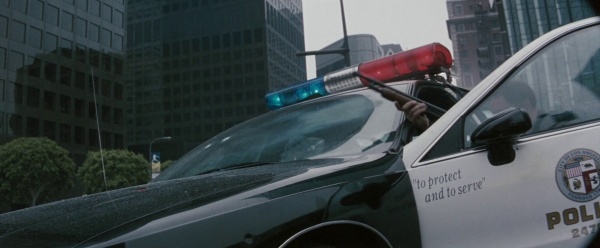
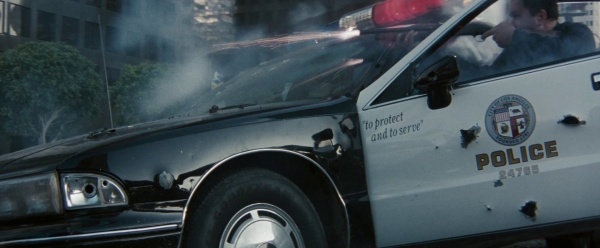
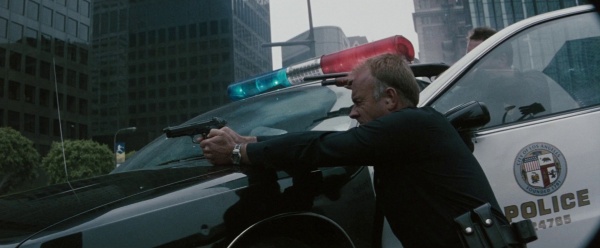
The LAPD patrol officers responding to the bank robbery return fire on Neil McCauley (Robert De Niro) and his crew with their standard issue Beretta 92FSs.
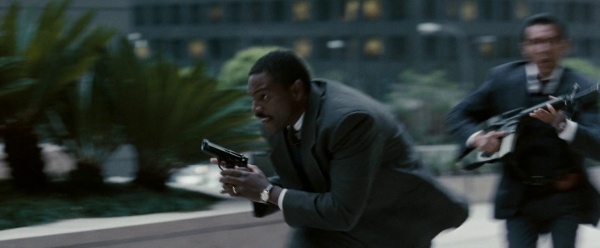
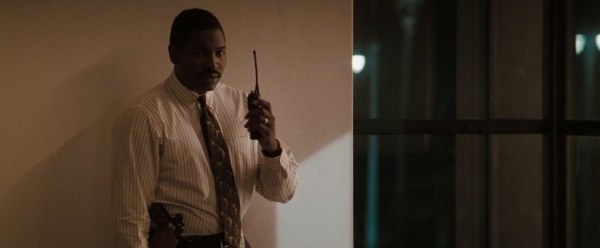
Beretta 92SB-C
Sergeant Drucker (Mykelti Williamson) carries a Beretta 92SB-C as his sidearm, which is only drawn while he is pursuing Cheritto after running out of ammunition for his Mossberg 500 shotgun.
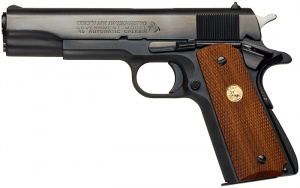
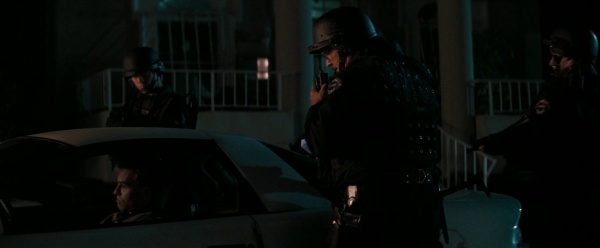
M1911A1
One of the SWAT officers checking Shiherlis' car has an unknown M1911A1 pistol in his holster. Since Kimbers weren't issued yet to LAPD officers, it is doubtful it is a Kimber Custom II, the current sidearm of LAPD special weapons and tactical units.
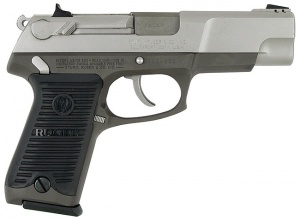
Ruger KP90
Michael Cheritto (Tom Sizemore) has a Ruger KP90 in a crossdraw holster on his tac vest during the armored car robbery. This is NOT the P90, as sometimes claimed, but the stainless KP90.
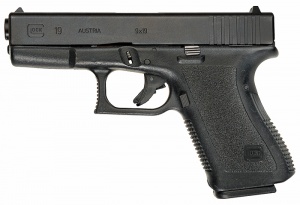
Glock 19
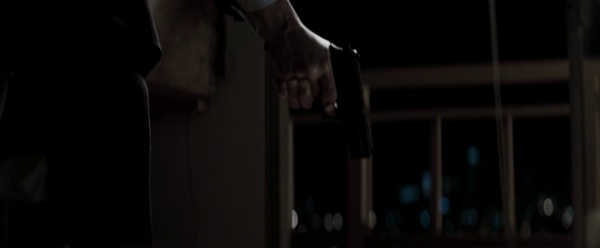
After McCauley executes Waingro, he leaves the room, and a detective working surveillance at the hotel draws a Glock 19 on him.
Taurus PT92AFS
A nickel Taurus PT92AFS can be seen in the holster of the bank guard that McCauley kicks to the floor during the start of the bank robbery. This may also be a PT99, depending on the sights, which are not visible while the weapon is holstered.
Revolvers
Smith & Wesson Model 36
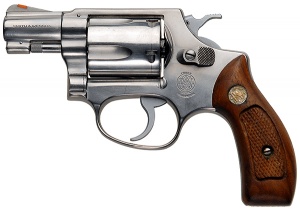
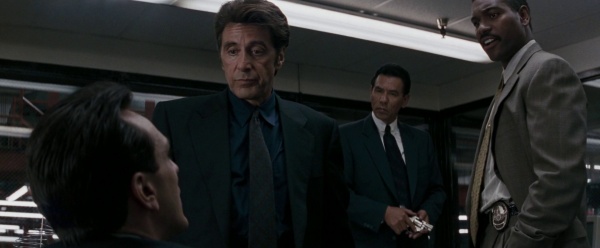
When Hanna and his men visit Alan Marciano (Hank Azaria) in Las Vegas to question him about his relationship with Charlene Shiherlis (Ashley Judd), Det. Casals (Wes Studi) is seen in the background holding a nickel Smith & Wesson Model 36 snub nose revolver.
Smith & Wesson Model 38 "Bodyguard"
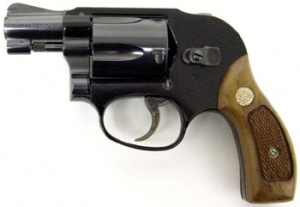
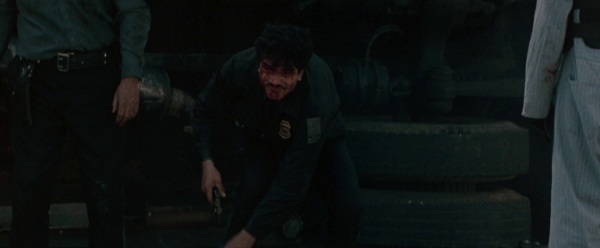
During the armored car robbery, as soon as Waingro uses his Star Megastar to execute the first guard, McCauley guns down the second guard (Thomas Rosales Jr.) as he tries to grab a Smith & Wesson Model 38 "Bodyguard" from his ankle holster.
Submachine Guns & Machine Pistols
Heckler & Koch HK94A3 (mocked-up as MP5A3)
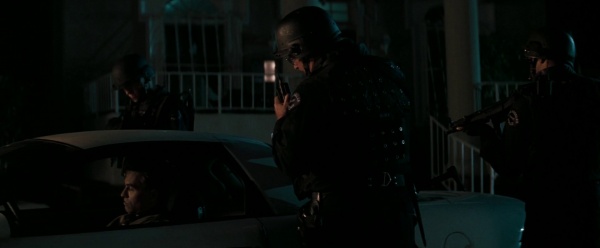
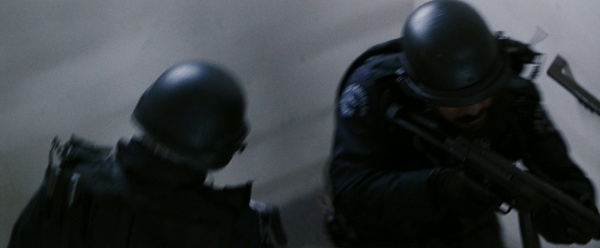
What appear to be Heckler & Koch MP5A3s are used by LAPD SWAT officers throughout the movie; however, close inspection reveals that they are actually the same partially-converted full-auto HK94A3 carbines that have appeared in numerous other motion pictures (including Predator, Lethal Weapon, Die Hard, etc.). One of these weapons is used by an officer in a hiding position during the stakeout scene at the precious metals repository. Another HK94A3 is used by a surveillance team watching for Shiherlis, and more of these weapons are used by the SWAT team that is sent to the hotel in the climax.
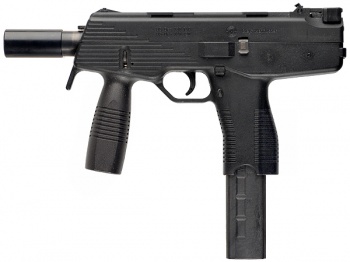
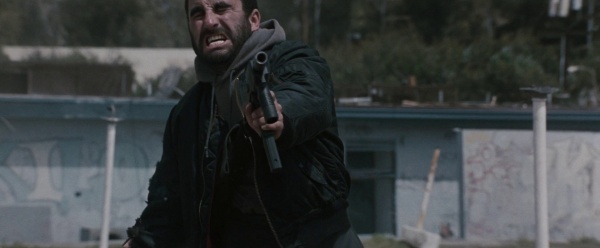
Steyr TMP
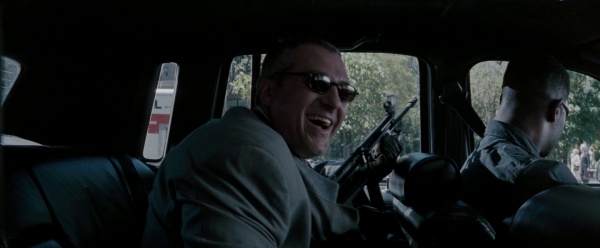
The assassin sent to the drive-in theater (Max Daniels) to kill McCauley brings a Steyr TMP.
Shotguns
Benelli M3 Super 90
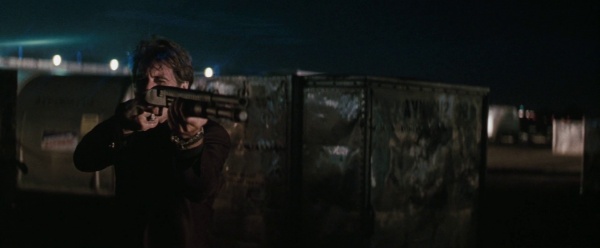
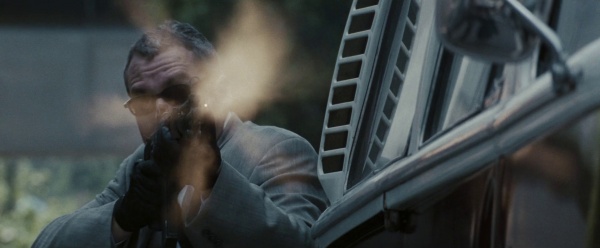
After the assassin is gunned down at the drive-in-theater, the truck driver starts to drive towards the exit, but just as he reaches the gate, Cheritto steps out from behind cover and opens fire with a Benelli M3 Super 90 12 gauge shotgun. The shotgun is a both pump-action and semi-automatic but Cheritto uses pump-action only.
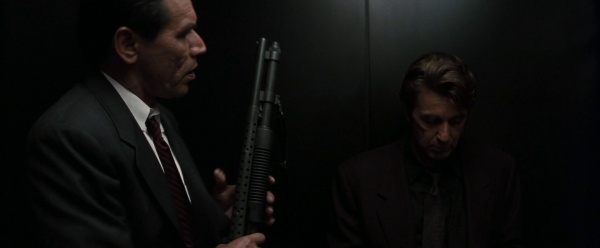
Mossberg 590
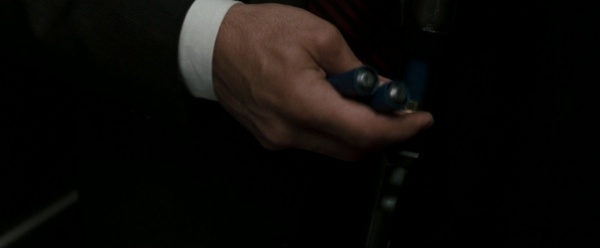
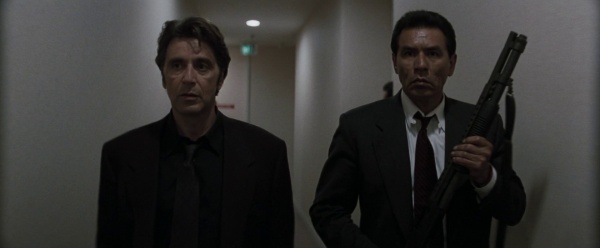
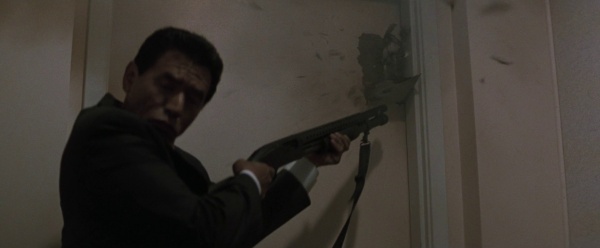
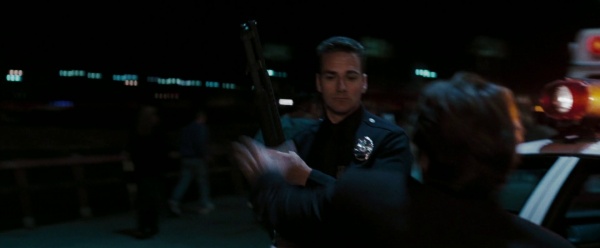
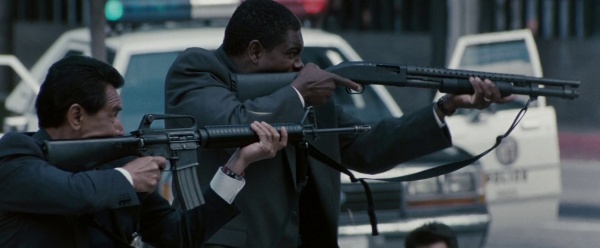
Detective Casals (Wes Studi) brings a Mossberg 590 to breach the door of Hugh Benny's (Henry Rollins) apartment. Sergeant Drucker (Mykelti Williamson) carries the exact same Mossberg 590 during the firefight outside the bank after the heist. Vincent Hanna later takes one from an officer towards the end of the film as he chases down McCauley on the tarmac.
Mossberg 500
Some of the LAPD officers are seen armed with Mossberg 500s during the bank robbery shootout.
Ithaca 37 "Stakeout"
An Ithaca 37 "Stakeout" short-barreled shotgun can be seen resting behind a security desk when McCauley goes to kill Waingro in the hotel.
Remington 870
Some of the LAPD officers are seen armed with Remington 870s during the bank robbery shootout.
Rifles & Carbines
Colt Model 654
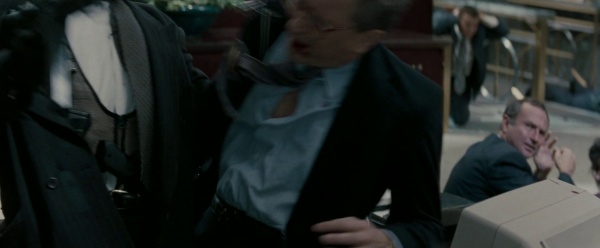
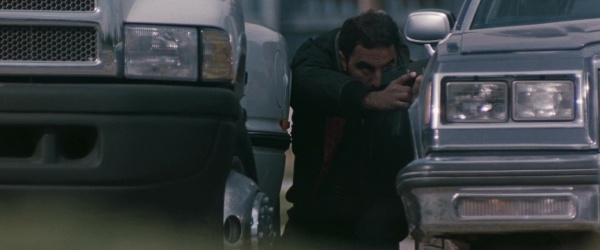
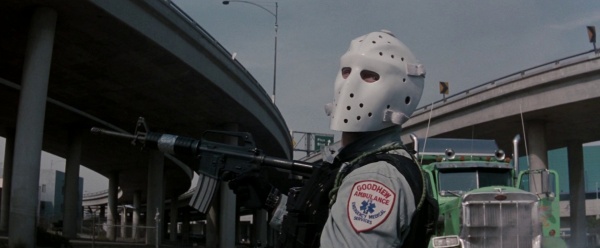
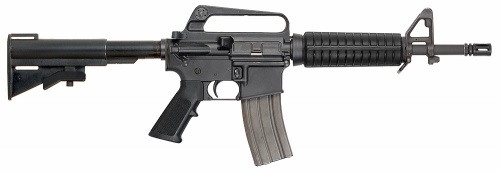
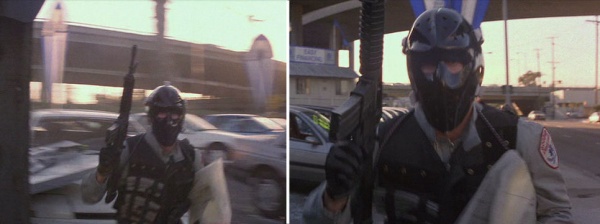
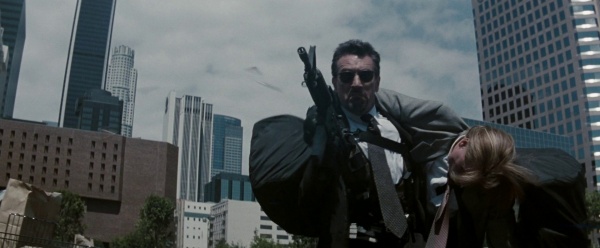
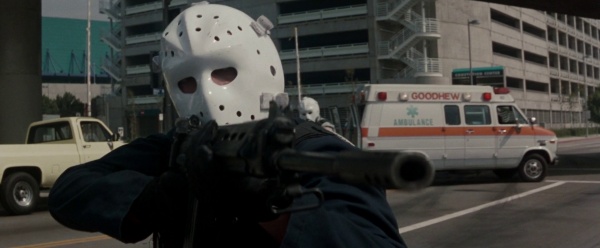
During the armored car robbery, McCauley carries a Colt Model 654 carbine, a 14.5" barreled predecessor to the M4, with M16A1-style lightweight barrel and sights. He uses his to execute the second guard (the one who tries to draw the Smith & Wesson Model 38 Bodyguard in his ankle holster), who gets hit in his right arm, his shoulder and in his chest. Based on configuration, it appears to be a 654 upper on a full-auto converted AR-15 SP1 carbine lower receiver group, with a drop-in autosear to allow it fire fully-automatic (as evidenced by the pivot pin at the front, which is the "screw hole" design).
Colt Model 733
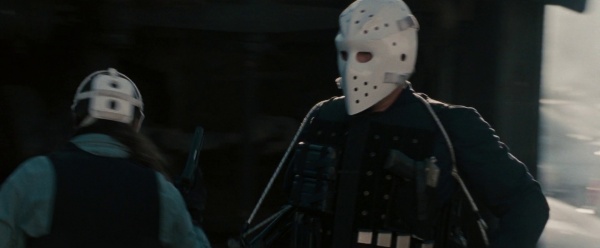
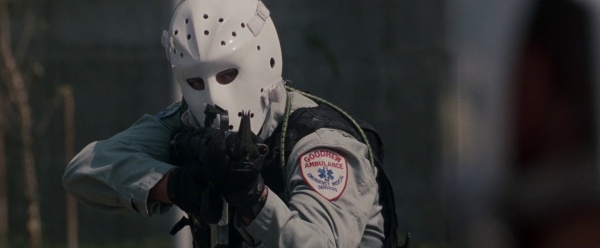
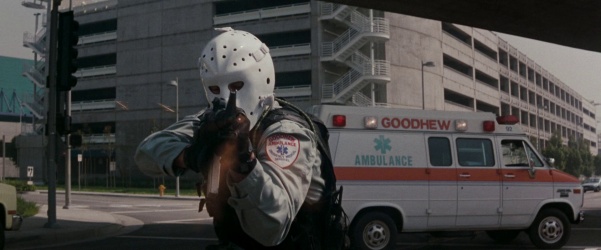
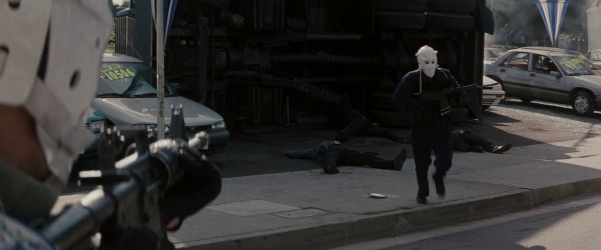
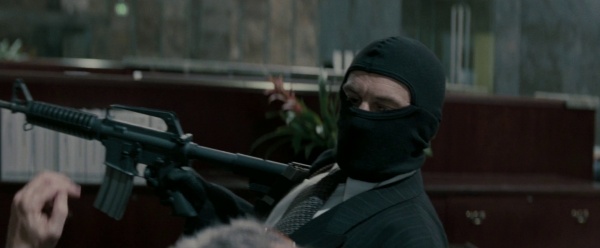
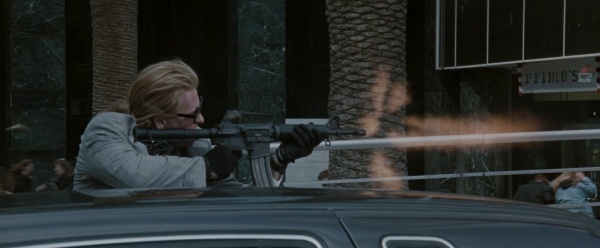
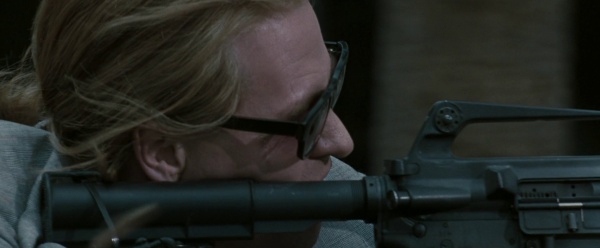
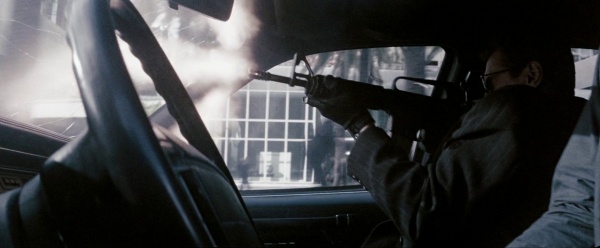
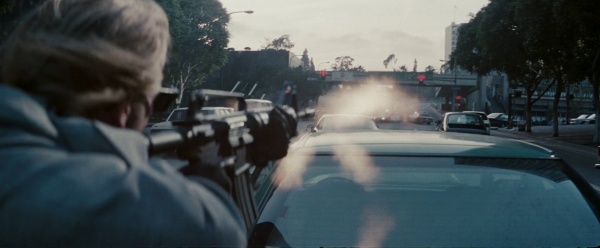
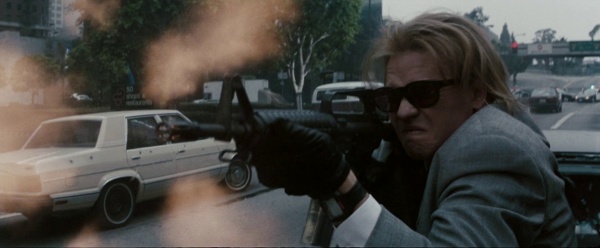
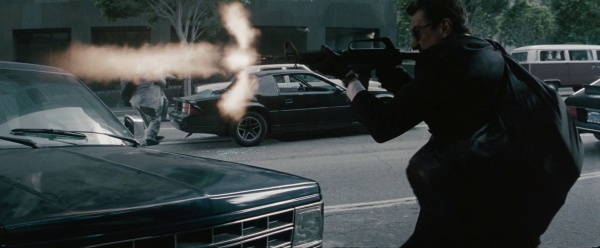
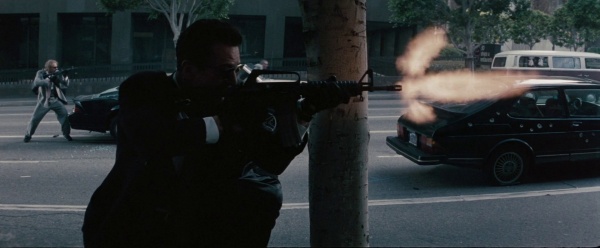
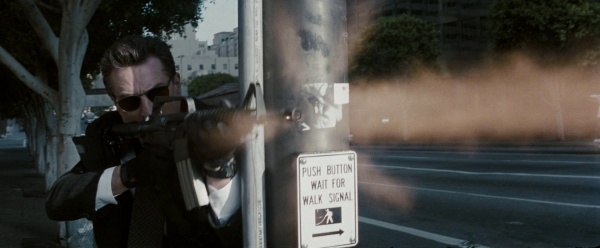
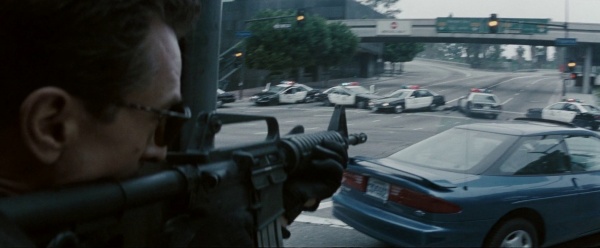
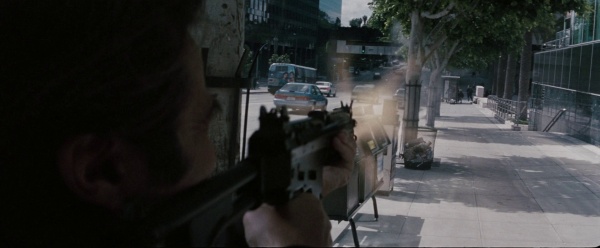
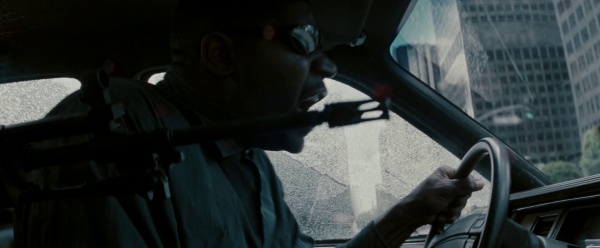
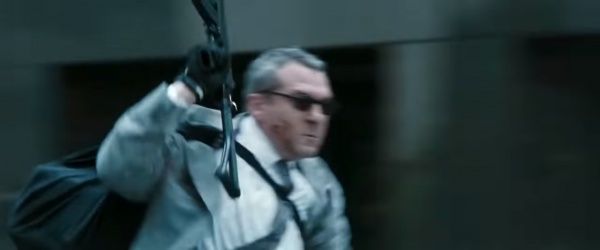
During the armored car robbery, Chris Shiherlis (Val Kilmer) uses a Colt Model 733 short-barreled carbine as his weapon of choice. During the bank robbery, Shiherlis and McCauley both carry the Model 733. These are compact versions of the M16 rifle family with 11.5-inch barrels.
Trivia: Allegedly, footage of Shiherlis expertly reloading his rifle during the bank robbery shootout has been shown to American Special Forces trainees, with the message from their instructor, "This is how I want you to reload."

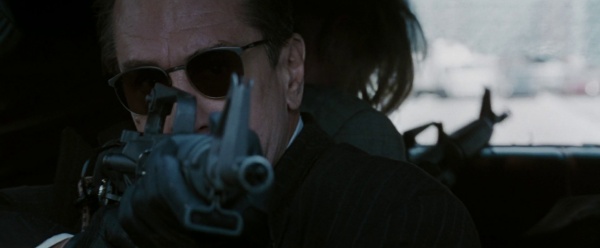
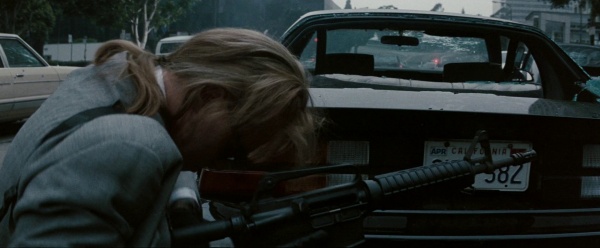
N.B. Val Kilmer's reload was so fast and smooth that this clip was used in U.S. Marine Corps training videos, to show new recruits how it should be done in combat.
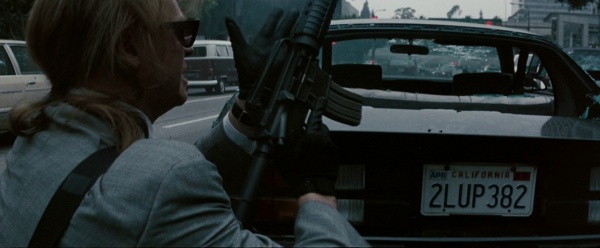
N.B. The car license plate on the right, "2LUP382", is an in-joke: LUP is British Army (ex-SAS commandos were technical advisors for this film) terminology for Lying Up Position. The 2LUP indicates that this is the second location in which Shiherlis has paused to take cover during the shootout.
FN FNC-80
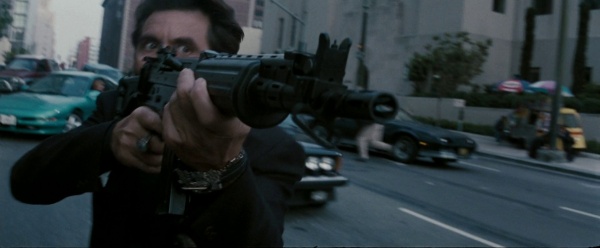
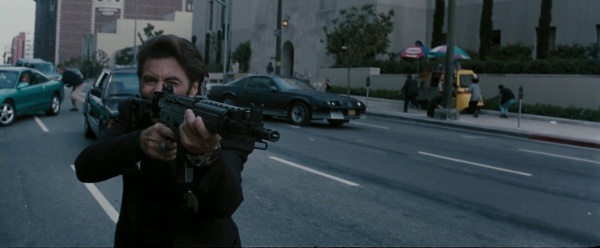
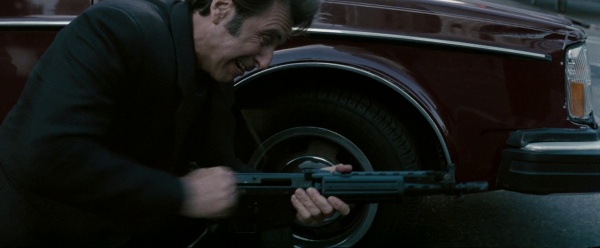
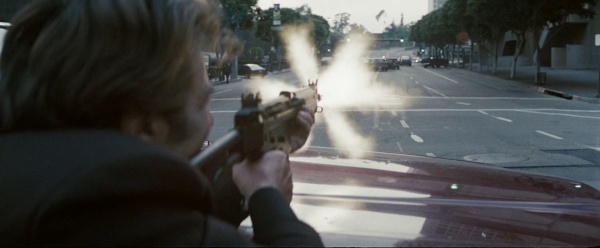
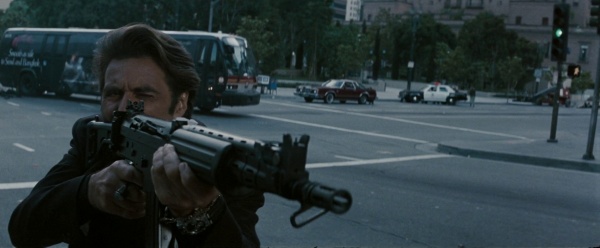
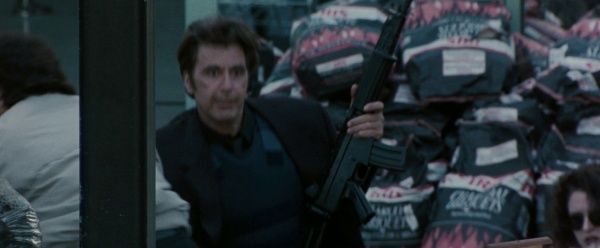
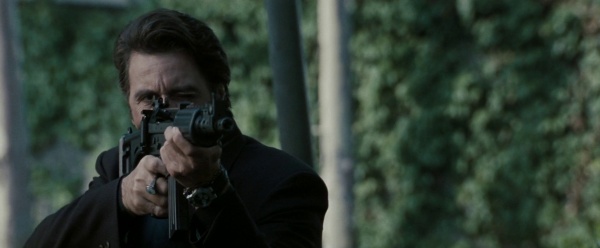
Lt. Vincent Hanna (Al Pacino) pulls out an FN FNC-80 assault rifle during the shootout on Flower Street, and uses it to kill Cheritto when Cheritto - who is firing at Drucker and several other cops - grabs a little girl as a human shield. According to the on-set armorer, Hanna's rifle was a Select Fire FNC-80 assault rifle that was chopped down by the armorer to a Para length barrel, and an M16 style birdcage was attached. The FNC-80 was imported into the U.S. as a full automatic weapon and as a Semiautomatic Sporter rifle named the FNC 223 Sporter. Despite being a full auto weapon, Michael Mann instructed Al Pacino to fire only in semi-automatic mode, because Hanna and all of the other cops who were involved in the shootout would be concerned about the possibility of endangering bystanders.

FN FAL 50.61
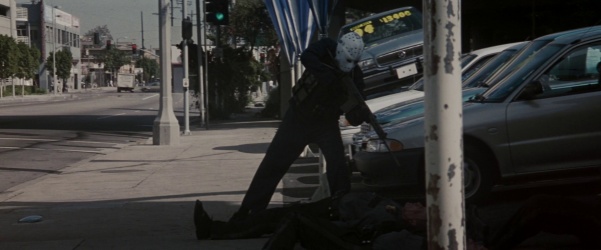
During the armored car robbery, Michael Cheritto (Tom Sizemore) uses a 20" barreled FN FAL 50.61 Paratrooper version with a side-folding stock. He uses his to execute the third guard with a double tap to the sternum and a third shot to the head. This is a military tactic known as a Failure Drill or Mozambique Drill, and is a prominent feature in Michael Mann's movies (it appears twice in Heat - this incident, and then at the end, when McCauley executes Waingro in his hotel room).
Heckler & Koch HK91A2
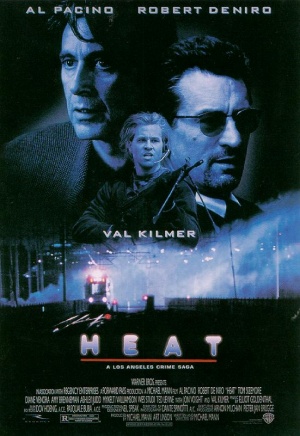
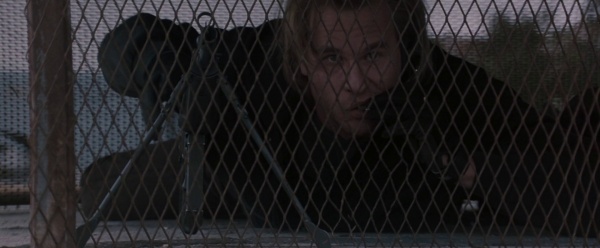
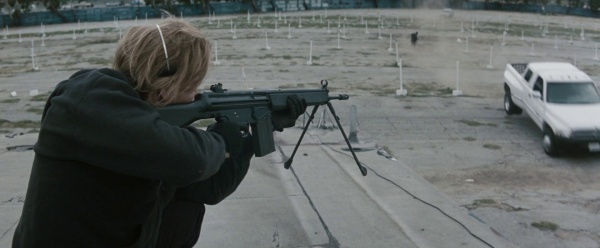
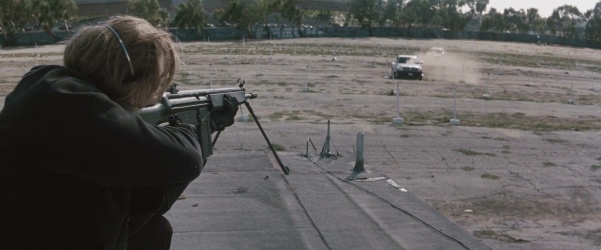
Chris Shiherlis (Val Kilmer) covers McCauley (Robert De Niro) at the drive-in theater with a Heckler & Koch HK91A2 fitted with a bipod, and manages to take out the Steyr TMP-wielding assassin with a shot to the back. Shiherlis can be seen holding the HK91A2 on the film's poster.
IMI Galil ARM
Michael Cheritto (Tom Sizemore) uses an IMI Galil ARM Model 372 with a wooden handguard during the bank robbery and the shootout. While inside the bank, the stock is removed from the mounting bracket. However, it appears when he enters the car, an obvious continuity error. He gets separated from the rest of the crew during the gun battle but managed to wound one of Hanna's men, Detective Schwartz (Jerry Trimble) by shooting him in the shoulder by a transit bus. Oddly enough, Mann refers to the weapon as a 7.62mm in his audio commentary.
M16A1 (with M16A2 handguards)
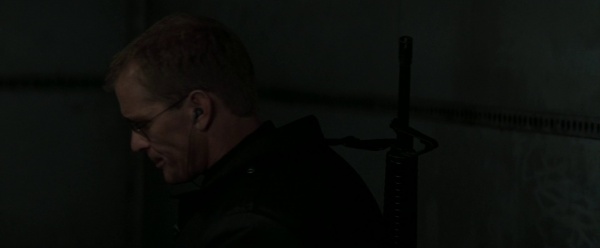
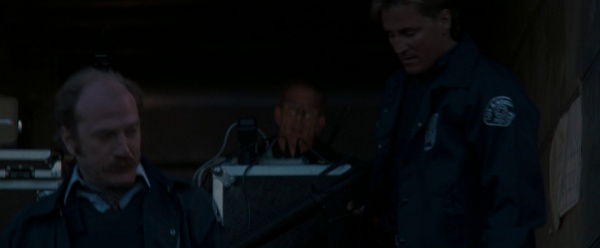
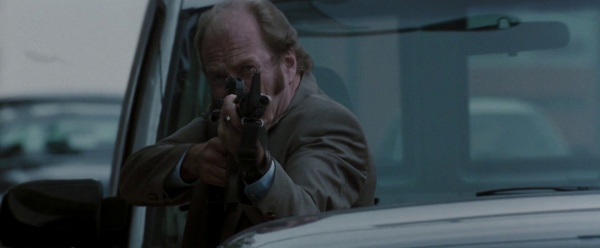
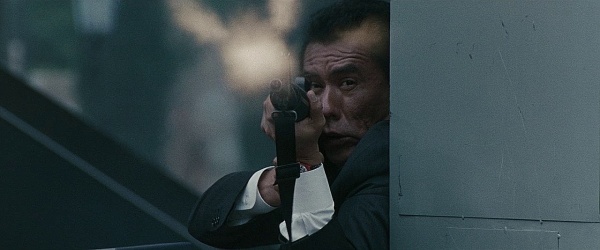
Several M16A1 assault rifles are featured prominently in the film, fitted with M16A2-style handguards and Rapidex type rear sight adjustment knobs. They are wielded by various L.A.P.D. detectives, including Detective Casals (Wes Studi), Detective Mike Bosko (Ted Levine) and Detective Schwartz (Jerry Trimble), and are also used by some of the SWAT officers. Casals uses one to assist in disabling the Lincoln Town Car being used as a getaway vehicle, and also manages to shoot and wound Shiherlis during the shootout. According to the on set armorer, the director wanted the actors to fire in semi-automatic mode only. The reason given was that the police would be less interested in 'suppressing fire' and more interested in controlled shots given the proximity of so many innocent bystanders.

Norinco Type 56-1
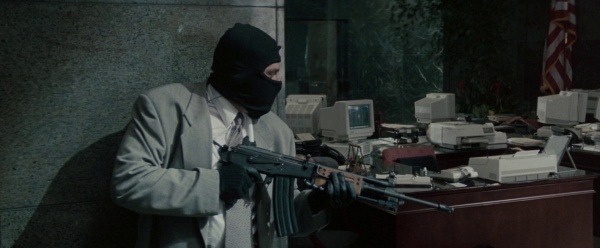
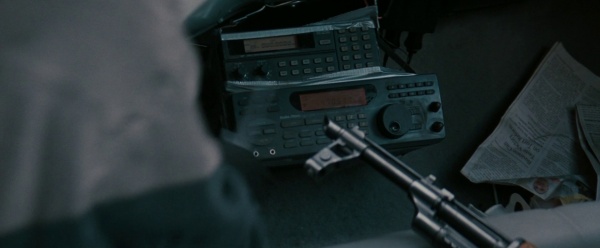
During the armored car robbery, Trejo (Danny Trejo) carries a Chinese Norinco Type 56-1 assault rifle.
Heckler & Koch SR9(T)
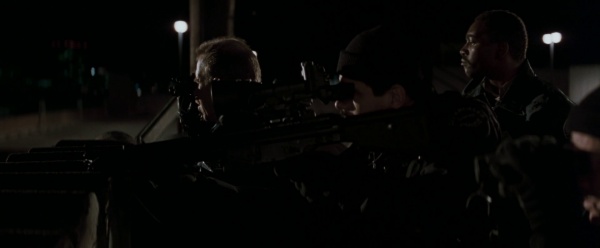
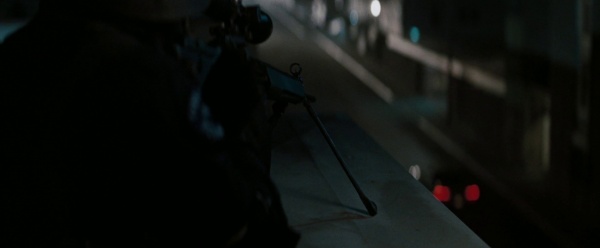
A police sniper of the surveillance team watches over McCauley with a Heckler & Koch SR9(T) sniper rifle. This same sniper is seen during the stakeout for Shiherlis with the rifle.
Trivia
It appears that some of the shots composed for the film were inspired by several paintings.
