| If you have been locked out of your account you can request a password reset here. |
Difference between revisions of "Bravo Two Zero"
Commando552 (talk | contribs) |
|||
| (14 intermediate revisions by 4 users not shown) | |||
| Line 1: | Line 1: | ||
| − | |||
{{Infobox Movie|{{PAGENAME}} | {{Infobox Movie|{{PAGENAME}} | ||
|name = Bravo Two Zero | |name = Bravo Two Zero | ||
| Line 26: | Line 25: | ||
}} | }} | ||
| − | '''Bravo Two Zero''' is a 1999 Gulf War film that originally aired on the BBC. The film chronicles the heroic mission of British SAS troopers dropped behind Iraqi lines during the First Gulf War (Operation Desert Storm 1990-1991). This unit later became the most highly decorated British Military Patrol unit since the last Boer War (1899-1902). [[Sean Bean]] starred in the film as SAS sergeant Andy McNab. | + | '''Bravo Two Zero''' is a 1999 Gulf War film that originally aired on the BBC. The film chronicles the heroic mission of British SAS troopers dropped behind Iraqi lines during the First Gulf War (Operation Desert Storm 1990-1991). This unit later became the most highly decorated British Military Patrol unit since the last Boer War (1899-1902). [[Sean Bean]] starred in the film as SAS sergeant Andy McNab. |
| − | + | This was second dramatization of the Bravo Two Zero mission, following ITV's 1996 adaptation of [[Chris Ryan]]'s account, ''[[One That Got Away, The (1996)|The One That Got Away]]''. | |
| + | |||
| + | {{Film Title}} | ||
__TOC__<br clear="all"> | __TOC__<br clear="all"> | ||
=Assault Rifles= | =Assault Rifles= | ||
| Line 66: | Line 67: | ||
== Vektor R4 (mocked up as an AK-47) == | == Vektor R4 (mocked up as an AK-47) == | ||
The majority of the Iraqi forces in the film carry [[Vektor R4]]s mocked up to resemble [[AK-47]]s, a common practice for films shot in South Africa. They can be distinguished from genuine AK-47s by their straighter 5.56x45mm magazine, the more slanted bottom edge of the milled receiver and the shape of the lightening cut above the magazine well. They are mocked up as both solid, and folding stock variants. | The majority of the Iraqi forces in the film carry [[Vektor R4]]s mocked up to resemble [[AK-47]]s, a common practice for films shot in South Africa. They can be distinguished from genuine AK-47s by their straighter 5.56x45mm magazine, the more slanted bottom edge of the milled receiver and the shape of the lightening cut above the magazine well. They are mocked up as both solid, and folding stock variants. | ||
| − | [[File:VektorR4.jpg|thumb|none| | + | [[File:VektorR4.jpg|thumb|none|400px|Vektor R4, with 50 round magazine - 5.56x45mm]] |
| − | [[ | + | [[File:Bravo Two Zero (3411).jpg|thumb|500px|none|McNab kicks a Vektor away from an Iraqi soldiers body. Note the large magazine release which is found on a Vektor but not on an AK-47.]] |
| + | [[File:Bravo Two Zero (3770).jpg|thumb|500px|none|A pair of Iraqi soldiers are gunned down at a vehicle checkpoint.]] | ||
| + | [[File:Bravo Two Zero (3814).jpg|thumb|500px|none|A soldier patrolling the border with his Vektor slung across his chest.]] | ||
| + | [[File:Bravo Two Zero (3917).jpg|thumb|500px|none|Although most of the dressed up Vektors are fitted with solid stocks, several are fitted with underfolding stocks as seen here on the right.]] | ||
| + | [[File:Bravo Two Zero (3970).jpg|thumb|500px|none|The best view of the AK-47 mock up in the film, showing the angled bottom of the receiver and lightening cut which are indicative of a Vektor.]] | ||
| + | [[File:Bravo Two Zero (3984).jpg|thumb|500px|none|After capturing McNab, Iraqi soldier fire their Vektors into the air in celebration.]] | ||
| + | [[File:Bravo Two Zero (4112).jpg|thumb|500px|none|A close up view of the side of one of the rifles showing the Vektor magazine.]] | ||
==Unidentified AK-47 Variant== | ==Unidentified AK-47 Variant== | ||
| Line 76: | Line 83: | ||
=Machine Guns= | =Machine Guns= | ||
== FN Minimi (Prototype)== | == FN Minimi (Prototype)== | ||
| − | Dinger ([[Steve Nicolson]]) carries the prototype version of the [[FN Minimi]]. It can be identified as such by the skeleton stock, the unhooded front sight, the more rounded and tapered handguard, and the [[FN FAL]] type carry handle. | + | Dinger ([[Steve Nicolson]]) carries the prototype version of the [[FN Minimi]]. It can be identified as such by the downward sloping skeleton stock, the unhooded front sight, the more rounded and tapered handguard, and the [[FN FAL]] type carry handle. |
[[File:FN Minimi prototype.jpg|thumb|401px|none|FN Minimi Prototype - 5.56x45mm]] | [[File:FN Minimi prototype.jpg|thumb|401px|none|FN Minimi Prototype - 5.56x45mm]] | ||
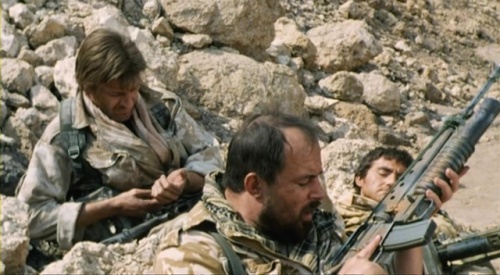
| − | [[Image:B2Z Minimi2.jpg|thumb|none|500px| | + | [[File:Bravo Two Zero (2494).jpg|thumb|500px|none|Dinger in the OP with his Minimi.]] |
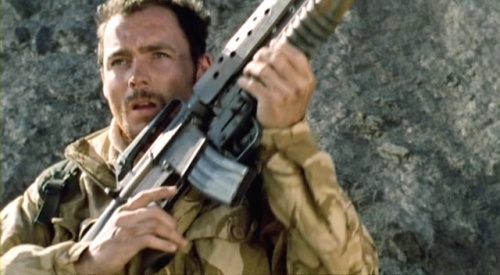
| + | [[Image:B2Z Minimi2.jpg|thumb|none|500px| A closeup of the Minimi prototype as Dinger takes aim when the patrol is compromised.]] | ||
| + | [[File:Bravo Two Zero (2975).jpg|thumb|500px|none|The Minimi prototype is at the bottom of this frame as the patrol take up position to ambush pursuing Iraqi armor. It can be recognized by its distinctive sloping skeleton stock.]] | ||
| + | [[File:Bravo Two Zero (3048).jpg|thumb|none|500px|Dinger laying ready with his Minimi]] | ||
| + | [[File:Bravo Two Zero (3240).jpg|thumb|none|500px|Tony ([[Rick Warden]]) can briefly be seen with the Minimi prototype during the first skirmish in the desert. Although his face is not visible in this shot, he can be identified by the two respirator pouches on his beltkit.]] | ||
| + | [[File:Bravo Two Zero (3582).jpg|thumb|500px|none|Dinger firing his Minimi during the running firefight across the desert.]] | ||
| + | [[File:Bravo Two Zero (3859).jpg|thumb|500px|none|Dinger running for cover after he and Baz are tagged by a spotlight at the border.]] | ||
== FN Minimi (Unidentified Variants) == | == FN Minimi (Unidentified Variants) == | ||
| − | Two different variants of the [[FN Minimi]] light machine gun are used by members of the patrol. Tony ([[Rick Warden]]) carries what appears to be a standard early model Minimi fitted with a Canadian [[FN Minimi#FN C9 Light Machine Gun|C9]] type front sight. The Minimis carried by Mark ([[Richard Graham]]) and Stan ([[Robert Hobbs]]) have the same [[FN Minimi#FN C9 Light Machine Gun|C9]] type front sight, but have the grooved [[M249]] type handguard (although the top heat-shield is not present) and | + | Two different variants of the [[FN Minimi]] light machine gun are used by members of the patrol. Tony ([[Rick Warden]]) carries what appears to be a standard early model Minimi fitted with a Canadian [[FN Minimi#FN C9 Light Machine Gun|C9]] type front sight. The Minimis carried by Mark ([[Richard Graham]]) and Stan ([[Robert Hobbs]]) have the same [[FN Minimi#FN C9 Light Machine Gun|C9]] type front sight, but have the grooved [[M249]] type handguard (although the top heat-shield is not present) and the same rear sight as found on the Minimi prototype shown above. |
[[Image:M249Minimi1stPattern.jpg|thumb|none|400px|FN Minimi 5.56x45mm with 200-round ammo drum]] | [[Image:M249Minimi1stPattern.jpg|thumb|none|400px|FN Minimi 5.56x45mm with 200-round ammo drum]] | ||
| − | [[File: | + | [[Image:B2Z Minimi.jpg|thumb|none|500px|Mark test firing his Minimi at the range.]] |
| − | [[ | + | [[File:Bravo Two Zero (2266).jpg|thumb|none|500px|Stan test firing his Minimi at the range.]] |
| − | [[File:Bravo20 01.jpg|thumb|none|500px|Tony | + | [[File:Bravo Two Zero (2290).jpg|thumb|500px|none|A view of the 3 Minimis at the range, the front and back weapons have M249 handguards with prototype rear sights whilst the middle weapon has standard FN Minimi furniture and rear sights.]] |
| + | [[File:Bravo Two Zero (2612).jpg|thumb|500px|none|Tony sleeping in the OP with his Minimi.]] | ||
| + | [[File:Bravo Two Zero (2671).jpg|thumb|500px|none|Mark aiming his Minimi after the patrol's position is compromised.]] | ||
| + | [[File:Bravo Two Zero (2690).jpg|thumb|500px|none|Tony scanning a ridge-line with his Minimi at the ready.]] | ||
| + | [[File:Bravo Two Zero (3026).jpg|thumb|500px|none|Stan laying prone with his Minimi as the patrol wait for the approaching armor.]] | ||
| + | [[File:Bravo20 01.jpg|thumb|none|500px|Tony opens fire with the Minimi.]] | ||
| + | [[File:Bravo Two Zero (3380).jpg|thumb|500px|none|Stan fires on the Iraqi vehicles from a berm, whilst Ray pulls extra linked ammunition from a respirator pouch on his belt kit. Even though Ray carries a magazine fed M16A1, all members of the patrol carry linked ammunition for the Minimis.]] | ||
==Browning M2HB== | ==Browning M2HB== | ||
| − | A [[Browning M2HB]] is seen mounted on an Iraqi APC. | + | A [[Browning M2HB]] is prominently seen mounted on the roof of an Iraqi BTR-60 APC (in place of the [[KPVT heavy machine gun|KPVT]]-equipped turret). One can also briefly be seen mounted on the roof of an SAS LSV at the Allied base on Saudi Arabia. |
[[File:BrowningM2.jpg|thumb|none|400px|Browning M2HB - .50 BMG]] | [[File:BrowningM2.jpg|thumb|none|400px|Browning M2HB - .50 BMG]] | ||
| − | [[File:Bravo20 02.jpg|thumb|none|500px| | + | [[File:Bravo Two Zero (2170).jpg|thumb|500px|none| The LSV (possibly a Longline) at the door has an M2HB mounted on the roll-cage.]] |
| + | [[File:Bravo Two Zero (3043).jpg|thumb|none|500px|An Iraqi BTR-60 driving into position.]] | ||
| + | [[File:Bravo20 02.jpg|thumb|none|500px|An Iraqi soldier firing the roof mounted M2HB.]] | ||
==RPD== | ==RPD== | ||
An [[RPD light machine gun]] can be seen mounted in the front firing port of an Iraqi APC. | An [[RPD light machine gun]] can be seen mounted in the front firing port of an Iraqi APC. | ||
[[File:RPD-Light-Machine-Gun.jpg|thumb|400px|none|RPD Light Machine Gun - 7.62x39mm]] | [[File:RPD-Light-Machine-Gun.jpg|thumb|400px|none|RPD Light Machine Gun - 7.62x39mm]] | ||
| + | [[File:Bravo Two Zero (3119).jpg|thumb|500px|none|Although only the front portion of the weapon is seen and the bipod is missing, the weapon can be identified as an RPD by its gas block, front sight and the handguard.]] | ||
==Besa Tank Machine Gun== | ==Besa Tank Machine Gun== | ||
| Line 105: | Line 127: | ||
=Pistols= | =Pistols= | ||
==Tokarev TT-33== | ==Tokarev TT-33== | ||
| − | A [[Tokarev TT-33]] is used by one of the Iraqi interrogators to threaten | + | A [[Tokarev TT-33]] is used by one of the Iraqi interrogators to threaten McNab. |
[[File:TT-33.jpg|thumb|300px|none|Tokarev TT-33 - 7.62x25mm Tokarev]] | [[File:TT-33.jpg|thumb|300px|none|Tokarev TT-33 - 7.62x25mm Tokarev]] | ||
| + | [[File:Bravo Two Zero (3985).jpg|thumb|500px|none|The interrogator draws his Tokarev.]] | ||
| + | [[File:Bravo Two Zero (3995).jpg|thumb|500px|none|The interrogator turning to threaten McNab with the pistol.]] | ||
==Webley .38 Mk IV== | ==Webley .38 Mk IV== | ||
An Iraqi civilian can be seen with a [[Webley .38 Mk IV]]. The revolver is never clearly seen, but it appears to be a shorter barrelled "duty" or "pocket" model. | An Iraqi civilian can be seen with a [[Webley .38 Mk IV]]. The revolver is never clearly seen, but it appears to be a shorter barrelled "duty" or "pocket" model. | ||
[[File:ShortWebley MkIV.jpg|thumb|300px|none|Webley Mk IV, 4" barrelled "Duty" model - .38 S&W]] | [[File:ShortWebley MkIV.jpg|thumb|300px|none|Webley Mk IV, 4" barrelled "Duty" model - .38 S&W]] | ||
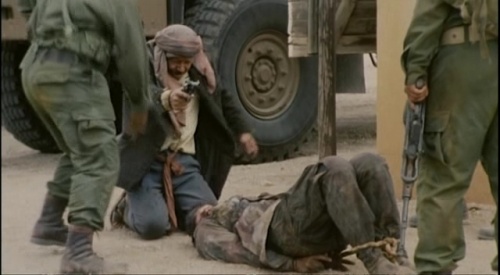
| + | [[File:Bravo Two Zero (4029).jpg|thumb|500px|none|The grieving civilian draws his Webley.]] | ||
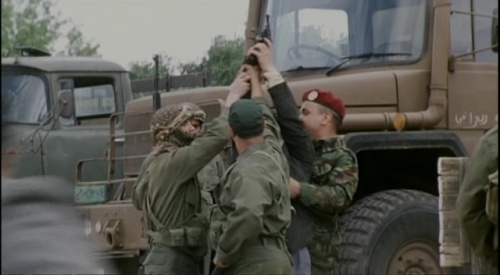
| + | [[File:Bravo Two Zero (4049).jpg|thumb|500px|none|Iraqi soldiers step in to stop the man from executing Dinger.]] | ||
=Launchers= | =Launchers= | ||
| Line 122: | Line 148: | ||
[[M203 grenade launcher]]s are seen mounted under the [[M16A2]]s carried by Andy McNab ([[Sean Bean]]) and Chris Ryan ([[Kevin Collins]]). | [[M203 grenade launcher]]s are seen mounted under the [[M16A2]]s carried by Andy McNab ([[Sean Bean]]) and Chris Ryan ([[Kevin Collins]]). | ||
[[File:M203.jpg|thumb|400px|none|M203 grenade launcher - 40x46mm]] | [[File:M203.jpg|thumb|400px|none|M203 grenade launcher - 40x46mm]] | ||
| + | [[File:Bravo Two Zero (2270).jpg|thumb|none|500px|Chris Ryan ([[Kevin Collins]]) firing his M203 at the target range.]] | ||
| + | [[File:Bravo Two Zero (2860).jpg|thumb|none|500px|Andy McNab ([[Sean Bean]]) check a bearing on his compass showing the receiver of his grenade launcher confirming that it is a genuine M203 rather that a [[Cobray CM203]]. Also note that the trigger guard has been removed, and the weapon correctly has the safety on.]] | ||
| + | [[File:Bravo Two Zero (3339).jpg|thumb|none|500px|McNab aiming his M203 with the leaf sights.]] | ||
==M72 LAW== | ==M72 LAW== | ||
| Line 140: | Line 169: | ||
[[File:2A28 Grom BMP1.jpg|thumb|400px|none|2A28 Grom - 73mm]] | [[File:2A28 Grom BMP1.jpg|thumb|400px|none|2A28 Grom - 73mm]] | ||
[[File:Bravo Two Zero (3072).jpg|thumb|500px|none|A BMP-1 takes up a firing position to bombard the SAS patrol.]] | [[File:Bravo Two Zero (3072).jpg|thumb|500px|none|A BMP-1 takes up a firing position to bombard the SAS patrol.]] | ||
| − | [[File:Bravo Two Zero (3370).jpg|thumb|500px|none|The BMP-1 fires its 2A28 Grom cannon.]] | + | [[File:Bravo Two Zero (3370).jpg|thumb|500px|none|The BMP-1 fires its 2A28 Grom cannon. Also note that the launch rail for the BMP-1's [[AT-3 Sagger]] missile is visible atop the base of the gun, but the missile itself is absent]] |
==AZP S-60== | ==AZP S-60== | ||
A number of S-60 57mm anti-aircraft cannons are used by the Iraqi forces to bombard the SAS patrol. | A number of S-60 57mm anti-aircraft cannons are used by the Iraqi forces to bombard the SAS patrol. | ||
| − | [[File:S-60 57mm.jpg|thumb|400px|none| | + | [[File:S-60 57mm.jpg|thumb|400px|none|AZP S-60 - 57×348 mm. SR]] |
[[File:Bravo Two Zero (2610).jpg|thumb|500px|none|The two near weapons are S-60s.]] | [[File:Bravo Two Zero (2610).jpg|thumb|500px|none|The two near weapons are S-60s.]] | ||
[[File:Bravo Two Zero (3540).jpg|thumb|500px|none|A close-up shot of the muzzles of the S-60s as they open fire on the patrol.]] | [[File:Bravo Two Zero (3540).jpg|thumb|500px|none|A close-up shot of the muzzles of the S-60s as they open fire on the patrol.]] | ||
| Line 155: | Line 184: | ||
[[Category:Movie]] | [[Category:Movie]] | ||
[[Category:War]] | [[Category:War]] | ||
| + | [[Category:Biographical Movie]] | ||
[[Category:British Produced/Filmed]] | [[Category:British Produced/Filmed]] | ||
[[Category:South African Produced/Filmed]] | [[Category:South African Produced/Filmed]] | ||
| + | |||
| + | ==See Also== | ||
| + | *''[[The One That Got Away (1996)|The One That Got Away]]'', ITV's 1996 version of the events of this mission from the perspective of [[Chris Ryan]]. | ||
Revision as of 18:22, 26 September 2014
| ||||||||||||||||||||||||||||||||
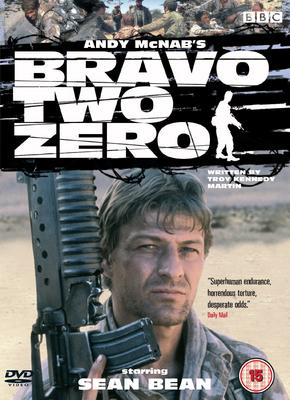
Bravo Two Zero is a 1999 Gulf War film that originally aired on the BBC. The film chronicles the heroic mission of British SAS troopers dropped behind Iraqi lines during the First Gulf War (Operation Desert Storm 1990-1991). This unit later became the most highly decorated British Military Patrol unit since the last Boer War (1899-1902). Sean Bean starred in the film as SAS sergeant Andy McNab.
This was second dramatization of the Bravo Two Zero mission, following ITV's 1996 adaptation of Chris Ryan's account, The One That Got Away.
The following weapons were used in the film Bravo Two Zero:
Assault Rifles
Colt AR-15 Sporter-1
Baz (Ian Curtis) carries a Colt AR-15 Sporter-1 fitted with a Cobray CM203 flare launcher. At various points in the film the rifle has the standard M16 front sight, no sight, or an AKM type front sight mounted to the gas block. It is possible that the rifle was damaged during production, and an AKM front sight was added from one of the many Vektor R4s mocked up as AK-47 type rifles.
Colt M16A1
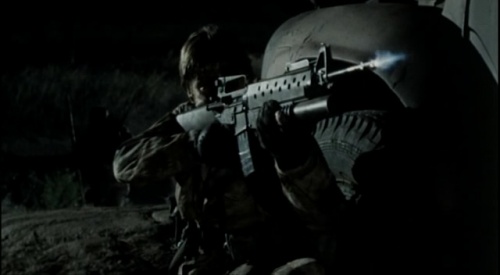
Ray (Jamie Bartlett) carries a Colt fitted with a Cobray CM203 flare launcher.
Colt M16A2
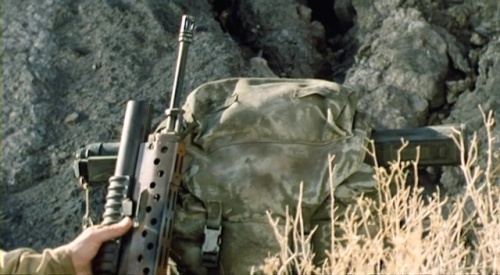
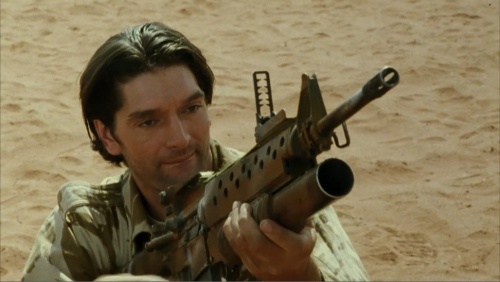
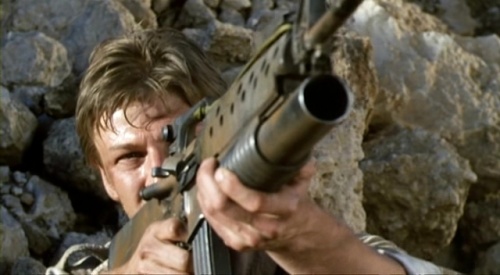
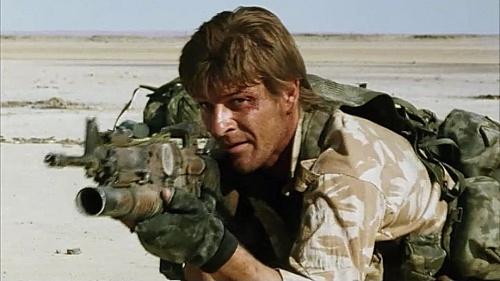
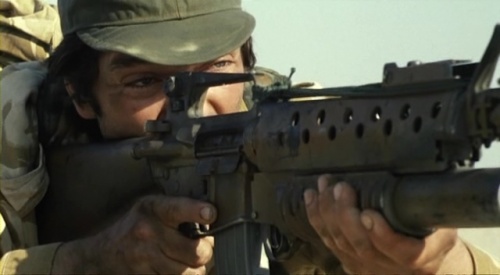
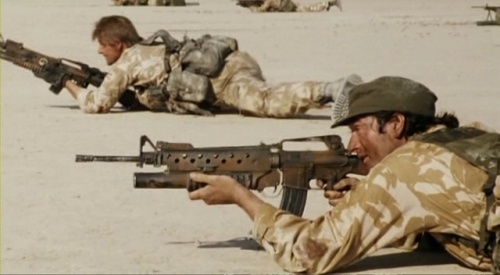
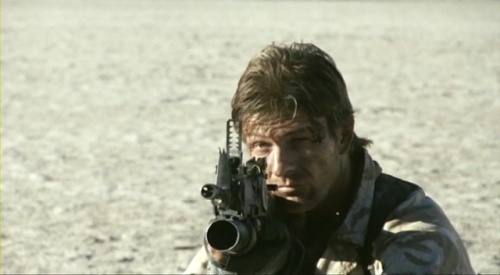
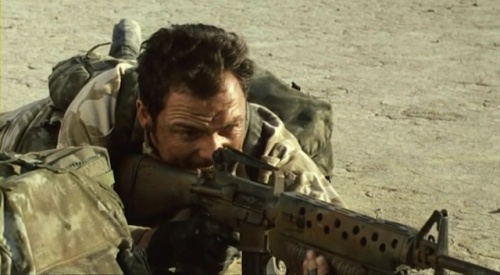
Andy McNab (Sean Bean) and Chris Ryan (Kevin Collins) both carry Colt M16A2 rifles fitted with under-slung M203 grenade launchers. The rifles feature a camouflage paint scheme, and McNab has a compass attached to the side of his weapon.
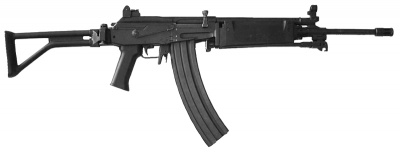
Heckler & Koch G3A4
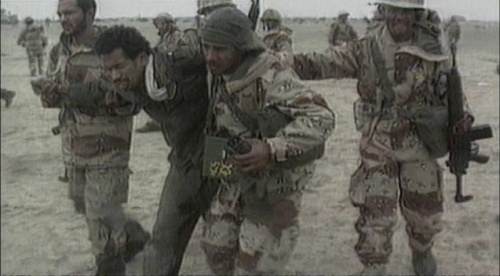
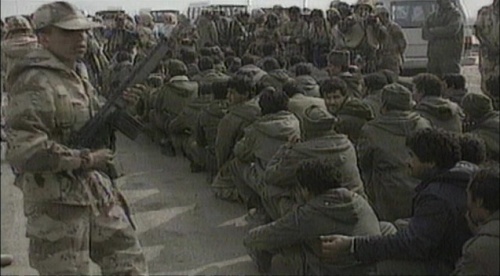
Heckler & Koch G3A4 rifles can be seen being carried by Saudi Arabian soldiers during a piece of stock footage at the end of the film, showing the Iraqi surrender.
Vektor R4 (mocked up as an AK-47)
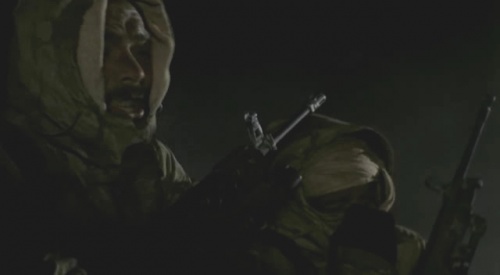
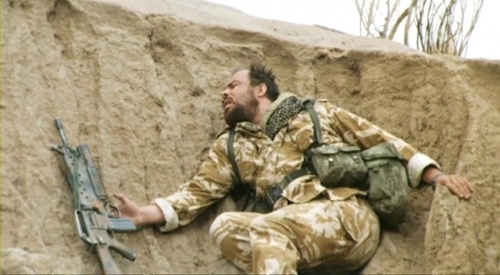
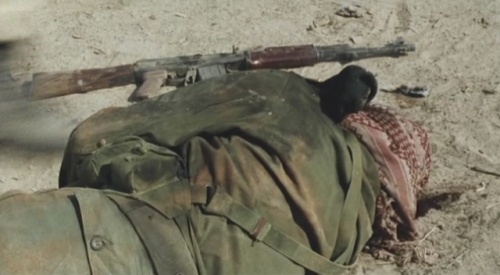
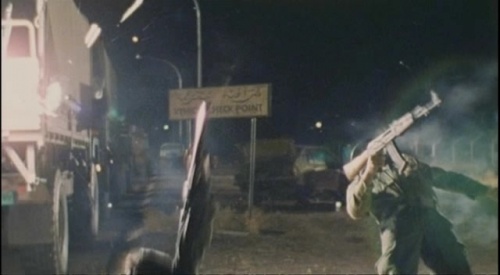
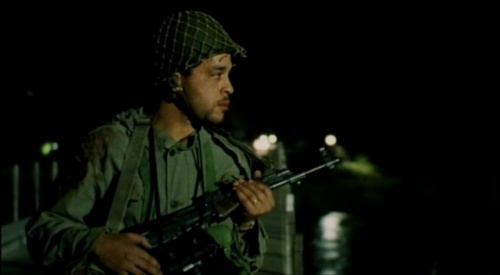
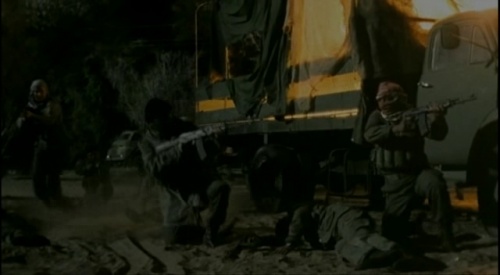
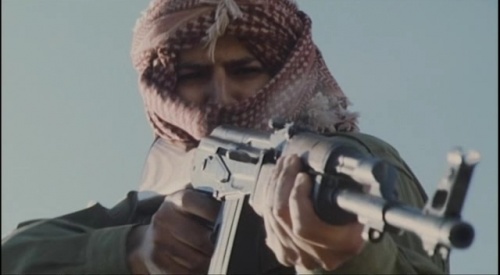
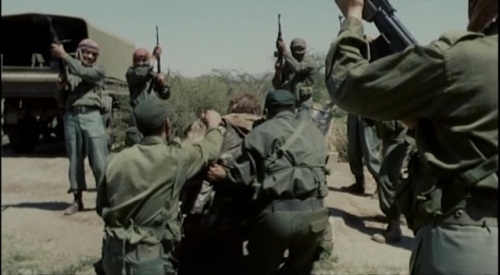
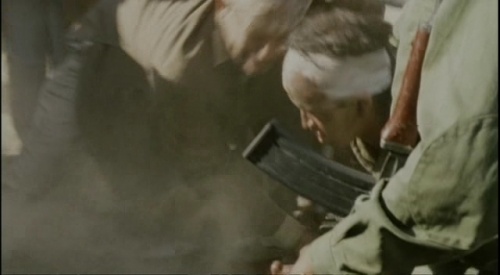
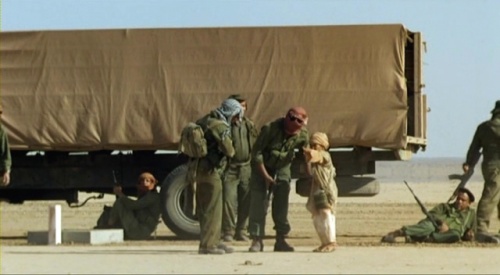
The majority of the Iraqi forces in the film carry Vektor R4s mocked up to resemble AK-47s, a common practice for films shot in South Africa. They can be distinguished from genuine AK-47s by their straighter 5.56x45mm magazine, the more slanted bottom edge of the milled receiver and the shape of the lightening cut above the magazine well. They are mocked up as both solid, and folding stock variants.
Unidentified AK-47 Variant
An unidentified AK-47 variant (possibly a replica) is seen in the background in some shots. It can be differentiated from the blank firing Vektor R4s used during the majority of the film by the curvature of its 7.62x39mm magazine.
Machine Guns
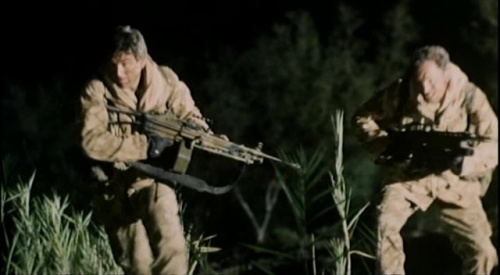
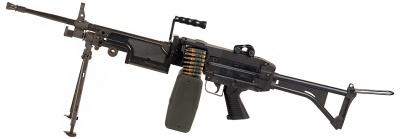
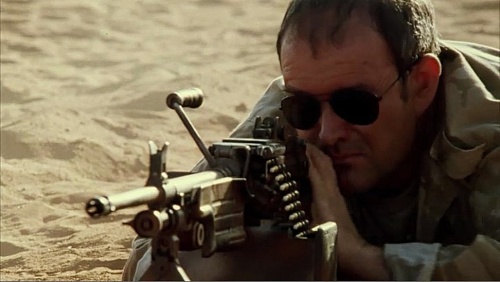
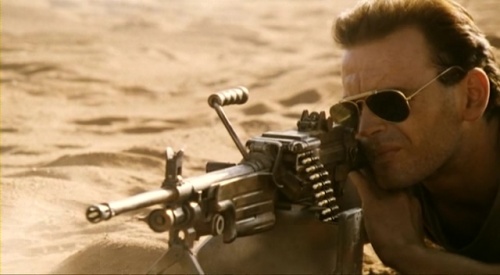
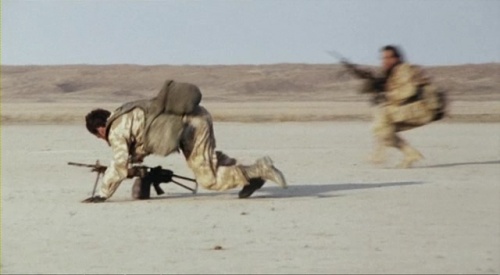
FN Minimi (Prototype)
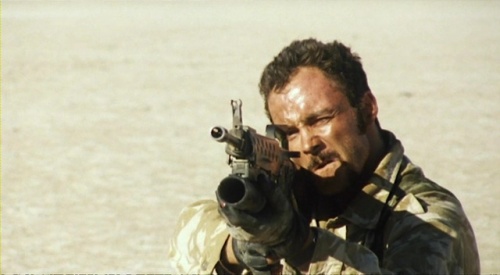
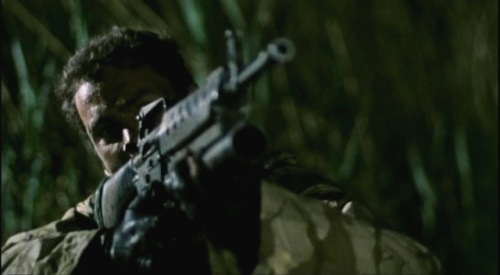
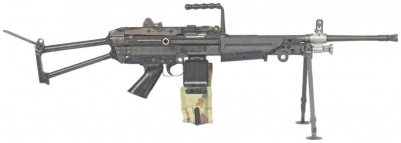
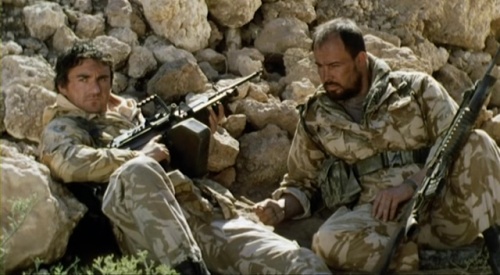
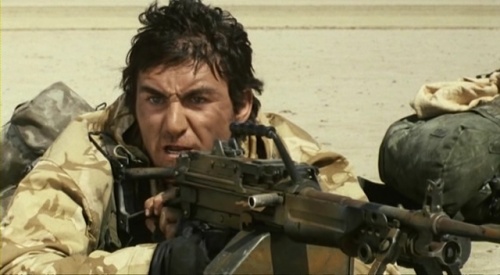
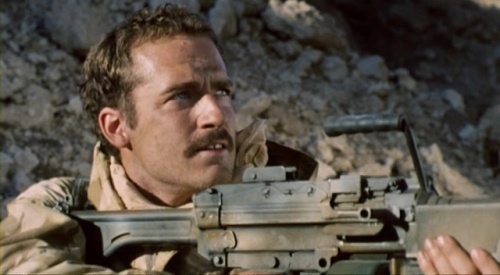
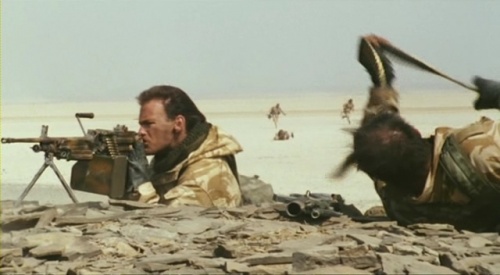
Dinger (Steve Nicolson) carries the prototype version of the FN Minimi. It can be identified as such by the downward sloping skeleton stock, the unhooded front sight, the more rounded and tapered handguard, and the FN FAL type carry handle.
FN Minimi (Unidentified Variants)
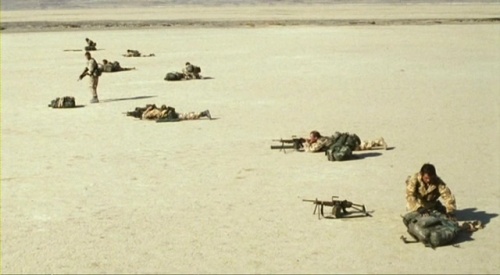
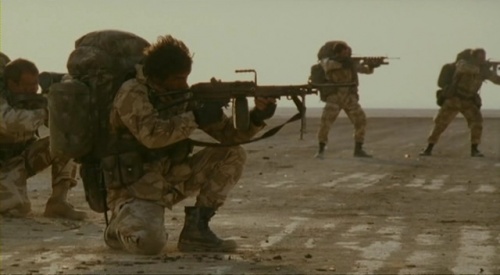
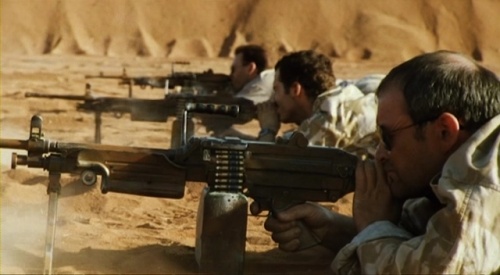
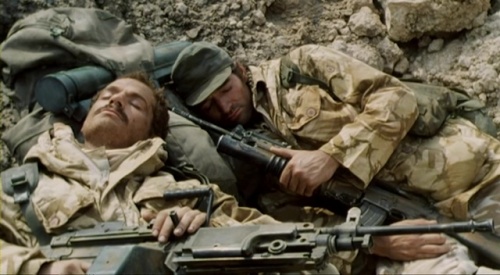
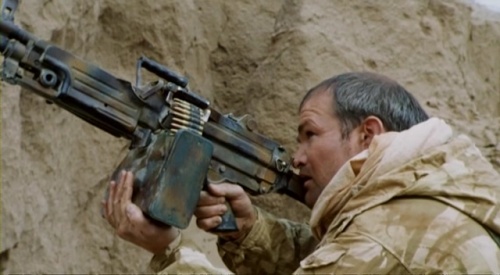
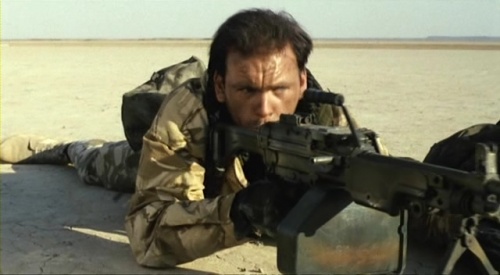
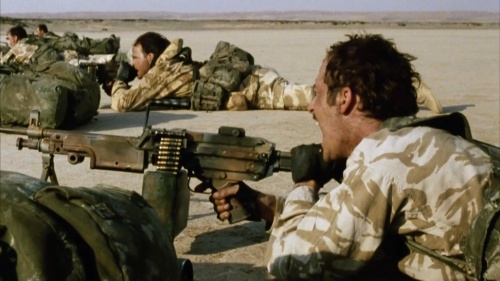
Two different variants of the FN Minimi light machine gun are used by members of the patrol. Tony (Rick Warden) carries what appears to be a standard early model Minimi fitted with a Canadian C9 type front sight. The Minimis carried by Mark (Richard Graham) and Stan (Robert Hobbs) have the same C9 type front sight, but have the grooved M249 type handguard (although the top heat-shield is not present) and the same rear sight as found on the Minimi prototype shown above.
Browning M2HB
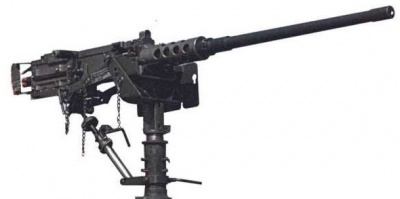
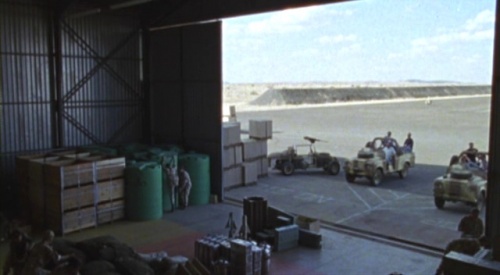
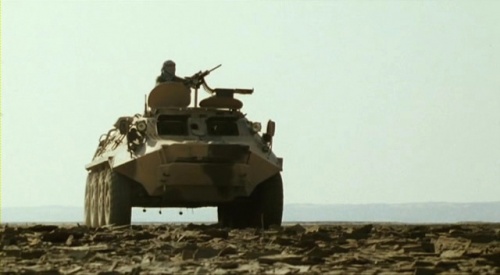
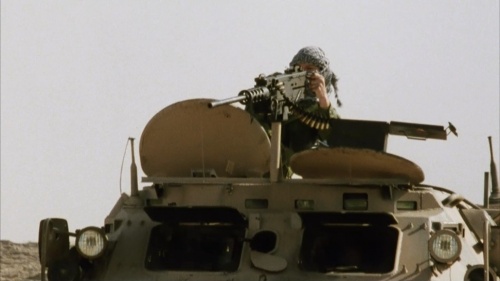
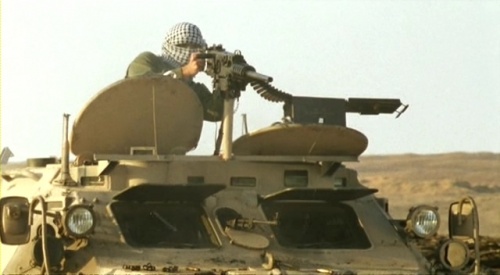
A Browning M2HB is prominently seen mounted on the roof of an Iraqi BTR-60 APC (in place of the KPVT-equipped turret). One can also briefly be seen mounted on the roof of an SAS LSV at the Allied base on Saudi Arabia.
RPD
An RPD light machine gun can be seen mounted in the front firing port of an Iraqi APC.
Besa Tank Machine Gun
A Besa tank machine gun can be seen being used by Iraqi soldiers as the SAS patrol attempts to cross the border.
Pistols
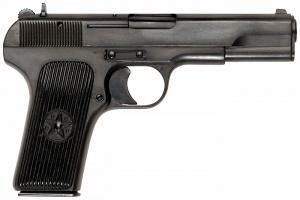
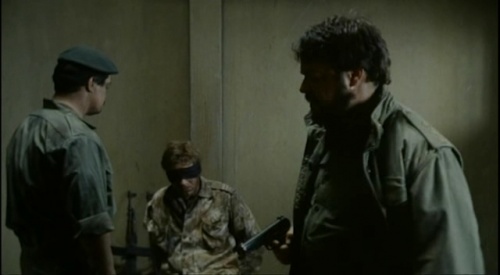
Tokarev TT-33
A Tokarev TT-33 is used by one of the Iraqi interrogators to threaten McNab.
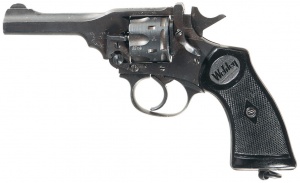
Webley .38 Mk IV
An Iraqi civilian can be seen with a Webley .38 Mk IV. The revolver is never clearly seen, but it appears to be a shorter barrelled "duty" or "pocket" model.
Launchers
Cobray CM203 Flare Launcher
Cobray CM203 flare launchers are seen mounted under the Colt AR-15 Sporter-1 carried by Baz (Ian Curtis) and the M16A1 carried by Ray (Jamie Bartlett).

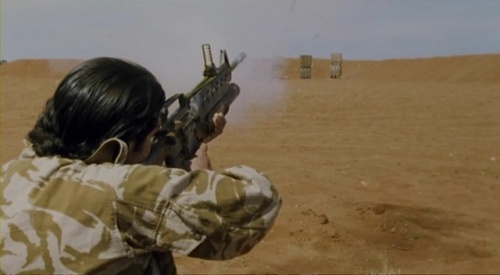
M203 Grenade Launcher
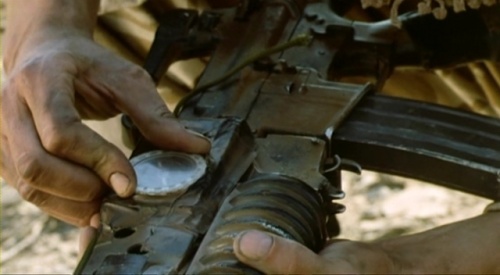
M203 grenade launchers are seen mounted under the M16A2s carried by Andy McNab (Sean Bean) and Chris Ryan (Kevin Collins).
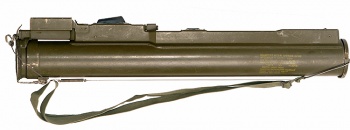
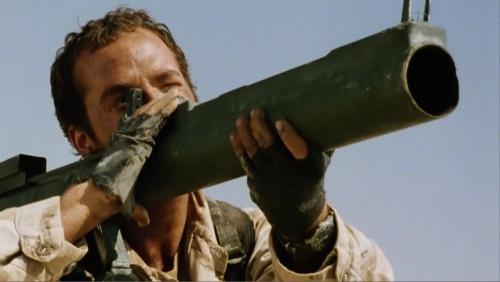
M72 LAW
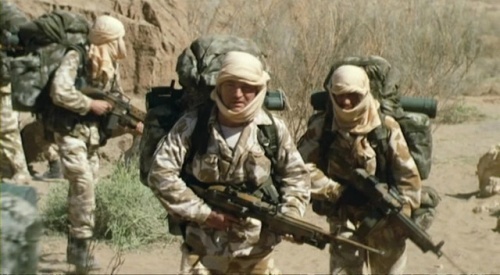
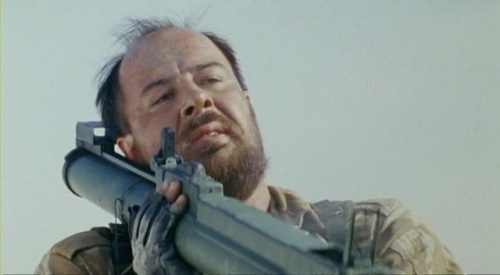
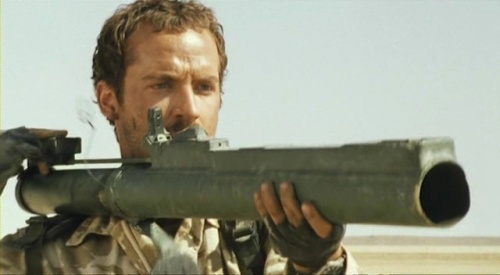
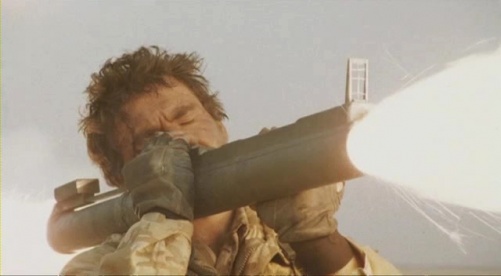
M72 LAWs are carried by all members of the SAS patrol, and are most prominently used to halt the advance of attacking Iraqi armor, knocking out a BMP and a truck during a brief skirmish.

Other Weapons
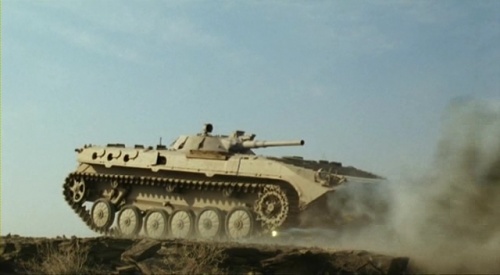
2A28 Grom
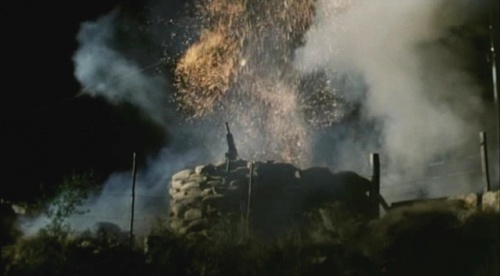
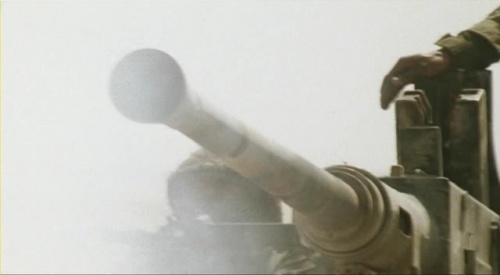
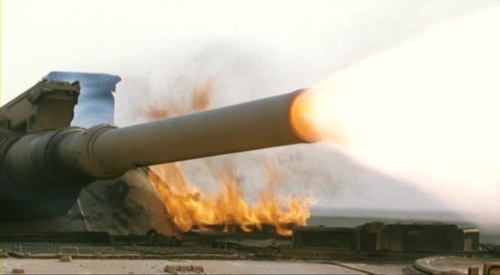
A 2A28 Grom 73 mm low pressure smoothbore gun can be seen as the main armament of a BMP-1 IFV which pursues the SAS patrol across the desert
AZP S-60
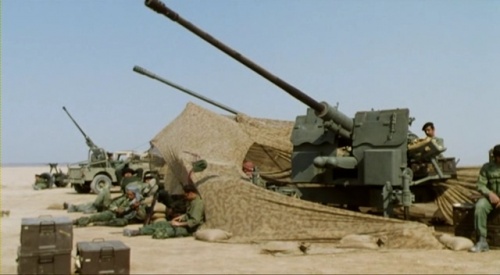
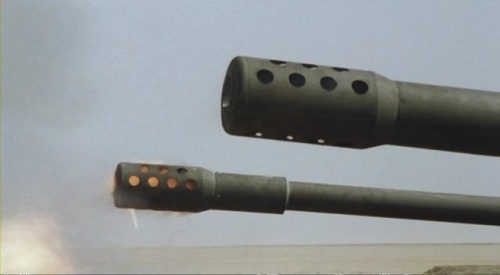
A number of S-60 57mm anti-aircraft cannons are used by the Iraqi forces to bombard the SAS patrol.
Bofors 40mm
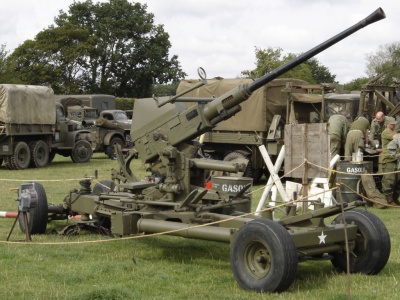
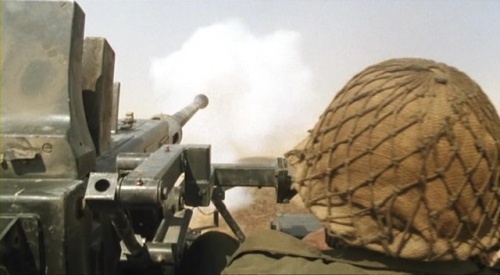
A number of Bofors 40mm anti-aircraft cannons are used by the Iraqi forces to bombard the SAS patrol.
See Also
- The One That Got Away, ITV's 1996 version of the events of this mission from the perspective of Chris Ryan.
