| If you have been locked out of your account you can request a password reset here. |
Difference between revisions of "The Rock"
Gunmaster45 (talk | contribs) |
Gunmaster45 (talk | contribs) |
||
| Line 9: | Line 9: | ||
[[Image:M14Rifle.jpg|thumb|none|400px|M14 rifle - 7.62x51mm NATO]] | [[Image:M14Rifle.jpg|thumb|none|400px|M14 rifle - 7.62x51mm NATO]] | ||
| − | [[Image:RockM14.jpg|thumb|none| | + | [[Image:RockM14.jpg|thumb|none|600px|A Marine at the funeral with his M14 rifle.]] |
| − | == Beretta 92FS == | + | ==Beretta 92FS== |
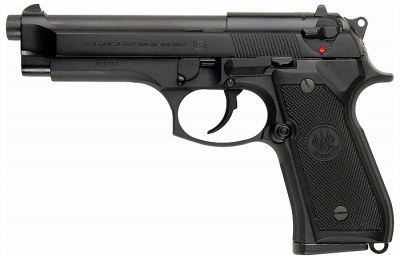
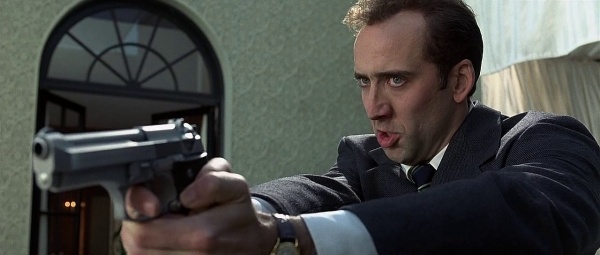
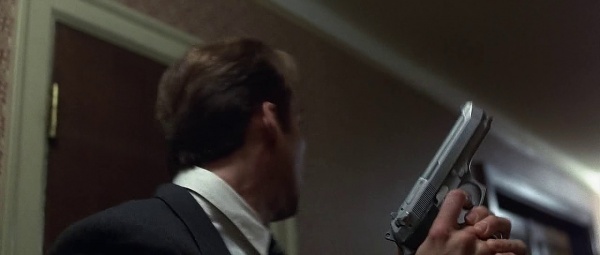
The Recon Marines carry [[Beretta M92F|Beretta 92FS]] (military designation, M9) pistols as their sidearms. Beretta M9s are the standard side arm for all the Navy SEALs including Stanley Goodspeed ([[Nicolas Cage]]), all with tactical flashlight attachments. Goodspeed points his at John Mason ([[Sean Connery]]), who swipes it out of his hand, but later gives it back to Goodspeed to defend himself with, and he uses it notably in the underground tunnels to kill one Marine, with little hesitation, as Mason notes. | The Recon Marines carry [[Beretta M92F|Beretta 92FS]] (military designation, M9) pistols as their sidearms. Beretta M9s are the standard side arm for all the Navy SEALs including Stanley Goodspeed ([[Nicolas Cage]]), all with tactical flashlight attachments. Goodspeed points his at John Mason ([[Sean Connery]]), who swipes it out of his hand, but later gives it back to Goodspeed to defend himself with, and he uses it notably in the underground tunnels to kill one Marine, with little hesitation, as Mason notes. | ||
[[Image:BerettaM92FS.jpg|thumb|400px|none|Beretta 92FS 9mm]] | [[Image:BerettaM92FS.jpg|thumb|400px|none|Beretta 92FS 9mm]] | ||
| − | [[Image:Rock92FS-1.jpg|thumb|none| | + | [[Image:Rock92FS-1.jpg|thumb|none|600px|One of Hummel's men pulls an M9 on some guards when they first take over the rock.]] |
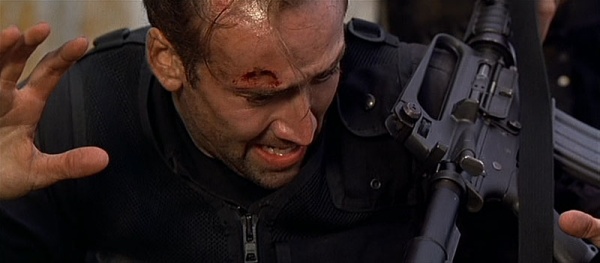
| − | [[Image:Rock92FS-2.jpg|thumb|none| | + | [[Image:Rock92FS-2.jpg|thumb|none|600px|Goodspeed with an M9 pistol with a tactical flashlight.]] |
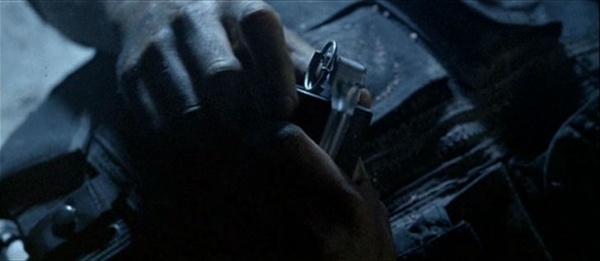
| − | [[Image:Rock92FS-3.jpg|thumb|none| | + | [[Image:Rock92FS-3.jpg|thumb|none|600px|Goodspeed reloads his M9.]] |
| − | [[Image:Rock92FS-5.jpg|thumb|none| | + | [[Image:Rock92FS-5.jpg|thumb|none|600px|Cpt. Darrow aims his M9 at Hummel.]] |
==Beretta 92FS Inox== | ==Beretta 92FS Inox== | ||
| Line 26: | Line 26: | ||
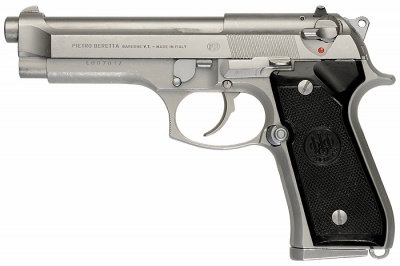
[[Image:Beretta-Inox.jpg|thumb|none|400px|Beretta 92FS Inox 9mm]] | [[Image:Beretta-Inox.jpg|thumb|none|400px|Beretta 92FS Inox 9mm]] | ||
| − | [[Image:RockBerettaInox-1.jpg|thumb|none| | + | [[Image:RockBerettaInox-1.jpg|thumb|none|600px|Major Baxter points his Beretta 92FS Inox at Hummel.]] |
==Beretta 92SB== | ==Beretta 92SB== | ||
| Line 34: | Line 34: | ||
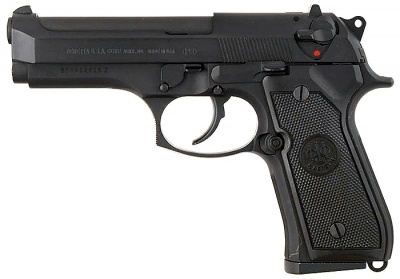
[[Image:92SB.jpg|thumb|none|400px|Beretta 92SB 9mm]] | [[Image:92SB.jpg|thumb|none|400px|Beretta 92SB 9mm]] | ||
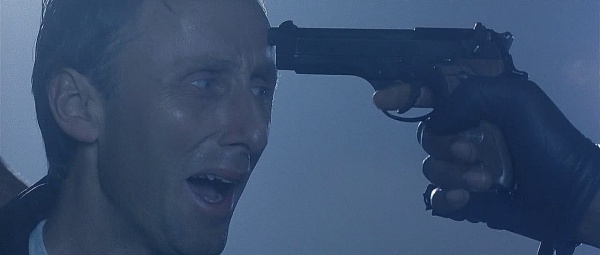
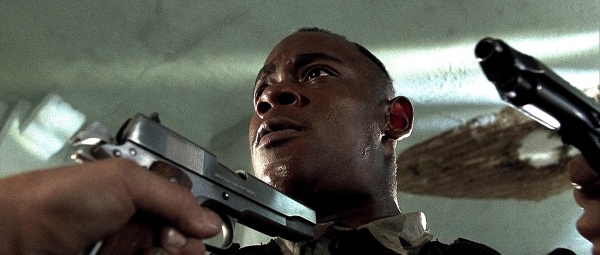
| − | [[Image:Rock92FS-4.jpg|thumb|none| | + | [[Image:Rock92FS-4.jpg|thumb|none|600px|A Marine holds his 92SB at Larry Henderson's head. You can see it has wooden grips but also a rounded trigger guard, unlike the 92FS/M9.]] |
==Beretta 92FS Centurion Inox== | ==Beretta 92FS Centurion Inox== | ||
| Line 41: | Line 41: | ||
[[Image:Beretta92Centurion.jpg|thumb|none|400px|Beretta 92FS Centurion 9mm]] | [[Image:Beretta92Centurion.jpg|thumb|none|400px|Beretta 92FS Centurion 9mm]] | ||
| − | [[Image:Rock92FSINOX-1.jpg|thumb|none| | + | [[Image:Rock92FSINOX-1.jpg|thumb|none|600px|Goodspeed aims his 92FS Centurion Inox at Mason when he throws Director Womack off the building, held only by a rope.]] |
| − | [[Image:Rock92FSINOX-2.jpg|thumb|none| | + | [[Image:Rock92FSINOX-2.jpg|thumb|none|600px|Goodspeed chases after Mason armed with the Centurion.]] |
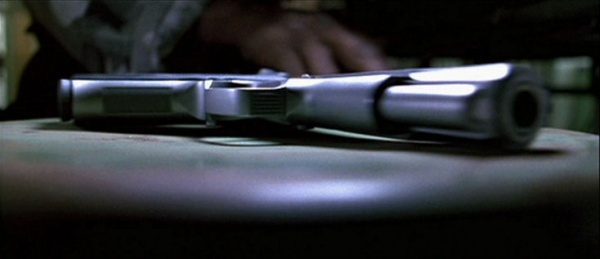
==Smith & Wesson 4506== | ==Smith & Wesson 4506== | ||
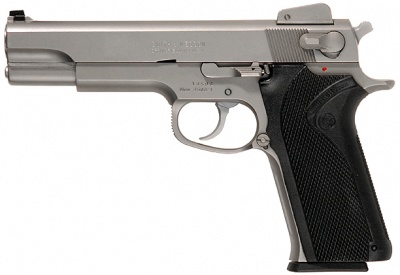
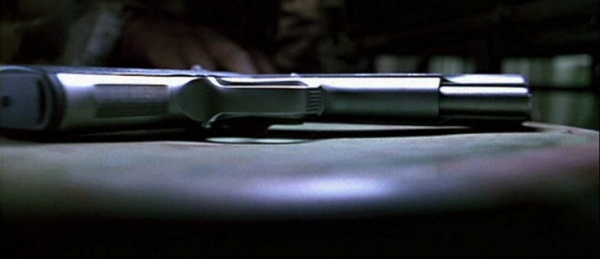
| Line 52: | Line 52: | ||
[[Image:RockS&W4506-3.jpg|thumb|none|600px|Note .45 caliber muzzle diameter.]] | [[Image:RockS&W4506-3.jpg|thumb|none|600px|Note .45 caliber muzzle diameter.]] | ||
| − | == M16A2 == | + | ==M16A2== |
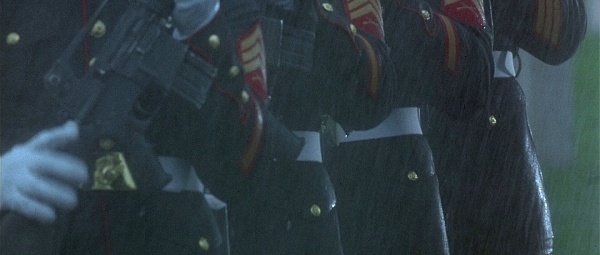
Marines at the funeral use real [[M16 rifle series#M16A2 Rifle|M16A2]] rifles for the 3 volley salute. | Marines at the funeral use real [[M16 rifle series#M16A2 Rifle|M16A2]] rifles for the 3 volley salute. | ||
[[Image:M16A2.jpg|thumb|400px|none|M16A2 5.56mm]] | [[Image:M16A2.jpg|thumb|400px|none|M16A2 5.56mm]] | ||
| − | [[Image:RockM16A2-1.jpg|thumb|none| | + | [[Image:RockM16A2-1.jpg|thumb|none|600px|The Marines ready their M16A2s for the 21 gun salute.]] |
| − | [[Image:RockM16A2-2.jpg|thumb|none| | + | [[Image:RockM16A2-2.jpg|thumb|none|600px|A Marine cycles a round into his M16A2. Note the bullet deflector and rounded forward assist.]] |
==M16A1 (w/ M16A2 handguards)== | ==M16A1 (w/ M16A2 handguards)== | ||
| Line 63: | Line 63: | ||
[[Image:M16A1wA2Handguards.jpg|thumb|none|400px|M16A1 with A2 style handguards - 5.56x45mm]] | [[Image:M16A1wA2Handguards.jpg|thumb|none|400px|M16A1 with A2 style handguards - 5.56x45mm]] | ||
| − | [[Image:RockM16A1-1.jpg|thumb|none| | + | [[Image:RockM16A1-1.jpg|thumb|none|600px|Major Baxter ([[David Morse]]), standing next to Hummel, aims his M16A1 at the Navy SEALS.]] |
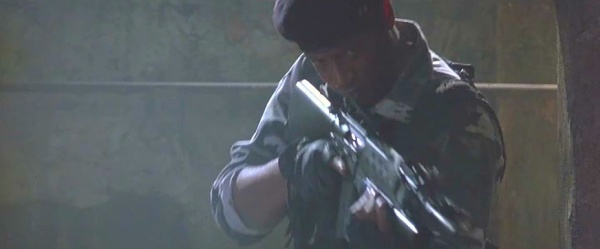
| − | [[Image:RockM16A1-2.jpg|thumb|none| | + | [[Image:RockM16A1-2.jpg|thumb|none|600px|Sgt. Crisp ([[Bokeem Woodbine]]) armed with an M16A1. Don't be fooled by the handguards into thinking that this is an M16A2; note the lack of a brass deflector, lack of an A2-style rear sight, and the older style forward assist.]] |
== Colt Commando variants == | == Colt Commando variants == | ||
| Line 73: | Line 73: | ||
[[Image:XM177E2-1-.jpg|thumb|none|400px|Colt Commando 5.56mm]] | [[Image:XM177E2-1-.jpg|thumb|none|400px|Colt Commando 5.56mm]] | ||
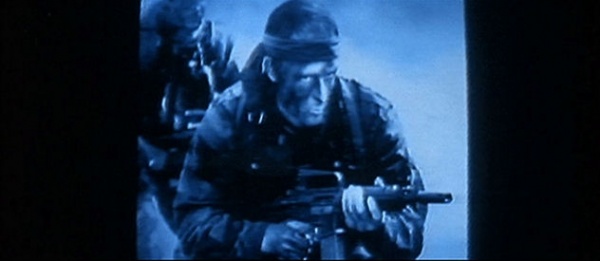
| − | [[Image:RockColtCommando-1.jpg|thumb|none| | + | [[Image:RockColtCommando-1.jpg|thumb|none|600px|When going over Hummel's military file, he is seen armed with a Colt Commando in Vietnam.]] |
| − | [[Image:RockCAR-15-1.jpg|thumb|none| | + | [[Image:RockCAR-15-1.jpg|thumb|none|600px|Major Baxter ([[David Morse]]) with a Colt Commando.]] |
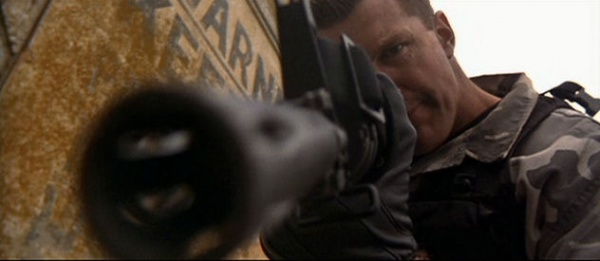
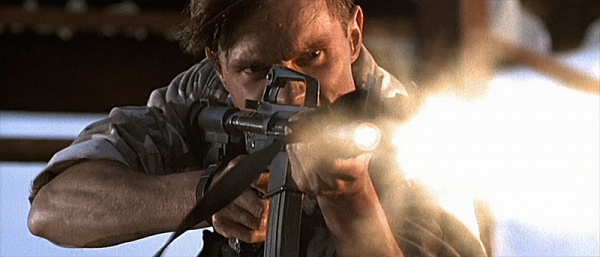
| − | [[Image:RockColtCommando-2.jpg|thumb|none| | + | [[Image:RockColtCommando-2.jpg|thumb|none|600px|A Marine aims his Colt Commando at Goodspeed. The large muzzle break is pretty obvious in this shot.]] |
| − | [[Image:RockColtCommando-3.jpg|thumb|none| | + | [[Image:RockColtCommando-3.jpg|thumb|none|600px|Mason gives Goodspeed the Colt Commando after killing the Marine aiming it at him. This rifle has an M16A2-style upper receiver, though the lower receiver lacks the fencing on the magazine release, and may have been taken from a civilian AR15 variant.]] |
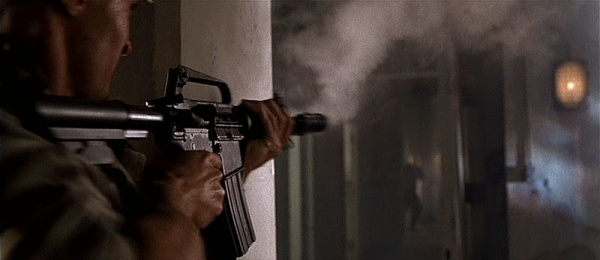
| − | [[Image:RockColtCommando-4.jpg|thumb|none| | + | [[Image:RockColtCommando-4.jpg|thumb|none|600px|Mason firing the Colt Commando.]] |
| − | [[Image:RockColtCommando-5.jpg|thumb|none| | + | [[Image:RockColtCommando-5.jpg|thumb|none|600px|Cpt. Frye returns fire on Mason. Note that the receiver of his gun has an A1-style rear sight, but it does have the brass deflector. The lower is also missing the fencing near the magazine release, so this again might be a civilian AR15 lower or a very early GAU-5/A lower.]] |
| − | [[Image:RockCAR-15-2.jpg|thumb|none| | + | [[Image:RockCAR-15-2.jpg|thumb|none|600px|Cpt. Frye fires his Colt Commando at Goodspeed, which now lacks a shell deflector.]] |
==M16 (SP1) + CM203 Flare Launcher== | ==M16 (SP1) + CM203 Flare Launcher== | ||
Some of the Marines have [[M16|M16 (SP1)]] slab-side rifles fitted with [[Cobray 37mm Launcher|Cobray CM203 37mm Launcher]]s, standing in for the HE [[M203 grenade launcher]]s. Captain Darrow ([[Tony Todd]]) is most commonly seen with this combo gun as his weapon. | Some of the Marines have [[M16|M16 (SP1)]] slab-side rifles fitted with [[Cobray 37mm Launcher|Cobray CM203 37mm Launcher]]s, standing in for the HE [[M203 grenade launcher]]s. Captain Darrow ([[Tony Todd]]) is most commonly seen with this combo gun as his weapon. | ||
| − | |||
| − | |||
| − | |||
| − | |||
| − | |||
| − | |||
| − | |||
| − | |||
| − | |||
[[Image:M16-SP1-30Mag.jpg|thumb|none|500px|M16 (SP1) slab-side rifle - 5.56mm]] | [[Image:M16-SP1-30Mag.jpg|thumb|none|500px|M16 (SP1) slab-side rifle - 5.56mm]] | ||
| − | [[Image:M16A1wNewCM203.jpg|thumb|none| | + | [[Image:M16A1wNewCM203.jpg|thumb|none|600px|M16A1 5.56mm with [[Cobray 37mm Launcher| Cobray CM203 Flare Launcher]] - 37mm]] |
| − | [[Image:RockM16A1-M203.jpg|thumb|none| | + | [[Image:RockM16A1-M203.jpg|thumb|none|600px|Darrow aims his M16/CM203 at the Navy SEALs.]] |
| − | [[Image:RockM16-CM203-1.jpg|thumb|none| | + | [[Image:RockM16-CM203-1.jpg|thumb|none|600px|Sgt. Crisp fires an M16/CM203 at the Navy SEALs.]] |
| − | [[Image:RockM16-CM203-2.jpg|thumb|none| | + | [[Image:RockM16-CM203-2.jpg|thumb|none|600px|A Marine fires his M16/CM203 at the SEALs.]] |
==MAC-10== | ==MAC-10== | ||
| Line 105: | Line 96: | ||
[[Image:IngramMAC10.jpg|thumb|none|400px|Ingram MAC-10 .45 ACP]] | [[Image:IngramMAC10.jpg|thumb|none|400px|Ingram MAC-10 .45 ACP]] | ||
| − | [[Image:RockMAC-10.jpg|thumb|none| | + | [[Image:RockMAC-10.jpg|thumb|none|600px|Hummel in Vietnam with a MAC-10.]] |
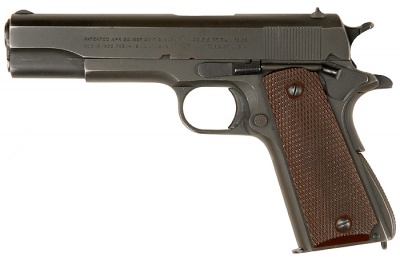
== Colt M1911A1 == | == Colt M1911A1 == | ||
| Line 112: | Line 103: | ||
[[Image:M1911Colt.jpg|thumb|none|400px|Colt M1911A1 .45 ACP.]] | [[Image:M1911Colt.jpg|thumb|none|400px|Colt M1911A1 .45 ACP.]] | ||
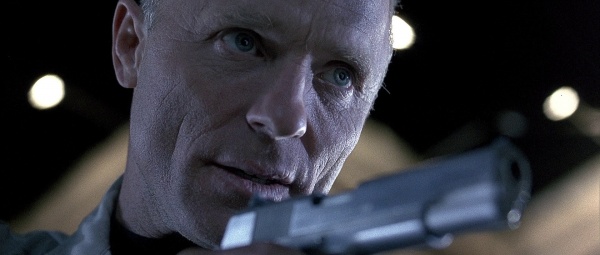
| − | [[Image:RockSpringfield1911.jpg|thumb|none| | + | [[Image:RockSpringfield1911.jpg|thumb|none|600px|Hummel holds his Colt M1911A1 to Mason.]] |
| − | [[Image:RockSpringfield1911-2.jpg|thumb|none| | + | [[Image:RockSpringfield1911-2.jpg|thumb|none|600px|Hummel aims his Colt M1911A1 at Maj. Baxter when he refuses to hang up the phone.]] |
| − | [[Image:RockColt1911-1.jpg|thumb|none| | + | [[Image:RockColt1911-1.jpg|thumb|none|600px|Hummel draws his M1911A1 from his back after hiding it there instead of his holster, aware his men would betray him an likely dissarm him.]] |
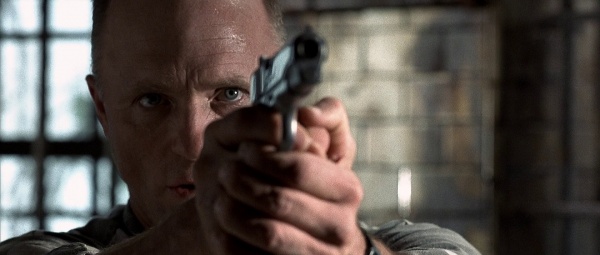
| − | + | [[Image:RockSpringfield1911-4.jpg|thumb|none|600px|Hummel holds his M1911A1 to Sgt. Crisp.]] | |
| − | + | [[Image:RockColt1911-2.jpg|thumb|none|600px|Close up on the muzzle of the M1911A1. Note how the threading that allows the blank plug to be screwed in is visible.]] | |
| − | [[Image:RockSpringfield1911-4.jpg|thumb|none| | + | [[Image:RockSpringfield1911-3.jpg|thumb|none|600px|Hummel shoots Crisp. Two goofs are present. The gun is clearly a harmless flashpaper gun as nothing cycles, and the squib is a bit too much to the right.]] |
| − | [[Image:RockColt1911-2.jpg|thumb|none| | ||
| − | [[Image:RockSpringfield1911-3.jpg|thumb|none| | ||
== Heckler & Koch MP5A3/A5 == | == Heckler & Koch MP5A3/A5 == | ||
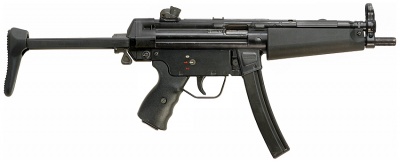
| Line 127: | Line 116: | ||
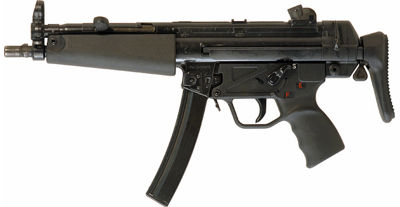
[[Image:MP5A3 StockCollapsed.jpg|thumb|none|400px|Heckler & Koch MP5A3, 9x19mm]] | [[Image:MP5A3 StockCollapsed.jpg|thumb|none|400px|Heckler & Koch MP5A3, 9x19mm]] | ||
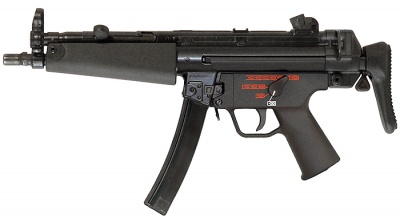
[[Image:H&KMP5A5.jpg|thumb|none|400px|Heckler and Koch MP5A5 9mm]] | [[Image:H&KMP5A5.jpg|thumb|none|400px|Heckler and Koch MP5A5 9mm]] | ||
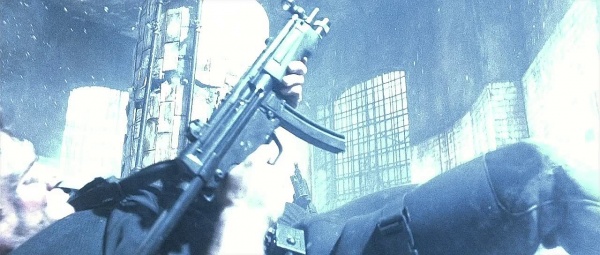
| − | [[Image:RockMP5-1.jpg|thumb|none| | + | [[Image:RockMP5-1.jpg|thumb|none|600px|SEAL Commander Anderson ([[Michael Biehn]]) with his MP5A3.]] |
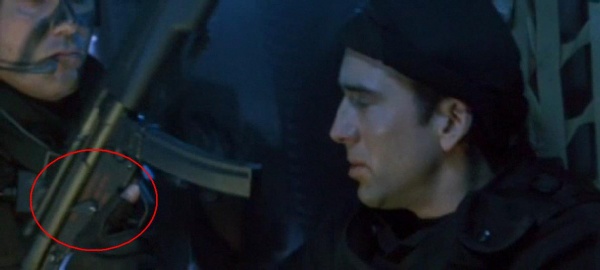
| − | [[Image:Rock-MP5A5-1.JPG|thumb|none| | + | [[Image:Rock-MP5A5-1.JPG|thumb|none|600px|A SEAL loads up his MP5 near Goodspeed. Note the trigger group (circled in red) has 4 positions, which makes the gun an MP5A5 - the A5 referring to a combination of collapsible stock and 4-position lower receiver).]] |
A handful of the MP5s used by the SEALs also appear to be chopped and converted 16" barrel civilian semi-auto [[Heckler & Koch MP5#Heckler & Koch HK94|Heckler & Koch HK94]]s with the barrels chopped down and converted to full auto. These lack barrel lugs and paddle magazine releases, as well as no push pin lower reciever and a right handed only selector switch with the old 0-1-2 switch. | A handful of the MP5s used by the SEALs also appear to be chopped and converted 16" barrel civilian semi-auto [[Heckler & Koch MP5#Heckler & Koch HK94|Heckler & Koch HK94]]s with the barrels chopped down and converted to full auto. These lack barrel lugs and paddle magazine releases, as well as no push pin lower reciever and a right handed only selector switch with the old 0-1-2 switch. | ||
[[Image:H&K94Conversion.jpg|thumb|none|400px|Heckler & Koch HK94 chopped and converted 9mm]] | [[Image:H&K94Conversion.jpg|thumb|none|400px|Heckler & Koch HK94 chopped and converted 9mm]] | ||
| − | [[Image:RockMp5-3.jpg|thumb|none| | + | [[Image:RockMp5-3.jpg|thumb|none|600px|A SEAL fires his chopped and converted HK94 at the Marines.]] |
| − | [[Image:RockMp5-2.jpg|thumb|none| | + | [[Image:RockMp5-2.jpg|thumb|none|600px|Lt. Shepard ([[Danny Nucci]]) about to go up and get shot with his HK94.]] |
==Heckler & Koch MP5K-PDW== | ==Heckler & Koch MP5K-PDW== | ||
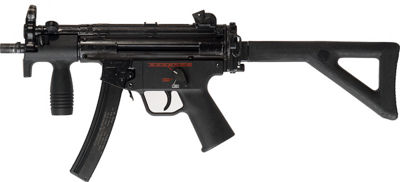
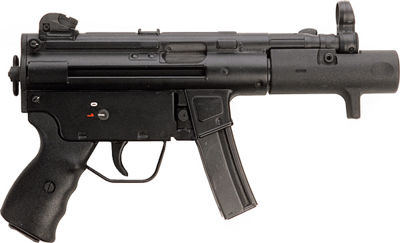
| Line 141: | Line 130: | ||
[[Image:MP5K-PDW.jpg|thumb|none|400px|Heckler & Koch MP5K-PDW 9mm]] | [[Image:MP5K-PDW.jpg|thumb|none|400px|Heckler & Koch MP5K-PDW 9mm]] | ||
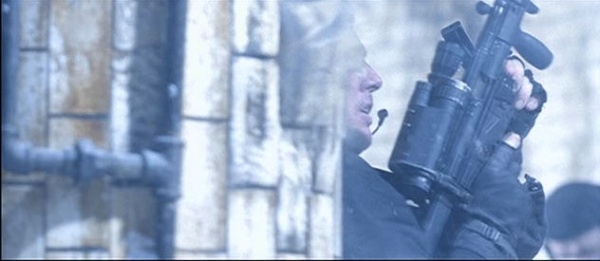
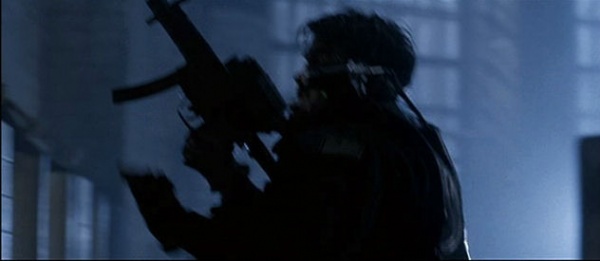
| − | [[Image:RockMP5K.jpg|thumb|none| | + | [[Image:RockMP5K.jpg|thumb|none|600px|A SEAL reloads his MP5K-PDW in the shower room shoot-out.]] |
| Line 149: | Line 138: | ||
[[Image:Remington870PoliceStd.jpg|thumb|none|400px|Remington 870 12-gauge]] | [[Image:Remington870PoliceStd.jpg|thumb|none|400px|Remington 870 12-gauge]] | ||
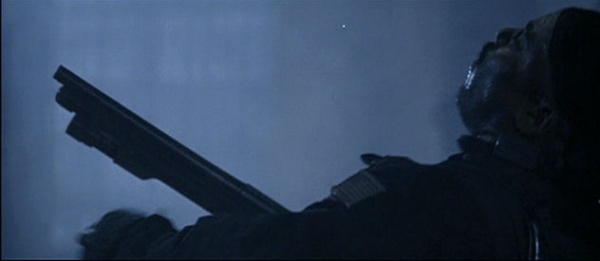
| − | [[Image:RockRem870-1.jpg|thumb|none| | + | [[Image:RockRem870-1.jpg|thumb|none|600px|A SEAL aims his Remington 870 at the Marines above.]] |
| − | [[Image:RockRem870-2.jpg|thumb|none| | + | [[Image:RockRem870-2.jpg|thumb|none|600px|The SEAL falls dead with his Remington 870 in hand.]] |
==Heckler & Koch SP89== | ==Heckler & Koch SP89== | ||
| Line 156: | Line 145: | ||
A [[Heckler & Koch MP5#Heckler & Koch SP89|Heckler & Koch SP89]] by one of the SEALs during the failed attempt to save the hostages. It seems to be fitted with the collapsible stock of an MP5A3, and was evidently converted to full-auto. | A [[Heckler & Koch MP5#Heckler & Koch SP89|Heckler & Koch SP89]] by one of the SEALs during the failed attempt to save the hostages. It seems to be fitted with the collapsible stock of an MP5A3, and was evidently converted to full-auto. | ||
[[Image:H&KSP89.jpg|thumb|none|400px|Heckler & Koch SP89 Pistol with factory 15rd magazine - 9mm]] | [[Image:H&KSP89.jpg|thumb|none|400px|Heckler & Koch SP89 Pistol with factory 15rd magazine - 9mm]] | ||
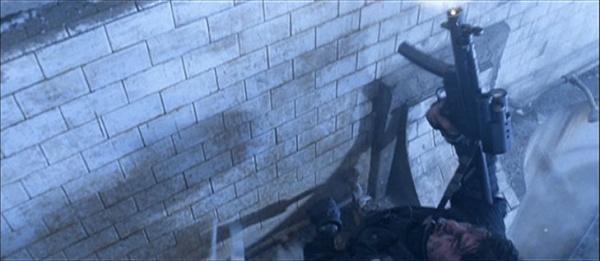
| − | [[Image:RockSP-89.jpg|thumb|none| | + | [[Image:RockSP-89.jpg|thumb|none|600px|A SEAL with an H&K SP89 tries to climb up to shoot at the Marines, before being gunned down.]] |
| − | [[Image:RockSP89stock-1.jpg|thumb|none| | + | [[Image:RockSP89stock-1.jpg|thumb|none|600px|The SEAL fires his H&K SP89.]] |
==DefTech Launcher== | ==DefTech Launcher== | ||
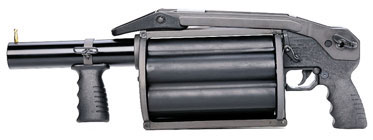
| Line 164: | Line 153: | ||
[[Image:Federallabs37.jpg|thumb|none|400px|DefTech 37mm launcher]] | [[Image:Federallabs37.jpg|thumb|none|400px|DefTech 37mm launcher]] | ||
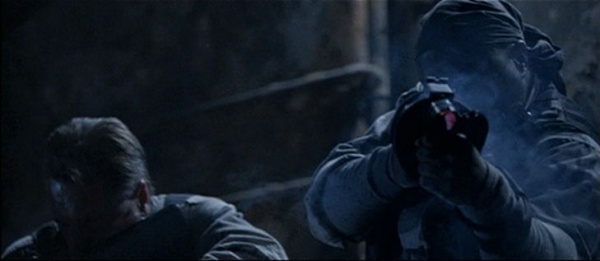
| − | [[Image:RockGL.jpg|thumb|none| | + | [[Image:RockGL.jpg|thumb|none|600px|Private McCoy ([[Steve Harris]]) with a DefTech 37mm.]] |
| − | [[Image:RockDefenseTechGL-1.jpg|thumb|none| | + | [[Image:RockDefenseTechGL-1.jpg|thumb|none|600px|McCoy fires his DefTech at the Marines.]] |
==M26 Handgrenade== | ==M26 Handgrenade== | ||
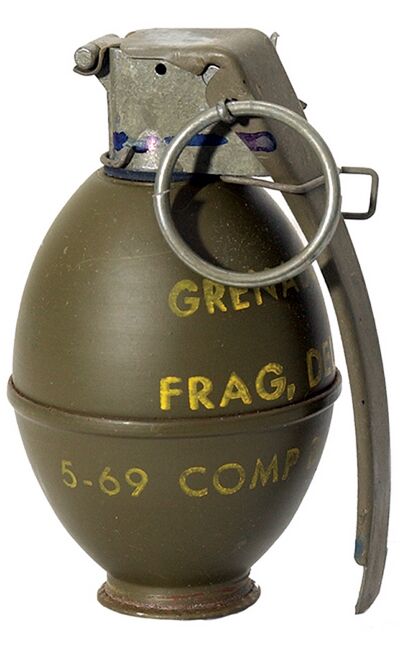
| Line 172: | Line 161: | ||
[[Image:200px-M-67handgrenade.jpg|thumb|none|400px|M26 HE fragmentation hand grenade]] | [[Image:200px-M-67handgrenade.jpg|thumb|none|400px|M26 HE fragmentation hand grenade]] | ||
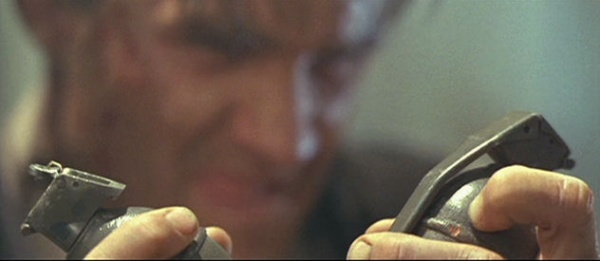
| − | [[Image:RockM26HG.jpg|thumb|none| | + | [[Image:RockM26HG.jpg|thumb|none|600px|Frye pops off the primer handles of his M26 grenades.]] |
==M18 Smoke Grenade== | ==M18 Smoke Grenade== | ||
A Marine in the morgue tries to pull the pin on an [[M18 Smoke Grenade]] to throw at Mason as a last ditch effort in killing him before Mason shoots out an air vent above him which crushes his head. In reality, a smoke grenade doesn't pose a threat for obvious reasons. | A Marine in the morgue tries to pull the pin on an [[M18 Smoke Grenade]] to throw at Mason as a last ditch effort in killing him before Mason shoots out an air vent above him which crushes his head. In reality, a smoke grenade doesn't pose a threat for obvious reasons. | ||
[[Image:M18 grenande.gif|thumb|none|150px|M18 smoke grenade.]] | [[Image:M18 grenande.gif|thumb|none|150px|M18 smoke grenade.]] | ||
| − | [[Image:RockM18-1.jpg|thumb|none| | + | [[Image:RockM18-1.jpg|thumb|none|600px|A Marine tries to pull the pin on an M18 smoke grenade before being killed by Mason.]] |
==M60E3== | ==M60E3== | ||
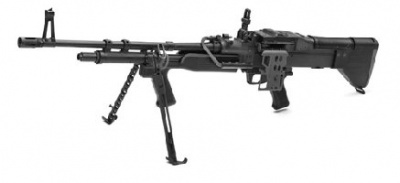
| Line 184: | Line 173: | ||
[[Image:USOM60E3.jpg|thumb|none|400px|M60E3 machine gun 7.62x51mm NATO]] | [[Image:USOM60E3.jpg|thumb|none|400px|M60E3 machine gun 7.62x51mm NATO]] | ||
| − | [[Image:RockM60E3-1.jpg|thumb|none| | + | [[Image:RockM60E3-1.jpg|thumb|none|600px|The barrel of the M60E3 before it fades to Goodspeed across the roof.]] |
| − | [[Image:RockM60E3-2.jpg|thumb|none| | + | [[Image:RockM60E3-2.jpg|thumb|none|600px|The muzzle of the M60E3 firing.]] |
| − | [[Image:RockM60E3-3.jpg|thumb|none| | + | [[Image:RockM60E3-3.jpg|thumb|none|600px|The Marine prepares to drop the empty M60E3.]] |
| Line 194: | Line 183: | ||
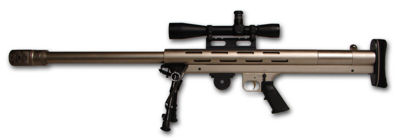
[[Image:LAR Grizzly.jpg|thumb|none|400px|LAR Grizzly Big-Bore .50 BMG]] | [[Image:LAR Grizzly.jpg|thumb|none|400px|LAR Grizzly Big-Bore .50 BMG]] | ||
| − | [[Image:RockBarettM99-1.jpg|thumb|none| | + | [[Image:RockBarettM99-1.jpg|thumb|none|600px|A Marine switches the safety off his LAR Grizzly.]] |
| − | [[Image:RockBarettM99-2.jpg|thumb|none| | + | [[Image:RockBarettM99-2.jpg|thumb|none|600px|The Marine prepares to fire the Grizzly before being killed by Mason. It is a good thing he didn't fire the gun; without the muzzle break, it would have hurt like hell.]] |
| Line 202: | Line 191: | ||
When Goodspeed is messing around in his office, he shoots a flip down target with a suction dart spring gun labeled "The Protector". It appears to be based off a Mossberg 500 "Cruiser" with barrel ribbing. | When Goodspeed is messing around in his office, he shoots a flip down target with a suction dart spring gun labeled "The Protector". It appears to be based off a Mossberg 500 "Cruiser" with barrel ribbing. | ||
| − | [[Image:RockTheProtector.jpg|thumb|none| | + | [[Image:RockTheProtector.jpg|thumb|none|600px|Goodspeed with "The Protector''. Is this the most pointless gun ever posted on the site? Probably.]] |
[[Category:Movie]] | [[Category:Movie]] | ||
Revision as of 00:24, 14 January 2009
The following guns were used in the movie The Rock
M14
A Marine at the funeral during the opening credits can be seen briefly holding an M14 rifle.
Beretta 92FS
The Recon Marines carry Beretta 92FS (military designation, M9) pistols as their sidearms. Beretta M9s are the standard side arm for all the Navy SEALs including Stanley Goodspeed (Nicolas Cage), all with tactical flashlight attachments. Goodspeed points his at John Mason (Sean Connery), who swipes it out of his hand, but later gives it back to Goodspeed to defend himself with, and he uses it notably in the underground tunnels to kill one Marine, with little hesitation, as Mason notes.
Beretta 92FS Inox
Major Baxter (David Morse) uses a Beretta 92FS Inox as his sidearm. He draws it on Hummel before turning the gun on Darrow and firing at him before being gunned down by the other Marines.
Beretta 92SB
One of the Marines is seen using an older Beretta 92SB (which has a rounded trigger guard, rather than squared, like on the 92FS/M9) with wood grips during the scene in which Hummel and his men use a hostage to draw Goodspeed and Mason out of hiding.
Beretta 92FS Centurion Inox
During the hotel scene Goodspeed is given a Beretta 92FS Centurion Inox by another FBI field agent after he arrives in San Francisco and tells Womack (John Spencer) that he forgot his FBI-issue sidearm.
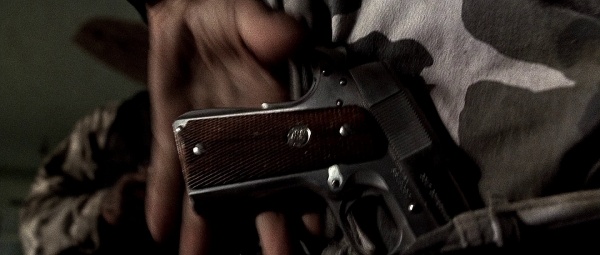
Smith & Wesson 4506
While waiting for Hummel to fire one of his VX gas missiles, a Marine is seen with his Smith & Wesson 4506, spinning it on a rotating table.
M16A2
Marines at the funeral use real M16A2 rifles for the 3 volley salute.
M16A1 (w/ M16A2 handguards)
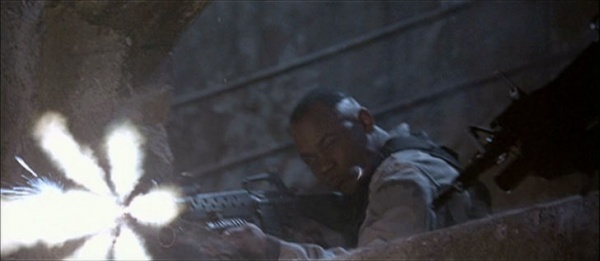
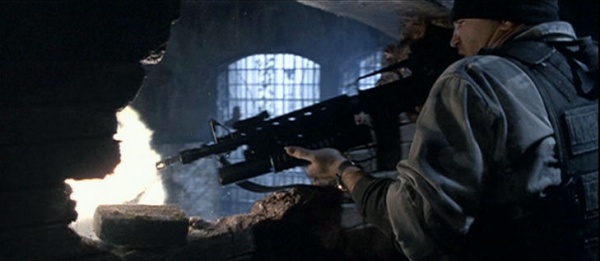
Many of the Marines under General Hummel's (Ed Harris) command are armed with M16A1 assault rifles fitted with M16A2 handguards. They are easily noticed as A1 models by the lack of a brass deflector and elevation-adjustable rear sight, older forward assists, and fully-automatic firing modes. Most of them have tactical flashlights installed on the barrels.


Colt Commando variants
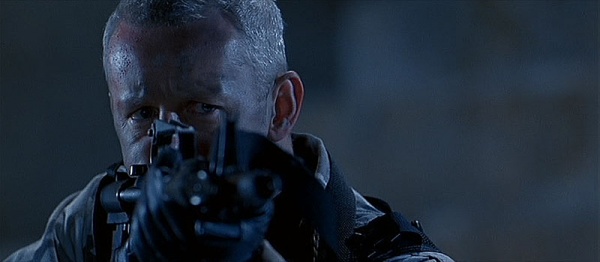
Colt CAR-15 Commando look-a-like rifles seen being used by many of the Marines. Mason and Goodspeed take two for themselves later in the film. The Commandos in the film all have 10" barrels and older-style flash suppressors, but also have various receiver styles. Some have A1 receivers, others have A2 receivers, and others have the forward assist and brass deflector but not the A2-style rear sight. Some have tactical flashlights on the barrels.
A notable goof is that the receivers of the guns held by individual characters change throughout the film (for instance, the Commando handed to Goodspeed by Mason clearly has an A2 receiver when he first gets it, but later, it has an A1 receiver).
M16 (SP1) + CM203 Flare Launcher
Some of the Marines have M16 (SP1) slab-side rifles fitted with Cobray CM203 37mm Launchers, standing in for the HE M203 grenade launchers. Captain Darrow (Tony Todd) is most commonly seen with this combo gun as his weapon.

MAC-10
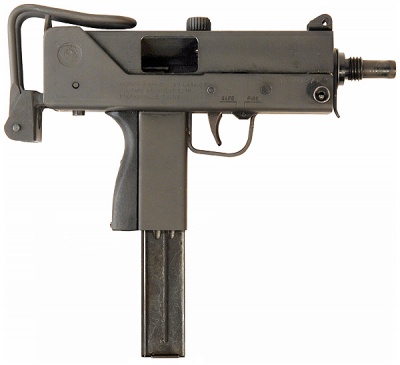
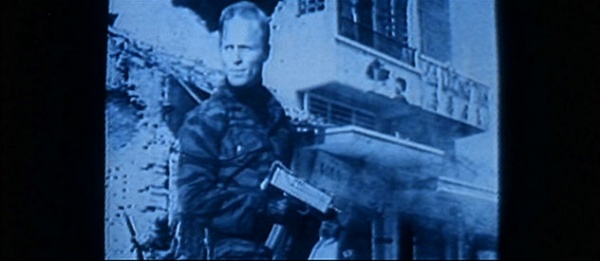
Hummel can be seen holding a MAC-10 in a Vietnam service picture. This image is actually taken from one of Ed Harris' earlier film roles, the Charles Bronson vehicle Borderline.
Colt M1911A1
The main villain of the film, General Frank Hummel (Ed Harris) carries a stainless Colt M1911A1 as his sidearm of choice throughout the film. It is seen being pulled out by Hummel, who then shoots Sergeant Crisp during the confrontation.
Heckler & Koch MP5A3/A5
A Heckler & Koch MP5A3 with an SEF trigger group is used by SEAL Commander Anderson (Michael Biehn). A Heckler & Koch MP5A5 is also seen in the hands of one of the Navy SEALs.

A handful of the MP5s used by the SEALs also appear to be chopped and converted 16" barrel civilian semi-auto Heckler & Koch HK94s with the barrels chopped down and converted to full auto. These lack barrel lugs and paddle magazine releases, as well as no push pin lower reciever and a right handed only selector switch with the old 0-1-2 switch.

Heckler & Koch MP5K-PDW
A Heckler & Koch MP5K-PDW is used by at least one of the SEALs.
Remington 870
A SEAL can be seen using a shortened tactical Remington 870 shotgun.
Heckler & Koch SP89
A Heckler & Koch SP89 by one of the SEALs during the failed attempt to save the hostages. It seems to be fitted with the collapsible stock of an MP5A3, and was evidently converted to full-auto.
DefTech Launcher
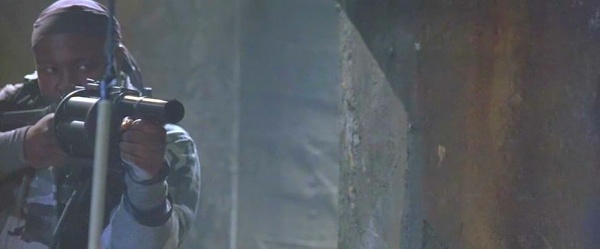
What appears to be a Defense Technologies (DefTech) 37mm launcher is used by Private McCoy (Steve Harris) in the shower room, firing shotgun like rounds at the Marines. They could also be Hornet's nest rounds, which is a grenade round with 8 .22 long rifle bullets inside.
M26 Handgrenade
Cpt. Frye (Gregory Sporleder) can be seen with two M26 hand grenades which he throws at Mason (Sean Connery) in an attempt to kill him. Mason jumps into a bathtub to avoid the blasts.
M18 Smoke Grenade
A Marine in the morgue tries to pull the pin on an M18 Smoke Grenade to throw at Mason as a last ditch effort in killing him before Mason shoots out an air vent above him which crushes his head. In reality, a smoke grenade doesn't pose a threat for obvious reasons.
M60E3
A Marine can be seen firing an M60E3 machine gun at Goodspeed when he disables the last rocket. Mason picks it up and knocks the shooter off the roof with it.
LAR Grizzly Big-Bore
When the Marine's M60E3 is empty, he picks up a .50 BMG LAR Grizzly Big-Bore bolt-action rifle to shoot Goodspeed. He is knocked off the roof by Mason before he can use it, though.
"The Protector"
When Goodspeed is messing around in his office, he shoots a flip down target with a suction dart spring gun labeled "The Protector". It appears to be based off a Mossberg 500 "Cruiser" with barrel ribbing.


